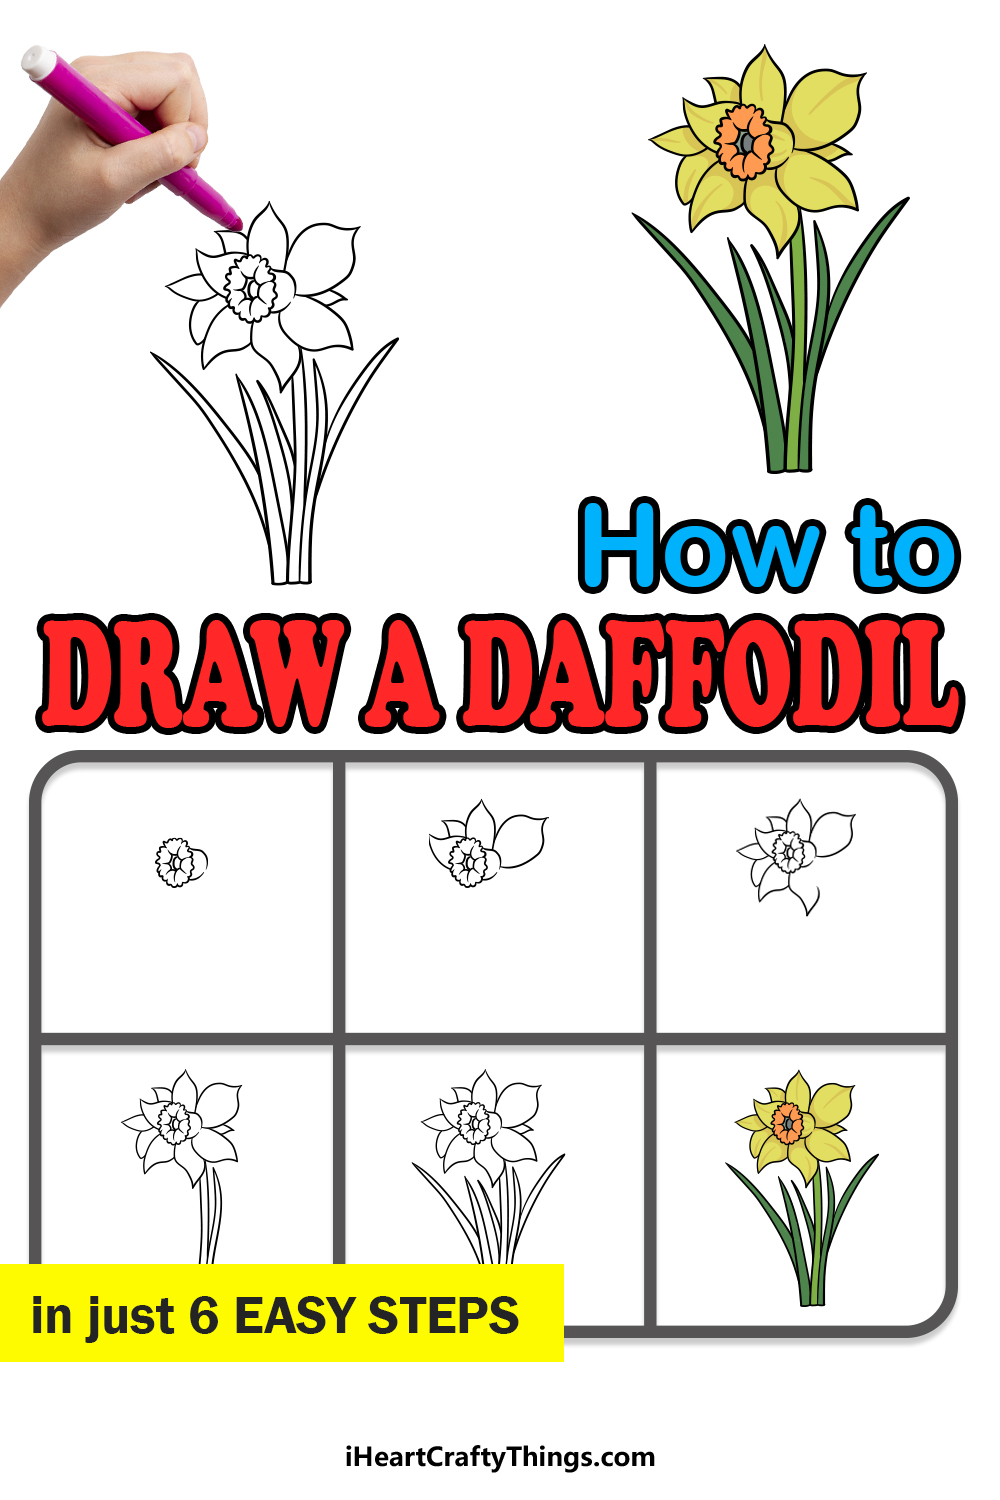
If you’ve wanted to learn how to draw a daffodil, then this guide for kids is perfect for you! Anyone can follow along and see how to draw this pretty flower.
Flower enthusiasts will have their favorites, and there are so many to choose from! The daffodil is a flower that is very popular around the world.
People love the structure of the flower as well as its beautiful colors, and so they like to try and draw them. A lot of people will discover that drawing a daffodil is easier said than done though.
That’s why I created this guide, as it will show you just how simple it can be when you know what to do. I’ll walk you through each step and show you how to draw each and every detail until you have a drawing you can be proud of.

Find Out How To Make Your Daffodil Drawing
How to Draw A Daffodil – Let’s get Started!
Step 1

For this first step of our guide on how to draw a daffodil, we will be starting with the central structure of the flower.
Daffodils are made up of several separate parts, and this can make them a bit tricky to draw. Don’t fear, however, as we will be taking it slowly throughout this guide.
For this central part of the flower, we will be using some curved lines connecting with one another to form a circular shape in the very center.
Then, we will be using a bumpier line surrounding this central part for a wavy outline. Then, we will be drawing a rounded shape to the right of this part of the flower.
This may sound a bit complicated, but it will all make sense as you refer to the reference image as you draw.
Step 2 – Next, draw the first petals of the daffodil
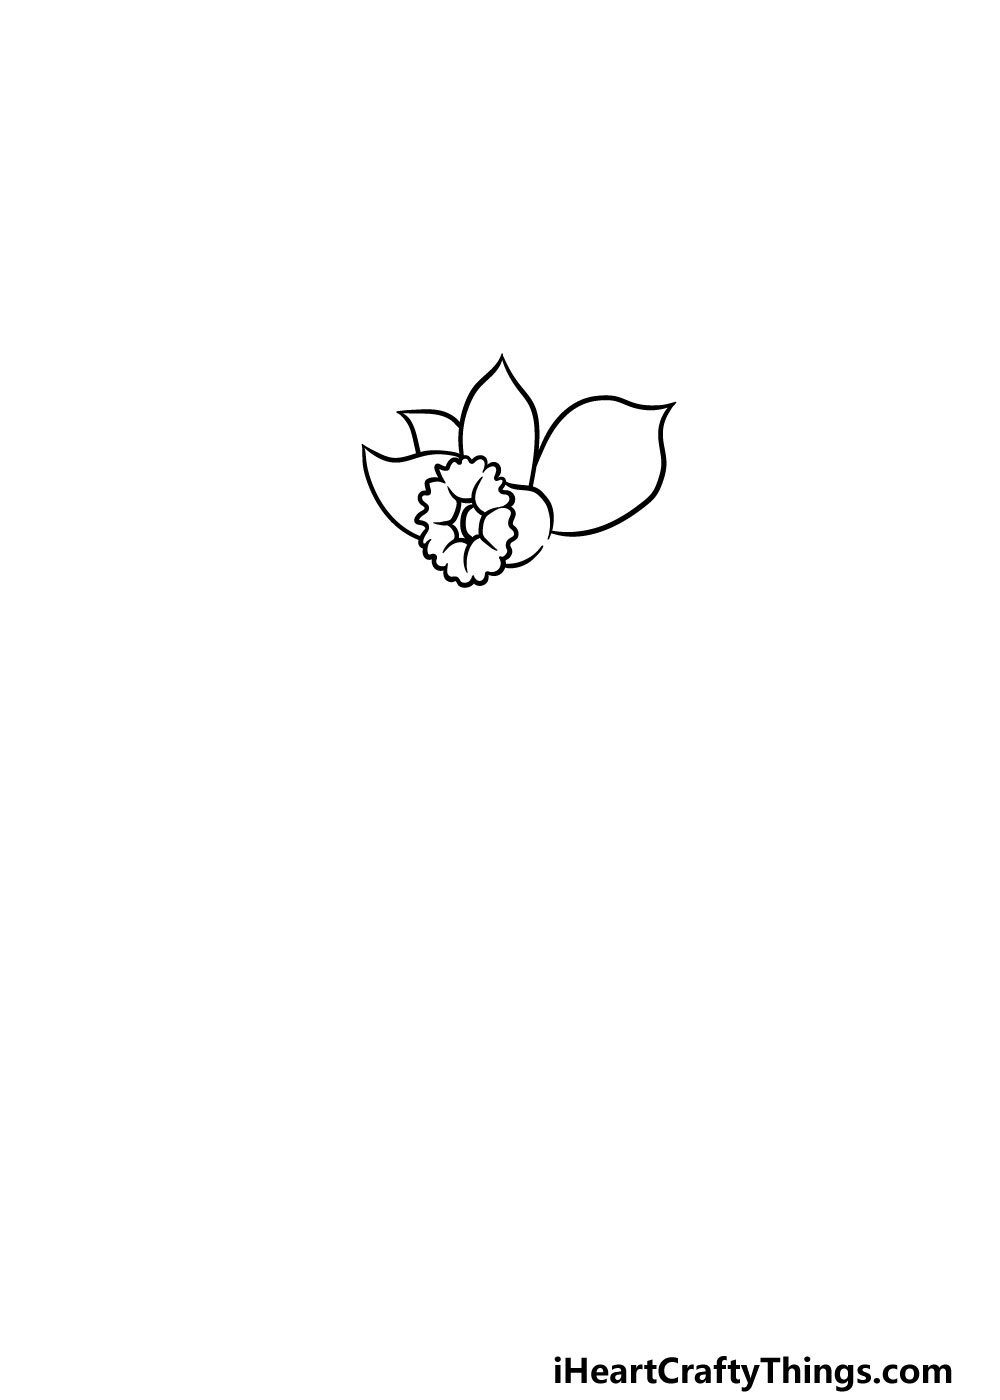
We will be drawing the first petals in this second step of your daffodil drawing. The sizes of these petals will be quite varied depending on their position, but the shapes will be pretty much the same for all of them.
This shape will be made up of some curved lines with a sharp point at the end. For now, we will be drawing three of these petals with a fourth smaller one between two of them.
They will be going at the top of the flower, and we will add more in the next few steps.
Step 3 – Now, draw some more petals on the lower side of the daffodil
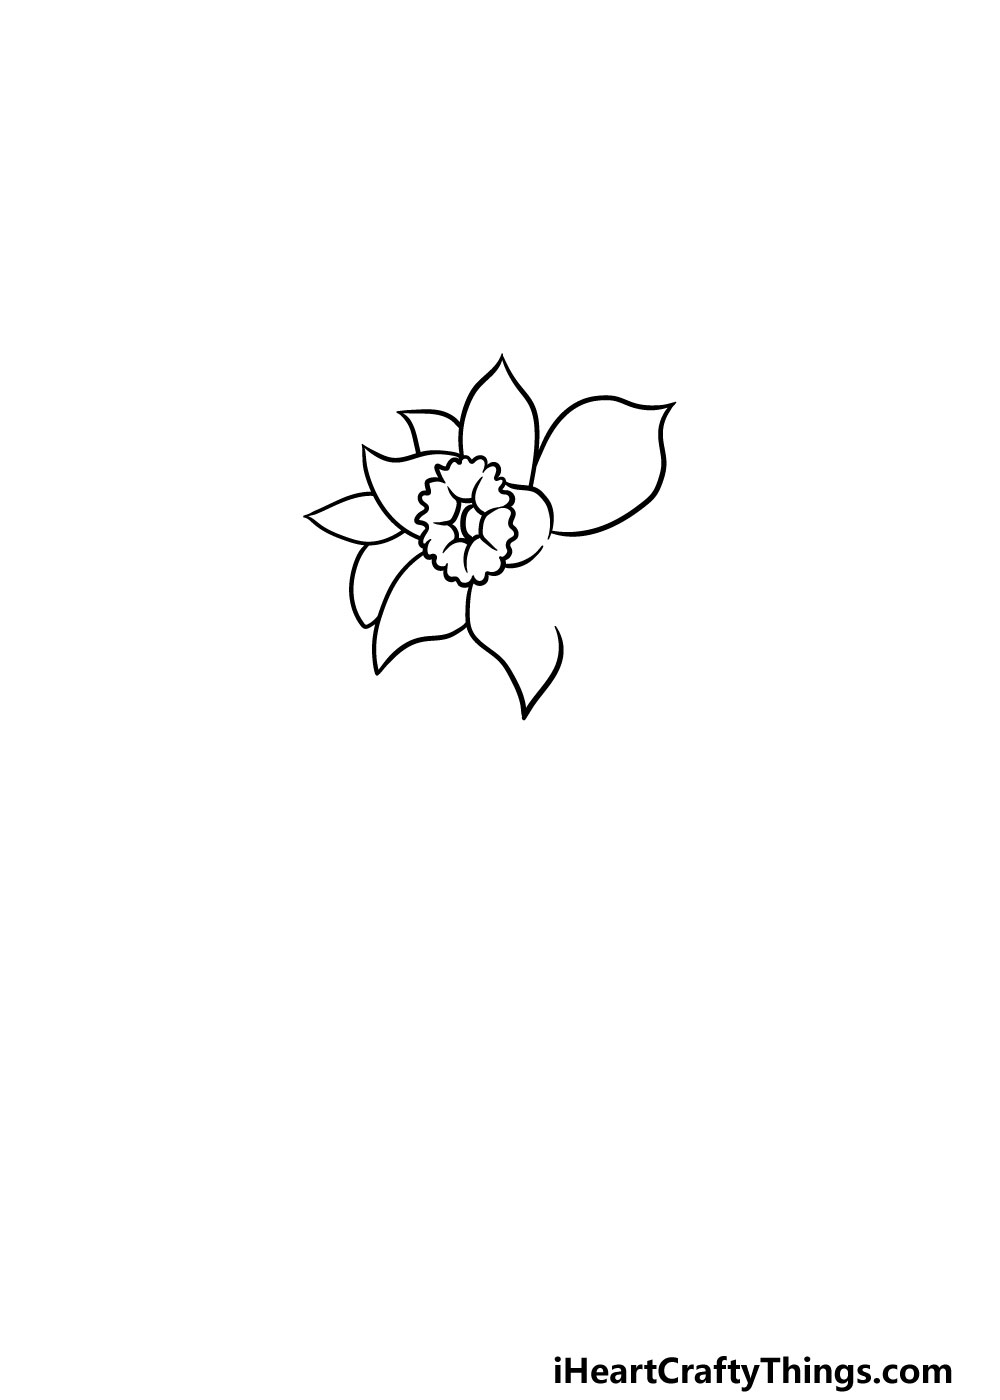
You’re doing a great job on this guide on how to draw a daffodil! For this next part, we will be focusing on adding some more petals for the flower.
For now, we will be adding four more petals to the flower, and they will be shaped very similarly to the ones that you drew in the previous step.
These ones will be going at the lower left-hand side of the flower, as shown in the reference image.
Once you have these petals drawn, you’re ready to move on to step 4!
Step 4 – Next, finish off the last petals and draw the stem
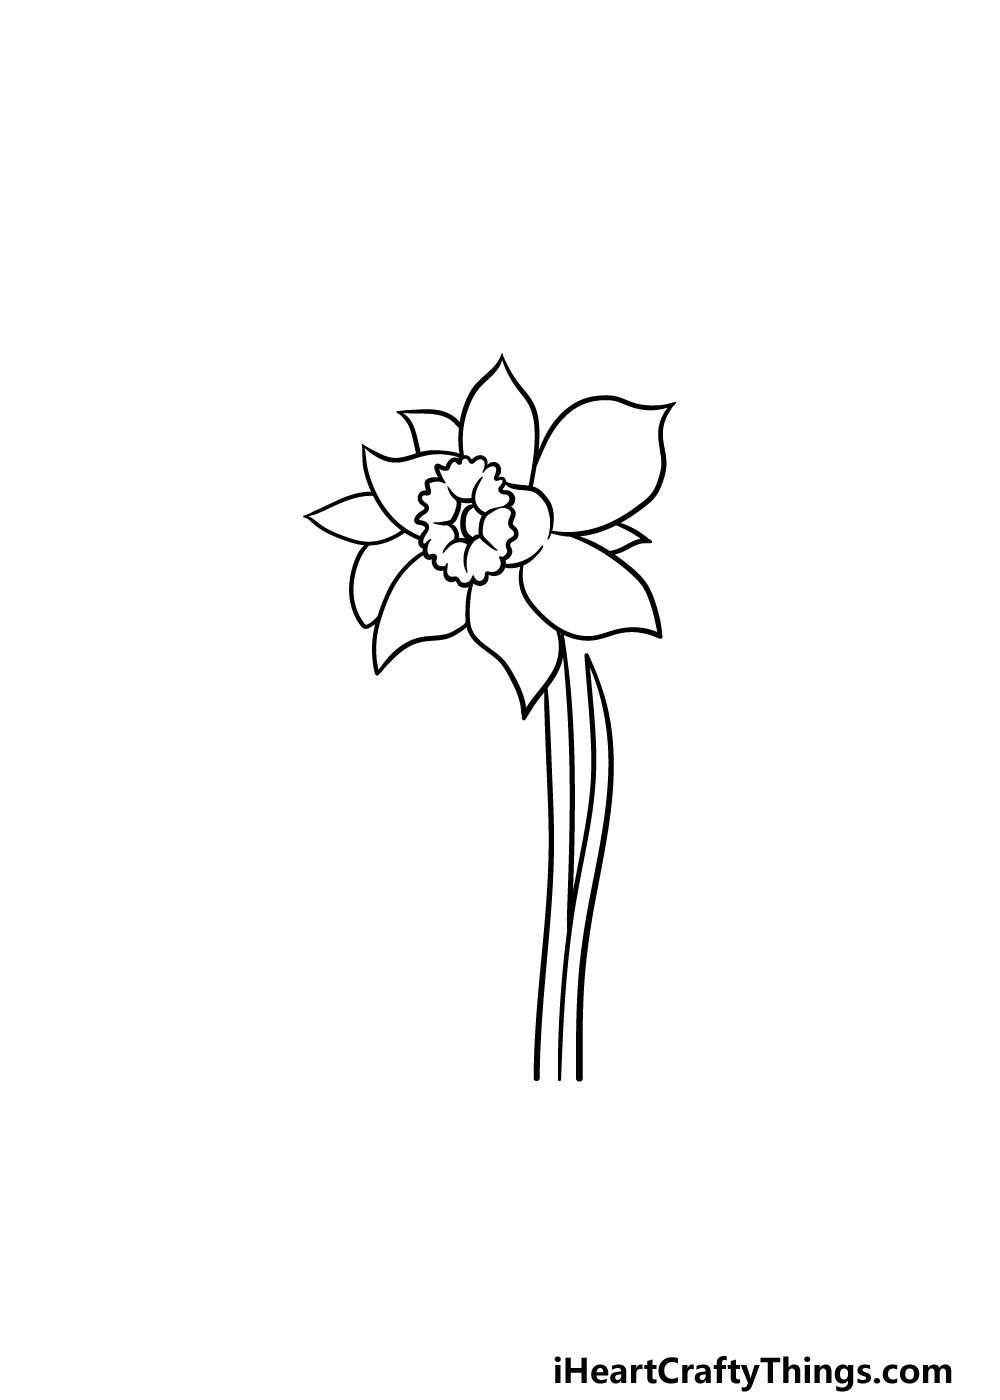
There is a space left between the petals on the right-hand side, and we will fill it in for this next step of your daffodil drawing.
Simply draw another large petal into the space and then add another much smaller one between it and the next one. That will do it for the petals, and now you can move on to drawing the stem.
To draw this, simply extend two slightly curved lines down from the flower that are quite close to one another. Then, we will be drawing a long blade of grass next to the flower.
To draw this, draw two more curved lines coming up from the ground next to it that meet at a sharp point at the top of it.
Then, we will just have a few final details to add before you color in your drawing!
Step 5 – Now, you can finish off the final details of your daffodil drawing
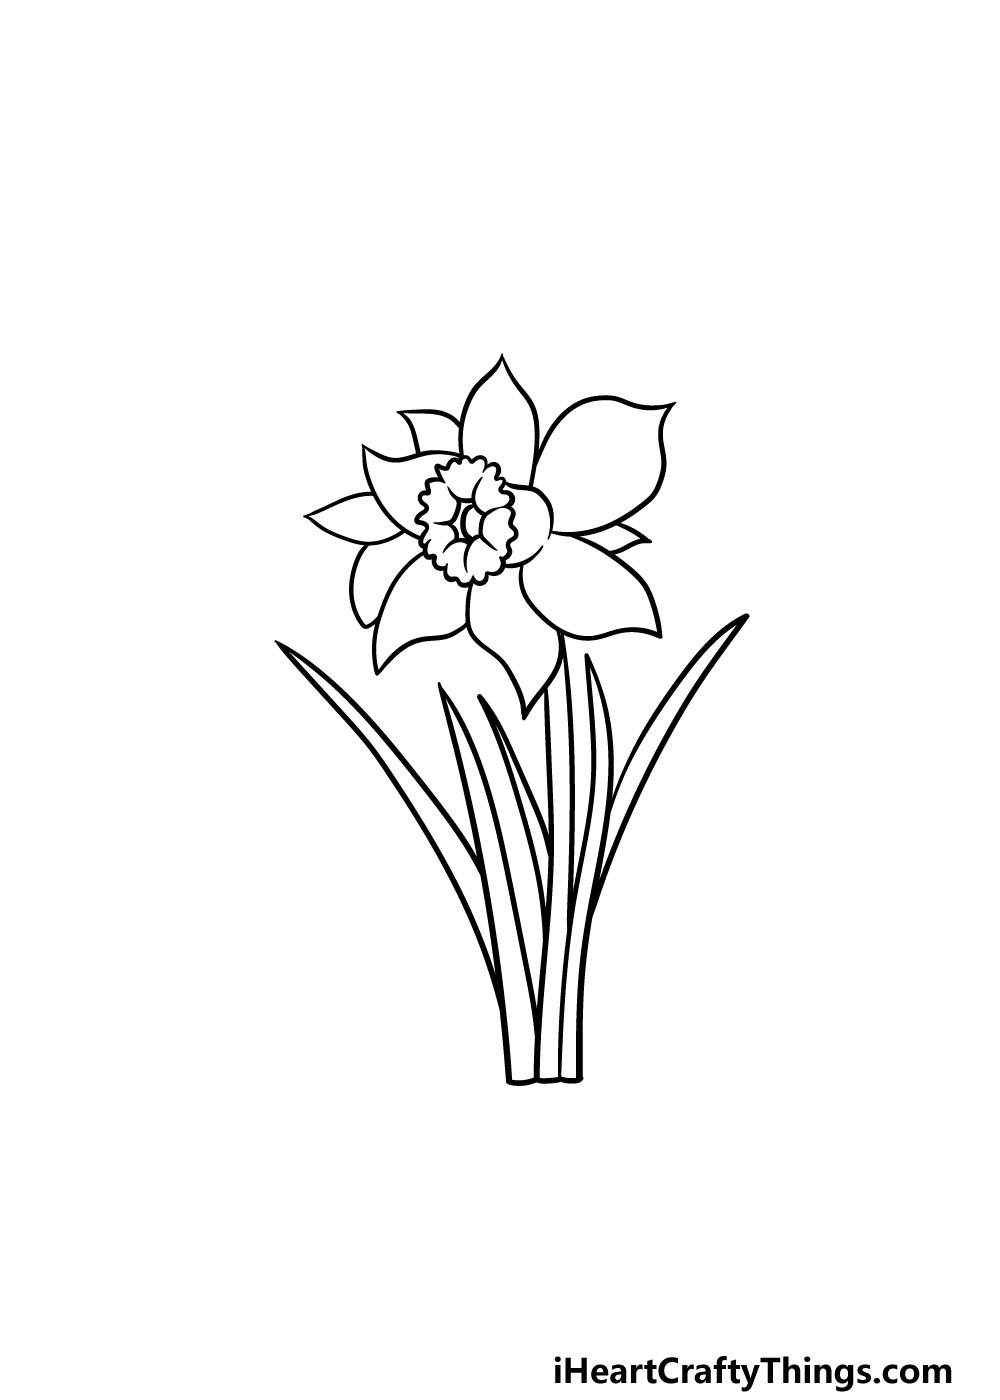
In this fifth step of our guide on how to draw a daffodil, we will be drawing some final details and elements for the picture.
We will show you the details we chose, but we will also go over a few ways in which you could add your own details and elements to it.
For our details, we will be adding some more blades of grass around the flower. These will be drawn in a very similar way to how you drew the previous ones in the last step.
We added four blades in this example, but you could change up the amount if your wish. Then, you can add some more details and elements of your own!
You could draw a background with more flowers for one idea, or surround this one with even more daffodils. These are just a few ideas you could use, but what else can you think of to finish off this daffodil drawing?
Step 6 – Finish off your daffodil drawing with some color
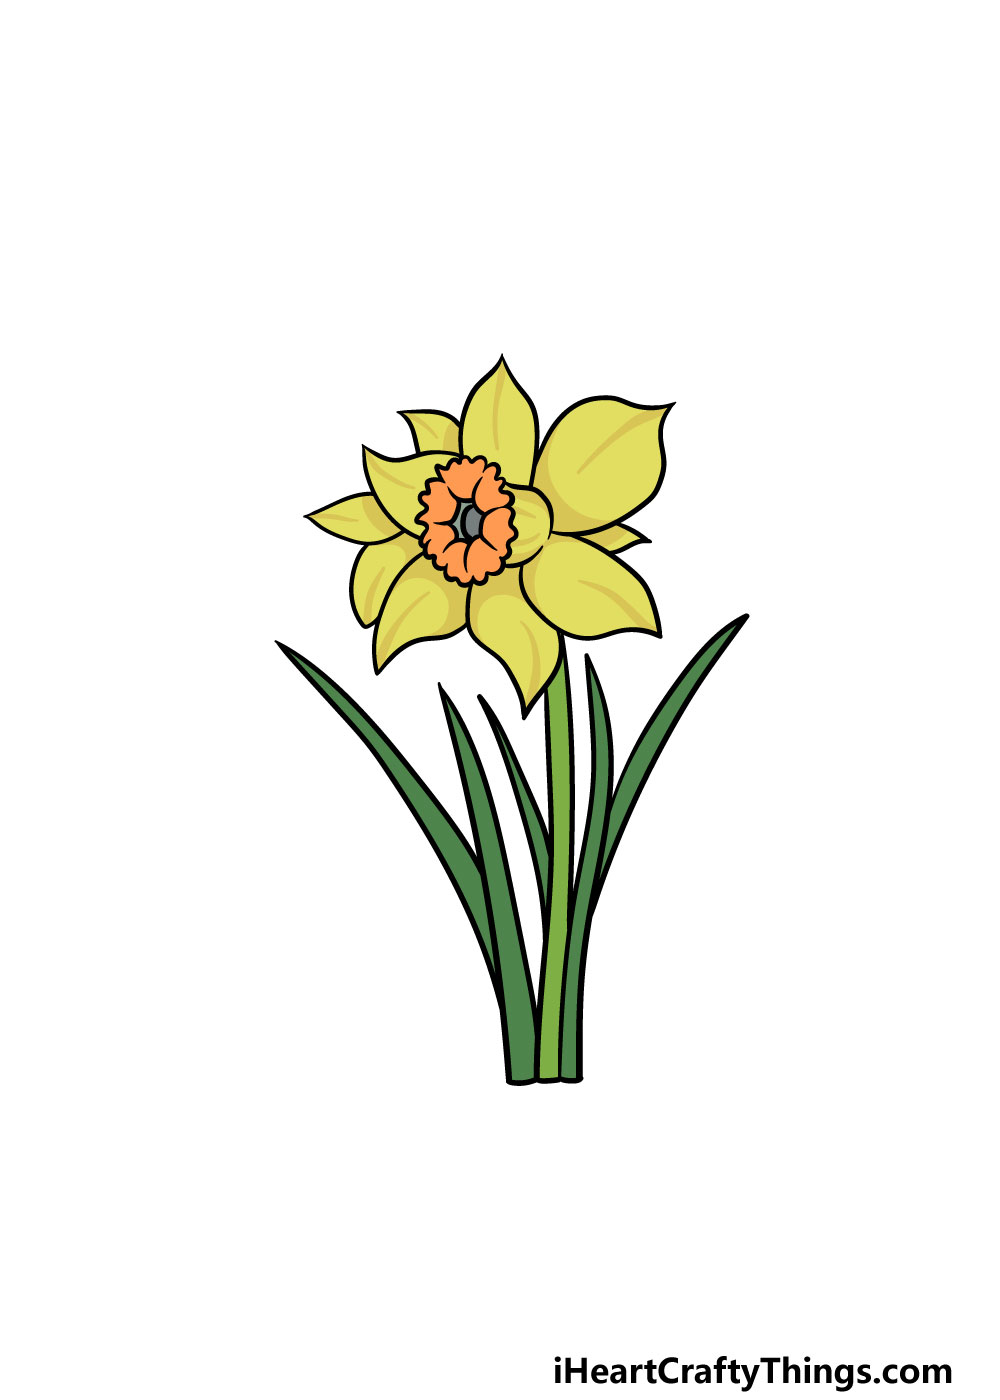
For this final part of your daffodil drawing, you can have some fun adding some amazing colors to your artwork.
In our reference image, we used some yellow, orange and green as the main colors for this image, and this will give you a reference point if you would like some similar colors for your own picture.
Once you have your colors chosen, you can then decide which art mediums you will use to bring them to life.
For pictures of flowers, watercolor paints can often be a great choice as they can create a lovely soft, subtle look for the image.
There are so many color and art mediums combinations you could go for, so be sure to have fun experimenting and see what happens!
4 More Ways To Make Your Daffodil Drawing Unique
Make this pretty daffodil sketch even better with these tips for your artwork!
Seeing a beautiful daffodil in the wild is always a wondrous sight, but it’s even better when there is more than one. That’s why we think it would be great to add a few more to this drawing of a daffodil!
Now that you can draw one so well, you could create a lovely bunch of pretty daffodils to make your image even more vibrant and beautiful. How many daffodils would you like to be in this bunch?
Of course, if you want to add some more flowers to this bunch then you don’t have to stick to just daffodils. In fact, you could add any of your favorite flowers to this scene.
Whether you love the boldness of the sunflower or the subtlety of a red rose, you could populate this picture with any flowers that you adore.
There are so many to choose from, but any flowers you choose will compliment this daffodil wonderfully!
Once you have added all the extra flowers you want for this daffodil drawing, it could be fun to add some life in other ways. For example, you could add some small animals around the flowers.
This could be anything from a cute rabbit to a fluffy squirrel, but you could also go for larger creatures. You could even add some human characters that are enjoying the sight of these flowers.
What are some characters that you could add to this scene?
Finally, once your daffodil sketch has all the life it needs, you could finish off with a lovely background. There are so many amazing settings you could create for this daffodil.
The flower could be in a beautiful yard or a garden, or maybe even a lush forest. Or, you could go for a more cultivated setting and show it in a pot at a flower store.
These are just a few ideas, but there are loads of creative settings you could possibly use for this background.
Your Daffodil Drawing is Complete!
You have reached the conclusion of this guide on how to draw a daffodil! We hope that this guide showed you that by breaking down a drawing into smaller steps you can make it so much easier to complete an amazing picture!
Now you can take it even further and show us what extra details or background details you can think of to take this to the next level. We can’t wait to see what you think of!
Then, you can visit us on our website for more amazing drawing guides like this one. We upload new ones frequently, so be sure to visit us often!
We would be thrilled to see your pretty daffodil drawing, so please be sure to share it on our Facebook and Pinterest pages.
Here Is A Cute Daffodil Drawing To Inspire You!
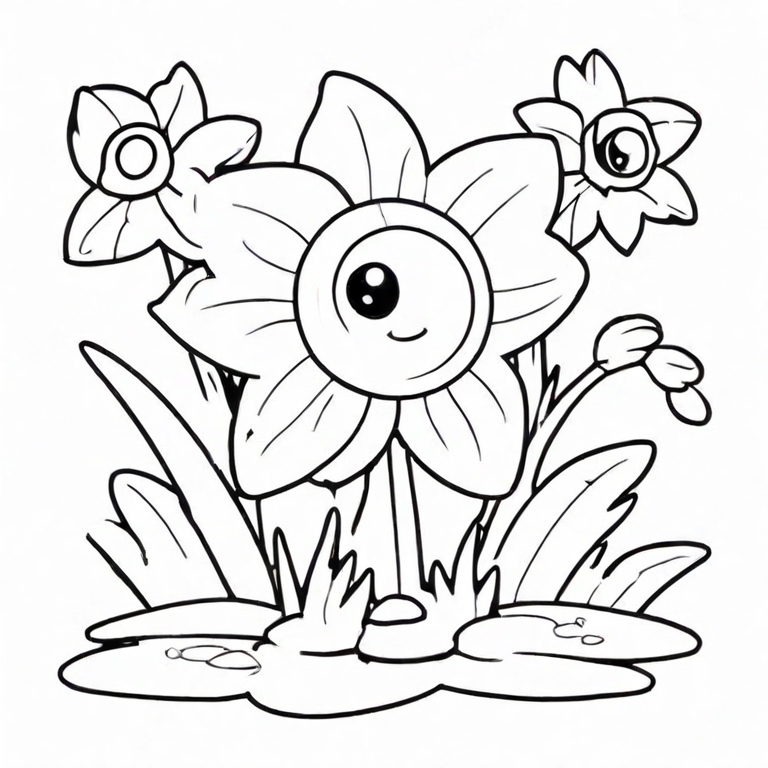
Daffodils are such beautiful flowers, and so they are perfect for artworks in various mediums! This cute daffodil drawing for kids shows you what your very own daffodil artwork could look like.
Our artist Freddy created this amazing drawing to help give your imagination something to work with as you draw. He drew three daffodils for you to use as inspiration, and they are all so cute!
The central daffodil has a cute face on it, and this helps to give it so much character. Remember that this drawing is here to help you, but it’s not a defined path you need to follow.
If you love Freddy’s design as is, you can make yours look identical to it. Don’t be shy about adding some changes if you prefer, though!
How will you make this cute daffodil sketch even more amazing?