When drawing human arms, there are a few facets that can make it difficult to get exactly right.
While we are all familiar with arms, aspects line muscles and bone structure when arms are in certain positions can make them tricky to draw.
For this reason, learning how to draw crossed arms can become frustrating if going in blind.
With the guide you’re about to work through, you don’t have to go into this drawing challenge blind though!
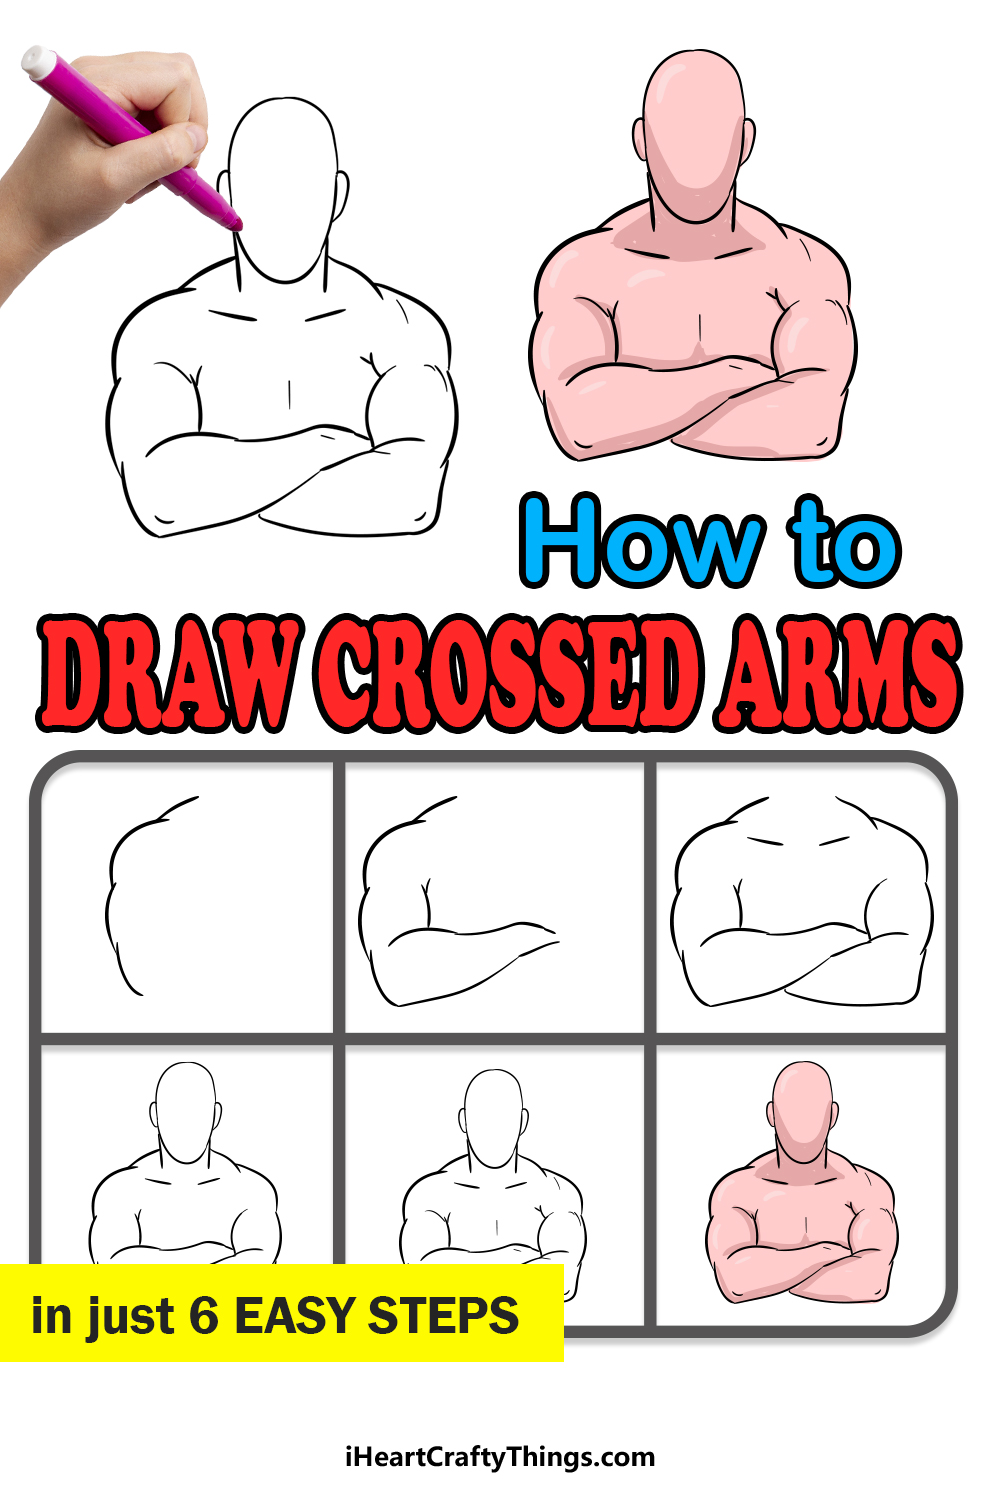
Our step-by-step guide on how to draw crossed arms will show you how easy it can be when you know what to do.
Use These Tips To Prepare For Your Drawing
When you look at this drawing of crossed arms, you may think it will be an easy drawing to do. However, you may find that it will be a bit more difficult than you think it may be.
That is because even though it is not a realistic person you’re drawing, the proportions are still fairly realistic. That means that if you get any details a bit off, it will throw off the whole drawing and make it look off.
When you begin this drawing, we have a few tips you can keep in mind that will make it easier for you. First of all, you may be tempted to get your favorite drawing pen out and use it to start the drawing.
This is not advisable, however, as if you draw with your pen then any mistakes you make are permanent. If you use a pencil, you can easily erase any mistakes or parts you’re not happy with.
If you don’t have a set of drawing pencils, we would recommend buying a decent set. It’s better to use real drawing pencils instead of a writing pencil, as they are better suited to the intricacies of drawing.
Having a good variety of pencils is also a good thing, as it will allow you to build up the image in layers. It also wouldn’t hurt to have some photos of people crossing their arms that you can use with the guide.
Sometimes when drawing humans, it can help to draw a stick figure first and then add some shapes over it with your pencil before drawing the outline.
These are a few of the tips you can use to make your crossed arms drawing easier, and now you’re ready to dive in!
How to Draw Crossed Arms – Let’s get started!
Step 1
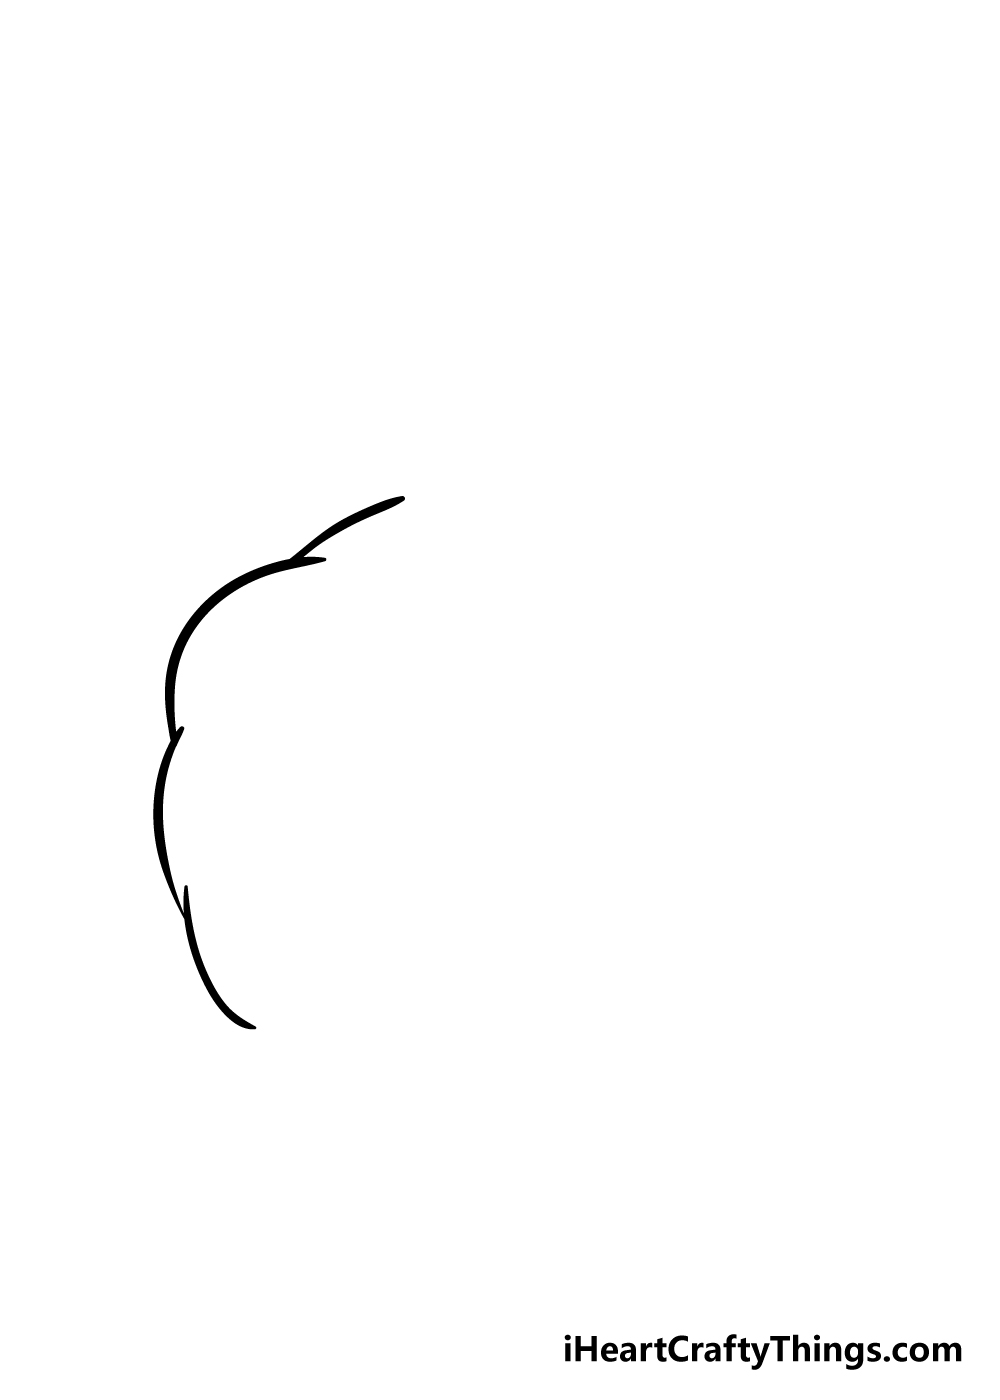
When taking on a drawing challenge like this one, it’s important to get the curves of the muscles right, so we shall focus on that in this step of our guide on how to draw crossed arms.
Using the reference image we provided to aid you, you can carefully draw a series of curved lines that connect and overlap with one another.
They may not look much like arms yet, but once we add to them in the next few steps you’ll see how it all comes together to form the crossed arms!
Step 2 – Draw the first forearm
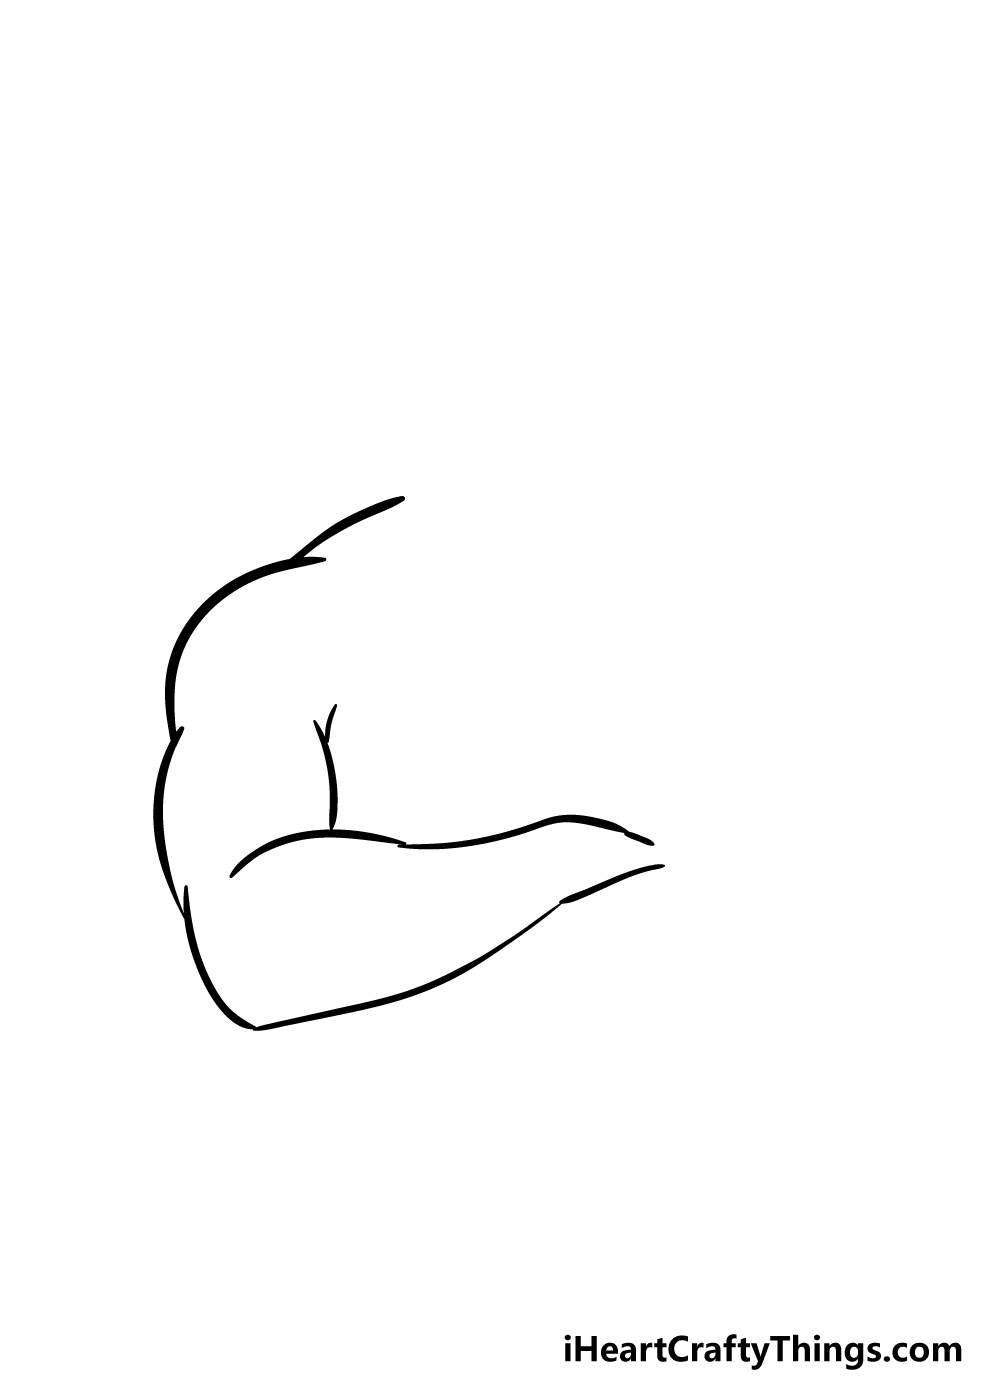
We will be drawing the forearm of your crossed arms drawing in this second step. This is another step where it will be very helpful to follow the reference image as you draw.
In the previous step, you drew the outer lines off the arm, and we will start to go inward for this step.
You can extend a line from the bottom of the one that you drew in the previous step, and this line will be at a sharp angle to form the elbow of the arm on the left.
Then, you can keep adding more long curved lines to that elbow and above it to form the forearm on the left. If it sounds complicated, the reference image will help you to get it right!
Step 3 – Now, draw the arm on the right
You’ve drawn one arm brilliantly already, so now you can draw the one on the right! In this step of our guide on how to draw crossed arms you will be repeating what you did in step 2 except mirrored.
The hand on the arm on the left will go behind the arm on the right-hand side. The hand on that arm will then go under the one on the left.
Once again, that may sound complicated but it’s not as hard as it sounds when you follow the steps!
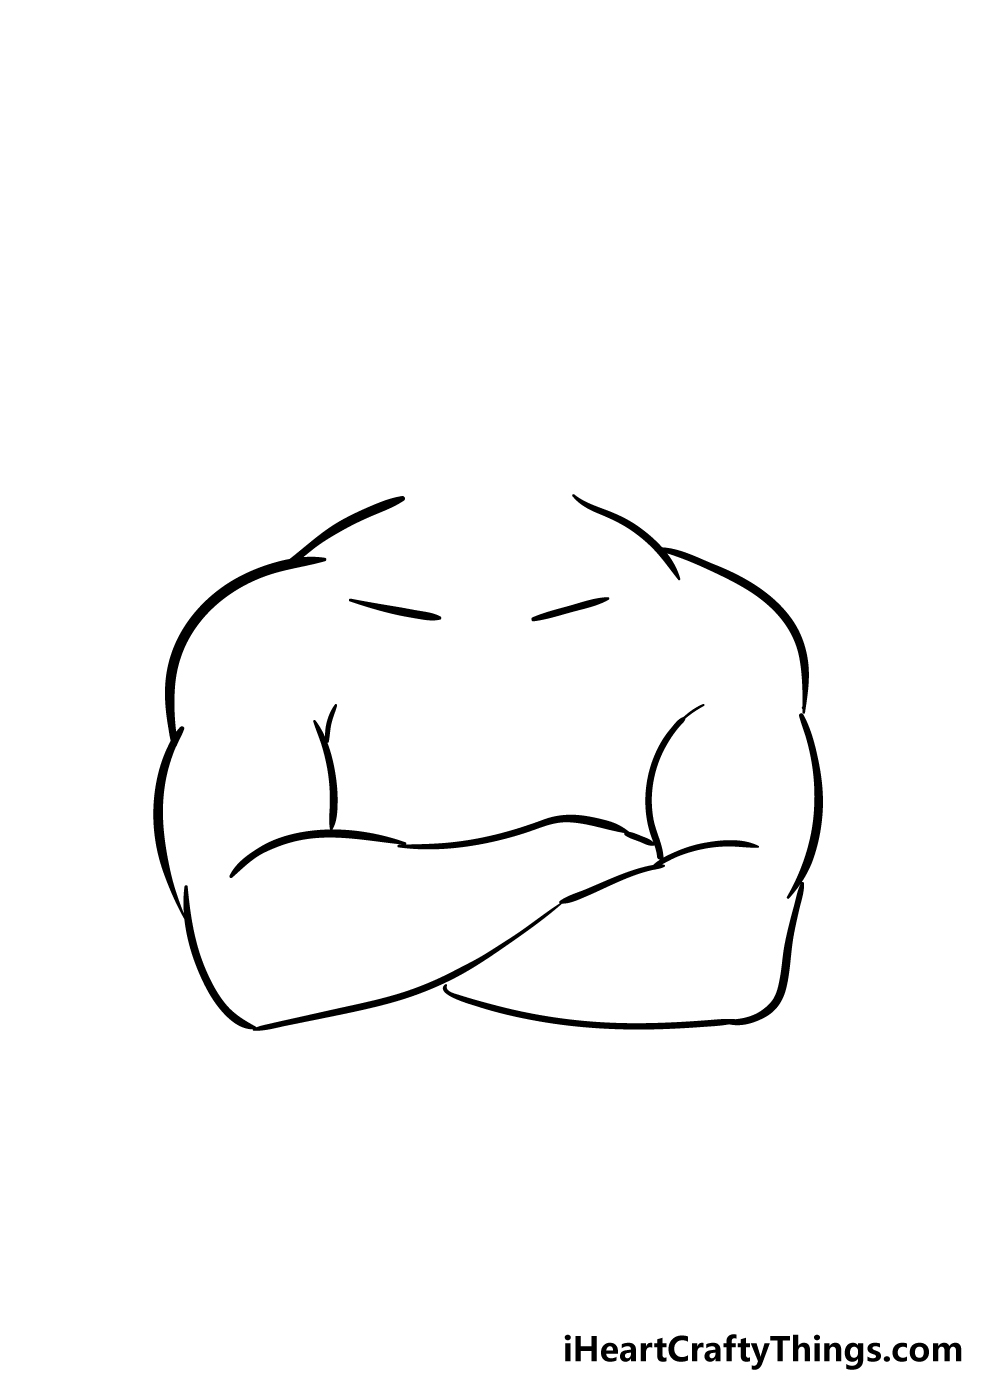
Before you move on to the next step, you can add some straight lines near the top of the center of the crossed arms for the collar bones.
Step 4 – Add a head to your drawing

Having a pair of arms with no head above them would look a bit disturbing, so to avoid that we shall add a head in this part of your crossed arms drawing!
First, you can draw two vertical lines for the neck that the head will be on. Then you can draw the head with a fairly thin oval shape. Then, you can draw some ears on the sides of the head.
We’ve kept the design of the head quite simple, but you could always make it more involved if you would like!
The crossed arms are still the star of this show, but it never hurts to add some of your own details.
Step 5 – Now, you can add the final details of your crossed arms drawing
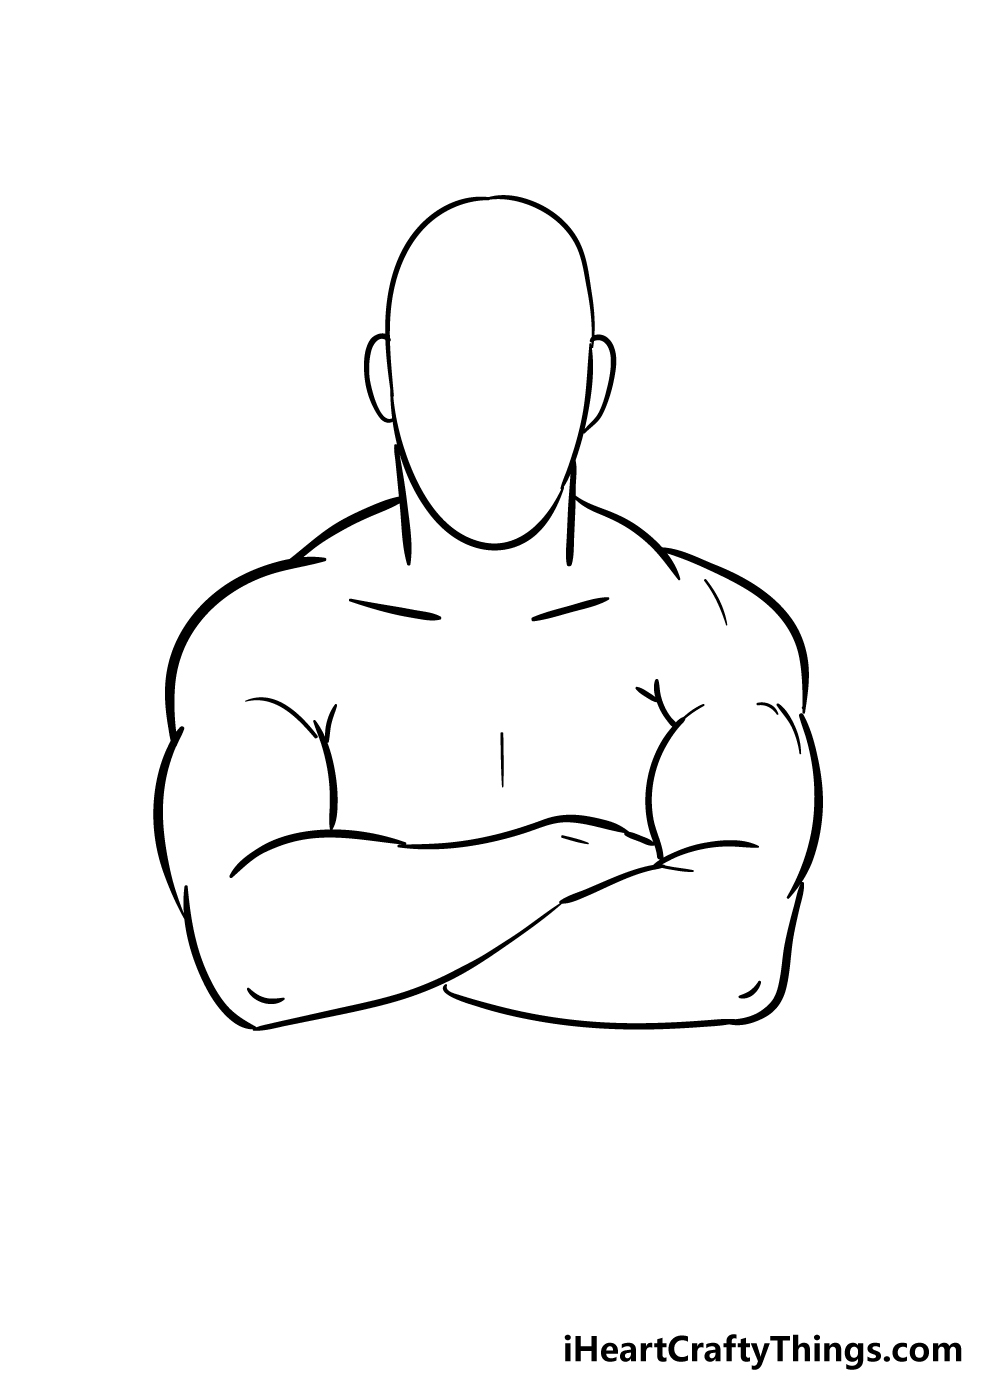
This fifth step of our guide on how to draw crossed arms will have you adding some minor final details to finish off the look of the muscles.
To do this, you will be adding lots of small curved lines throughout the arms as you can see it in our reference image.
Once you have added these final details, be sure to add any of your own touches and details that you would like!
We mentioned making the face more detailed in the previous step, and now you could take it even further by drawing a real face onto it. You could even draw your own face onto it!
You could even draw other aspects such as a shirt on the body or a cool background.
How will you finish off this drawing before you color it in?
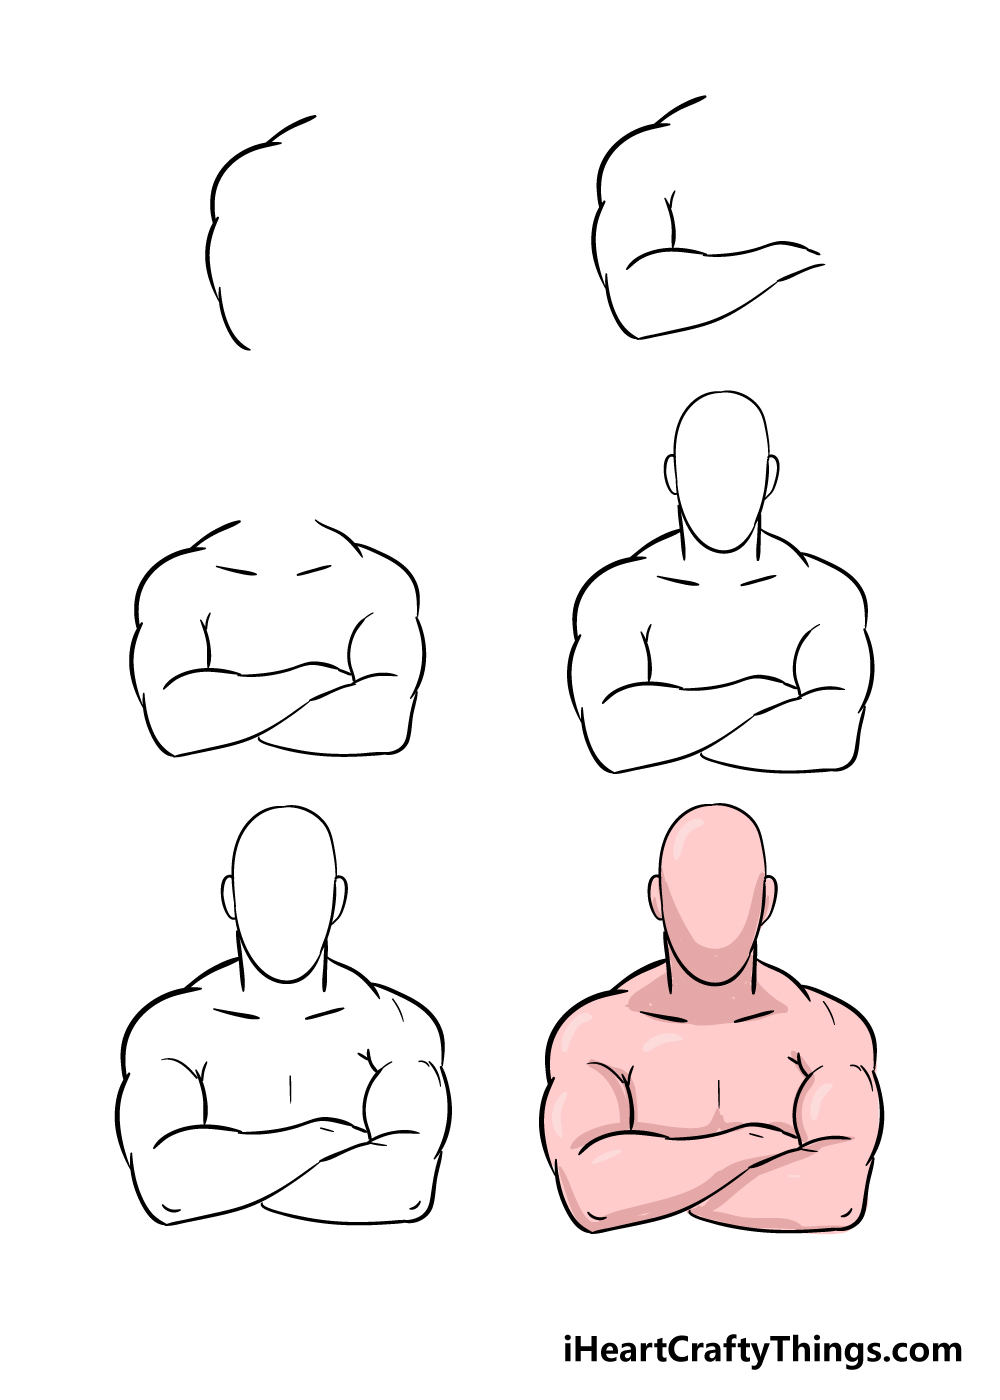
Step 6 – Finish off your crossed arms drawing with some color
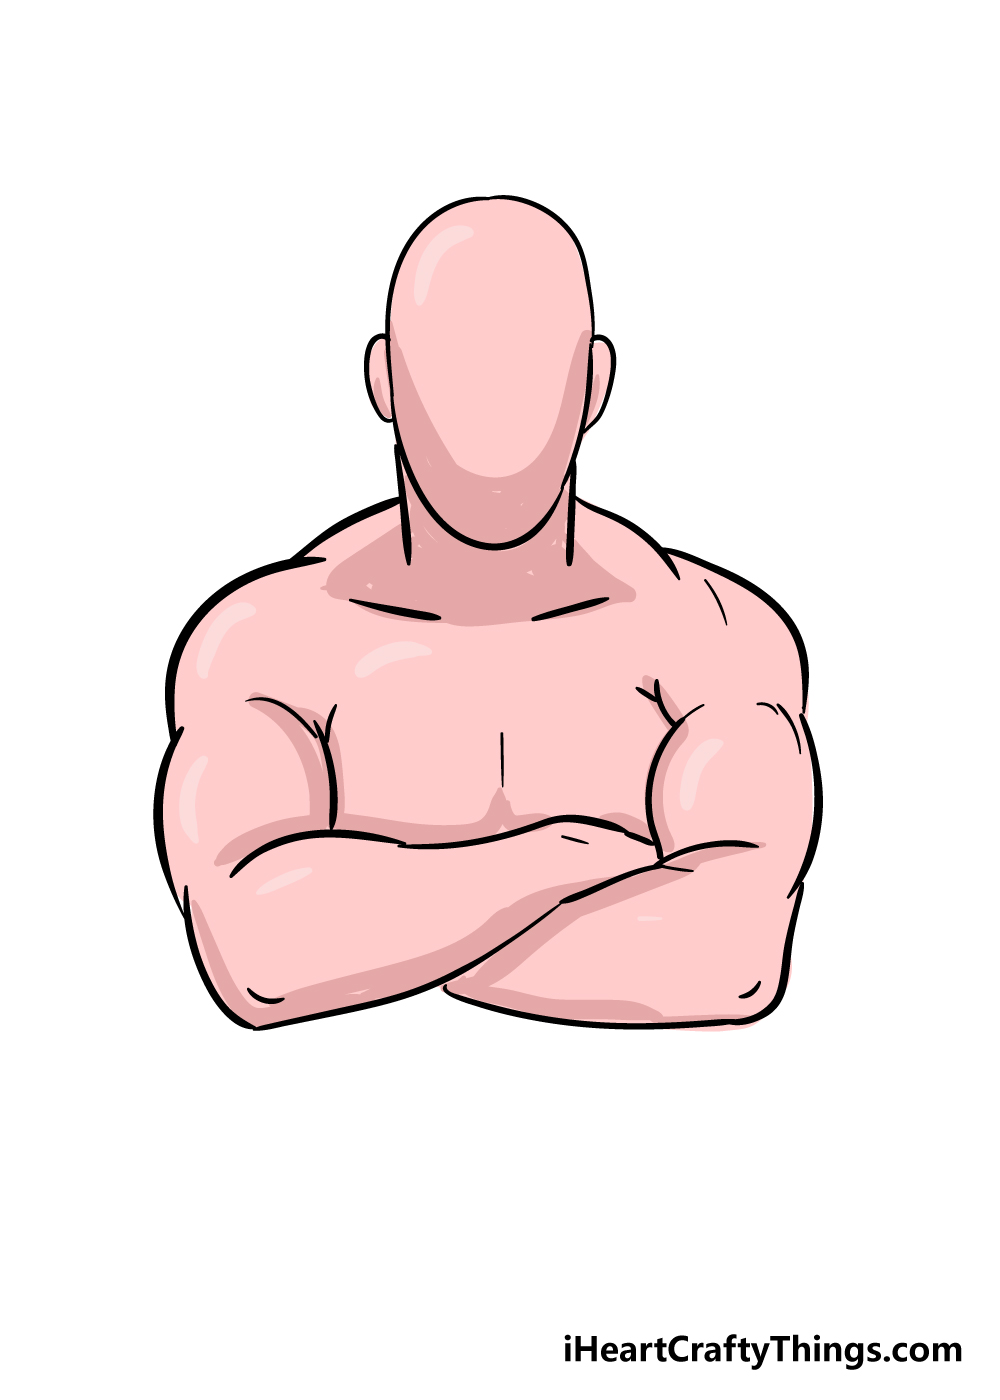
Now that you have finished your crossed arms drawing, it’s time to have some fun coloring in your artwork!
This final step is the one where you get to take over and show off your creativity.
You have many options for how you could color this in, and we showed just one of an infinite amount of possibilities in our reference image.
For an extra personal touch, you could use your favorite art mediums to recreate your own skin tone for this drawing!
Or you could go for a stylistic approach and use your favorite colors to make this drawing pop.
Once you have picked which colors you would like to use, you can also have some fun with your favorite art mediums.
Watercolor paints have a nice subtlety to them and are great for conveying skin tones. For a brighter, more stylistic approach you could also use something like acrylic paints or colored pens for colors that pop!
What will you use to bring your drawing to life with color?
Here’s how you can make your crossed arms drawing even better…
Uncross your arms as we make this crossed arms sketch even greater with these tips!
Many people will decorate their bodies with tattoos, and these would be great to add to this crossed arms drawing! Getting a real tattoo is a lifelong commitment that can be possible to regret!
However, adding some to these arms would be a great way to try out different designs without fear.
There are so many incredible tattoo designs you could go for, and they could even be themed.
What are some cool tattoos you could add?
For people who maybe don’t want to commit to a tattoo that will last forever, they can also express themselves with clothing. This would also be a great addition to your drawing of crossed arms!
It could be a shirt, cool hat or maybe even some jewelry. Much as it was with the tattoos, this would be a great way to try out some styles without having to spend a fortune on clothes.
We would love to see how you style this person!
Another cool way to put your own spin on this crossed arms sketch would be by adding some facial features. We kept the face blank to make it easier, but adding one would really help bring it to life!
If you need some inspiration, you could use your own face in a mirror as a model. Or, you could get a friend or a family member to pose for you.
What sort of facial expression would you choose for this person?
Finally, once you have finished adding or changing details on this crossed arms drawing, you could also add a background. This person we drew is quite muscular, so maybe they could be at a gym or a weightlifting contest.
These are just a few ideas, but you could go for any settings you like! They could be more grounded settings, or it could be something crazy that no one would expect.
What are some backgrounds that would suit this image?
Your Crossed Arms Drawing is Complete!
With those final details and colors added, you have reached the end of this guide on how to draw crossed arms!
We hope that this guide made drawing this subject not only much easier but also lots of fun to do!
Now that you have mastered this guide, you can take it even further with how you personalize the drawing.
We mentioned some ideas like drawing a face or a background, but there is a lot more you could do as well!
Be sure to check out our website, as we have many more awesome drawing guides for you to enjoy.
We upload new ones all the time too, so be sure to check in often!
Once your crossed arms drawing is complete we would love to see it, so please share it on our Facebook and Pinterest pages for us to enjoy!