In days gone by, shoes were purely practical, intended only to protect the feet of people who would be participating in a lifestyle that put them at risk.
While shoes do still protect our feet, they have also become a statement of fashion and style. In recent years, Converse shoes have been one of the top brands in the world, with many styles and various brands under the brand.
While it’s great to own some of your own, it can be great to learn how to draw Converse so that you can design your own pair.
Fans of this brand will definitely want to read all the way to the end of this tutorial.
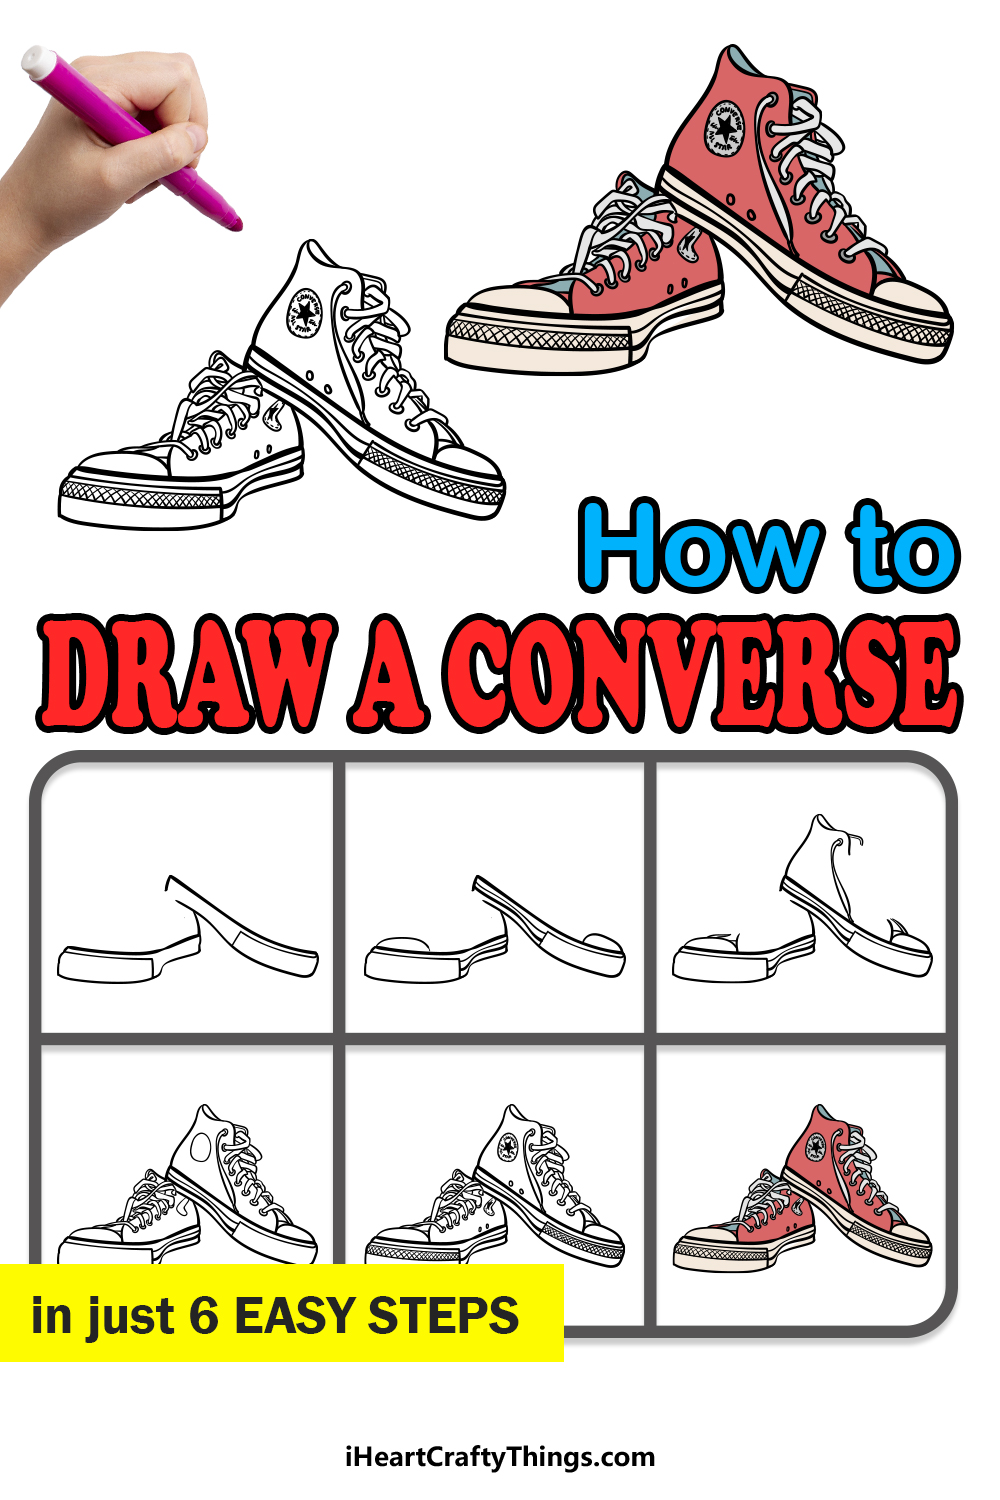
Our step-by-step guide on how to draw Converse will show you how you can recreate this awesome pair of shoes.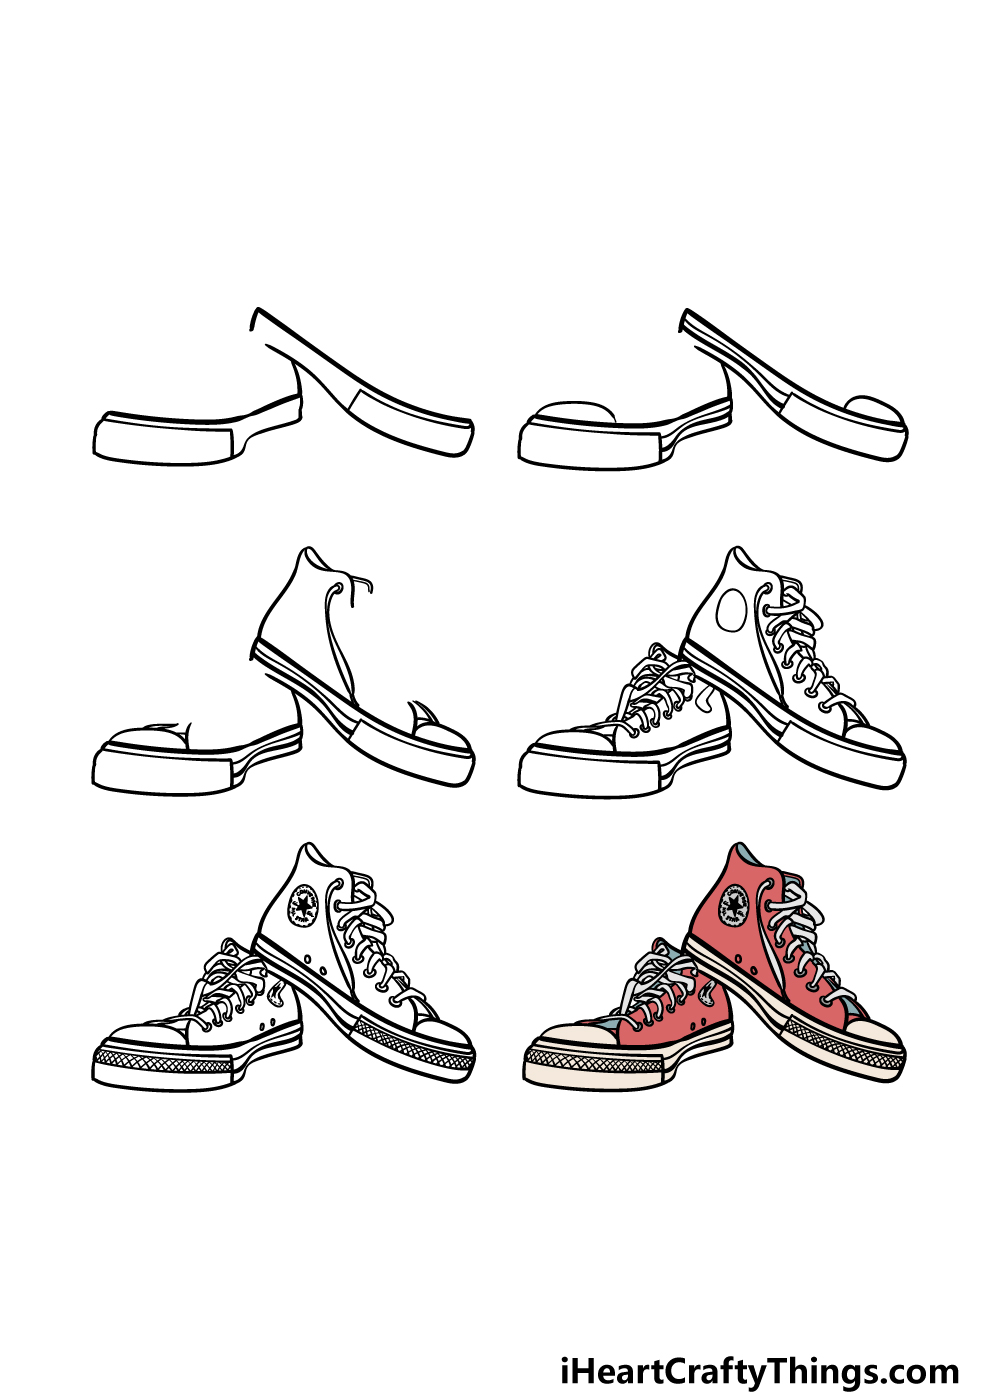
How to Draw Converse – Let’s Get Started!
Step 1
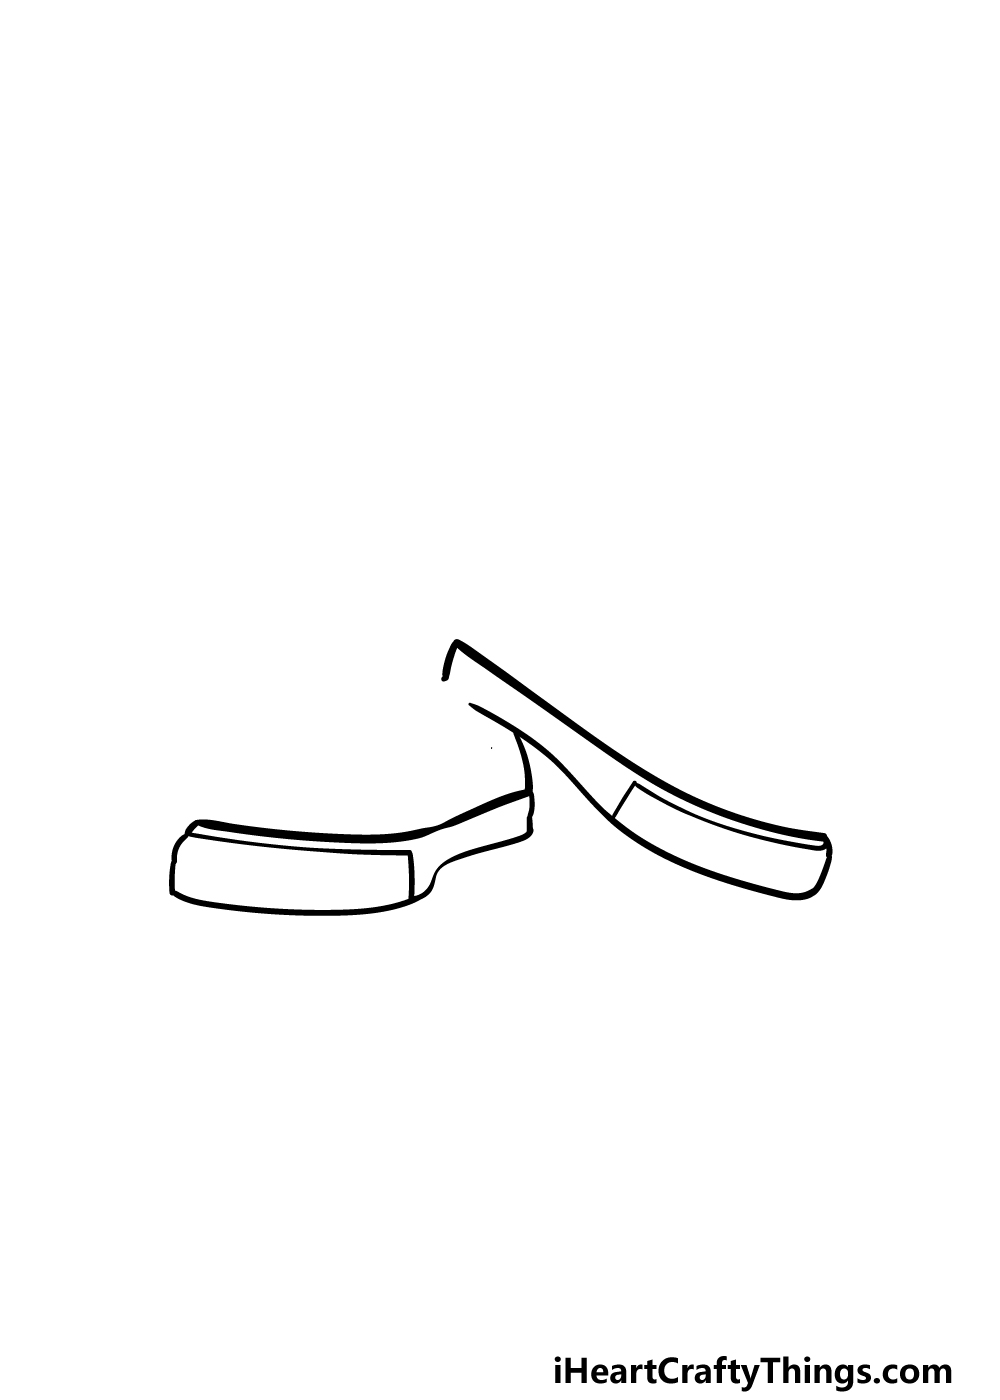
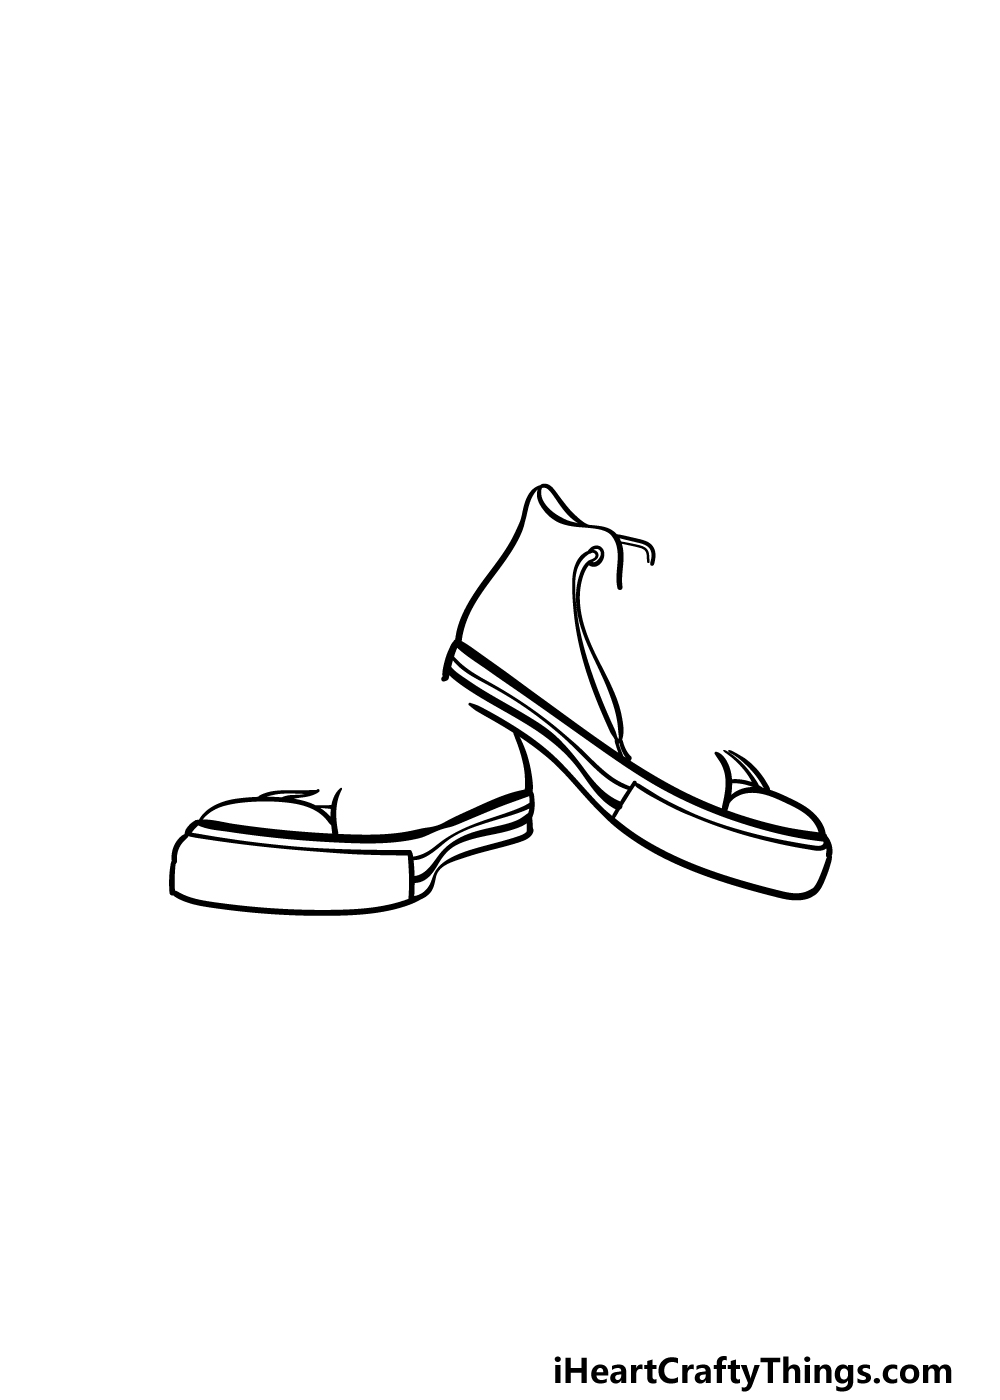
We will begin with the soles of this pair of shoes for the first step of our guide on how to draw Converse. One of the shoes will be flat on the ground while the other is leaning on it.
This is worth keeping in mind as you try to replicate the sole outlines as they appear in our reference image.
We will be drawing these soles by using some flat shapes drawn with some curved lines. Each sole will have a rectangular section at the front that leads to the sides and back.
Once you’re happy with how these soles look compared to our reference image we will be ready to proceed!
Step 2 – Next, draw some detailing for the sneaker soles
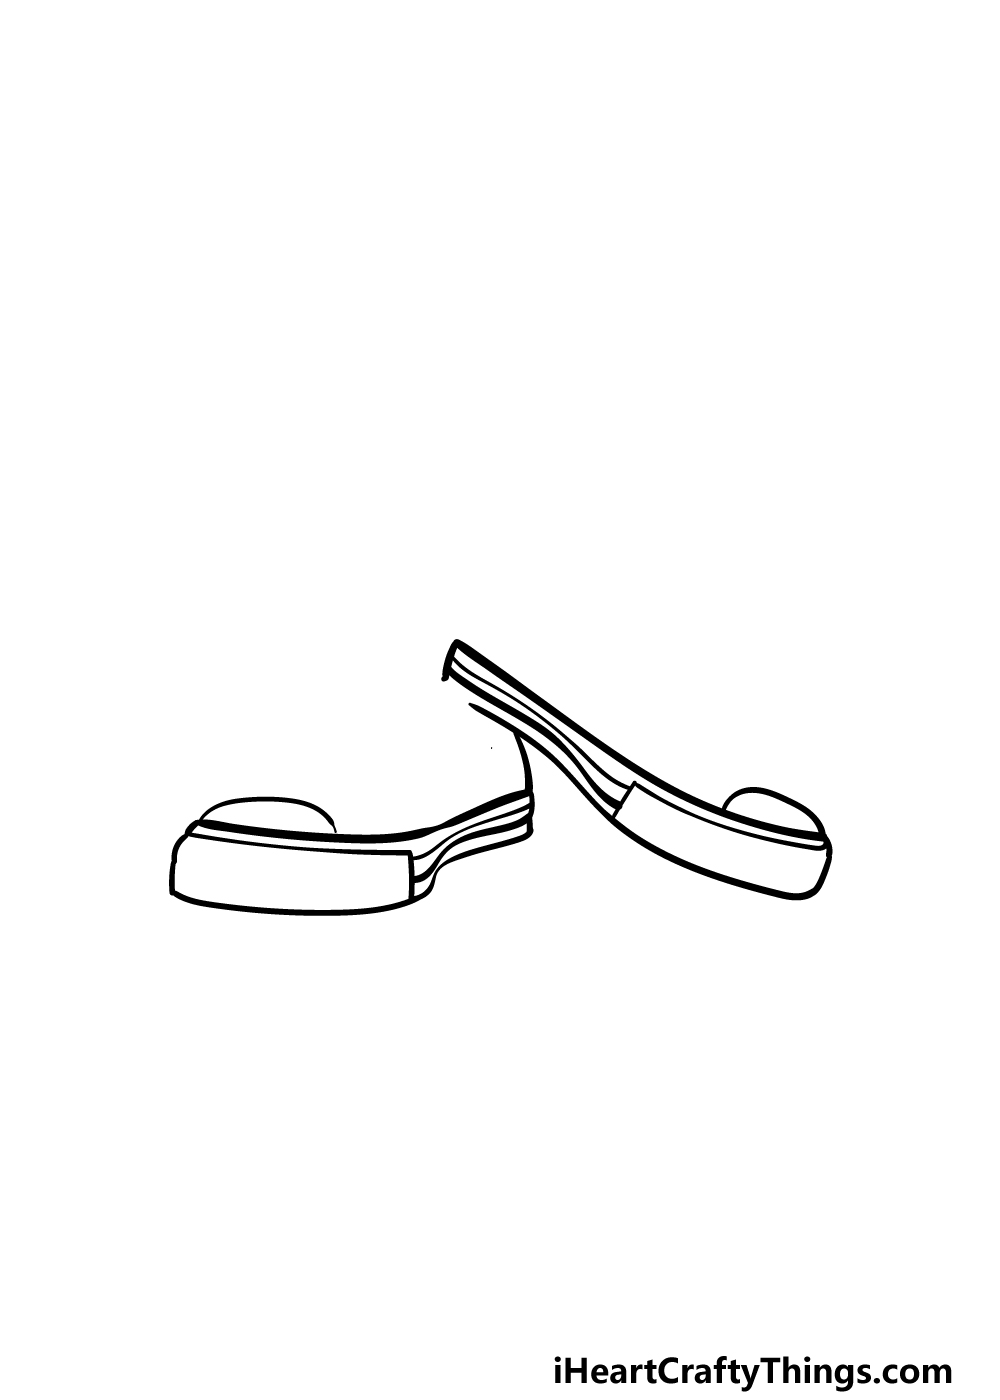
Now that you have drawn the soles of this pair of shoes, we can now start to draw some detailing onto the soles in this part of your Converse drawing. First, we will be drawing a rounded line above the front tip of each of the shoes.
Once that is done, we shall next be drawing two lines along the center of each sole. With these lines, the top one will be rather thin while the one beneath it will be a bit thicker. That’s all there is to it for now, so let’s move on!
Step 3 – Start drawing the back of the shoe
In this third step of our guide on how to draw Converse, we will start drawing the top half of the shoes. For now, we will be focusing on the shoe on the right-hand side of the picture.
You can start this by drawing a curved line up from the back edge of the top of the sole. This line will then curl outward a bit and then back in to form the mouth of the shoe.
Then, we will use some wavy lines to show the first lace dropping down onto the shoe. Some of this can sound a bit confusing, so just be sure to closely replicate our example image and you’ll get the hang of it in no time!
Step 4 – Now, draw the laces
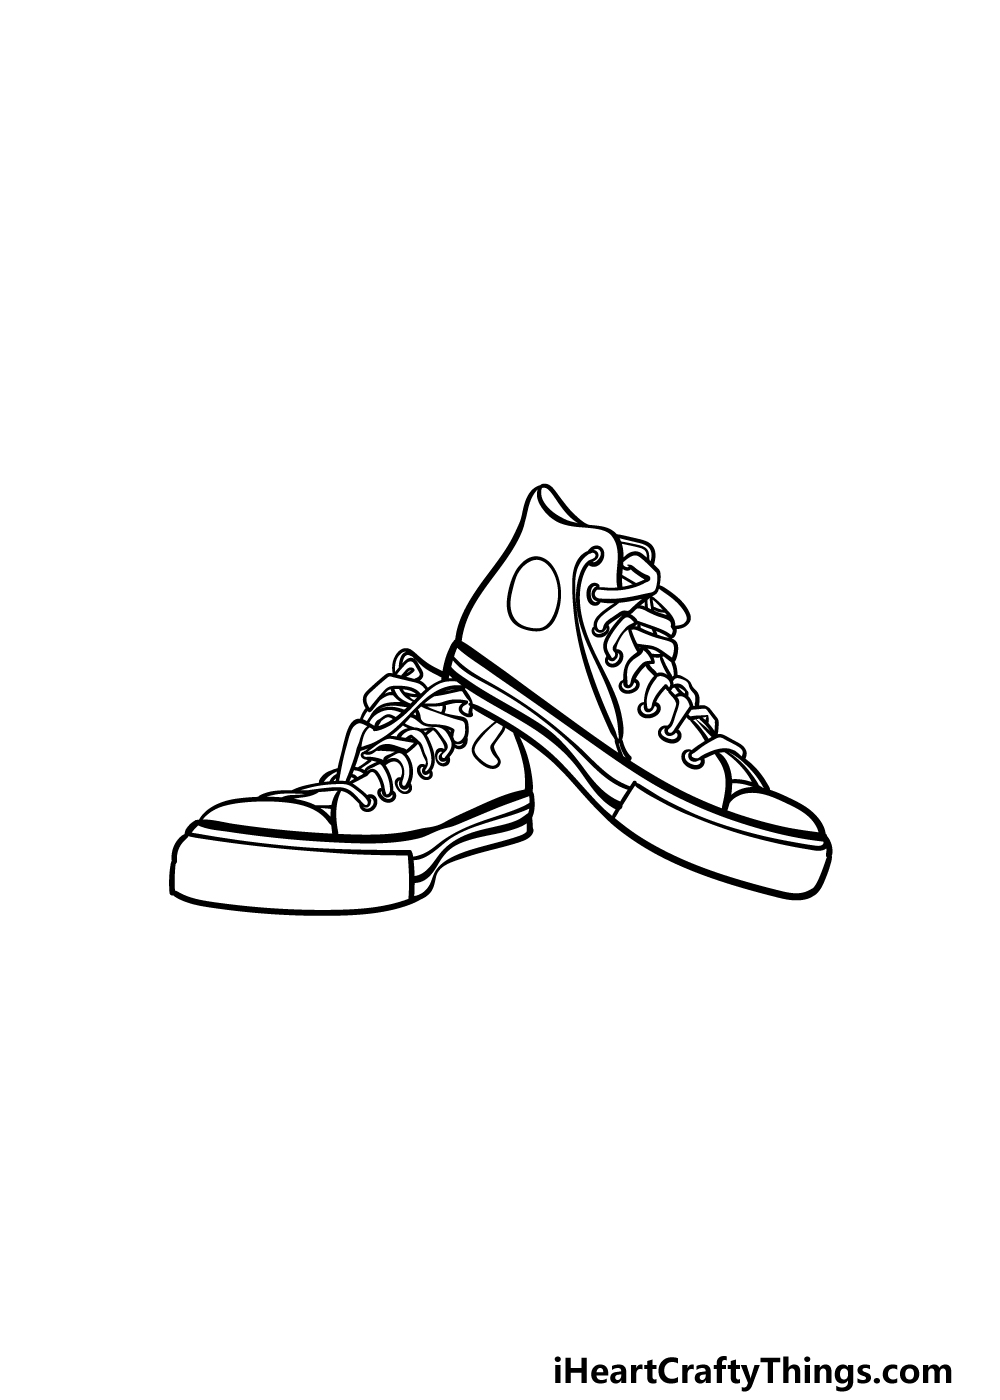
We are now moving to what is probably the trickiest step of this Converse drawing. That’s okay, though, as we will take it nice and slowly!
This is a step that looks quite complicated, but it doesn’t have to be. To make things easier, we will add rows of small, rounded shapes for the metal rings that the laces will emerge from. Be sure to draw a row of these on each of the shoes.
These rings will help you to visualize how each individual lace will be situated on the shoes. Once they are drawn, carefully refer to our example and draw a rounded set of lines to show each lace coming from its respective ring.
There will be some other line details we will be adding around them to finish off the outline of the tops of the shoes.
Step 5 – Add some final details to your Converse drawing
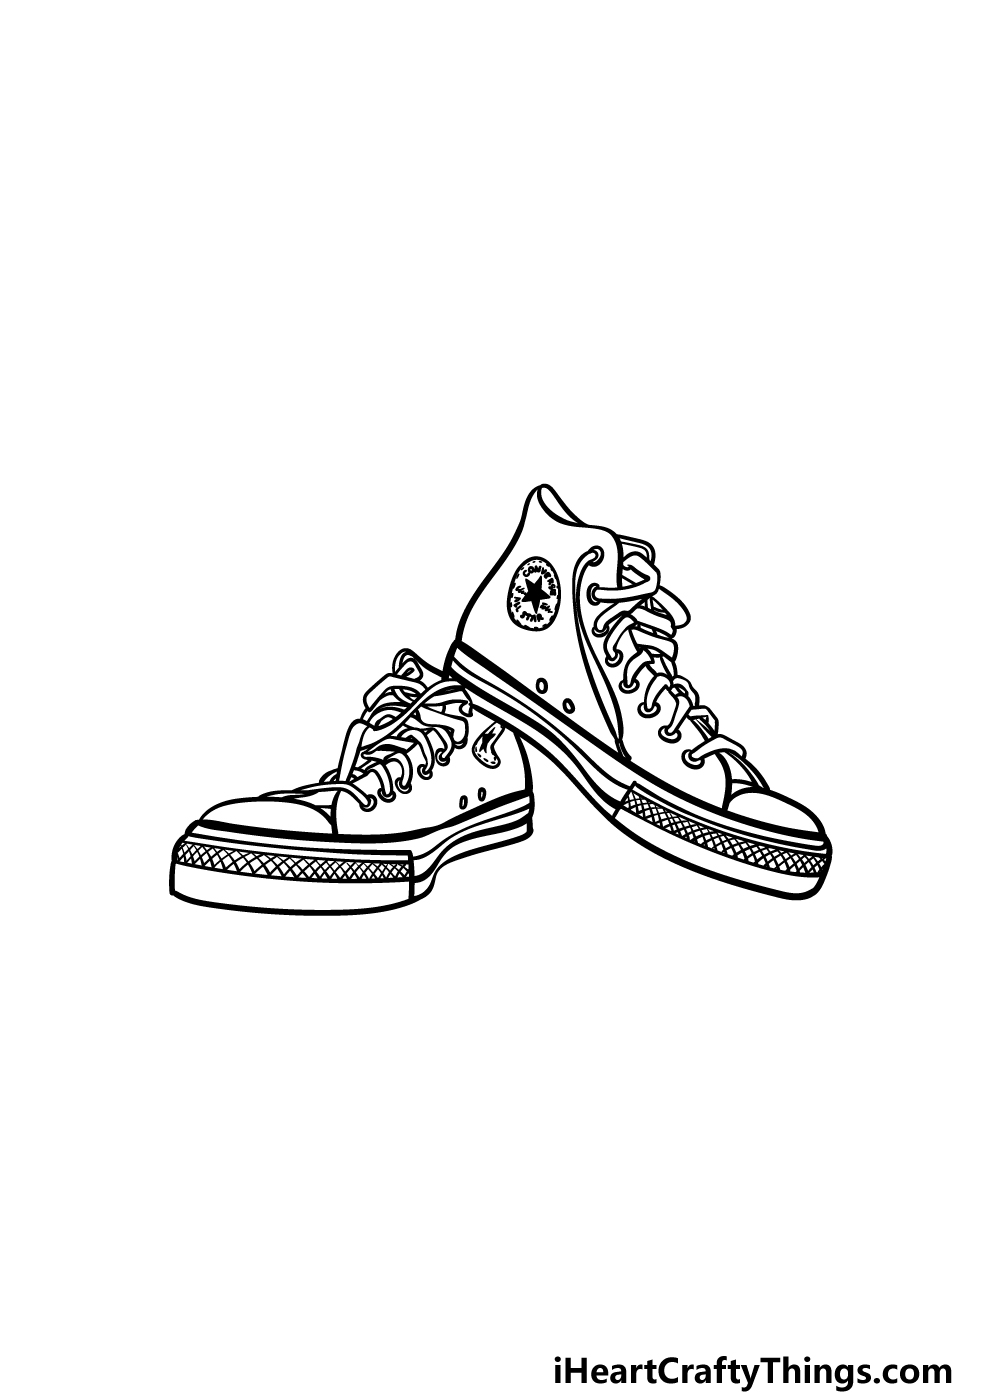
That last step was quite an intense one, but this part of our guide on how to draw Converse should prove to be a bit more relaxed! In this one, we will finish off by drawing some final details for this pair of shoes.
First, we will start by drawing the Converse logo onto the sides of the shoes. This logo has a rounded outline with a black star inside each one, along with some text.
Then, we will be drawing some detailing to the front of the soles. To do this, simply draw a long, thin rectangular shape and then add a cross-hatch pattern to the interior of that rectangle.
That will finish off this drawing, but you could also go ahead and add some more details or a cool background to finish it off!
Step 6 – Finish off your Converse drawing with some color
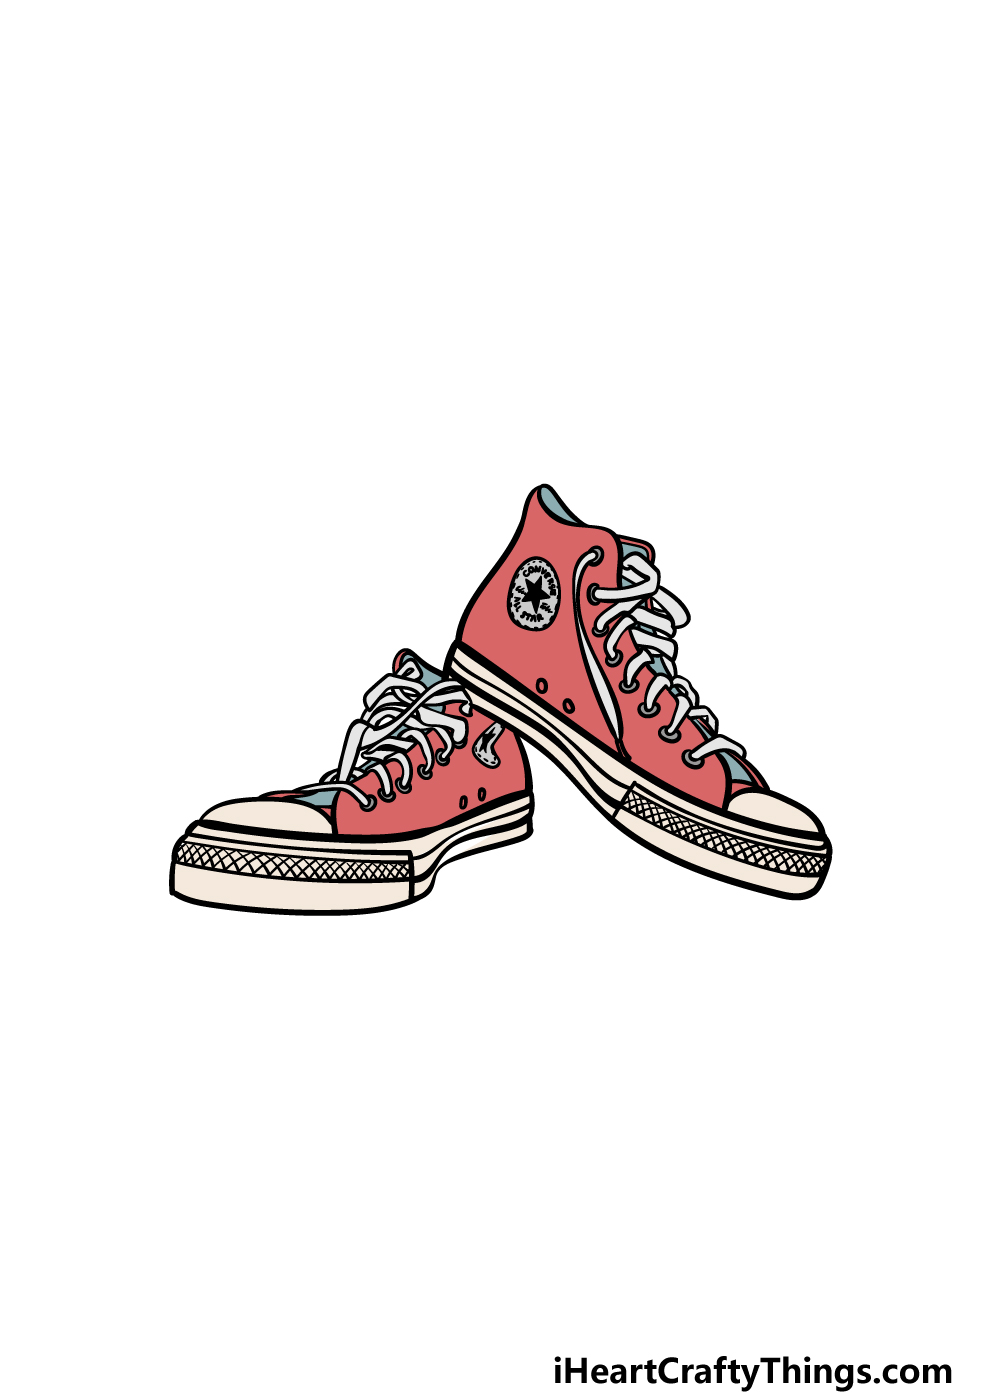
Converse shoes can come in a wide variety of colors, so that gives you a lot of freedom for how to color them in to finish off this Converse drawing.
In our reference image, we went with a red and beige color scheme for it, and this is one approach you could take.
Once you have decided on the colors you would like to use, you can also have fun trying out some great art mediums to achieve them.
This is where you can really express your creativity, so be sure to have fun with it and show us what you can do!
Here’s how you can make your Converse drawing even better…
Try these tips for your Converse sketch on for size as we make this drawing even better!
This drawing of Converse shoes shows a red pair of these stylish sneakers. They come in many different colors and designs, so you could customize these shoes to your liking!
This could be as simple as changing the color of the shoes. You could also add small patterns or shapes on the shoes to make them more personalized.
What are some other ways that you could customize these Converse shoes?
Once you have the hang of drawing these shoes, you could create alternate versions where the shoes are positioned differently. This could be as simple as having them side by side.
If you have some real Converse shoes on hand, then you could use them to help you draw these other angles. Otherwise, you could look up some pictures of Converse shoes to help as you draw.
This way, you could show off these awesome sneakers at all sorts of different angles and sides.
When wearing these kinds of sneakers, they will often be paired with other kinds of clothing and accessories. These are some things that you could add to this Converse drawing!
These could include some socks, sports equipment or maybe a hat. These are just a few vague examples of items you could use.
This would be your chance to show off what outfit you would use to wear these Converse shoes with. What kind of look do you think you would create with these shoes?
Finally, while these sneakers look amazing, they would look even better if worn by someone. That’s why we think it would be cool to add a human character to this Converse sketch!
This would be a great idea to go with if you went with some of our previous suggestions, too. One fun idea would be to use yourself as a model and show what it would look like if you were wearing these shoes!
Where would you like to wear these awesome sneakers?
Your Converse Drawing is Complete!
This brand of sneakers is immensely popular and loved around the world, and we hope that you had an amazing time drawing them in this guide on how to draw Converse!
Drawing shoes can sometimes not be that easy, as there are lots of small parts and details. We aimed to show you that it can be much easier when you know what to do!
Now that you have finished this guide, how will you complete your drawing? Will you draw a background, add some details or perhaps use an art medium that you’ve never tried before? Whatever you do, we know it will look great!
Then, when you’re itching for a new drawing challenge you can find it on our website. We have many more guides coming out soon, so definitely keep checking in!
It would be great to see how you finished off your Converse drawing, so please be sure to share it on our Facebook and Pinterest pages.