


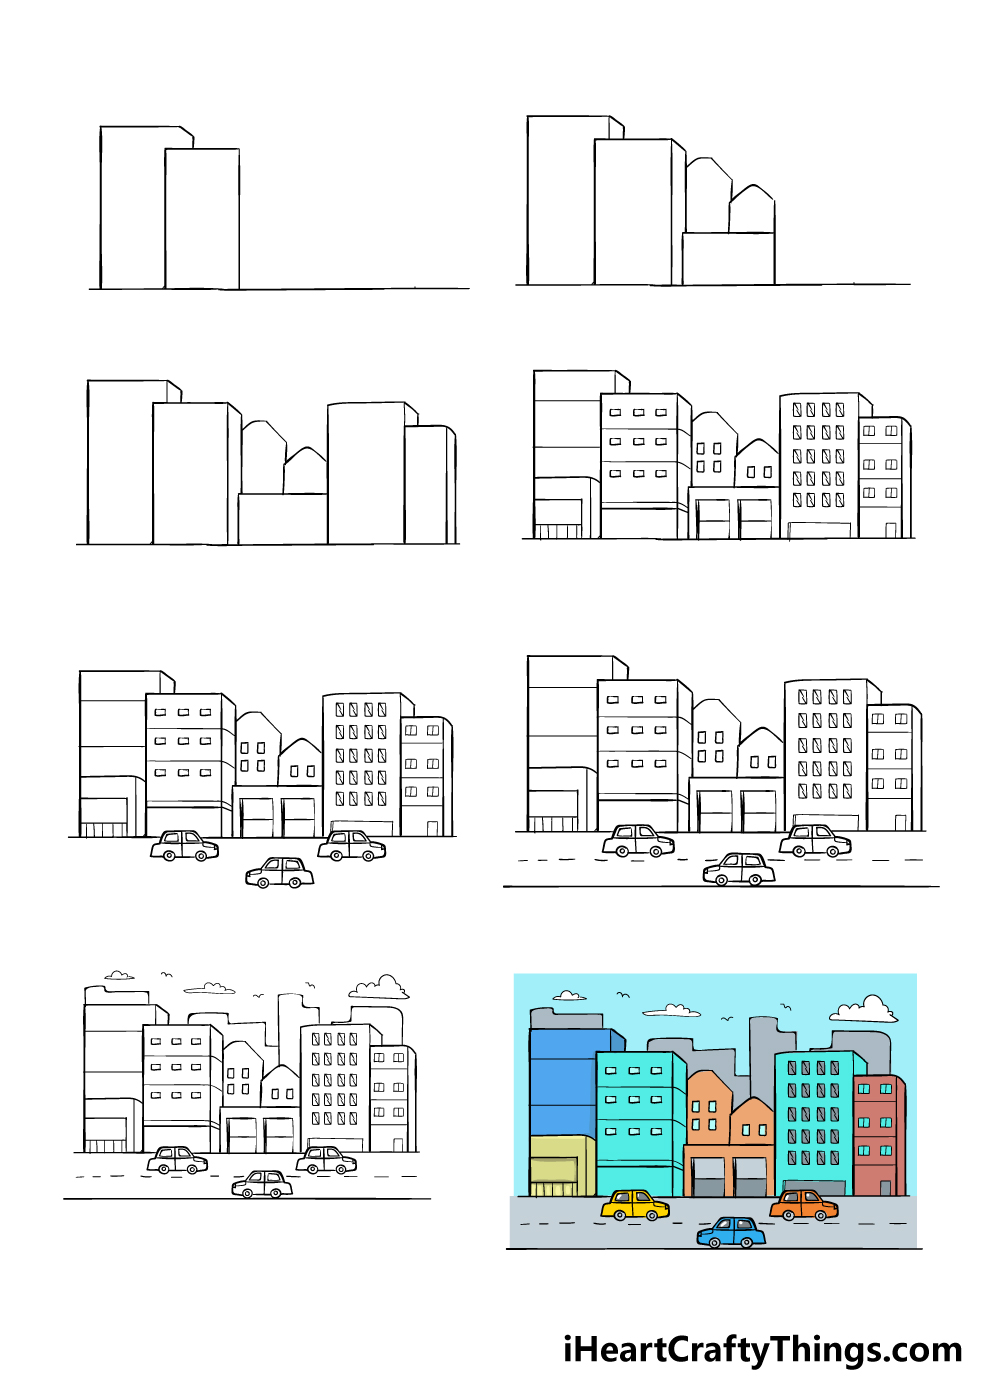
You don’t have to be an architect to learn how to draw a city! All you need is this guide, some patience and your favorite art tools.
Cities have captivated our imaginations since they first started popping up around the world. You see a city and see a world of possibilities and adventure, and they are also a sign of the heights of civilization.
Cities come in many different forms and sizes, and it can be fun to imagine what your very own city would look like. You won’t have to stop at just imagining it after you work on this guide!
I will show you how to draw the street, some cars and of course some skyscrapers. This is just the beginning, though, as you can turn this drawing into whatever you like.
Adding your own details and additions can be a great way to make your city even more unique, so let’s start building this metropolis together.
This Video Guide Will Help You Make Your City Drawing
How to Draw A City – Let’s get Started!
Step 1
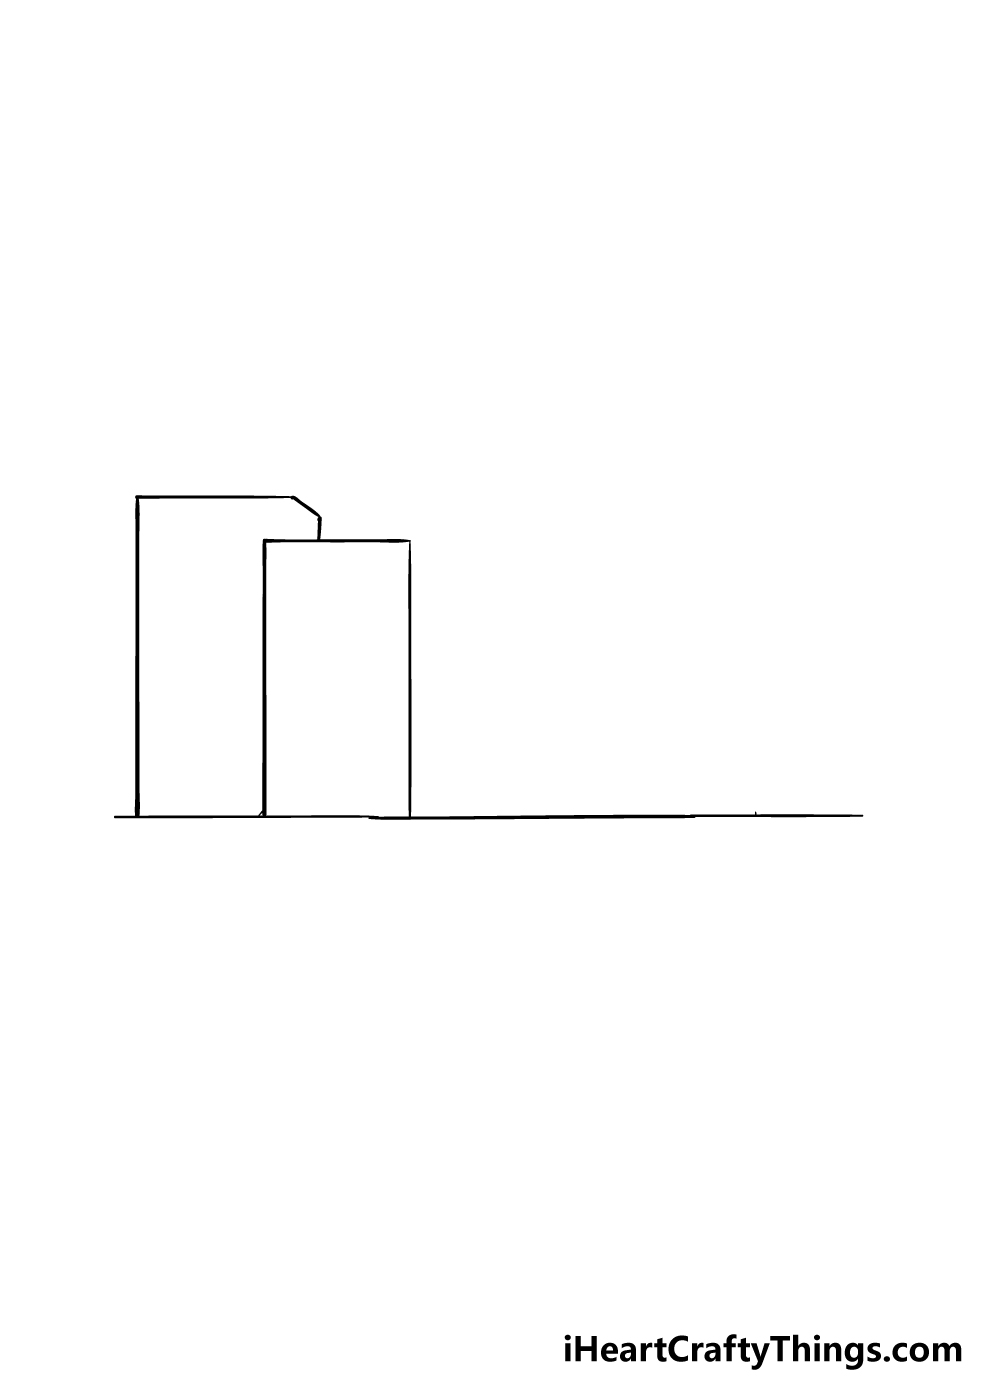
A city is a whole made up of many individual parts, so we will be building it up slowly throughout this guide on how to draw a city.
There will be a lot of straight lines in this guide, so you will find it much easier if you have a ruler handy.
Using that ruler, start by drawing a horizontal line that your buildings will be going on. You may want to draw this line with a pencil for now, as there will be some cars breaking this line in a later step.
Then, once you have this line drawn you can use your ruler to draw the two buildings that we show in our reference image. Once you have these aspects drawn, you’re ready for step 2!
Step 2 – Next, draw some more buildings for your city
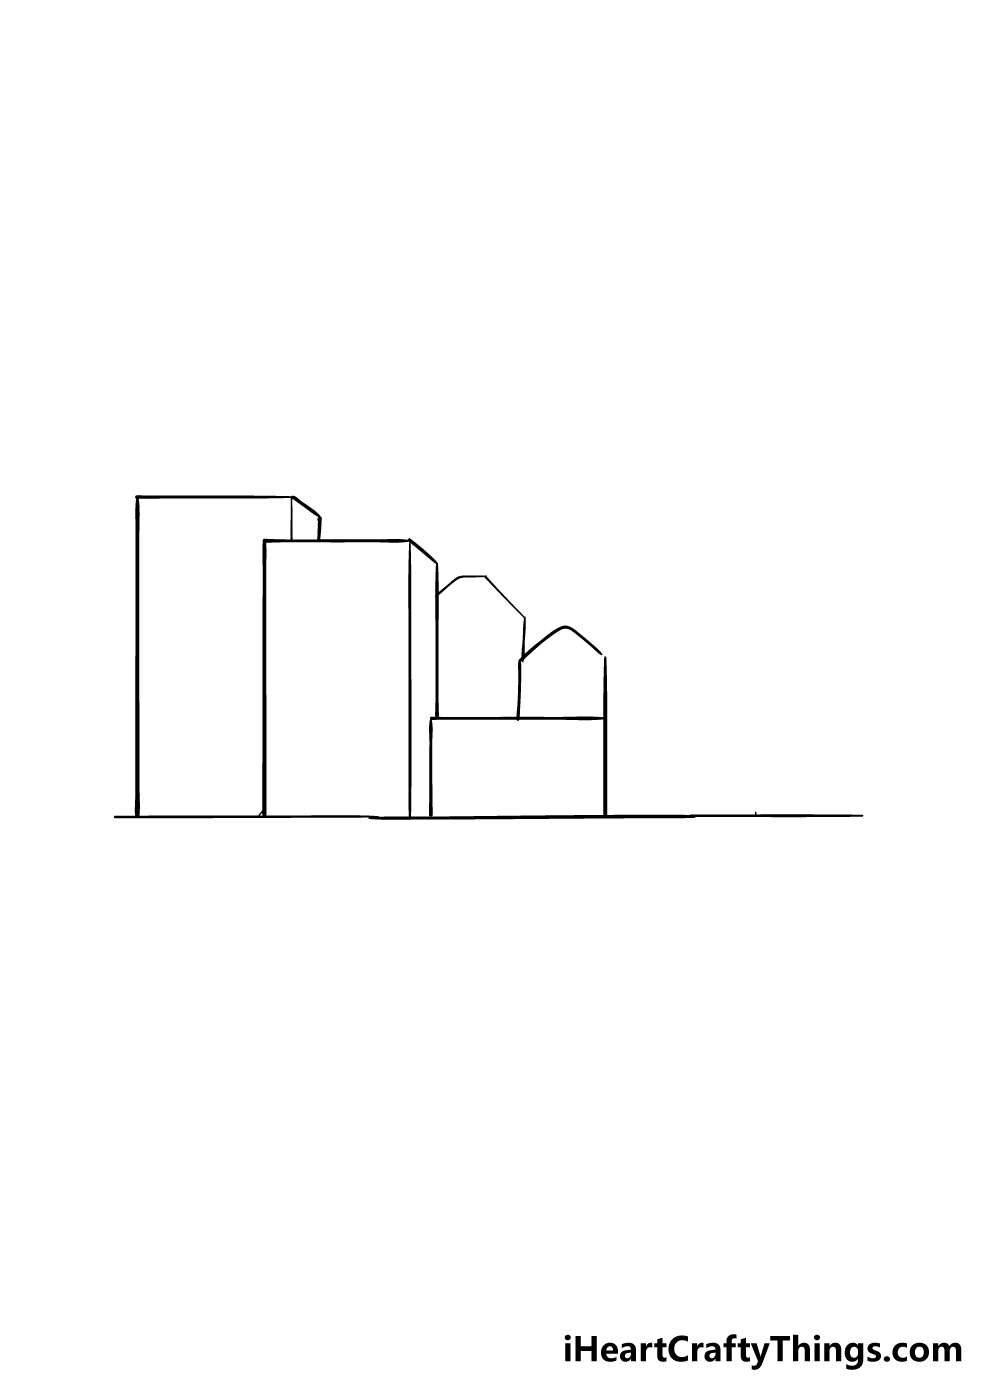
In this part of your city drawing, you will start to build the layers of the city. Using your ruler, you can draw a small rectangular building to the right of the ones you drew previously.
Then, you can draw two buildings with pointy tops behind this rectangle building and next to the first two. This will make it look like these buildings are in the background.
Step 3 – Now, keep drawing some buildings for your city drawing
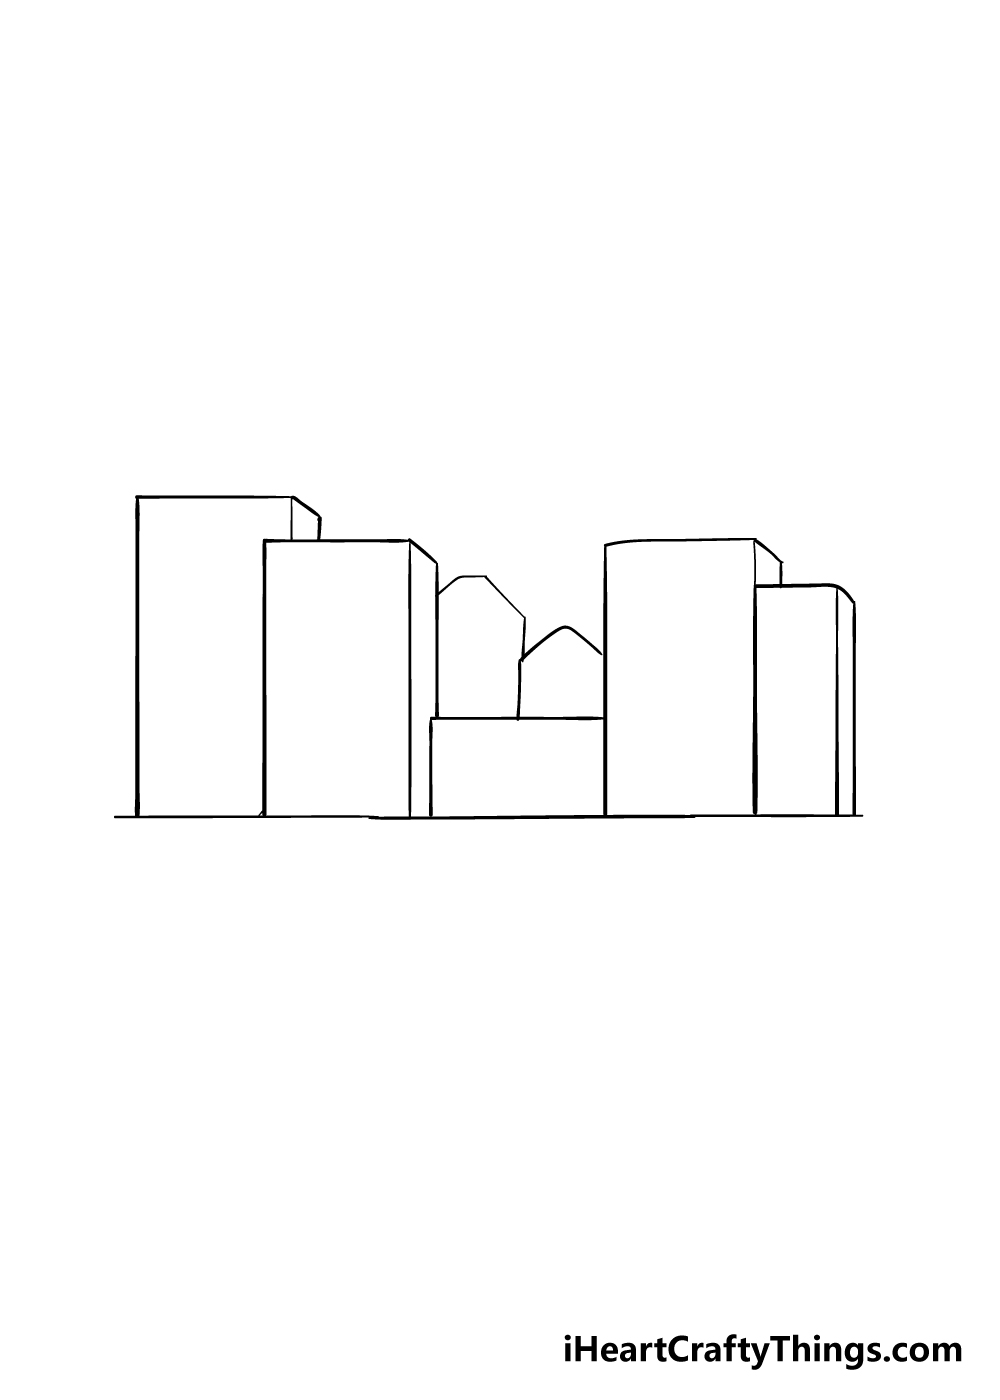
The buildings that you will be drawing in this step of our guide on how to draw a city will be going to the right of the other ones that you drew.
These ones will be square and rectangular, and you will draw the side of the buildings as well. That will finish off the bulk of the city structure, and we will add some details in the next steps.
Step 4 – Next, draw some detail for the buildings
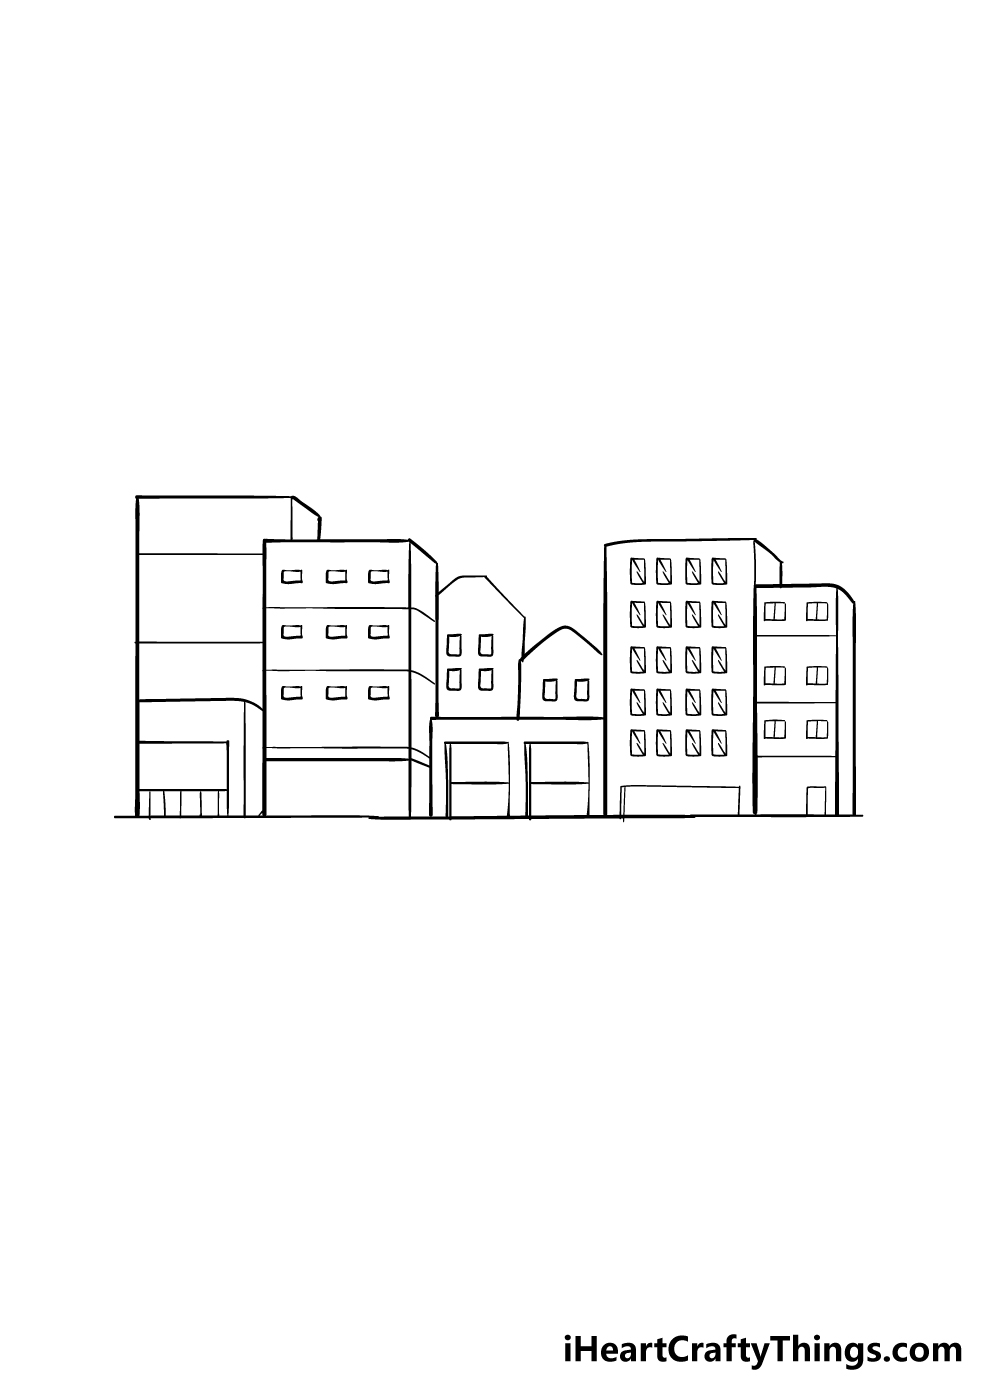
You have all of the buildings for your city drawing, and now you can add some details to them.
Cities are full of unique architecture, and for this reason we used a different design for the details of each building to make each one unique.
You can replicate the designs we used in our example, but you can also change up the designs a bit for your own drawing if you want to put your own spin on it.
Step 5 – Now, draw some cars on the street
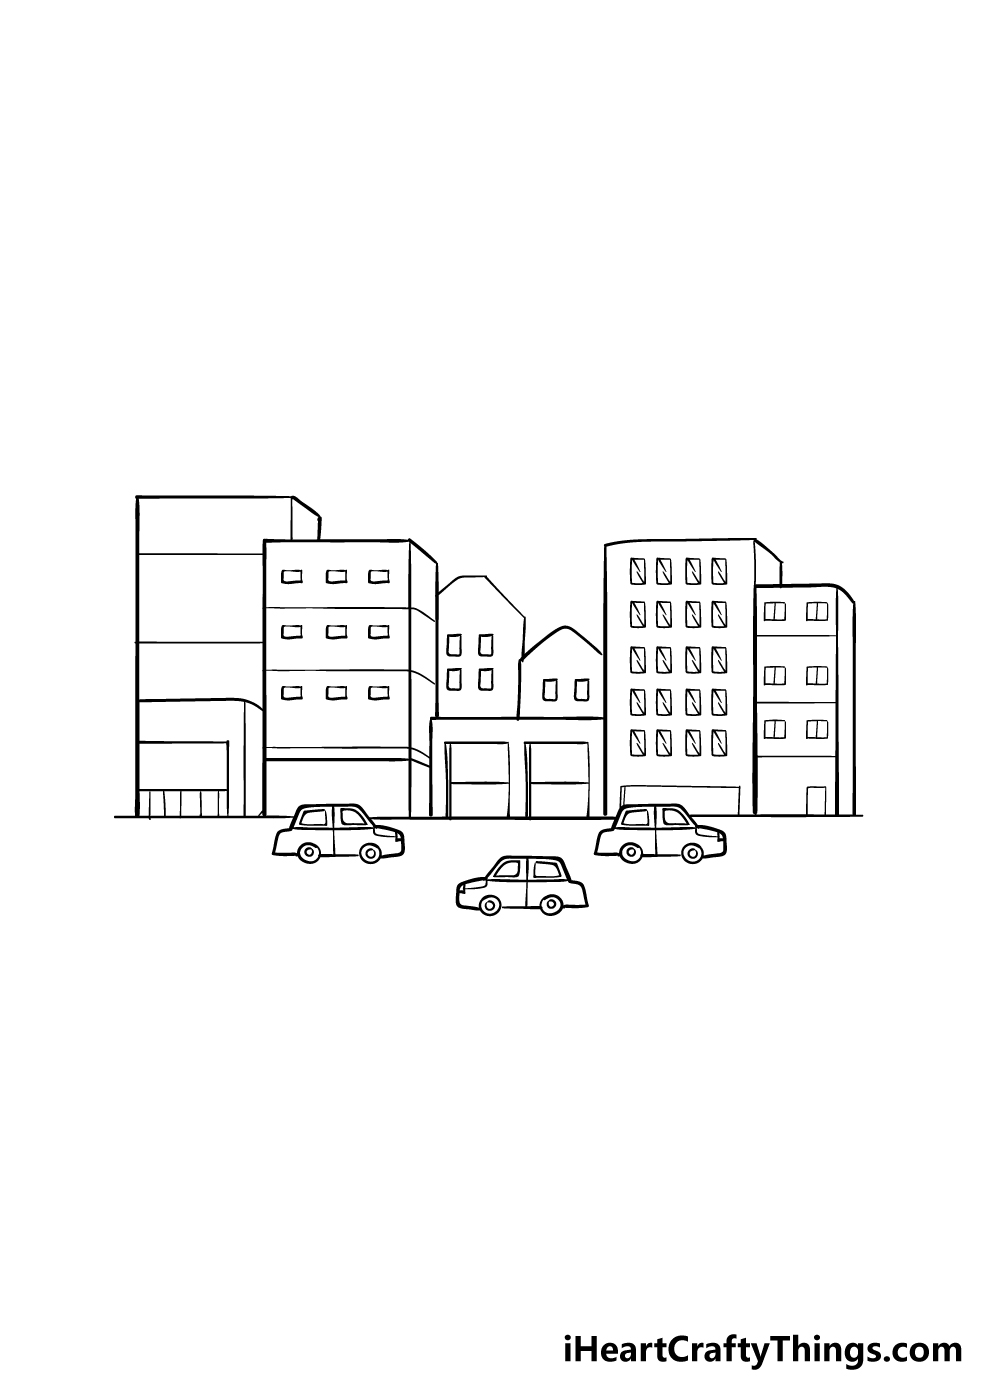
We’re going to add a bit of life to the city in this step of our guide on how to draw a city! To do this, you can draw some simple car designs onto the street in front of the buildings.
Two will be going right, whereas one will be going left. If you used a pencil for the line of the street then you can draw over that with your pen and erase the pencil once the pen ink is dry.
Step 6 – Next, draw detail for the road
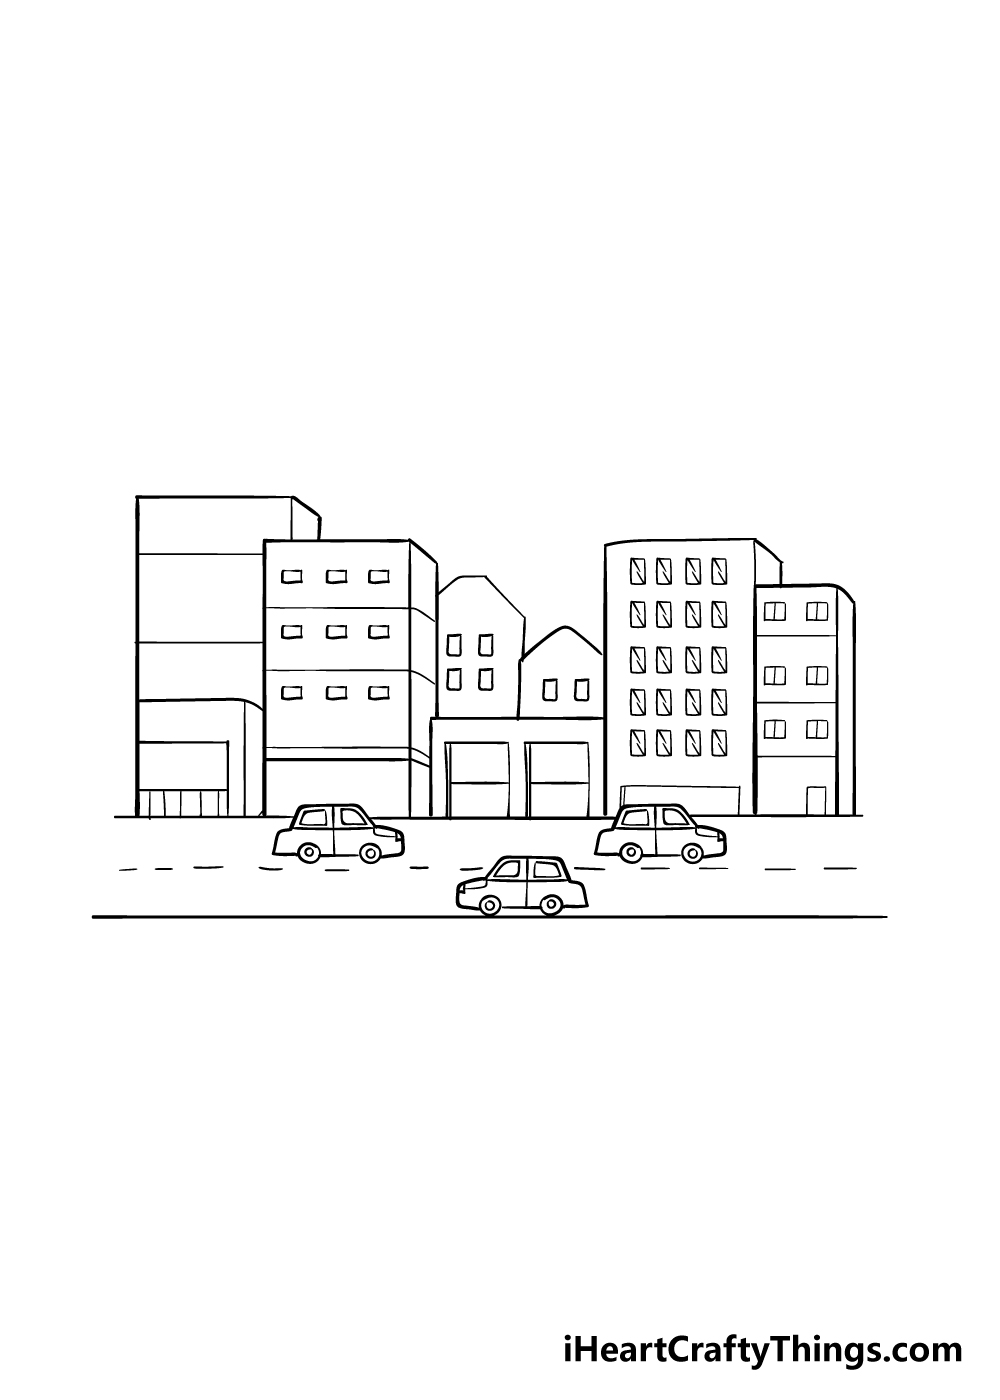
This step of your city drawing will see you finishing off the road that the cars are driving.
All you need to do is draw another horizontal line under the cars running parallel to the top line of the road. Then, simply draw a series of short lines along the center of the road.
Step 7 – Next, draw the final details of your city drawing
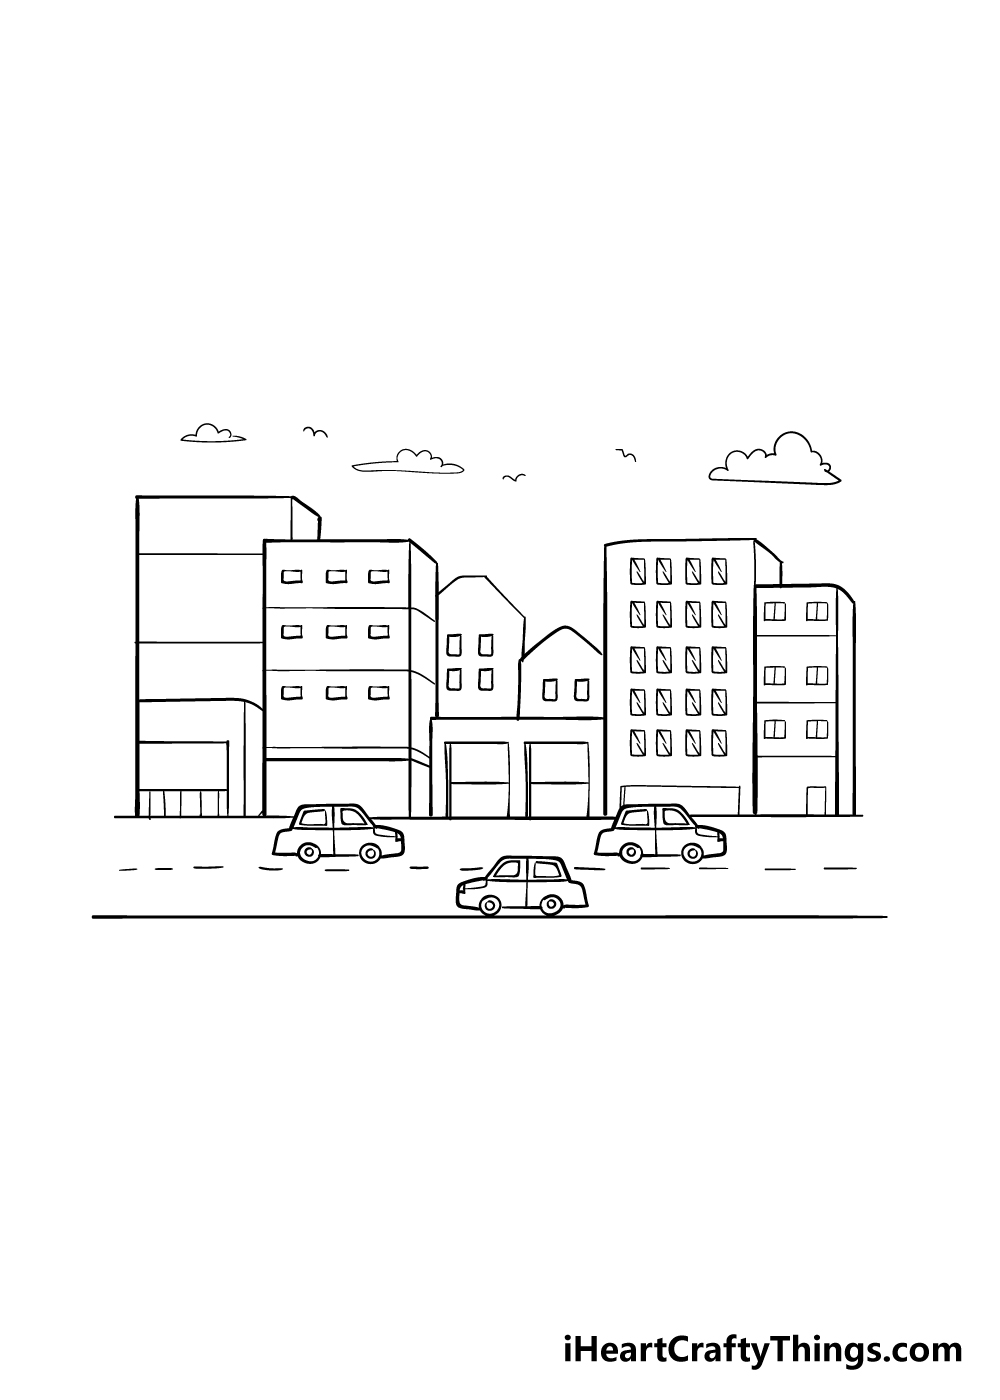
Before you start to bring some color to your city, we have a few more details to add in this guide on how to draw a city.
For our details, we drew some clouds above the city and also drew some birds flying above it. This is to show that it’s a lovely day in the city, but you could change up these details to fit your preference as well!
If you prefer, you could draw some rainy clouds to make this a more moody image, or you could add some details such as a chopper or a blimp above it.
How will you finish off your city drawing before the final step?
Step 8 – Now finish off your city drawing with some color!
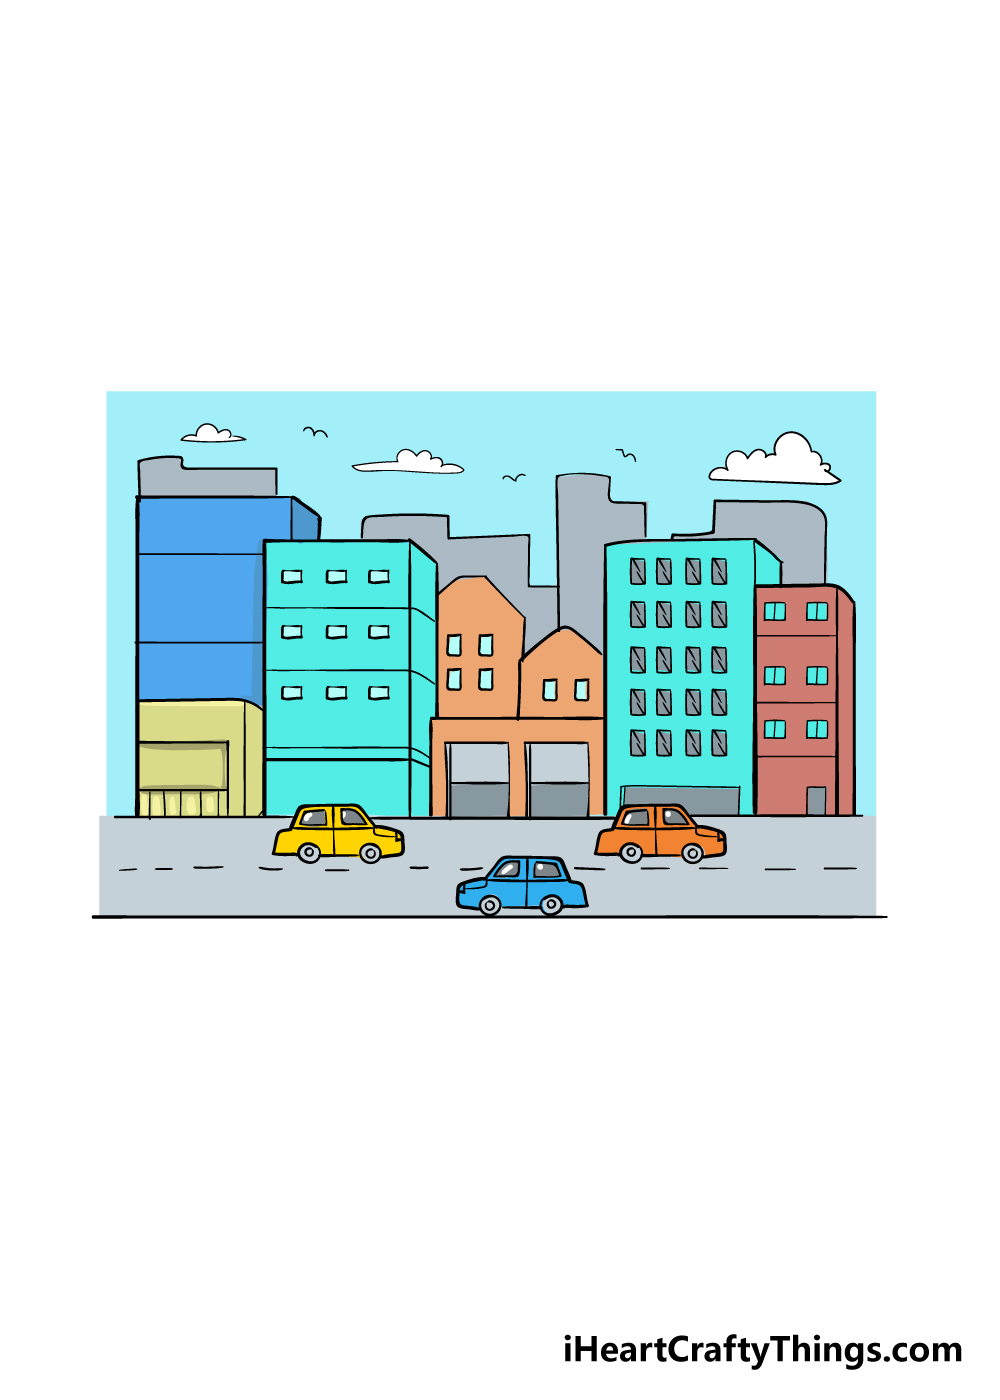
Now that your city drawing is finished, you can bring it to life with some color! Just by using color and some small details you can create some unique moods for your image.
Some more muted tones and mediums would create a moody and rainy look for your city.
On the other hand, brighter colors and mediums would make this look like a bright and happy metropolis!
It’s up to you, and we can’t wait to see the creative ways that you bring this image to life with your colors.
5 Tips To Make Your City Drawing Even Better!
Create a metropolis with these 5 tips on making your city sketch even greater!
We have a few cars driving around this city drawing, but there are many other vehicles you could also go for! Some smaller ones could include motorcycles or even just bicycles.
You can also add vehicles to the sky. Some ideas for this would be to add some aircraft or even a hot air balloon or maybe a blimp.
What are some other vehicles you can think of that you could add?
Another way to improve your drawing of a city even further would be by adding some weather effects. These could be some big clouds, heavy rain or even some snow.
If you add these effects, you can also change the details of the city to reflect these weather effects. For example, you could draw snow gathering on top of the buildings if you’re creating a snowy day.
An easy way to customize this city drawing even more would be by adding some details to the existing buildings. These details could be small yet effective!
You could add some signs above the doorways of the buildings, add more windows or maybe have some flags flying across the walls.
The colors you use can also make a huge difference to your drawing. Not only this, but also the art tools and mediums you go with!
If you want the image to look darker or more muted, then you could go for some colored pencils or watercolors. For more intense colors, you’ll want to get out some acrylic paints or colored pens.
Finally, you can look to real cities for inspiration on how to customize this city sketch. You could even take elements from other cities to make your very own unique combination!
This could include famous landmarks like the Empire state building, the Seattle Space Needle or the Sydney Opera House.
These are just a few ideas, but what other famous landmarks could you borrow for this city?
We can’t wait to see what you create!
Your City Drawing is Complete!
We hope that you had a great time working alongside us on this guide on how to draw a city!
Designing your very own city may have seemed like a tall order when you first saw what you would be drawing, but when you break it down into smaller steps it can be made so much easier!
Now that you have completed this guide, you can also keep this drawing going by adding your own details and background details.
You could change the sky above the city and you could also add some more vehicles above and below it. It’s up to you and you can really unleash your creativity!
We have tons of amazing drawing guides for you to enjoy on our website, so we hope to see you there! We upload new guides all the time, so be sure to check in often.
Once your city drawing is complete, we would love to see it! Please feel free to share it on our Facebook and Pinterest pages when it’s done.
Here Is A City Drawing To Inspire You!
A trip to the city is always fun, but it’s not always easy or convenient to do so if you don’t live close to one.
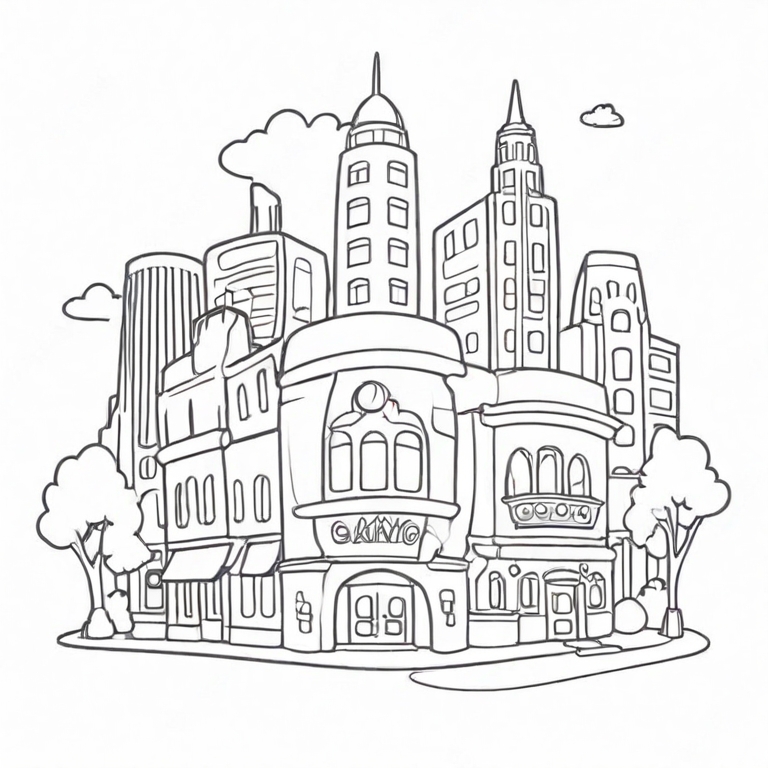
This city drawing for kids was done by our artist Freddy to show you what your own artwork could look like.
It’s an amazing portrayal of a city that has a larger than life feeling to it. You can certainly imagine roaming through the streets of this city, and there are so many details to admire.
The details may seem intimidating to draw, but you can always change any that seem too difficult. Doing so would also make your drawing even more unique!
If you have a favorite city that you love, then you could also change some of the details to make this drawing look like that one. Which landmarks could you add to this city sketch?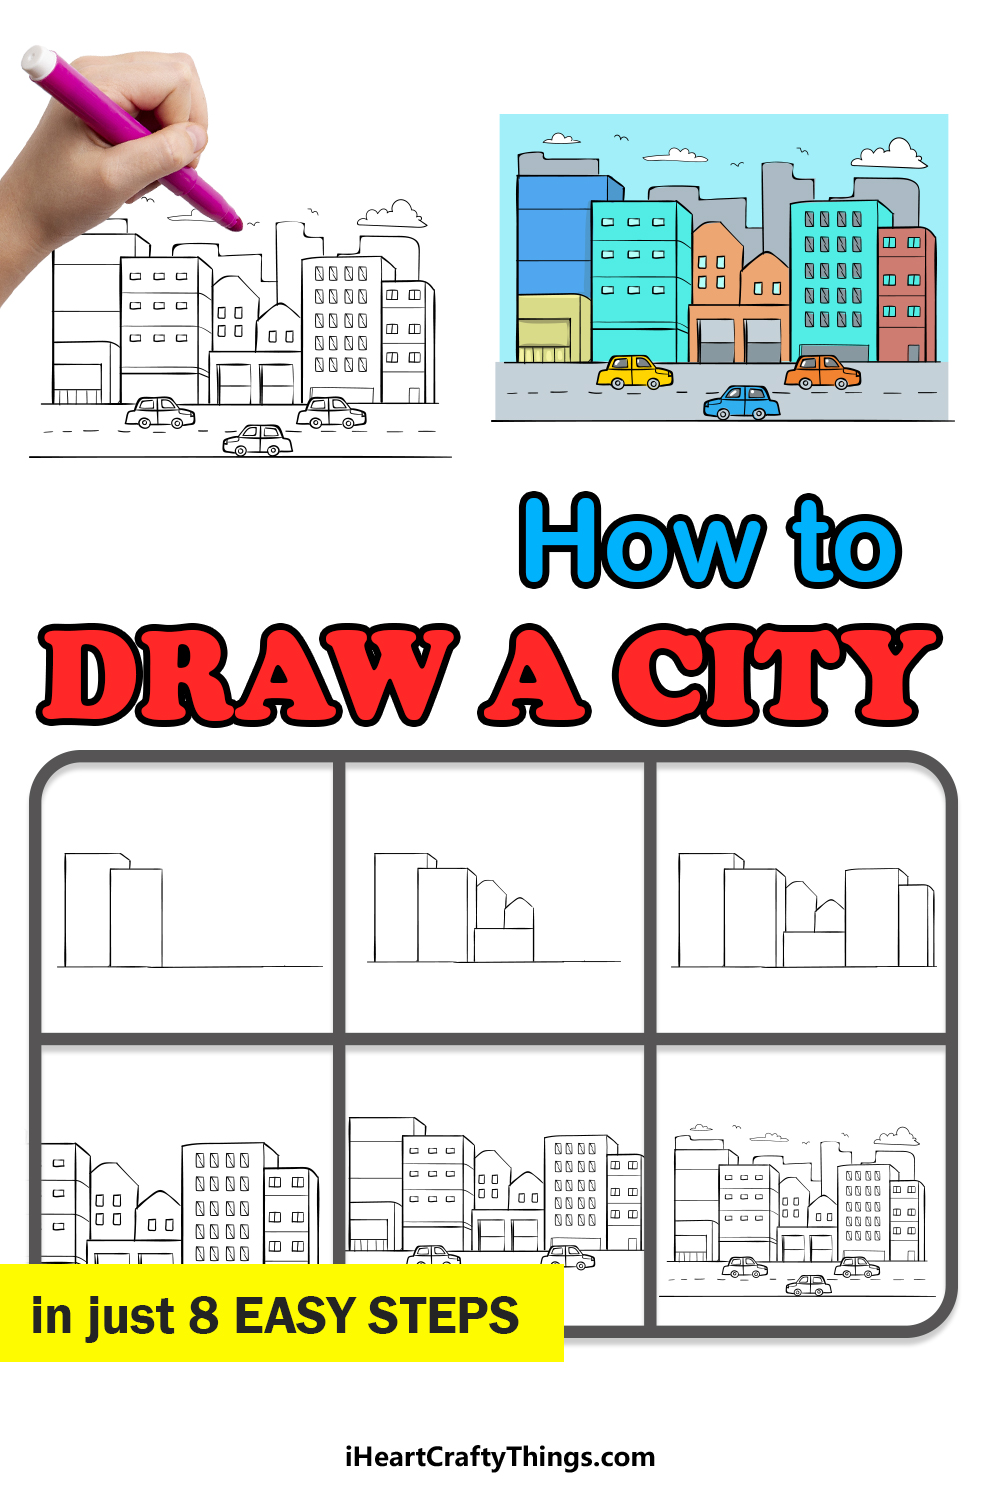
Use Your Favorite Art Tools And Mediums To Make This City Drawing Even Better!
We’ve reached the end of this guide on how to draw a city, but we aren’t done quite yet! We have a few more ways that you can take this drawing to the next level.
There are two more sections, one where we will give you a few more ideas for the drawing, and this one where we will go over some of the art tools and mediums you can use to enhance your drawing.
When we covered the final section of the guide, we went over a few of the ways that you could color in your drawing. But we have a few more ideas on how you can make this city drawing even more unique using your art tools.
When coloring, it can be fun to try out some brand new mediums. There are common mediums like crayons, colored pens and colored pencils that many people like to use when coloring.
But there are also many kinds of paint that can be used to make the colors really pop and stand out. When you use these paint mediums correctly, they can also really bring it to life.
For example, let’s say you use watercolor paints for most of the city. You could then use something bright like a yellow marker or colored pen for the windows of the buildings.
This contrast of bright against the lighter watercolor medium will make it look like the windows are shining in the night. It’s one example of how you can achieve a cool effect simply.
If you have crafts like stickers and beads, they can even be stuck onto the picture to make it more dynamic. Do you have some unusual art tools and mediums you like to use in order to make your pictures even cooler?