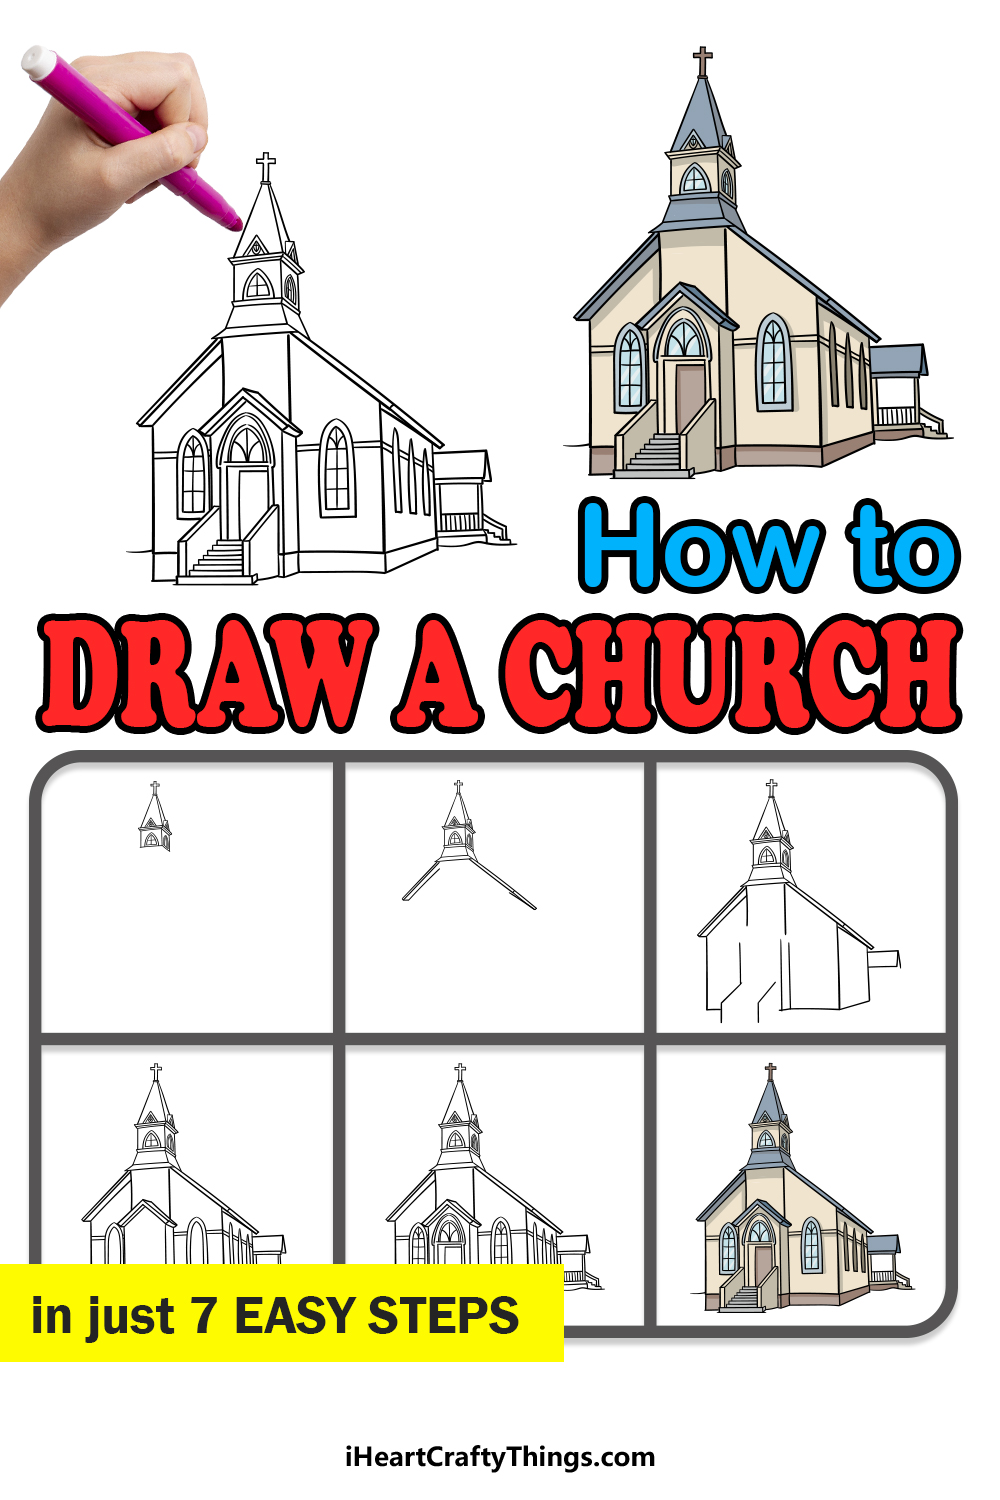
In architecture, there are certain buildings that you can always identify at first glance.
Churches are a great example of this, as while they can come in many shapes and sizes, they often have aspects like steeples and crosses that make them instantly recognizable.
Some of the most beautiful architecture in history has been made up of churches and cathedrals, and learning how to draw a church can be a great way to create your own unique church design.
If you would like to know how you can create your own example of one of these special buildings, then this is the guide for you!
Our step-by-step guide on how to draw a church will show you how you can have tons of fun drawing one of these sacred structures.
How to Draw A Church – Let’s Get Started!
Step 1

There will be lots of sharp angles that we will be drawing in this guide on how to draw a church, so to make things easier it would be highly recommended to use a ruler as you draw.
With that in mind, we shall start on the steeple for the church. Using that ruler we mentioned, use some straight lines to create the pointy tip of the steeple.
Then, you can draw some triangular windows at the base of it.
You can then draw a thin ridge underneath that base before bringing more lines down for the next section of the steeple. This section will also have some triangular windows set in it.
Before you move on to the next step, use your ruler to place a cross at the tip of the steeple.
Step 2 – Next, draw the sloping roof

Things could get a bit tricky for the next few steps of your church drawing, so be sure to follow the reference image closely as you draw!
First, use a ruler to add another section of the steeple. Then you can use it to draw the roof sloping down from it by drawing some lines close together for the slope.
There will be some spaces left in the lines where we will be adding more elements later, so this is where you will want to closely follow the reference image.
Step 3 – Draw the general outline of the church
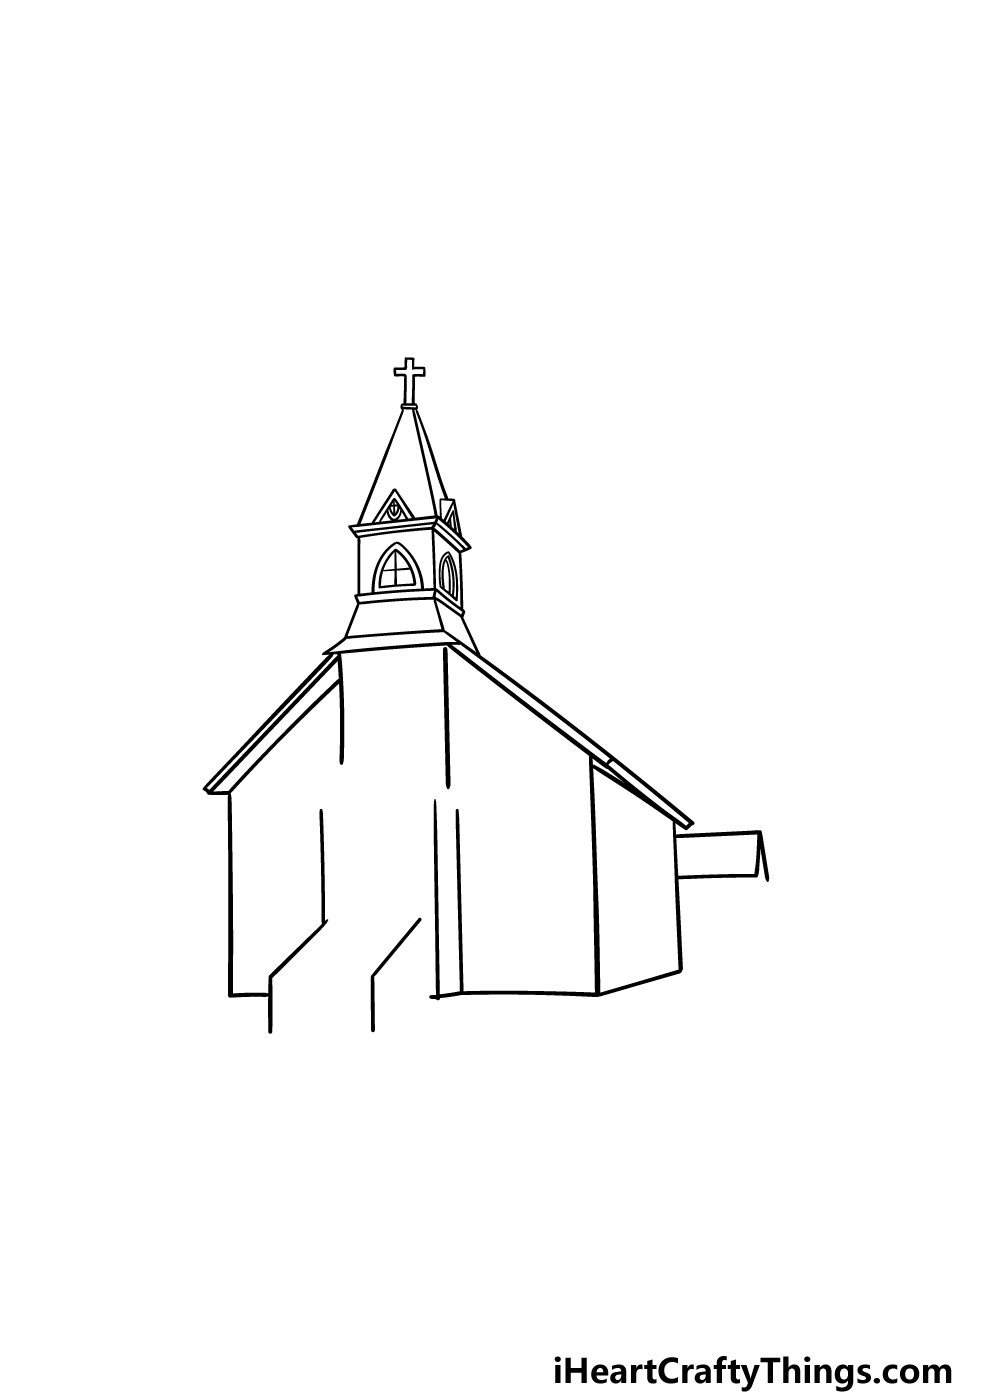
This next step of our guide on how to draw a church may look like a lot, but as long as you closely follow the image again you should have no problems drawing it!
We will be using a series of vertical and horizontal lines in order to create the walls and floors for the church.
Once again, we will be leaving some spaces for more elements later, so once you have replicated the reference picture you can move on.
Step 4 – Draw some windows and other details
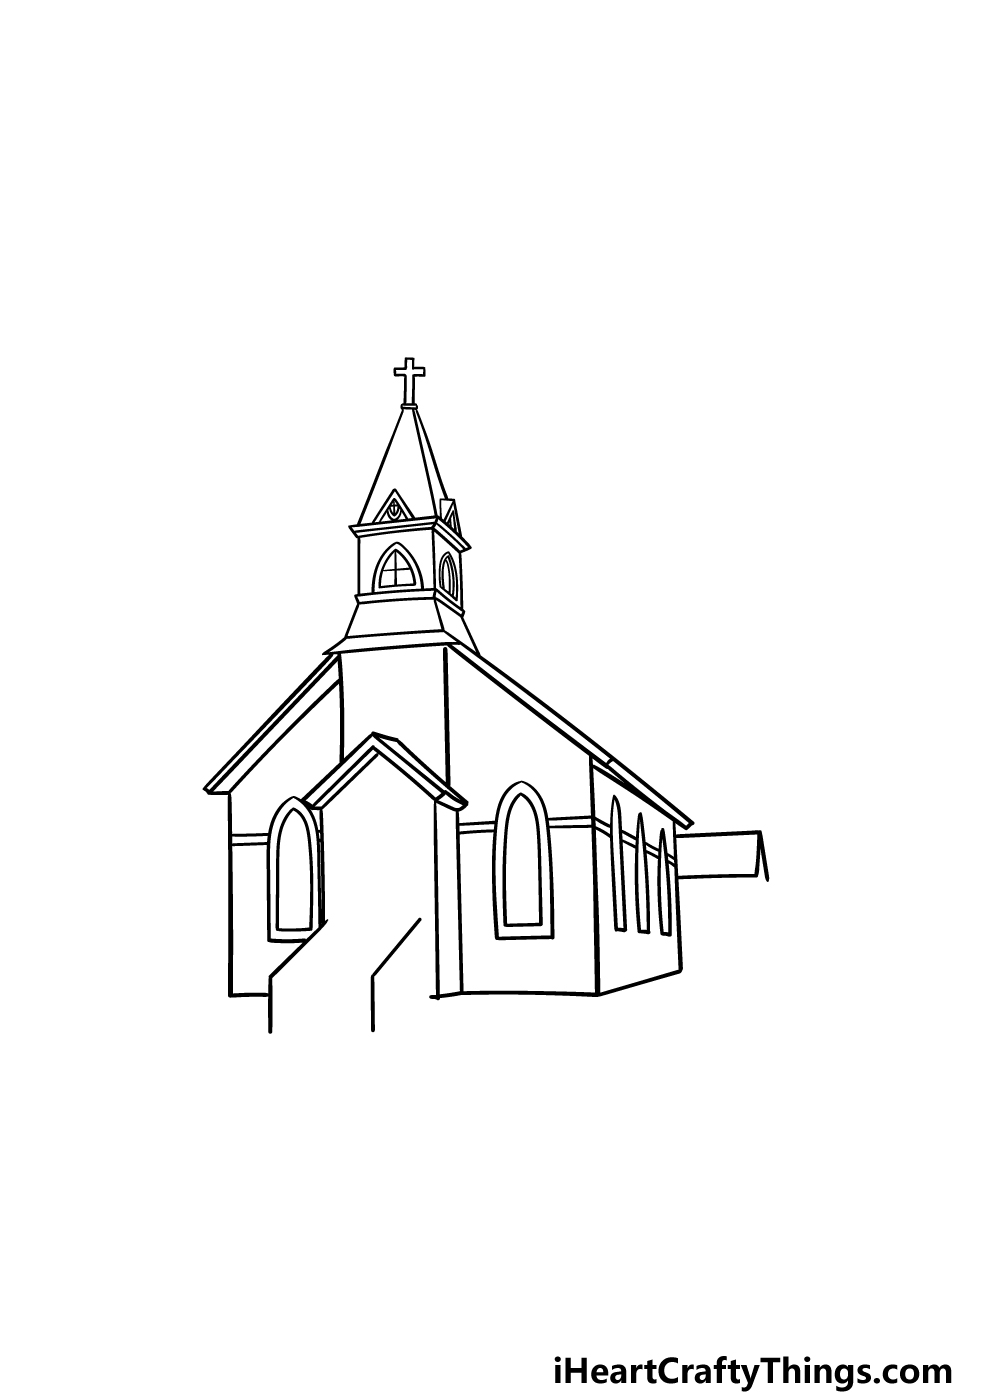
Now we will add some windows and smaller details to your church drawing. First, draw a little roof over the front section of the church.
Then we will add some thin windows on either side of the door, and these will have flat bases with round tops.
You can finish off with some more thin windows on the side of the church and add a few more details as well.
Step 5 – Now, draw the base of the church
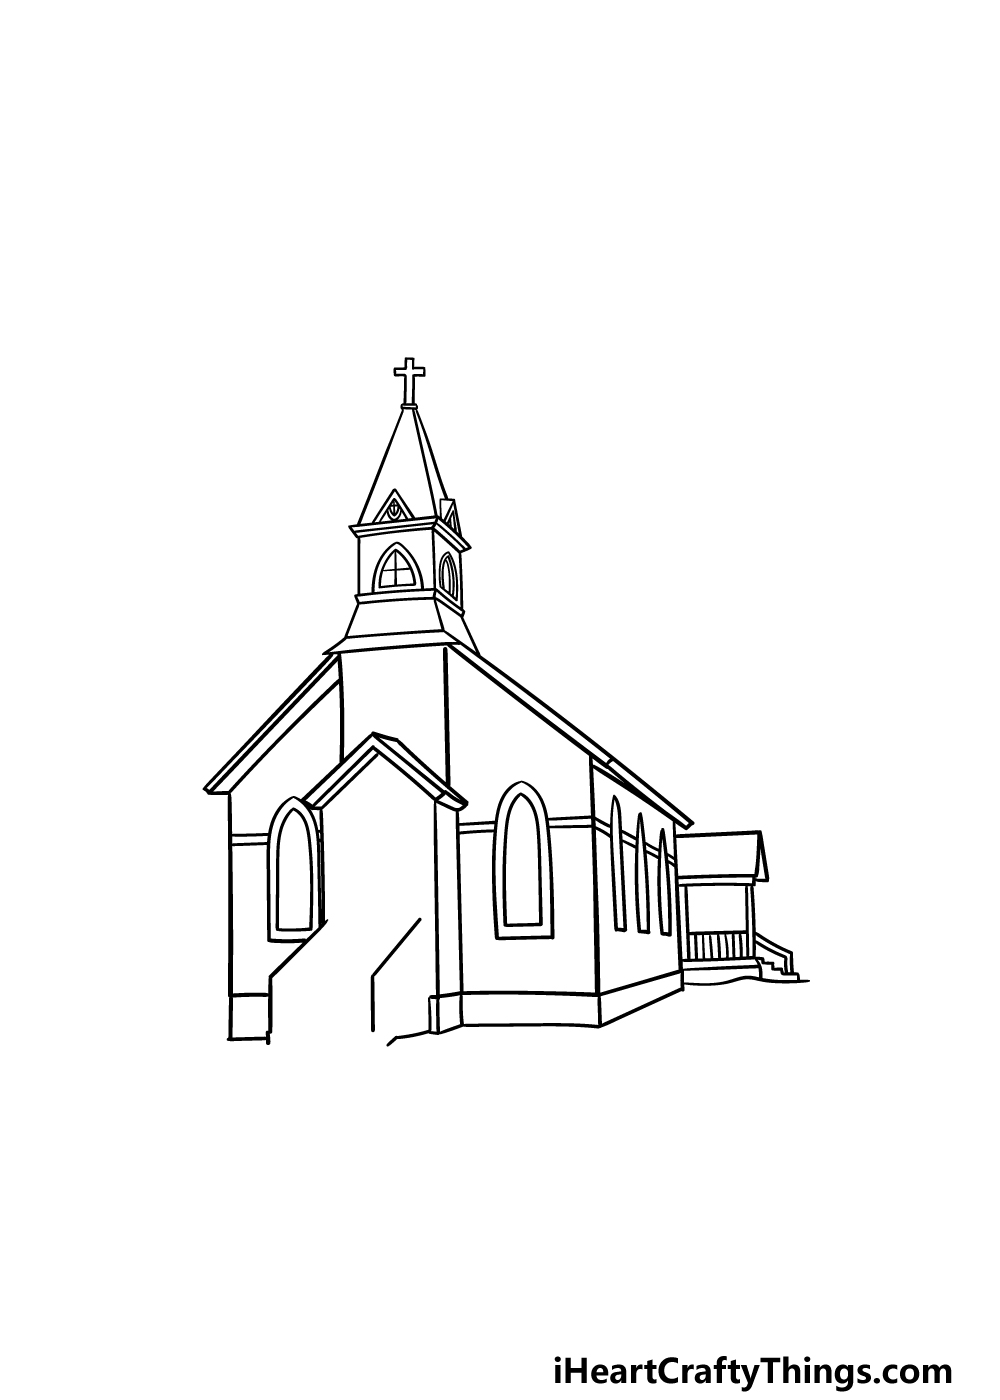
You’re doing a great job on this guide on how to draw a church! For now, we will continue with the base of the church.
Draw some straight, horizontal lines along the bottom of the church for this base.
Then you can finish off this step by drawing a small roofed deck area with some stairs leading to it on the right-hand side of the church.
Once you have done that, we can add some final details in the next step of the guide!
Step 6 – Finish off your church drawing
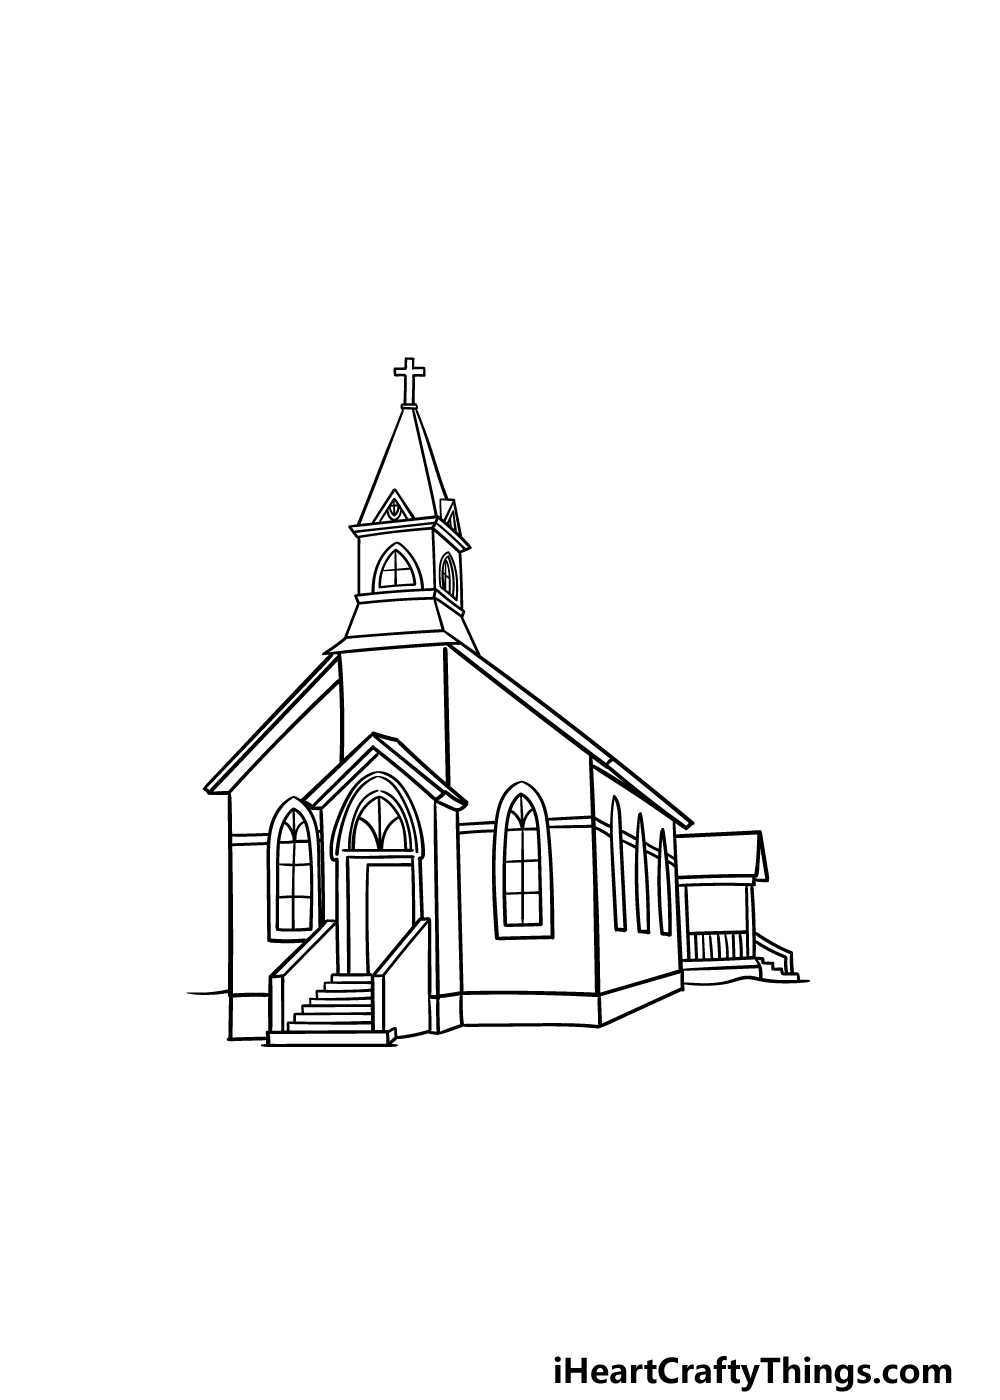
Now you are ready to finish off your church drawing to have you ready for the final step. First, draw some detailing for the front section of the church.
These details will include some steps leading up to a door, and then you can draw another fancy window above it.
Finally, you can finish off by adding some final details throughout the church. These details will include some linework on the interiors of the windows, but you could also add some of your own!
Perhaps there could be some bushes alongside the church, or some people walking into it. These are some ideas, but what others can you think of to finish this off?
Step 7 – Finish off your church drawing with some color
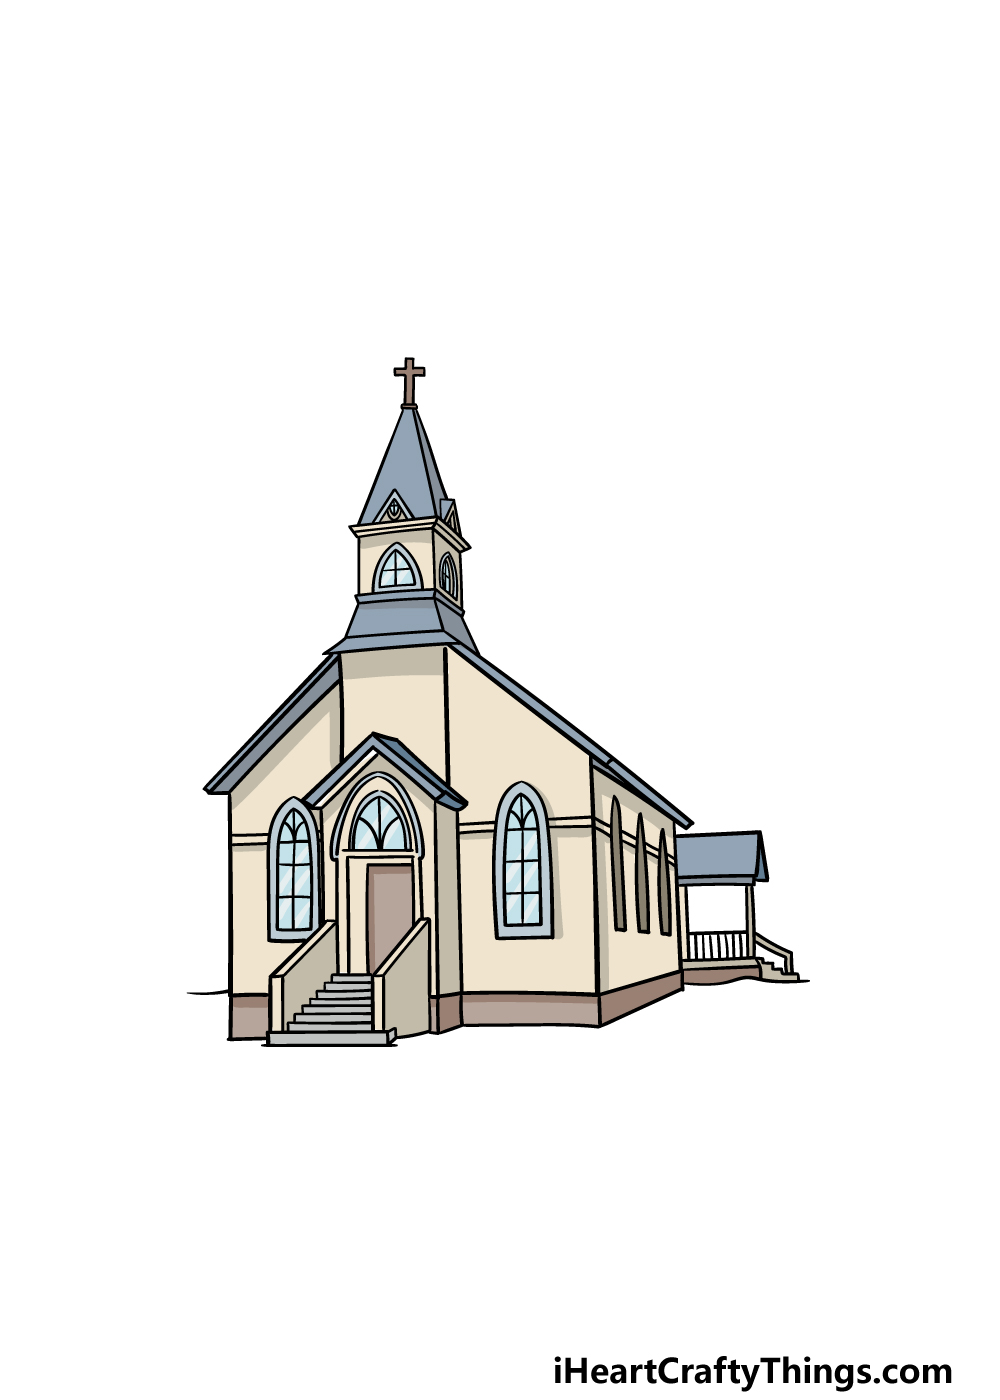
This seventh and final step of this guide on how to draw a church will see you finish it off with some color.
In our reference image we went with some more muted colors to give it more of a subdued feel. We used some light beige for the walls of the church and then went with some dark blue for the various roofs.
These are the colors that we chose, but you should feel free to use any other colors that you would like for it!
Then you can decide which art mediums you will use for your color choices, so be sure to have fun being creative with your colors as you finish up!
4 More Ways To Make Your Church Drawing Unique
These tips for your church sketch will make it look even more amazing!
This drawing of a church has a few details surrounding it. You could add even more of these details to make the scene more complete.
This could be as simple as adding small bushes, trees and plants. Or, you could even add different sections to the building or add a background landscape.
Whether you want to keep it simple or make it more complex, you could really make this setting more realized and complete. What are some details you could add?
Once you have the church and its surrounding areas looking as you want it, you could then add some people to the image to make it look like this church is well populated.
They will probably seem quite small in the image, but it will still help to add a lot of life to the scene. You could also add details like cars and other vehicles to suggest life in the image.
What sorts of little scenes would you like to create by adding some people to the picture?
If you have a real church that you attend or if there is a beautiful one near you, you could change this church drawing to look more like it.
To do this, you would benefit from taking lots of photos of the real church, and then you can use those photos along with the steps of our guide to help you turn this into that church you like.
A church is a symbolic building to many people, and you could add some details to highlight this. For example, you could fill the sky above it with some puffy clouds.
Then, there could be a ray of sunshine shining down on the cross of the church. This would make your church sketch have more of a symbolic meaning to it, as it would highlight faith and spirituality.
There are many other subtle ways that you could represent this as well, and you could give the artwork more personal meanings to you.
Your Church Drawing is Complete!
That will conclude all 7 steps of this guide on how to draw a church! This was a bit of a tricky drawing to do, so you should be extra proud of reaching the end of this one.
Remember that the key to overcoming a trickier drawing is to break it down into smaller, more manageable steps to make sure there is no frustration.
Now that the hard parts are over, you can relax as you get creative with some final details!
We mentioned a few ideas such as some plants or churchgoers, but this is where you can really show off your creativity. Which additional elements, color choices and mediums can you think of for your picture?
We have so much more drawing fun for you to enjoy on our website, and these guides cover a huge range of different subject matter. Be sure to keep visiting, as we have many more incoming!
Once you have completed your beautiful church drawing, we would be honored to see it. You can let us take a look by sharing it on our Facebook and Pinterest pages!