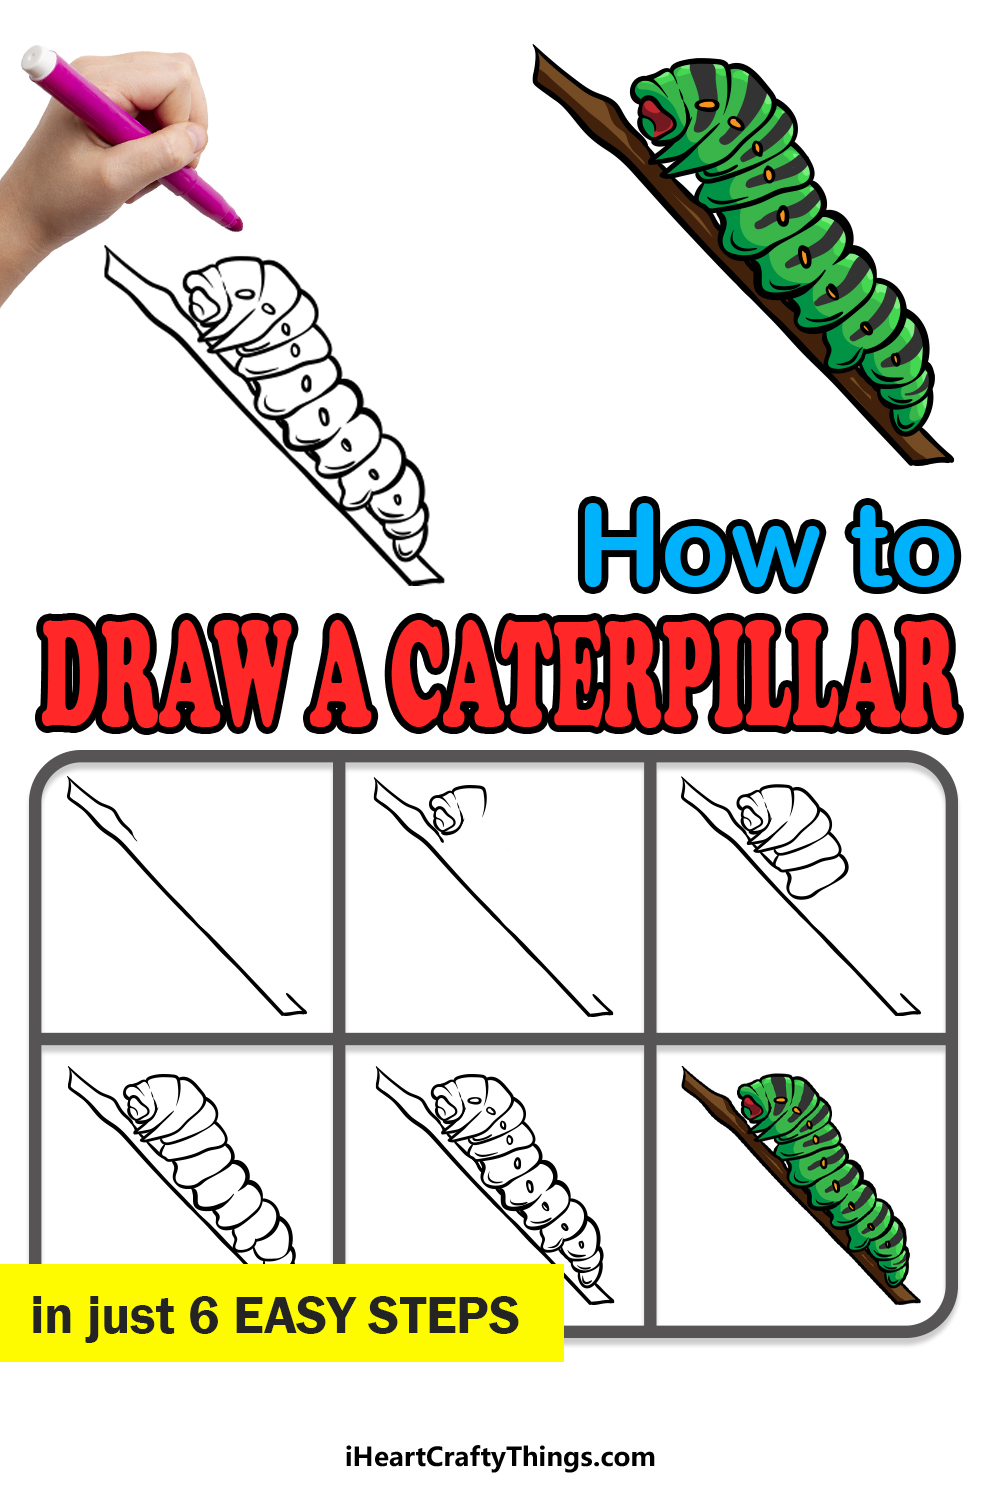
Caterpillars may not look like much in their caterpillar state, but they hide a secret! Their worm-like state is only temporary, and as they get older they will turn into magnificent moths or butterflies.
They may not be as impressive as these variants, but the caterpillar is still cute and beautiful in its own way! That can make it lots of fun to learn how to draw a caterpillar.
If you would like to learn how, then you’re in the right place!
This step-by-step guide on how to draw a caterpillar in just 6 easy steps will show you just how easy and fun it can be.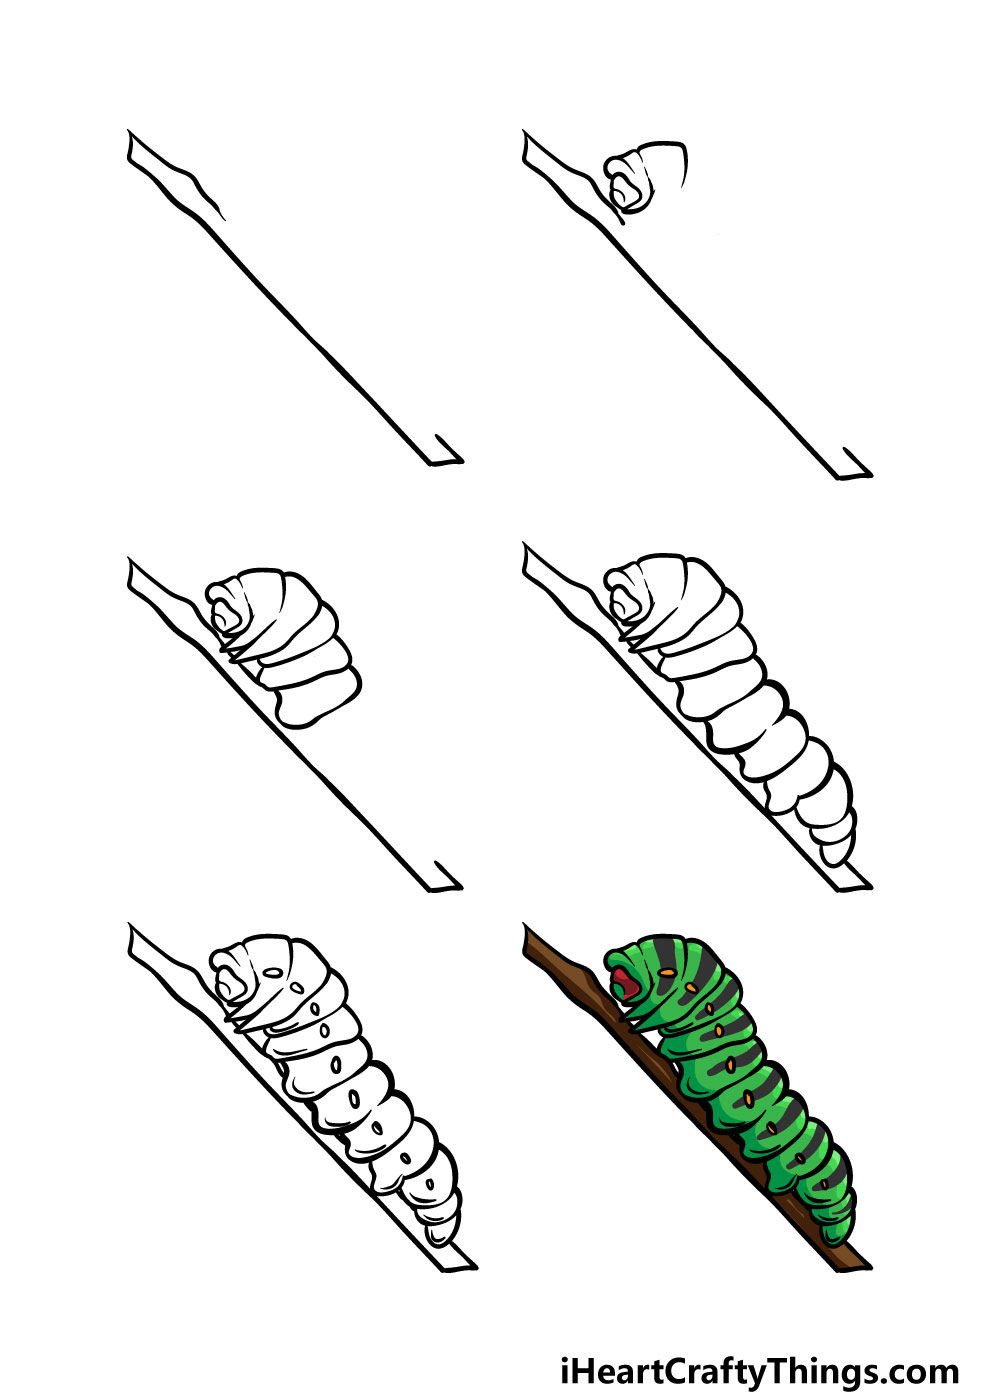
How to Draw A Caterpillar – Let’s Get Started!
Step 1
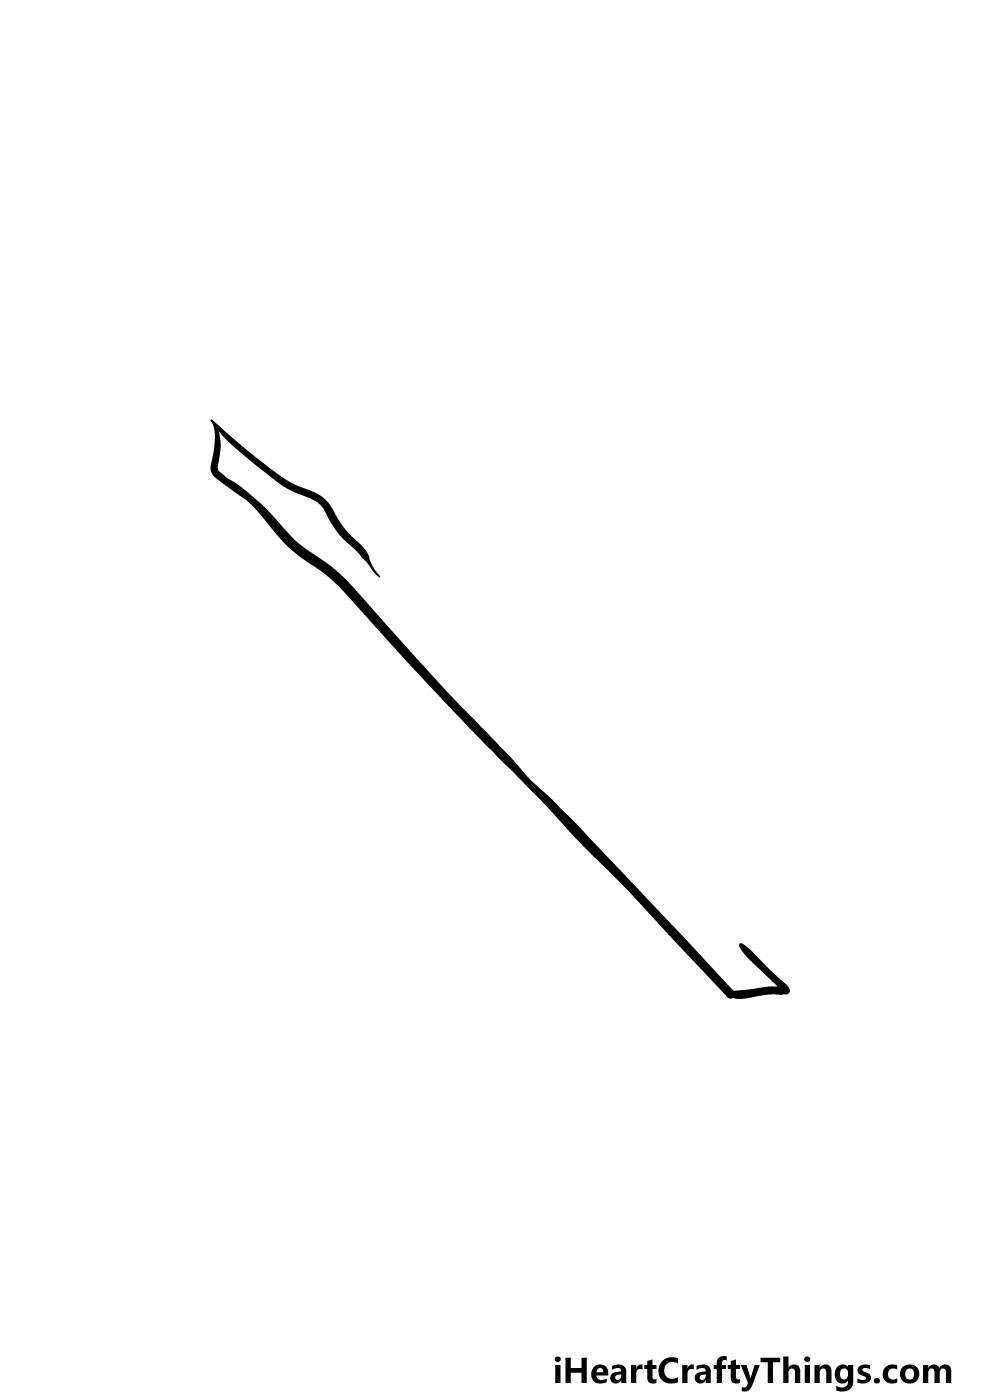
For this first step of our guide on how to draw a caterpillar, we will be starting with the stick that it will be sitting on.
To do this, you will be drawing some straight lines that have some small bumps in them.
This will form a thin stick or a branch, and both ends of it will be quite flat and angular. We will be leaving a space on it on the right-hand side, but we will be filling this space in with the caterpillar itself very soon.
Step 2 – Draw the head of the caterpillar
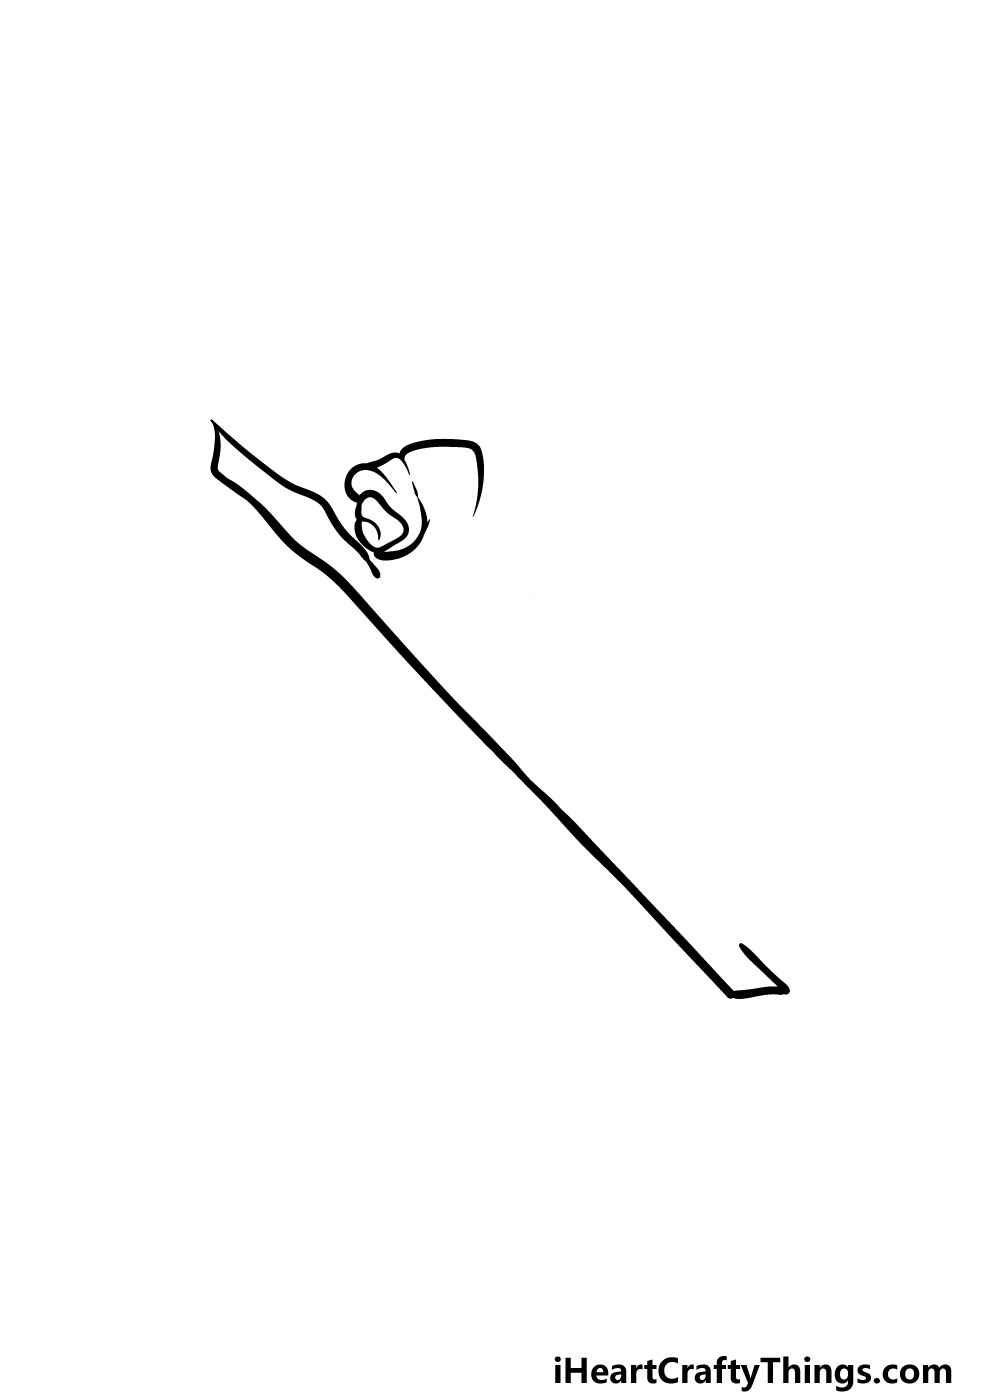
Now that you have the stick of your caterpillar drawing done, we can now start on the head. The head may look a bit complicated and detailed, but it’s not as difficult as it may look!
As long as you follow the reference image closely then you should have no problem with it. The head is drawn with lots of rounded lines to create a wrinkly appearance for it.
There will also be a little face segment near the front, as seen in the reference picture.
Step 3 – Now, start drawing the body of the caterpillar

With the head drawn, we will start on the body in this step of our guide on how to draw a caterpillar.
The body will follow a similar design to the head in that it will be drawn with lots of curved lines to create a segmented, wrinkly effect for the caterpillar.
In this step, you can also use some pointy lines at the base of the caterpillar for its front feelers.
Step 4 – Finish off the body outline in this step
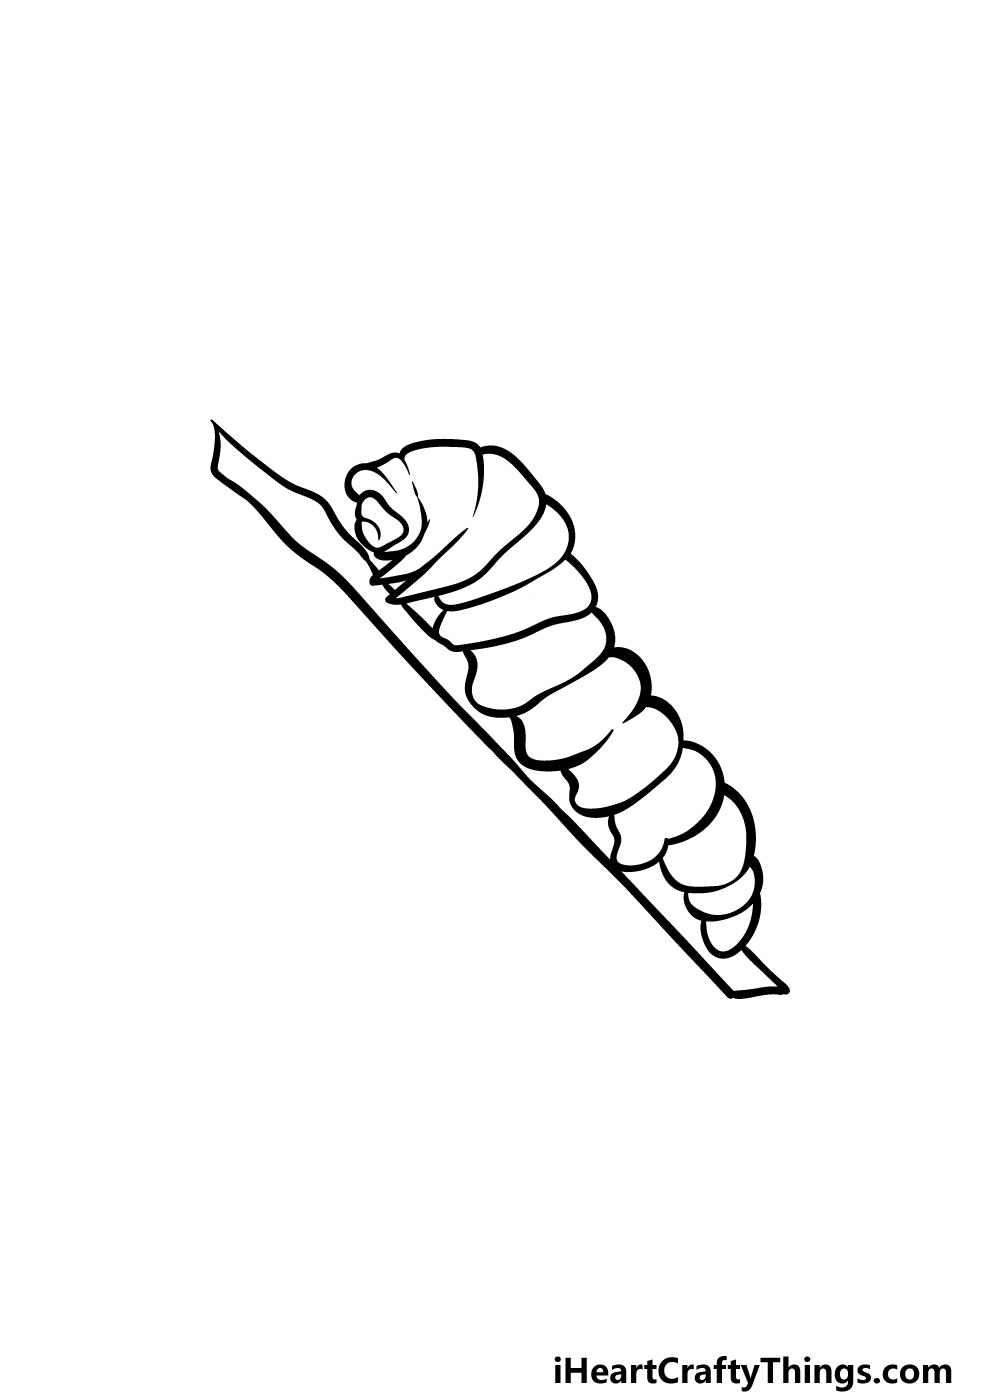
Your caterpillar drawing is already taking shape nicely! You’re really getting the hang of it now, so you should have no problems with this next step.
Simply continue drawing the segmented body that you started in the previous step. There will also be some bumps at the base of the caterpillar’s body in this step for its rounded legs beneath it.
The body will also get thinner and thinner as it nears the back of the caterpillar.
Once you have finished the outline, the gap left in the branch should be filled, and then you will be ready to add some final details in the next step!
Step 5 – Now, you can add some final details
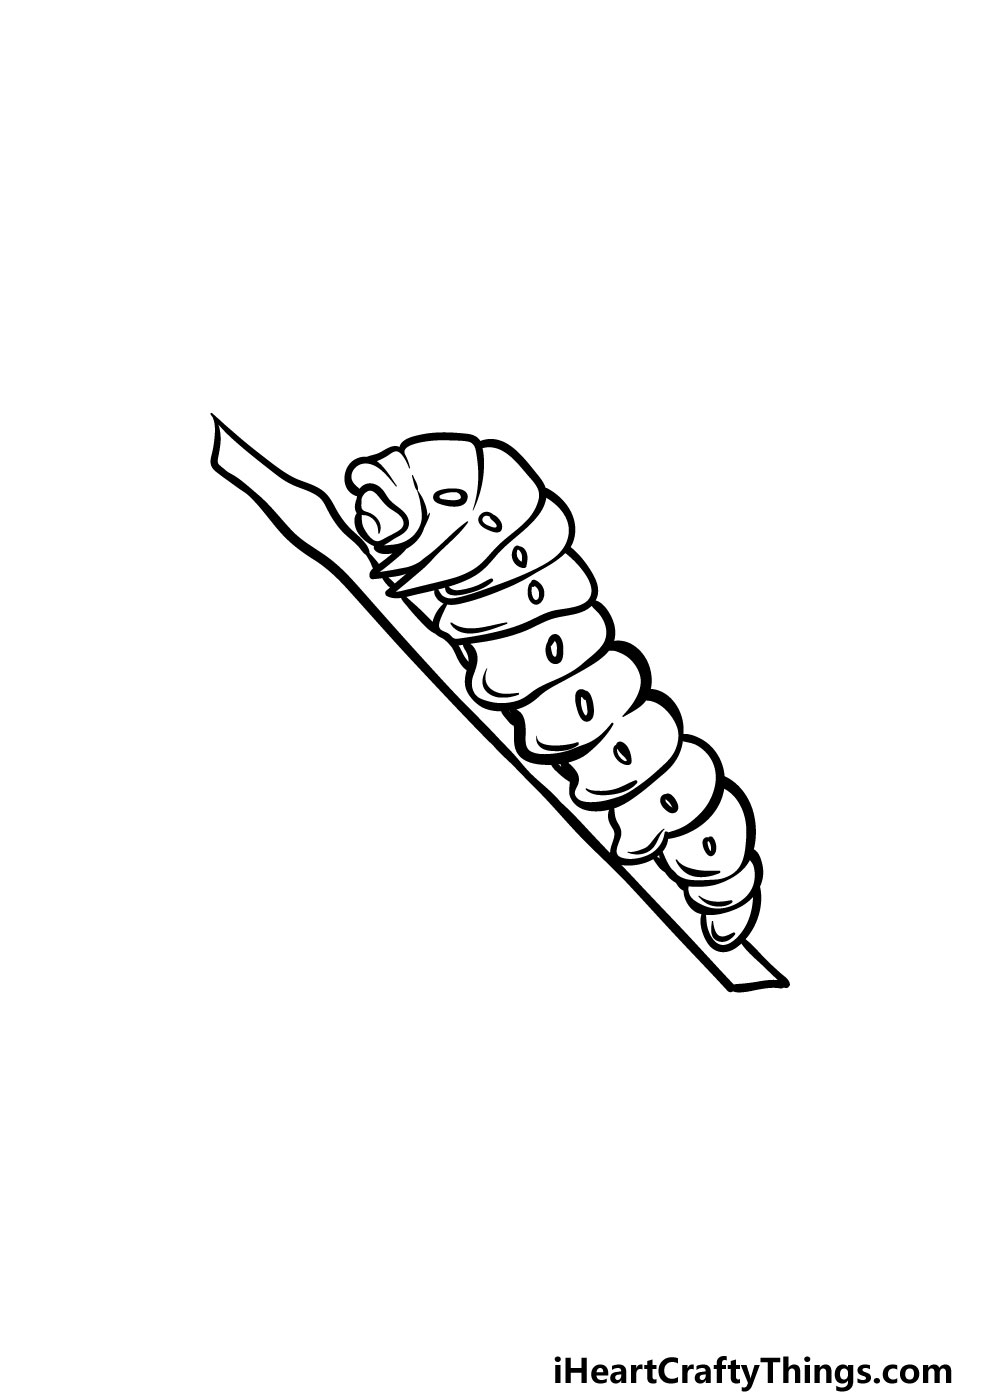
It’s almost time to add some color to your picture, but first we have some final details to add in this fifth step of our guide on how to draw a caterpillar.
The details that we have in our reference image are subtle yet effective! You can add some small circular shapes to the segments of the caterpillar to finish off our details.
That will do it for the final touches, but you don’t have to move on to the next step quite yet!
Before you move on, be sure to add any details of your own that you may want! You could draw a background and add some leaves and other plant life to it for one idea. Maybe you could also draw some more caterpillars or other insects as well!
This is your chance to really let your creativity flow and see what kinds of great ideas you can come up with.
We can’t wait to see what fantastic touches you add to this image!
Step 6 – Finish off your caterpillar drawing with some color
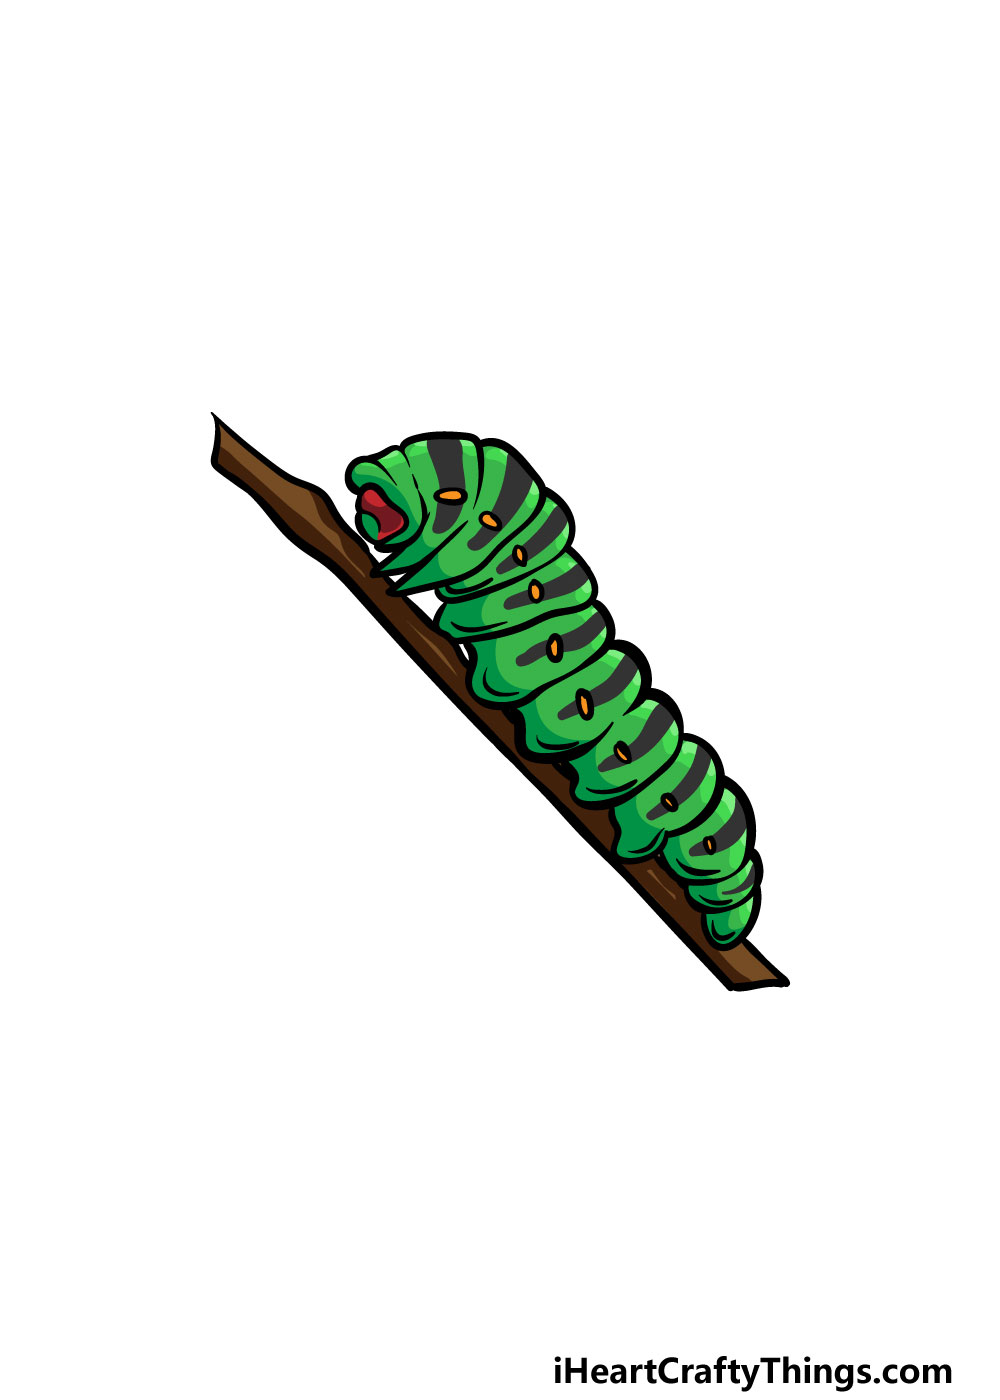
That brings you to the final step of your caterpillar drawing! This step will be a fun one, as it is all about bringing some amazing colors to your picture.
In our reference image, we used some green, grey, yellow, red and brown to create a vibrant caterpillar.
This is just one idea you could go for, however, and you should feel free to use any amazing colors that you want to!
A caterpillar can come in all manner of different colors and patterns, so that gives you a lot of freedom with how you can color in this caterpillar drawing.
Once you know which colors you would like to use for your picture, you can also consider which art mediums will work best to bring them to life.
For some examples if you would like to make your caterpillar bright and vibrant then you could use some acrylic paints and colored pens.
Alternatively, you could use some colored pencils and watercolor paints for a softer, more muted look.
There are no wrong ways to go about it, so be sure to have fun with it and see what happens!
Here’s how you can make your caterpillar drawing even better…
Transform this caterpillar sketch into something even more amazing with these tips!
This drawing of a caterpillar that we created in this guide is colored with a muted green and grey color scheme, but they can come in any colors you can imagine!
Because of this, you could use any other colors you like when coloring your drawing. You could go with some of the ones we chose while alternating some of the other ones.
Or, you may like to go for a completely unique color scheme instead!
Once you have finished drawing this one caterpillar, you could have some fun by adding another one to the drawing.
Now that you know how to draw one caterpillar, you can use what you learned from the guide to draw another.
If you add another caterpillar, you could change a few details in the pose and markings to make it unique. It could also have different colors to help set it apart.
How many caterpillars do you think you would like to add to the picture?
Once your caterpillar drawing has all of the caterpillars that you want, you could show where they are by adding a background.
Caterpillars can be found in all sorts of places, so you could have any background you like!
They could be on a branch with a lovely garden background behind them. Or, you could draw the caterpillar in a room in your house or another place where you like to spend time.
Perhaps the most fascinating aspect of a caterpillar is that they will transform into butterflies later in life. You could show this process by showing what this caterpillar will turn into one day.
If you need some help drawing a butterfly, you can look up some photos of real butterflies online that you can use as a reference.
If you wanted to take it even further, you could draw a cocoon to show the first stage of the transformation.
This would be a great way to make this caterpillar sketch even more interesting!
Your Caterpillar Drawing is Complete!
With that, you have reached the end of this guide on how to draw a caterpillar and successfully finished your picture!
We hope that this guide made it much easier for you to complete this drawing. We also hope that it was lots of fun as well as being easy for you to use!
Now that you have completed this guide, the fun doesn’t have to stop. You can keep it going by adding your own details and elements!
We mentioned a few ideas such as drawing a background or by adding some plants or more insects to the image as well. These are just a few ideas that you could go for, so be sure to get creative and have fun!
When you’re ready for your next drawing challenge, we look forward to seeing you on our website! We have tons of guides for you to enjoy there and we upload new ones frequently.
We would also love to see your caterpillar drawing! Once it’s finished, please be sure to share it on our Facebook and Pinterest pages so we can admire your artwork.