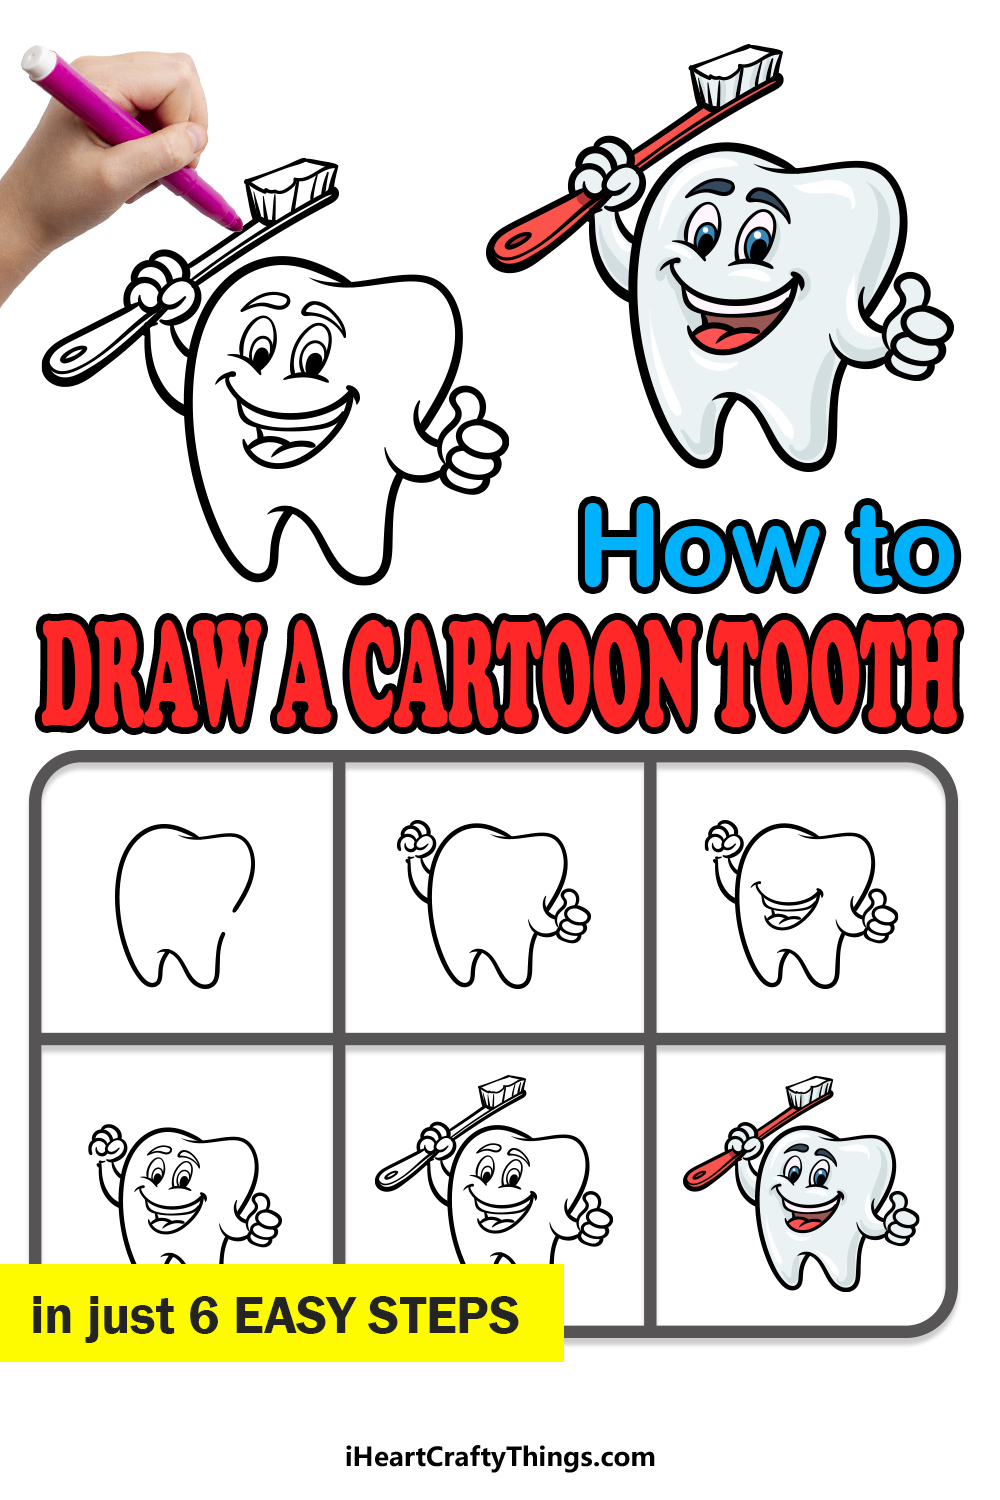
Our teeth are very important, and it’s equally important to take care of them. They help us to chew our food and give us brighter smiles, but if not taken care of they can become a literal pain to own!
That’s why it’s important to make sure that they are frequently cleaned so that trips to the dreaded dentist can be less frequent.
They can also be fun to draw, and learning how to draw a cartoon tooth can be a great experience!
That’s exactly what we will be doing throughout this guide you have before you!
Our step-by-step guide on how to draw a cartoon tooth in just 6 easy steps will show you how to create a fun tooth interpretation!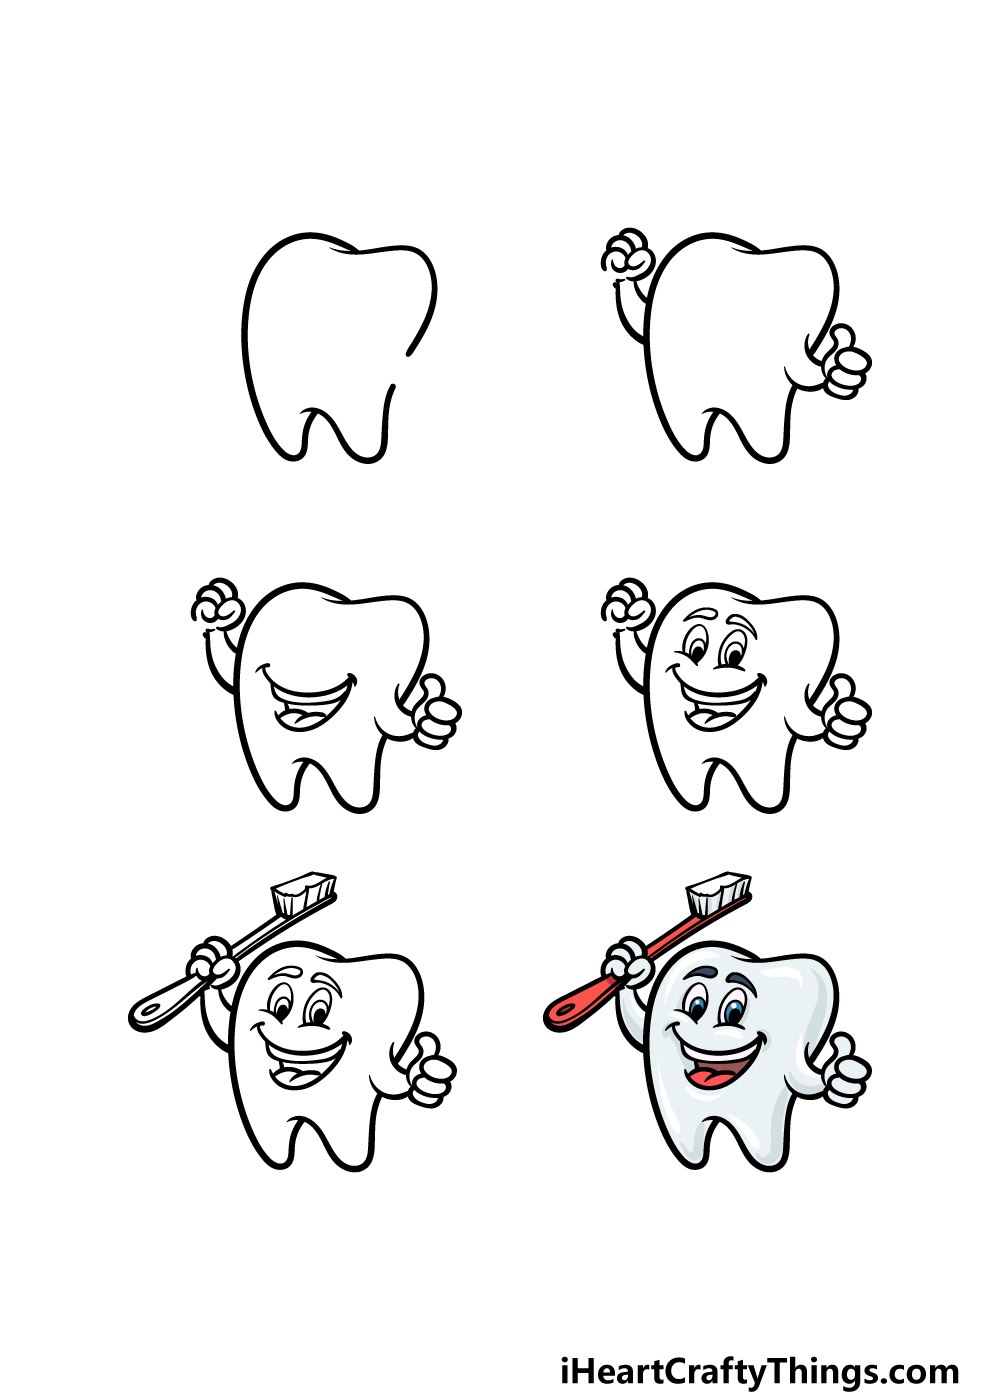
How to Draw A Cartoon Tooth – Let’s Get Started!
Step 1
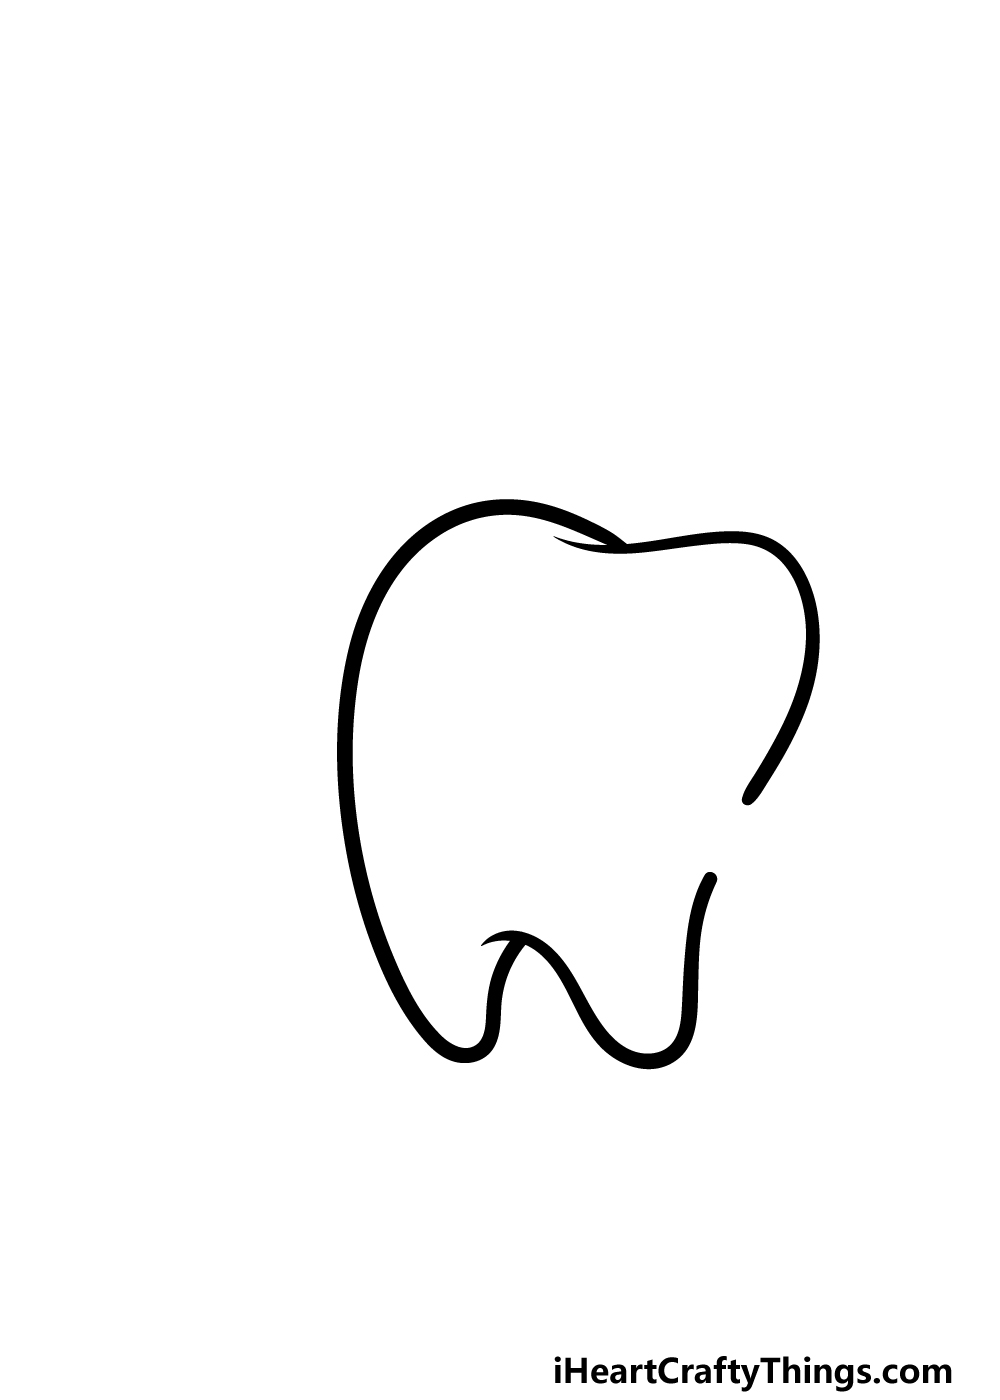
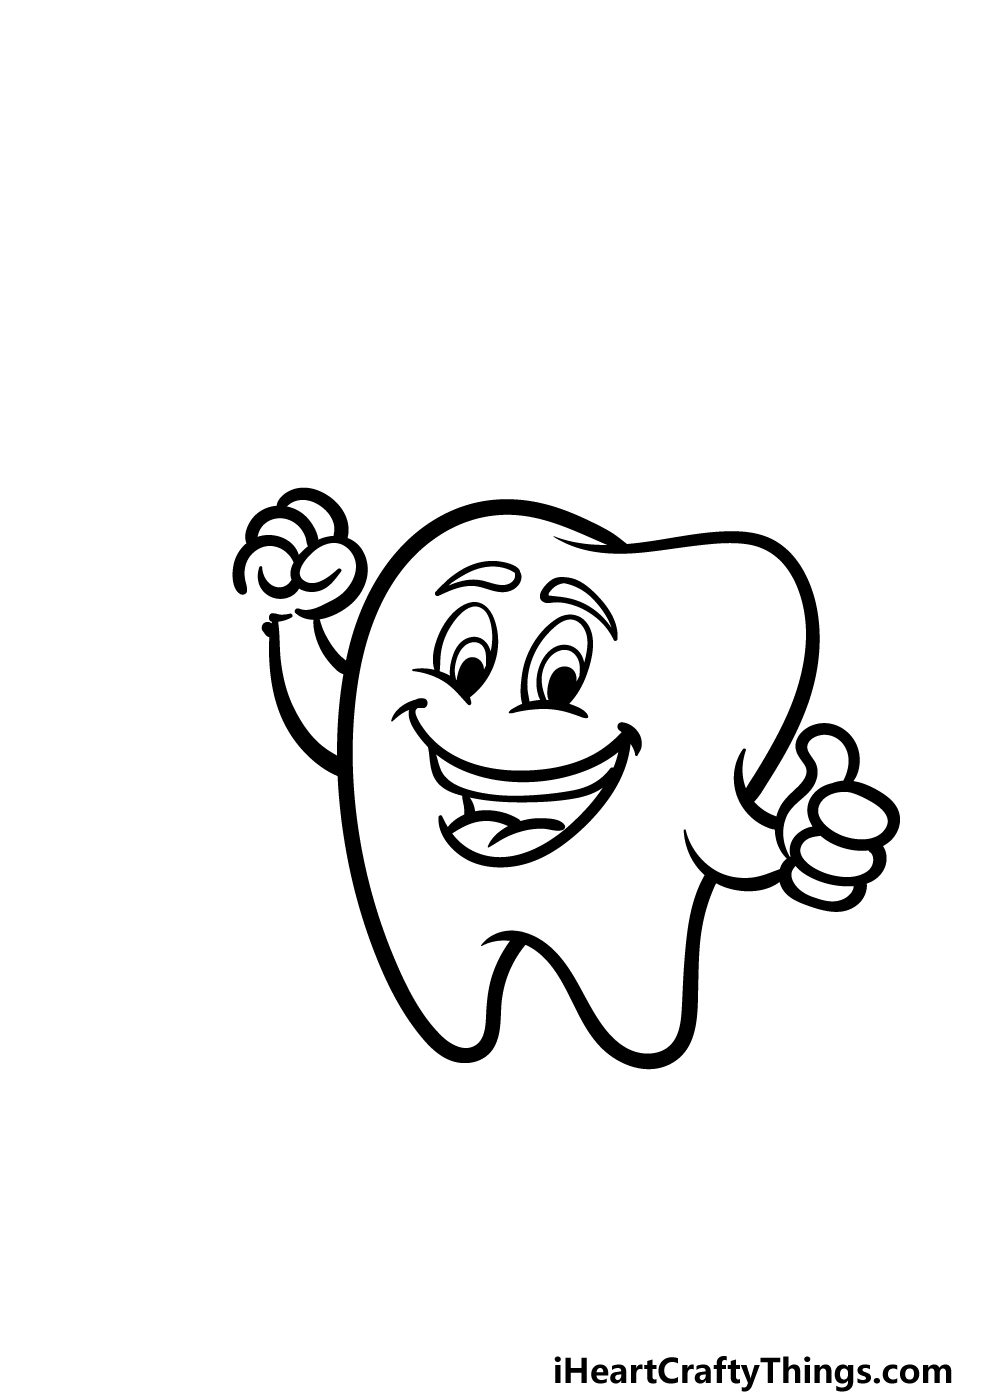
Teeth have a very distinctive shape when seen out of the gums! They have rounded tops that help to grind down food with some pointy parts at the base that go into the gums.
We will be depicting this shape in this guide on how to draw a cartoon tooth, yet it will be a slightly stylized approach to this shape.
As you can see in our example image, we will be using lots of curved and rounded lines to draw this tooth outline, and this will be true even for the two pointy portions.
We will be leaving a small empty space on the right-hand side, as this is where an arm will go later.
Step 2 – Now, draw some arms for this cartoon tooth
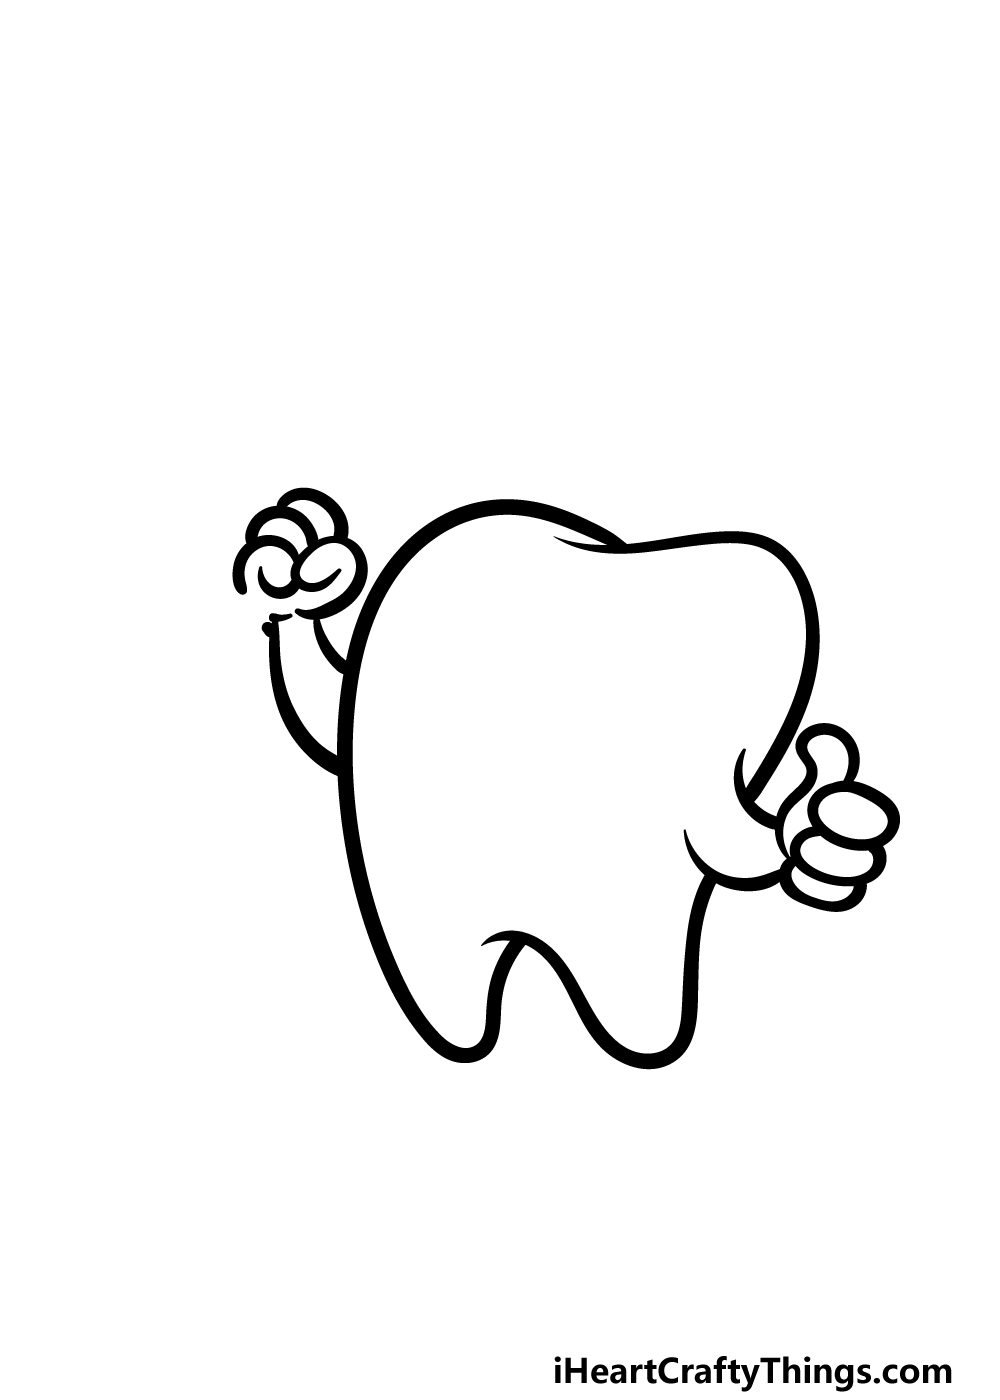
We mentioned some arms in the previous step of this cartoon tooth drawing, and we will start adding them in this step.
It’s a good thing real teeth don’t have these, but they make this one a lot more fun!
For the arm on the right, it will have some curved lines for the arm itself.
Then, we will use some more curved lines for the thumb extending up, and then we will use some small oval shapes for the fingers curled over.
The arm on the left will look rather similar, but it will be longer than the one on the right. There will also be a small space left at the base of the fist for an object we will add later.
Step 3 – Next, add the smiling mouth

This tooth would be part of a bright smile, and it has one of its own on its face! That is what we will be drawing in this next step of the guide.
First, draw a large curved horizontal line for the top of the smiling mouth. This will then have a smaller curved line at each corner.
Use another curved line coming down from the right corner of this line for the bottom edge of the mouth.
Once these aspects are drawn, we will then add some teeth and a tongue inside of the mouth.
These can both be drawn using some simple rounded lines, as shown in the reference image. Then, it’s time for step 4!
Step 4 – Now, finish off the face
For this fourth step of our guide on how to draw a cartoon tooth, we will add the rest of the smiling face. This means adding the eyes and other facial features, and we will begin with the eyes.
These can be drawn using some oval shapes that have small curved lines at the bases.
Next, we will then add another smaller oval inside each one, with an even smaller black oval within each smaller one.
Then, we will finish off his facial expression with some eyebrows. These will be rounded at the inner corners and then have pointy tips at the outer corners.
We will then be ready to finish off this cartoon tooth in the fifth step of the guide!
Step 5 – Add the final details to your cartoon tooth drawing
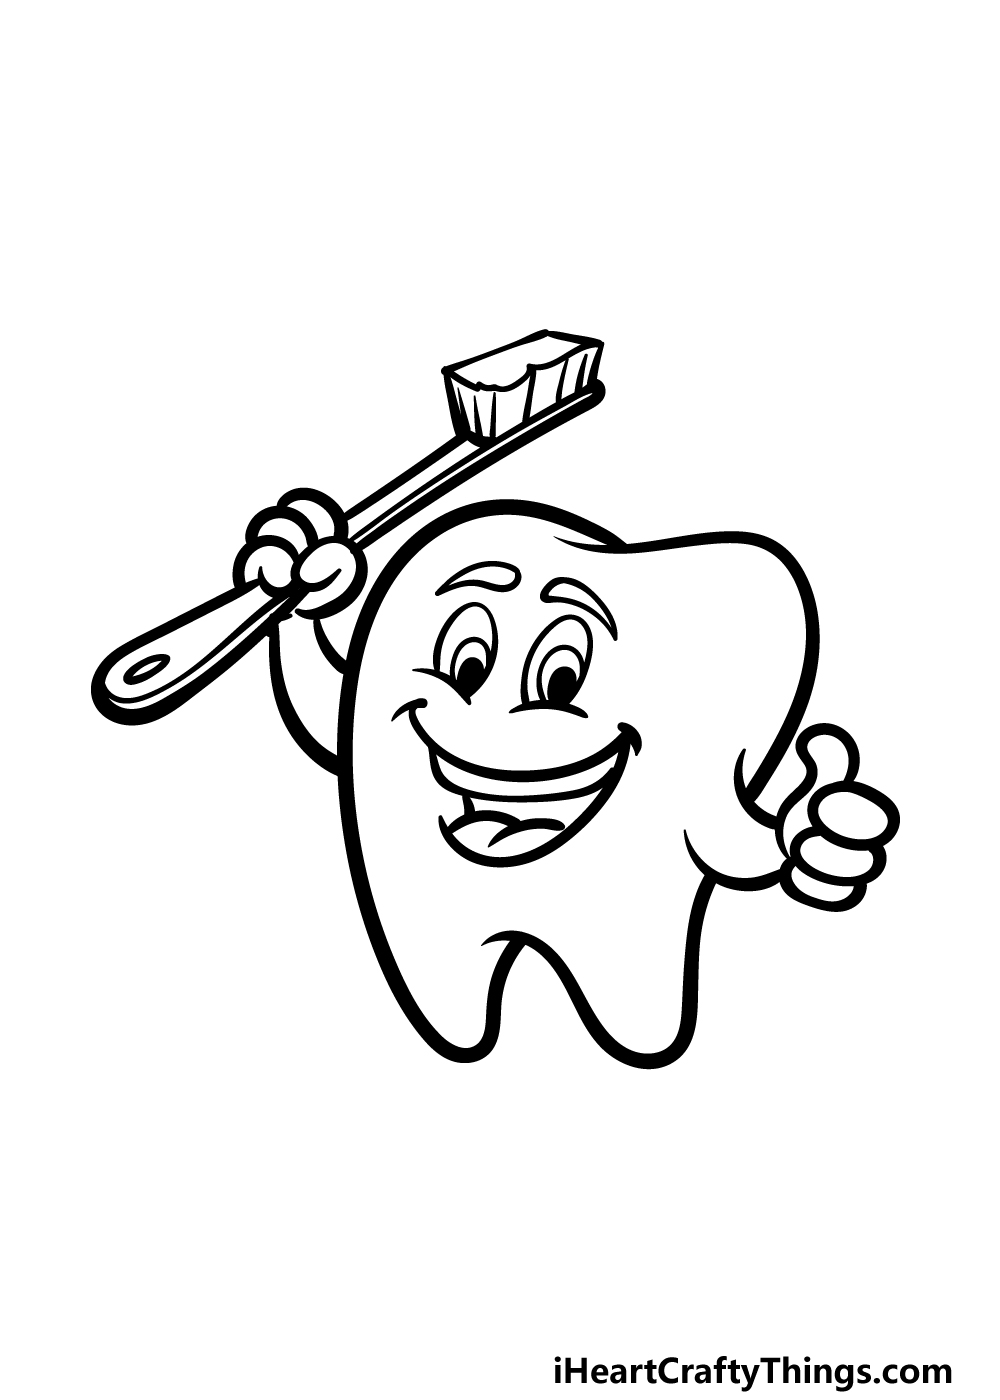
In order to be reminded of proper tooth care, we will be adding a toothbrush to this composition!
He will be holding a large toothbrush in his hand at the left, and this will fill in the space that you left in his fist.
The toothbrush has a rather simple design, as it is drawn using some straight and slightly curved lines.
Then, you can add the bristle section at the end, and this will take on a roughly rectangular shape with lots of line details on the sides.
Then, your drawing is complete! Before you move on to the final step, you can also add some extra details of your own.
You could draw a background or maybe add some pictures of tooth-related objects to the background. What else can you think of?
Step 6 – Finish off your drawing with color
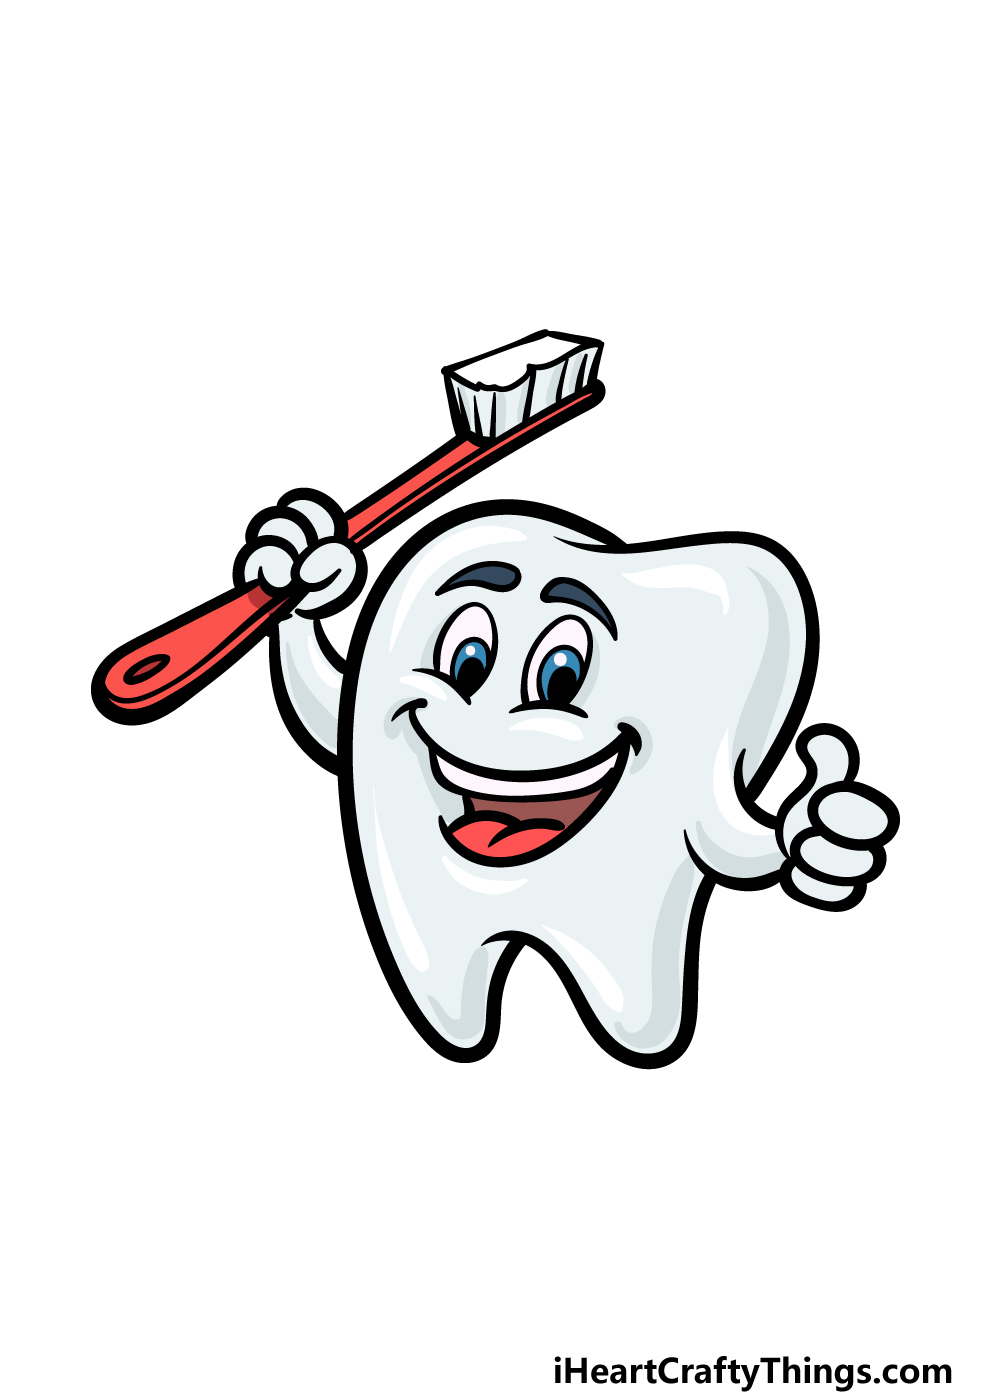
This final step will be all about finishing off this cute cartoon tooth drawing with some colors!
For the tooth itself, you’ll see that we used various shades of light greys and whites for the ‘body’ of the tooth.
The eyes are a soft blue, and then we added a nice splash of color for the toothbrush by using red for the handle.
These are the colors we chose, but you should feel free to go for any other color choices you may like! This is your drawing, and it needs to be perfect for your own taste.
What colors and art mediums do you think would suit this tooth?
Do this to take your cartoon tooth drawing to the next level
Take a bite out of these fun tips we have for your cartoon tooth sketch to make it even better!
This drawing of a cartoon tooth that we created in this guide shows off just one kind of tooth. You could give him some friends by drawing similar cartoon versions of other teeth.
For example, you could draw sharp incisor teeth. You could look up other kinds of teeth and then use them as inspiration for more cartoon tooth designs.
How many kinds of teeth would you like to include in this image?
Another fun character design you could add to this drawing would be one based on a tube of toothpaste. This character could be standing next to the cartoon tooth.
You could even use the brand of toothpaste that you yourself use every day to give it a personal touch. It would be a challenge, but a fun one to take on for this drawing!
What are some fun poses you could use for this toothpaste tube character if you were to add it?
Leading on from our previous tip, you could use certain art mediums to portray the toothpaste we mentioned. For example, you could use a thick trail of paint coming from the tube of toothpaste.
Acrylic or even oil paint would be good for this. It would take a longer time to dry, but it would make it look like there is actually toothpaste coming from the tube!
Can you think of any other mediums you could use to enhance this cartoon tooth drawing?
We think that this cartoon tooth sketch would be perfect to use on a poster design! First, you would need a big piece of paper or cardboard.
Then, you could add the drawing and any extras that you want for it. Another fun touch would be to add a slogan or phrase to the poster.
It could be a slogan reminding anyone viewing the image to brush their teeth frequently. What is a good slogan you could use?
Your Cartoon Tooth Drawing is Complete!
That concludes all 6 steps of this guide on how to draw a cartoon tooth! Drawings like these aren’t always easy to get right, and that can make them intimidating to take on!
We hope that this guide showed you that it can be really fun and easy when you have some steps to follow.
Now you can take over and show off what you can do with your own awesome details! These along with your color choices can really put a personal touch on your drawing.
If you had fun with this guide, there is more to enjoy on our website! There you will find many more awesome drawing guides to enjoy, and more are coming soon as well.
We would love to see how you finished up this cartoon tooth drawing, so please share your artwork on our Facebook and Pinterest pages for us to see!