There are many different foods that you can enjoy, and the burger has to be one of the best and most versatile! They can come in many different variations to have something for everyone.
Whether it’s beef, chicken or a vegetable variation, there’s something for every taste. It can also be fun to create your own burger variations, and learning how to draw a burger can be very useful for that.
By the end of this guide, you will know everything you need to do just that!
We hope you have some culinary drawing fun in this step-by-step guide on how to draw a burger!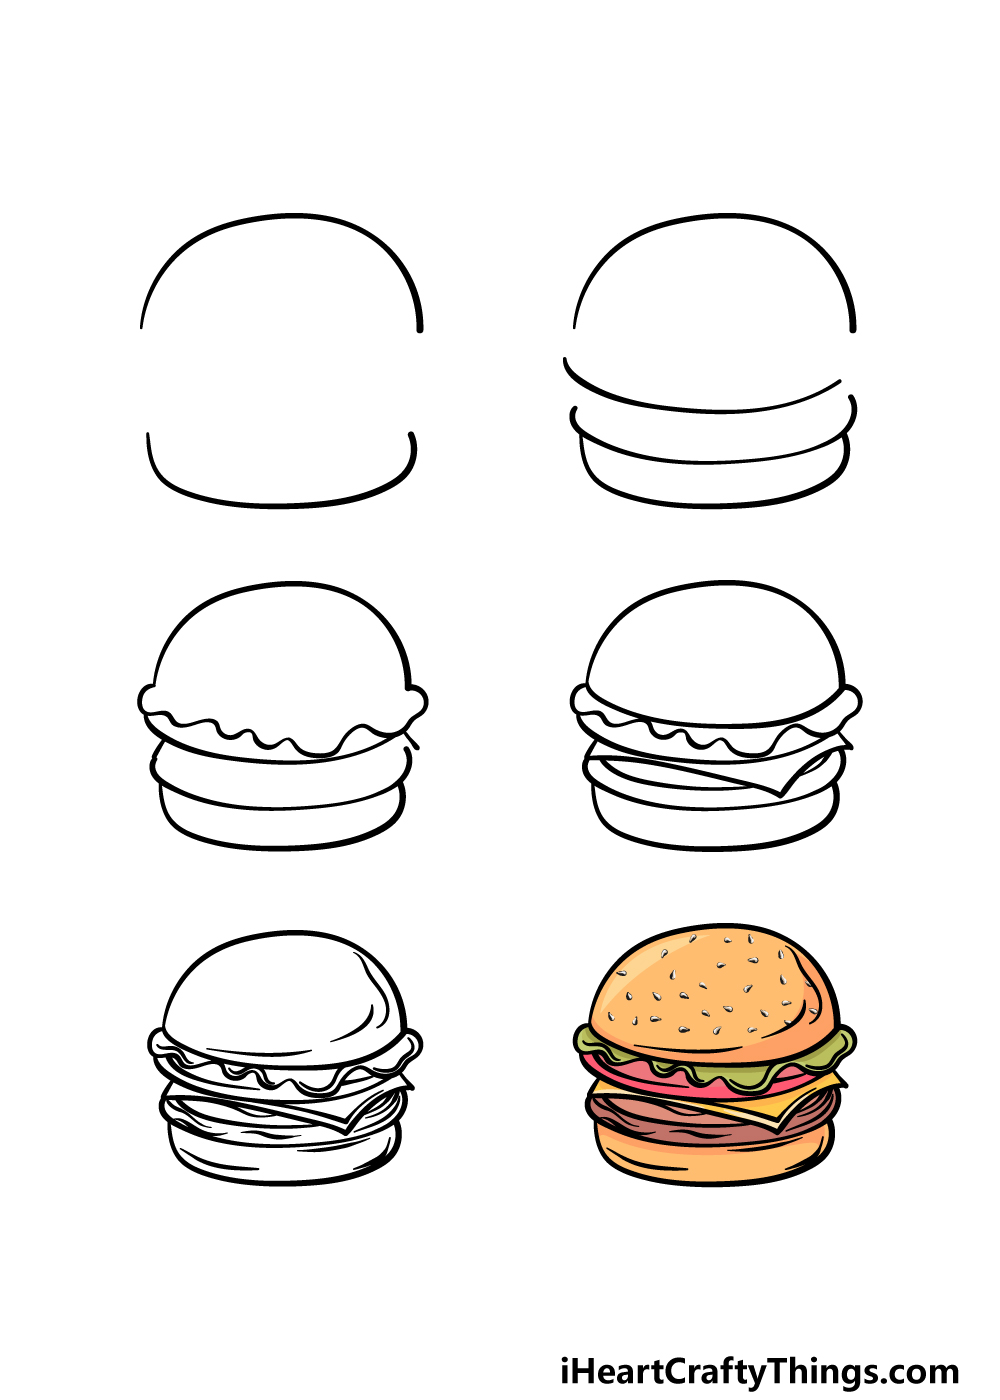
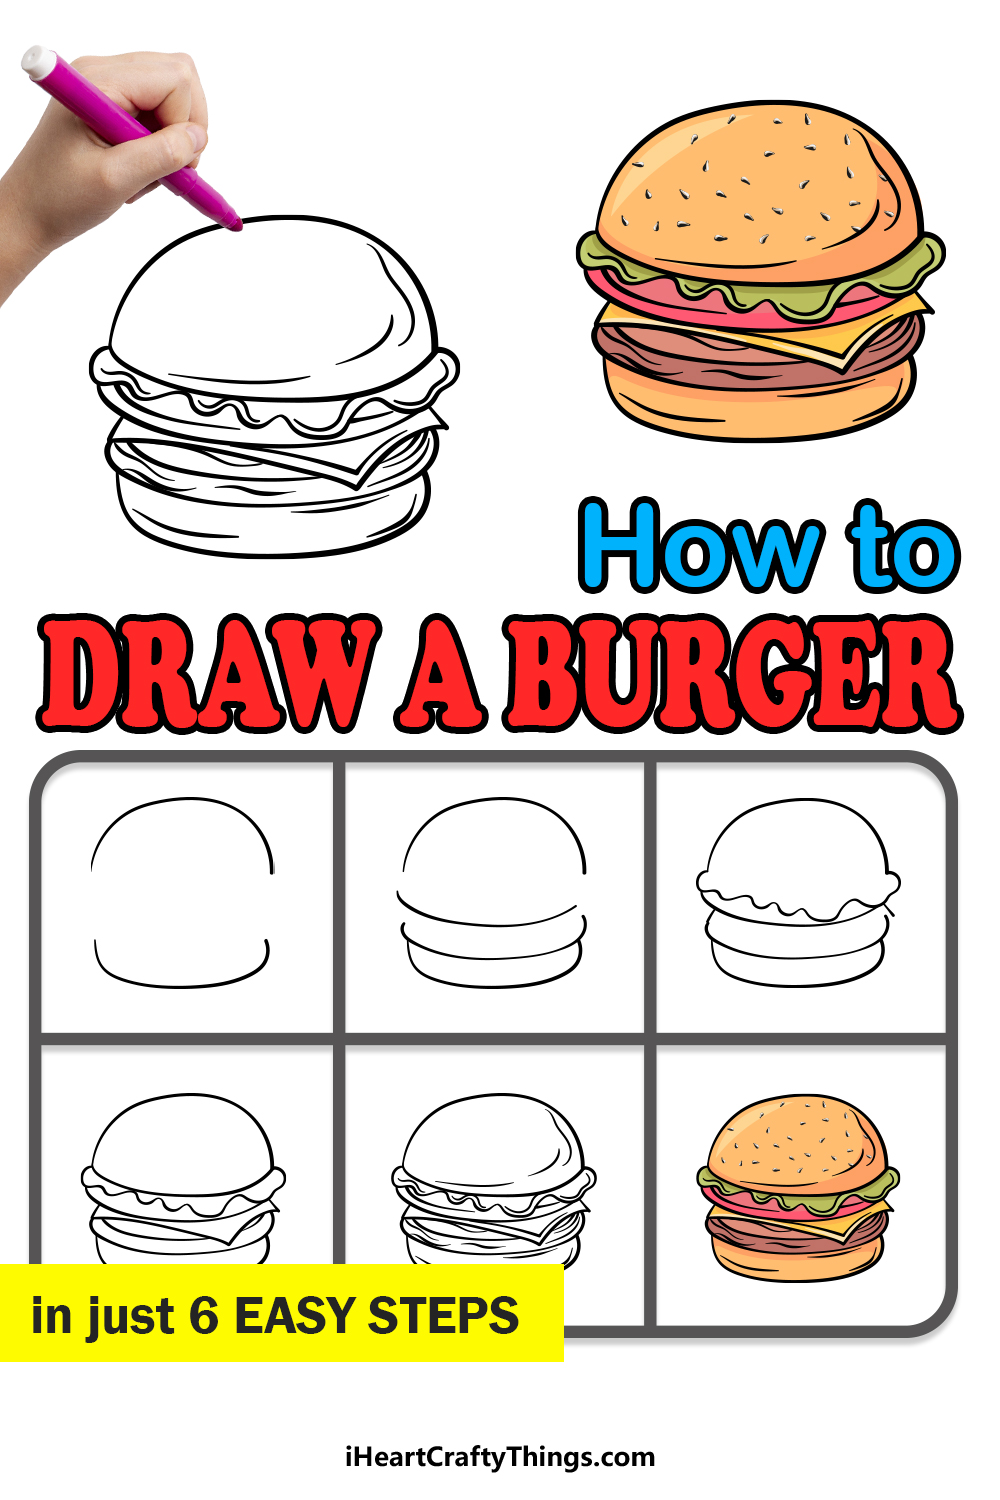
How to Draw A Burger – Let’s get Started!
Step 1
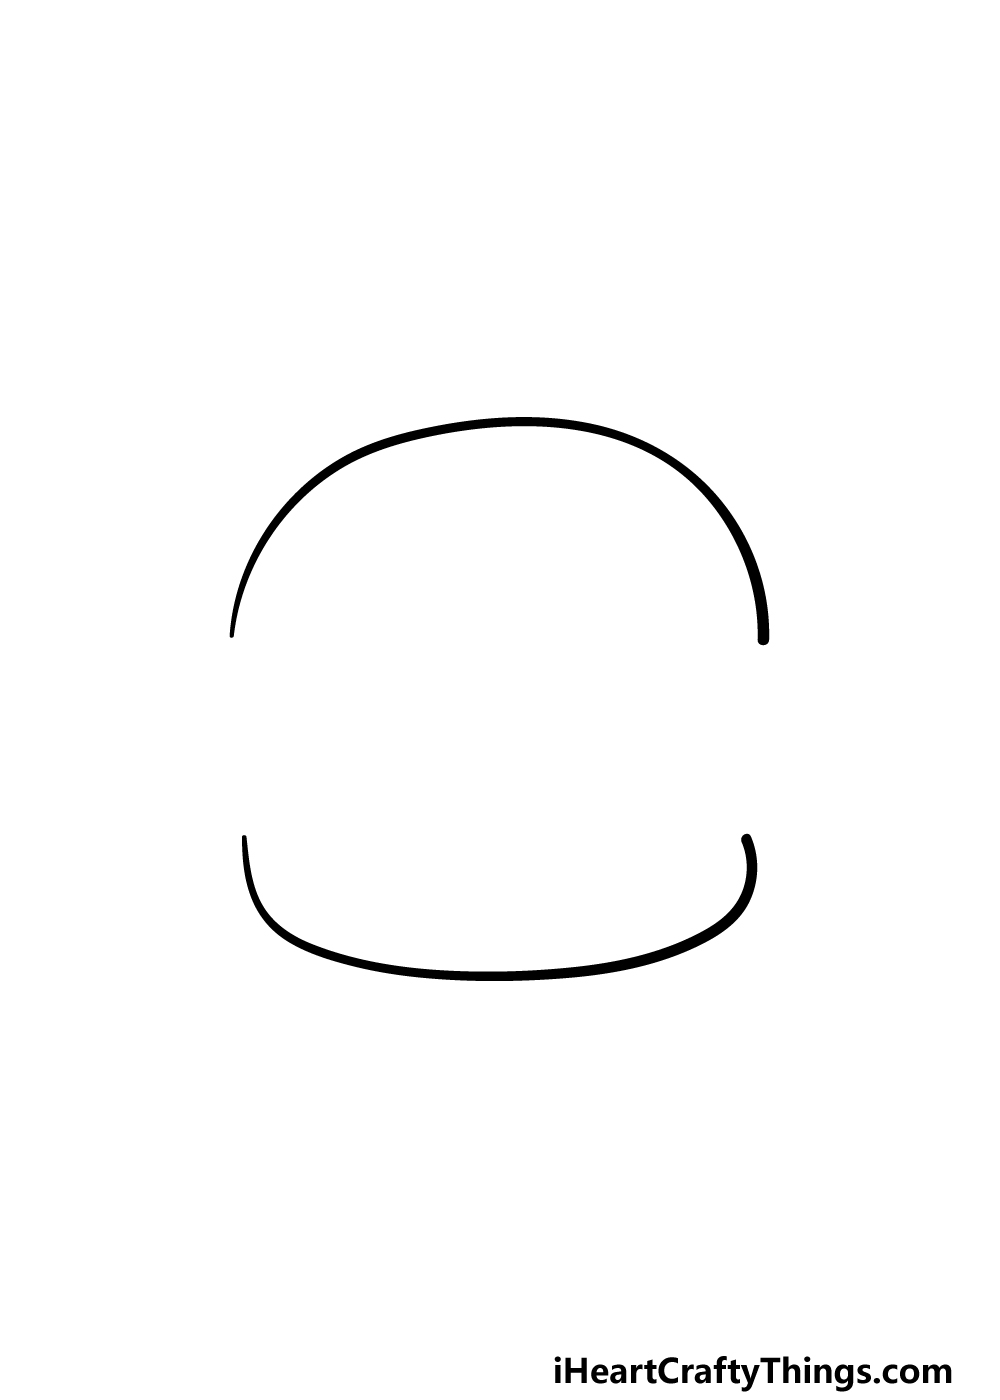
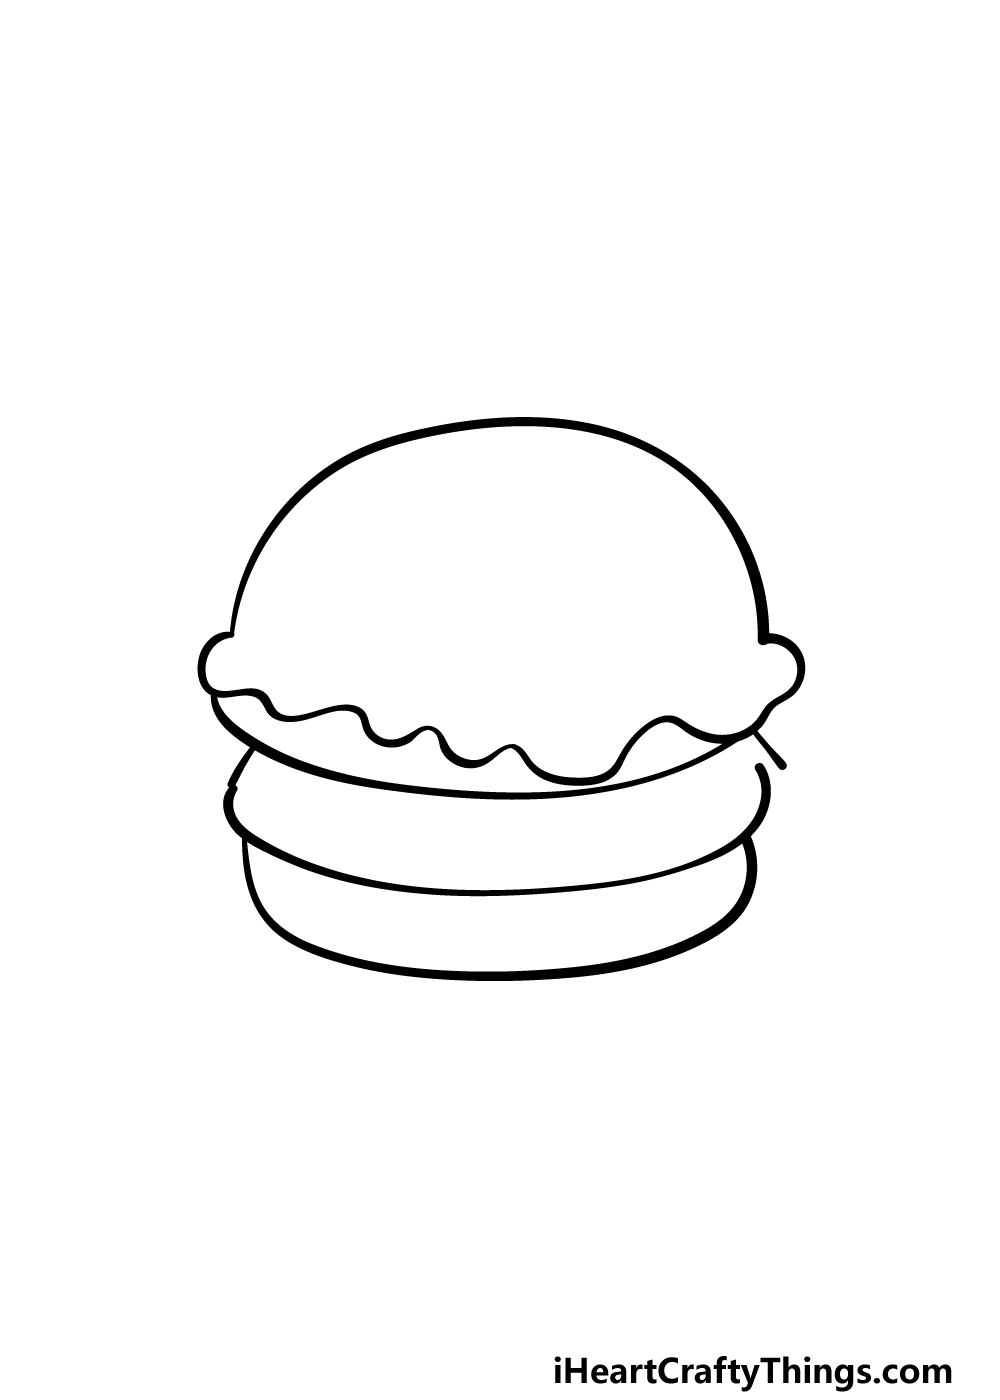
We will be starting with the outlines of the buns in this step of our guide on how to draw a burger.
This step will be quite a simple one, as all you will need to do is draw two curved lines. The one for the top bun will be a bit more rounded, whereas the one on the bottom will be a little flatter than the other one.
That will be all we are doing in this first step, so let’s move on to the next one!
Step 2 – Draw some lines for the interior of the burger
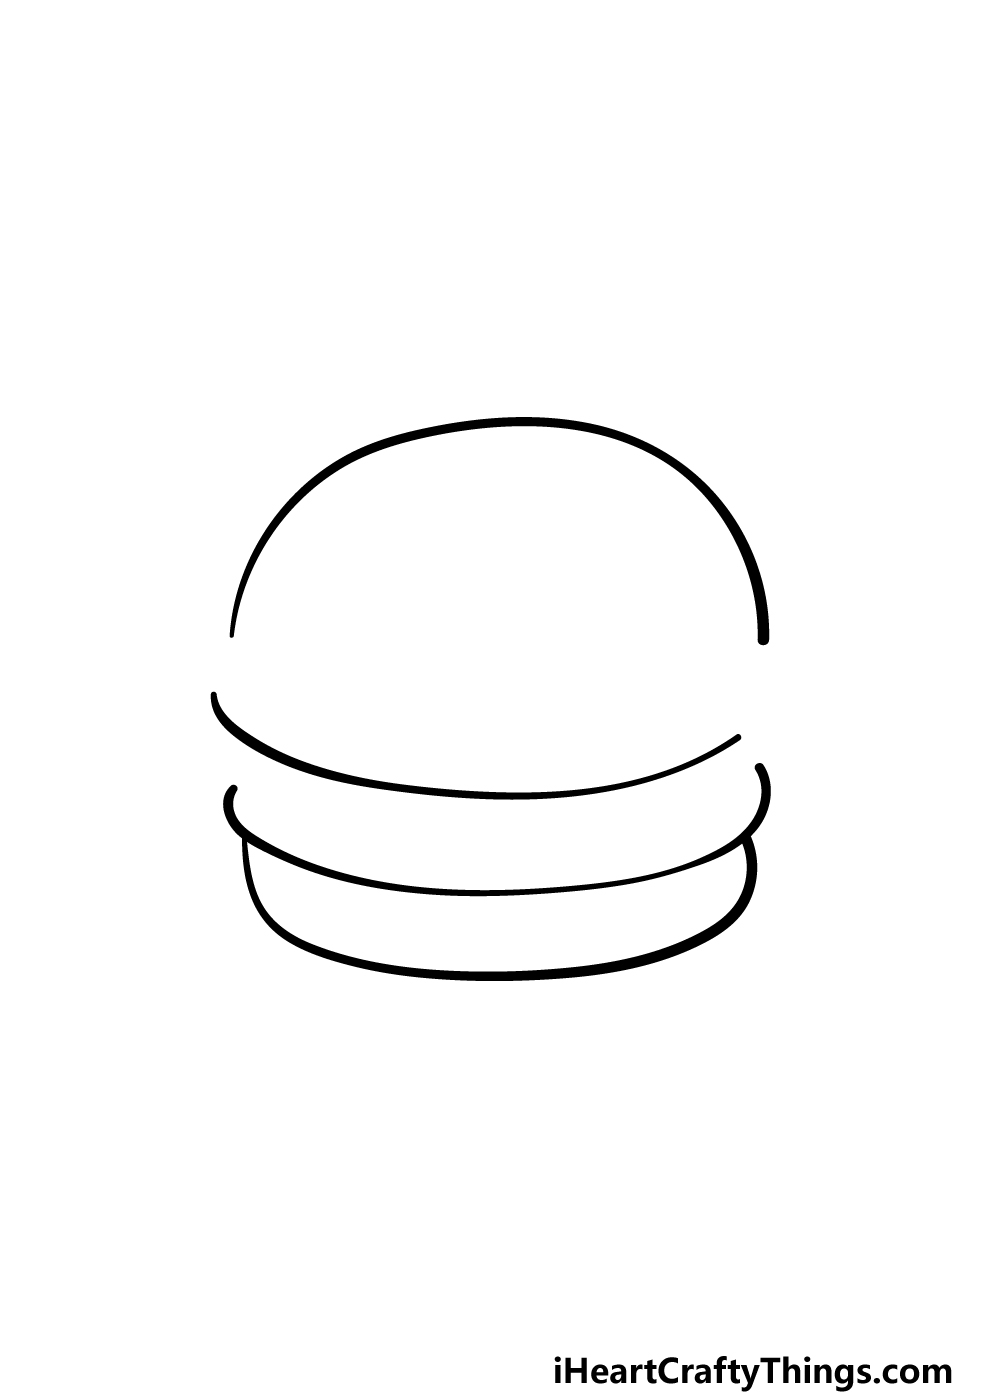
A burger is made or broken by what it has sandwiched inside of it, and we shall start to draw that interior in this step of your burger drawing.
For now we will still be keeping the details a bit simpler, and you can simply draw some more curved lines in between the buns.
These ones will be curved in the opposite direction to the previous lines that you drew, as shown in the reference image.
We will be adding a lot more details to the filling of the burger soon, and these lines that you have drawn so far will form the foundation for those details.
Step 3 – Now, start drawing some details for the burger
In this third step of our guide on how to draw a burger, we will be starting to draw the filling of the burger.
The line that we are drawing is to show some lettuce on the burger, but you could change the lines or the colors to make it something else as well!
For now, we will be using a somewhat wavy line connecting the top line of the bun. For now, it will look a bit as if the lettuce and the bun are connected, but we will be changing that very soon!
Step 4 – Next, keep adding details to the filling of the burger
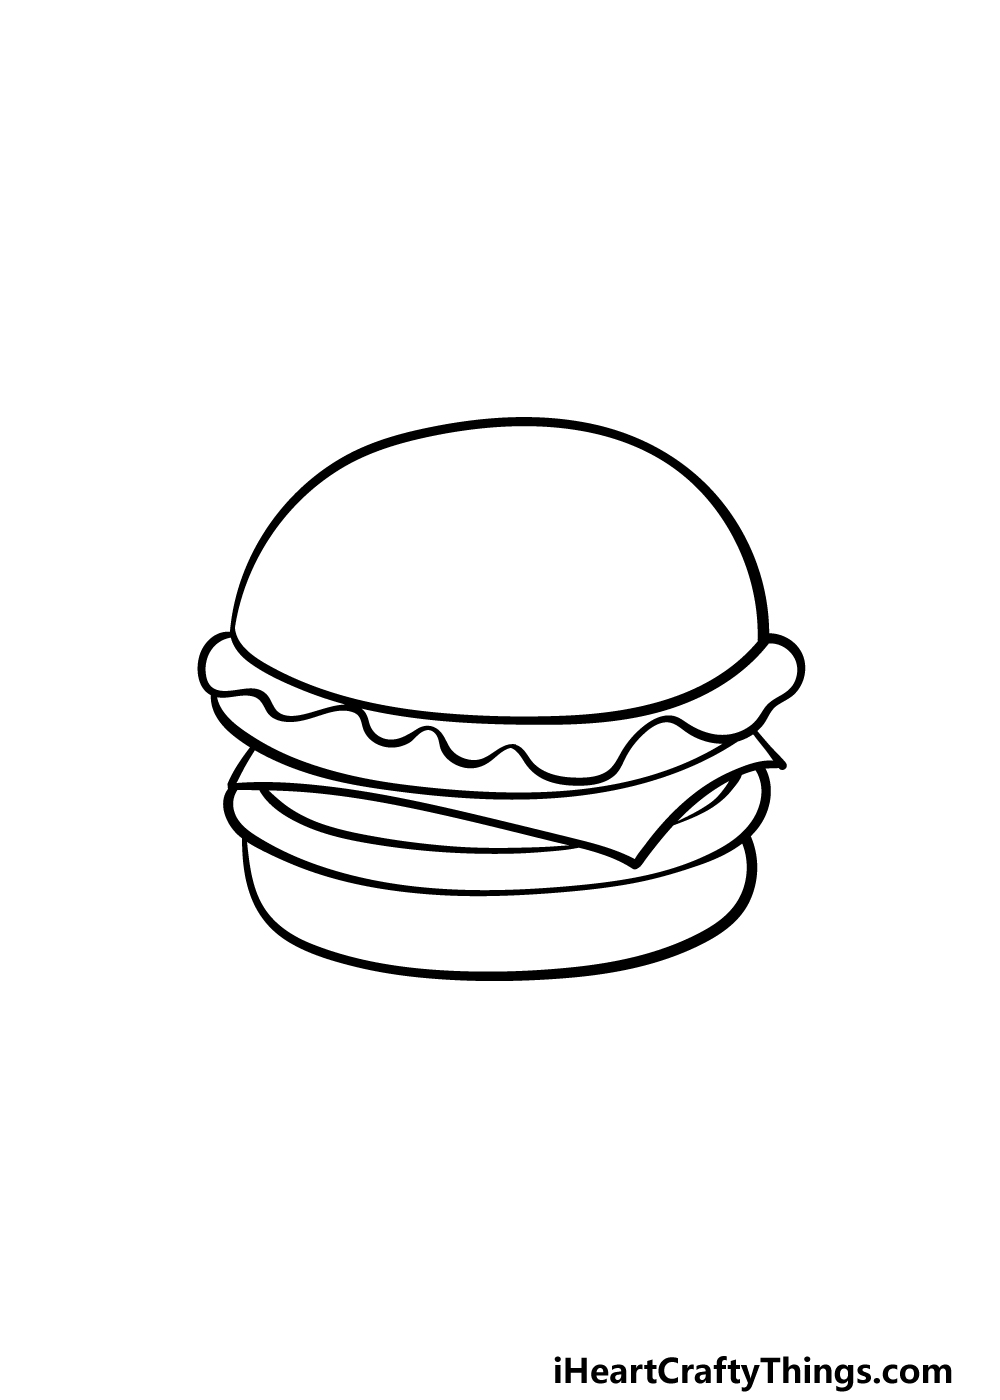
We will continue to add to the interior of the burger in this part of your burger drawing.
We mentioned in the previous step that we will be finishing off the outline of the top bun to separate it from the lettuce, and we will do that first here.
You can do this by drawing a curved line above the lettuce to connect the top line of the burger bun.
Then, we will be using some straighter lines lower down the burger to make a square shape that will form the cheese on the burger. Then, you can finish off this step with some more simple line details beneath the cheese.
Once you have added all of these details we just have a few more to add in the next step to have you ready for some coloring fun.
Step 5 – Now, you can draw the final details for the burger
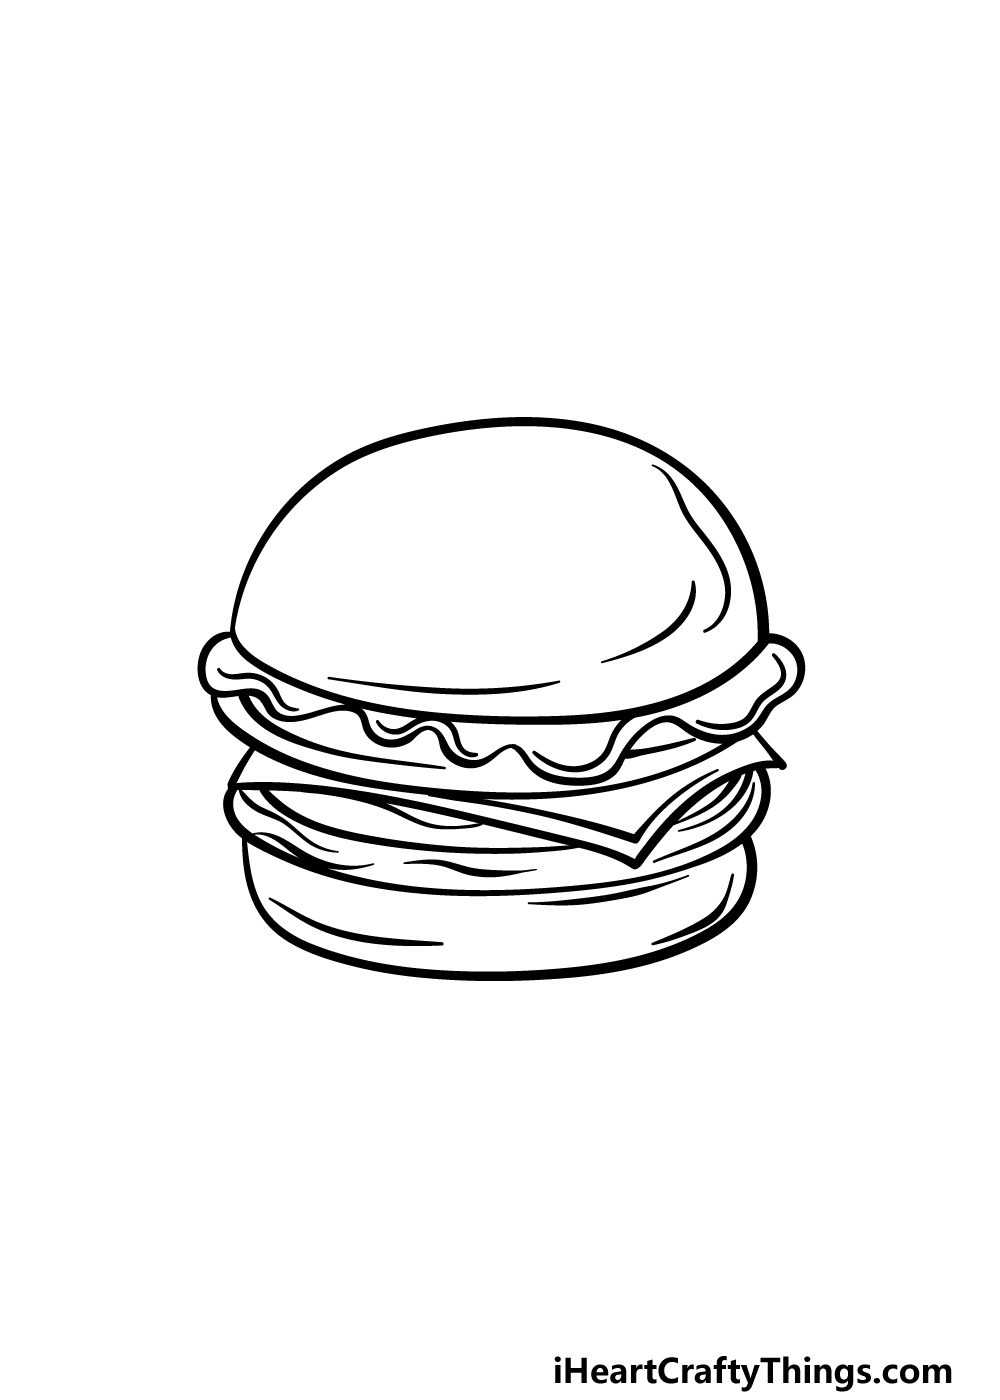
This step of our guide on how to draw a burger will be all about adding the final touches before you finish off with some colors in the next step.
We will show you some line details you can use for this picture, but this is also a step where you can really let your creativity flow as you add some elements of your own.
For our details, we will be adding some curved lines throughout the buns and fillings of the burger to give it some more texture detail.
The way these lines are drawn will vary depending on the part of the burger they will be decorating, and you can change it up as you wish, too!
Then, before you move on to the next part you can also add some elements of your own.
Perhaps you could draw some fries and your favorite beverage that you would be enjoying with this tasty burger. What else can you think of to add to this drawing to make it the perfect burger?
Step 6 – Finish off your burger drawing with some color
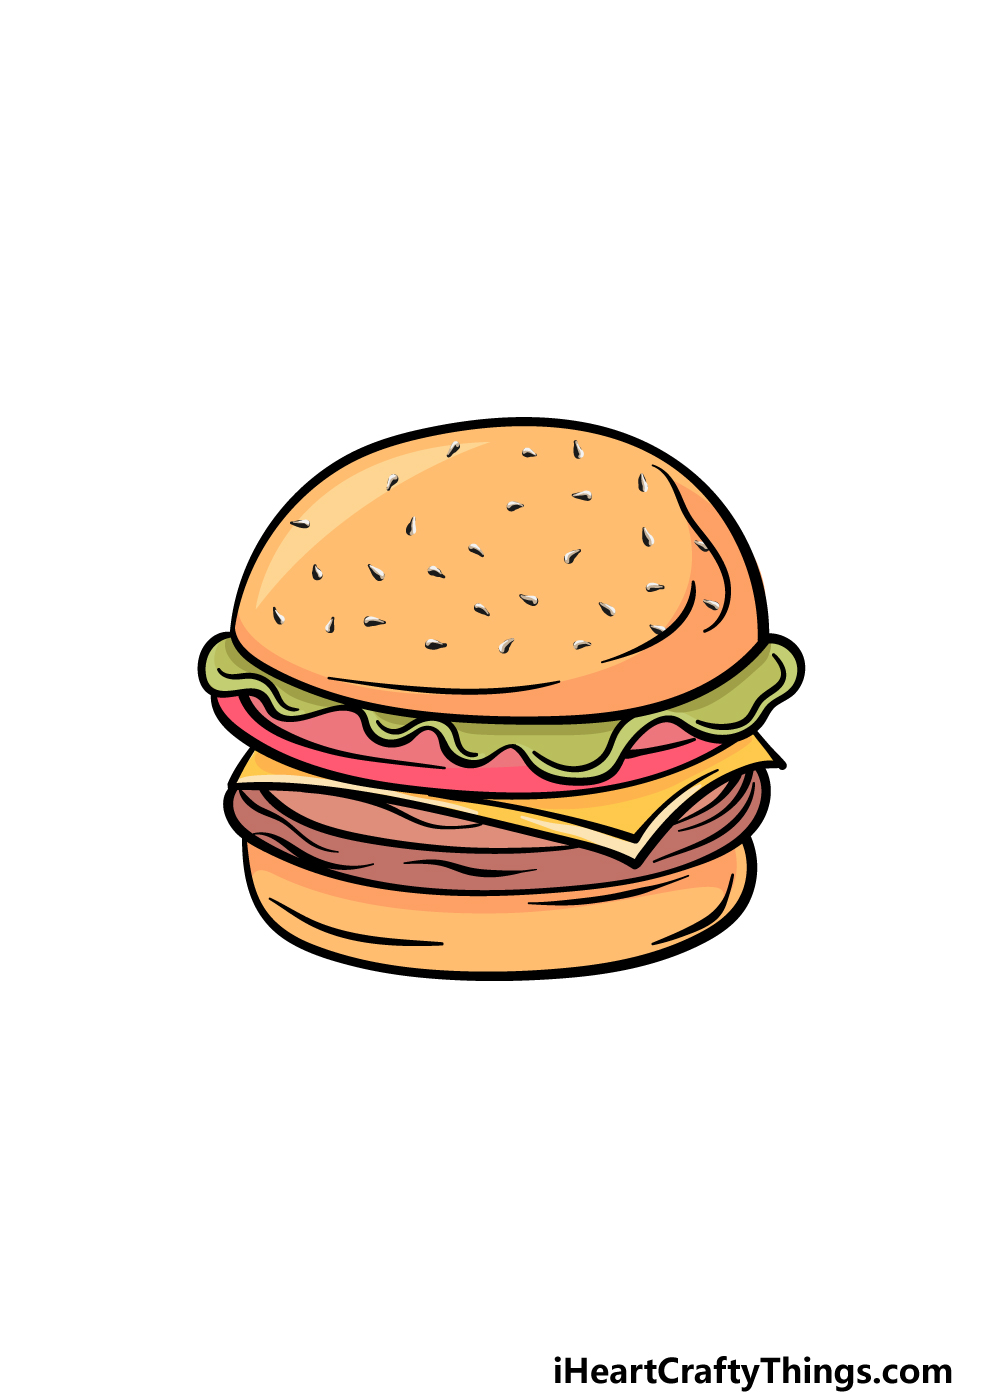
You have reached the final step of this burger drawing, and now you get to relax with some coloring fun!
In our reference image, we showed you the colors that we would choose for this image, but these colors are just a suggestion.
As you can see in the picture, we also used some color details for more detail on the image, as we created some seeds for the buns with some black lines.
Once you have chosen which colors to use, you can also pick which art mediums and tools you will use to make them happen.
You can achieve some very distinct tones depending on the mediums you choose, so be sure to have fun experimenting as you finish off this picture!
4 More Ways To Make Your Burger Drawing Unique
Make your burger sketch even tastier with these fun and easy tips!
There is no wrong combination of ingredients and fillings you can use when it comes to real burgers.
We stuffed this burger drawing with plenty of ingredients, but you could probably squeeze in a few more!
If you have some favorite burger fillings, then you can add as many as you want. If there are some on this drawing you don’t like, then you could also remove those.
This is all about creating your very own perfect burger, so let your imagination run wild. The burger doesn’t even necessarily need to obey the laws of gravity!
Once you have completed your ideal burger, then you could show us the kinds of sides you would like with it. For some easy examples, you could add some fries and maybe a soda for a fast-food feel to this burger sketch.
These are just some examples, and if you would prefer additional sides then you should certainly add them. This is a great chance to not only create your ideal burger but also your ideal meal!
Next, you could take this drawing of a burger even further with more of a background. This is an area where you could really let loose with some fun ideas!
Maybe you could design a fun burger joint, for example. Or you might prefer to have a home setting with the burger meal all planned out.
If you want to take it even further then it could be fun to draw some human characters that are about to enjoy this meal!
Finally, you can bring this burger drawing to life with some amazing colors. The colors you choose are one part of the equation, but the art tools you use can make it better as well.
For example, you could use some dribbling paint to represent some ketchup oozing out from the burger.
Mixing mediums can be a great way to create varied textures and tones, so have fun experimenting with it!
Your Burger Drawing is Complete!
You have finished the details and colors in this guide on how to draw a burger! In this guide, we tried to make sure that this would be a fun drawing but also that it would be easy for you to learn and customize.
Now you can add your own elements to it, and these could be anything from adding some ingredients to the filling or creating a cool background. We can’t wait to see what you choose to draw!
We have many more amazing guides like the one you just did on our website. We also add new ones frequently, so be sure to visit often to never miss out!
Once your burger drawing is complete, we would really love to see it! You can show us your awesome artwork on our Facebook and Pinterest pages.
We will look forward to seeing the creative touches you brought to this picture!