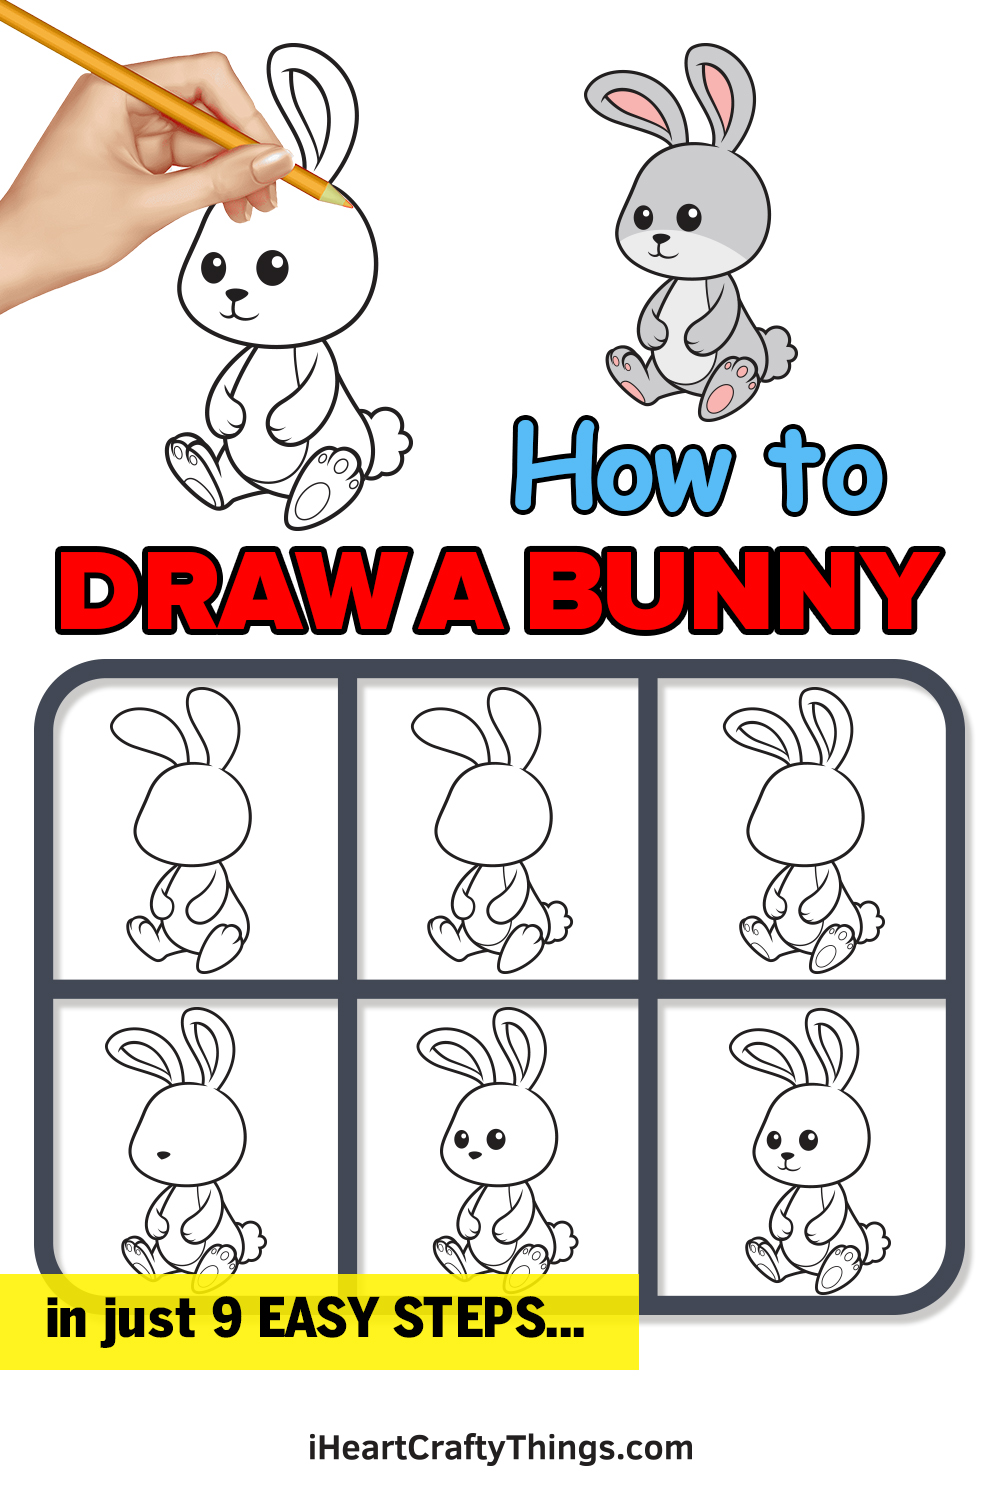
Get ready to learn how to draw a bunny thanks to this step-by-step guide for kids! Kids of all ages can have a great time learning how to bring this cute bunny to life with creativity.
Bunnies are just so cute, I don’t think anyone can deny that. That’s why with this guide I aimed to create a bunny design that highlights just how adorable they are.
The steps of this tutorial are logical and simple to follow for anyone, so you’re just a few moments away from drawing your own bunny! The rabbit ears, fluffy tail, whiskers, big feet and other characteristics of a rabbit are all shown in this guide.
I’ll even show you one way that you can color your drawing, but you can also go in a different direction if you prefer. Perhaps you could even add a carrot for this rabbit or put some Easter eggs around it!
Watch This Easy Guide On How To Draw A Cartoon Bunny!
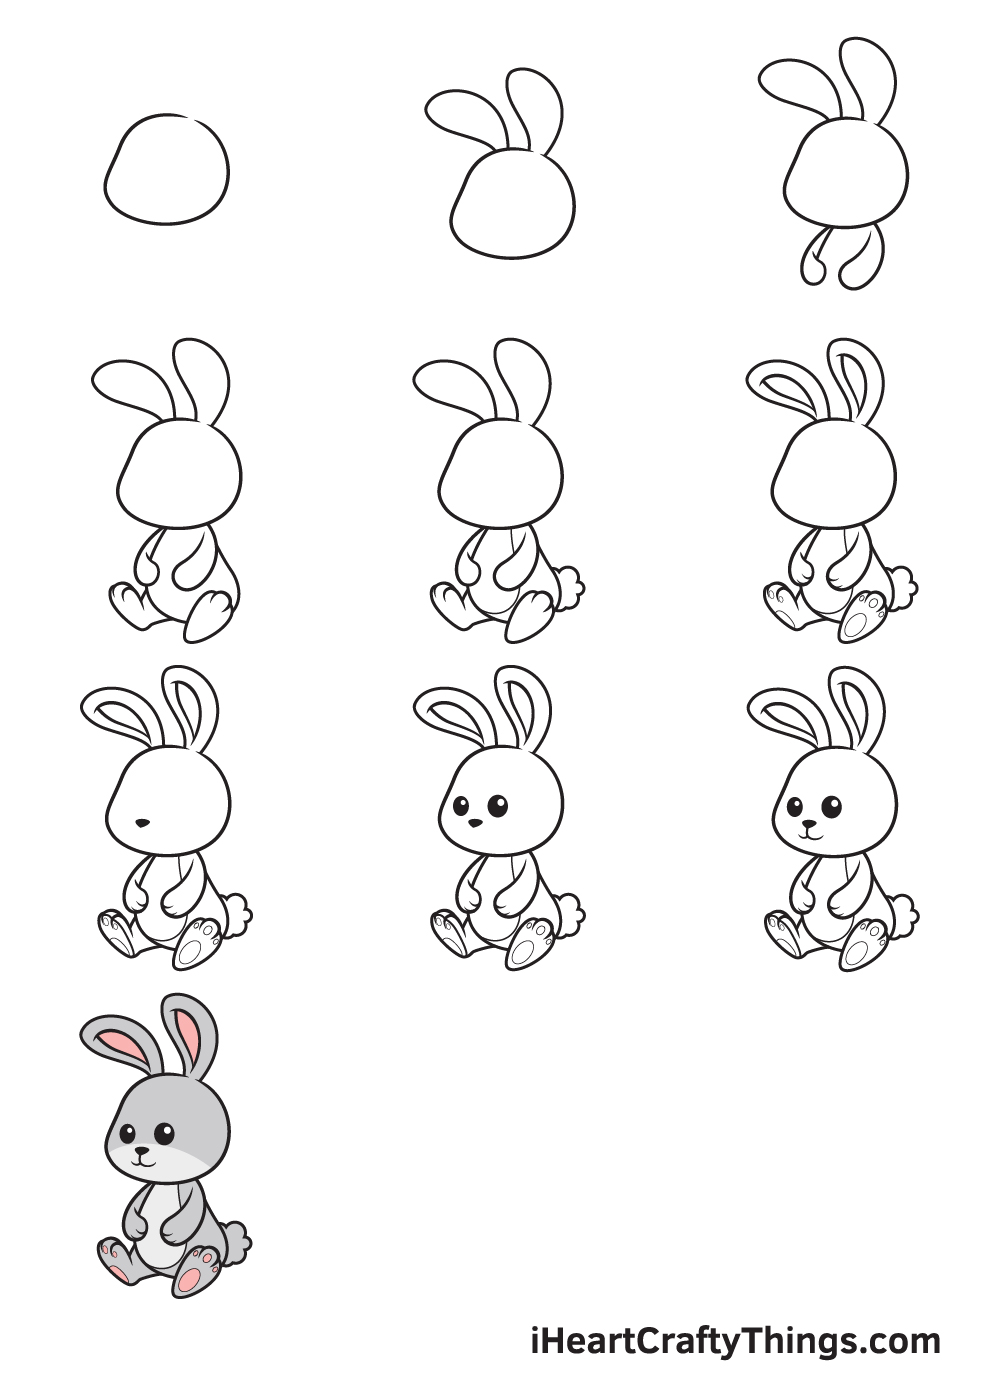
How to Draw a Bunny – Let’s get started!
Step 1
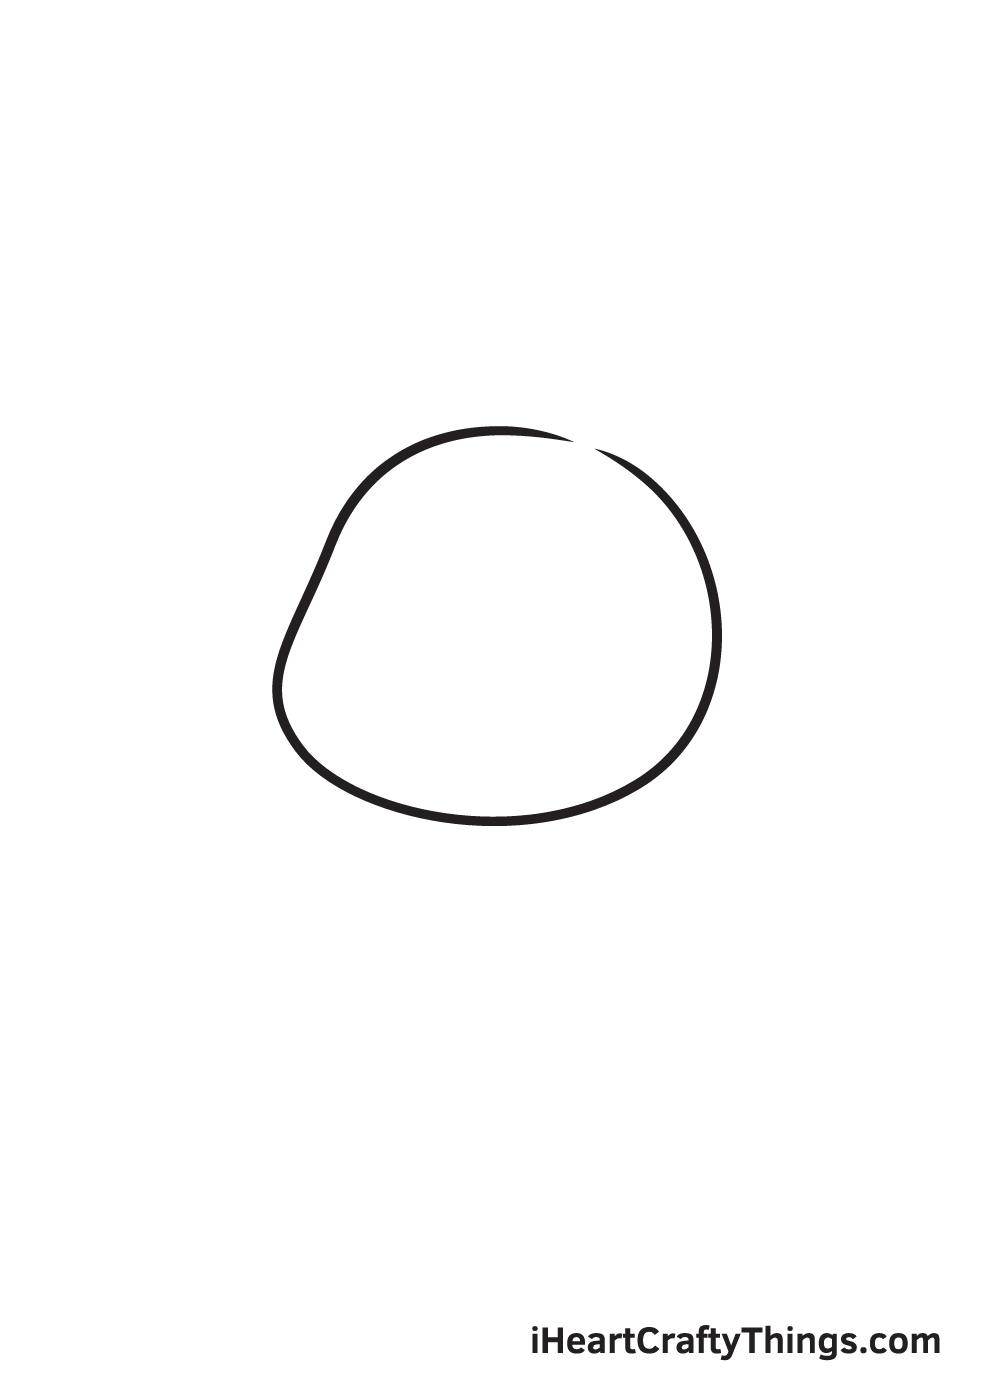
Start by sketching the outline of the bunny’s face. Draw an irregular circle shape with the bottom part slightly wider than the top.
Bunnies naturally have chubby and fluffy cheeks. So, don’t forget to put emphasis on the cheeks as you draw the outline of the bunny’s face.
Here’s a useful tip: draw a vertical line and a horizontal line across your paper to serve as a reference line to ensure that the bunny’s face will be drawn in the very middle.
Step 2 – Draw the Outline of the Bunny’s Face
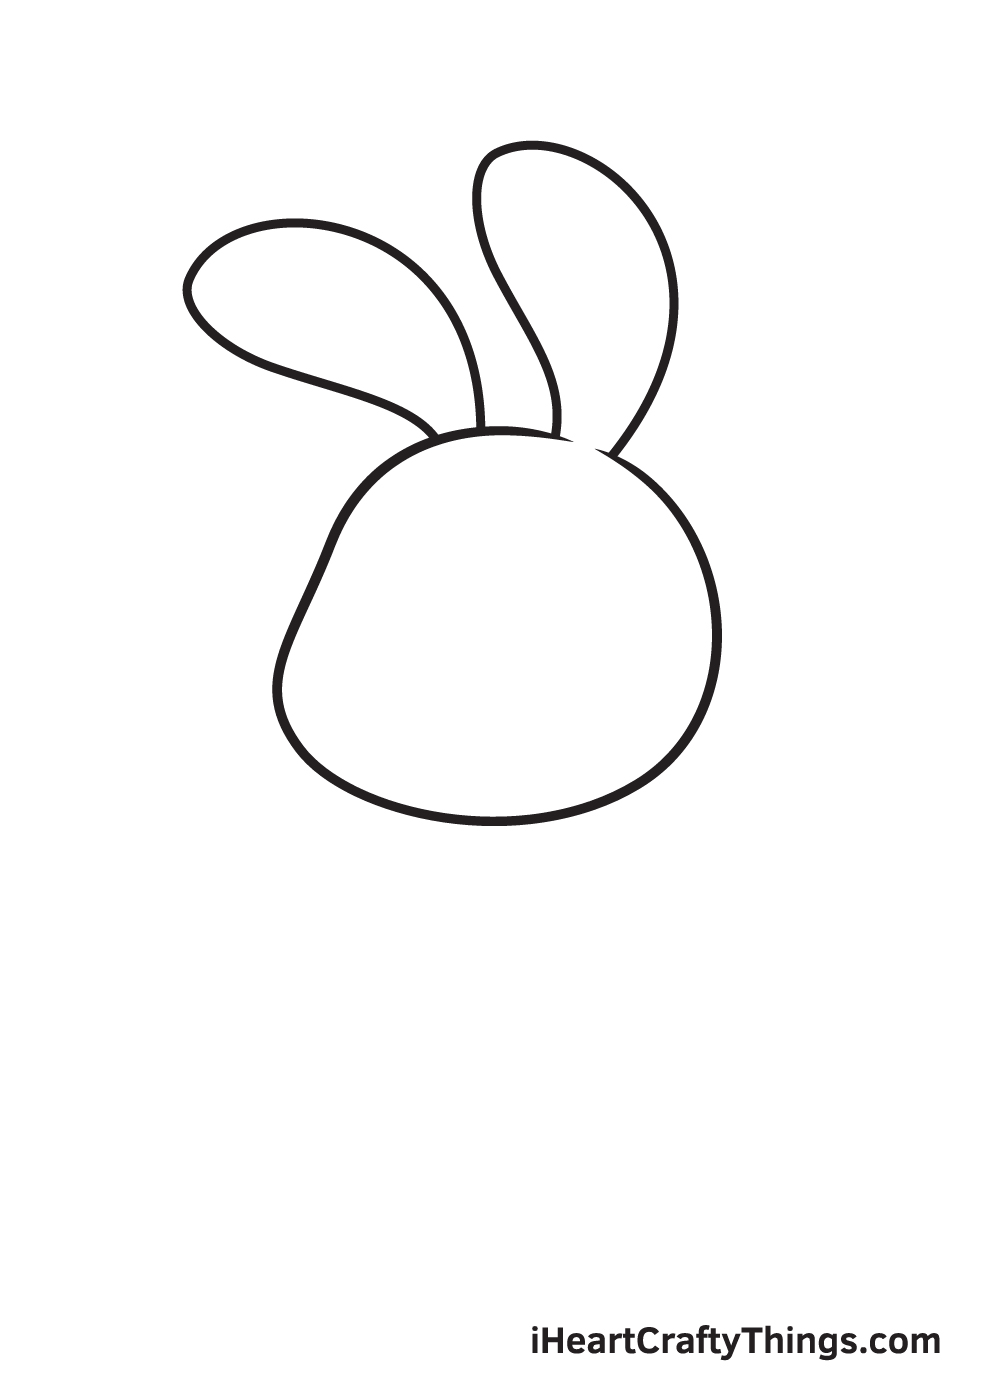
At the top of the bunny’s face, draw a pair of ears on each side of the face. The ears of the bunny pretty much look like an upside down letter “U”.
The bottom part of the ear connected to the bunny’s face should be narrow, while the middle part of the ear should be the widest, as shown in the illustration.
Bunnies are known for their distinctively large ears. So, make sure to make your bunny’s ears enormous to make it more realistic! Also, try to make the ears the same size as much as possible.
Step 3 – Attach a Body and an Arm to the Bunny’s Face
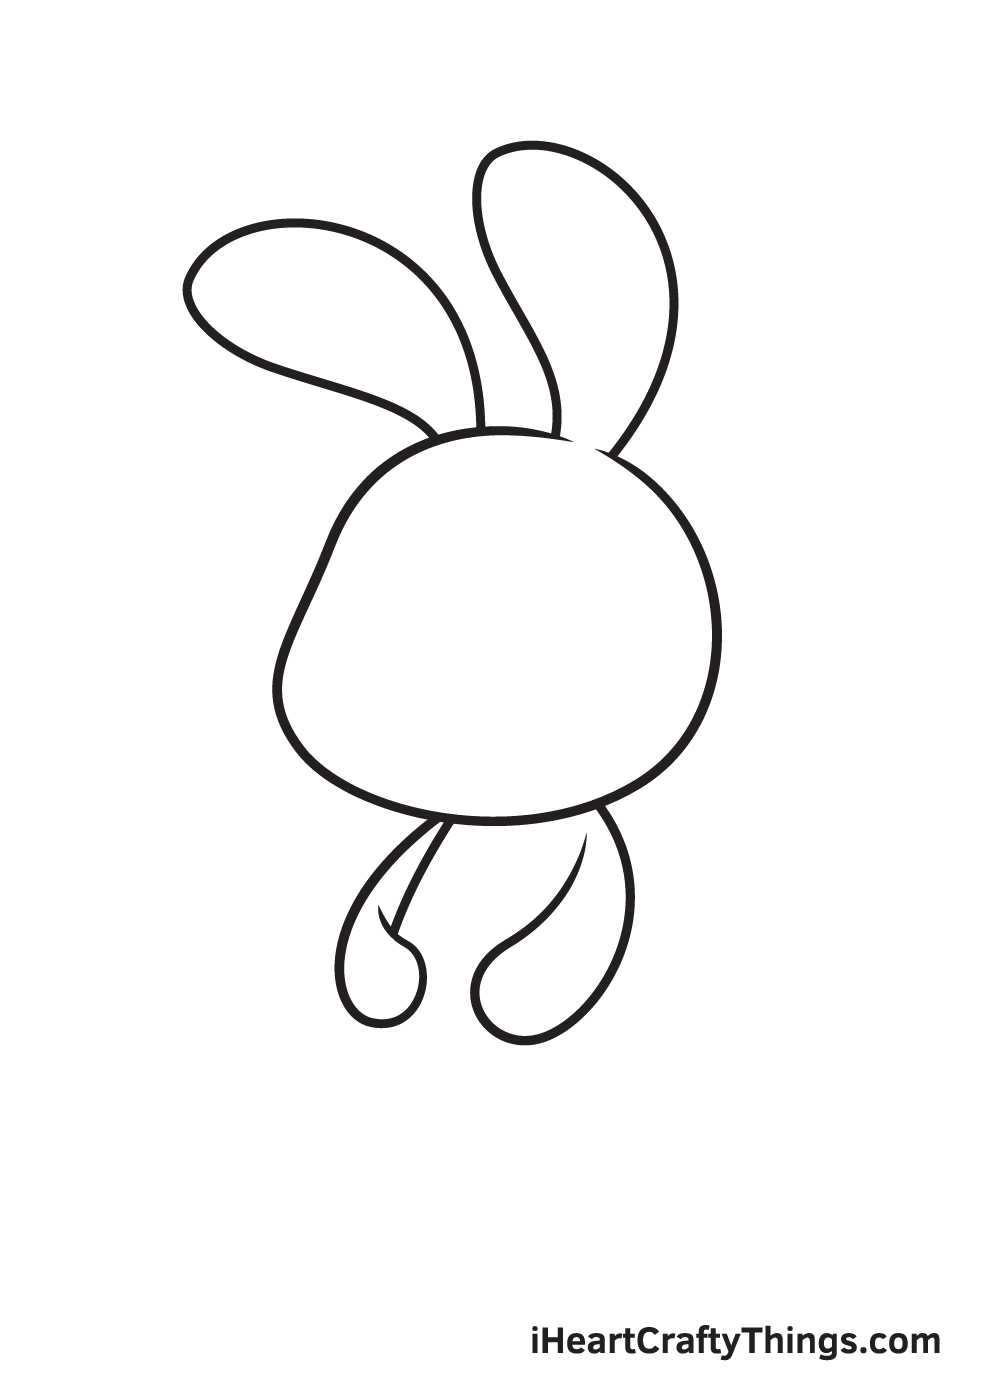
Now, that we have completed the outline of the bunny’s face, it’s time to draw the body.
Draw two curved lines right underneath the bunny’s face. The arms’ shape should be like a smaller version of the bunny’s ears we have drawn in the previous step.
In this illustration, you can see that the bunny’s arms are actually placed in the front of its body. However , you can position the bunny’s arms any way you want. You can draw the arms positioned on the sides of its body, or even raised upwards.
Step 4 – Complete the Bunny’s Body
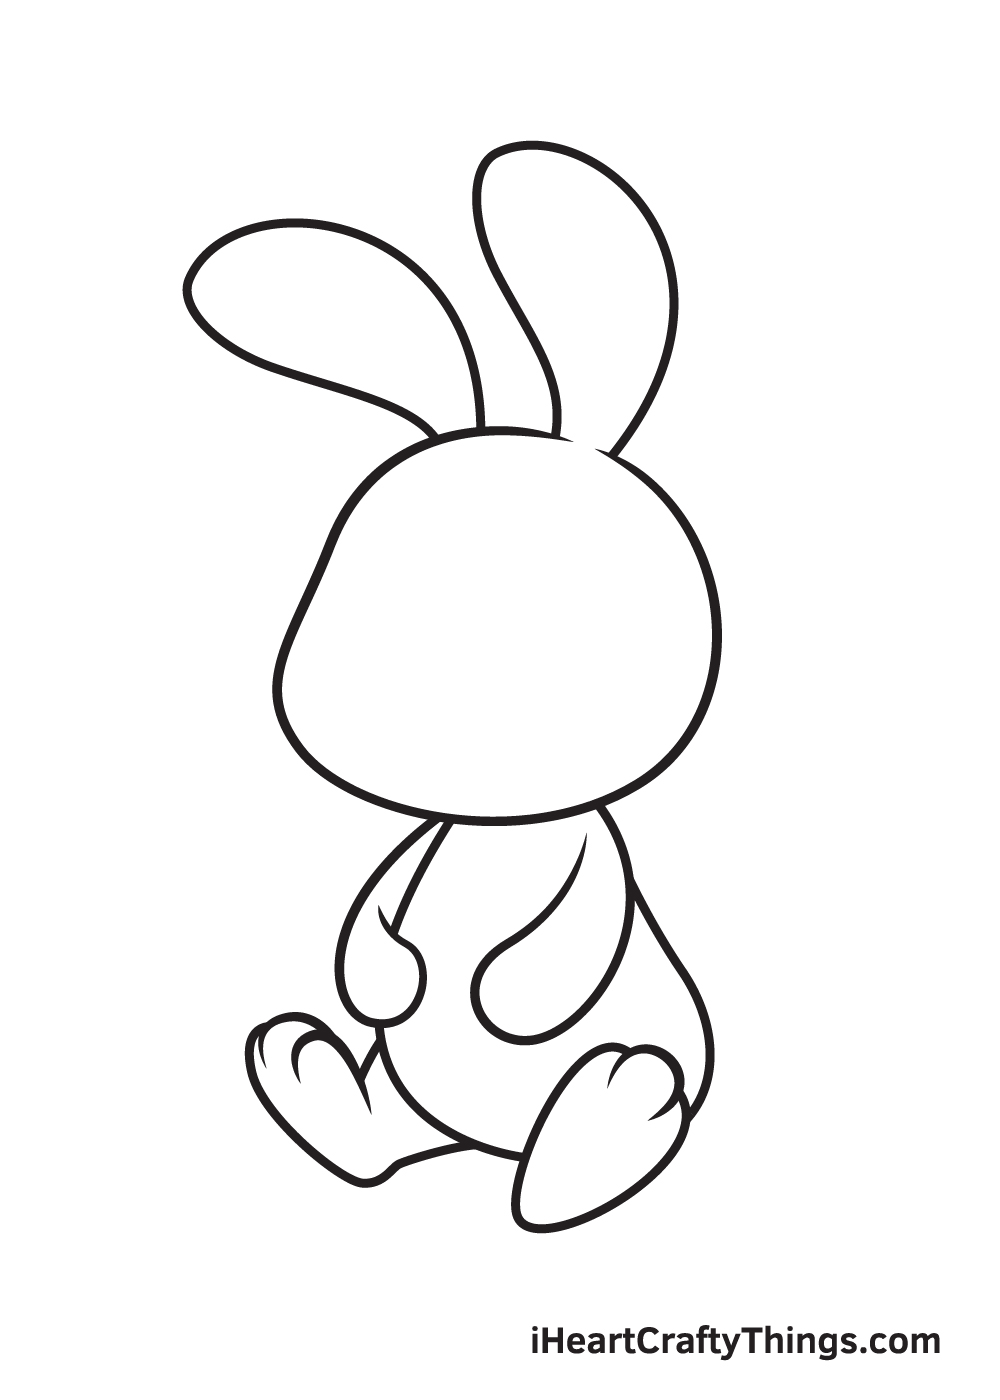
Afterwards, it’s time to draw the entire bunny’s body!
Using the previous step as a guide, extend the lines to create a full body. Then, draw a pair of feet with three toes each on both sides of the bunny’s body. One feet should be facing straight ahead, while the other one is facing sideways.
Keep in mind to make the body chubby to create an extremely adorable bunny!
Step 5 – Draw the Bunny’s Fluffy Tail
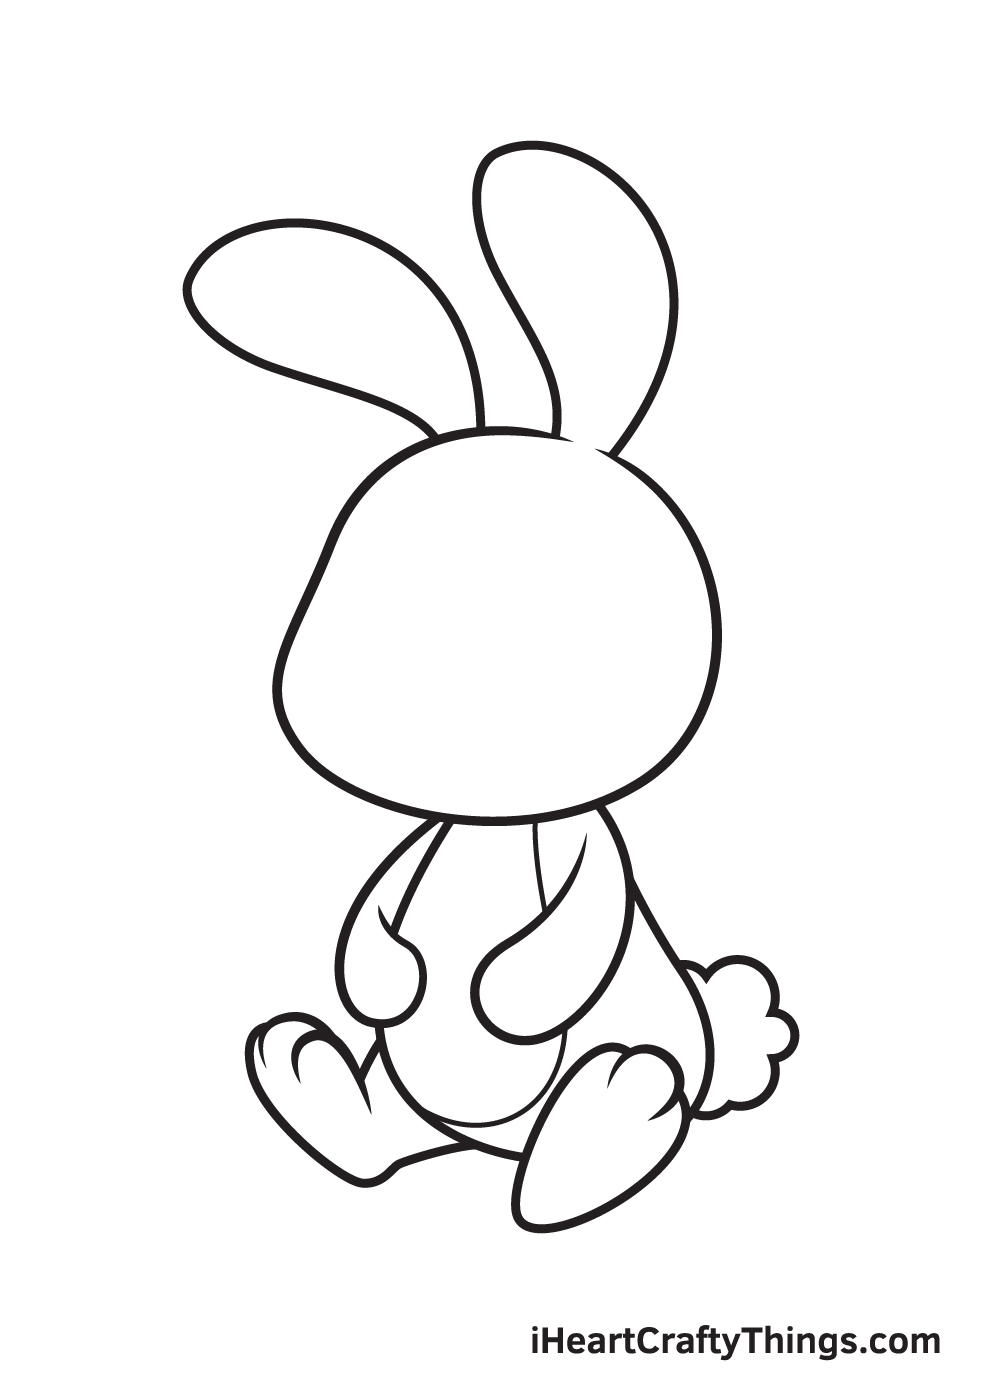
One of the most adorable features of a bunny is definitely its tail. And in this step, we’ll draw the bunny’s furry tail!
On the bottom part of the bunny’s back, draw multiple curved shapes connected together. When drawn correctly, it should look like a fluffy cotton ball. Remember, the tail is positioned at the bottom of the bunny, so it should be only visible halfway through.
Step 6 – Add Patterns to the Bunny’s Body
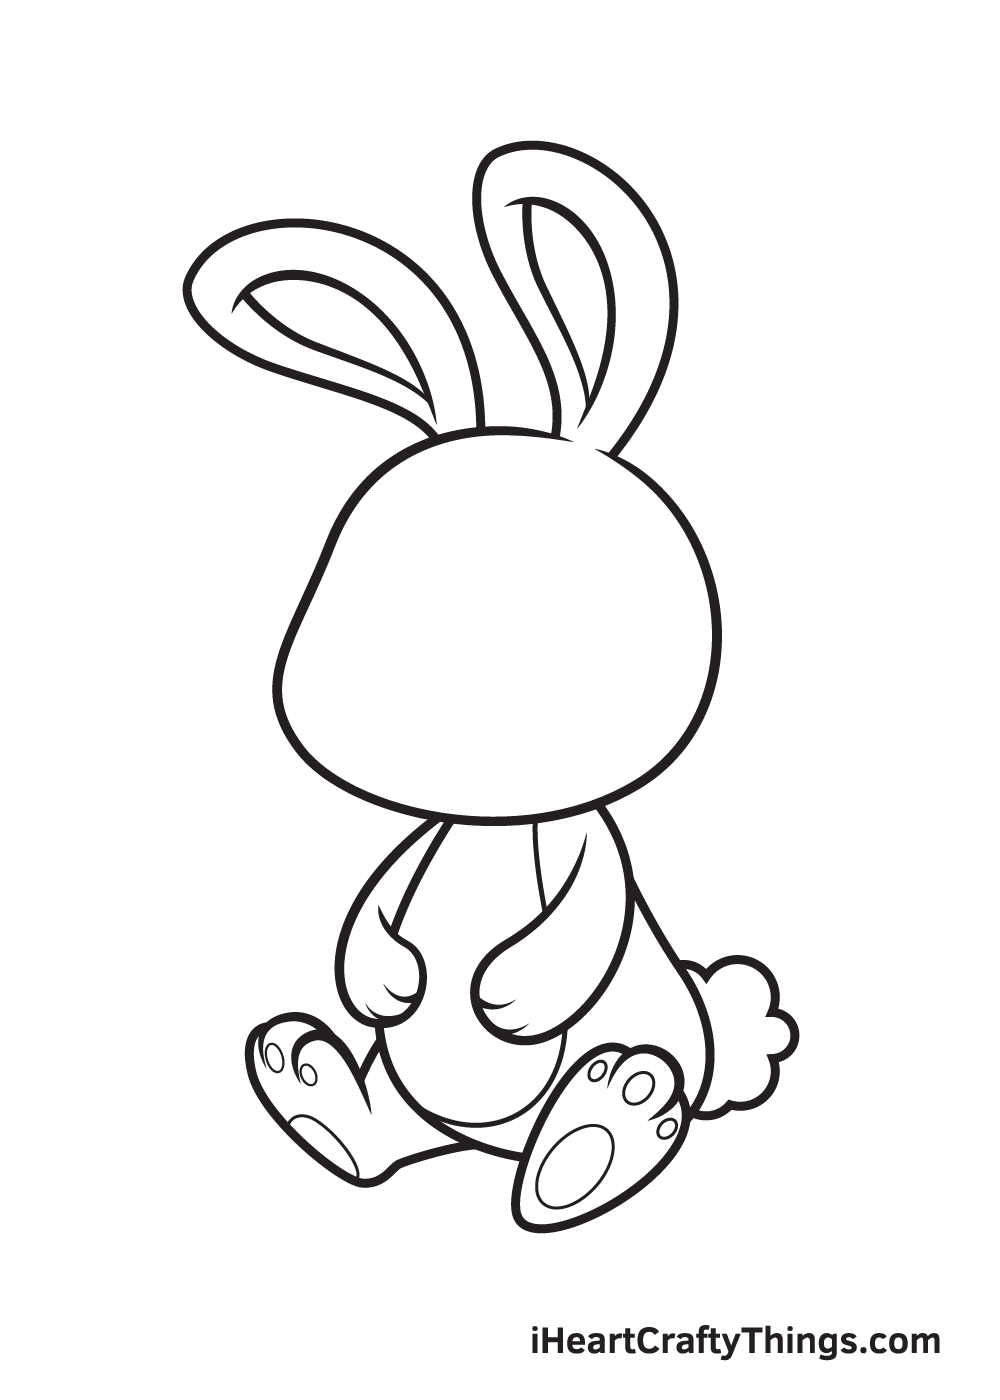
Now, it’s time to add the intricate details on the bunny’s body to make it look more realistic.
Let’s start by adding patterns within the bunny’s ears. Using the outline of the bunny’s ears that we’ve drawn in the second step as a guide, draw a smaller outline inside each of the bunny’s ears.
Remember, the second outline must be a bit smaller than the first outline of the bunny’s ears. This will make the bunny’s ears appear more realistic.
Step 7 – Next, Draw the Bunny’s Nose
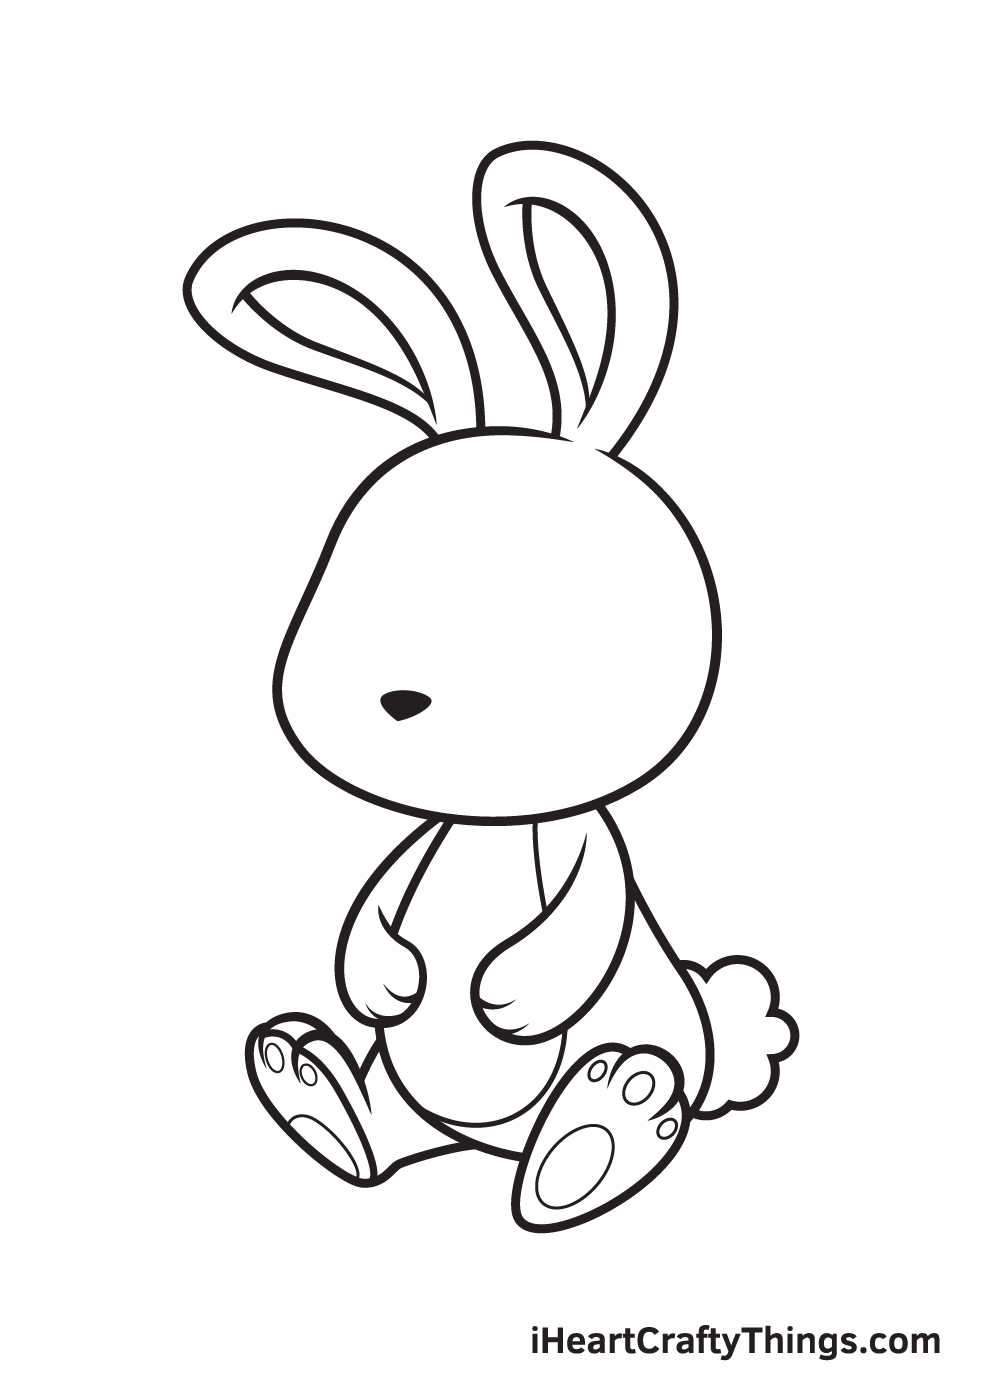
Draw an upside down triangular shape in the middle of the bottom part of the bunny’s face. It should be positioned far from the forehead and near the chin.
In order to ensure that the nose will be drawn proportionally, draw reference lines across the bunny’s face to pinpoint the perfect spot for the nose.
Step 8 – Then, Draw the Bunny’s Eyes
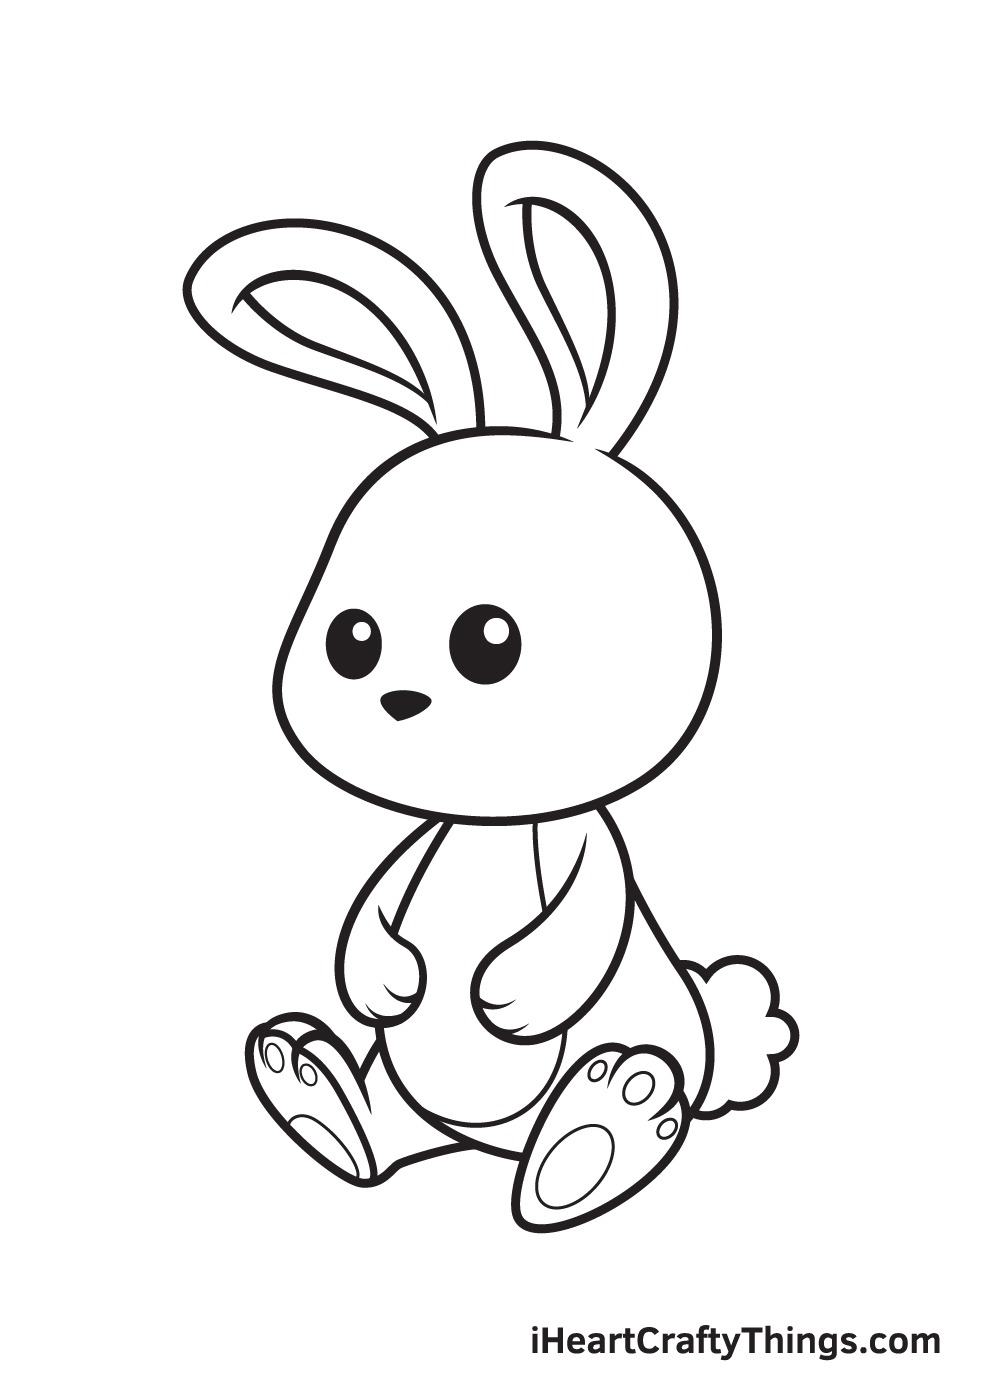
Draw two big circles above the bunny’s nose. Afterwards, draw another two circles within the eyes. Afterwards, shade the eyes to complete the look.
Don’t forget to leave out the tiny circle inside the eyes unshaded to create the illusion of “gleaming eyes”.
To make sure the eyes are aligned and even, make sure that the nose is positioned below and right in between the eyes.
Step 9 – Afterwards, Draw the Bunny’s Mouth
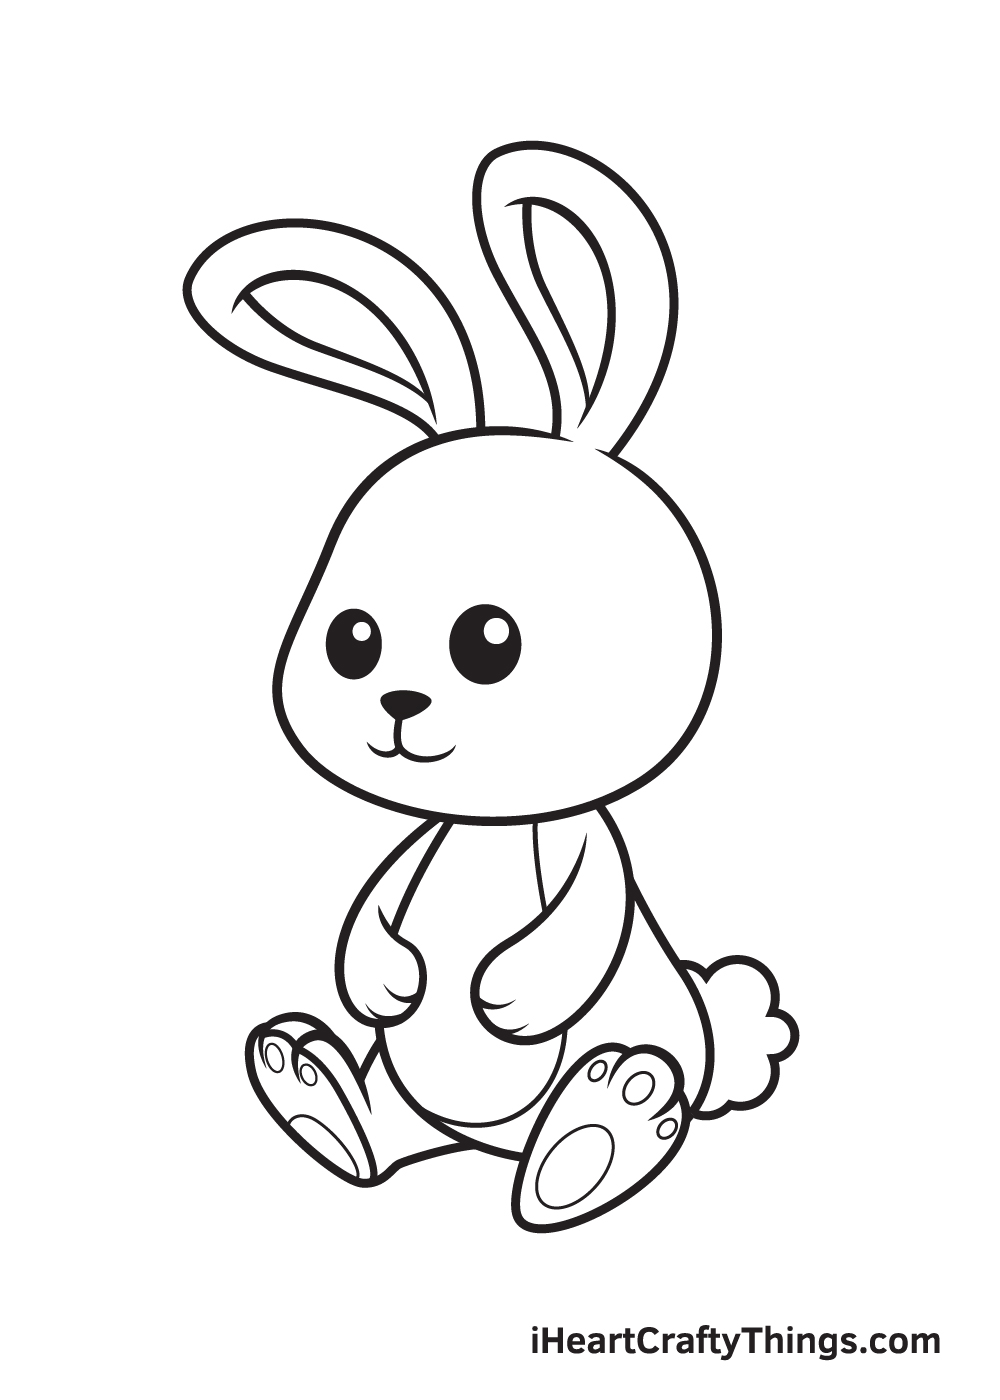
Right underneath the nose, draw a small vertical line. From the tip of the vertical line, draw two curved lines on either side. When drawn correctly, it should look like a curvy letter “W”.
Here, you can see the cupcake is nearly finished! The only thing it’s missing is a dash of multiple colors to complete your bunny artwork!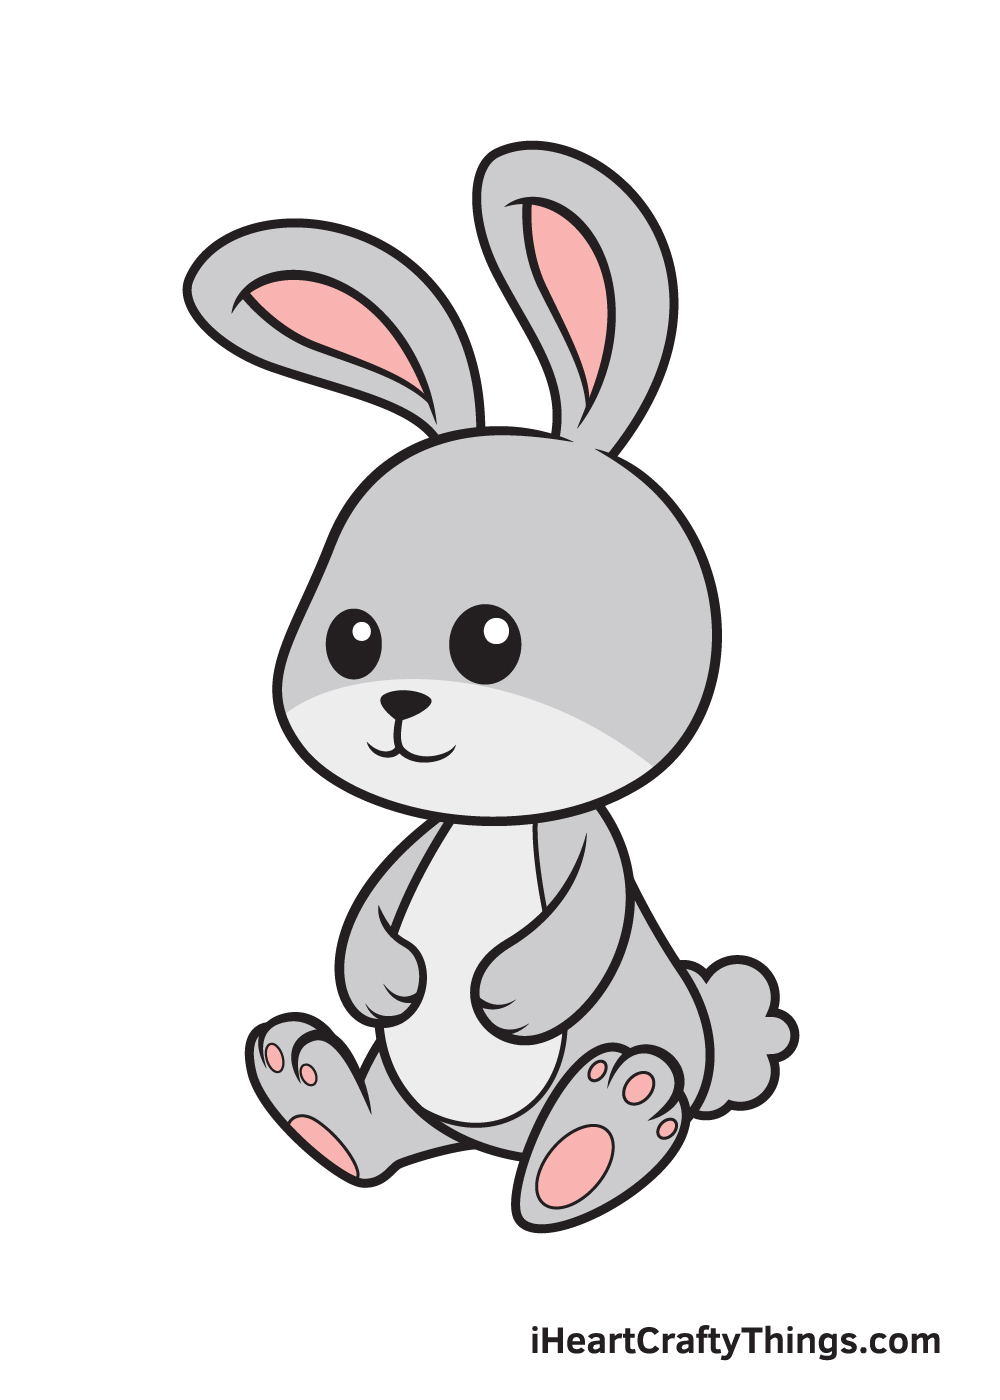
Finally, here is the most exciting part—filling in the colors for your awesome drawing! This is the part where you can show off your artistic skills and your ability to mix and match various colors.
Bunnies exist in a wide range of colors, with white, black, brown, cream, fawn, and gray being the most common. Some bunnies even have distinct patterns across their fur. This gives you a lot of color options to choose from when coloring your bunny drawing.
Don’t be afraid to experiment with different colors. After all, it’s your work of art! Remember, the sky’s the limit to your imagination!
Bonus: Change Some Details To Make This Bunny Drawing More Unique!
There’s no denying that the design in this guide on how to draw a bunny is really adorable as is. However, there’s nothing stopping you from putting your own spin on it!
This could be done in a few subtle ways, and we wanted to cover those before we get to the final step. Changing these details doesn’t mean you don’t like the design, it could just be a way to put your own spin on it.
It would also be handy if you wanted to add more than one bunny to this drawing, as doing so would allow you to have some unique bunnies.
We kept the face on this bunny nice and simple. This was done because it looks cute, but also because it would be easier for you to draw.
Another benefit of this is that it makes it easier to change the facial expression. This could be done in minor or major ways.
It could be as simple as making the eyes look in a different direction or having them drawn in a different style. Changing the shape of the mouth would also be something to try.
It could be to make it look like it is speaking, or to convey a different emotion. Additionally, you could move the arms and legs around to make it look like the rabbit is in a different pose.
Changing how long its fur is and other minor details like that would also be a fun way to make the rabbit unique while sticking to the design in the drawing.
Will you customize this bunny drawing or maybe add some friends for it to hang out with? Either way, we will be ready for the final step when you’re done!
4 More Ways To Make Your Bunny Drawing Unique
Find out how to make this adorable bunny drawing even better with these tips!
Adding a theme to a drawing is a great way to easily make it even better. Bunnies are often associated with Easter, so that would be a great theme for this bunny drawing.
You could do this by adding some colorful Easter eggs around it to create a stunning picture. If you were to do this, not only would you be able to create some amazing patterns but also add some vibrant colors.
What other themes could you create for this cute drawing?
This bunny sketch is already so cute, but it would be even cuter if you added some friends for the bunny!
If you follow the steps of this guide and change a few details, you could add some more bunnies to hang out with this one.
Or, you could add different animals drawn in a simple cartoon style to create a wonderful animal scene. What are some other animals you could add to this scene?
Another way to make this drawing of a bunny more unique would be to draw a background. There are so many possibilities to choose from if you want to do this that it can be hard to choose!
You could draw a background that you would imagine seeing a bunny in such as a field or meadow. Or you could create a bunny party by adding some rabbit-themed decorations and balloons.
If you can’t decide what settings to draw, you could make several different pictures showing some background variations.
Finally, you can make this bunny sketch more unique with the colors and art tools you use. We spoke a bit of how you could color this bunny in the guide, but there are so many fun and creative ways you could go about it.
You can try out different kinds of paints, pens and pencils, but you can use crafts as well.
For instance, you could use a small lump of cotton wool and some glue to give this rabbit a proper cottontail!
Your Bunny Drawing is Complete!
We hope you enjoy this step-by-step tutorial on how to draw a bunny. With this guide, you can surely draw and color a bunny along with its complex features and elaborate details in no time.
And the most fun part is, you can customize its physical features and play with various colors as much as you like! And while you’re at it, why not try using different coloring tools as well?
Once you’ve finished your masterpiece, we’re certain you must be feeling very proud of yourself—as you should be! Completing this bunny drawing is definitely fulfilling.
Make sure to show off your work of art and share it on our Facebook page and on Pinterest. We’re sure it looks amazing!
We can’t wait to see your colorful and intricate bunny drawing!
Here Is A Cute Bunny Drawing To Inspire You!
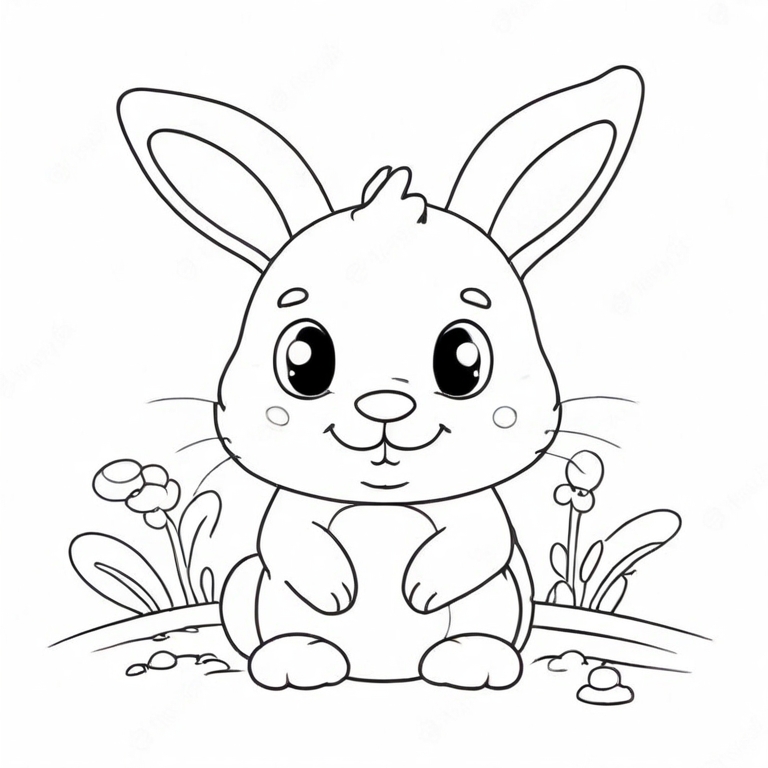
Bunnies are so adorable even in real life, and this cute bunny drawing for kids shows an even cuter version! This drawing was created to help you as you draw your very own bunny friend.
The bunny is sitting on its hind legs and looks very friendly and happy. There are also some pretty flowers and plants in the background, and these would be fun to color as well.
These small details make it look like a beautiful day outside, and so you could add even more details to build a background setting for this cute bunny.
Of course, you can also choose to focus on the bunny. This cute bunny sketch is drawn as inspiration, not something you have to replicate identically.
Hopefully, this drawing will help you as you work on your own version of this adorably cute bunny!