The letter R is a letter that is one of the most commonly used letters in the English language. It is also a strange one as the lowercase and uppercase versions of the letter are quite different from one another.
This can make it a bit of a headache for people first learning to write it, but seeing as we use it so much it’s definitely worth the effort!
You can probably write R with ease, but this guide will be based on how to draw a bubble letter R. This way, you will be able to make all sorts of cool designs with it!
We will guide you through the process in a way that is fun and easy, and then you will be able to add some of your own details and fun ideas to finish it off.
Now, let’s begin with the first step of the guide!
Let’s Get Started
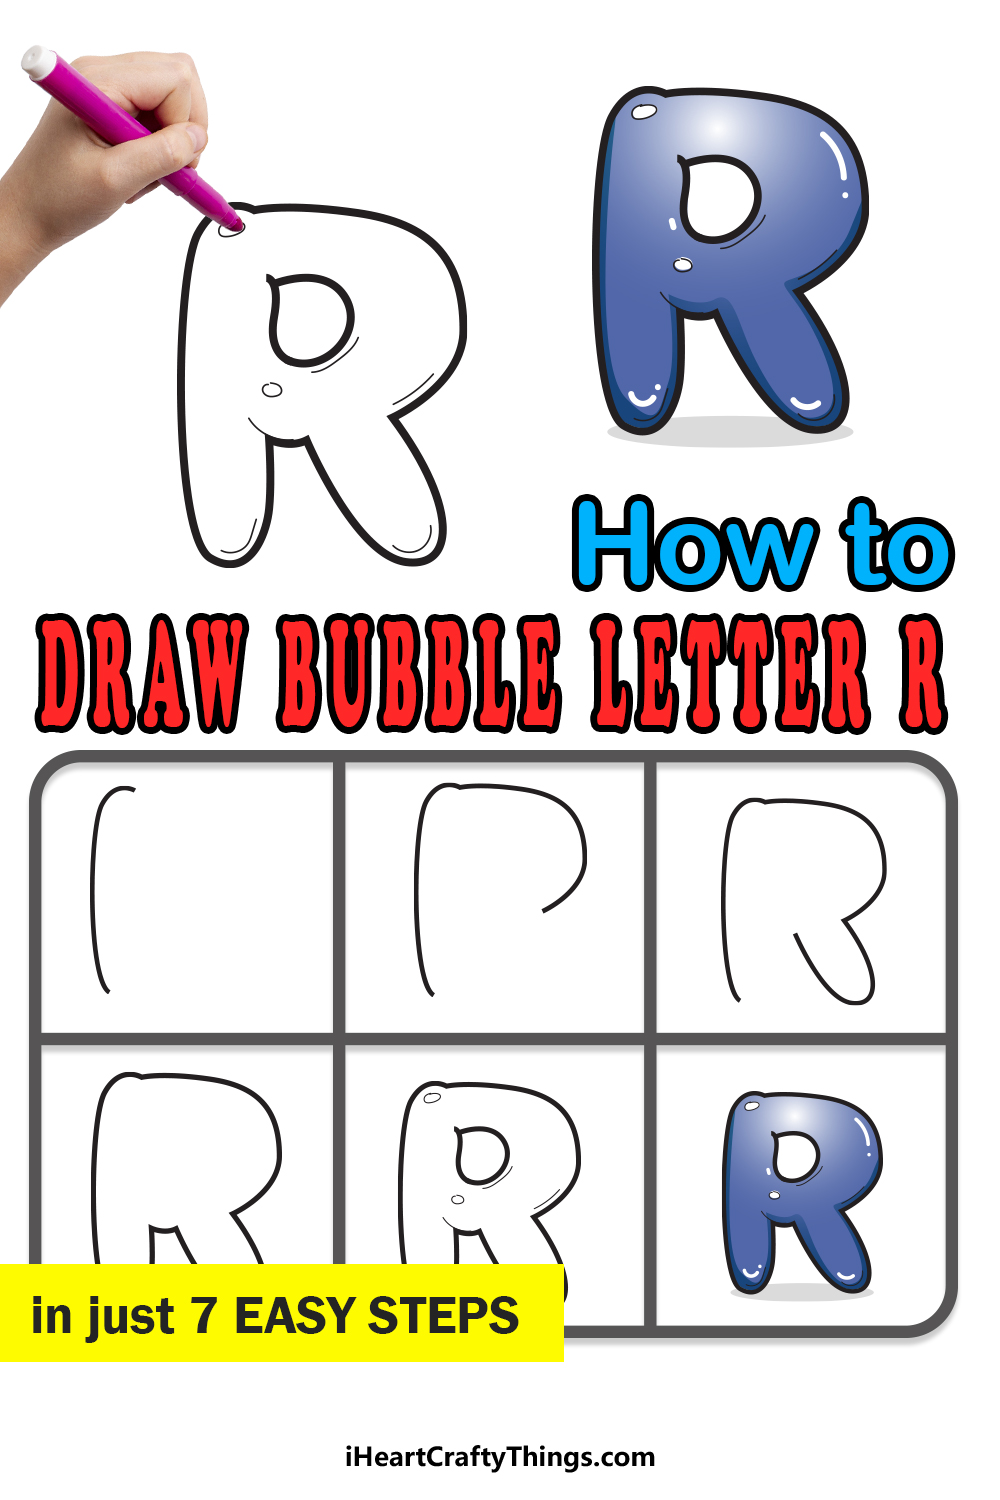
STEP 1:
Whenever we’re making a bubble letter version of a letter, we usually like to draw it out with a pencil first. This isn’t always necessary for easier letters, but R is complicated enough that we would definitely recommend it.
If you do this, using a pencil is the best idea, as you will be able to erase it when you’re done. Simply use your pencil to draw out a regular R shape and you can build the bubble letter around it.
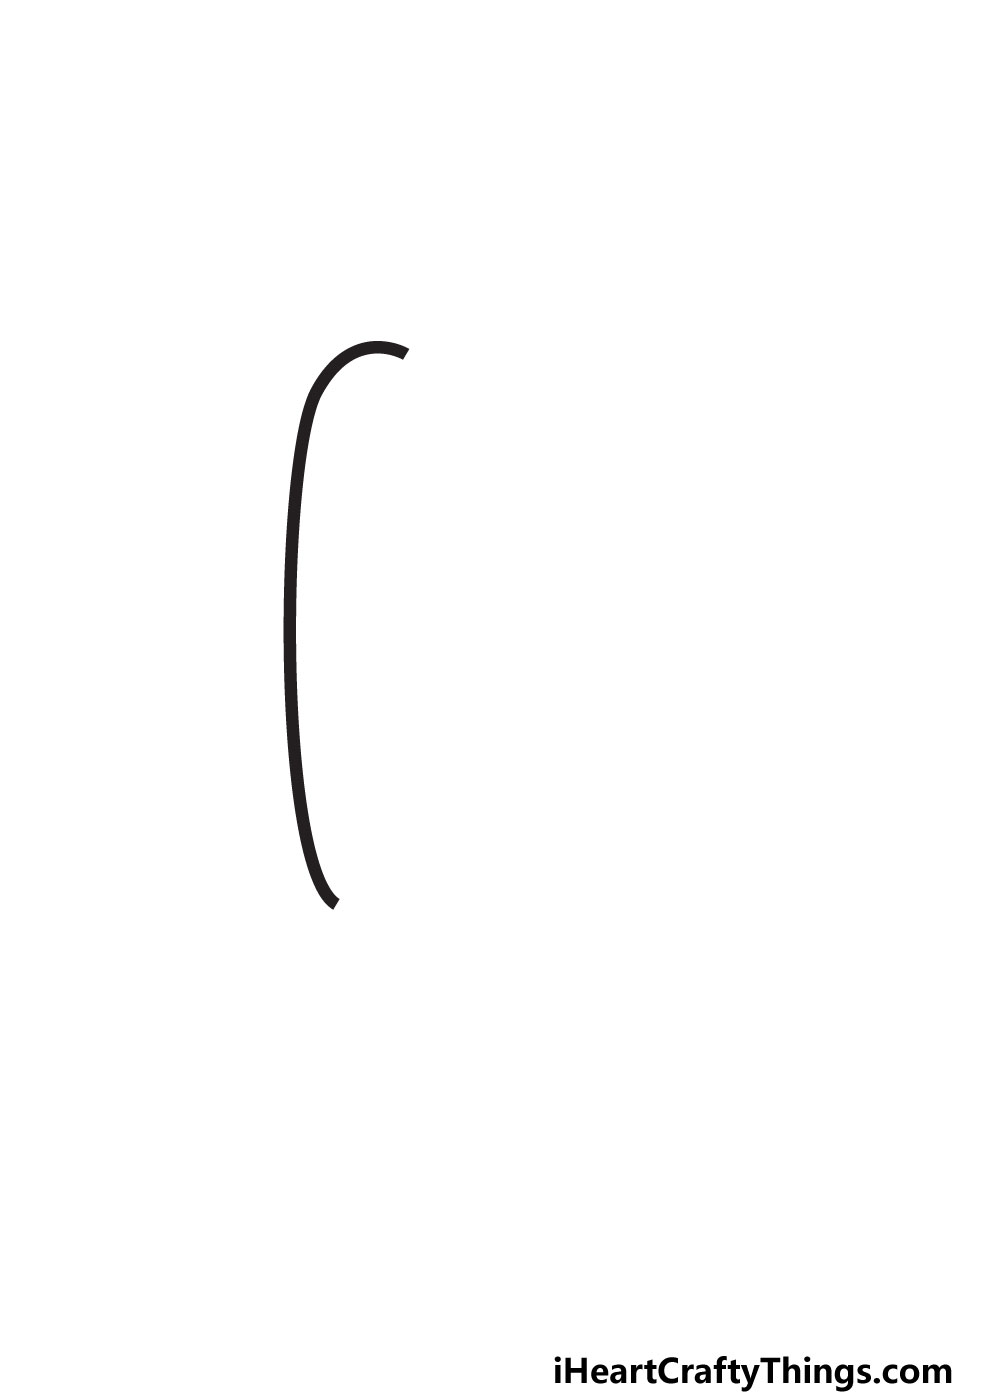
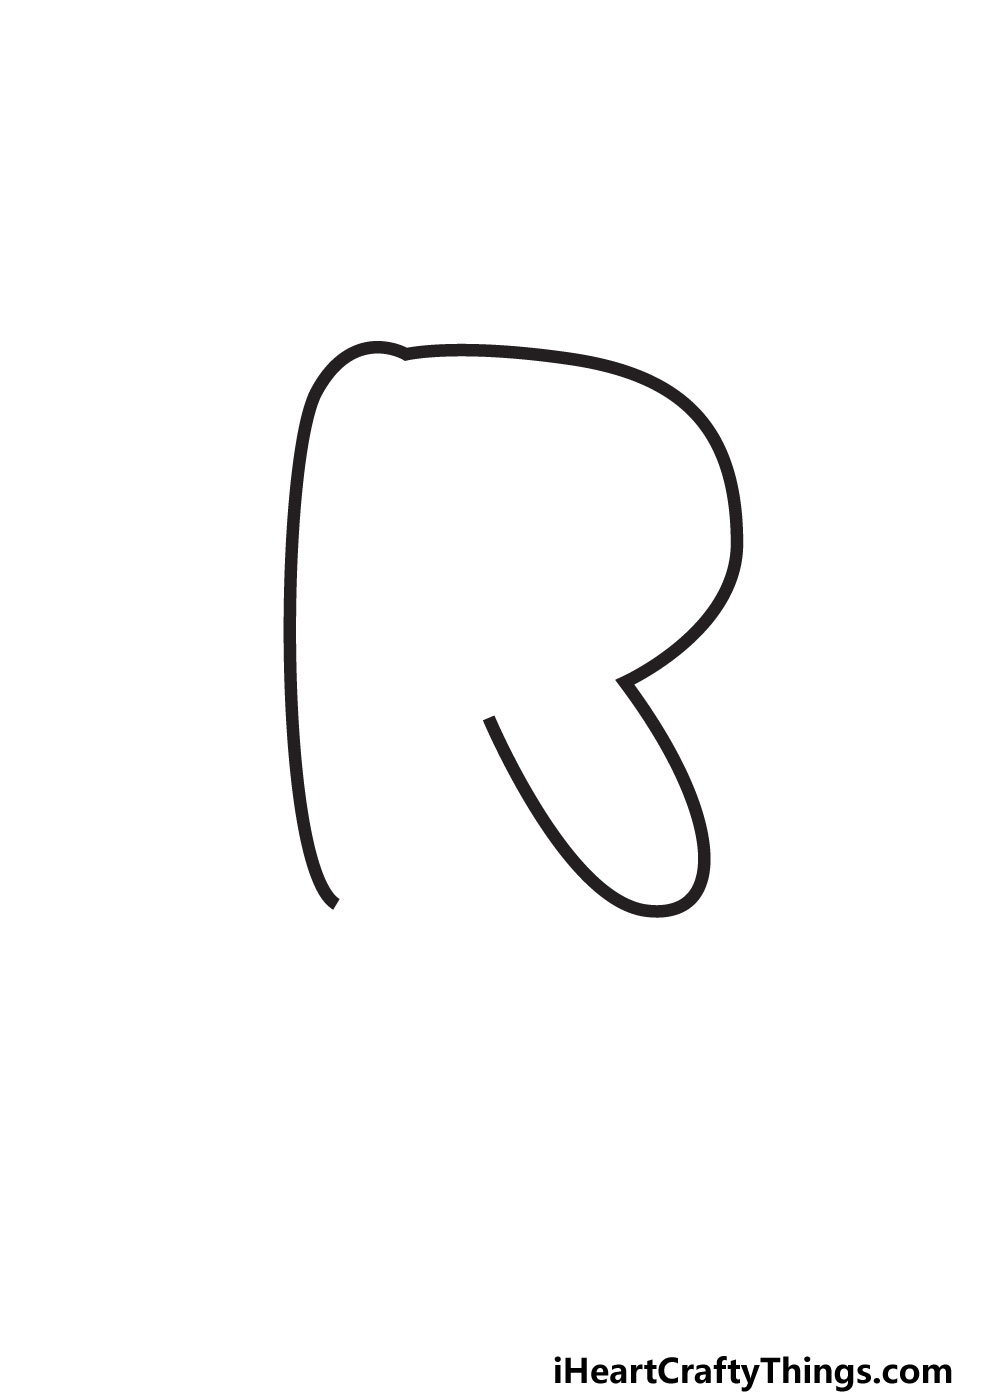
Now, we can draw the first actual line of the letter. This first line will form the left-hand edge of the letter.
Simply draw a vertical line that has a very slight curve to it. There will be a slightly sharper curve at the top of the line, as shown in our reference image.
Try to make the line as smooth and rounded as you can! Then, we can move on to step 2.
STEP 2:
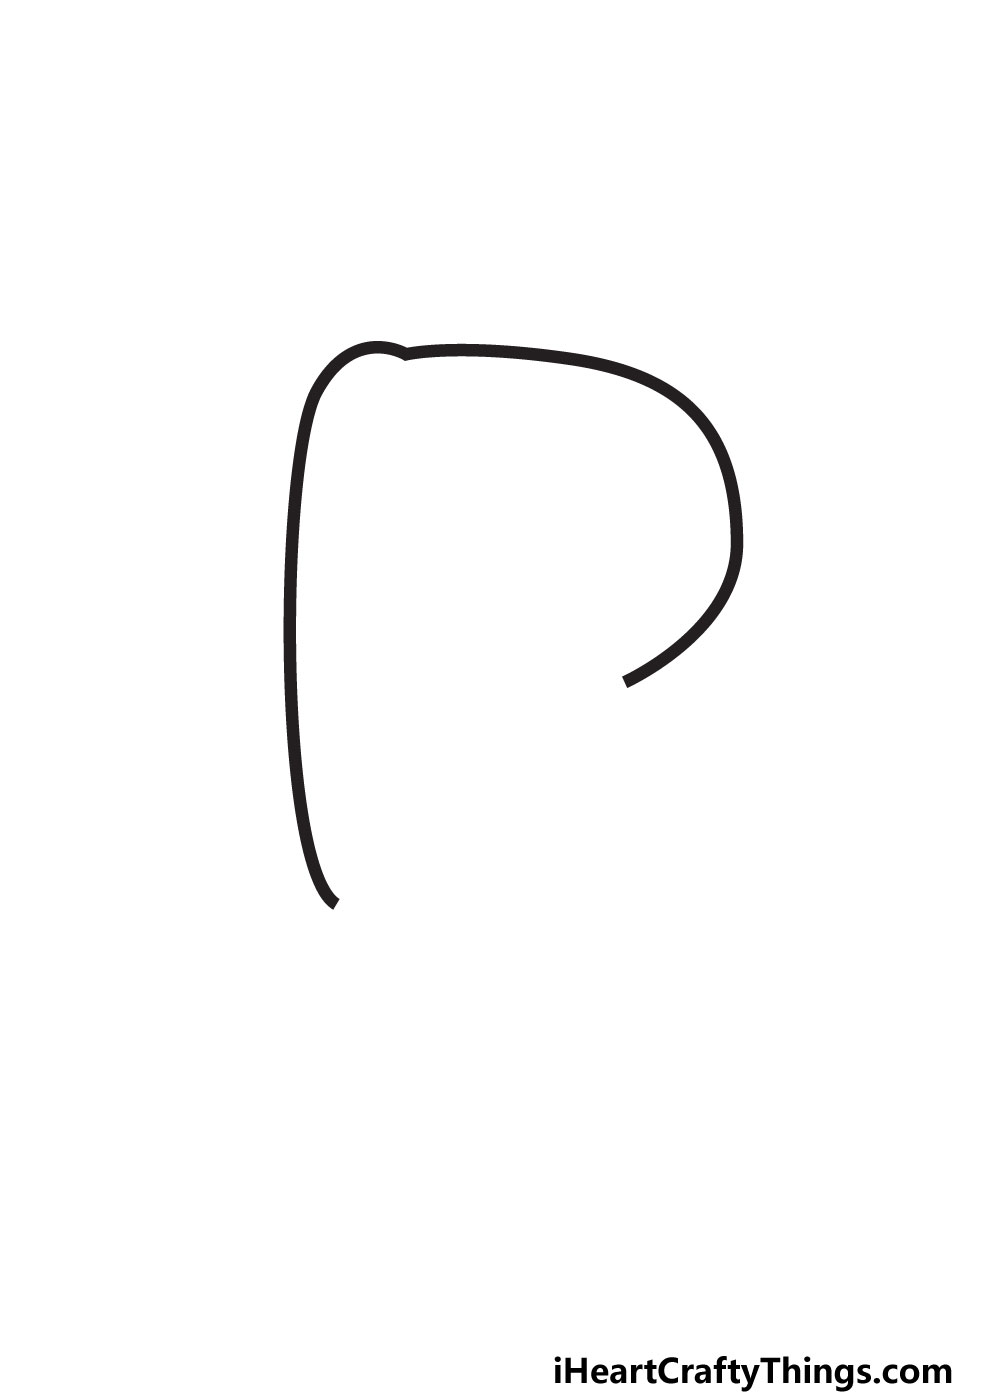
Now, we will be adding the rounded section on the right-hand side of a capital letter R. This will extend directly from the curved part at the top of the line from the last step.
The line curves quite sharply around and then down towards the center of the letter. Try your best to make it match our reference image as best you can!
Take note of the gap in the middle, as we will be adding more sections to that empty space in the next few steps.
With this part drawn, we will then be ready for step 3 of the guide, so let’s proceed.
STEP 3:
The next part of your bubble letter R looks a bit like the letter is sticking out a leg. It will be connected directly to the rounded line that we drew in the previous step.
You will see in our reference image that it is a shape that is drawn with a curved line that bends sharply at the end and then back towards the center of the letter R.
It may not look much like an R right now, but if you imagine it over a regular R then you will see where this is going!
We have one more space to fill in to finish the outline, and we will do that in the next step.
STEP 4:
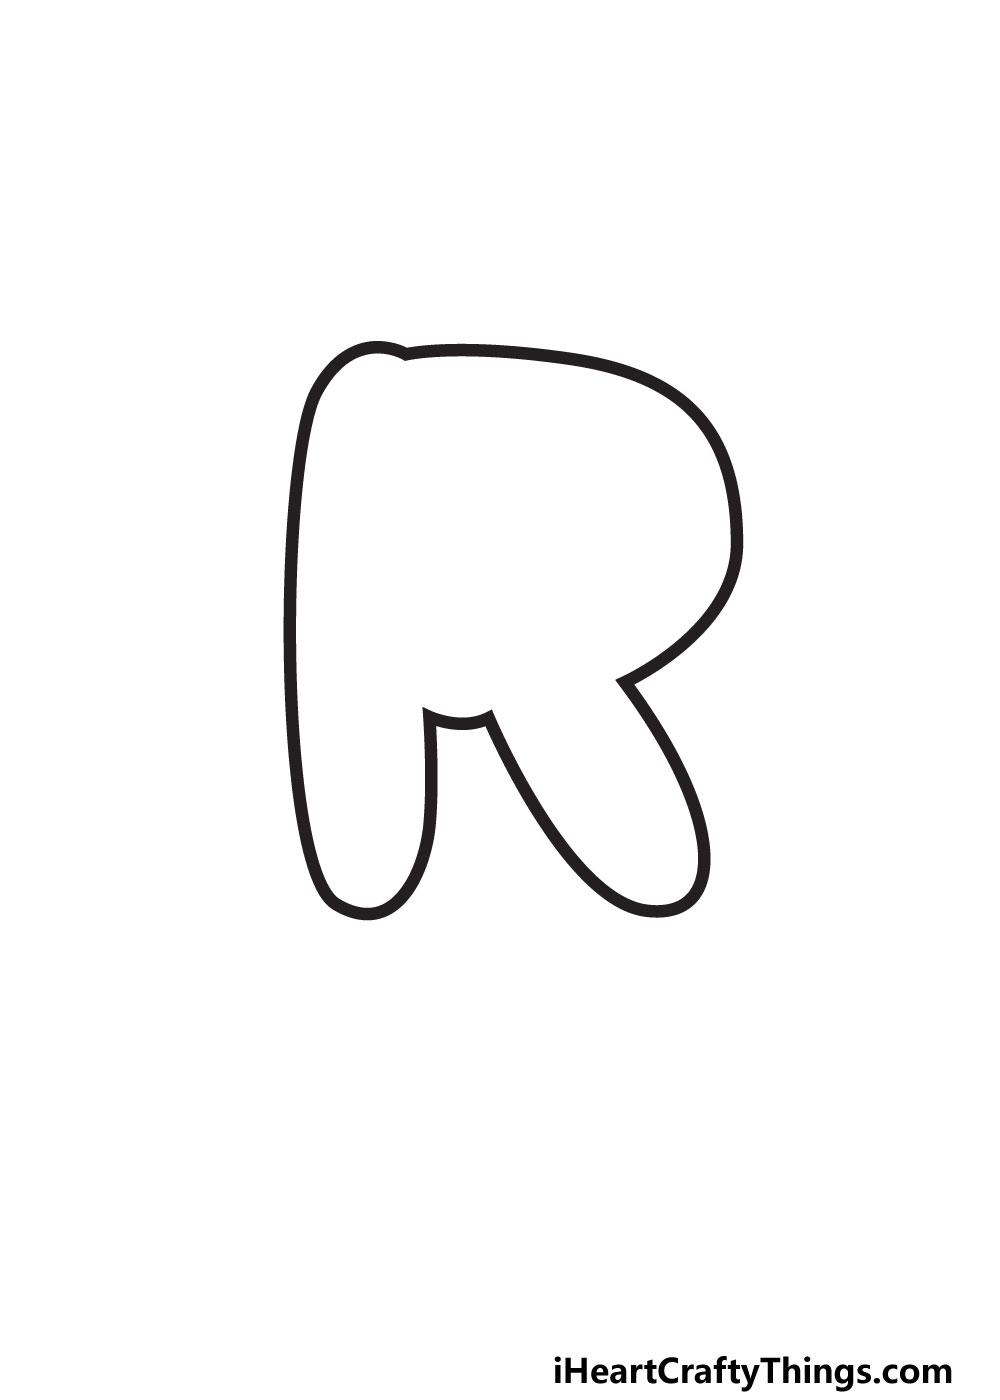
Now we’re ready to finish off the outline by adding two more lines to the image. The first of these will be a really small, curved line where the previous one ended.
This smaller line will be used to separate the two ‘legs’ of the letter. That second leg will be drawn using a slightly curved line connecting the gap that we now have left.
With that, you have your completed outline for your R! We’re not done with it yet, but you can safely erase any pencil lines you used for the outline now.
Be careful when erasing, as you may accidentally smudge or remove the final lines of the letter.
Next, we will add the hole at the center of the R in the fifth step of the guide.
STEP 5:
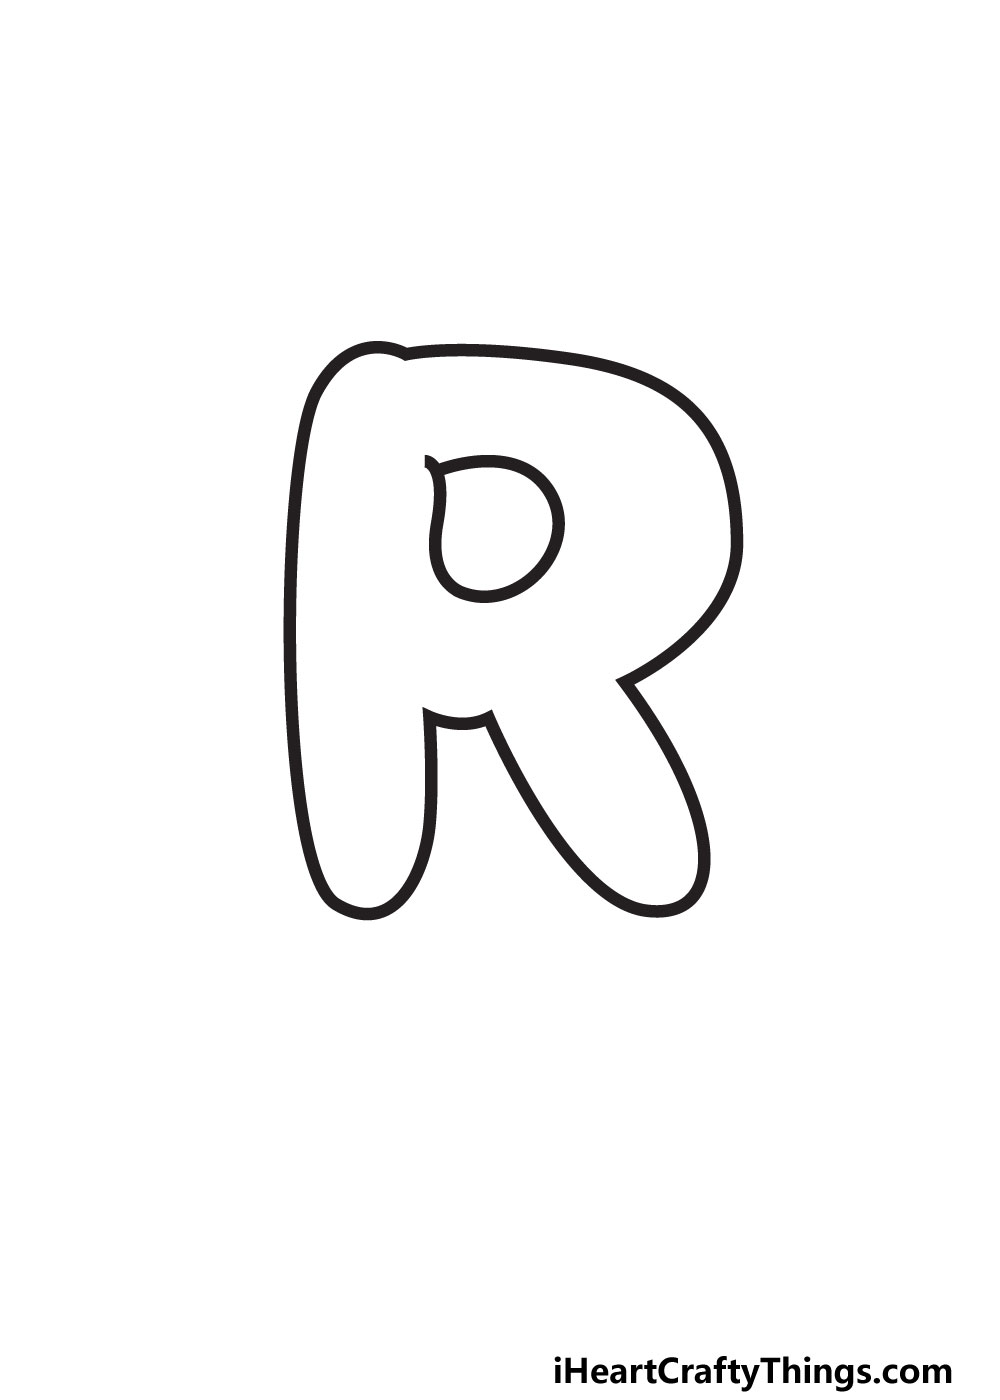
In the previous step, we mentioned that we will draw the hole of the R letter and we will keep to that promise!
If we were to draw a perfectly rounded shape for the hole, it would make it look less like a bubble letter and more like a flat shape on a page.
We want to avoid that, so we will use a special shape for the hole. It will be shaped a bit like a letter D that has a small line poking out from the upper left-hand corner.
You can closely refer to the reference image to make sure it’s positioned and shaped correctly. Now you can see the bubble letter R in all its glory!
The shape and design may be done, but we’re not done yet. The next step is going to be all about finishing off the bubble effect with some small details.
STEP 6:
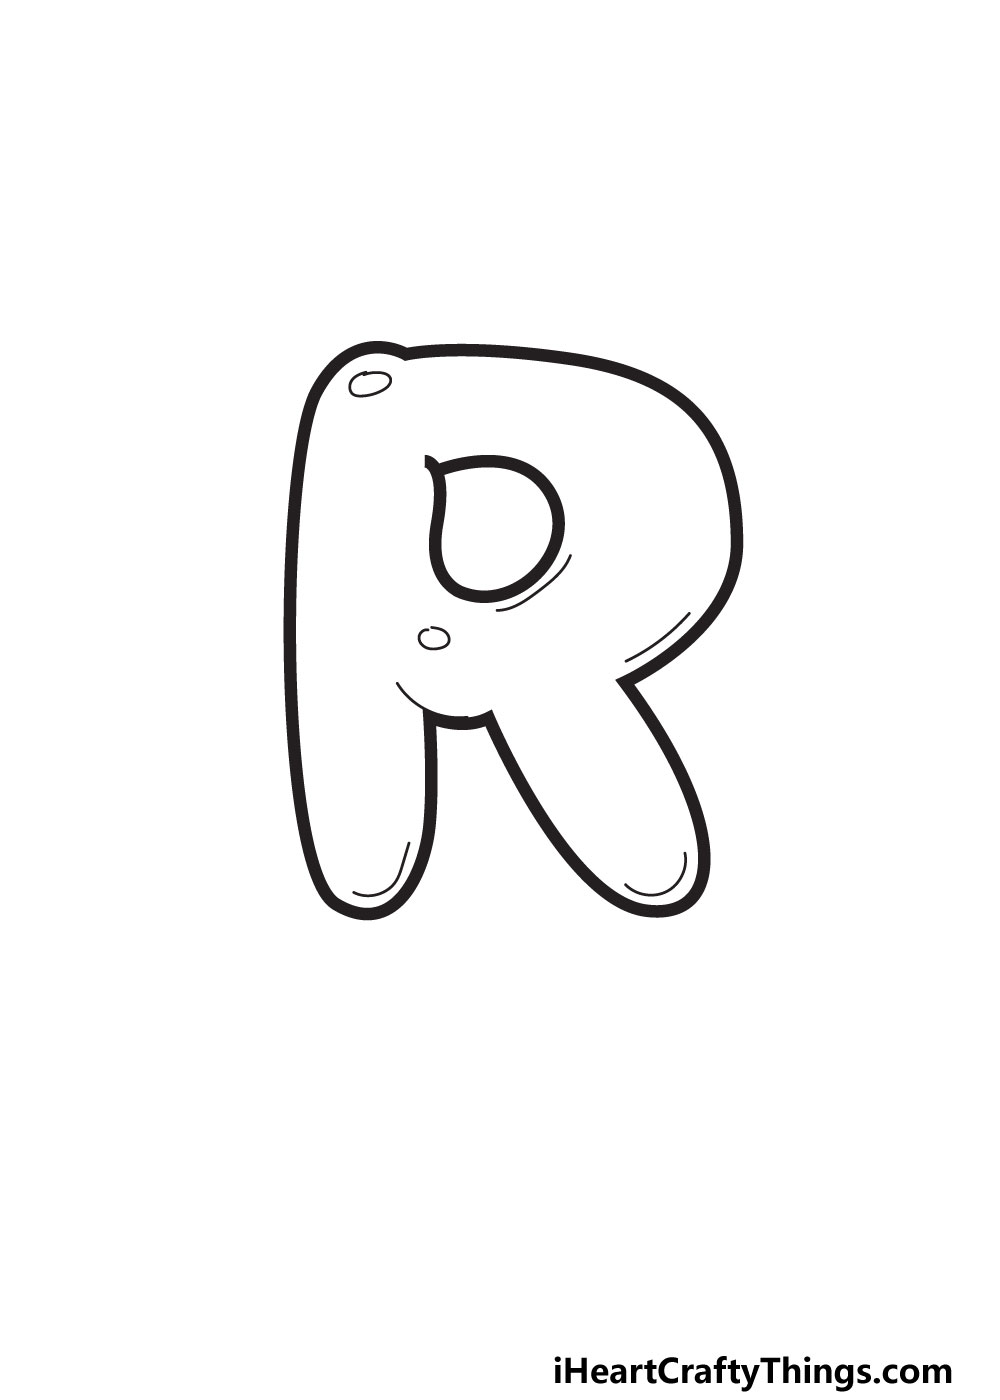
The letter R we have been drawing is, of course, flat on the page, but we can create the illusion that it is made out of a bubble or a balloon with a few simple details.
The first way we will do this will be by drawing some reflective spots on the letter. We added one on the upper left-hand corner and one near the center of the letter.
They are lined up with each other to suggest a single light source shining on the letter. Then, we will add some lines inside the letter near the outlines.
These lines will make it look like the letter is filled with air that is pushing out against whatever the letter would be made of.
It’s a simple touch, but it really helps to give the letter some depth and volume, even though it is flat on the page.
Feel free to add more of these lines in different places as well! You can also add other fun details to the design or draw elements around it to make it more unique.
When you’re ready, we will move on to the final step where we will color in your creation.
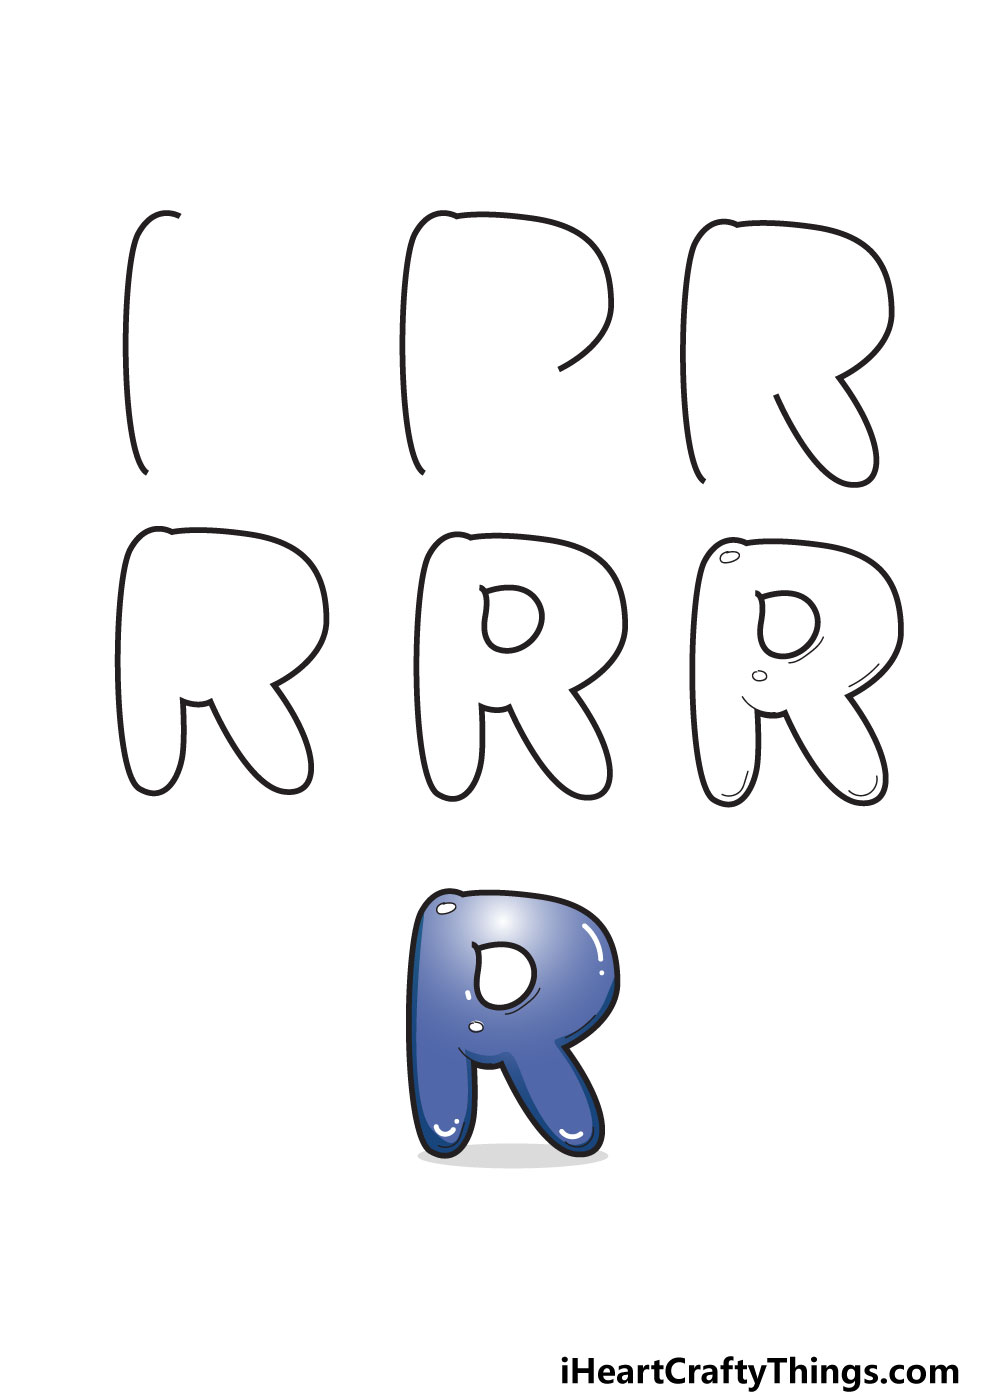
STEP 7:
Now all the most difficult parts of this design are complete, we can have some fun coloring it in! This is a step where we want you to feel free to be as creative as you like.
In previous steps we suggested following the guide closely, but here we think you should try out some of your own choices and ideas.
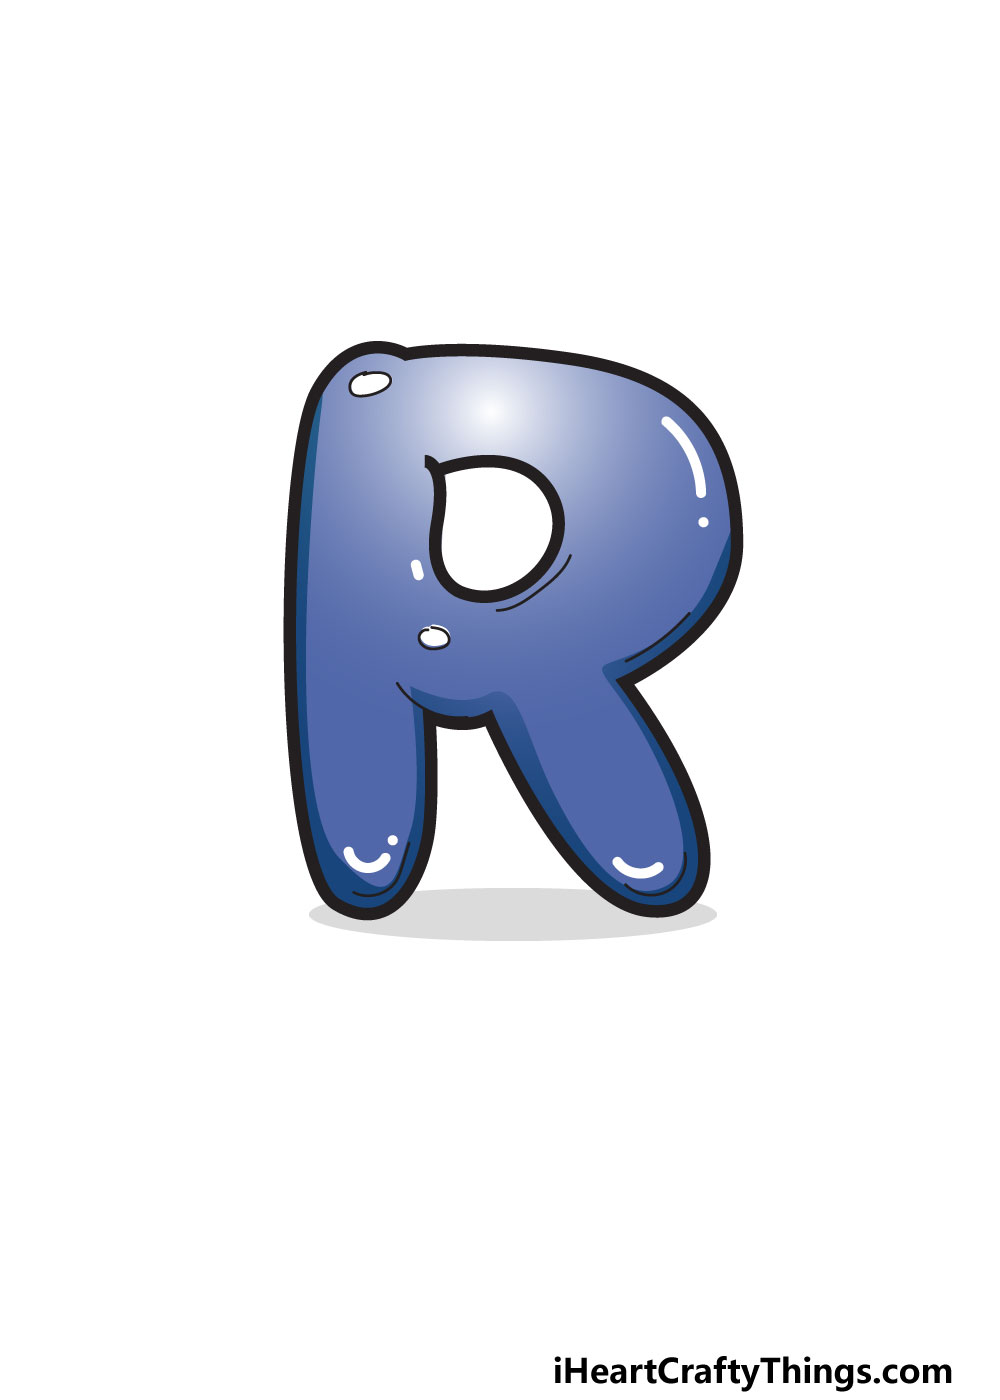
For our example, we went with a nice dark blue color scheme for the letter. We didn’t just use one shade though, we made it lighter and darker depending on the section of the letter.
You’ll see that the colors are lighter close to where light is reflecting on the letter and darker elsewhere. This is an effect you can replicate no matter which colors you use.
It will be the final aspect that will make this letter look more like a bubble, and it can make a big difference!
Of course, you don’t have to stick to just one color. Instead, you could add a rainbow of colors and incorporate different coloring tools and techniques.
This is your chance to show off what you can do, so be sure to have fun with it and see what happens!
My Final Tips To Make Your Bubble Letter R Drawing Even Better!
Before you wrap up this drawing, we wanted to give you a few more ideas for how you can make it even more special and unique.
When it comes to drawing bubble letters, we always think it’s fun to think of some words that start with the letter.
For a few examples here, there are words like rat, railway, rabbit or raccoon. Once you have chosen your word, you can then make the letter themed around it.
For example, if you chose the word rat then you could draw a cartoon rat and make it look like the letter is made out of cheese.
That is a simple yet fun example of how you can make this drawing more thematic. We also like to write out names using this bubble letter style.
If your name starts with R or you know someone whose name does, you have the perfect place to start! Names like Robin, Reagan and Ronald are some examples, but you can probably think of many more.
If you do know someone with a name starting with R, you could write out their name and give it to them as a gift!
These ideas will get you started, but what else could you create with this letter?