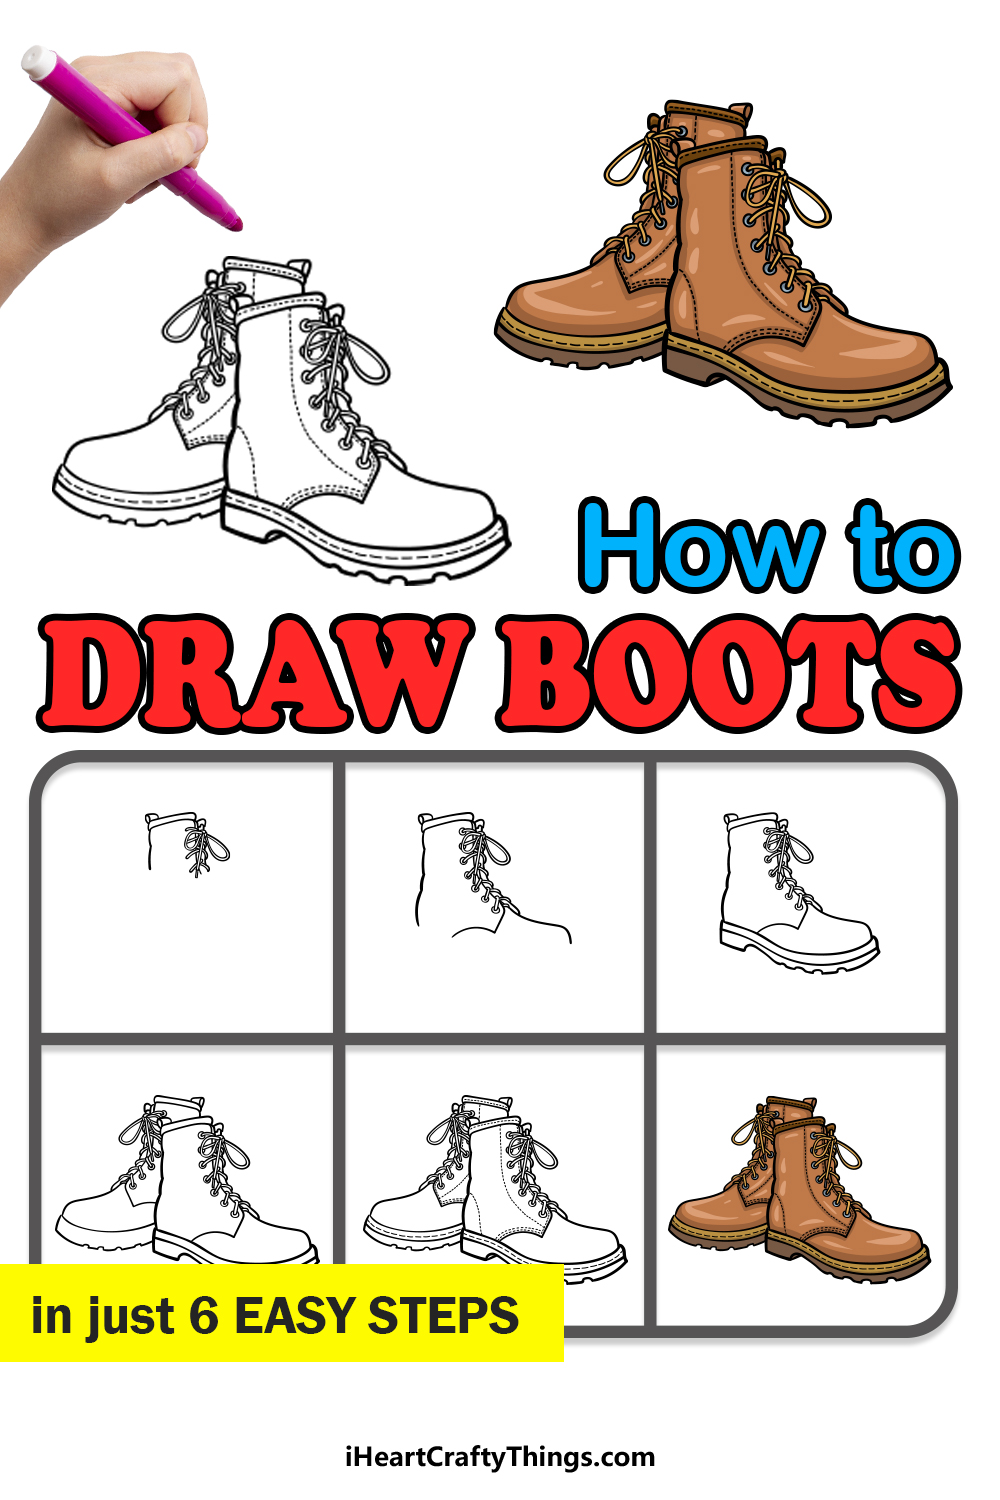
Find out how to draw boots by following this intuitive guide for kids! By the end, you will see how to make a detailed depiction of this durable footwear.
Boots have been around for many years as a way to protect fragile feet from the many hazards the ground has to offer. From cowboy boots to construction footwear, there are so many different kinds of boots.
There are many reasons why you may want to draw boots, but they’re actually quite challenging to depict. You need to get the shape and details right which can make it too tricky.
This guide aims to make it much easier as I show you everything you need to do in order to make your drawing. It will be a lot of fun, so let’s begin the first step!
Watch How To Make Your Boots Drawing
How to Draw Boots – Let’s Get Started!
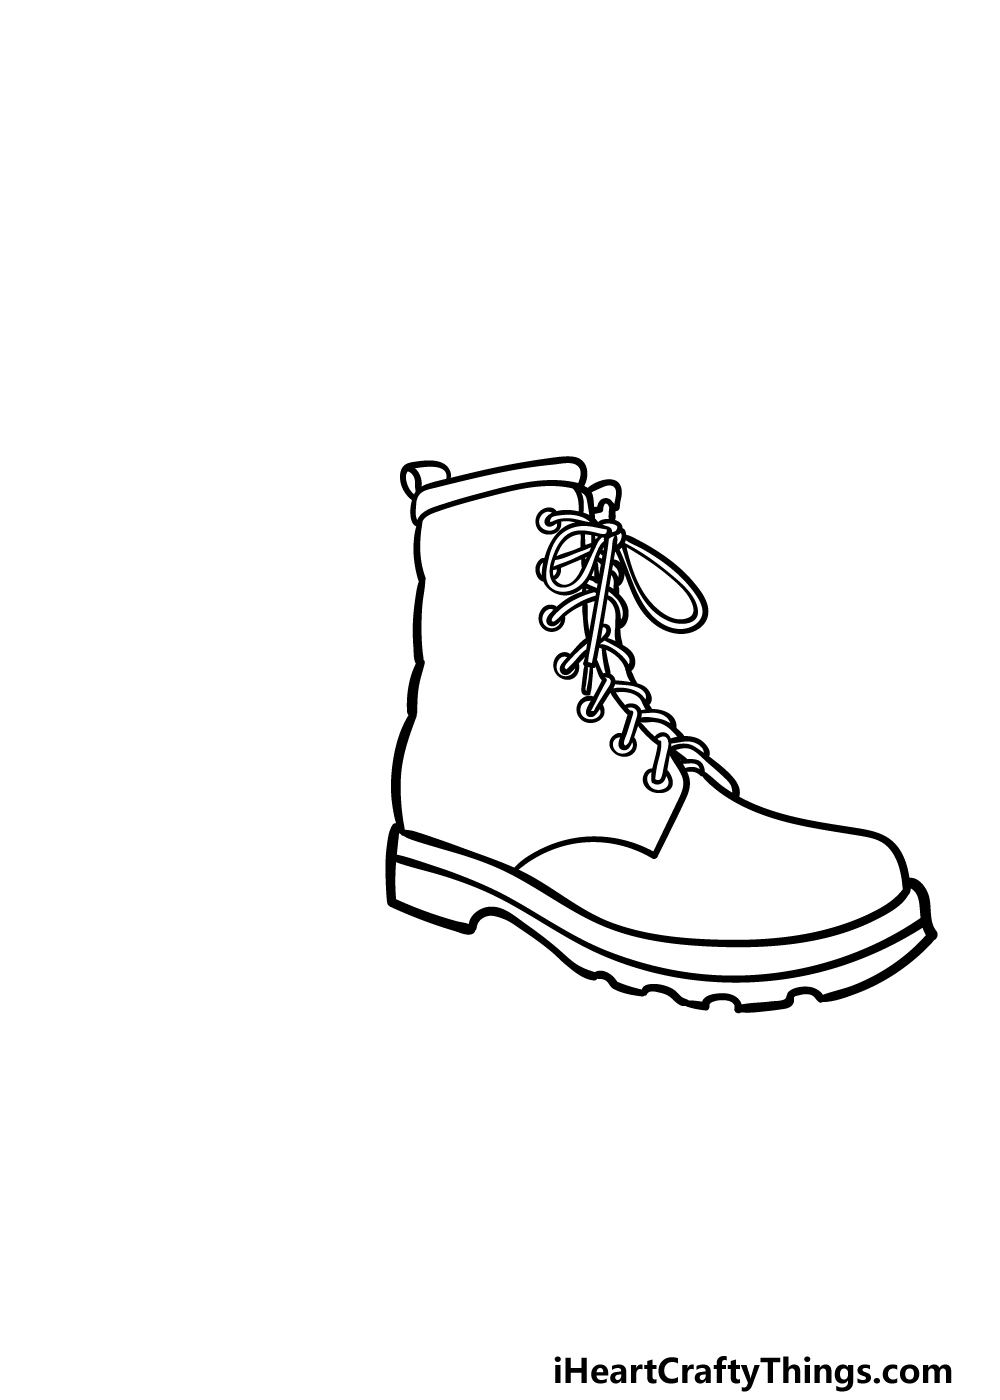
Step 1
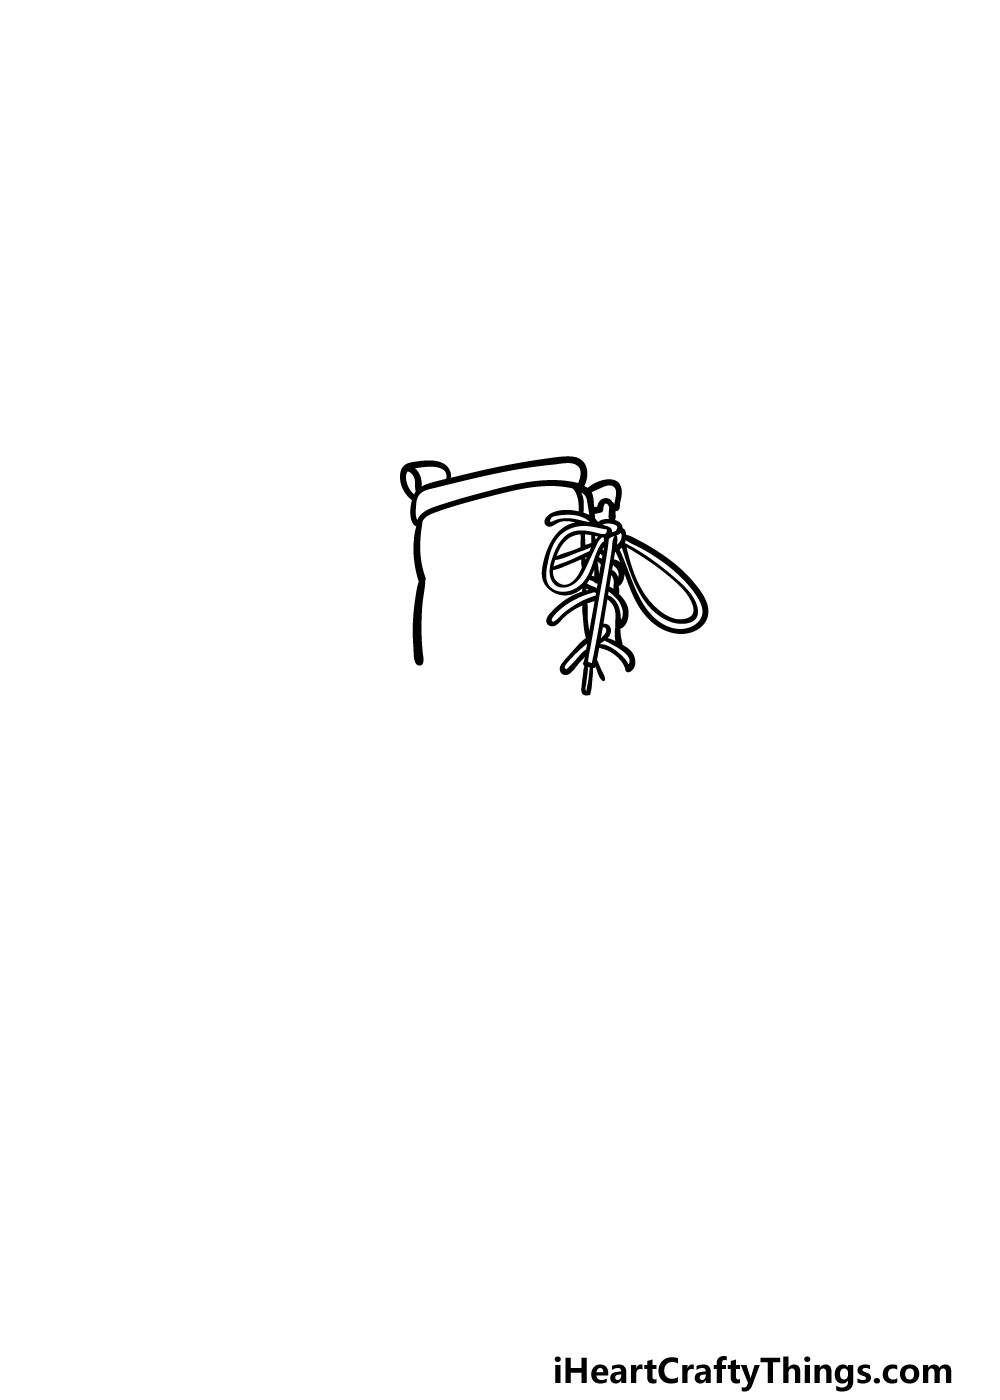
We will begin this guide on how to draw boots with one of the trickier aspects of the image.
These will be the laces on the neck of the boots, but before we add those we will first draw the neck of the boot.
Use some smooth, slightly curved lines for the rim at the top of the boot, and then extend a line down for the back of the boot.
Then, we will be drawing those laces. When drawing these, you may want to use a pencil while closely following the reference image to start with.
Once you have the laces looking as they do in our example, we will be ready for the second step of the guide.
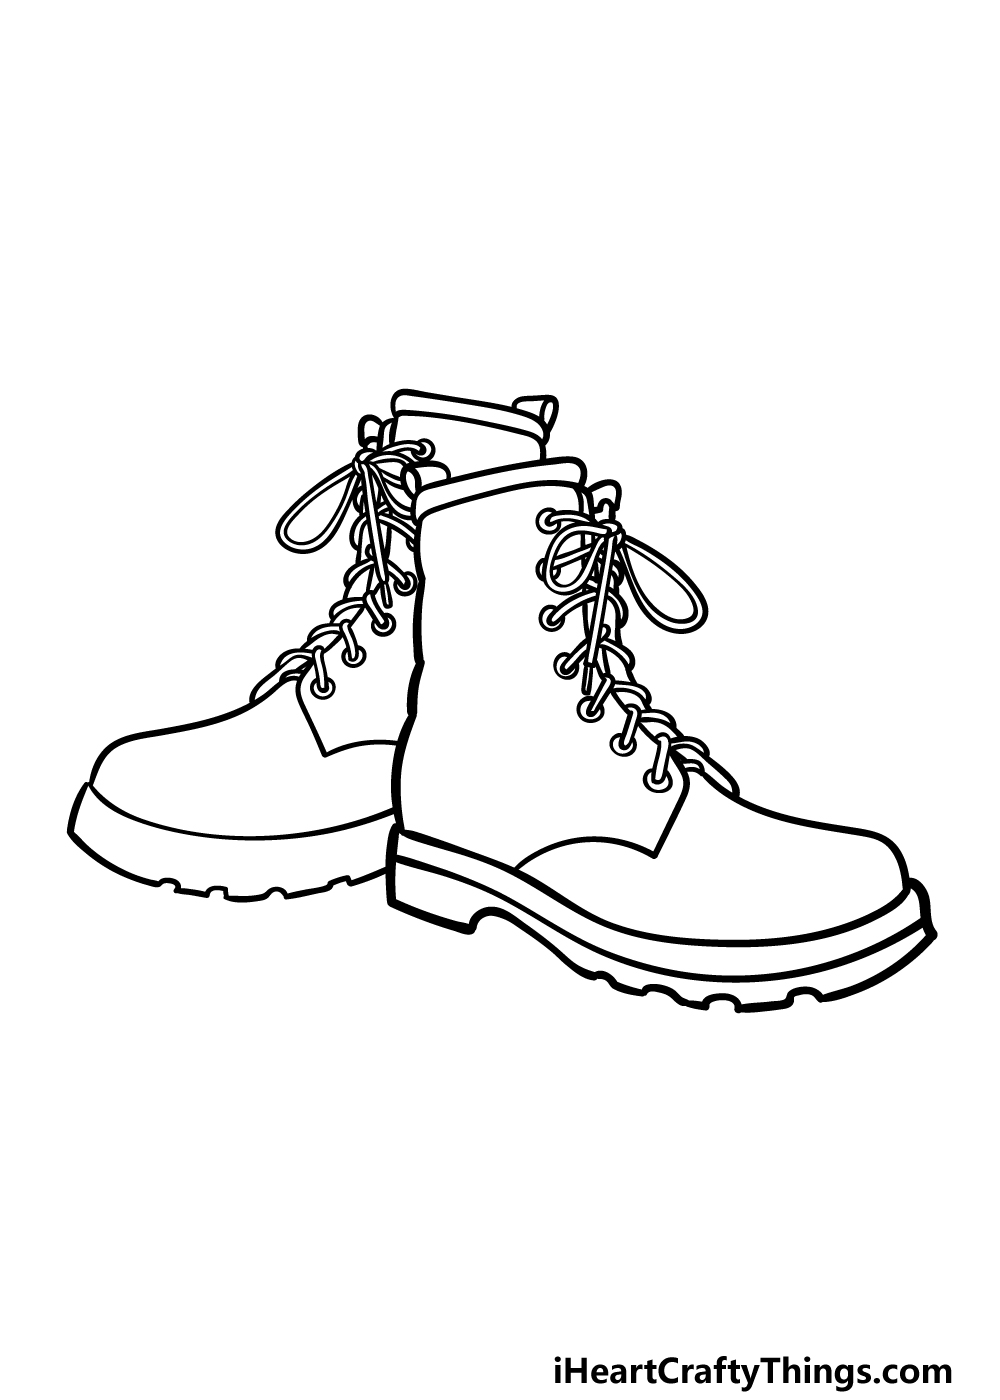
Step 2 – Now, start drawing the next section of the boots
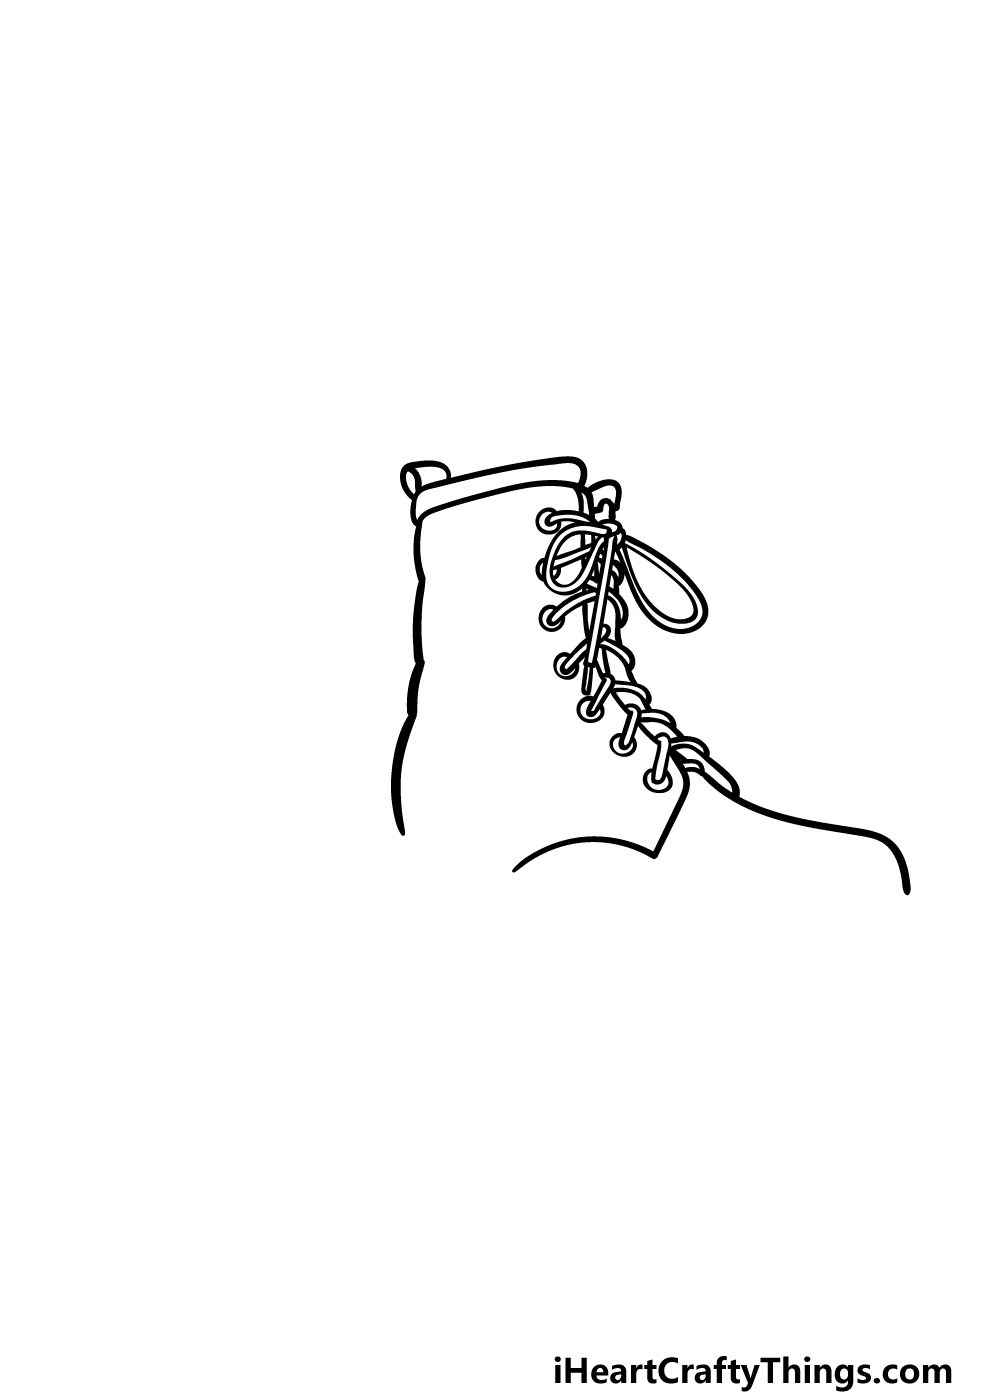
This second step of your boots drawing will see you adding the next section of the boot body and the laces. First, extend the back of the neck of the boots down further.
Then, we will be adding more rows of looping laces. You can also draw some small circles around the areas where the laces loop through the boots.
These will represent the small metal rings that add some durability to the lace holes on the boots.
That’s all there is to it for now, and then we can proceed to step 3 to continue this drawing.
Step 3 – Draw the base of the boots in this step
For the third part of this guide on how to draw boots, we will be drawing the thick base of the shoes.
These soles will usually be very thick to prevent the feet from any sharp or dangerous objects on the ground.
First, use some curvy lines underneath the boot for the top of these thick soles. Then, we will be drawing the base of the soles.
These will be drawn using some more jagged lines, as the base of the soles needs to be a bit more textured to provide traction for the wearer.
Once this sole is drawn we can move on in the guide.
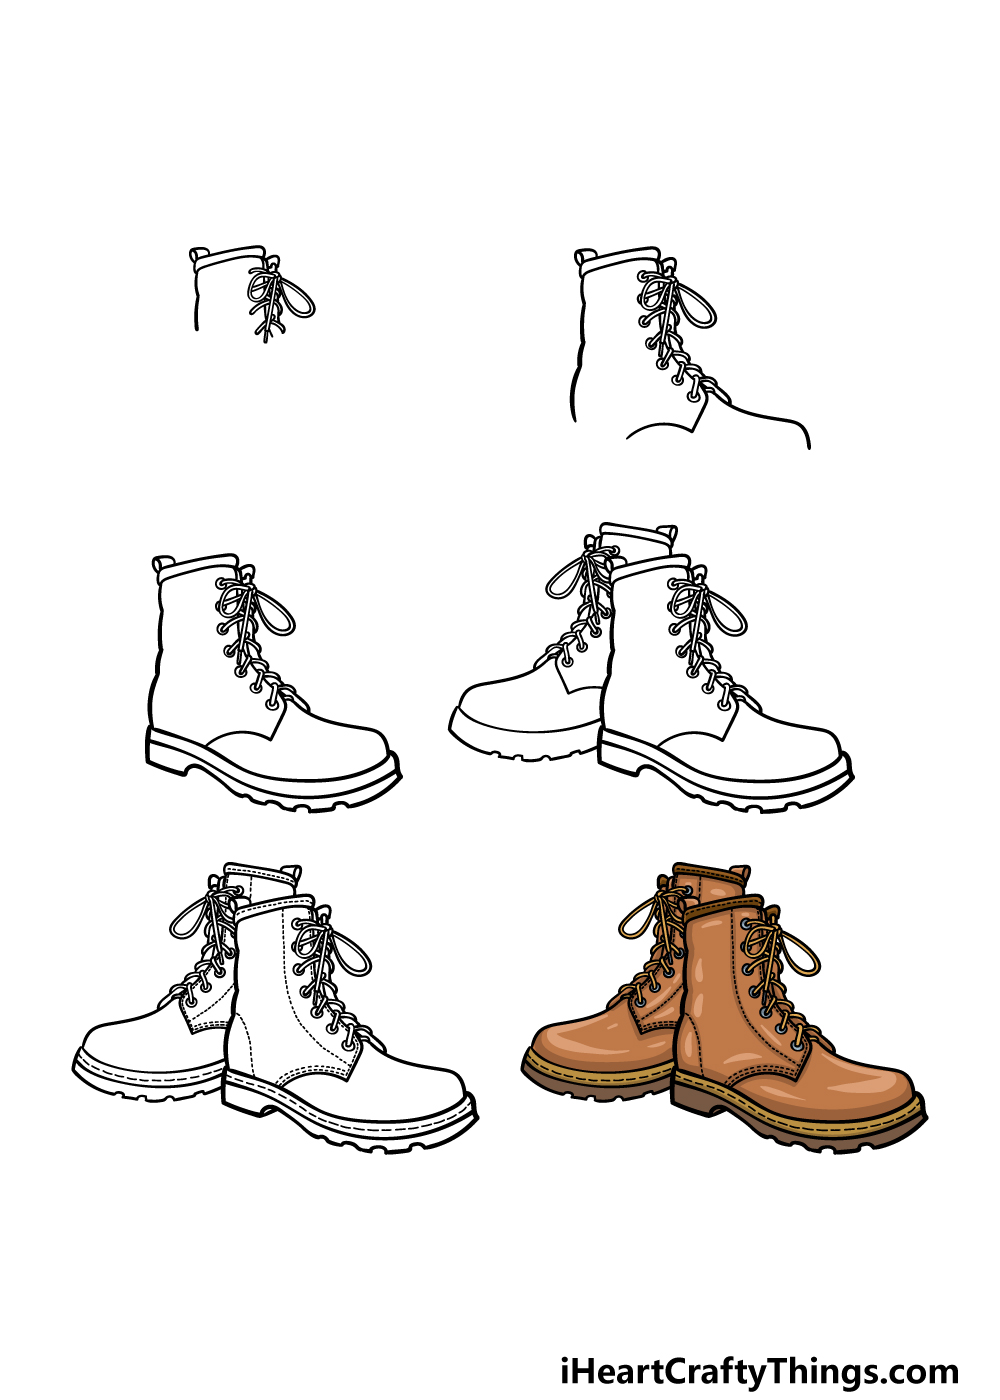
Step 4 – Next, draw another boot
We will be adding a second shoe to your boots drawing in this fourth step. When doing this, you will be doing everything that you learned in the previous step except in reverse!
This second boot will be facing the opposite direction to the first one, but otherwise it will look identical.
Simply draw the neck of the boot with the laces and other elements as you did for the previous one.
Once this second boot is drawn, we will then be able to add the final details as we proceed to the fifth step of the guide, so when you are ready let’s move on!
Step 5 – Add the final details to your boots drawing
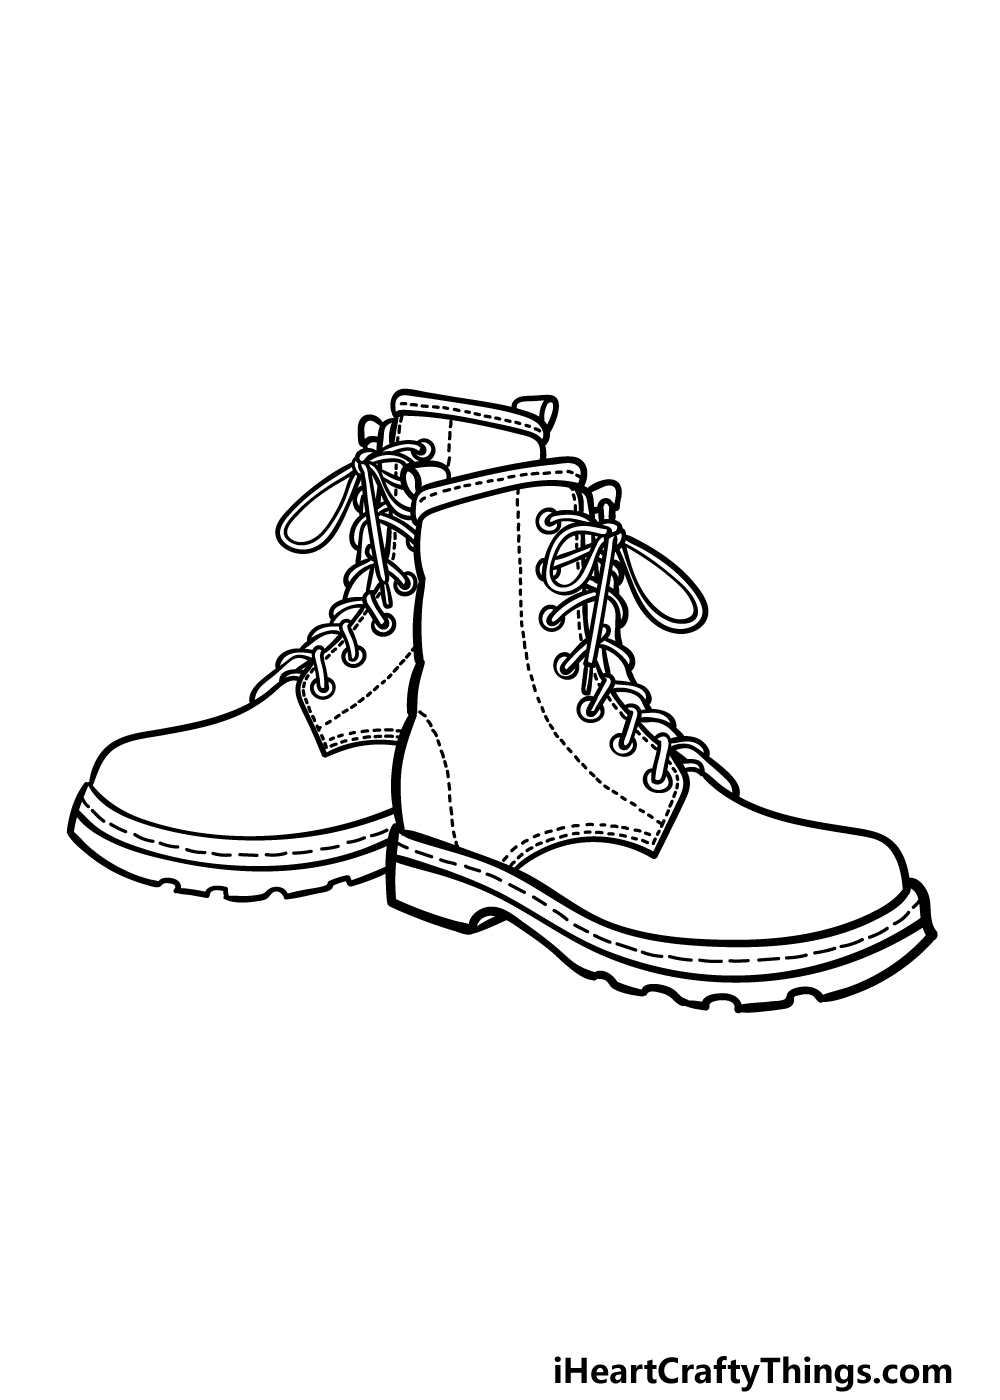
Both of the shoes have been drawn, and now we can add some final details in this next step of our guide on how to draw boots.
Most of the details we will be adding in this step will be fairly minor, but they will help with making the boots look more realistic.
First, add some small lines to the rims and the sides of the boots to show the stitching holding them together.
You can also add some of these small lines along the base of the shoes. Once you have drawn these details, you can also add some extra details of your own.
You could draw your own background to show what kind of setting these boots are being stored in.
What other objects or articles of clothing do you think would be stored with these boots?
Step 6 – Finish off your boots drawing with color
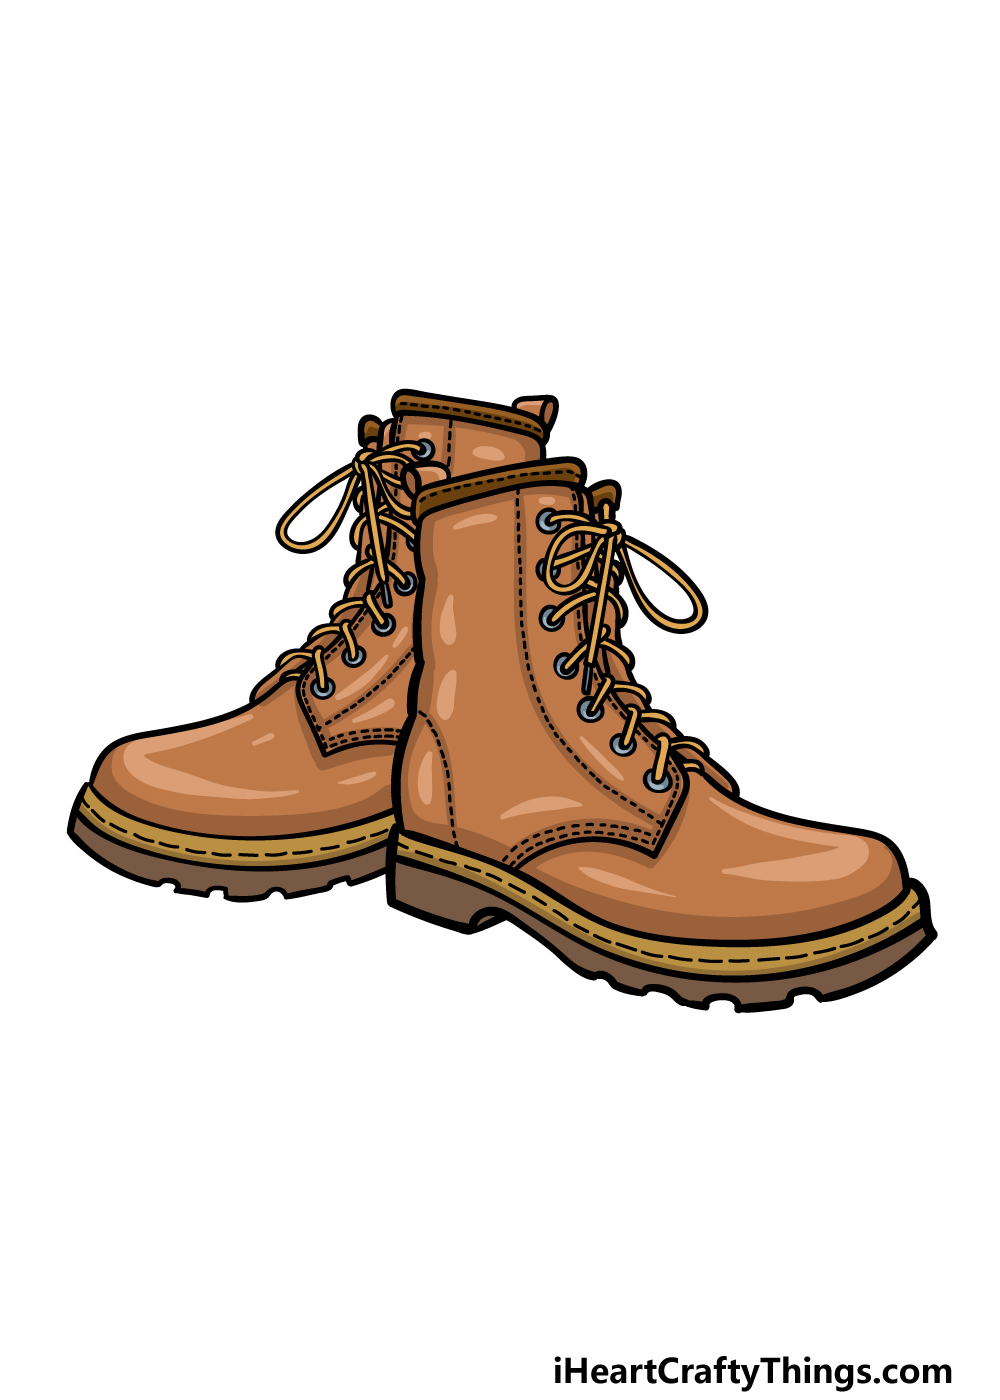
Now it’s time to finish off this boots drawing with some colors. Boots are usually designed to be very durable for harsh conditions, so they will usually be made from tough substances such as leather.
This is the look that we went for in our example image.
We used various shades of browns for the boots to give them that leathery look, and you could go for some similar colors if you would like a similar style for your picture.
While these are certainly some colors you can use, you could also go for some entirely unique color choices you may prefer!
Which colors, art tools and mediums do you think you will use to complete this image?
Here’s how you can make your boots drawing even better…
Find out how you can easily make your boots sketch even more amazing with these tips!
Boots are used to keep our feet safe from all sorts of harsh environments. You could tell a story of where these boots have been by adding some subtle details!
For example, maybe these boots were just used to walk through some thick mud. You could show this by adding some mud details on and around your boots drawing.
What other substances could you show that these boots have trekked through?
Boots such as these will often be used with other items of clothing for maximum protection. You could add some of these to your drawing of boots!
For instance, maybe these boots were used by a worker on a construction site. If that’s the case, you could draw a hard hat and maybe a vest near to the boots.
That’s just one idea we could name, but there are sure to be many different objects you can think of that you could put around them!
A more blatant way you could show the environment these boots are in is by drawing the environment! This would be done by adding a background to your boots sketch.
Using some of our previous suggestions, you could have a muddy forest or maybe a snowy hill as a few examples. If you went with a certain kind of theme for your other additions, then the background could tie into it as well!
What are some background ideas you can use for this picture?
You can then tie all of these tips together with the right colors and mediums for your boots drawing. Art mediums can also be used to achieve various purposes.
For example, say you want to create some mud on the boots. You could use some thicker brown paint to make it look like the mud has a bit of a 3D texture!
Also, if you wanted to create a more leathery look for the boots you may want to use softer mediums like watercolor paints.
Your Boots Drawing is Complete!
That brings you to the end of this guide on how to draw boots! Even though boots are such a practical type of footwear with no frills, it can still be rather tricky to learn how to draw them.
Hopefully this guide helped to show you how easy it can be when you know what to do!
When you have completed the guide, remember that there are loads of ways that you could go about adding your own spin to the image.
These could include drawing extra details, adding new elements or by getting creative with your colors and art mediums.
Then, you’ll be able to find your next great drawing guide on our website. We have loads of awesome guides to try out, and we plan on bringing out many more soon.
Stay tuned for all of the awesome drawing content we have in store for you!
We would also love to see how you finished off this boots drawing, so please share the finished product on our Facebook and Pinterest pages for us to see!