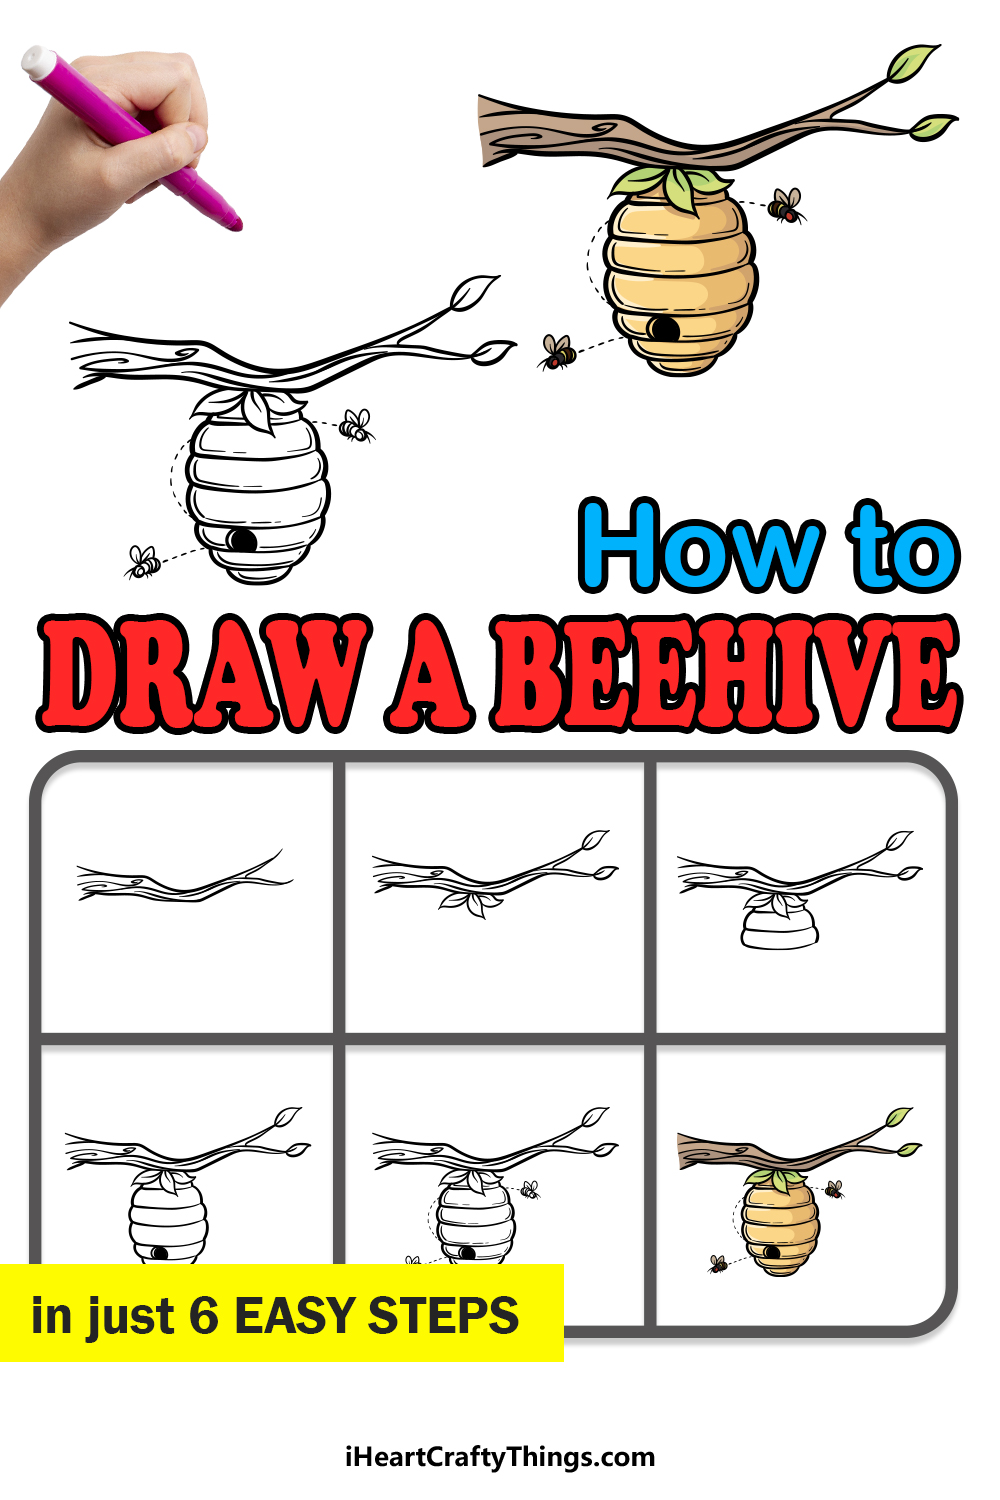
Learn how to draw a beehive! This easy guide will walk you through drawing a cute, cartoonish beehive on a tree branch, step by step.
Beehives are the iconic home of bees, where all the buzzing activity happens. Whether you’re sketching for fun or creating bee-themed art, this tutorial is perfect for you.
Forget any tricky details—just grab your pencil or a permanent marker and start drawing a classic beehive shape. You’ll be creating a simple but charming beehive in no time. Perfect for nature lovers, kids, or anyone wanting to add some bee magic to their art!
Watch Me Draw This Simple Beehive: Quick and Easy Guide
How to Draw A Beehive – Let’s Get Started!
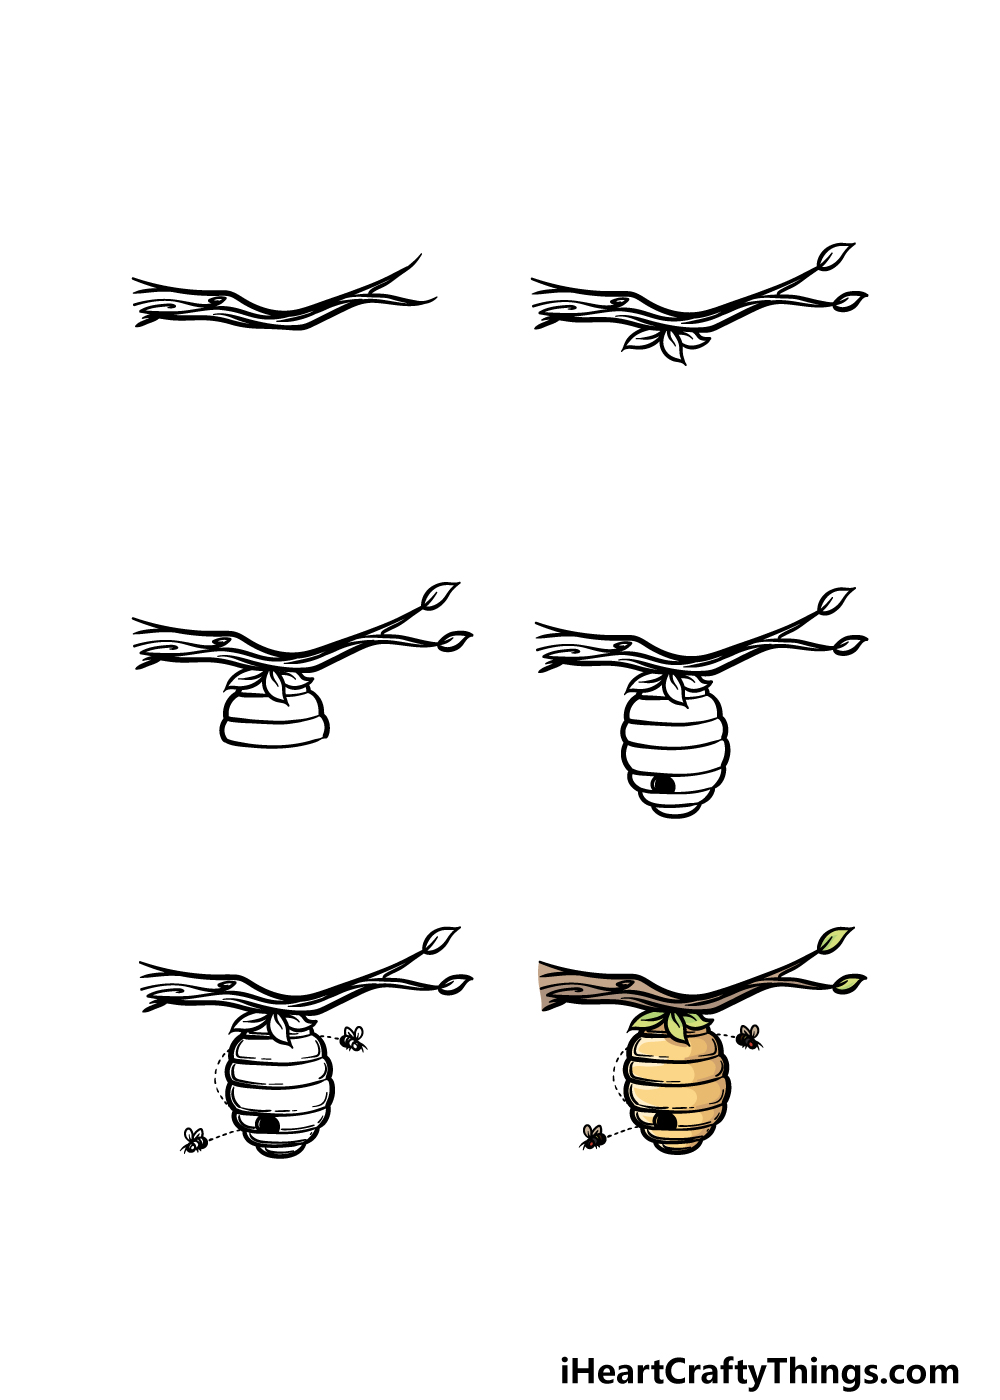
Step 1
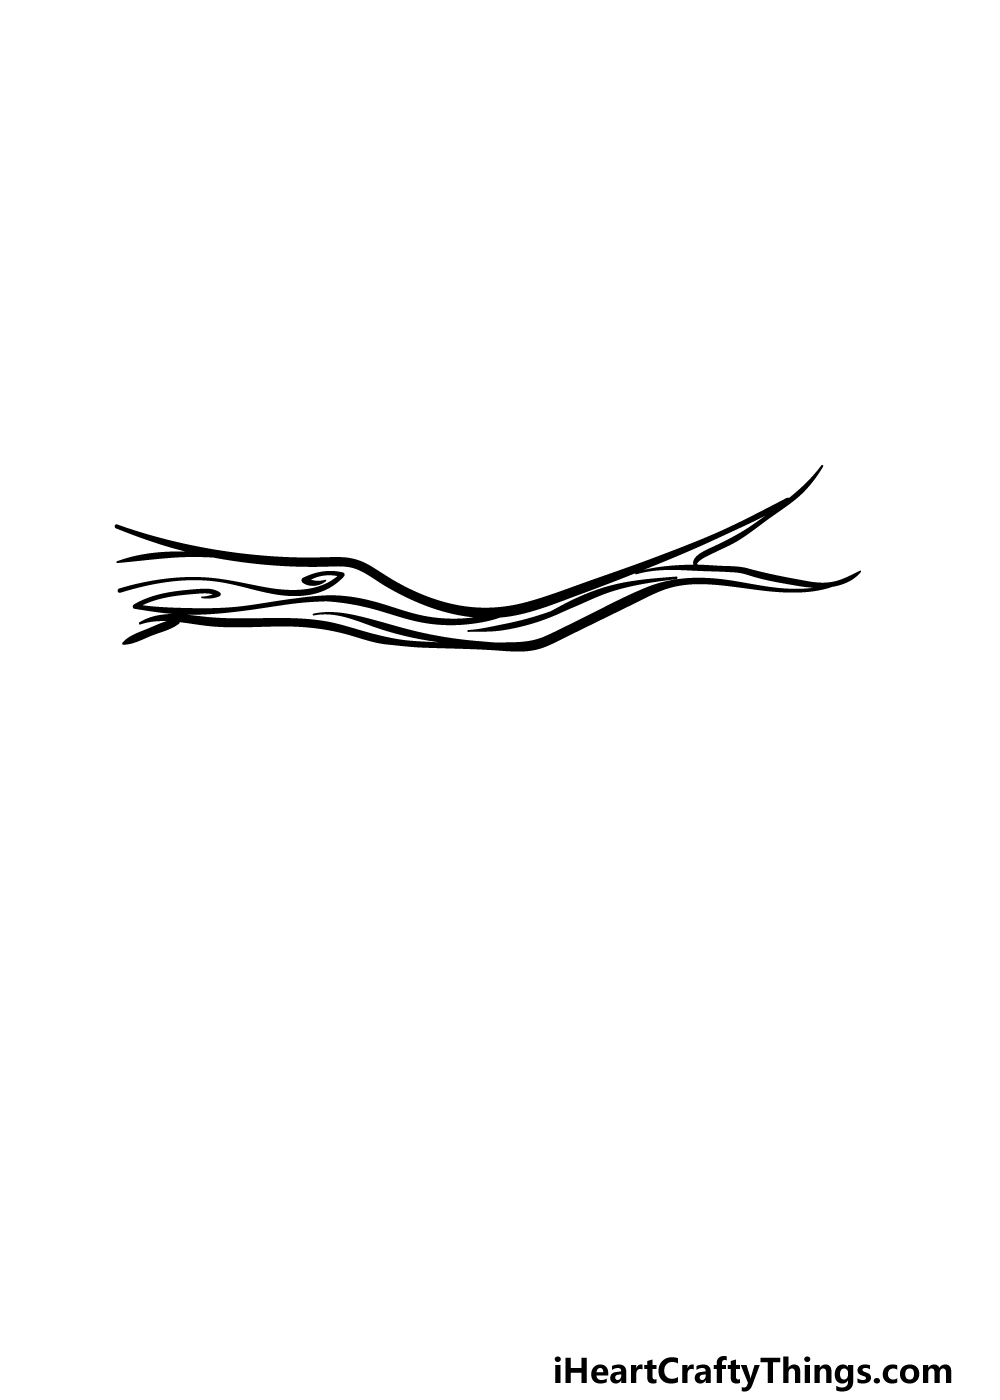
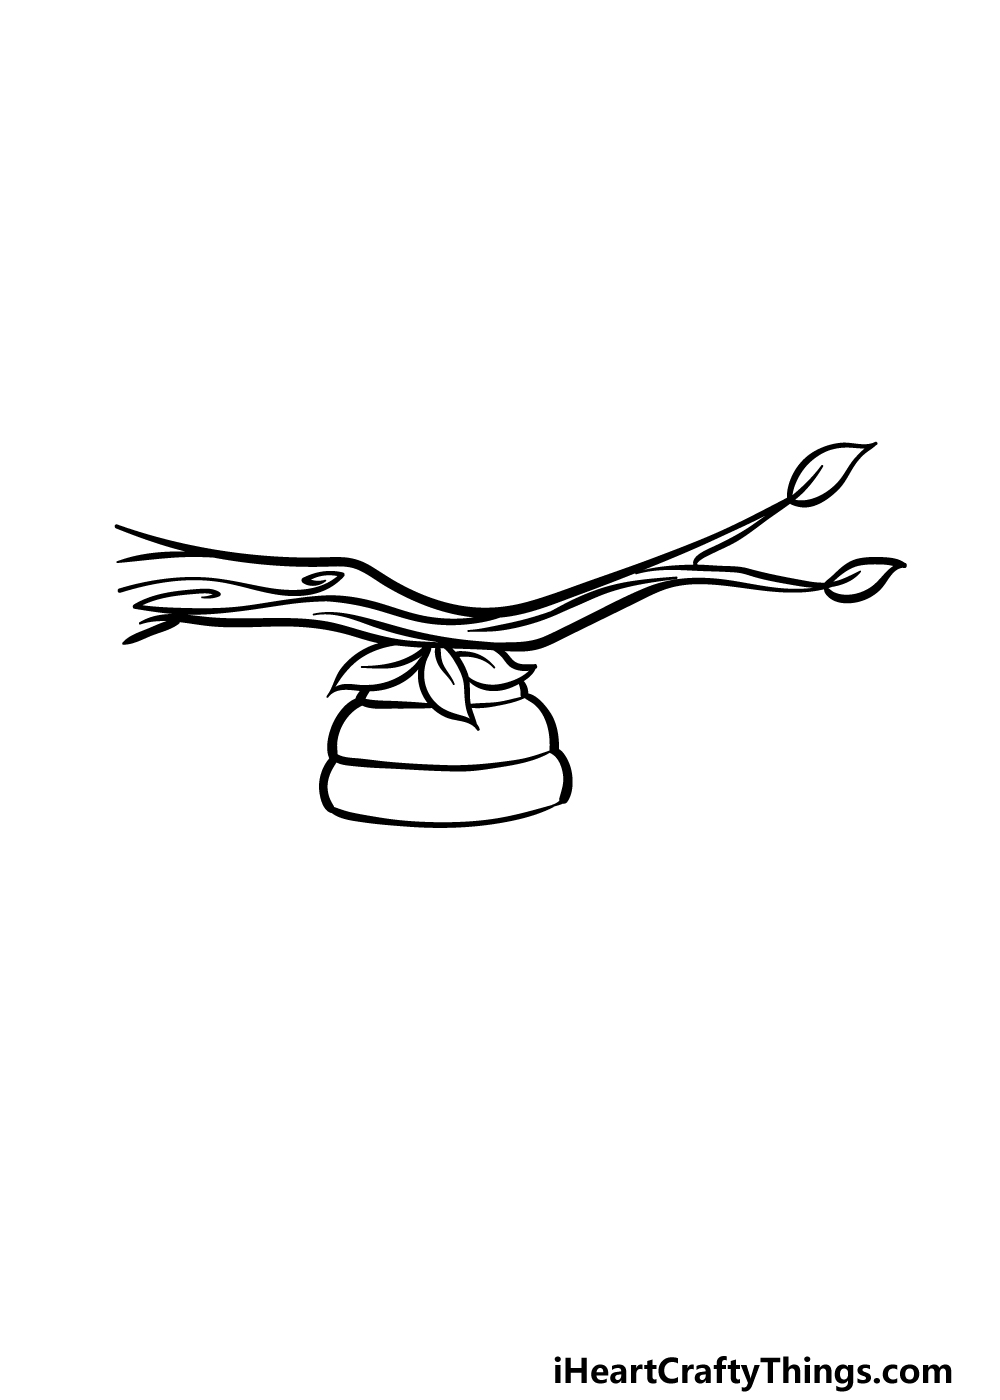
A beehive will usually be hanging from a branch when found in nature, and that is why for this guide on how to draw a beehive we shall start with the branch.
To draw this branch, we will be using some smooth yet slightly curvy lines for the outline of it. This will end in two forked edges that have pointy tips at the ends of them.
Then, once you have drawn this branch outline, you can start to add some detailing to it. We will do this by adding some wavy lines onto the branch, some of which will have a little twirl in them.
These lines will help to give the branch the look of being made out of wood.
Once you have drawn this branch so that it looks as it does in our reference image, you will be ready to add some more details to it in the next step!
Step 2 – Next, draw some leaves for the branch
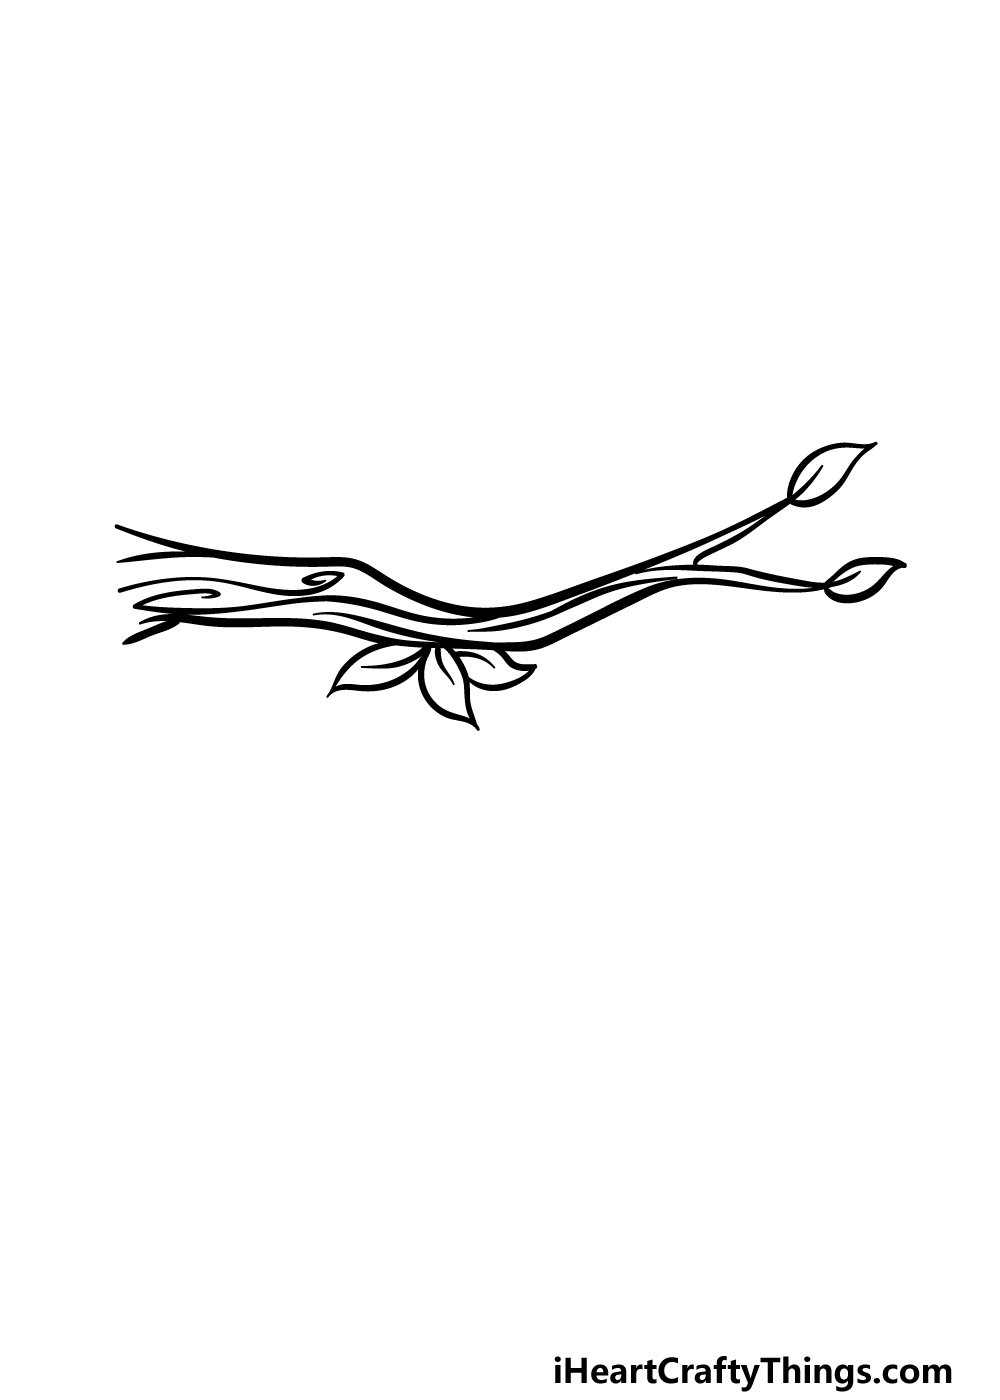
We don’t want this tree to look too dead, so in this part of your beehive drawing we will add some leaves onto it.
First, add a clump of three leaves to the bottom of the branch. Each leaf will be drawn with some curved lines that culminate in a sharp point.
Then, each leaf will have a small line in the center of each one for some additional detail.
Once you have gotten the hang of it, add another leaf onto each tip of the forked branch. In the next step, we will then start drawing the beehive!
Step 3 – Draw the first section of the beehive
Now that you have the branch for your drawing, you can now start to draw the star of the drawing for this third step of our guide on how to draw a beehive!
Beehives are made up of several sections, and you can extend them down from the clump of three leaves.
Draw two small, curved lines down from these leaves, and then draw two more moving outward from the top of the hive.
There will also be some curved lines going from left to right from each side of each section of the hive. That’s all there is to it for this step, so let’s move on so that we can keep adding to the beehive.
Step 4 – Now, draw the bottom half of the beehive
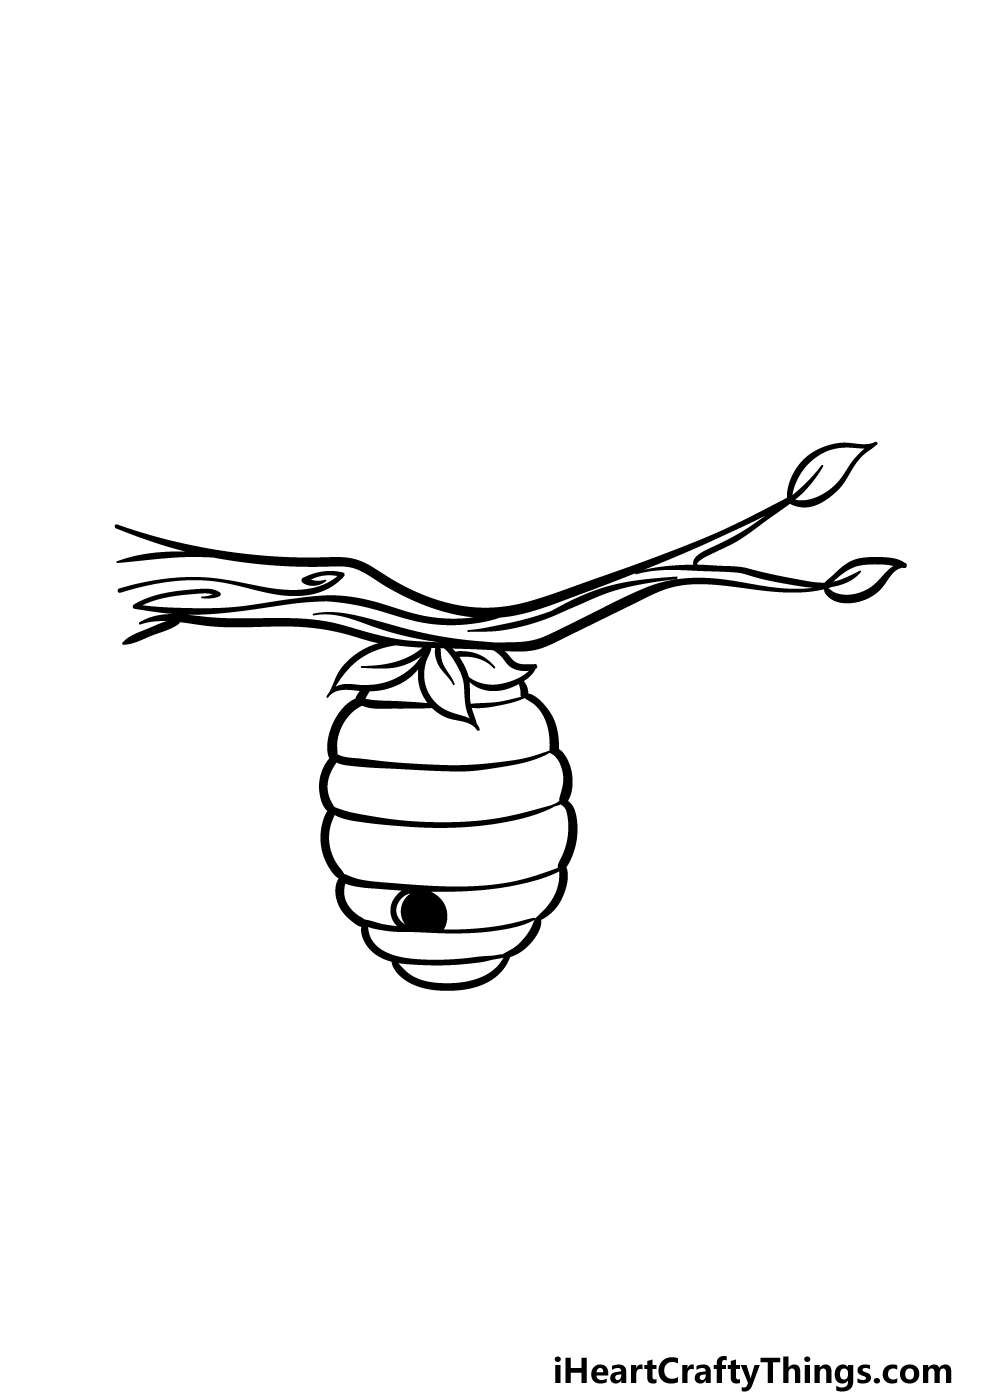
You did a great job on the first half of your beehive drawing, so this part where you draw the bottom half should prove no challenge!
For this bottom half, you will essentially be doing what you did in the previous part, that is drawing the various sections.
In the previous step, the sections got wider as you went lower, but now they will start getting narrower.
Once you have finished drawing the beehive outline, you can then add a back, circular shape onto the third section from the bottom for the hole.
Then it’s only a matter of adding some final touches and colors, both of which we will see to in the final two steps!
Step 5 – Finish off your beehive drawing
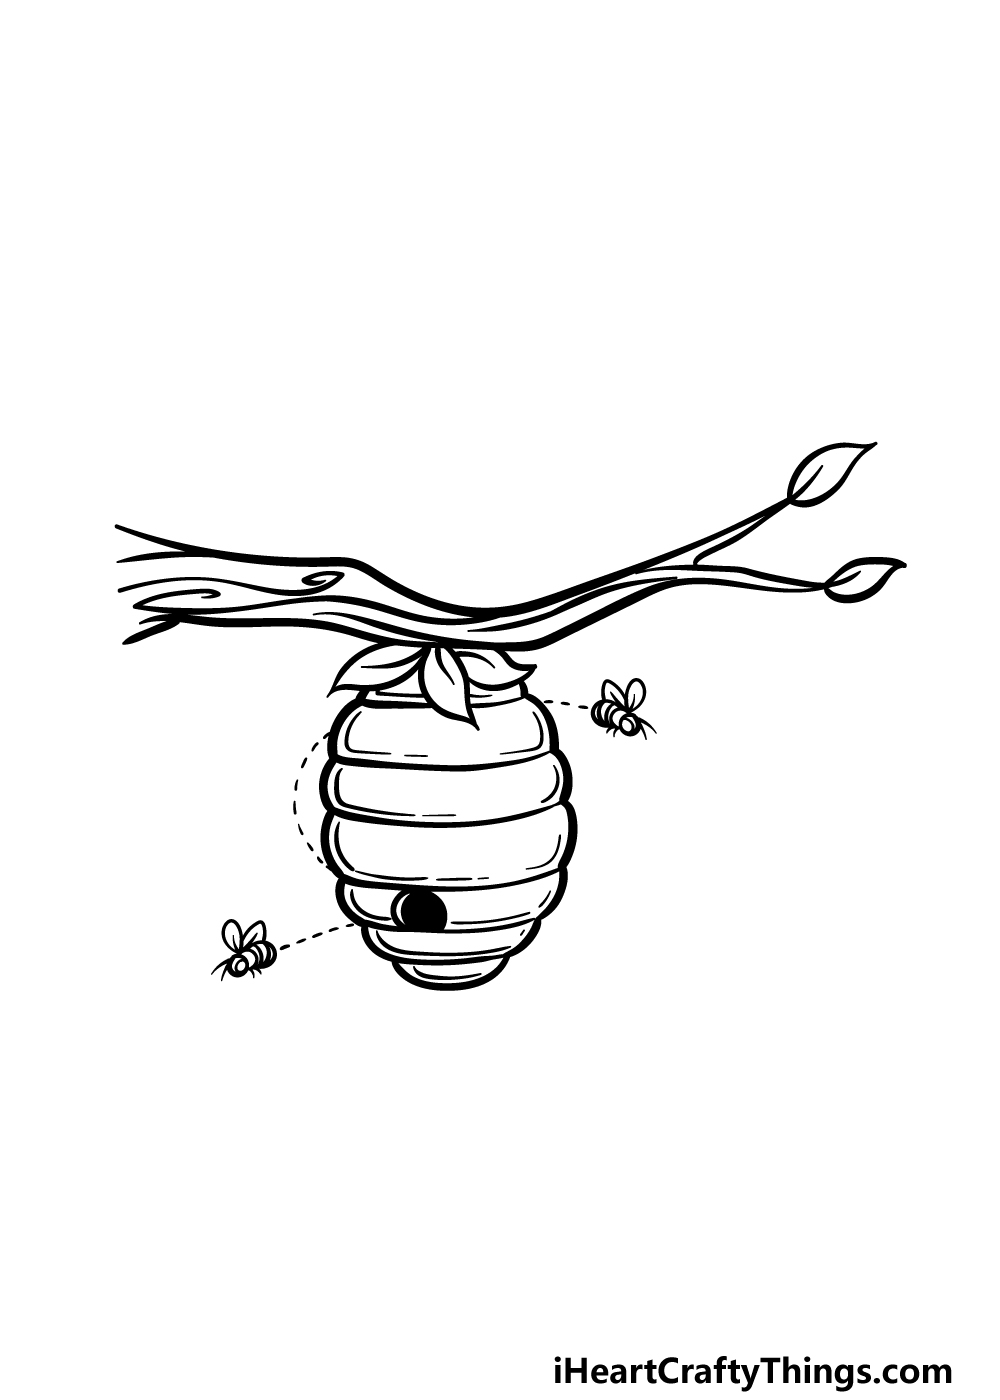
Now it’s time to finish off the picture in this step of our guide on how to draw a beehive. This will get you ready for the final step where you will color it in!
First, we added some curved line details to the sections of the beehive to give them a bit more depth.
Then we added something that every beehive needs: bees! We drew two little bees buzzing around the hive, and for an extra fun touch we added a trail of small lines behind them to show their travel paths.
You could also add some details of your own before moving on! If you think this drawing is lacking in bees, then you could add as many as you like!
You could also draw a background to show what kind of setting this hive is in.
How will you finish off your picture before the final step?
Step 6 – Finish off your beehive drawing with some color
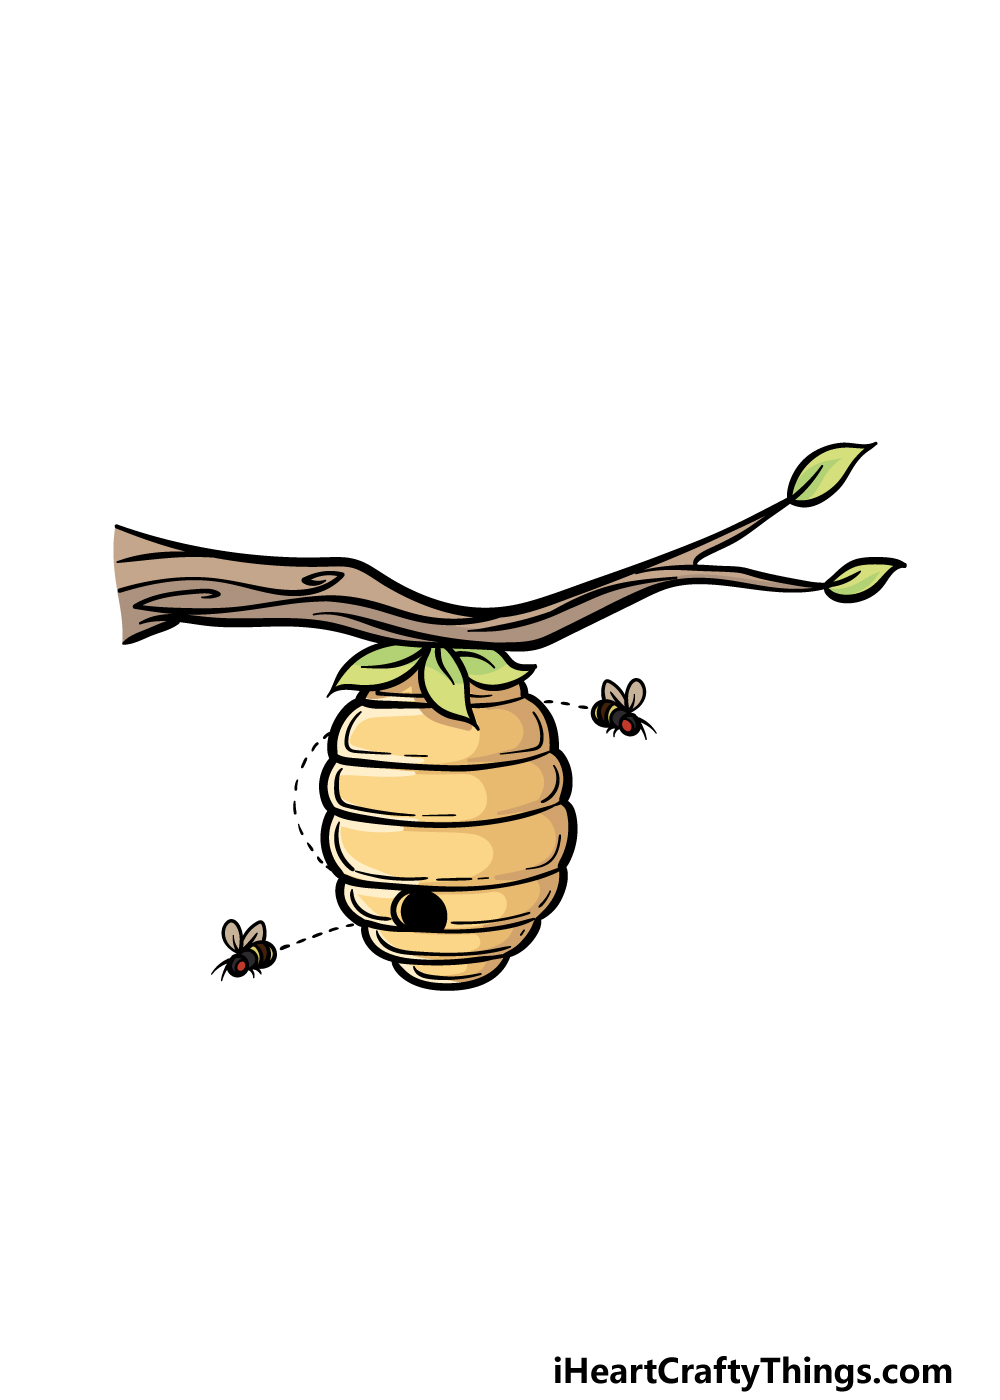
This is the final step of your beehive drawing, and this is where you can finish it off with some great colors!
We used some lighter golden yellow for most of the beehive, and then we incorporated some darker shades for shading on the sides of the hive.
Then, we used some lighter browns and greens for the branch and leaves that the hive is hanging from.
These colors are what we chose, but you can use any color choices that appeal to you! Then you have a lot of options for the various art mediums and tools that you could use to achieve them.
Be sure to have lots of fun as you express yourself with color!
3 More tips to make your beehive drawing easy!
See what all the buzz is about as we make this beehive drawing a bit easier!
- Remove Extra Details This drawing of a beehive we created is attached to a branch, and this means that there is quite a bit going on in the image. You can remove some of these extra details to make it a bit easier. This could also be done if you want the focus to be purely on the beehive itself.You could also do a few versions with fewer elements while you get the hang of the drawing. What elements you remove would depend on your own preferences as well as what you are most comfortable drawing.
- Simplify The Design Another way you could make this beehive drawing easy would be by simplifying the design. There are a few ways that you could do this and still have an interesting picture at the end. For instance, you may want to go for a much simpler outline shape for the beehive.Perhaps you could use a solid oval shape and then draw some lines along it. If you did this, you may want to make other elements like the branch and bees simpler in design as well. This would ensure that the design of the entire drawing is consistent.
What are some other ways that you could make the drawing easier with some simplified details?
- Use A Photo Reference This final tip would come in handy whether you need some extra help or maybe want to make your beehive sketch more realistic. We would recommend using a real photo of a beehive to aid you as you draw. If you look online, you will find many different photos of beehives.Your best bet would be to find one that looks at least fairly similar to the one in our example. Then, using that photo along with our guide will allow you to get a better feel for the structure of the beehive. Looking up pictures of tree branches and bees would also help with those individual elements. It would also allow you to make the image different and more unique!
Your Beehive Drawing is Complete!
Drawing something like a beehive can often be a lot trickier than expected, so we hope that our guide on how to draw a beehive made it fun and easy for you to take on!
When you break something down into smaller steps, it can always make it seem more manageable, so that’s what we attempted for this guide.
Now, be sure to add any extra details, color choices or background details that you think would suit this image best!
We also have tons of amazing guides like this one on our website that you can enjoy right now! There are many more coming soon as well, so you’re not likely to run out of drawing fun!
Please also be sure to share your completed beehive drawing on our Facebook and Pinterest pages, as we would love to see it!