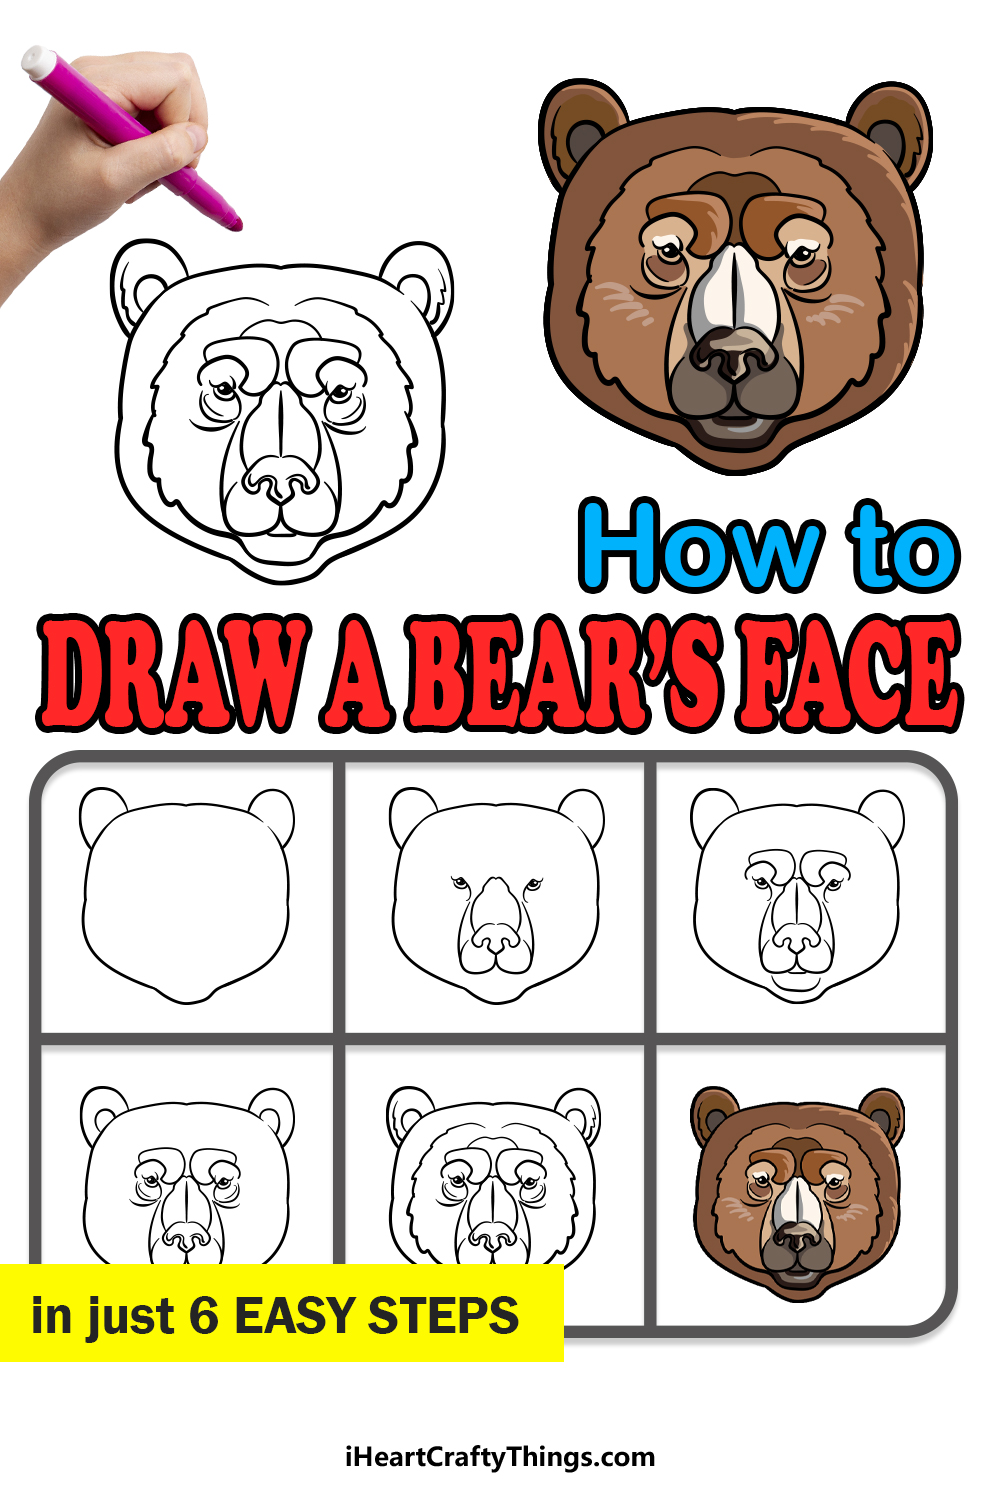
When someone mentions bears, you may think of a beloved teddy bear or maybe a classic book character, but in reality bears are usually fearsome and not to be taken lightly!
Bears are some of the strongest and most intimidating creatures in the animal kingdom, and many people love them despite their dangerous reputation.
For fans of this incredible animal, they may want to learn how to draw a bear face yet not know where to start.
This guide you’re about to work on is the perfect place to start, though!
Our step-by-step guide on how to draw a bear face in just 6 steps will show you how fun and easy it can be.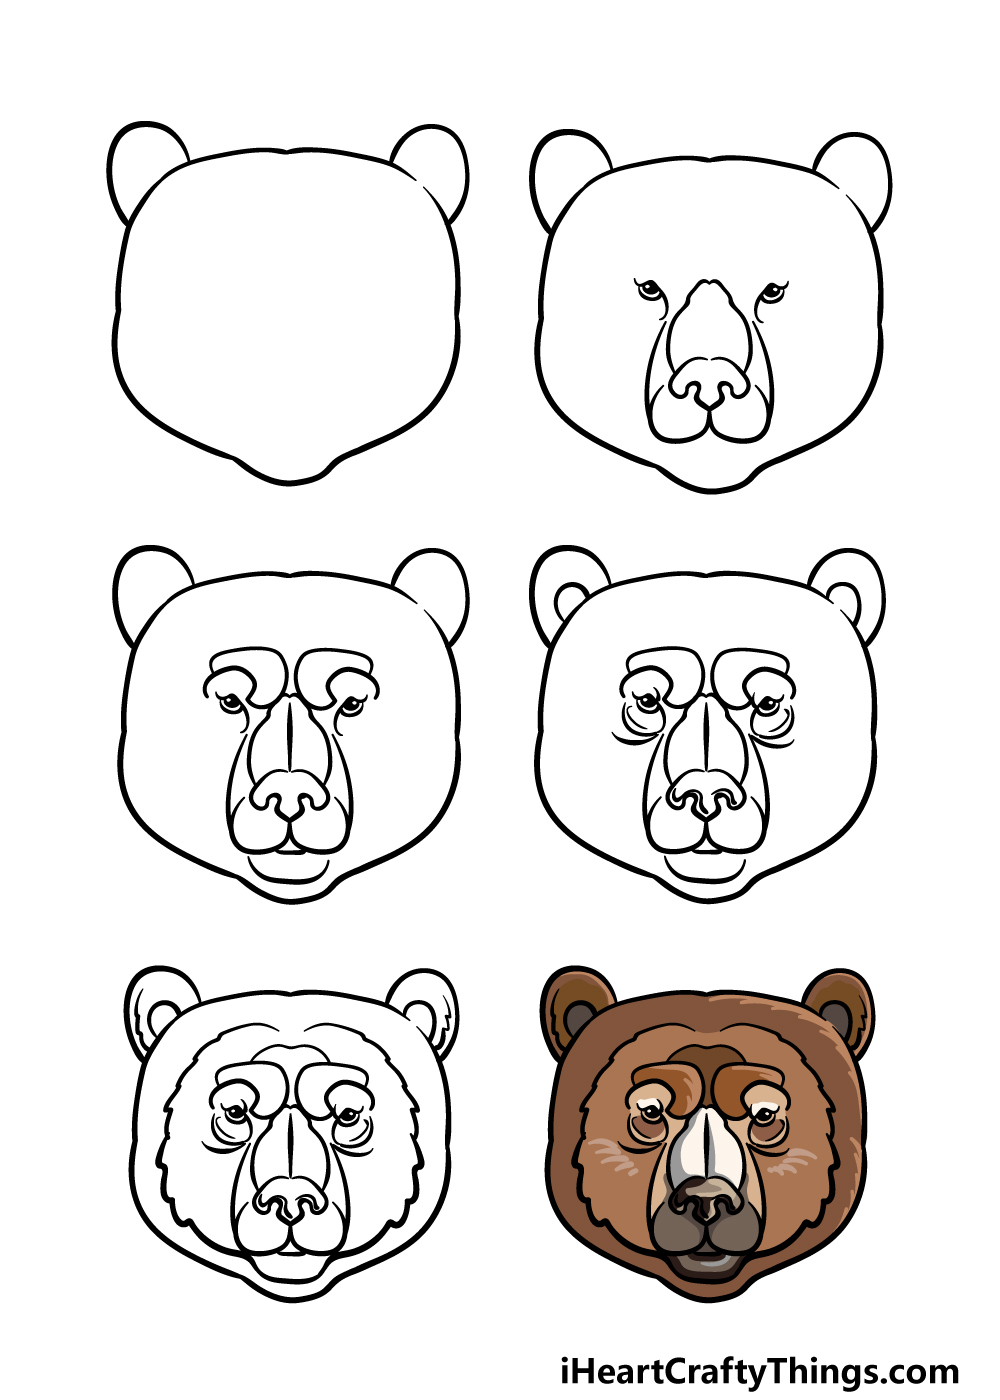
How to Draw A Bear Face – Let’s get Started!
Step 1
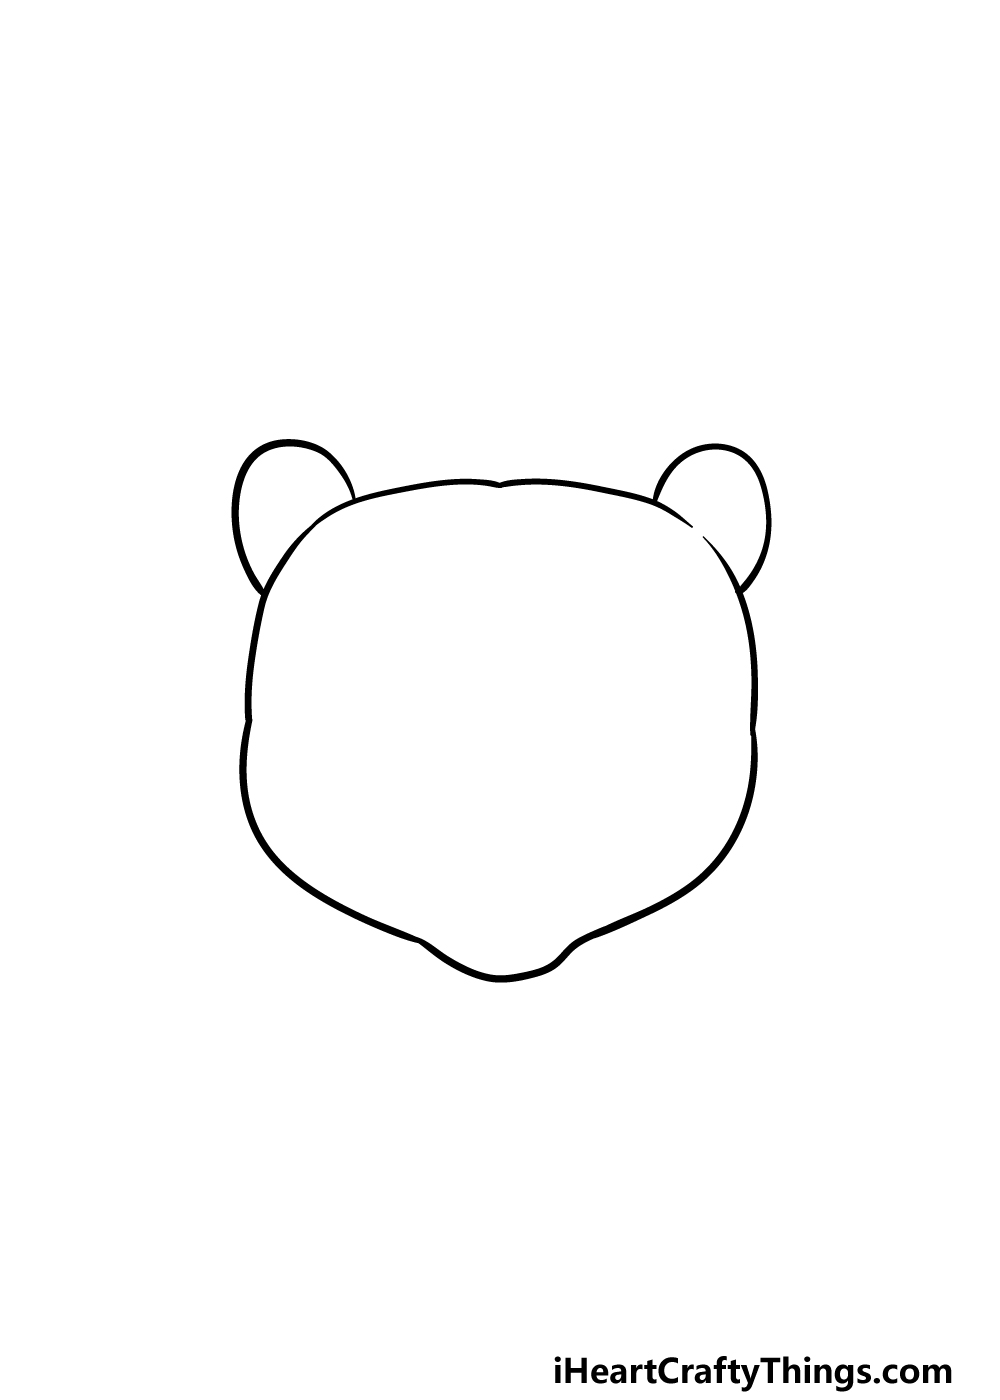
In order to start this guide on how to draw a bear face, we will start by drawing the outline of the face.
This will give us a good foundation as we start adding some facial details later on in this guide. The head will largely be composed of a large, rounded square shape with a small part poking out at the bottom for the chin of the face.
Then, you can add two rounded lines on top of the head for the two ears.
Then you’re ready to move on to the next part!
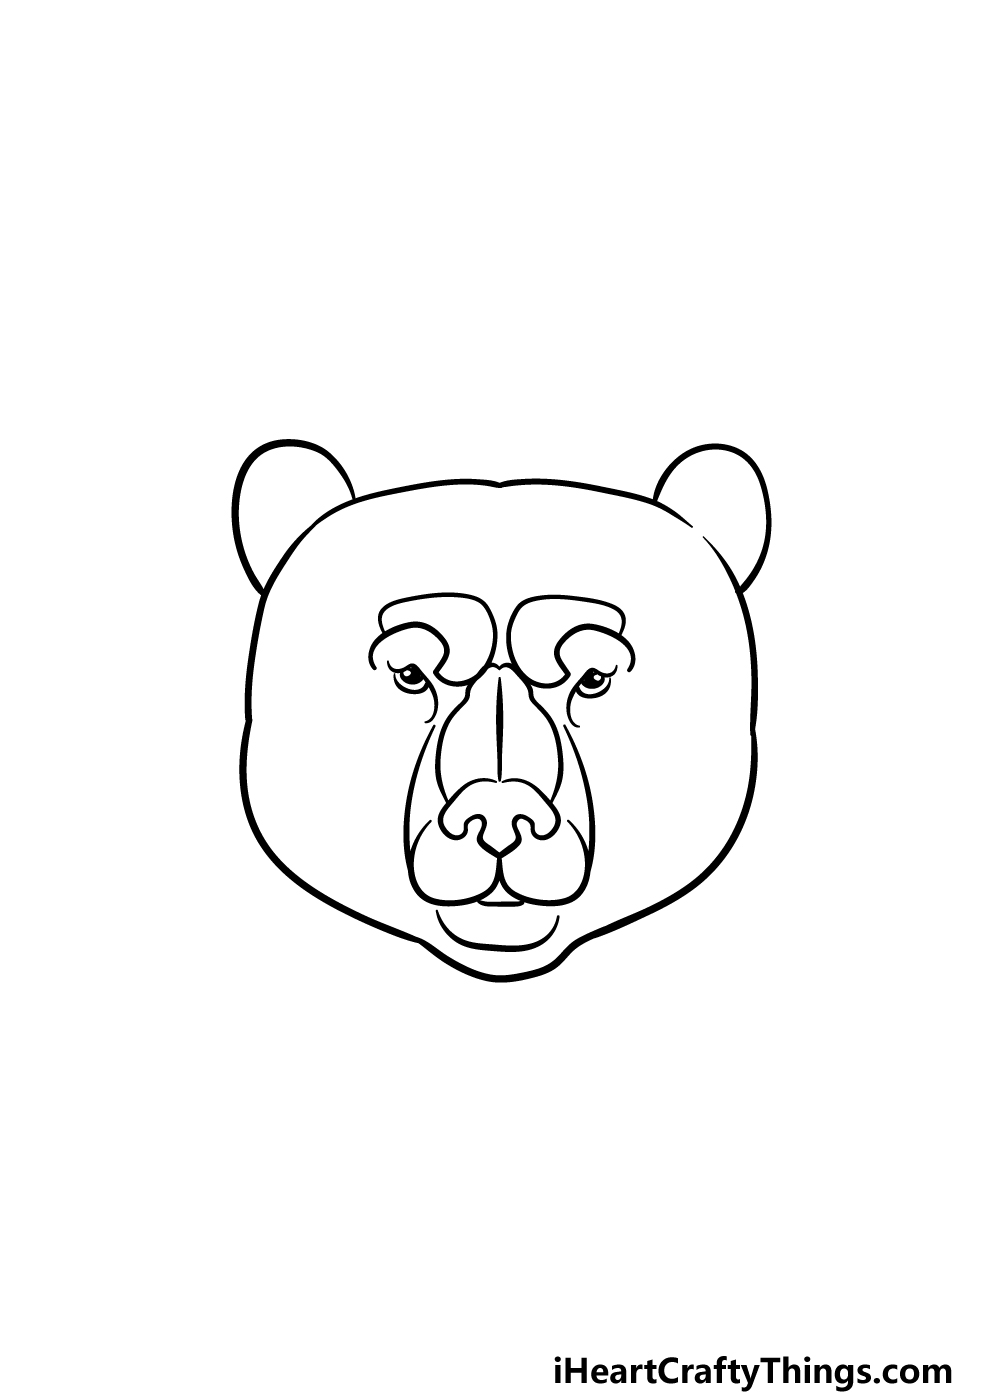
Step 2 – Start drawing the facial features of the bear
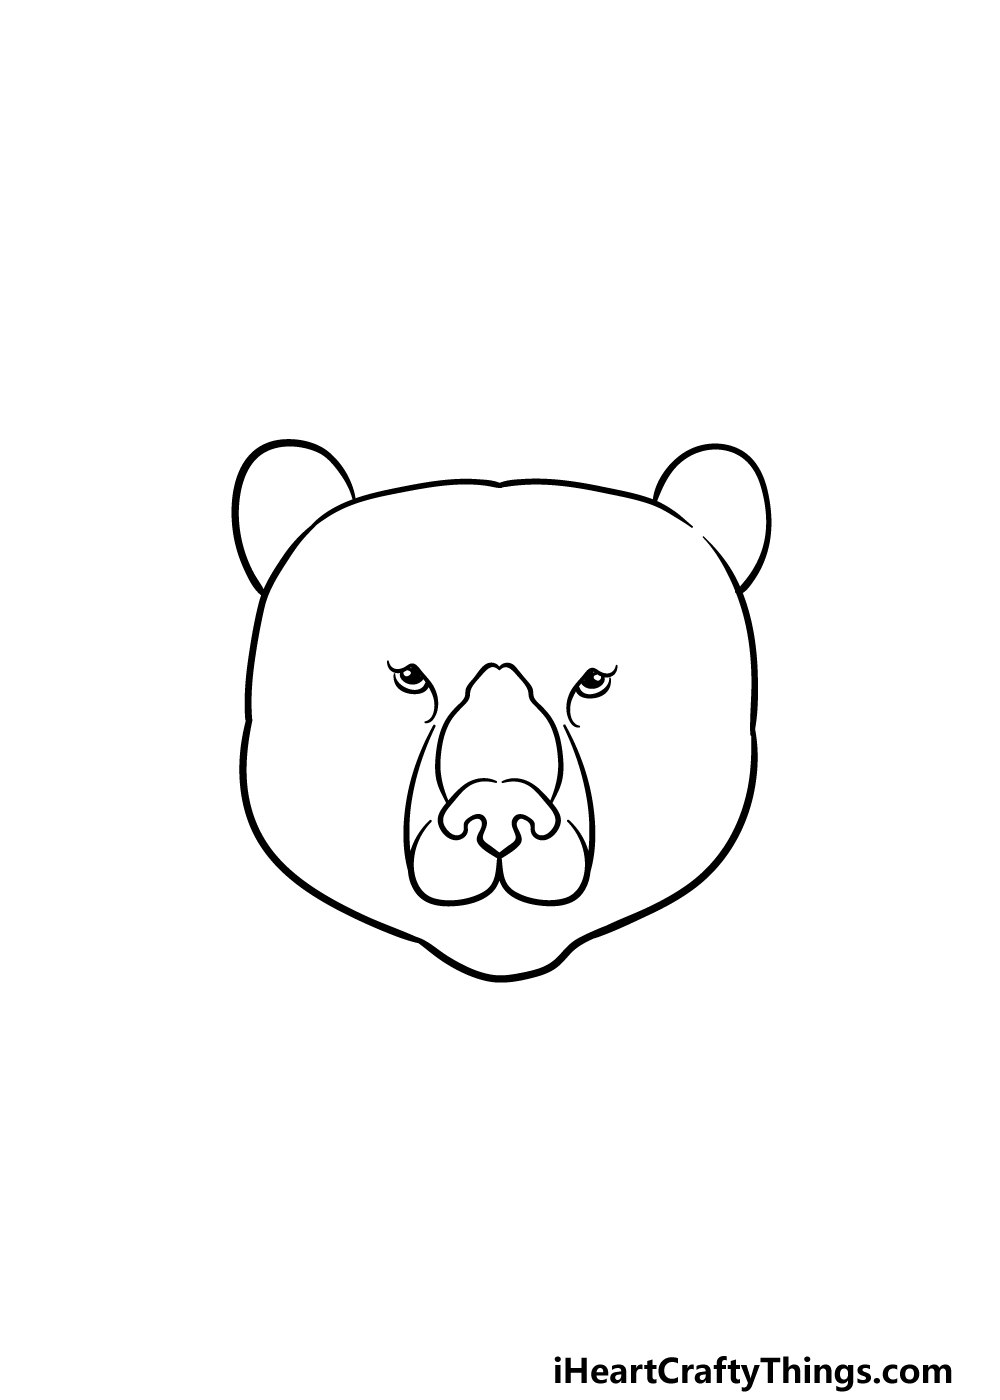
Now that you have the outline of the head drawn, we can start on the facial features in this next step.
First, we will start with the eyes. The eyes are pretty small compared to the rest of the face and head. They can be drawn with solid black circles with a white dot in each one.
Then, you can draw another small circle around them and then extend some lines down from them.
Finally, we will be drawing the distinctive nose shape, and then this will have some lines extending up from it.
Then you can close off this step by adding the top of the mouth, which is separated into two parts. It may sound complicated here, but when you follow the reference image it will be made much easier to follow!
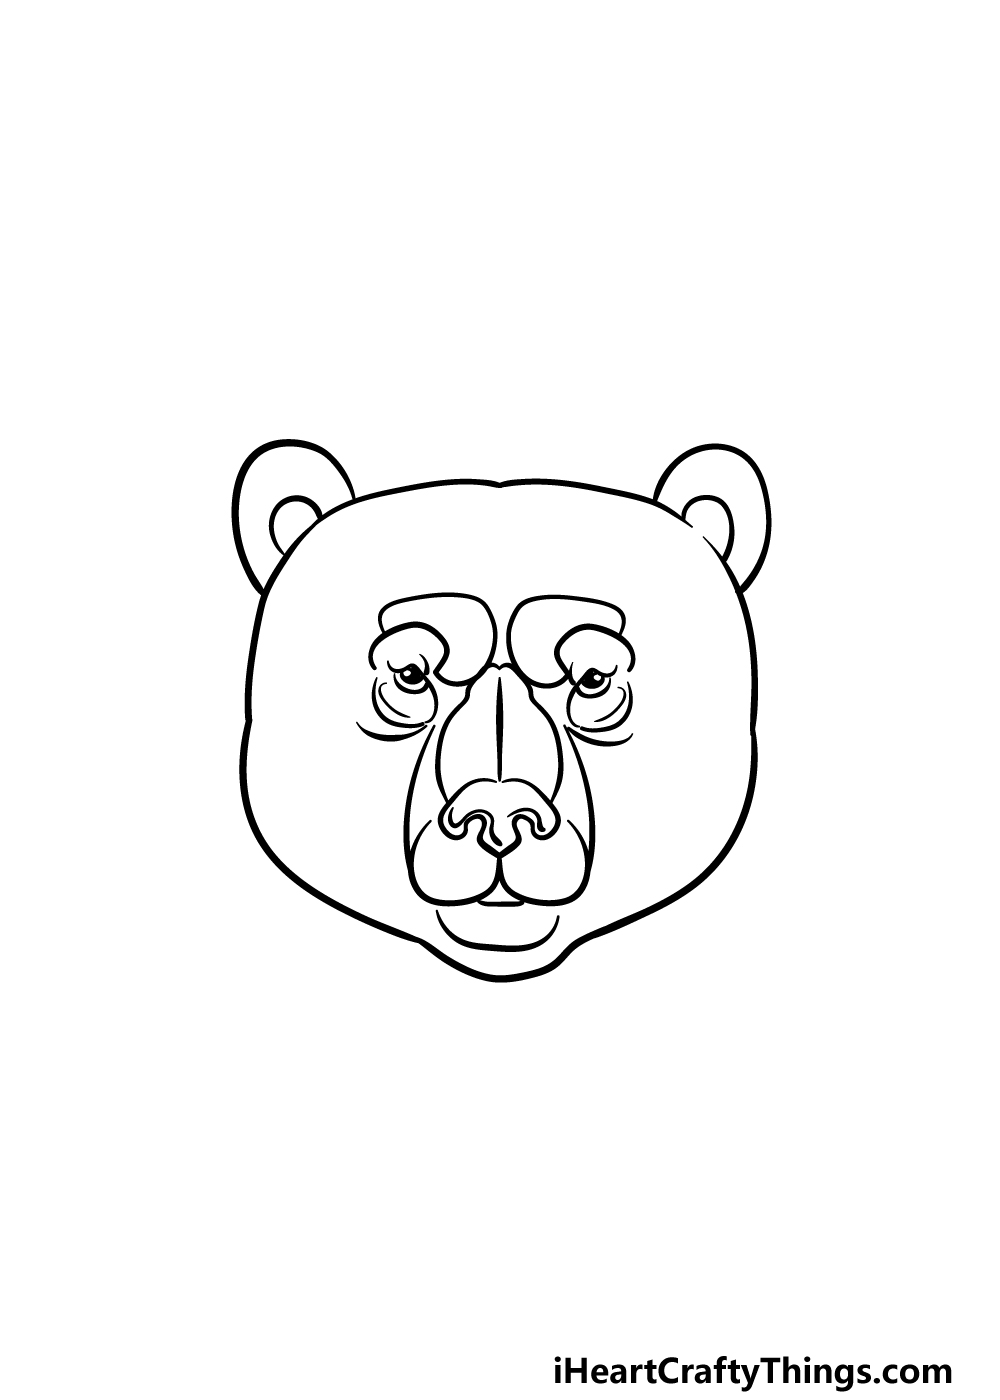
Step 3 – Now, draw some more facial details for the bear
We will continue to add some details to the face in this third step of our guide on how to draw a bear face.
First, draw some rounded, curved shapes over the eyes, as shown in the reference image. Then, extend a straight line down the center of the muzzle.
Then, we will finish off by drawing another curved line underneath the mouth for the bottom lip. It’s as simple as that for this part, so let’s move on to keep adding more details.
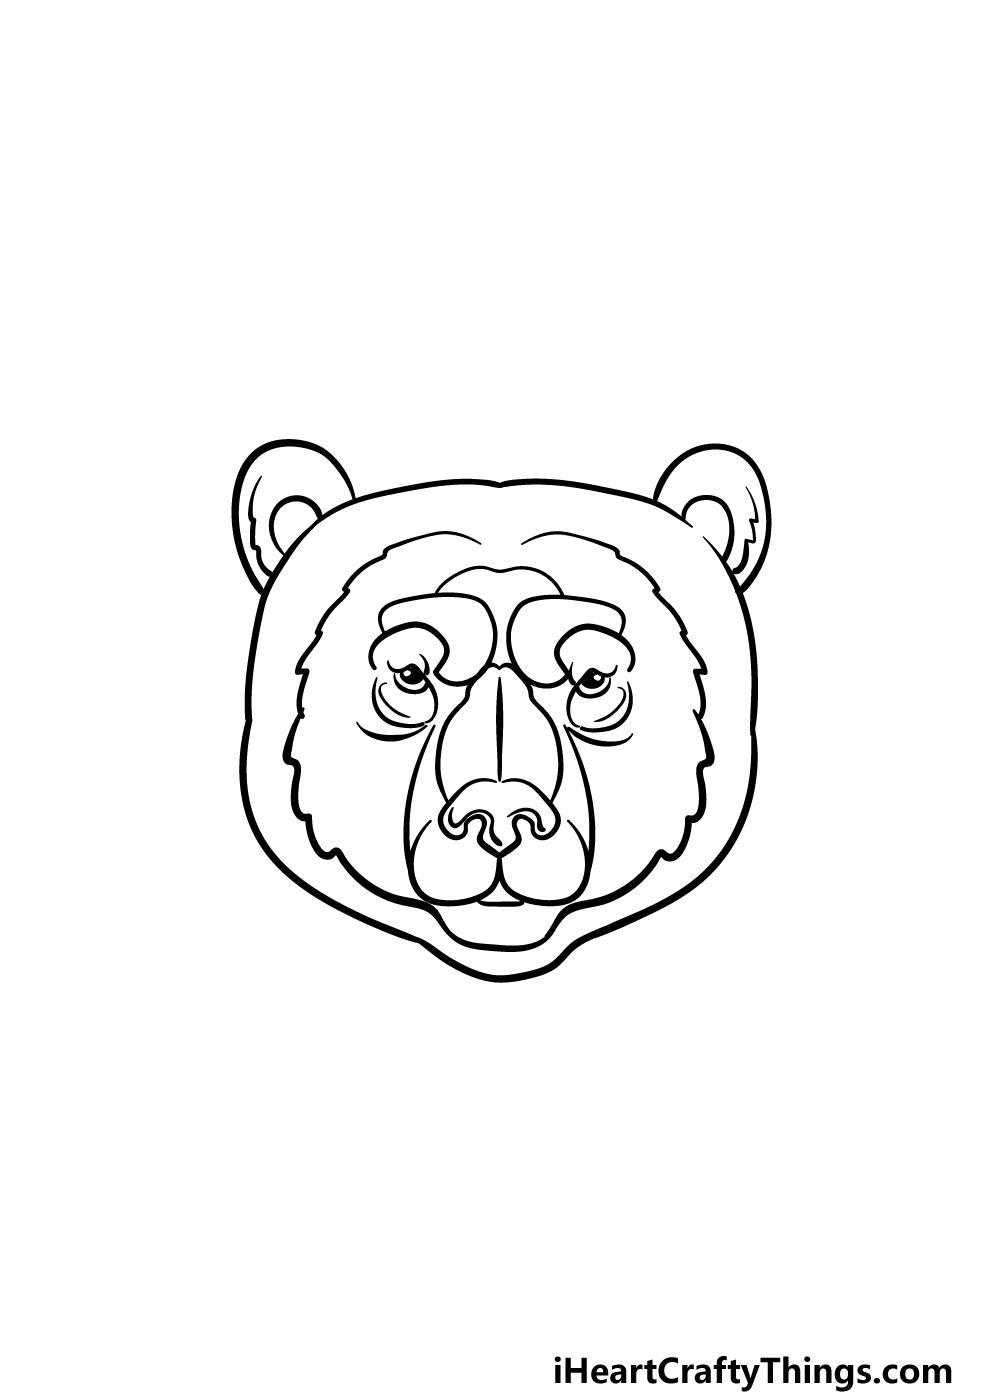
Step 4 – Next, add some more details for the face
This fourth part of your bear face drawing will have you adding some more small yet effective details to it. First, draw some round lines inside of the ears to show their interiors.
Then, we will be adding some small, thin round lines around the eyes to make them look more realistic.
Then, we will finish off this step by drawing some lines inside of the nose to also make it look a bit more realistic.
Then we just have a few more details to add before the final step!
Step 5 – Now, you can finish off the final details
It’s almost time to color in your picture, but first we have a few final touches to add in this step of our guide on how to draw a bear face. We will start by drawing some curved, jagged lines on the inner sides of the face.
Then, we will be adding some more lines inside of the ears for even more detail there.
That will finish off the details in this guide, but you don’t have to stop there! Before you move on, you can also add some details of your own to put your own spin on this image.
There are many ideas that you could go for to do this, and these could include drawing a body for the bear face, or even creating a detailed background.
Bears can live in many different environments and climates, so you have a lot of freedom for the kind of background you could create.
How will you finish off this drawing before coloring it in?
Step 6 – Finish off your bear face drawing with some color
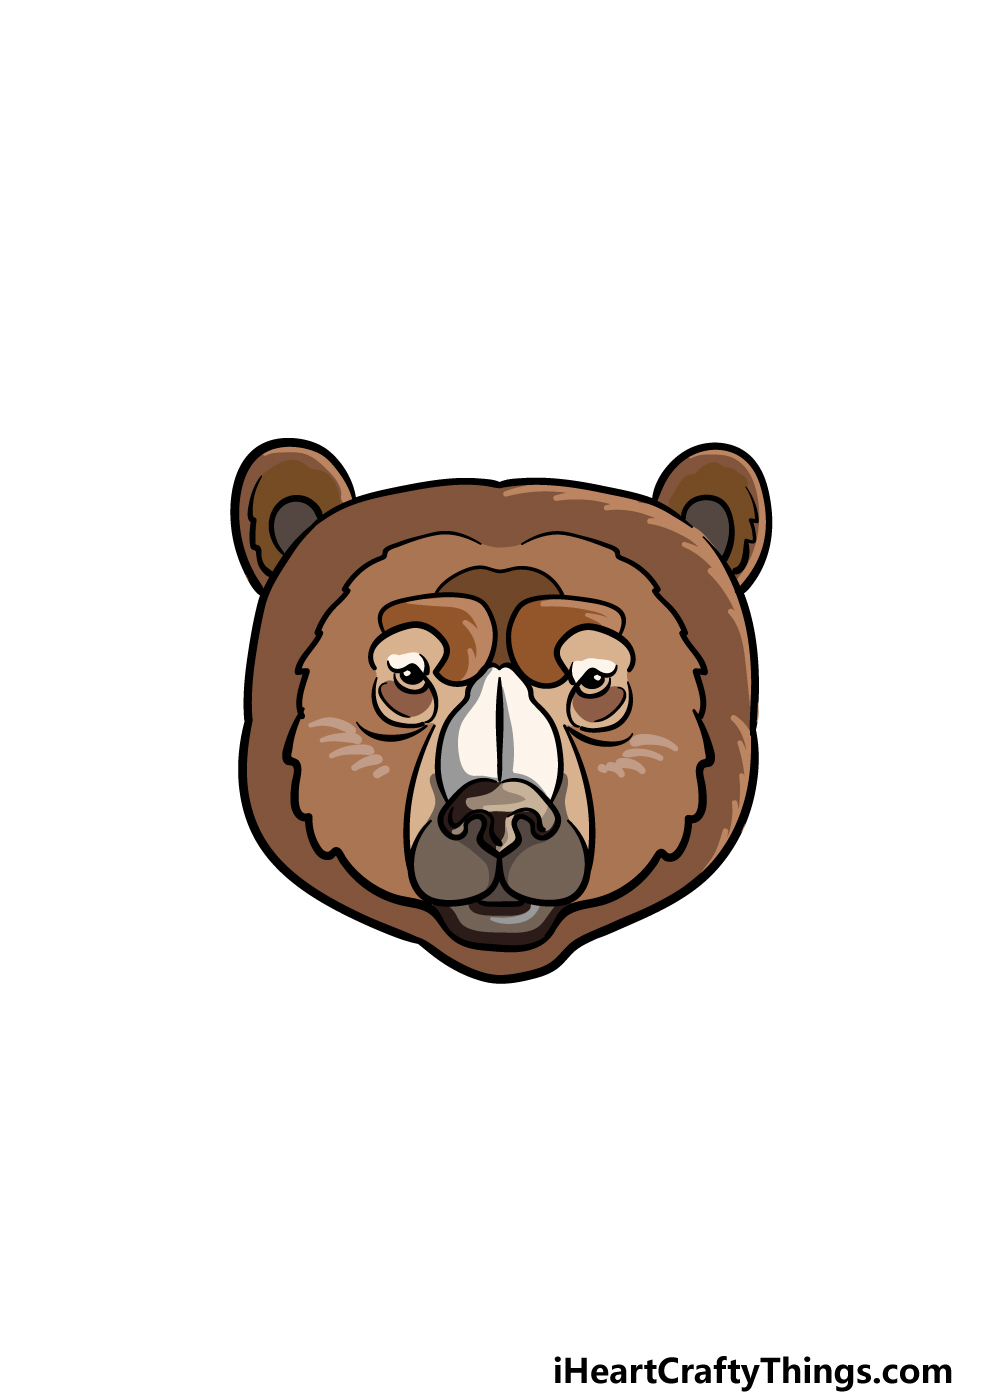
That brings you to the sixth and final step of this bear face drawing. You’ve worked hard on drawing this picture, and now you get to have a fun time bringing some amazing colors to it in this step.
In our reference image, we went with some nice shades of brown to color in the bear, but these colors are just a suggestion!
You could go with many other shades or a different color scheme entirely if you prefer.
You could even make this a stylistic portrayal by adding some bright and amazing colors to the picture.
Then, you can also have fun choosing how you will bring these colors to life. You could use some painterly mediums such as acrylics or watercolor paints for a dynamic look to the image.
Or you could go with mediums like colored pens, pencils or markers for some great color variation.
Whatever colors and mediums you choose, we know your bear face drawing will look amazing!
4 More Ways To Make Your Bear Face Drawing Unique
Check out these 4 tips that will help make your bear face sketch even better!
This drawing of a bear face shows just the face of this magnificent animal, as you could probably tell. One way to make it even better would be by drawing some more of the bear’s body.
To make this easier, you could start by looking up some images of bears that could help as you add a body for this bear. Would you use a relaxed pose for the bear or maybe have it ready to attack?
If you were to draw this bear face in one corner of a page, you could add some heads of other animals you like. For example, you could make it look like a cool pattern by adding three heads!
There would be so many different animals that you could choose from, but you could definitely start with your favorites.
Once again, you could look up images of your chosen animals to make adding their heads to this drawing a bit easier.
Which animals would you choose?
This bear face drawing is relatively detailed, so it could be fun to add different takes on the same picture.
Much as we mentioned drawing different animal faces, you could draw these different styles near the one we created.
One could be a cartoony take on a bear face, and maybe another could be designed like a teddy bear’s face. These are a few ideas, but you could really play around with new styles.
Finally, you could finish off your bear face sketch with a background. There are a few ways you could do this, and it could depend on what you chose to add or exclude from your design.
For example, if you drew more of the bear’s body then you could add a nature background behind it. If you kept it to just the face, then you could use simple shapes and colors for the background.
Do you have some ideas for a fun background for your artwork?
Your Bear Face Drawing is Complete!
You’ve done an amazing job on this drawing, and you have successfully completed this guide on how to draw a bear face!
We hope that this guide made adding all the shapes and lines much easier, and we also hope you had lots of fun doing it.
Now you can show us how creative you can be by experimenting with different details, backgrounds, colors or mediums. We look forward to seeing what you come up with!
When you’re ready for more drawing fun, be sure to check out our website. We have many amazing guides for you there and we upload new ones frequently. We upload new guides often so be sure to visit frequently!
We would love to check out your bear face drawing when it’s done, so please share it on our Facebook and Pinterest pages for us to admire!