Barbed wire is something that you’ll generally see and not give a second thought to. Barbed wire serves a simple yet important function, yet it’s something often taken for granted.
While serving a simple function, the structure of barbed wire is actually surprisingly convoluted and complex, which can make it hard to learn how to draw barbed wire.
Luckily, when you break it down into steps it can be much easier to do, and that’s what this guide is for!
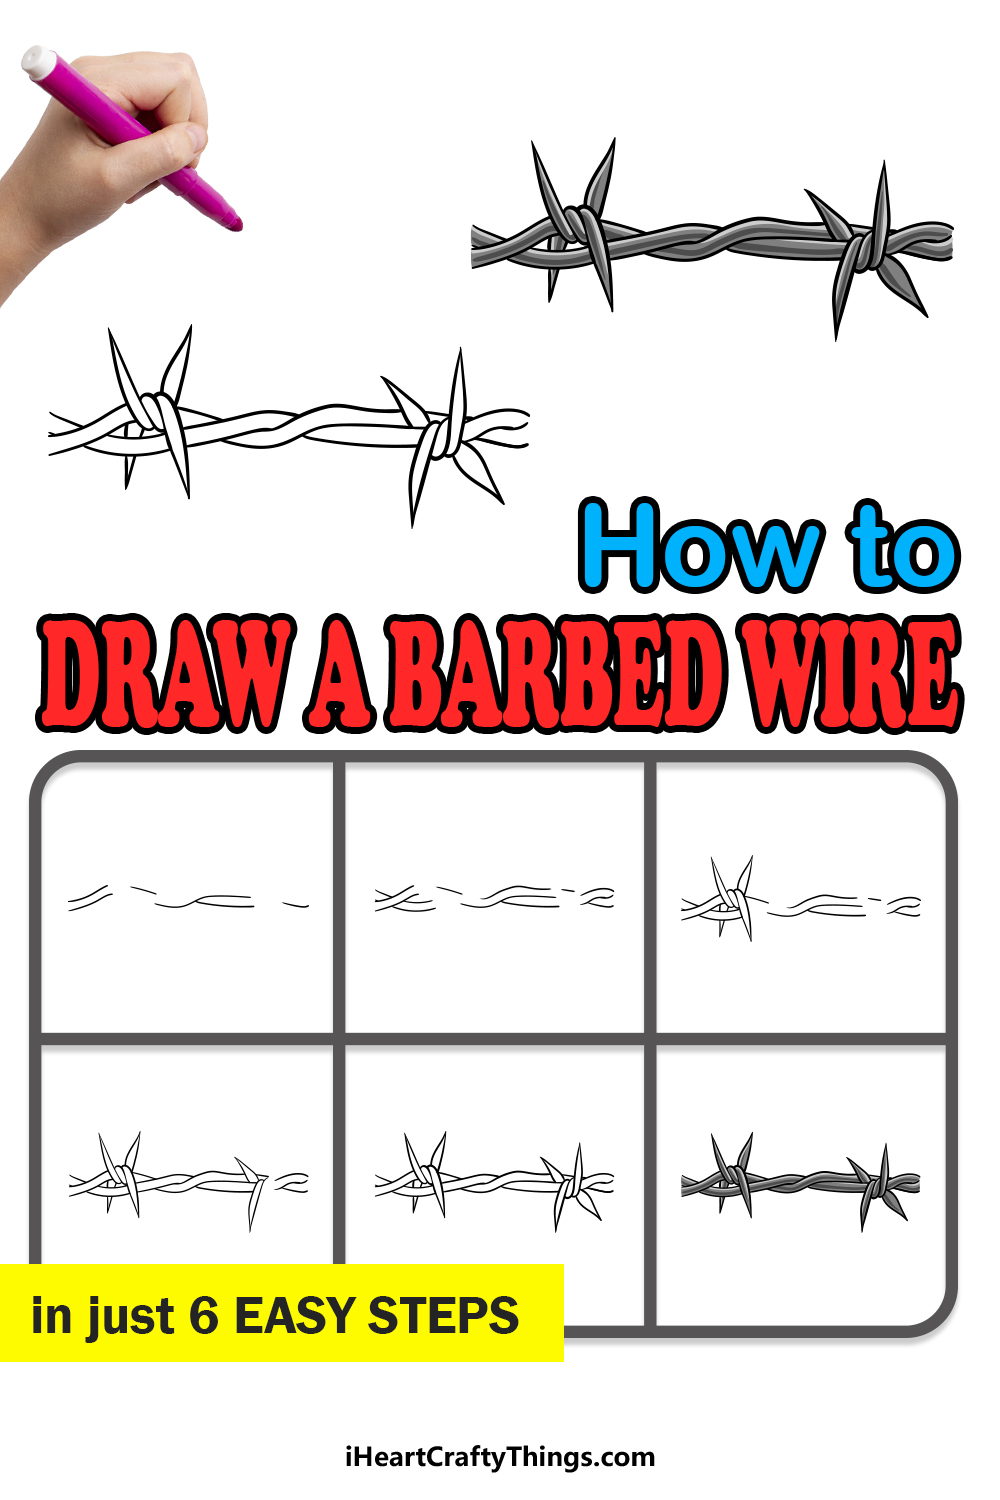
We hope that you really enjoy working through this step-by-step guide on how to draw barbed wire in just 6 easy steps with us!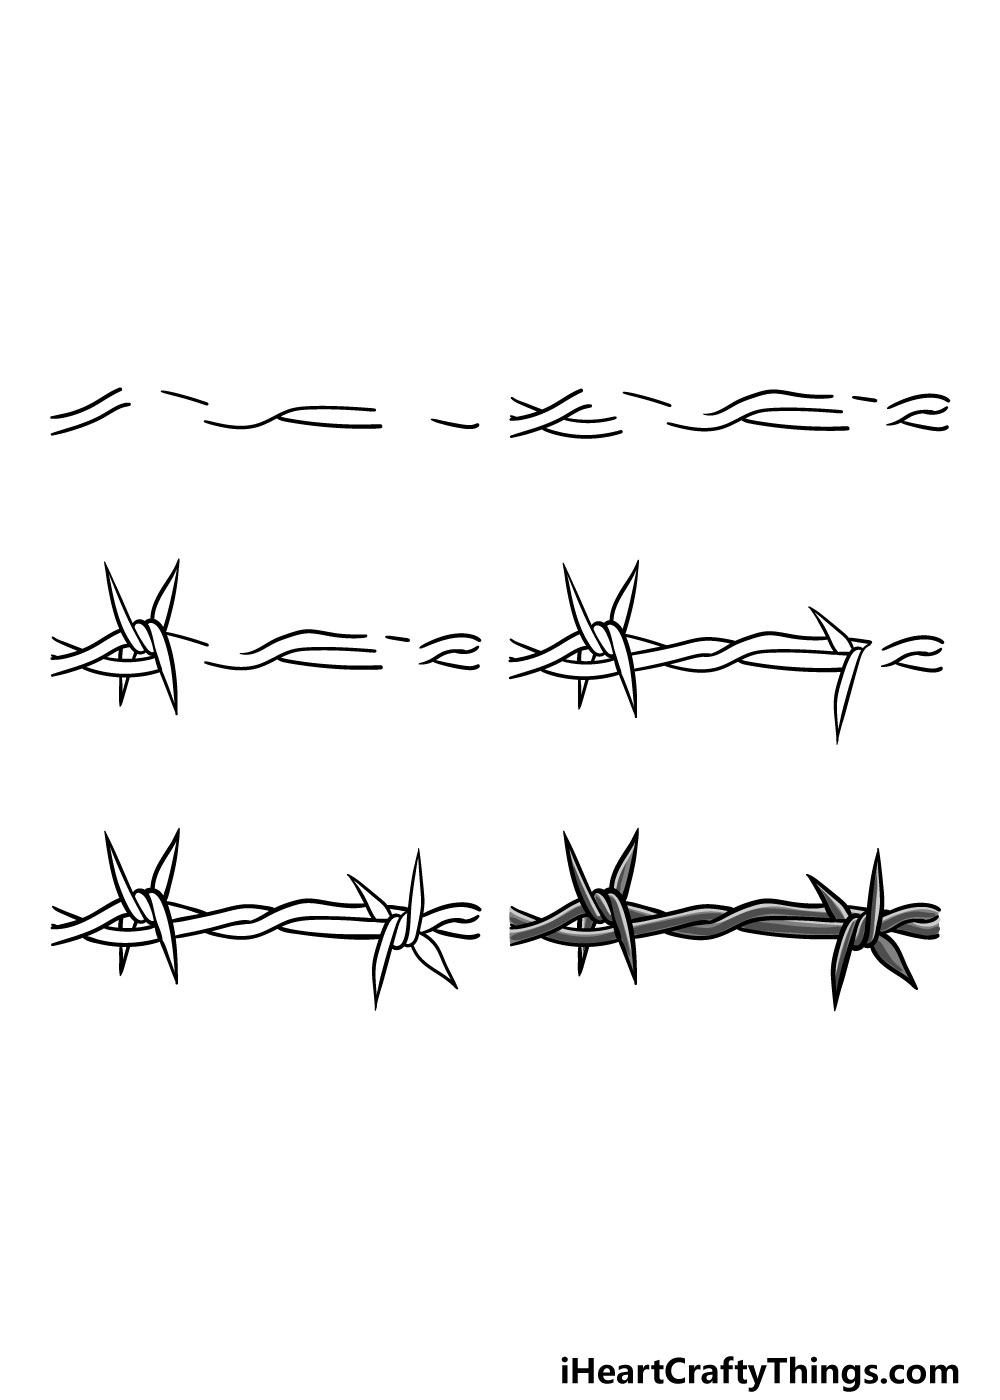
How to Draw Barbed Wire – Let’s Get Started!
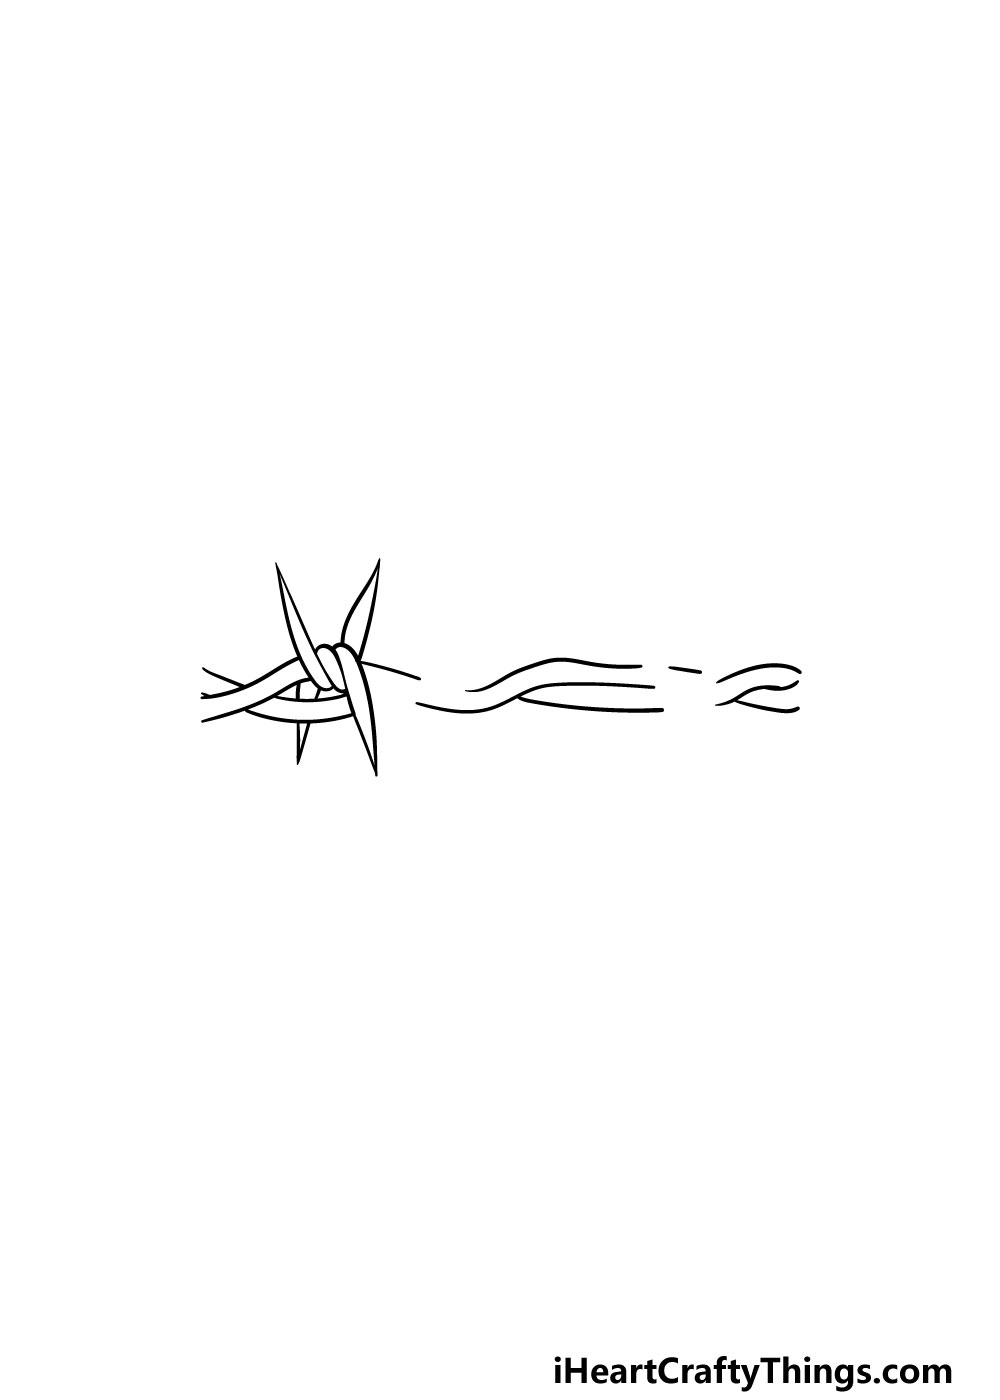
Step 1
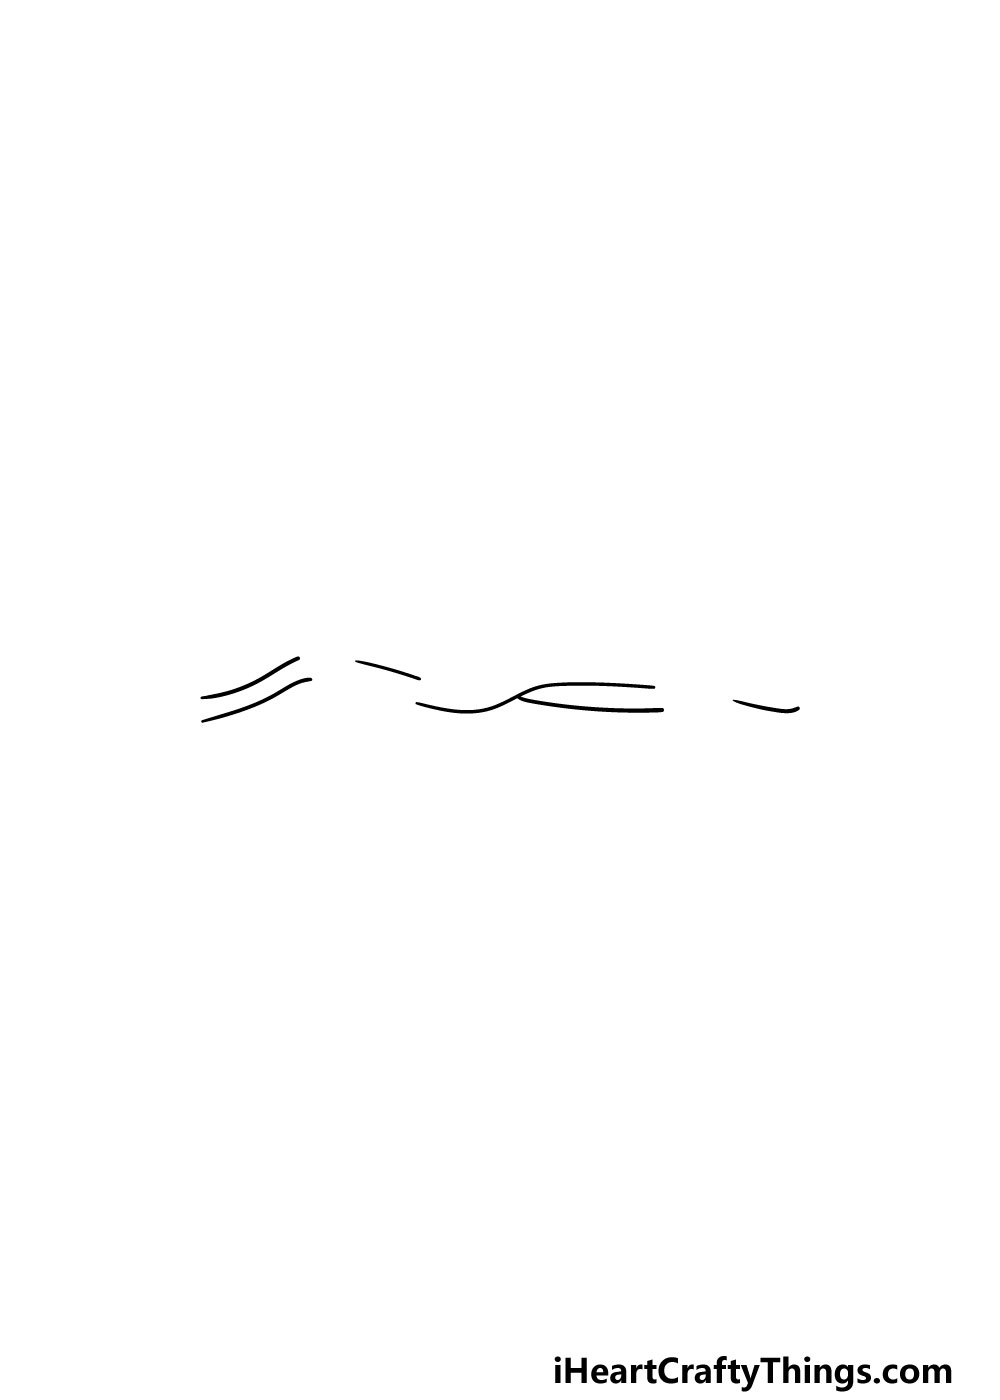
In this first step of our guide on how to draw barbed wire, we will be drawing some curved lines that may not look like much initially, but will later form an important part of the drawing.
For this step, you will want to refer very closely to the reference image as you draw, as what we’re drawing now will interact with future steps very specifically.
You may also want to draw with a pencil first and then go over it with a pen when you’re happy with how it looks. Once you have drawn the lines as they appear in the reference image then you’re ready for the next step!
Step 2 – Add some more curved lines for the wires
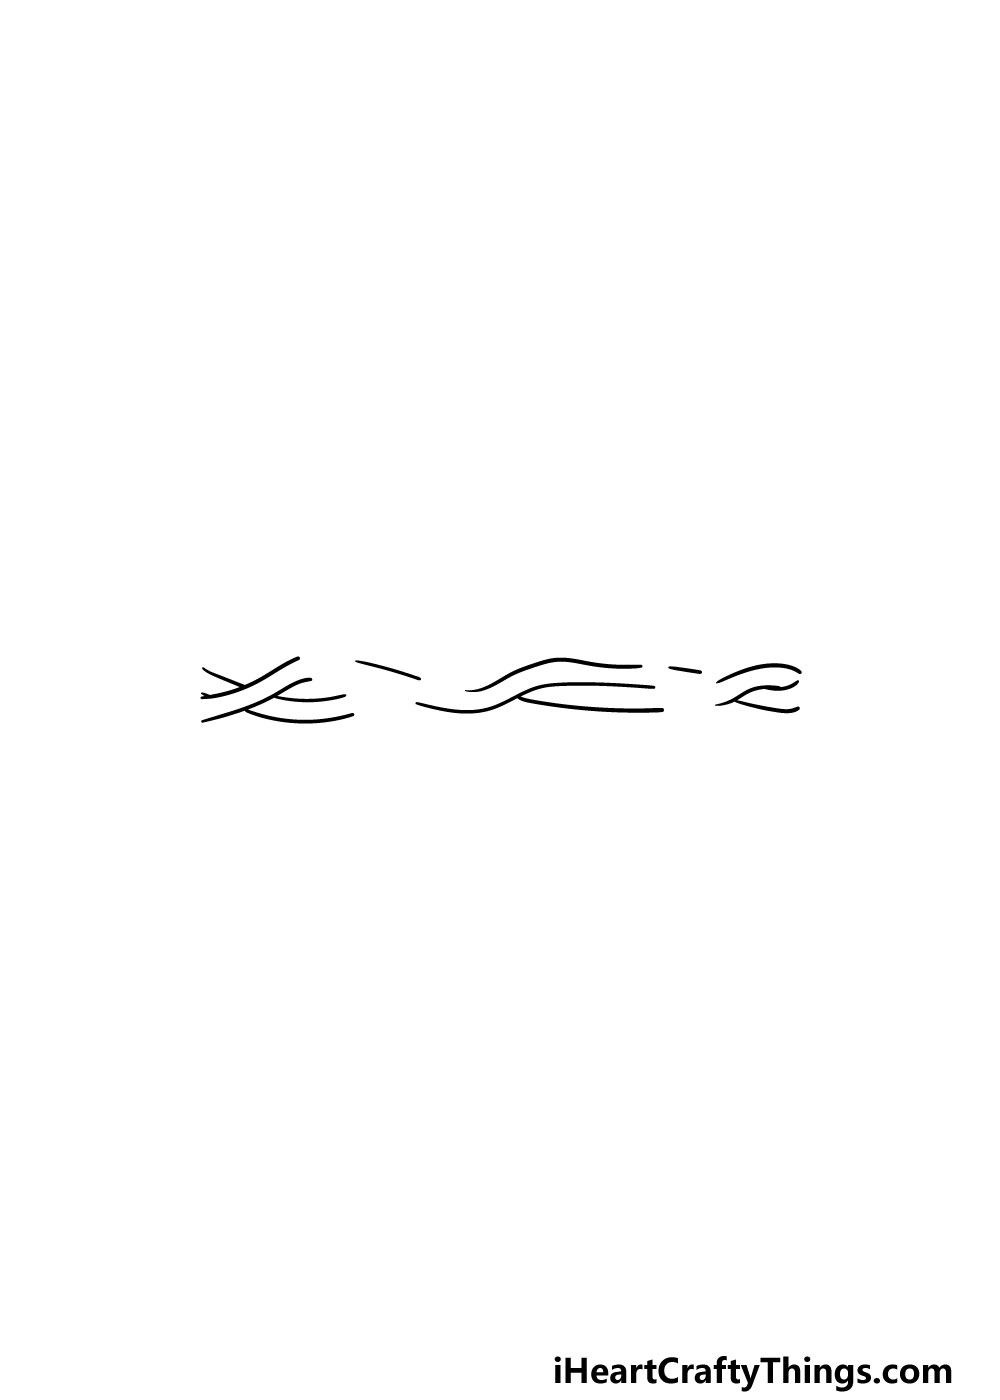
It’s no secret that barbed wire is made up of twisty wires as it’s in the name, and with the lines we will be drawing in this part of your barbed wire drawing we will add some more wire.
These lines will be similar to the ones in the previous step, and they will interact in a specific way to look like the twisty wires.
Once you’re happy with how it looks then you’re ready for the third step!
Step 3 – Next, you can start drawing the spikes of the barbed wire
Barbed wire would not be very useful without some spikes, so we shall start to draw them in this part of our guide on how to draw barbed wire.
To do this, you will be using some sharp and angular lines that end in sharp points for the spikes. The lines will also curve in such a way that it looks like they are twisting together.
This spiky part may look confusing, but it’s easier than you may think when you take it slowly and follow the reference image closely.
Step 4 – Draw some more of the wires and spikes
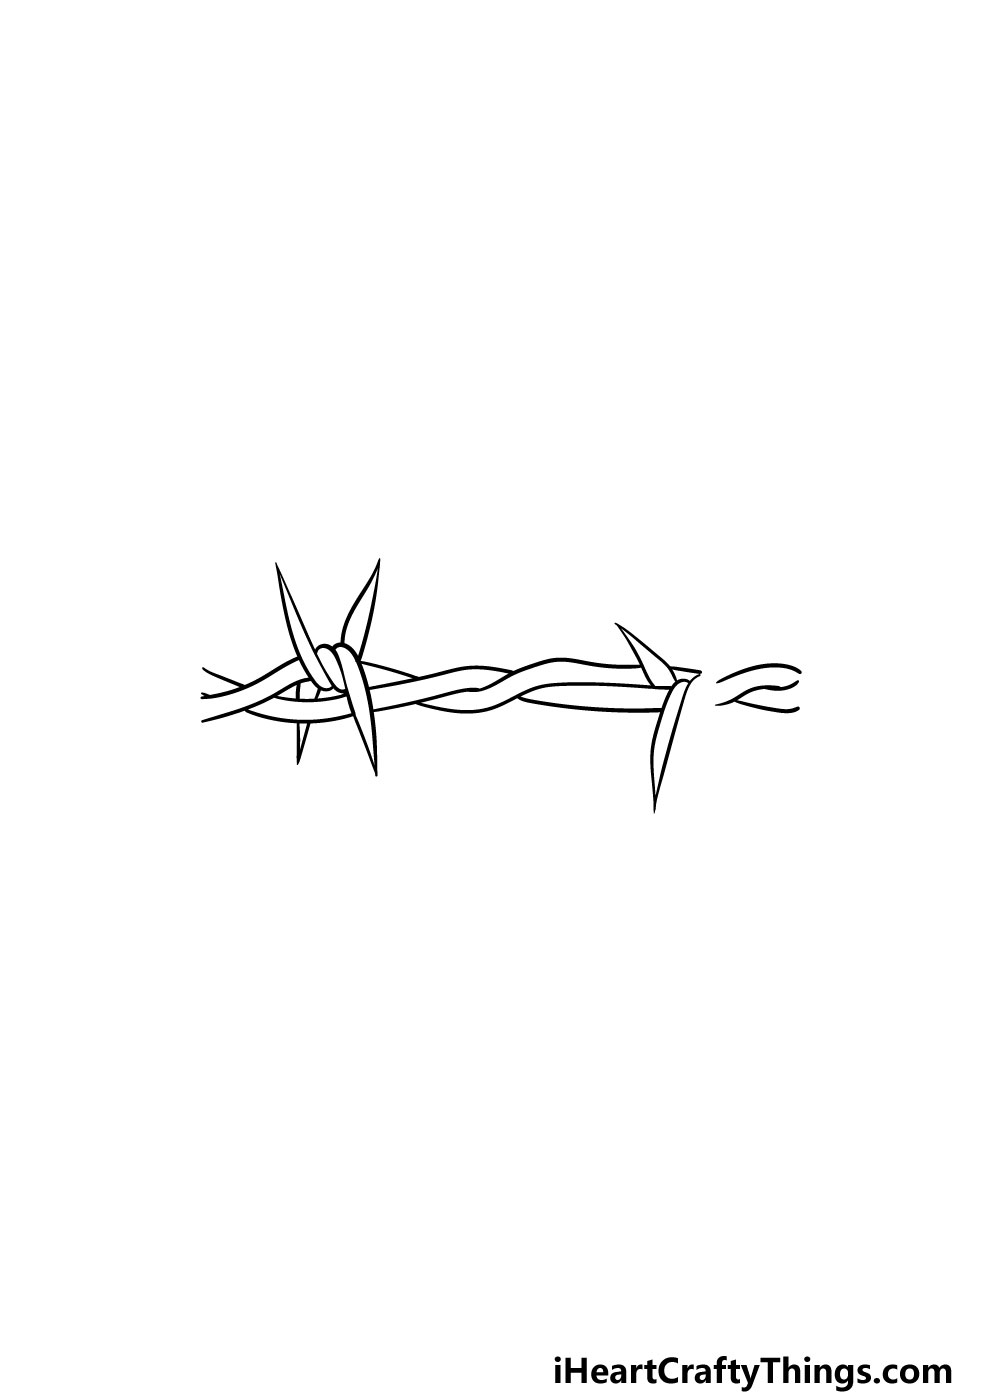
You’re doing a great job on this barbed wire drawing so far! You’ve made it to this point, so you should have no problems doing the rest of this guide.
In this part, we will be adding more lines to the wires and spikes. Simply use some more wavy lines for the horizontal wire as you have been doing so far.
Then, we will be adding two more spikes. At the moment, this cluster of spikes will look a little different from the one that you drew in the previous step.
We will be adding more to it in the next step, however, so once you’re happy with how this is looking then you’re ready for some final details in step 5!
Step 5 – Now, you can add some final details to your barbed wire drawing
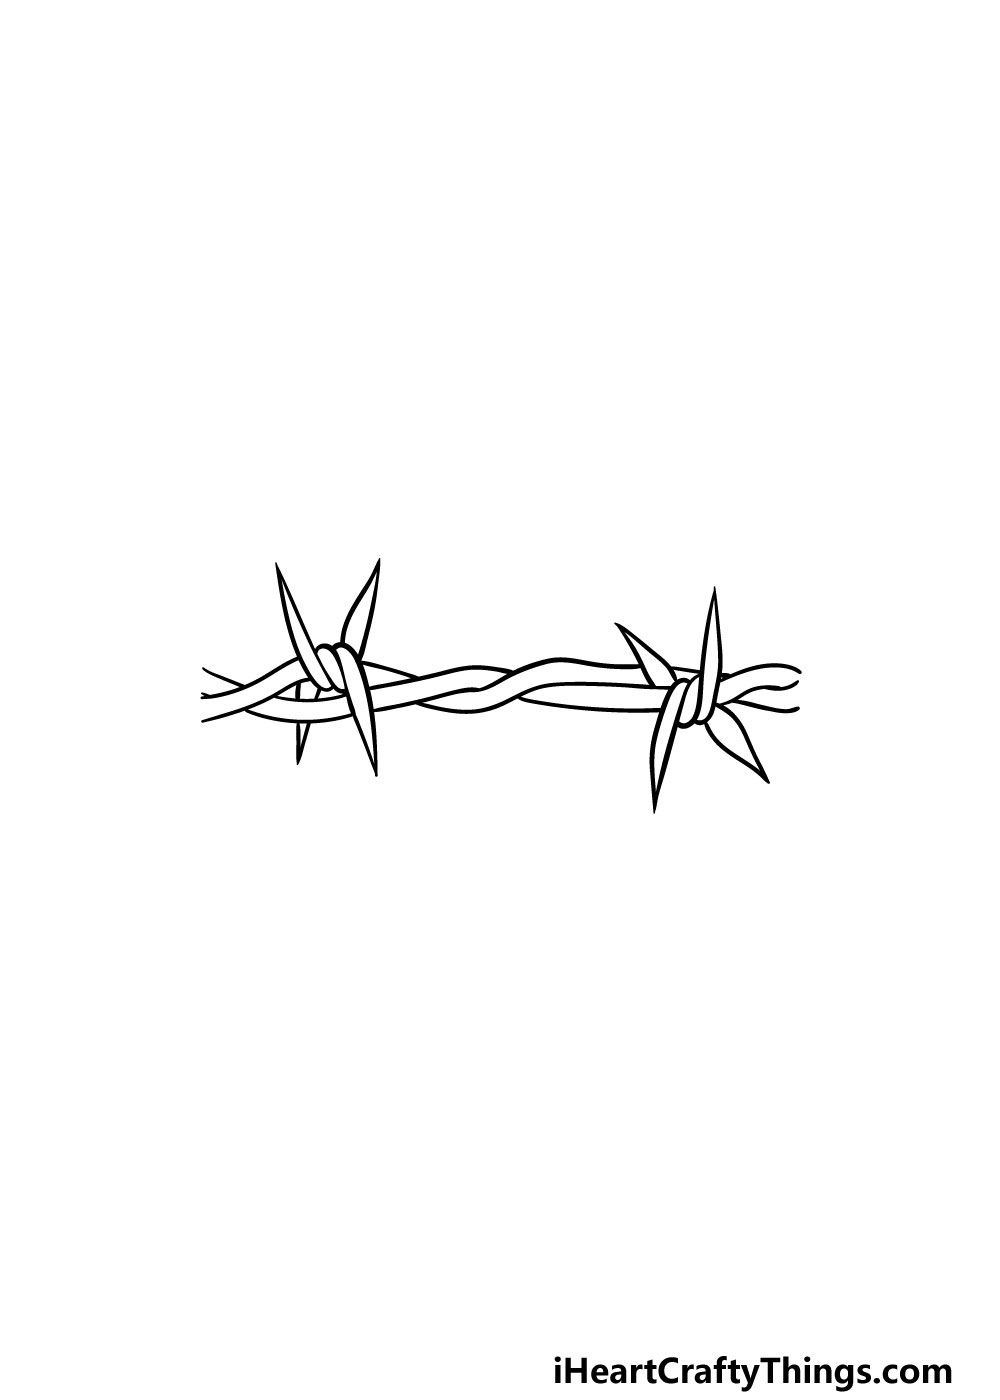
It will soon be time to add some colors to your drawing in this guide on how to draw barbed wire, but first we have some final details to add.
As we mentioned in the last step, we will be finishing off the clump of spikes that you began in part 4. Using some more curved lines that end in sharp points, you can finish off the twisty wires and sharp protrusions of the barbed wire.
With these final details and spikes added, that means that you have finished all of the details for this picture! Before you move on, you could add some details of your own as well.
You could draw more rows of barbed wire beneath this row, or maybe draw an imposing sign beneath the wire to show what it is protecting.
These are just a few ideas, but what else can you think of to finish off this barbed wire drawing before the final step?
Step 6 – Finish off your barbed wire drawing with some color
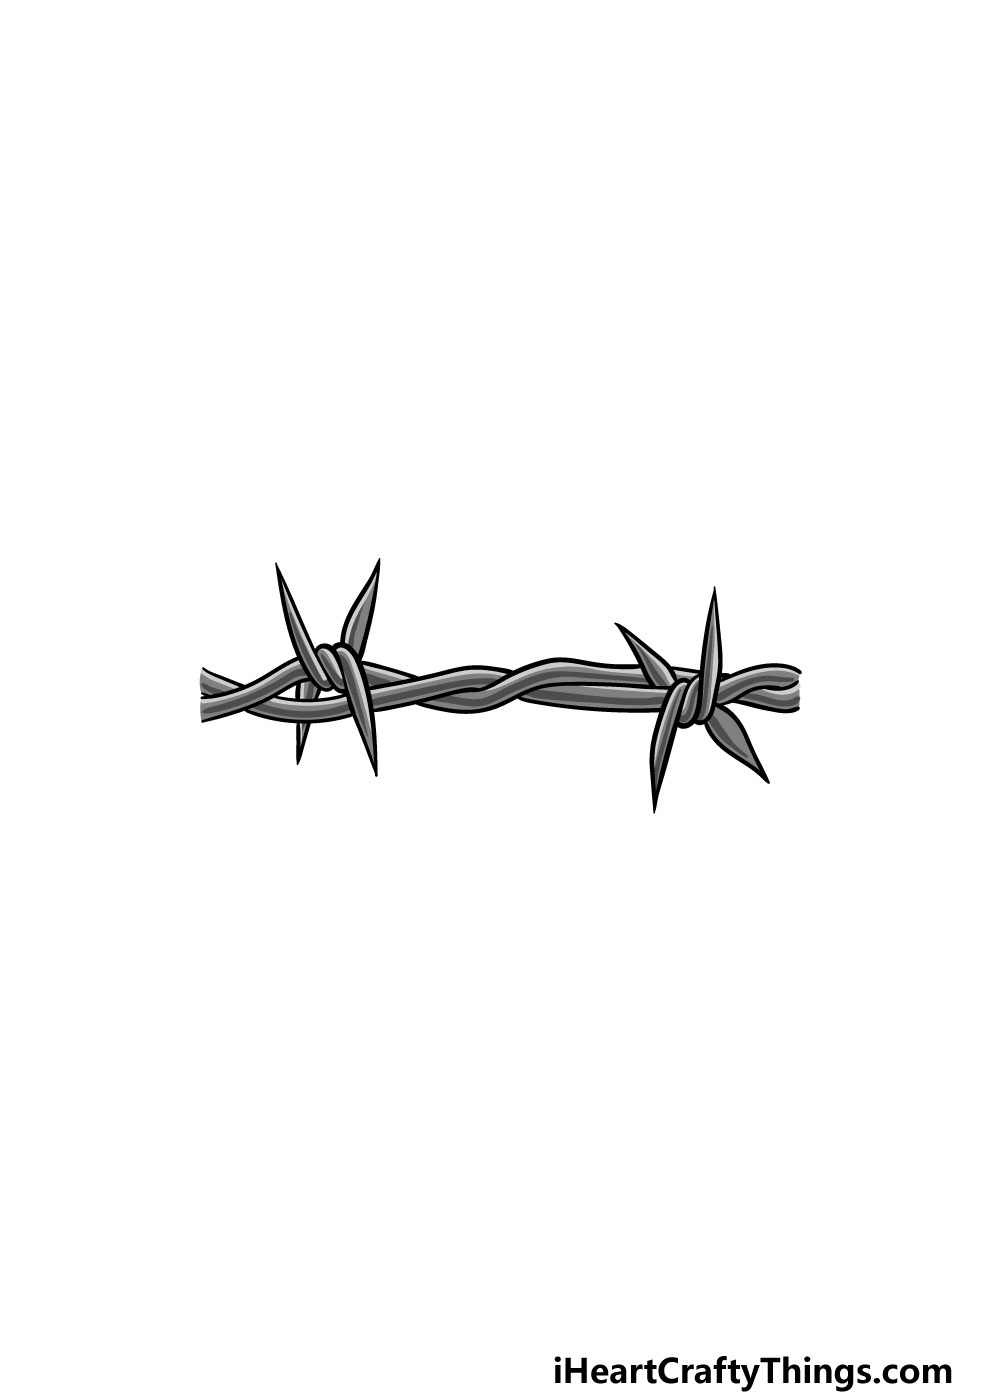
That brings you to the final step of your barbed wire drawing. This step will see you adding some colors to your picture to really finish it off.
In our reference image, we used some variations of different greys to give a metallic look to the wire.
This can serve as a reference point if you want a similar look for your picture, but there are many ways that you can bring your own favorite colors to this image.
If you drew a background or added any elements then that is a great way to bring some more color to this picture.
You could also go for a more stylistic look and use some bright and vibrant hues to finish it off. What favorite colors and art mediums will you use to close off this barbed wire drawing of yours?
5 Tips To Make Your Barbed Wire Drawing Even Better!
These tips we have for your barbed wire sketch will be a lot more inviting than the wire!
Now that you have completed this section of this drawing of barbed wire, you could add as much more as you like. This would be limited only by the size of your page or canvas!
With a bit of patience, you could extend this barbed wire as far as you like. Just be sure to include some supports and extra details that would be holding it up.
Barbed wire is by design not a welcoming thing, but sometimes there can still be beauty on and around it. For example, some vines or flowers may grow around the twisty wire.
This would be a great detail to add to the drawing! It would help to add some beauty to this dour object.
This wire may be designed to deter humans, but sometimes you will still see wildlife on the non-pointy parts. It would be another pretty detail to add to your barbed wire drawing!
For example, you could have some pretty birds or maybe a squirrel sitting on the barbed wire. Of course, you would want to have them on the smooth parts of the barbed wire!
What other animals could be sitting atop this barbed wire?
Barbed wire will often be used in conjunction with other types of fences and defensive objects. You could add some of these to your barbed wire.
For example, there could be some wire fencing beneath it. Or, there could be some spikes over the wire to make whatever it is guarding even more secure.
Lastly, you could incorporate this barbed wire sketch into a larger background setting. This would be a great way to show where this barbed wire is protecting!
There are so many different locations you could use. Perhaps the barbed wire is outside of a secure prison. Or, it could be guarding an old house that is holding some kind of secret.
These are a few ideas, but what else could you think of?
Your Barbed Wire Drawing is Complete!
You have successfully worked your way through this guide on how to draw barbed wire!
As we mentioned in the introduction, this drawing was trickier than it looked, so you should be proud of creating such an amazing image.
Even when a subject is a bit trickier, guides like this one can break it down until it’s much more manageable and fun to do.
Now you can show off your creativity with how you put your own spin on this drawing! You could add some elements, draw a background or experiment with colors and art mediums to really bring it to life.
Now that you have finished off this guide, you’ll be happy to know that there are plenty more on our website! Be sure to visit us there often, as we upload new guides frequently.
Please remember to share your amazing barbed wire drawing on our Facebook and Pinterest pages once it’s done! We can’t wait to see all of the creative ways that you chose to finish off your artwork.