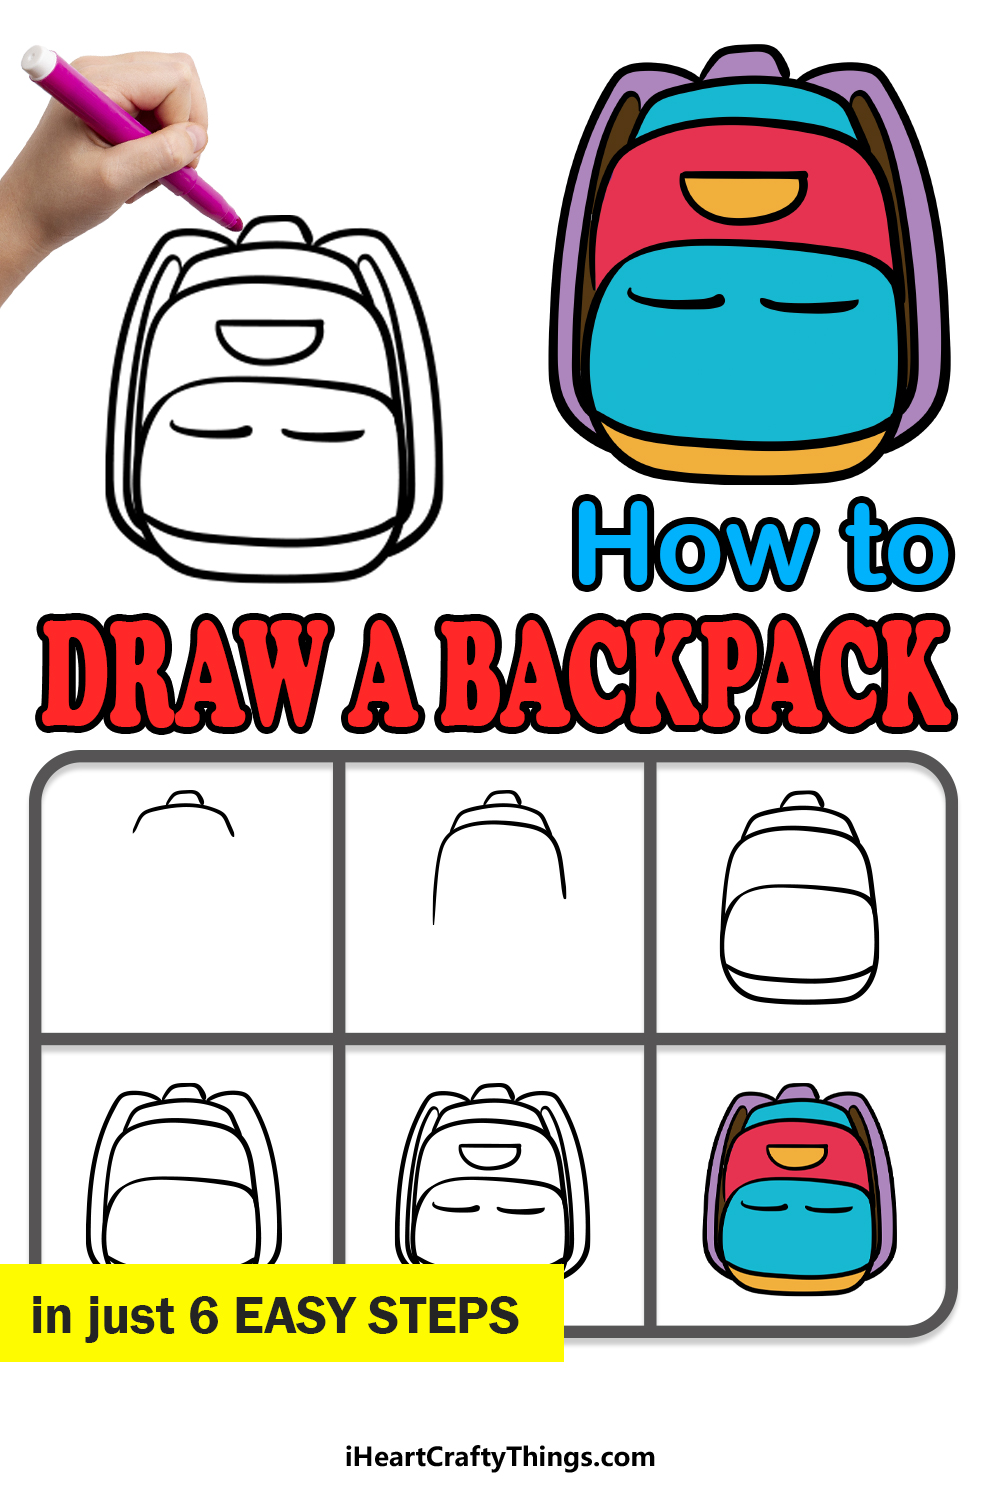
A backpack is quite a humble accessory, but it’s a highly useful one that pretty much everyone has owned in one way or another!
Whether it’s used to carry school books or belongings on an overseas adventure, they are the best way to transport what matters to you in style.
They can come in many different styles and designs as well, so it can be fun to learn how to draw a backpack in order to make your own designs.
With this step-by-step guide on how to draw a backpack, you will be able to create your own awesome backpack designs in no time!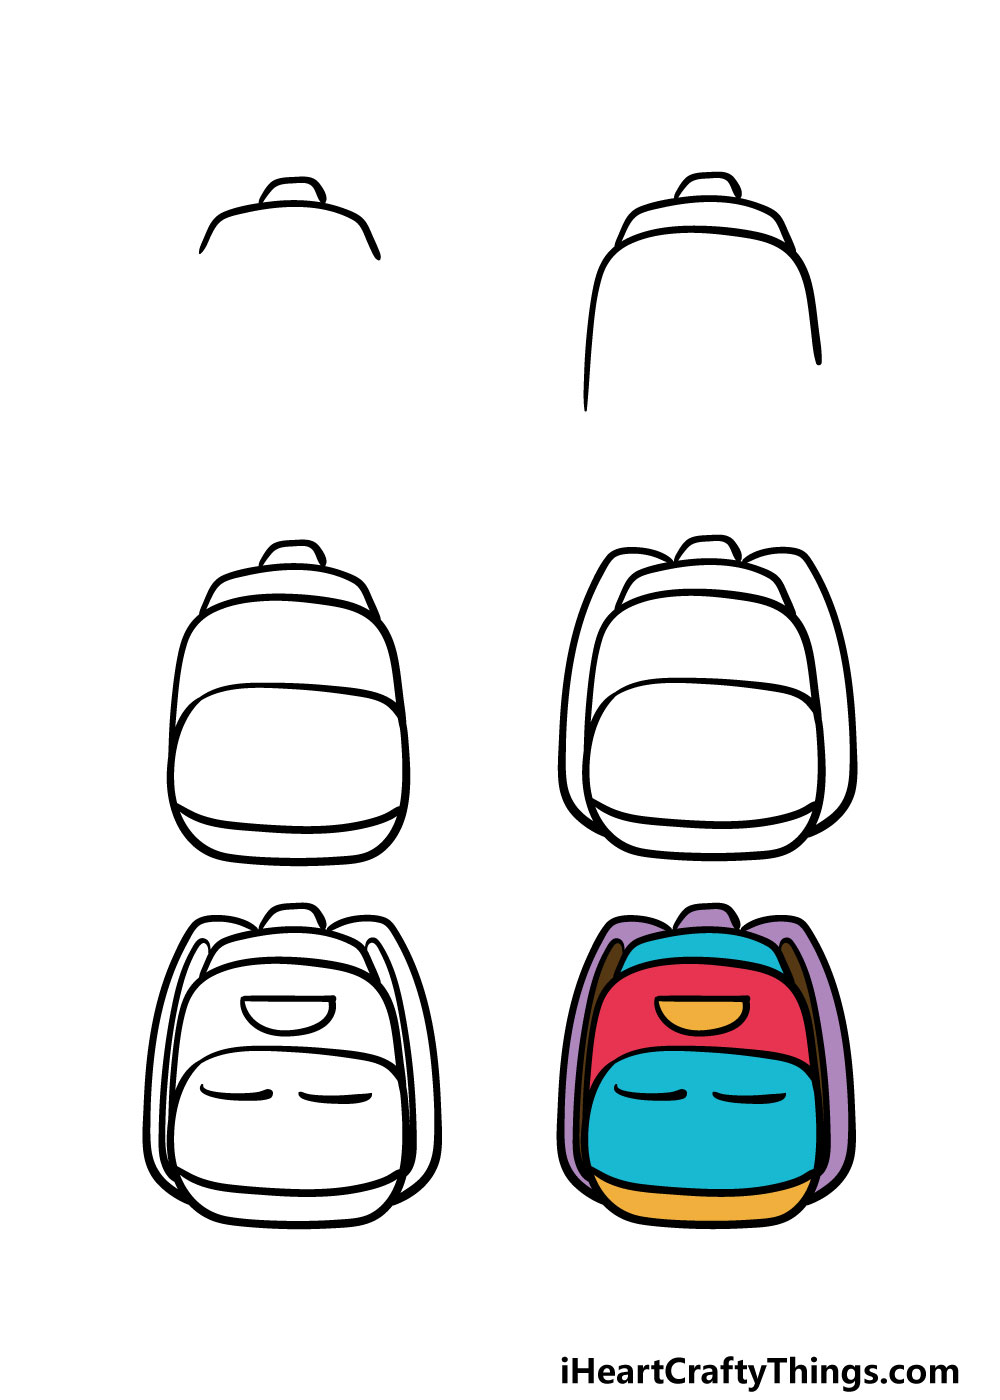
How to Draw A Backpack – Let’s Get Started!
Step 1

Before you get started with this guide on how to draw a backpack, you will need a light pencil to get you going.
The reason you will be using a pencil for now will be that you are going to be drawing shapes to guide you, and these won’t show up in the final image.
Using your pencil and following our reference image, you can draw a rounded square shape for the bottom of the backpack.
Then, you can use a curved line above this shape for the upper half of the backpack.
Step 2 – Start drawing the final outlines of the backpack
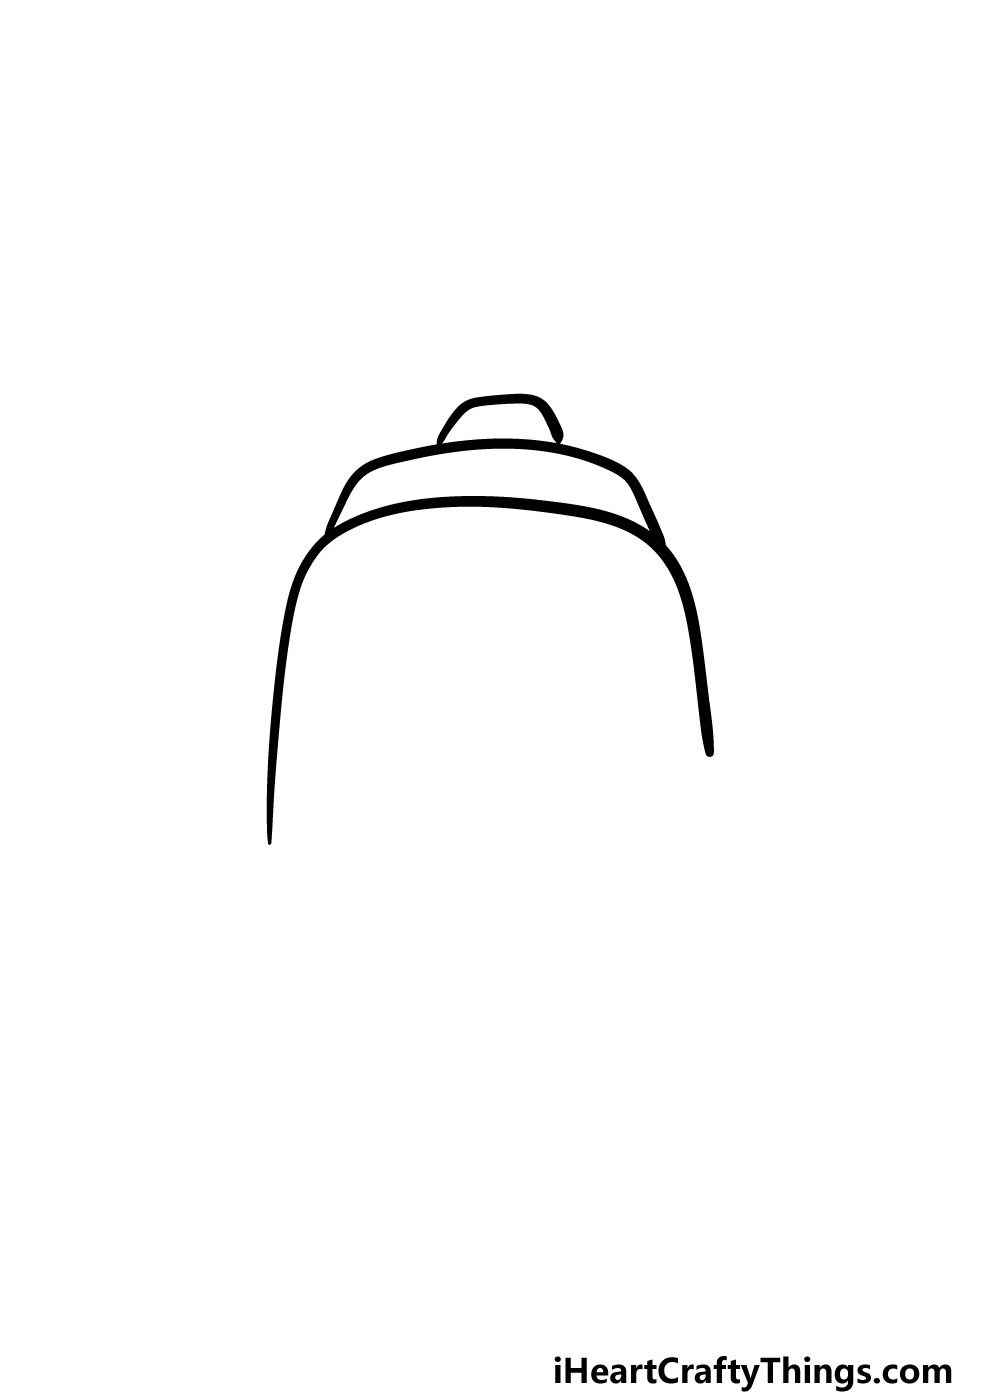
Now that you have the guide shapes of your backpack drawing done, you can start to add the proper lines using your pen.
For this step, we will be focusing on the upper half of the backpack. You can use a series of three shapes that get smaller as they go up.
The final one will be quite a bit smaller, as it will be the carrying strap of the backpack in the final image.
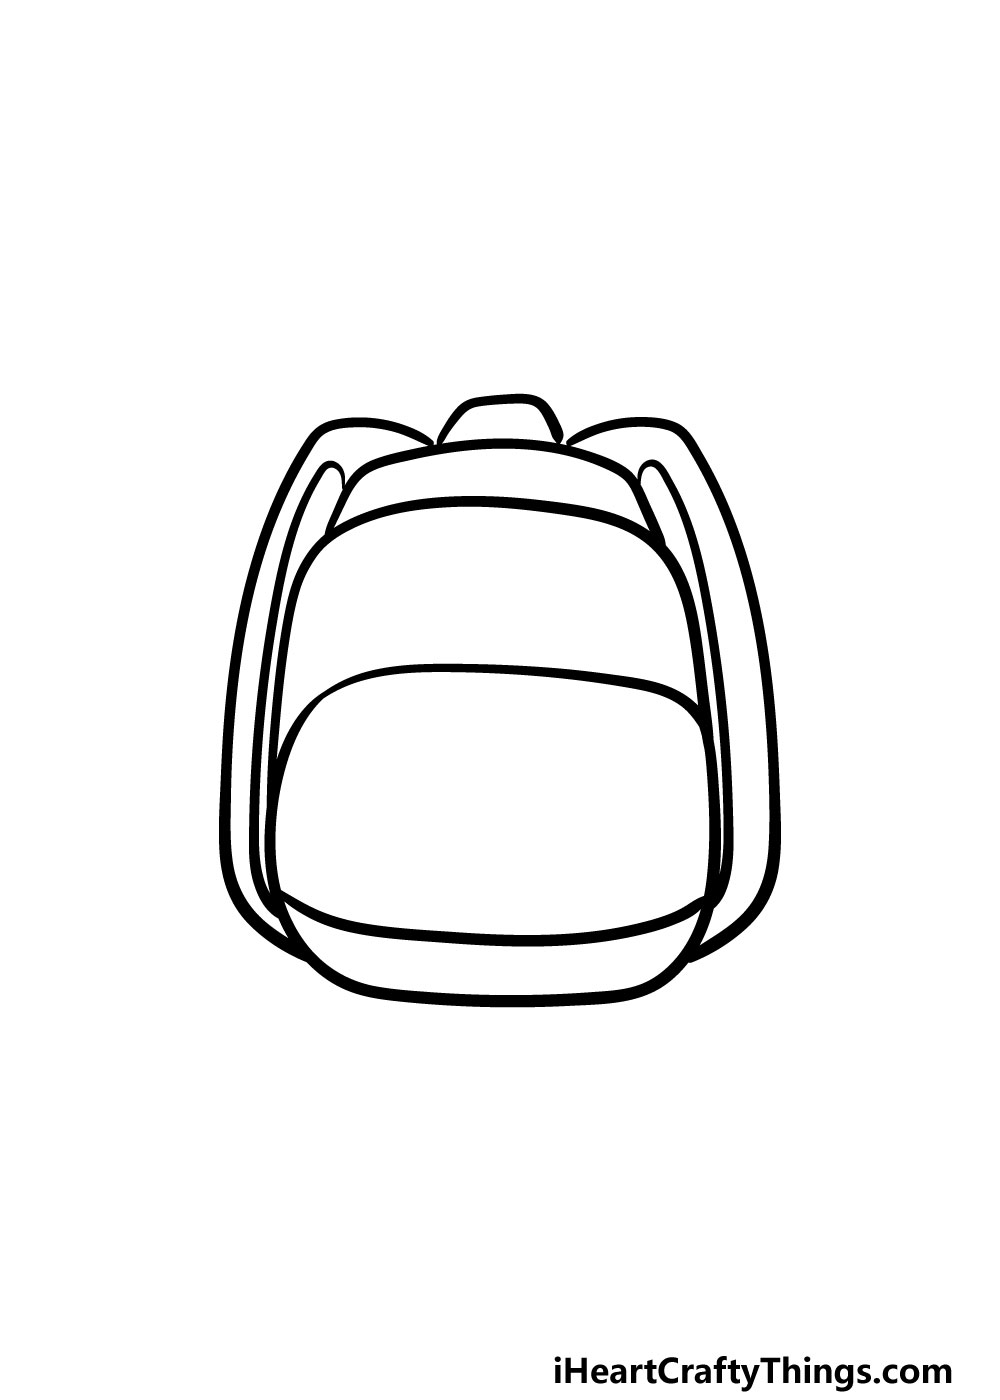
Step 3 – Now, draw the bottom half of the backpack along with some straps
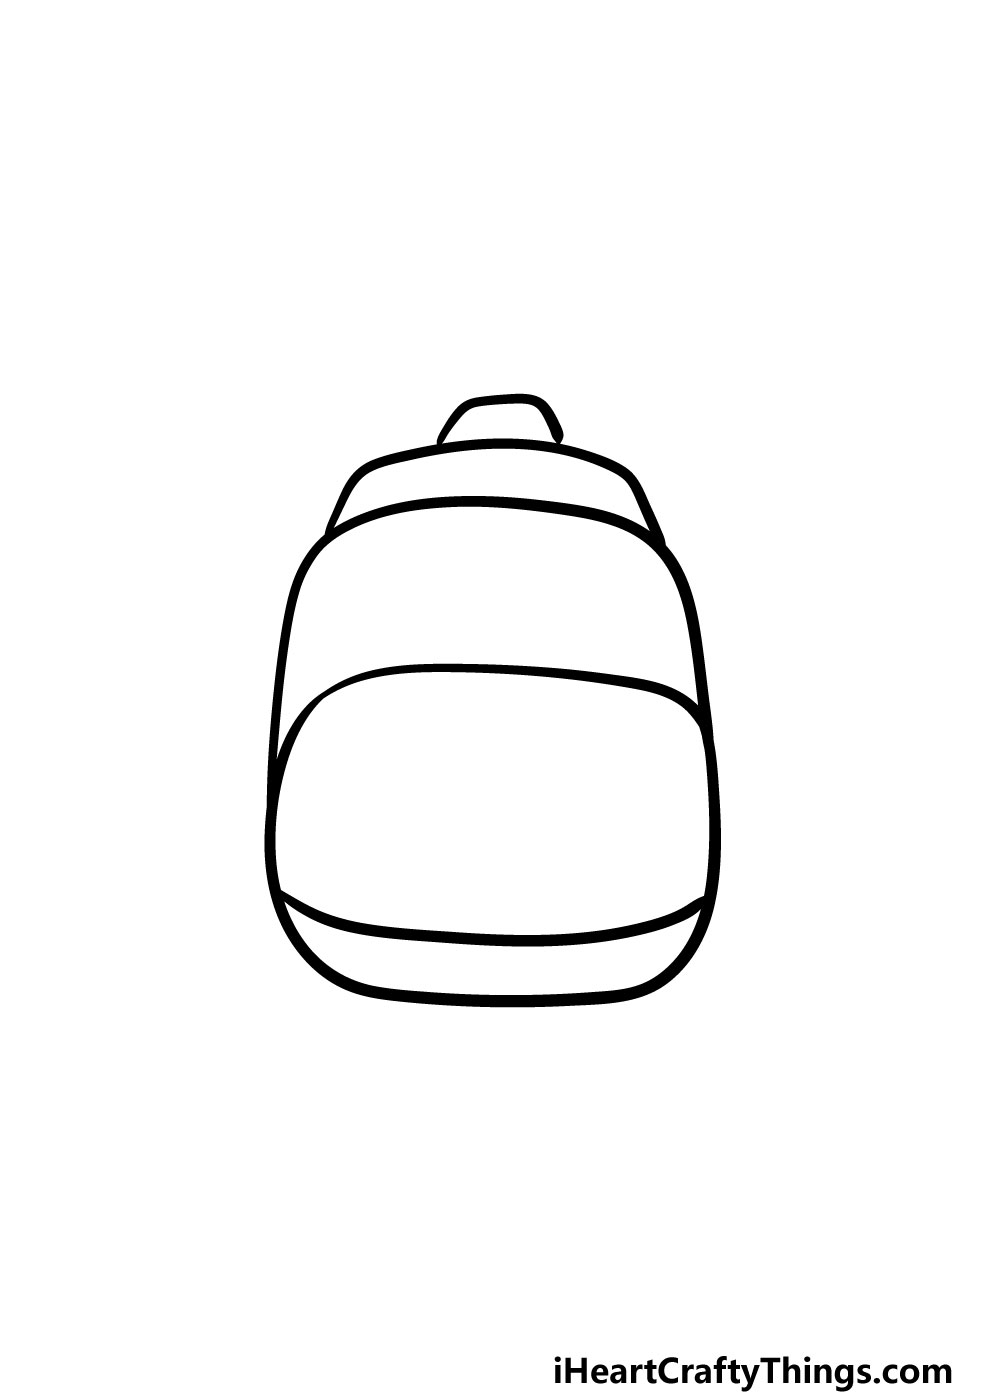
In this part of our guide on how to draw a backpack, we will be focusing on the bottom half of the backpack while also adding the main shoulder straps.
First, for the bottom half of the backpack you can use your pen to go over the penciled rounded square from the first step.
Then, you can draw some curved lines going from the top to the bottom of the backpack to create the shoulder straps.
Finally, draw a half-circle shape in the top half of the backpack for some extra detail
Step 4 – Finish off the shoulder straps and add some details
Your backpack drawing is really starting to take shape now! In this step of your drawing, you can add some more curved lines within the outlines of the shoulder straps to finish them off.
Then, you can draw some simple horizontal lines in the bottom half of the backpack for some pockets.
Step 5 – Now, you can add some final details to your backpack drawing
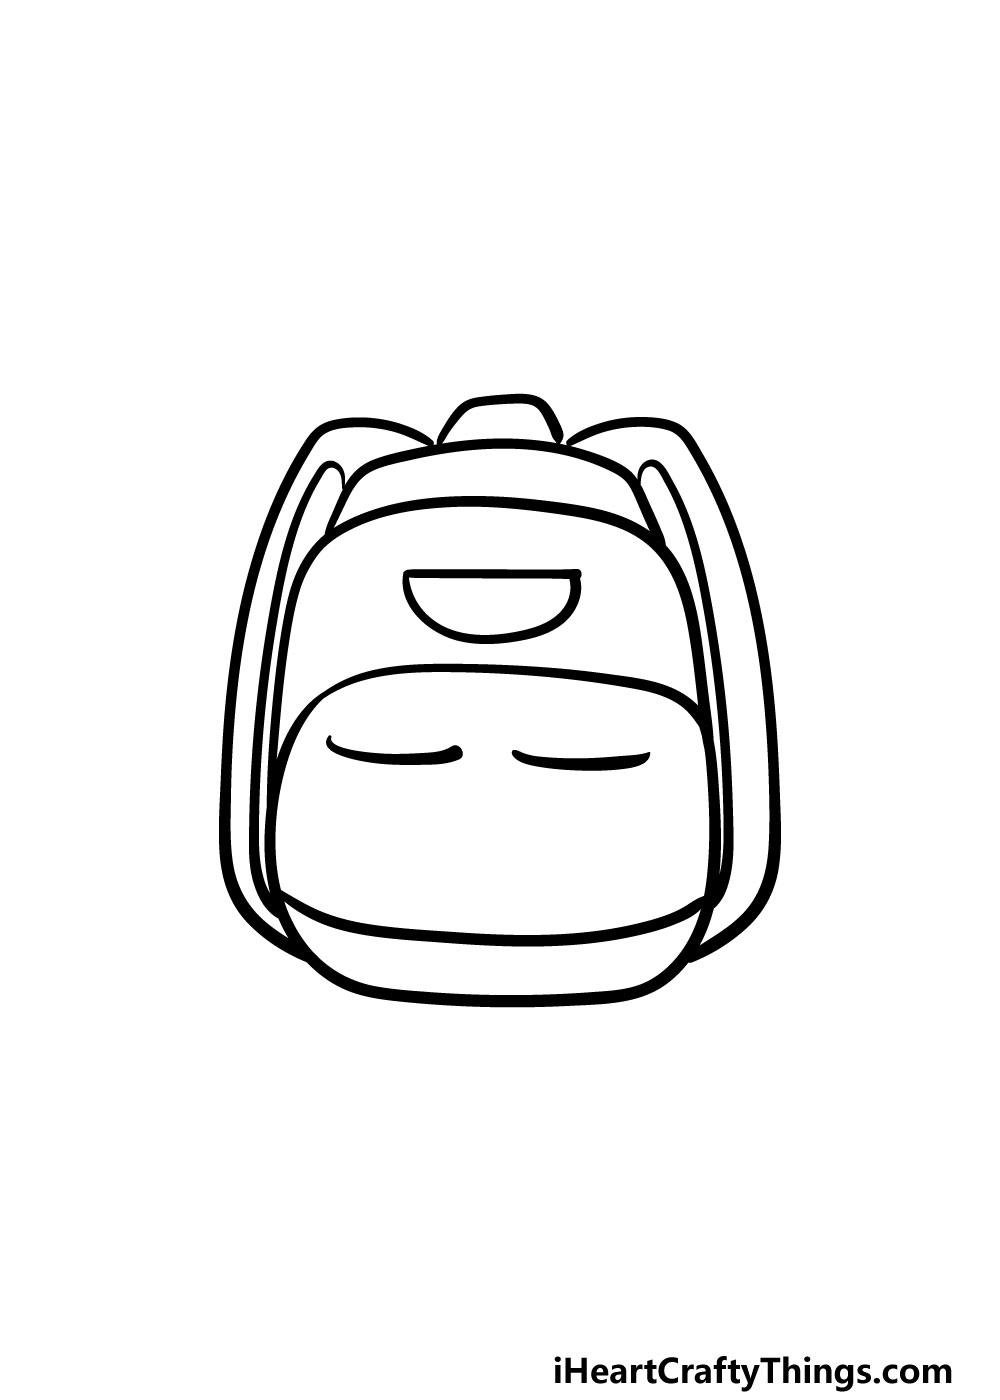
Before you move on to the coloring stage of your drawing, there are a few more final details to add in this guide on how to draw a backpack.
First, you can draw a line along the bottom of the backpack to form its base. Once you’ve added that, you can take your eraser and erase all of the pencil lines from step 1.
When doing this, be sure to wait until all of the pen ink is dry before you start erasing or you may smudge the ink.
Once you’ve done that, you’re technically ready for the final step, but you don’t have to move on quite yet!
Before finishing off, you can add some of your own final details to further personalize your backpack drawing.
These could include some stylistic designs for the background, or even some decorative elements such as badges or keyrings.
This is your chance to let your inner designer free and show us what your ideal backpack would look like!
How will you finish off this drawing before the final step?
Step 6 – Finish off your backpack drawing with some color
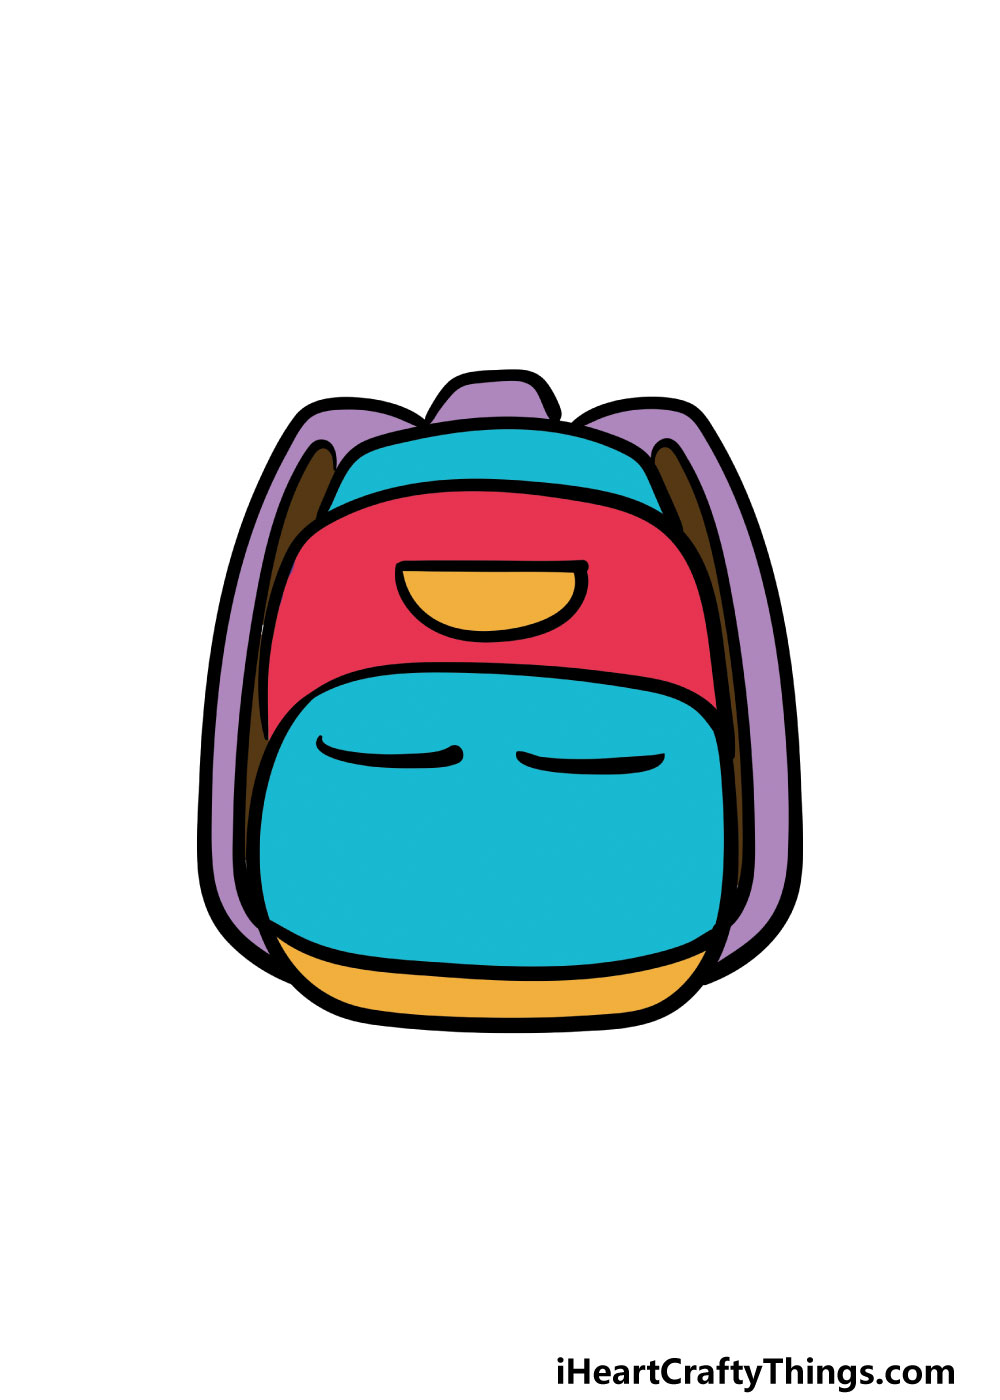
For the final step of your backpack drawing, you can have some fun adding some incredible colors to the image!
For our example image, we used reds, purples, blues and yellows. These are the colors that we chose for our example, but this is a step where you can get creative and show us what you can do.
Backpacks can come in all manner of colors and designs, so there are no limits to what you can do! This is your chance to use all of your favorite colors to finish off your backpack!
Once you know which colors to use, you can choose your art mediums to use on this drawing.
If you would like brighter and more vibrant colors, then you could go for some paints, colored pens or markers. For more muted colors, you could try some watercolors or colored pencils for that look.
For some extra fun, you could also incorporate some crafts such as glitter, beads or stickers to personalize it even further!
4 More Ways To Make Your Backpack Drawing Unique
Grab your drawing tools from your backpack and make your backpack sketch even better!
Even with a real backpack, you will often see people customizing them with various buttons and keychains. You could add these kinds of extras to your backpack drawing!
If you have a real life backpack that you have customized with these kinds of extras then you could replicate them for this drawing. We mentioned buttons and keychains, but these are just a few examples!
What are some other ways that you can think of to add some personal flair to this backpack?
We went with a simple, standard design for this drawing of a backpack, but you can also change it up a bit! This is another step where you could look at a backpack you or someone you know own for inspiration.
By adding different zippers, compartments and logos you could easily make this backpack look more distinct. Once you really have the hang of it, you can entirely change the type of backpack it is.
What kind of backpack would you like to create?
Once you have settled on the design of this backpack sketch, you might want to add a character to wear it. This could be a character drawn in any kind of style you find fun and easy!
It could also be a fun idea to use yourself or someone you know as a model for this human character. While you’re at it, why not add a background setting to show where the human is using this backpack?
We used some bright and eye-catching colors for our example of this backpack drawing, and they look great! You could really use any colors you like in order to create your very own perfect backpack.
You might prefer a darker, more muted color scheme, but it might also be fun to make it even more bright and beautiful. You can use the colors you choose in conjunction with any changes you may have made earlier.
We can’t wait to see how it turns out!
Your Backpack Drawing is Complete!
With the final details added and some colors to bring it to life, you have reached the end of this guide on how to draw a backpack!
This guide was created to not only show you how easy it can be to draw a backpack, but also to leave enough room for you to create your own designs.
We also hope that this guide was not only useful and easy to use but also that it was lots of fun for you to work through!
Noe that you have finished this guide, you can have some fun adding your own personal touches to it.
This is a great opportunity for you to create your own designs and visualize what your ideal backpack would look like.
You can further enhance the design by adding some cool crafts, art mediums and extra touches you really bring it to life!
Once you’re done with this guide on how to draw a backpack, we hope that you will visit us on our website! We have plenty of guides for you to enjoy, and we upload new ones frequently as well.
We would love to see your finished backpack drawing, so once it’s done we hope you will share it on our Facebook and Pinterest pages for us to admire!