There’s nothing like the sense of freedom and adventure that sailing a boat or a ship provides.
As fun as it is to cut elegantly through the water, boats have to stop sometime, and for that they need an anchor to not drift away!
These tools have also become an iconic symbol of sailing and sailors, and it’s a lot of fun to learn how to draw an anchor!
If you would like to join in the seafaring fun then you’ll definitely want to read until the end of this guide.
This step-by-step guide on how to draw an anchor will make sure that this drawing is smooth sailing for you!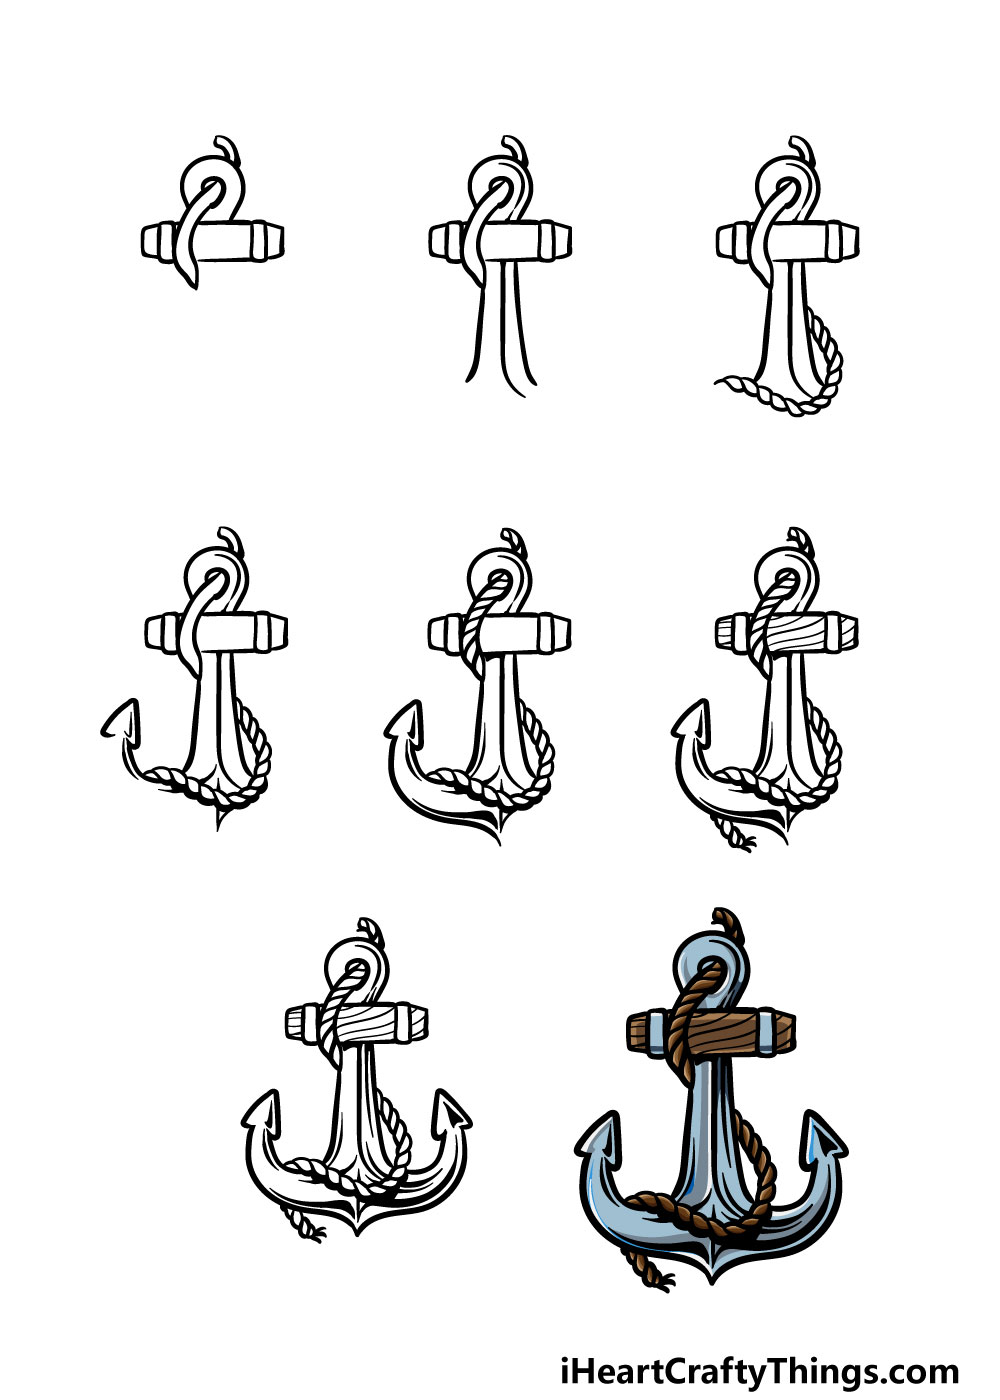
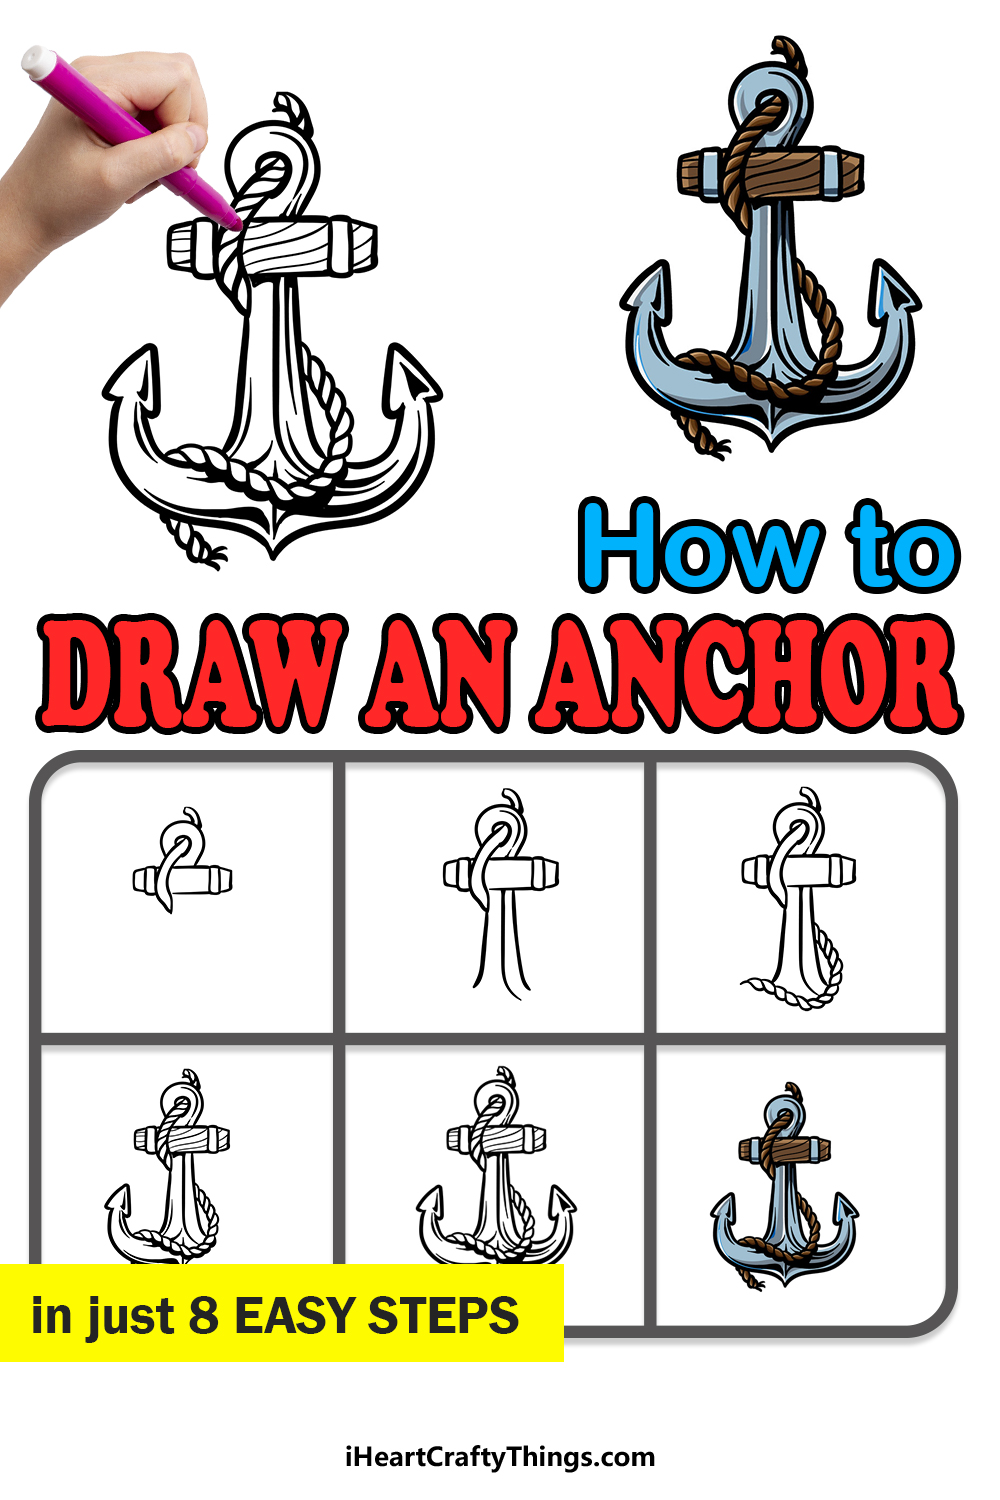
How to Draw Anchor – Let’s Get Started!
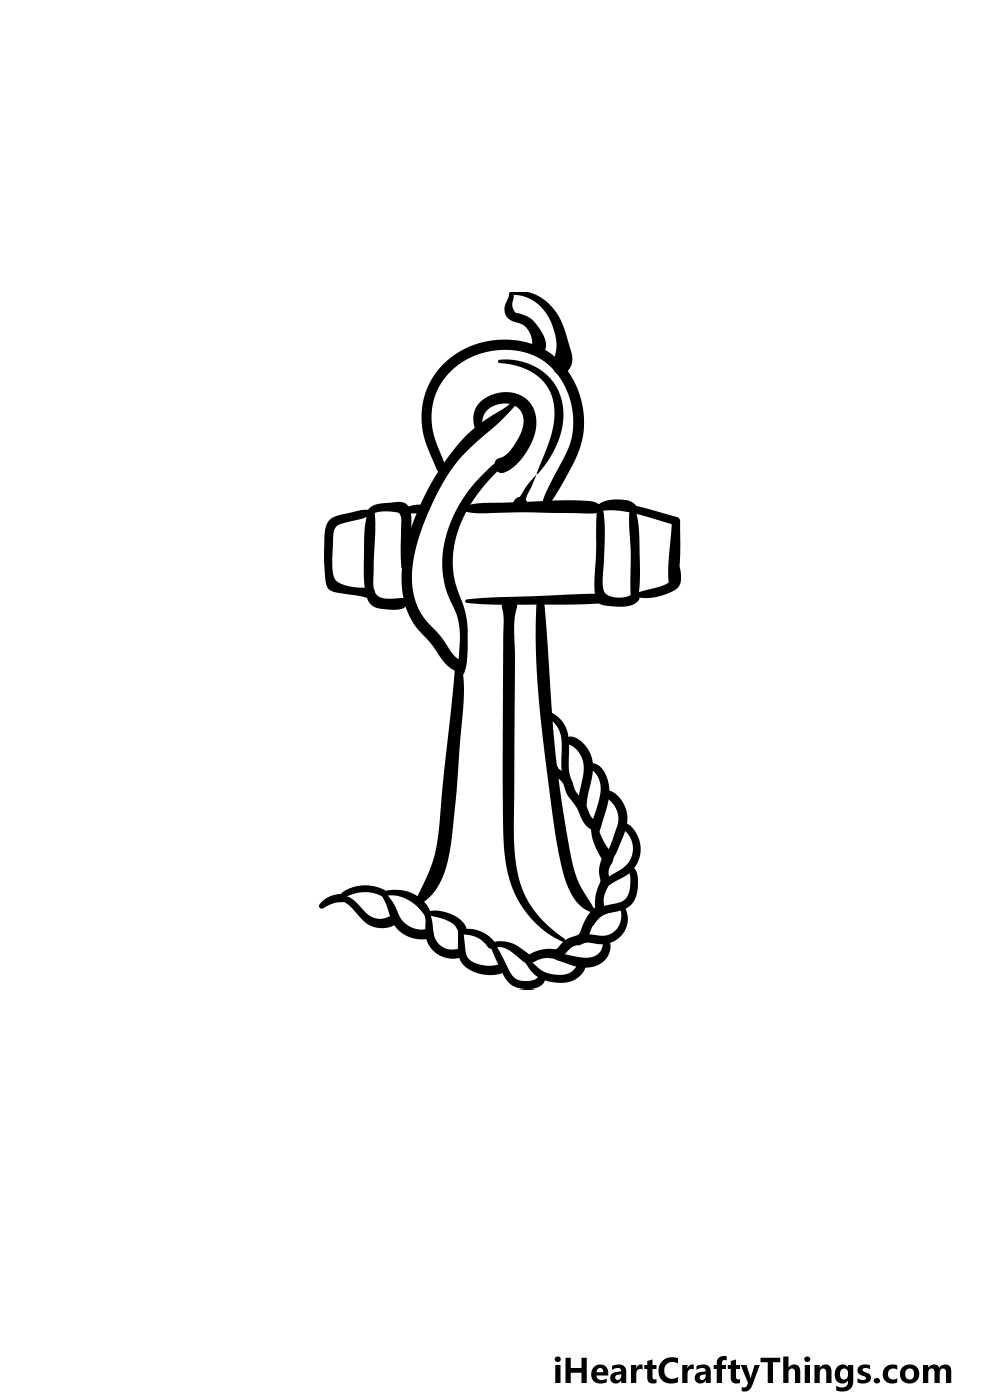
Step 1
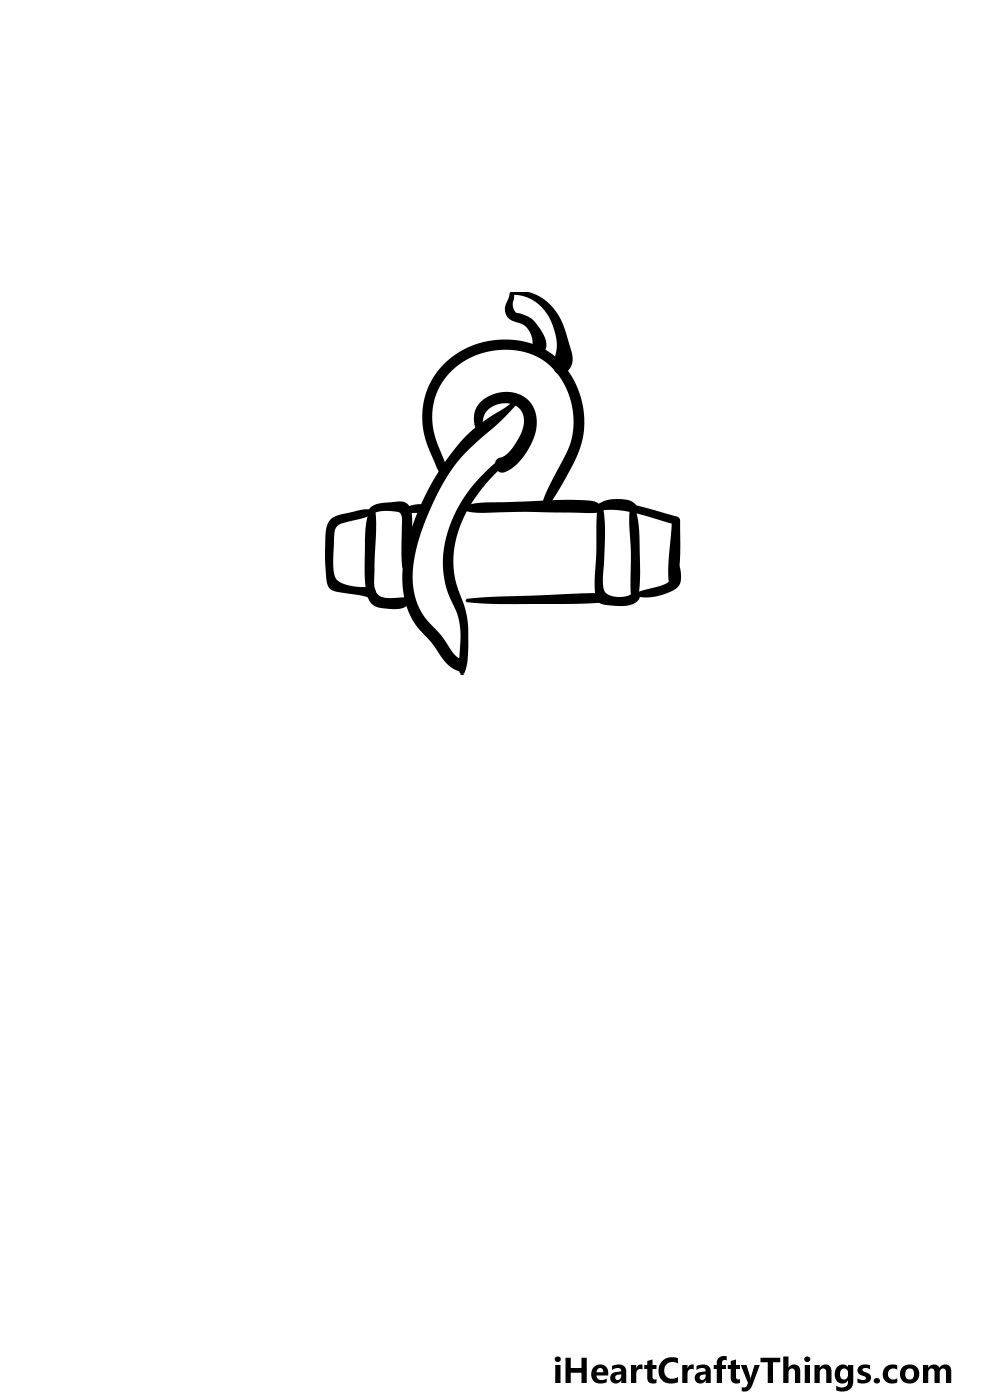
For this first step of our guide on how to draw an anchor, we will be using a pencil to get the basic shape of the anchor ready for us to add some details later.
Using the reference image as your guide, carefully use your pencil to draw the basic anchor outline.
Then, once you have that outline you can take your pen and start drawing the top portion of the anchor. There will also be a rope snaking down along the anchor, and this will also be started in this step.
Step 2 – Next, draw the center of the anchor
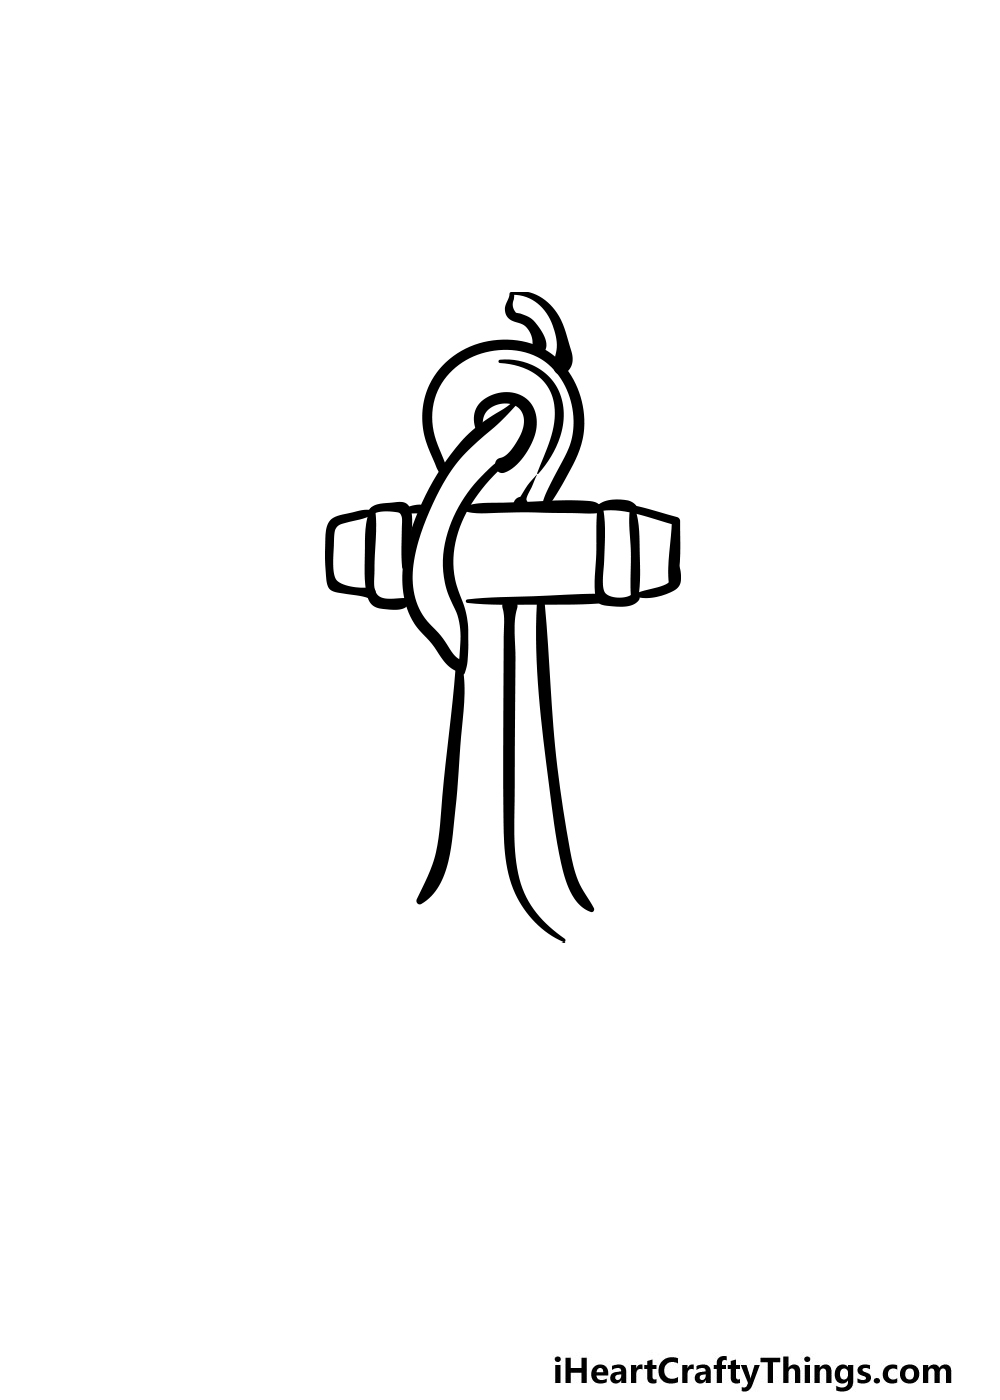
We will be drawing the central part of the anchor in this second stage of your anchor drawing. This part of the anchor is called the shank, just for interest’s sake!
This part of the anchor will be drawn with three lines, and that will help to show that this part has several sides to it. Once you’ve drawn these then we can move on to step 3!
Step 3 – Now, draw the rope coming down the anchor
The rope on the anchor will be the focus of this step of our guide on how to draw an anchor.
To do this, you will extend the rope from the right-hand side of the anchor, and it should be positioned in such a way that it looks like it’s connected to the top portion of the rope.
It will also be drawn in a row of segments, as shown in our reference image. This will provide more of a textured look than it would if you just used two straight lines.
Step 4 – Next, draw the side of the anchor
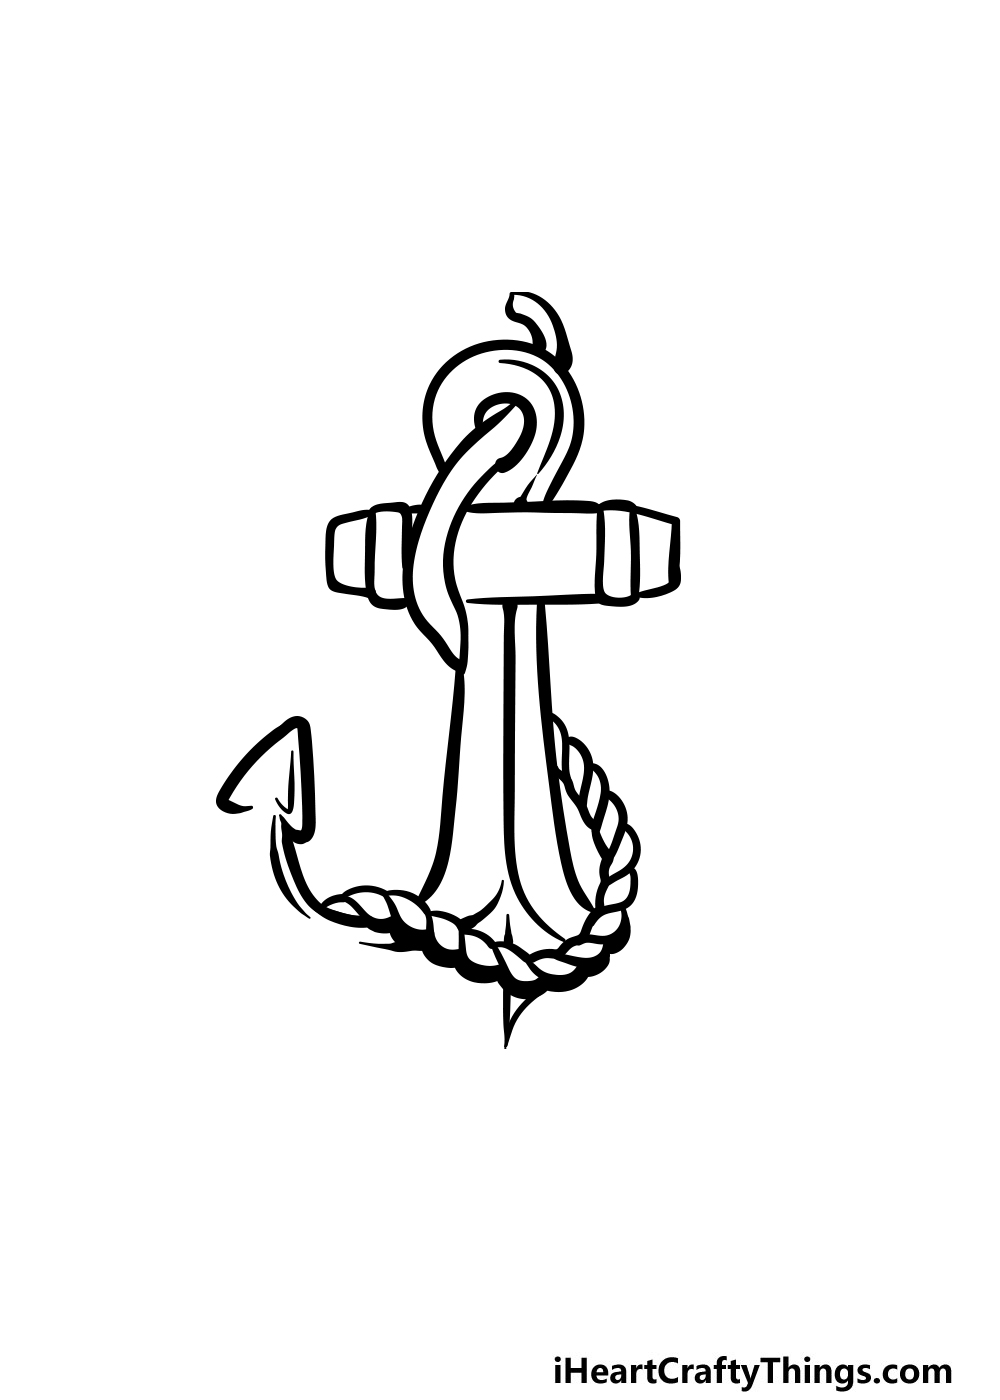
On the sides of an anchor, there are some sharp spikes that are called flukes. This is what you will be drawing in this step of your anchor drawing.
To do this, simply draw a line curving upward, and then add the sharp shape at the end of it. As you can see in our reference image, the fluke will be quite triangular in shape.
Step 5 – Now, finish off the arm of the anchor

The part of the anchor that the fluke is connected to is called the arm, and that’s what we will be drawing in part 5 of our guide on how to draw an anchor.
Using your pencil guides from step 1, simply extend some curved lines to the center of the anchor. You can also add some thick lines inside this area for more detail.
Step 6 – Next, draw the end of the rope
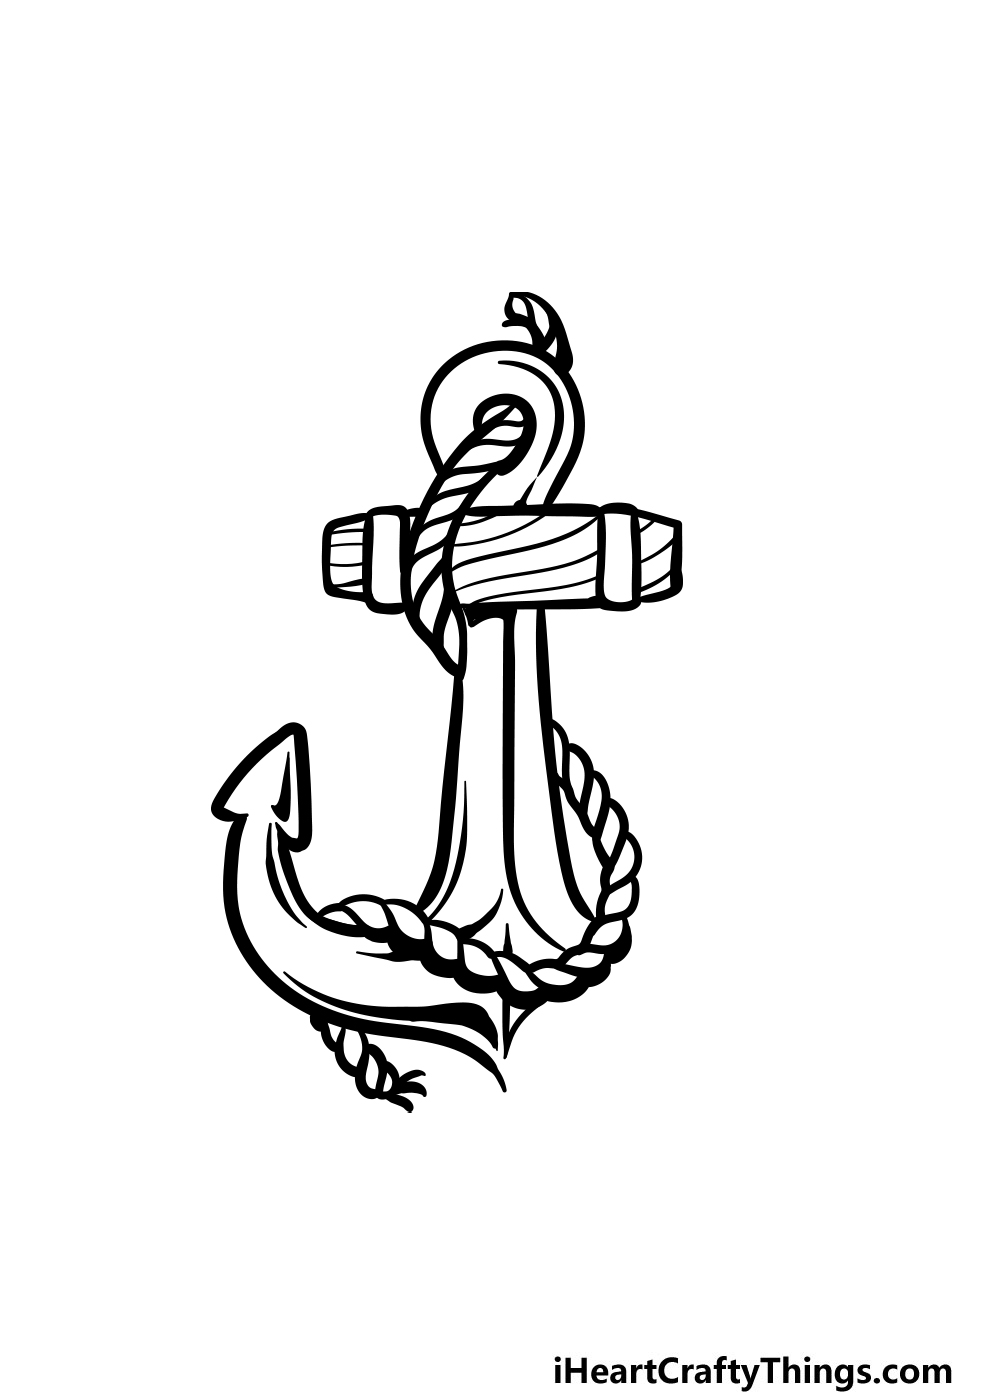
This part of your anchor drawing should be quite easy! All you need to do for this part is draw the end of the rope. This will come down from under the left arm of the anchor.
Much like with the previous step when you drew the rope, it should be placed to look like it’s connecting to the rope looping over the top of the arm.
You can add some little lines to the end to make the rope look a bit frayed.
Step 7 – Finish off the final portion and details
It’s almost time for the coloring portion of this guide on how to draw an anchor! Before we move on to that part, we just have a few more details to add.
First, draw the arm and fluke on the right-hand side of the anchor. This can be drawn as a mirror image of the left-hand side, so it should be easy enough for you to do!
Once you have the entire anchor drawn, be sure to add any extra details that you might want! It could be nice to draw a background to show where this anchor is sitting!
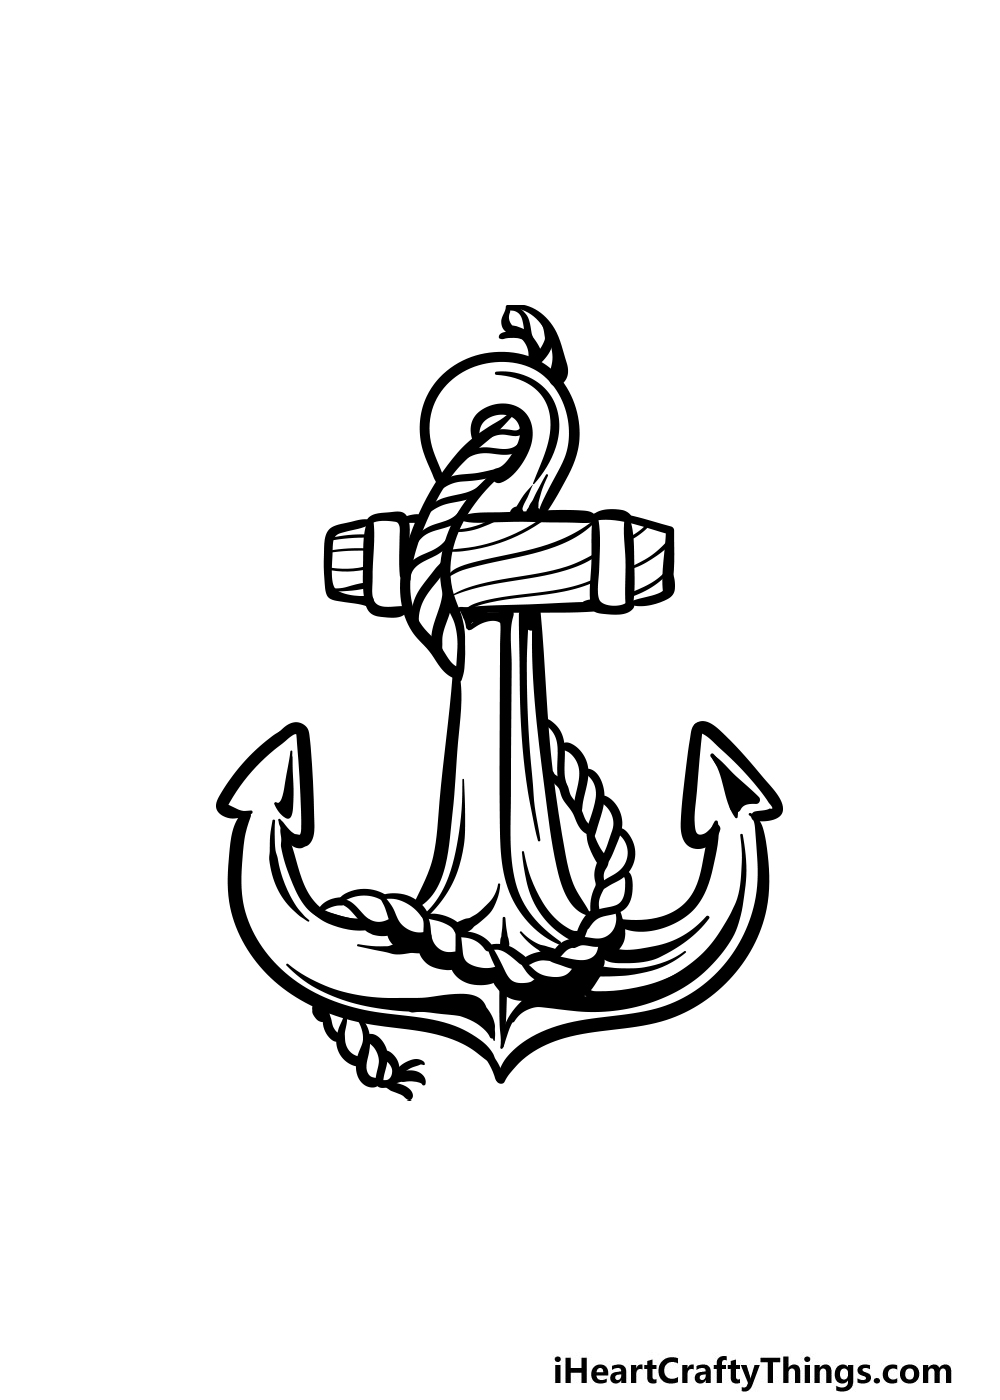
Step 8 – Now finish off your anchor drawing with some color
Once you’ve drawn your anchor and erased all of your pencil lines, you’re ready to add some color to it.
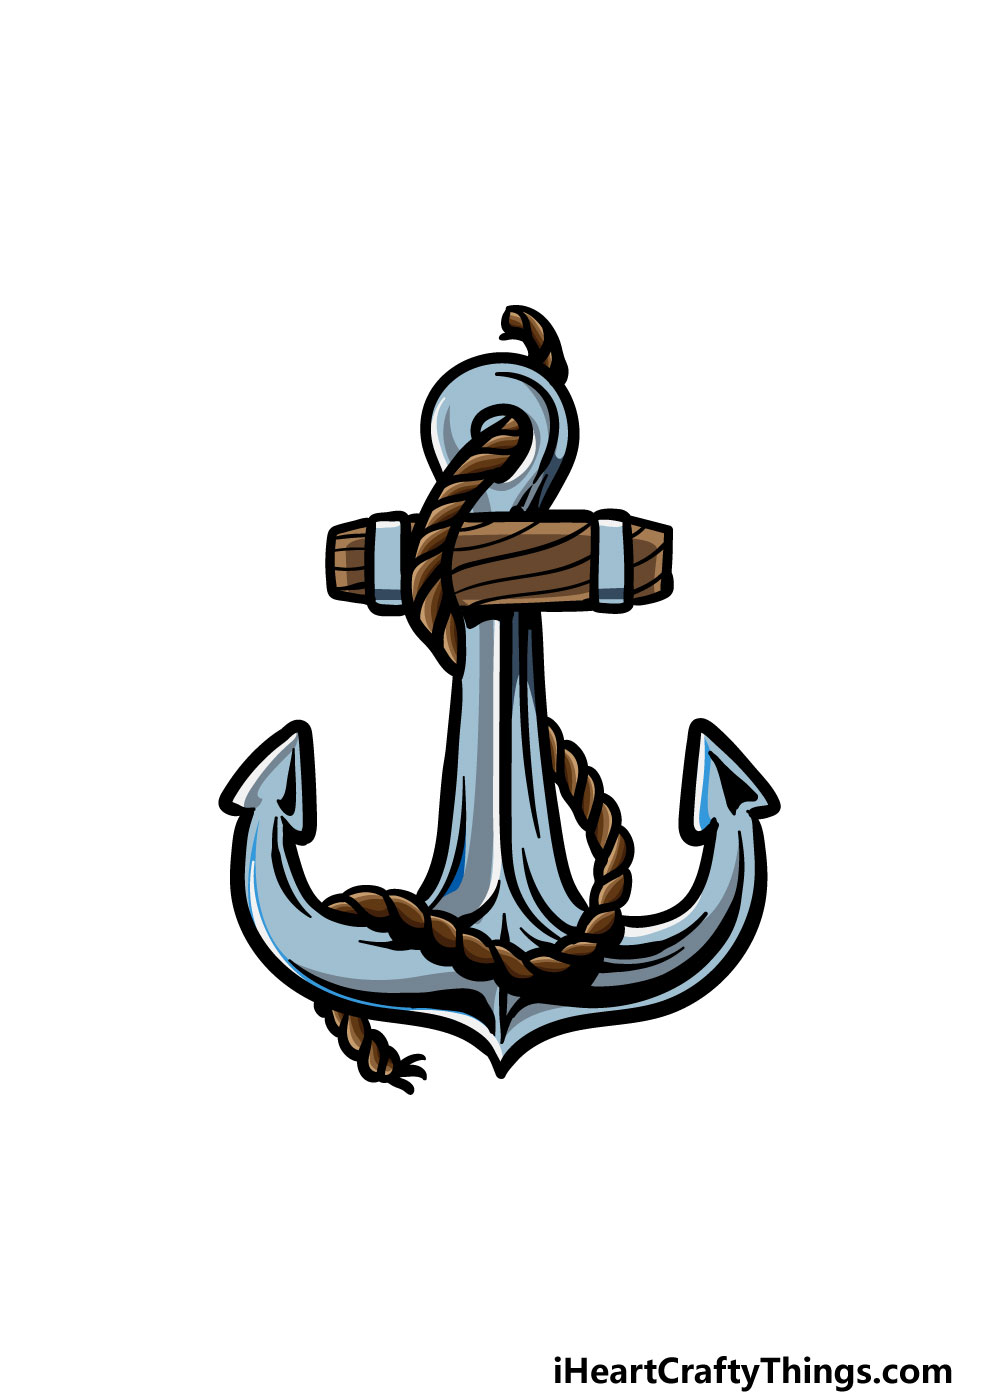
In our reference image, we used a nice dark blue for the anchor itself, and then some browns for the head of the anchor along with the rope.
These colors are just a suggestion, however, and you should feel free to use any colors that you would like for this drawing!
You could make this anchor bright and vibrant if you wanted, or you could keep the colors more muted for a more classic look.
You should let yourself have fun and experiment with some great colors and cool art mediums to finish off this anchor drawing of yours!
4 More Ways To Make Your Anchor Drawing Unique
Sail into some drawing fun with these tips for your anchor sketch!
For this drawing of an anchor, we looped the rope around it in a way that looks really cool. If you wanted to make this anchor look functional, then you could change the way that the rope is attached to it.
For instance, you could draw it exactly as it appears here, but instead you would make it taut to make it look like it is weighted. Or, the rope could be swirling around the anger to make it look looser.
How would you like to portray this rope?
You could also use some crafts to make the rope look more real. Certain craft stores will sell rolls of thin pieces of rope.
You could buy some of this and then stick it over the place where the rope would go in the image. That would give that portion of the picture some real texture that you can feel.
Are there other crafts or art tools that you could use to give this picture some unique textures?
Another way to make this anchor drawing even more interesting would be by drawing a background around it. There are a few ways you could go about doing this!
The anchor could be sitting at the bottom of the ocean with some fish and ocean creatures swimming about. Or, it could be on the deck of a ship, ready to be dropped down.
These are just a few ideas you could try, but what other background settings can you think of?
An anchor is something used by real ships, but it is also a common symbol for other things. You could turn your anchor sketch into one of these symbols!
For example, you could draw it on a naval cap to make it look like the logo a sailor is wearing. Or, maybe you could draw it on the arm of a pirate to make it look like a tattoo!
How could you change the design to look like a logo?
Your Anchor Drawing is Complete!
We hope that you had a lot of fun working on this guide on how to draw an anchor alongside us!
Now that you have completed this guide, you have learned how to easily draw this iconic maritime symbol.
This guide was designed to be both easy to use while allowing you to be creative and have fun with it, and we can’t wait to see what you create!
The drawing fun can continue as you add your own elements and details to this drawing.
Whether you add some fun extra parts or draw a background to show this anchor deep under the sea with fishes and sharks, there are lots of ways to make this your own!
We have many amazing drawing guides on our website for you to enjoy! We also upload new ones very often so please check in often to never miss out!
When your anchor drawing is complete, we hope that you will share it on our Facebook and Pinterest pages for us to admire!