The alphabet is a huge part of our lives. We use it to communicate and express ourselves, and learning the shapes of each letter is a vital skill to learn.
Even when you have all the general shapes down, there are many different fonts and styles to try out as well!
It can be a bit of a challenge learning a new style of the alphabet, but it can be made much easier when you have simple steps to follow, and that’s what we’re here to do today.
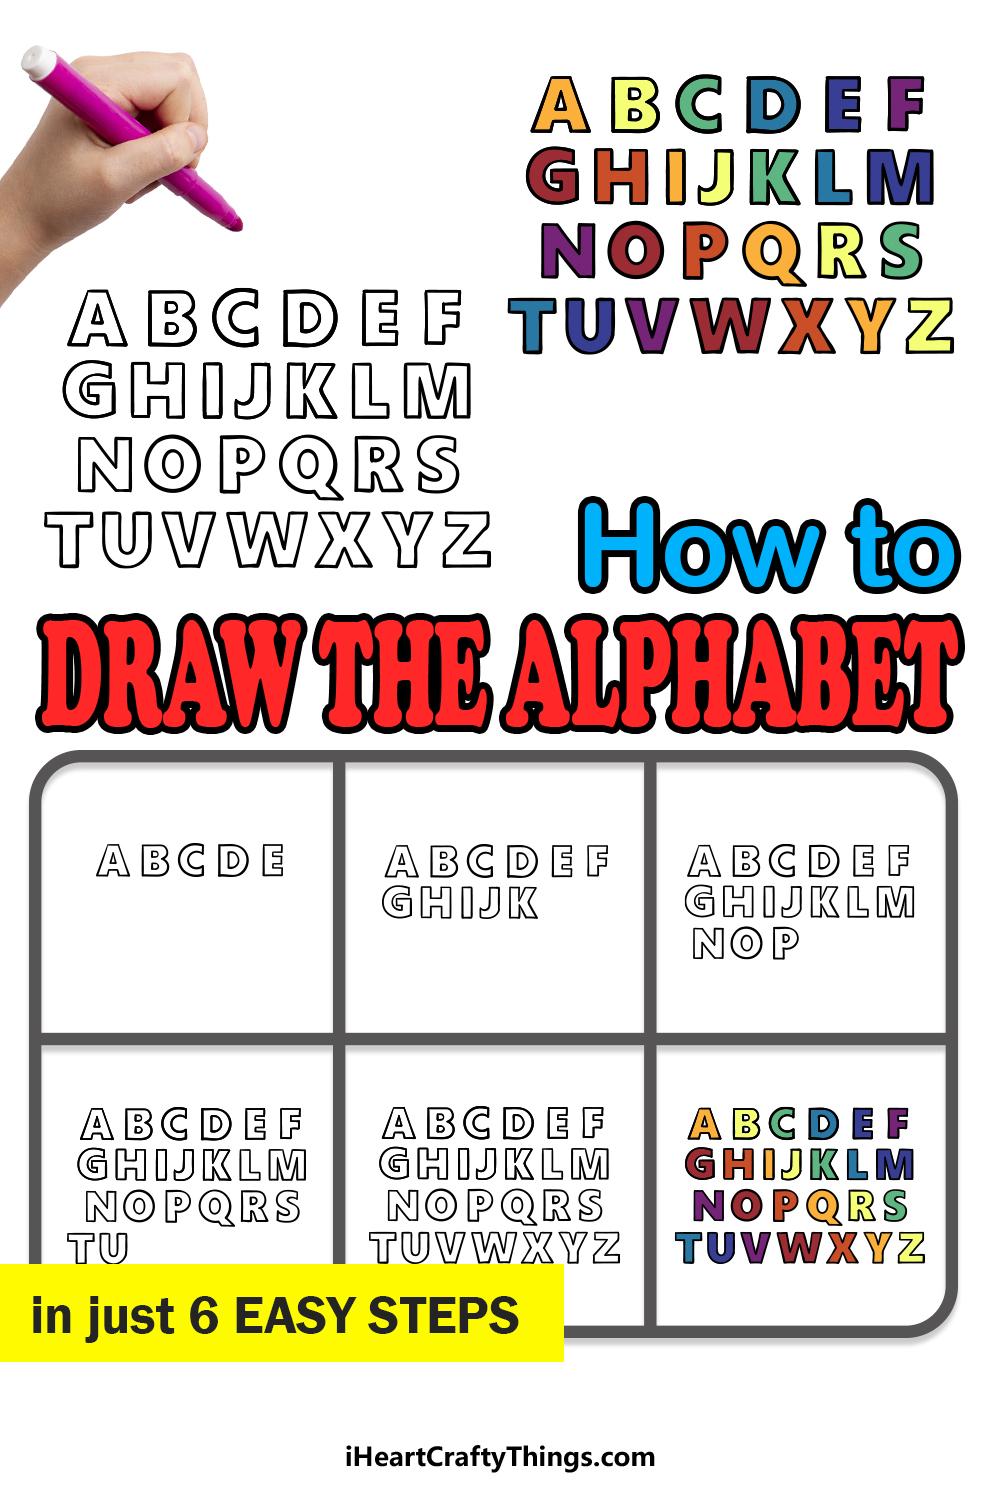
This fun step-by-step guide on how to draw the alphabet in just 6 steps will show you how you can draw a simple yet effective font for the alphabet that you can make all kinds of words with!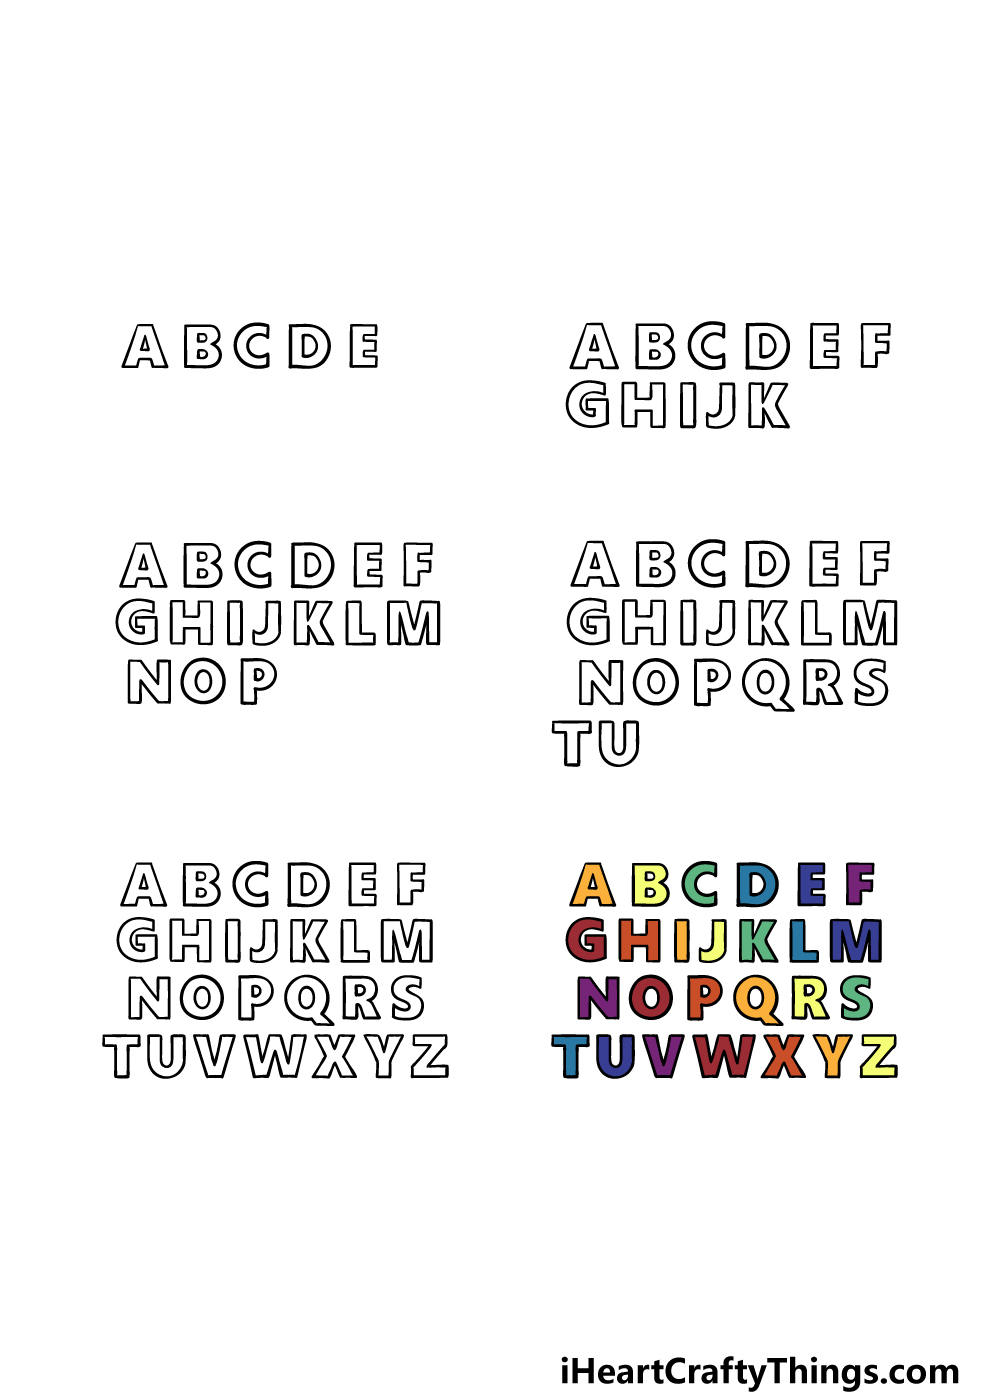
How to Draw The Alphabet – Let’s get Started!
Step 1
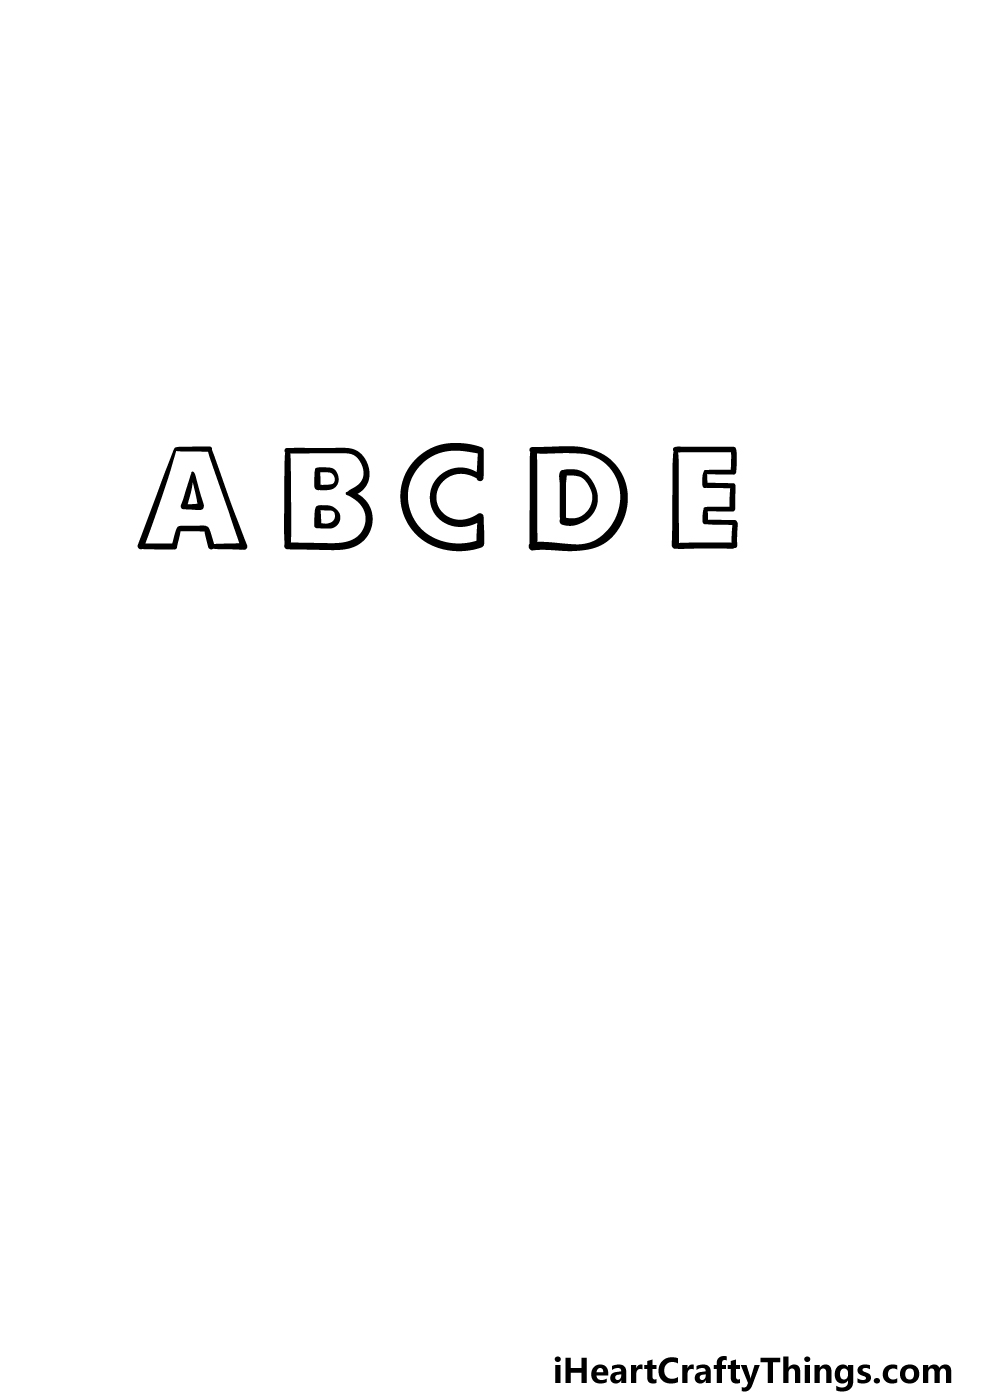
For this alphabet drawing, we will be taking it slowly to make sure it doesn’t get too overwhelming. For now, we will begin with the first 5 letters of the alphabet.
That means we will be drawing A, B, C, D and E. We will be drawing the capital letter versions of these letters, and they will be drawn in a simple yet great-looking thick block font.
To make things easier on yourself, you can do some things to prepare.
First, draw equally spaced rows of horizontal lines. You can then draw the letters between these, and this will help you to keep the heights of the letters consistent.
You can also draw simple shapes of the letters using your pencil before drawing the outlines around them. Lastly, a ruler would really help a lot with drawing the font style!
Then, you will be ready for step 2!
Step 2 – Draw the next six letters
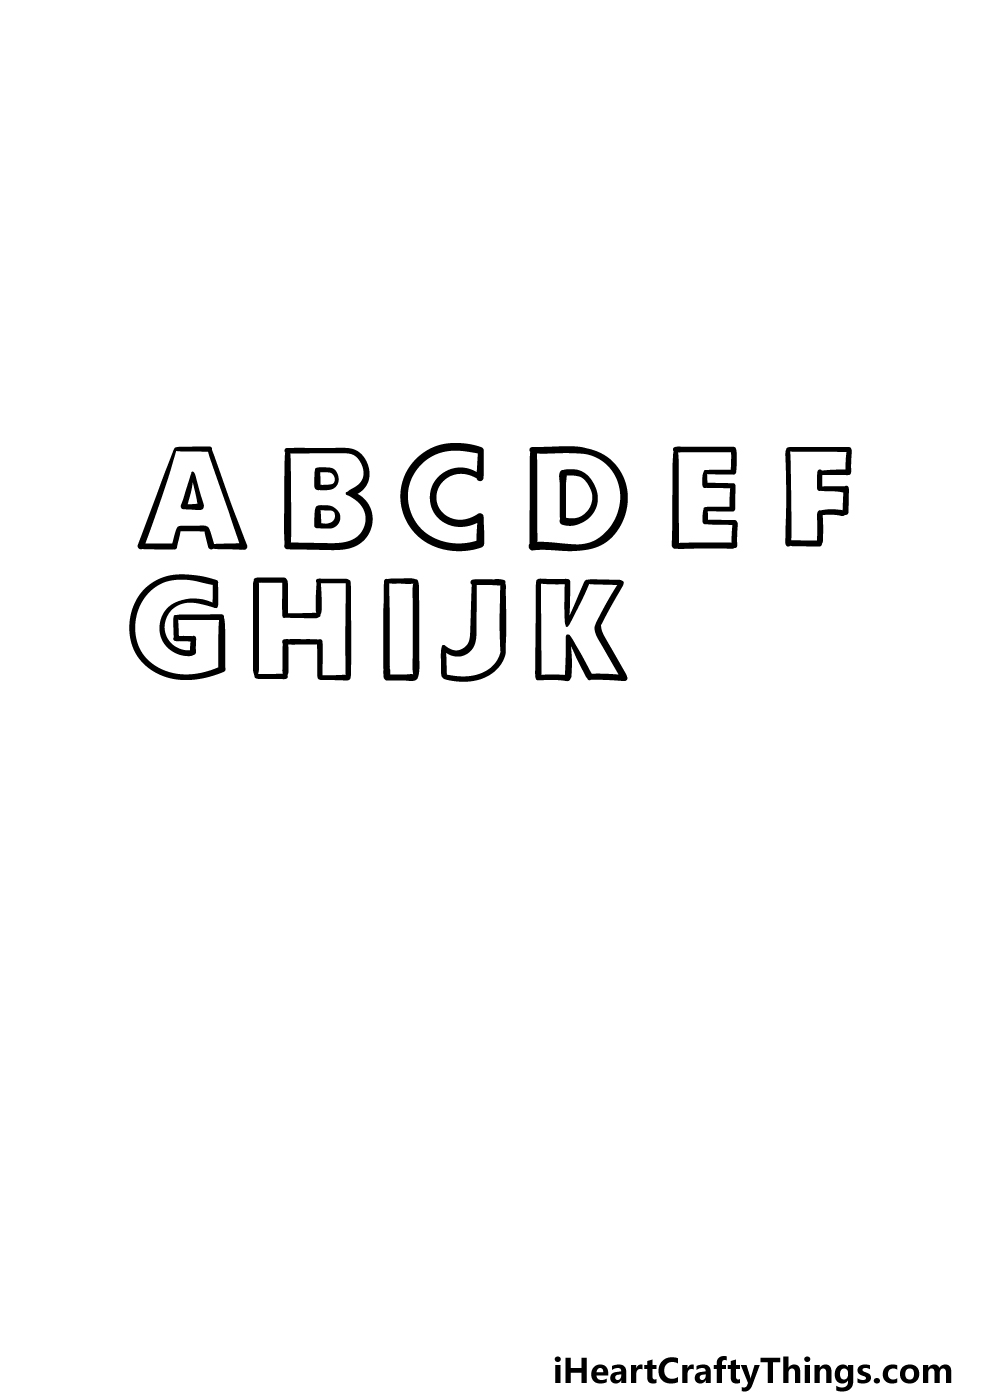
It’s time for the second step of this guide on how to draw the alphabet, and in this second part we shall be adding the next six letters of the alphabet.
You can keep using the guidelines that you drew previously for these next letters, and you could also draw simple rough versions for these ones.
For this part, we will be adding F, G, H, I, J and K. Most of these should be fairly simple to draw, but K may be the most challenging one due to the angles that need to be drawn correctly.
With these 6 letters drawn, it’s on to the next ones.
Step 3 – Now, we shall add the next 5 letters

You’re doing a great job on this alphabet drawing so far! In step 3, we shall be adding the next 5 letters. That means that L, M, N, O and P are up next for you to draw.
Most of these should also be fairly simple for you to draw! The M would probably be the trickiest of the bunch, but with proper planning it should be made much easier.
The O can also require a bit of a steady hand, but going slow and steady is the key!
Step 4 – Add 5 more letters to the alphabet
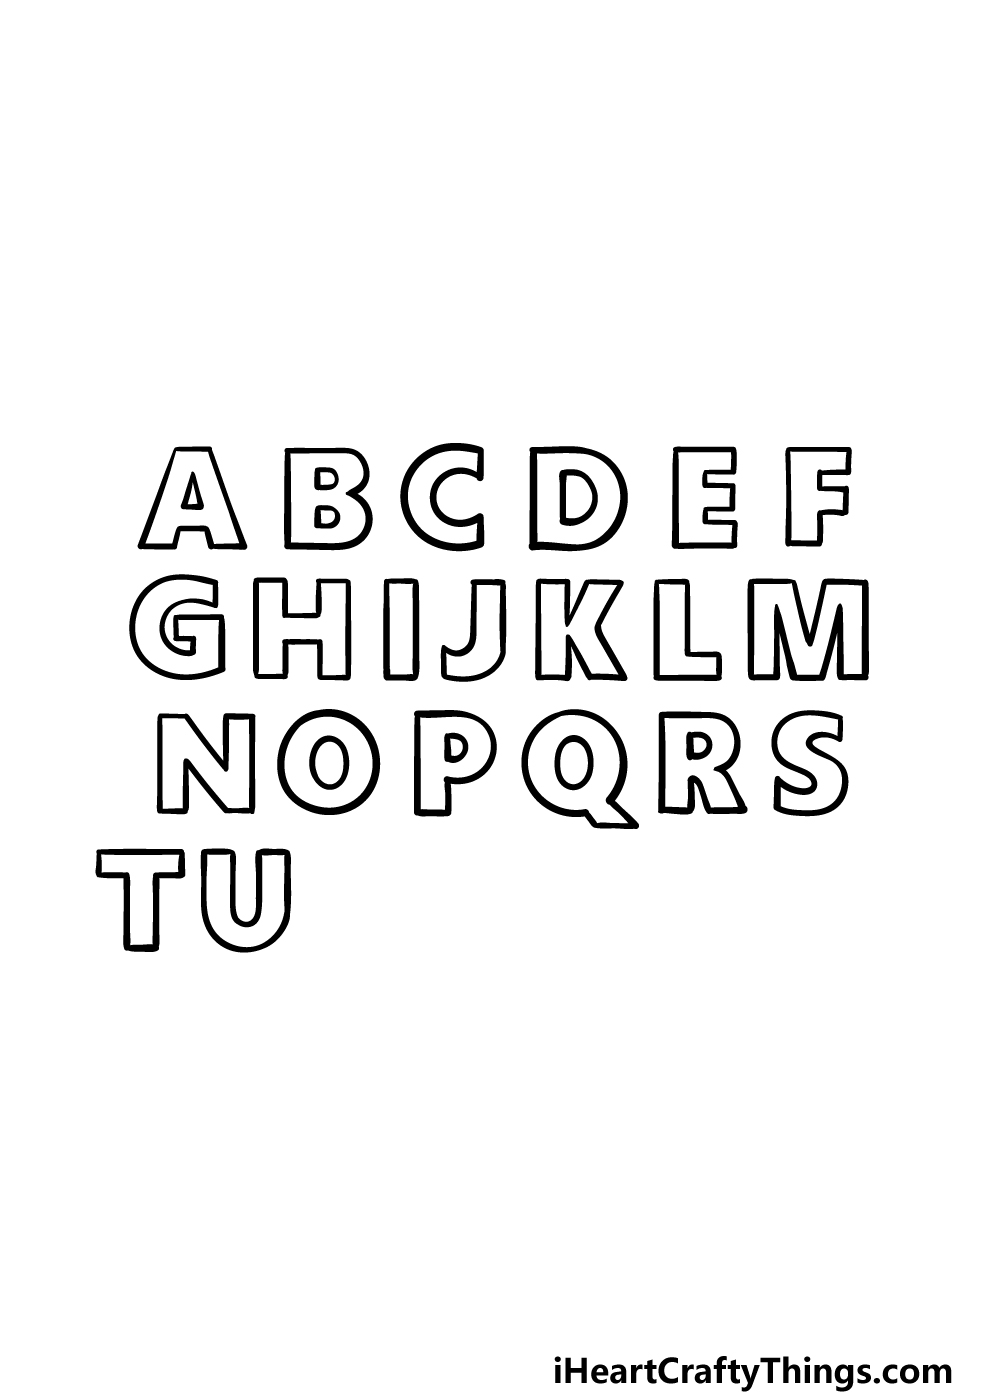
The fourth part of this guide on how to draw the alphabet will focus on 5 more letters. As you can see in our reference image, this means we will be drawing Q, R, S, T and U.
These ones should all be fairly simple to draw. Q can be a bit tricky as it has lots of rounded lines, but as with the other ones it will be easy enough when taken slowly!
Once you have drawn these letters, you will be ready to add the remaining few in the next step.
Step 5 – Now, you can add in the final letters
It’s almost time to make these letters pop off the page with some amazing colors! Before that, we just have a few final letters to add.
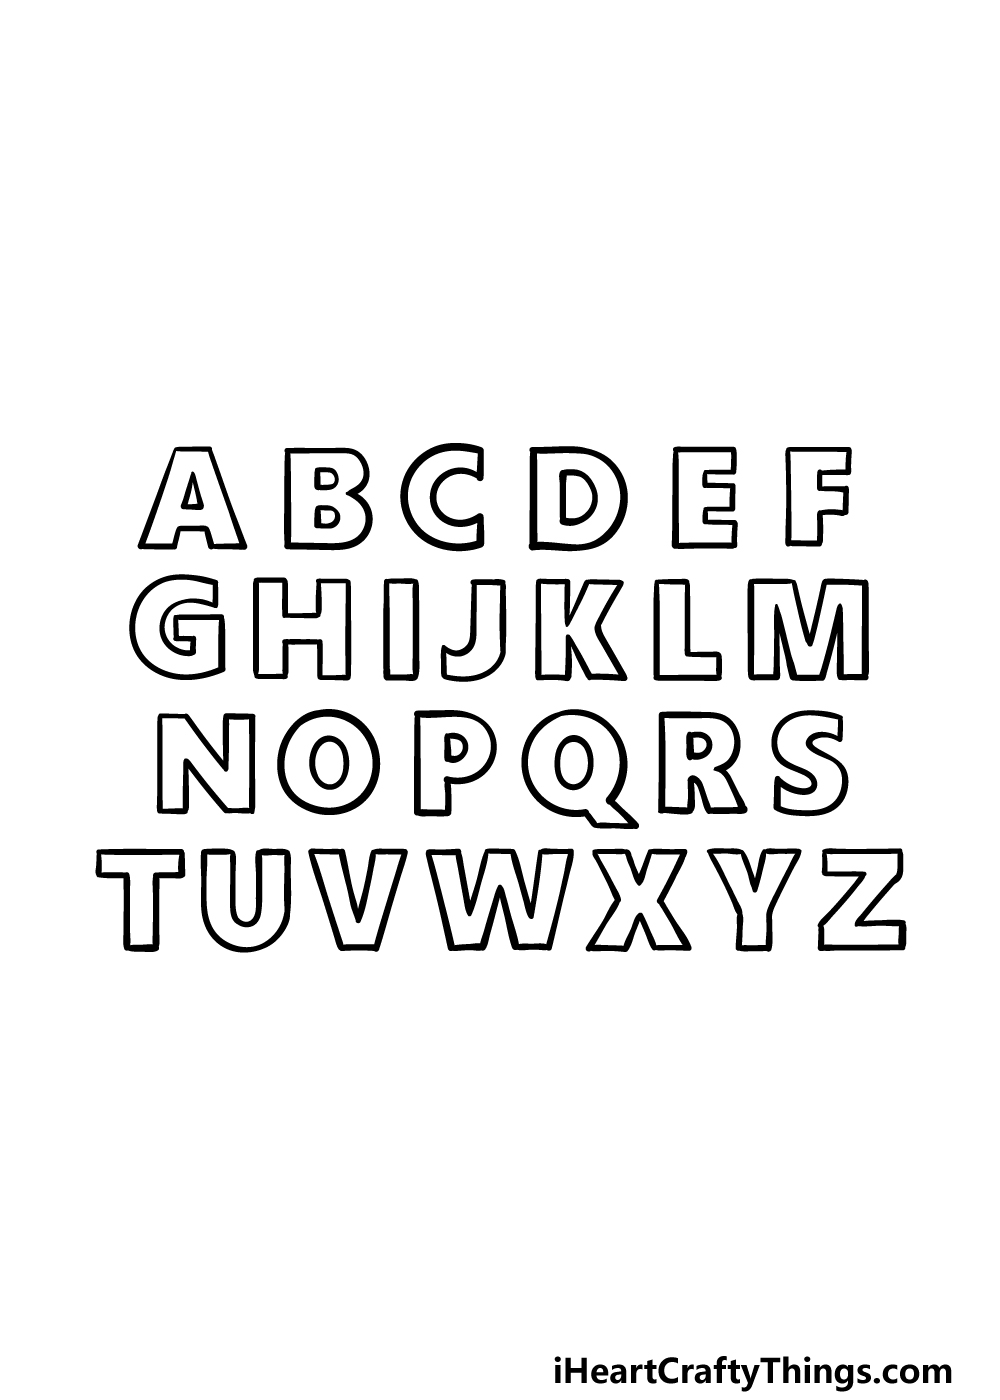
The final 5 letters of the alphabet to add will be V, W, X, Y and Z. Once you have added these letters, you will have 4 rows of letters like we have in our example.
To finish off, you can then erase any guiding pencil lines that you may have added. Then you’re ready for the final step of the guide!
Before that, you can also add some extra details or use what you’ve learned to create your own images.
Once you have the hang of it, maybe you could try writing out your name in this font or try out some variations!
What other fun ideas do you have for these alphabet letters?
Step 6 – Finish off your alphabet drawing with some color
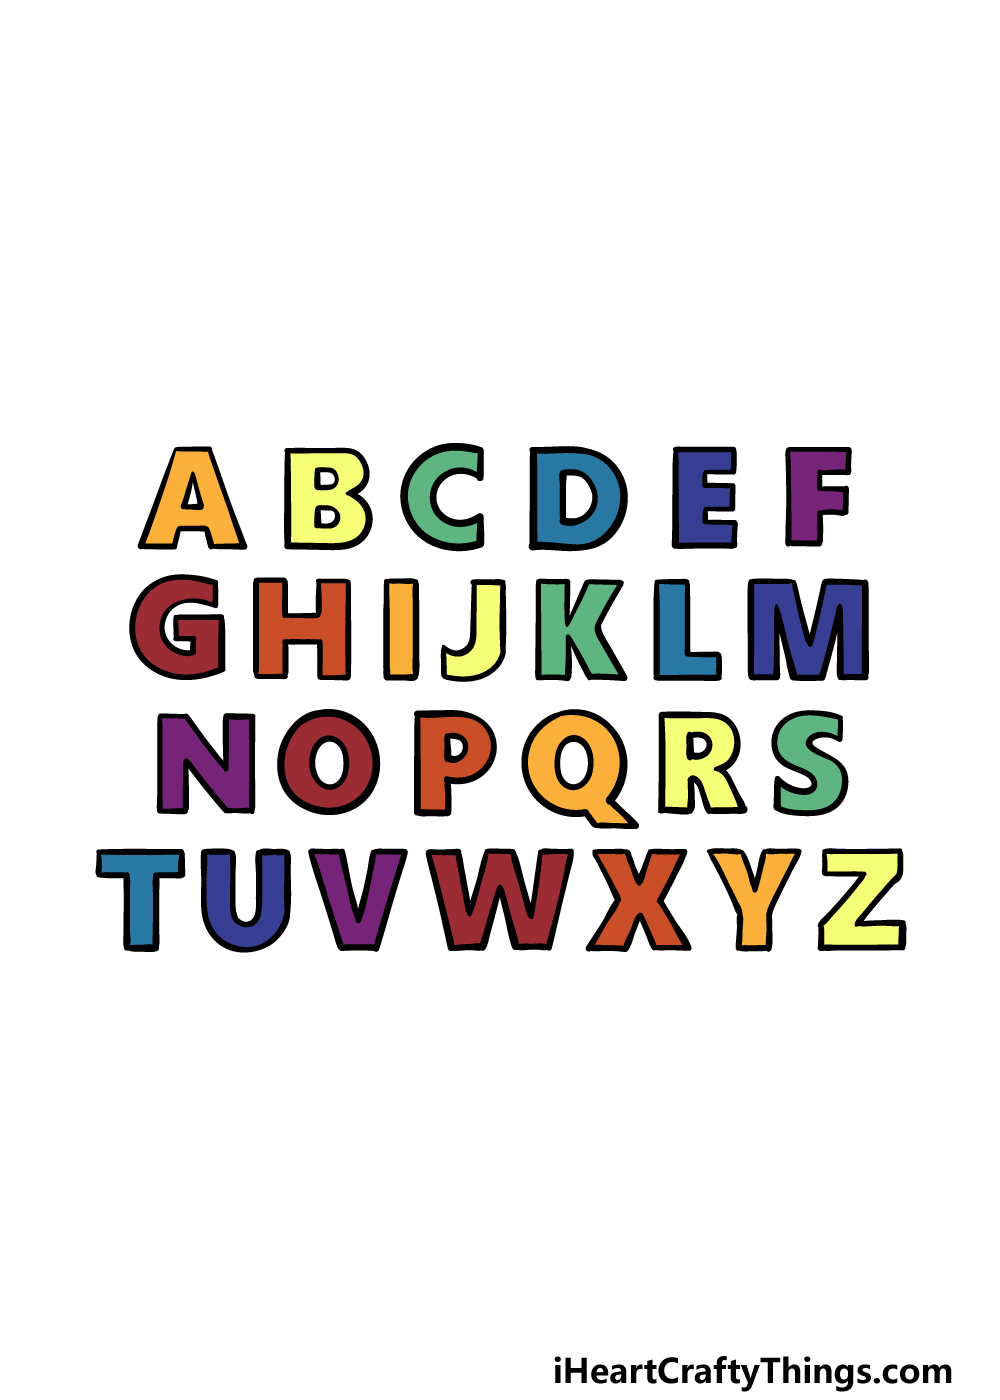
You have finished this alphabet drawing, and now it’s time to make it look even better with some colors! For this step, you can really take over and have fun getting creative with it.
We showed you one way that you could go for it in our version. We went with lots of bright and vibrant colors to make the image really pop!
You could also go for one color for all of them or alternate a few different colors.
Or, you could pick a theme and go for that. Whatever you choose, we know it will look amazing when you’re finished with it!
Here’s how you can make your alphabet drawing even better…
Let’s spell out a few ways you can make your alphabet sketch even better!
For this drawing of the alphabet, we used lots of different colors for each letter. This makes for a really striking image, but you can also play around with the colors you choose.
For instance, maybe you would prefer one color for all the letters or perhaps two alternating ones.
You could also play around with different art tools and mediums to make the colors look distinct for the letters.
What colors would you choose?
Another way that you could customize the look of these letters of the alphabet would be by using some fun arts and crafts.
For instance, you could use some glitter or glitter glue to make the letters sparkle!
There are other crafts such as stickers and beads that you could use as well. Cutting out pieces of material could also be a fun way to make them stand out.
Just be sure not to make a mess and don’t cut up anything without help or permission!
Once you have finished this alphabet drawing, you could take what you learned to create some words. You could use the letters in this design to spell out any words you like.
To start with, why not begin with your name? We would suggest drawing some lines to guide you as you draw. Then, use a pencil to write out your name as you normally would.
Then you could draw the letters from this image over your rough pencil lines to have your chosen word drawn out in cool letters.
Finally, if you really want to challenge yourself, you could expand this alphabet sketch with more additions. One way to do this would be to draw the smaller versions of each letter beside the capital letter.
Then, you could even try and draw some numbers and punctuation marks as well. With these, you could even write out some full sentences and maybe even some math problems.
What are some other letters and numbers you could draw?
Your Alphabet Drawing is Complete!
That brings you to the end of this guide on how to draw the alphabet! Even if you know the alphabet backwards and forwards, taking on a new kind of font design can sometimes be tricky to do.
We hope that the guide made it fun and easy for you to master this one.
In this guide, we aimed to create a font that would look really great while also making sure that it would be easy for you to master drawing it.
Now that you have done that, you can take it further by adding details or creating your own words out of the letters.
Finishing this guide doesn’t have to be the end of the drawing fun! You can keep it going by visiting our website for access to many more amazing drawing guides to enjoy.
We upload new ones often, so keep checking in to never miss out!
We would love to see your awesome alphabet drawing once it’s done, so please share your creation on our Facebook and Pinterest pages for us to see!