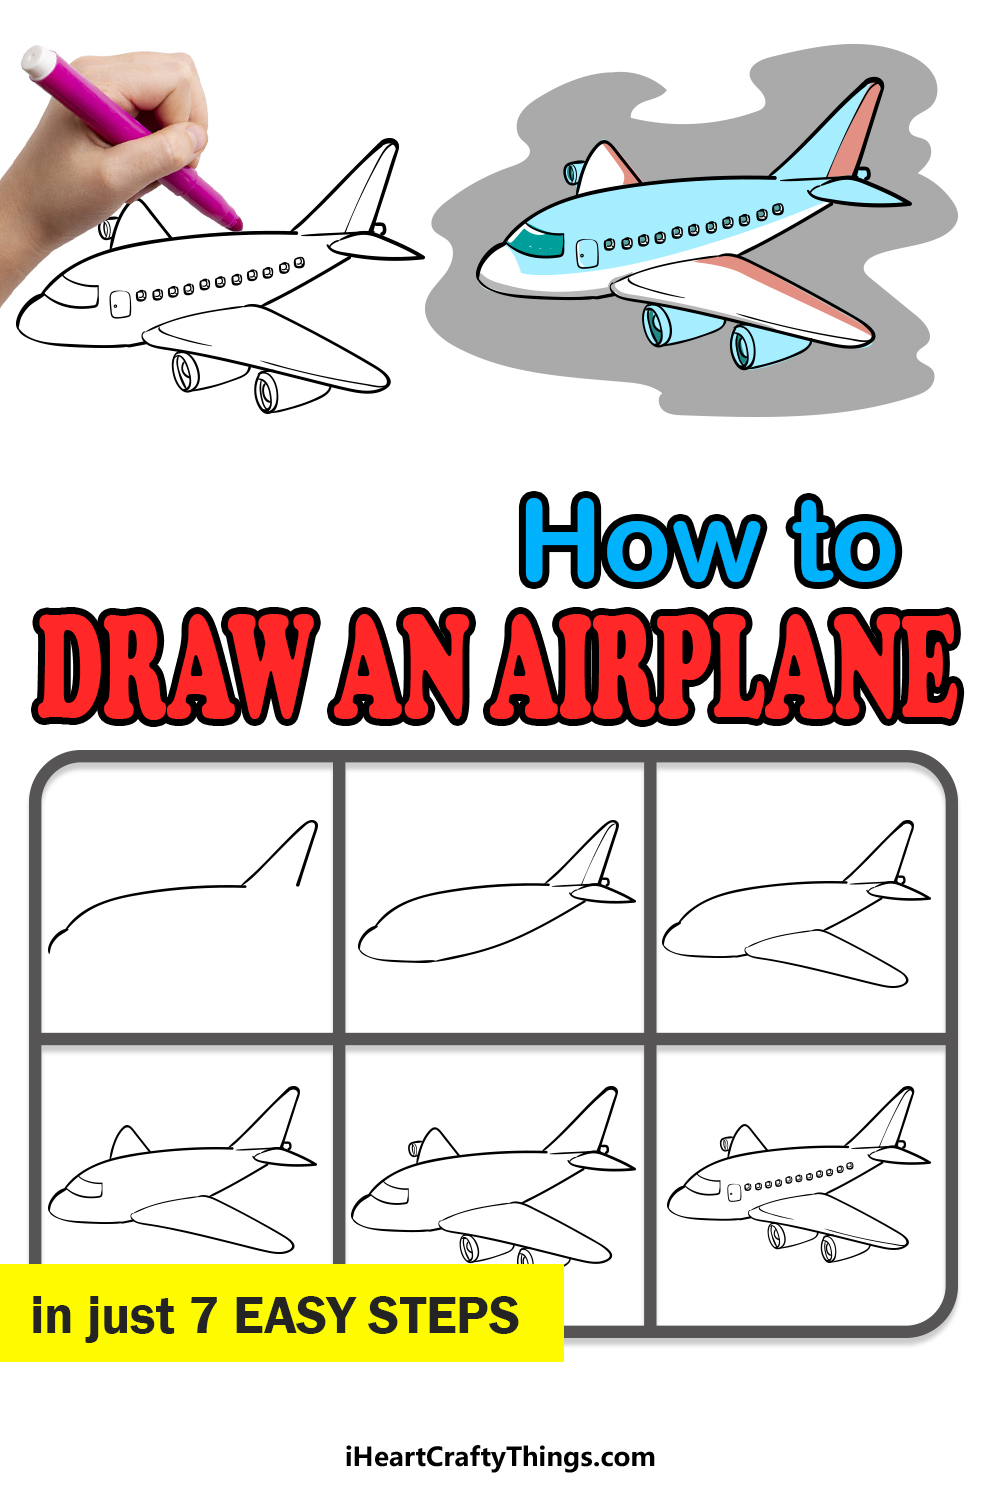
It’s easier than ever to learn how to draw an airplane with this guide for kids. You can follow along and draw your own aircraft, and it’s easy for all ages!
Airplanes are an amazing technological feat, and it’s easy to take them for granted. Learning how to draw one can create new appreciation for them though. It’s not always so easy to do so, though.
At least, it’s not easy unless you have this guide! I will be showing you exactly how to make all parts of the airplane from the wings to the engines, windows and even a bit of the background.
Once you have this airplane drawn, you could even add branding from real airplanes or adapt the designs to your favorite airplane types. It could also be fun to draw more of the background to show where you would like to fly.
Follow Along To Find Out How To Draw An Airplane
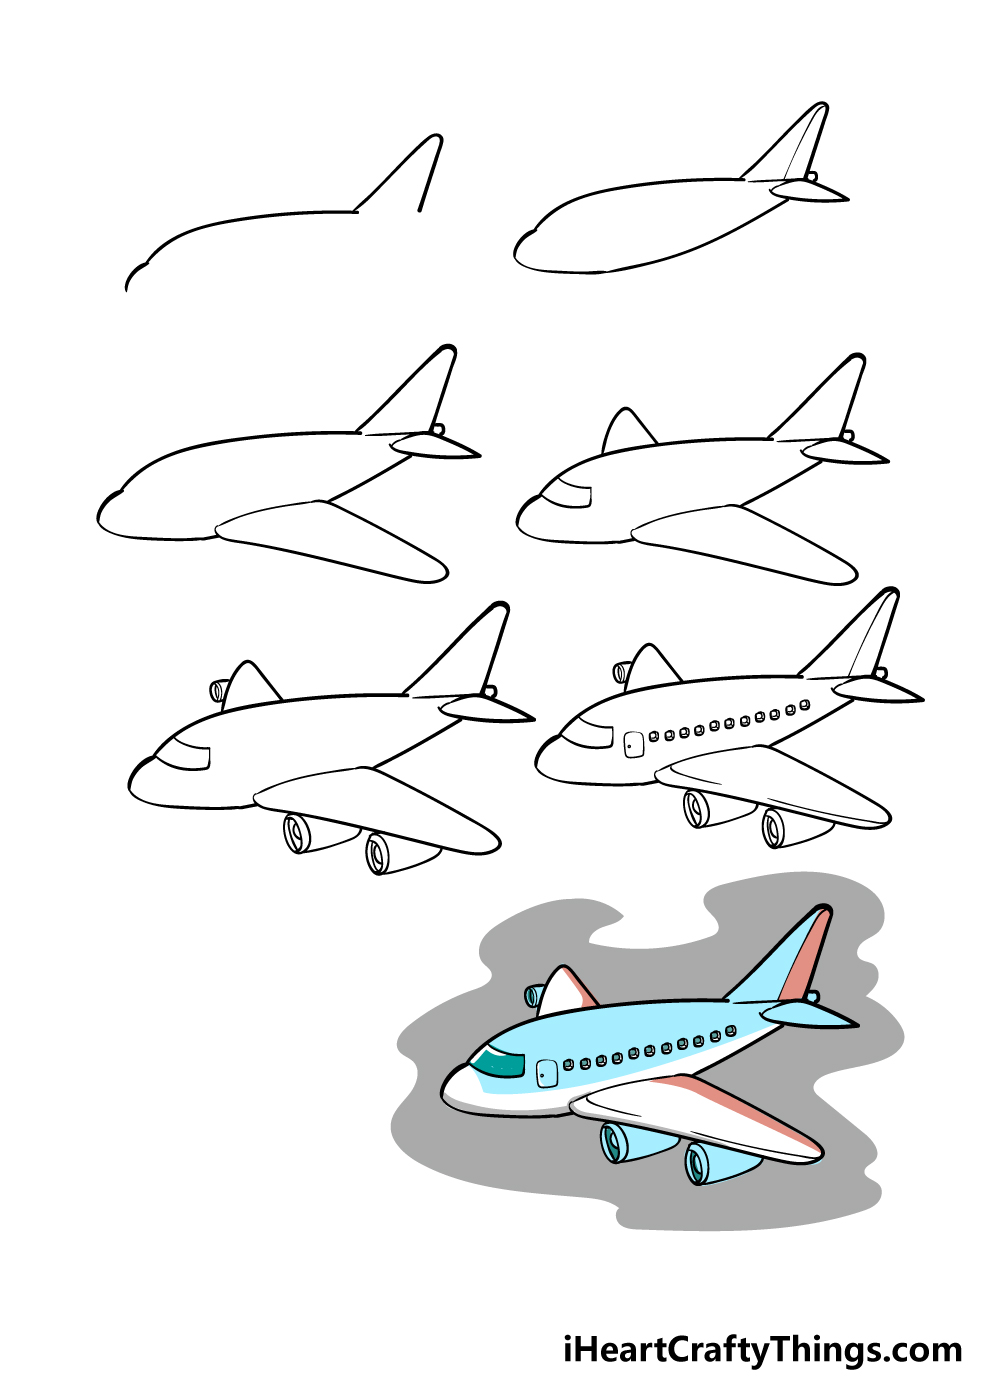
How to Draw An Airplane – Let’s get Started
Step 1
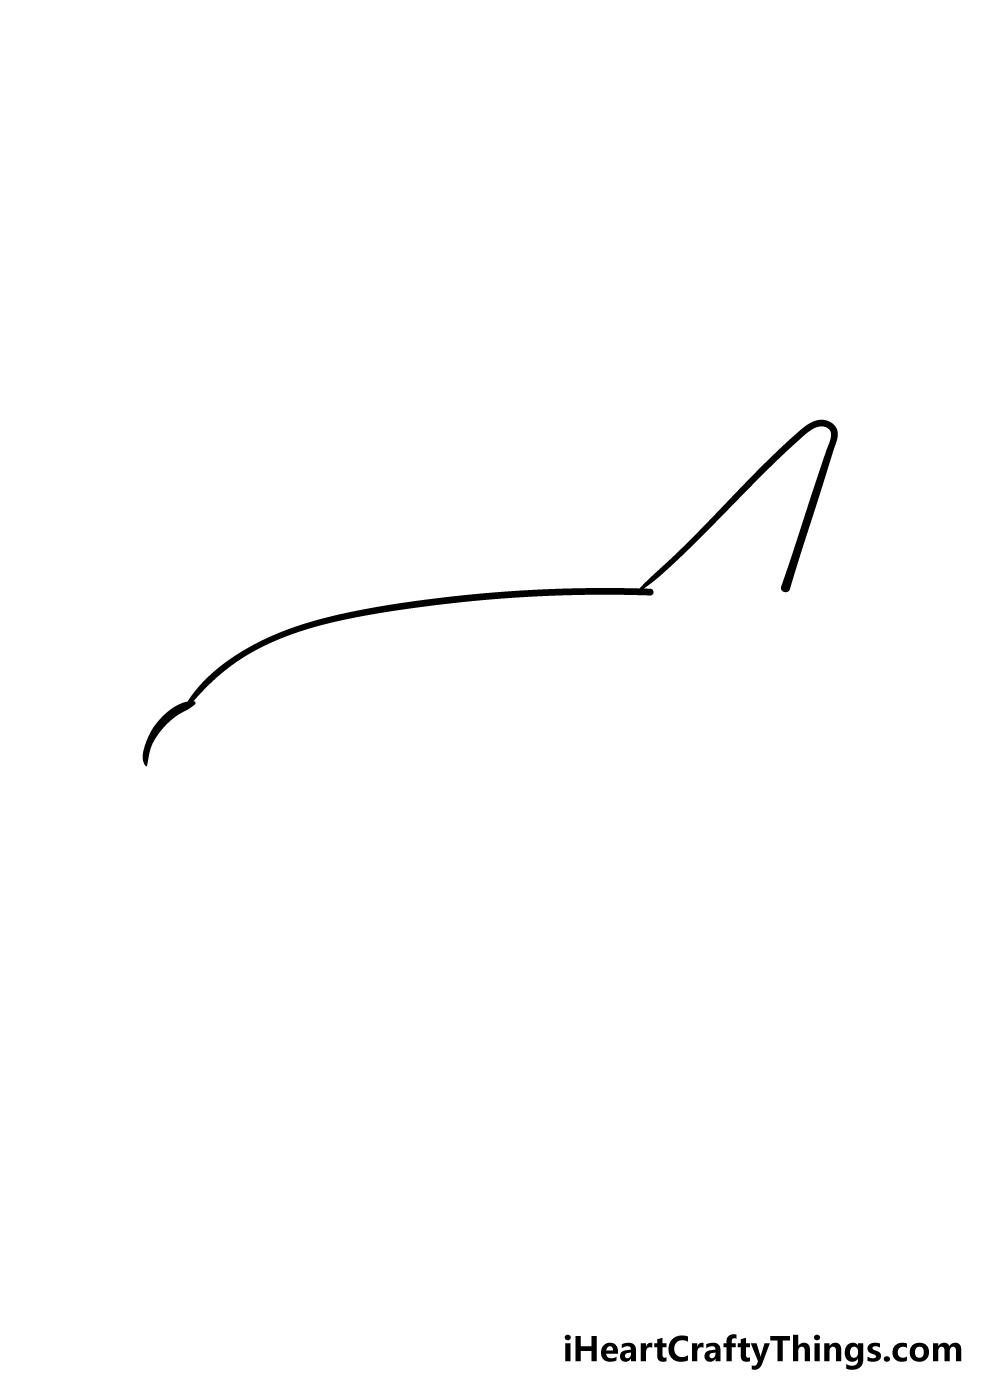
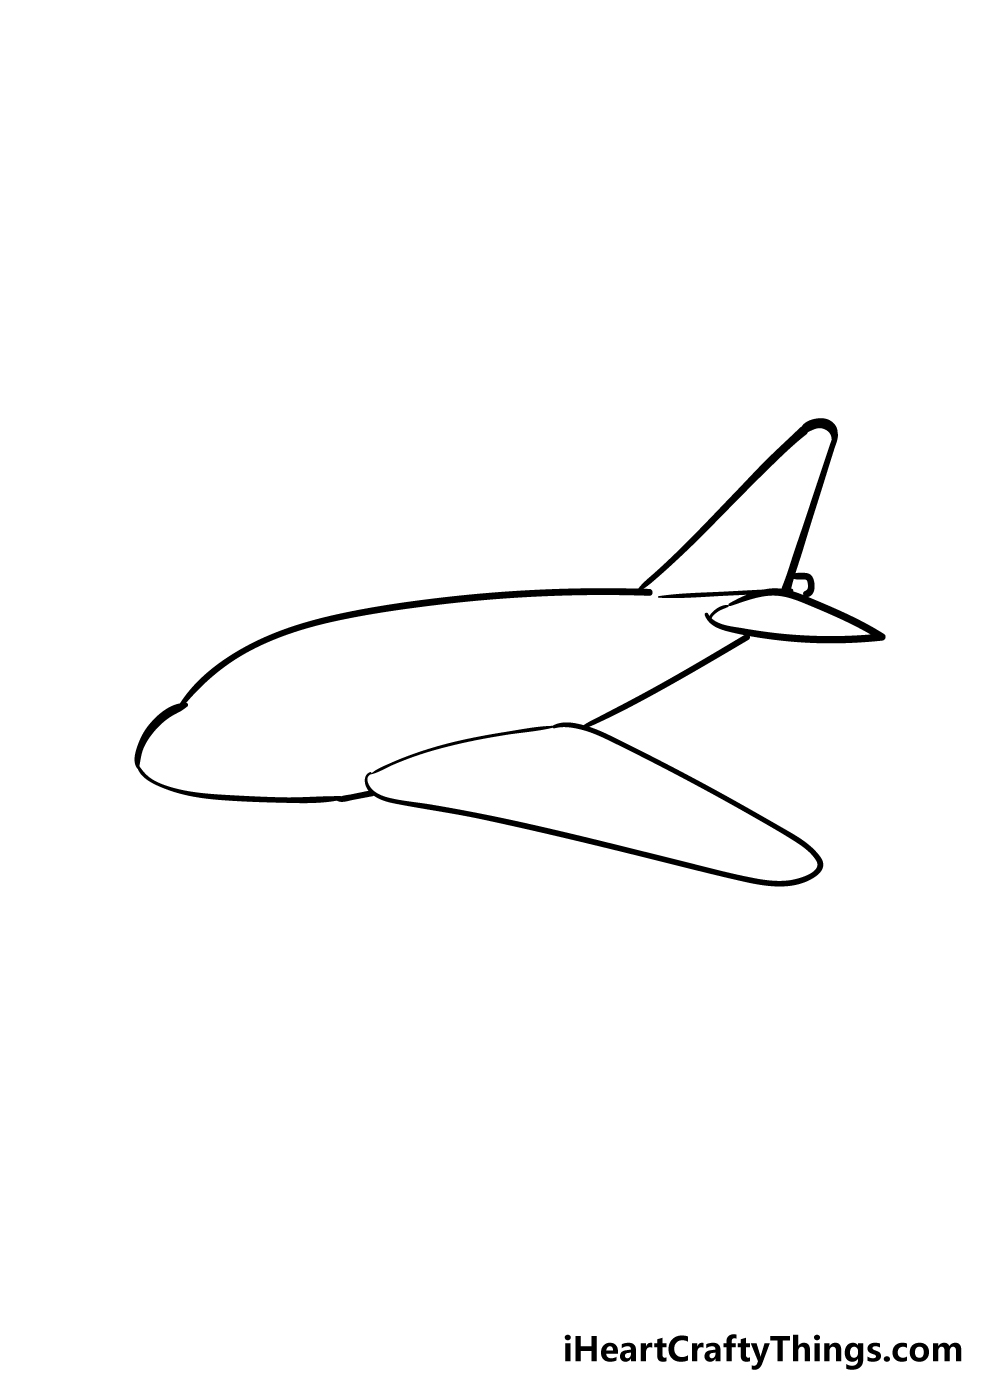
For the first step of our guide on how to draw an airplane, we will start with the upper section of the plane.
To do this, simply draw a curved vertical line that will form part of the nose, and then draw a long slightly curved horizontal line.
Finally, draw a sharply curved vertical line for the top of the tail of your airplane drawing.
With the start of your airplane done, you’re ready for step 2!
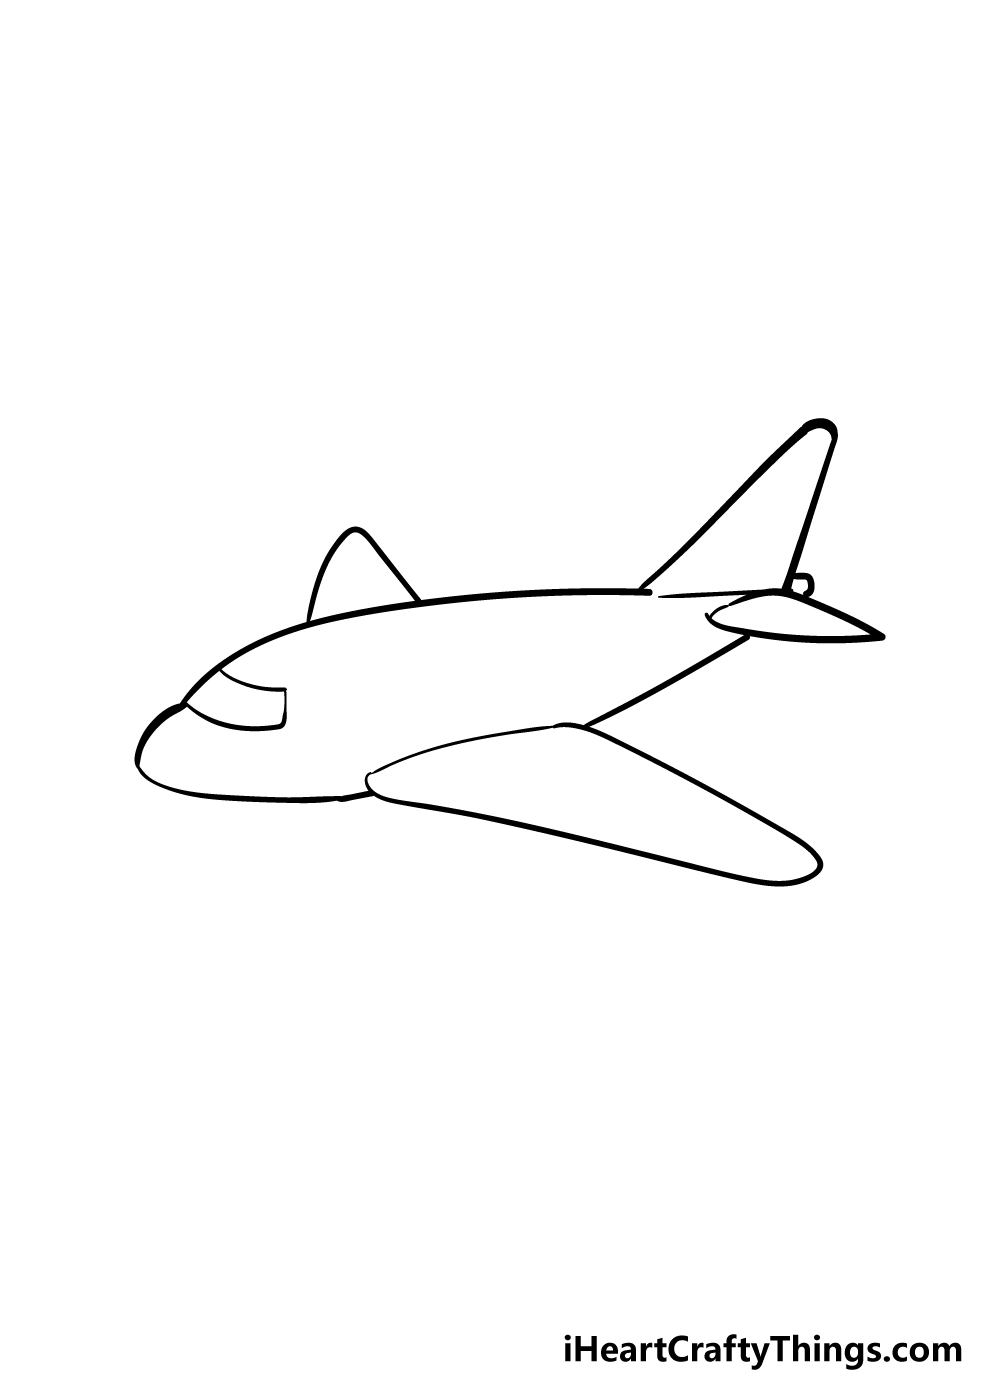
Step 2 – Next, draw the bottom of the plane
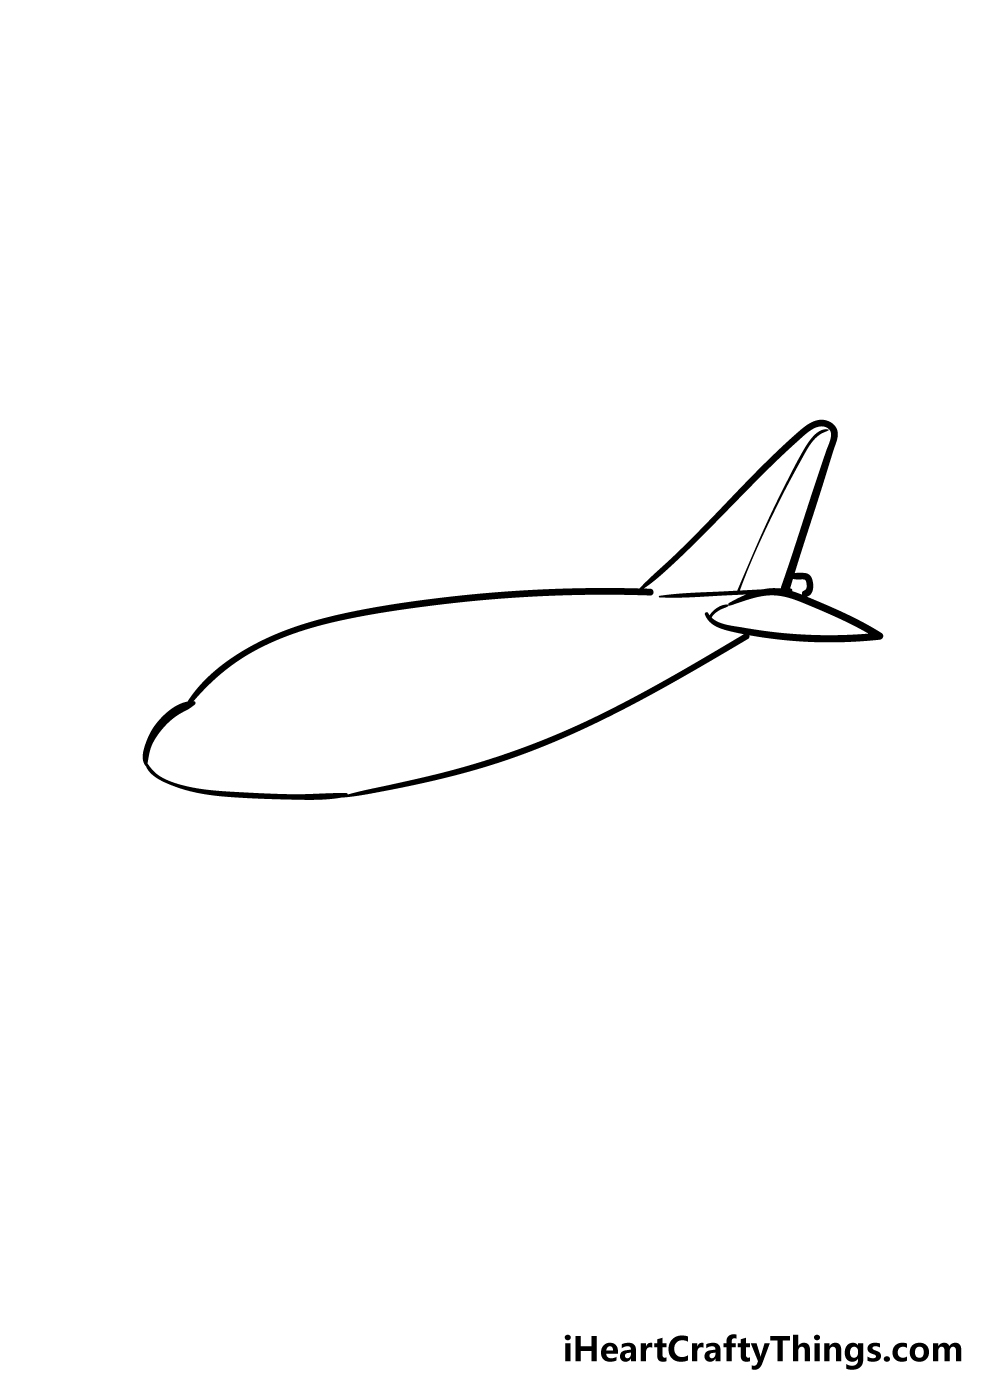
To create an underbelly for your airplane drawing, you can mirror the lines that you created for the first step. The difference will be that there won’t be a large fin jutting out like there is on top of the tail.
Instead, simply draw a small fin piece coming out from the side. It will also help to look at the next step to see where the wing will be going so that you can leave a space for it.
Step 3 – Now, draw the first wing
We’ll be adding a wing in this third step of our guide on how to draw an airplane. You’ll be glad that you left a space for it in the previous step!
The wing will be made of a long, curved line curving slightly back towards the tail of the plane. It may look a bit bare at the moment, but you’ll be adding some detail to it a bit later on in this guide.
Step 4 – Draw the other wing and window of the airplane
You have one wing for your airplane drawing, so for this step let’s add another one. This one is on the other side and at quite a different angle, so it will have a different shape.
This one will have a more triangular, tortilla chip shape to it. Once you have that, your airplane needs a window so the pilots can see where they’re going!
To do this, simply draw a bent rectangle shape over the cockpit to create a window as it appears in the reference picture.
Step 5 – Next, draw some engines
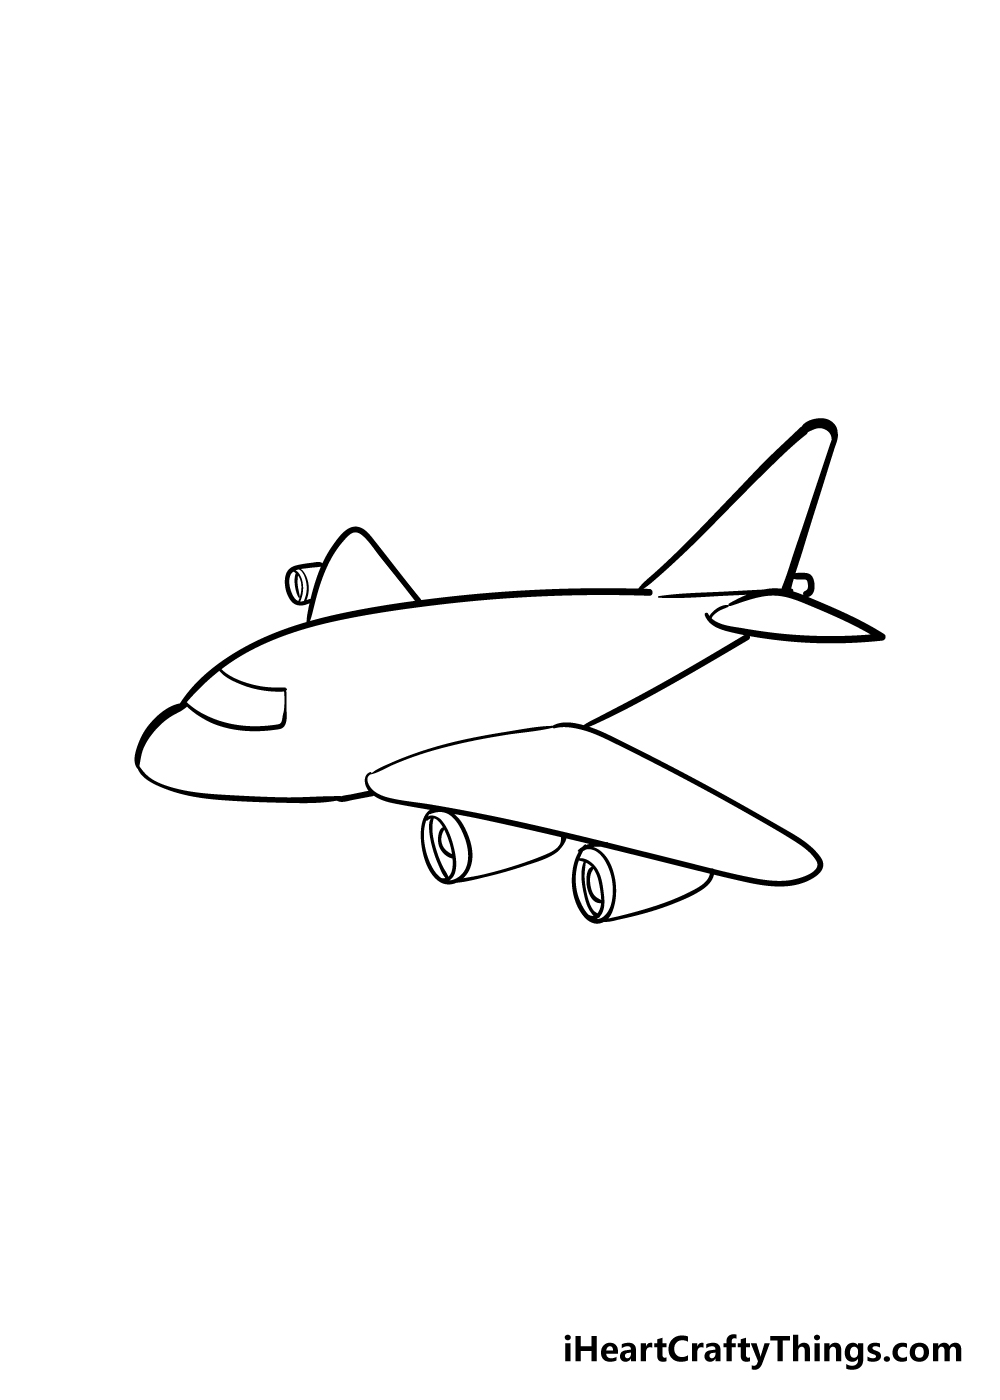
Airplanes wouldn’t get very far without engines to propel them, so we better add some in this step of our guide on how to draw an airplane!
To draw one of these powerful engines, simply draw a long oval shape coming off from the wing.
You can draw the details inside of this circle, and then use a curved line going back to create the body of the engine.
There will be two engines on our right when looking at this picture, and there will be one smaller one on our left. Once you have it looking as it does in the reference picture, you’re ready to proceed!
Step 6 – Draw some final details for your airplane drawing
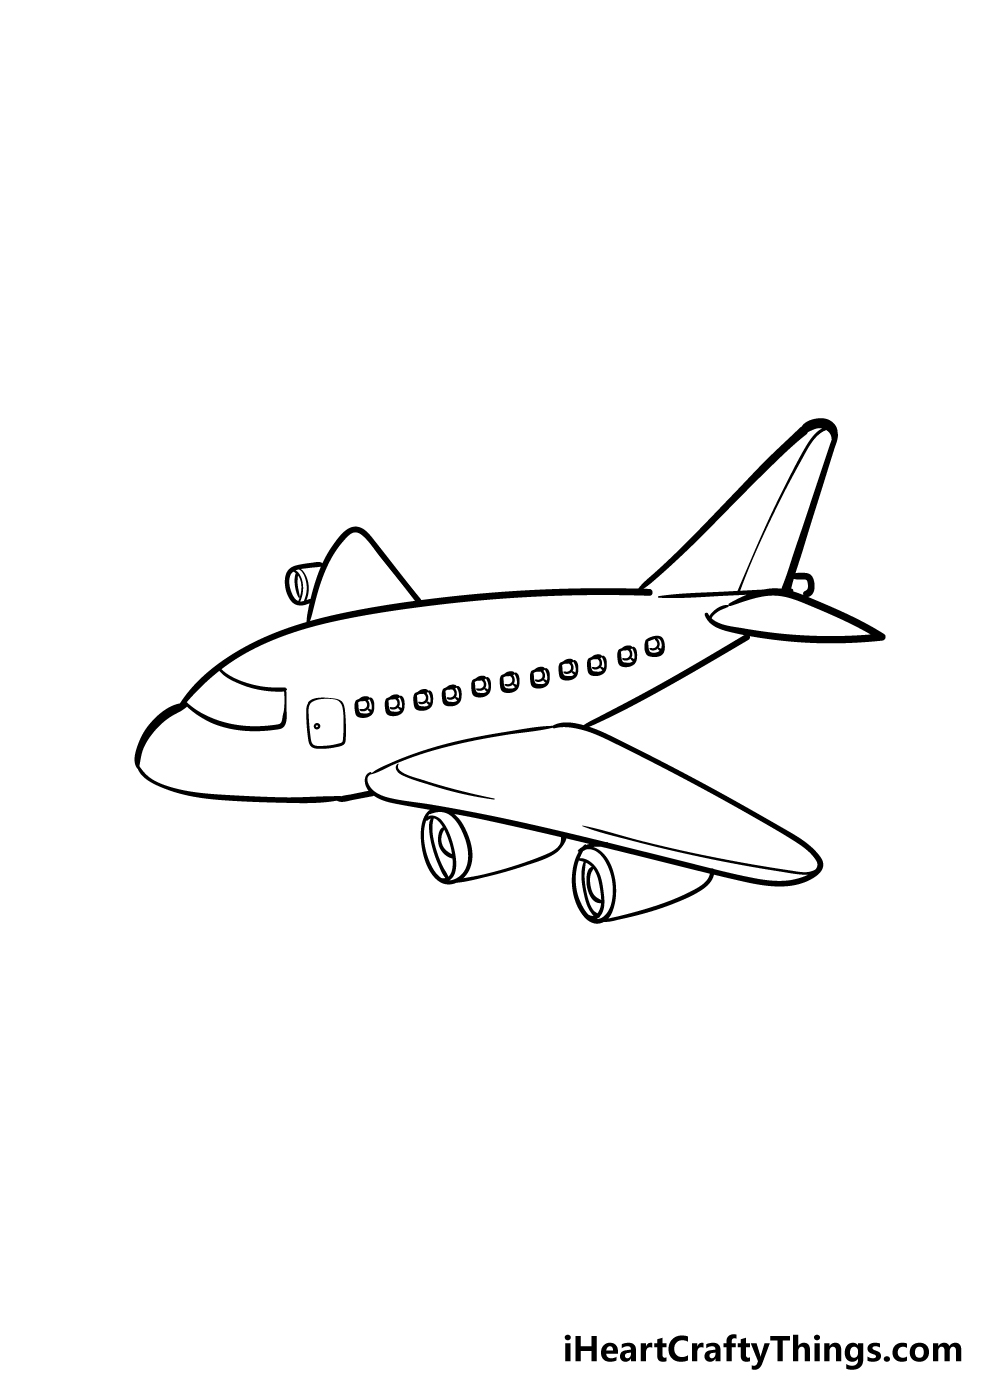
It’s almost time to start coloring in your airplane drawing, but before we get to that, you can draw some final details. We’ve shown you a few details that you could draw.
For example, there are small windows going along the plane and a door behind the cockpit. E also drew some lines along the wing and tail to finish it off.
These are just a few details that you could add, but you should feel free to add any that you like! If you have a favorite aircraft or airline, then you could draw in details that would make your drawing look like that one.
What fun details and extra elements do you think would look good for your airplane? Perhaps you could draw a beautiful background for it!
Step 7 – Finish off your airplane drawing with some color
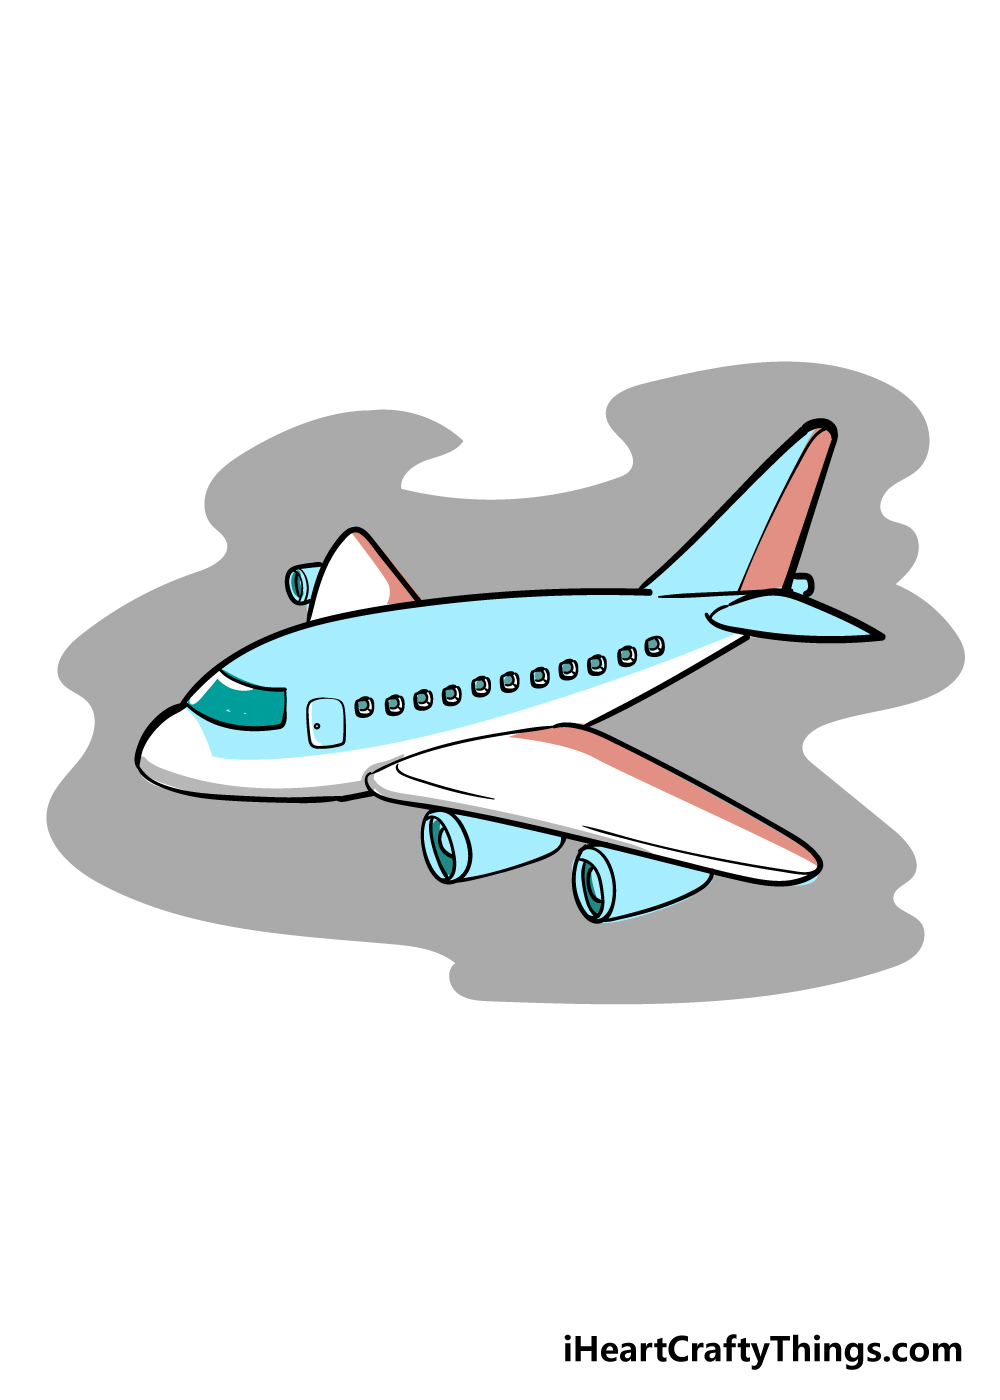
Now that you have finished drawing your airplane and have filled in the final details, you can have some fun coloring in your artwork in this final step of our guide on how to draw an airplane!
We have shown you one way that you could go about coloring in, but this is a step where you can really let your creativity flow.
There are no wrong ways to color in, so you should make it look exactly how you would like.
You could look up pictures of real aircraft for inspiration as well! Then, once you know the colors you would like to use, you can have fun experimenting with some fun art mediums!
You could get some great color clarity with some colored pens and acrylic paints or go for some watercolors and colored pencils for a softer, more vintage look. We can’t wait to see what you come up with!
4 More Ways To Make Your Airplane Drawing Unique
Before this airplane drawing takes to the skies, we have a few extra touches you can add to make it look even better!
Anyone who loves planes will tell you that there are many different kinds that come in many shapes, sizes and styles.
Once you have mastered the design we have here, you could make a new one by changing just a few details.
You could look up a picture of an airplane you love and change elements such as the wings or the cockpit to match that model.
You could even add brand new elements such as a propellor! Do you have a favorite type of aircraft you could turn this one into?
Airplanes usually have a fairly muted color scheme, but some will be brightly colored with promotional images or themed designs.
If you wanted to make your very own themed airplane, you could decorate the fuselage and other parts of the plane with patterns, pictures or logos. Maybe you could even make your very own airline name and design a logo that you can put on the side!
Small details can make a big difference, and you can make this airplane sketch look even more unique with some.
For example, you could draw the faces of some airline passengers in the windows and try to make each face unique!
You could even show who is piloting this aircraft by adding some faces inside of the cockpit window. Can you think of any other small details you could add?
Airplanes will travel over a vast array of different environments and locations, and you could take this drawing of an airplane to whole new places by drawing a background!
It could be soaring over some majestic mountains or maybe a vast ocean. If drawing a landscape background is proving tricky, there are so many pictures online that you could use to help you draw whichever locale you like.
Adding a background is a great way to travel to whatever place in the world you’ve always dreamed of seeing!
Your Airplane Drawing is Complete!
That brings us to the end of this guide on how to draw an airplane, and you did a great job!
Drawing an airplane can be frustrating and difficult if you don’t know what to do, so we hope that this guide was both fun and helpful for you to use!
If you break a drawing down into smaller steps, it can make it so much easier to do, so we tried to help you with that in this guide.
Now that you can draw your own airplane, there are ways that you can make this drawing your own. You could use this guide as a template to make your own unique airplane drawing.
You could use some images online to change the design and make your own aircraft!
This isn’t the end of the drawing fun, however, and we will be uploading many more step-by-step guides for you to enjoy on our site! Be sure to check in often to never miss out!
We would love to see your amazing airplane drawing, so please be sure to share it on our Facebook and Pinterest pages for us to enjoy!