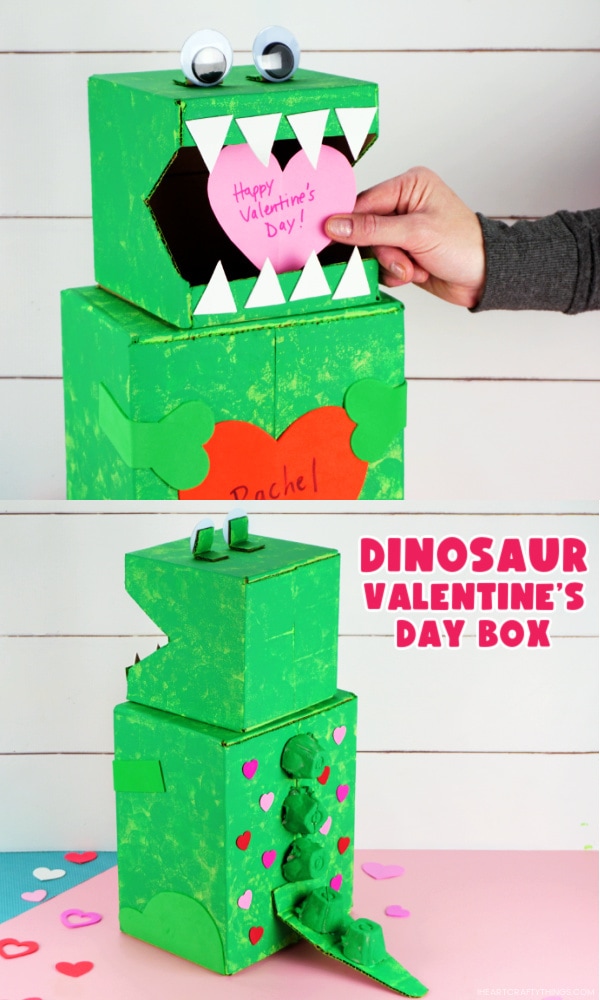
Do you have a dinosaur fan at your house? If so, they are going to jump for joy over making this awesome dino box to hold all of their Valentine’s this year. The box is designed with a big open T-Rex mouth so friends feed your dinosaur with their Valentine cards. So much fun, right?!
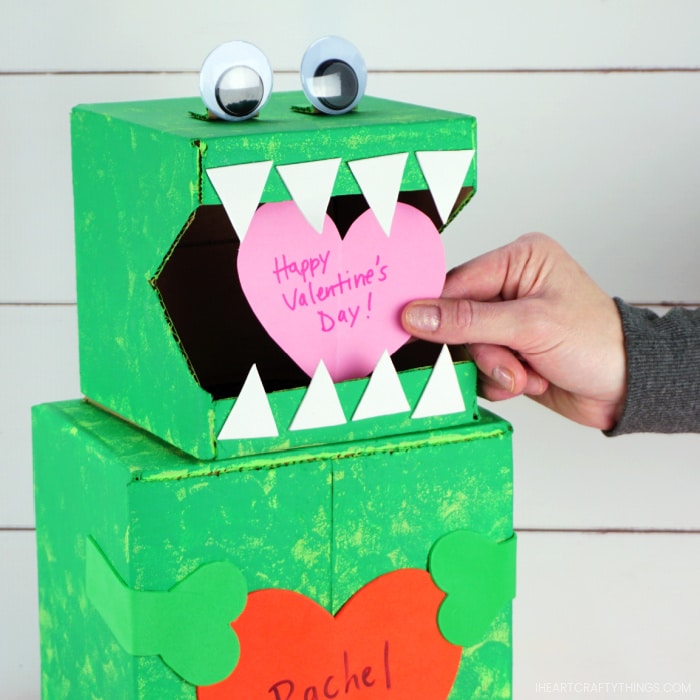
We used two boxes to create this cool dinosaur. This gives the finished Valentine box a perfect three-dimensional look. A rectangle box was used for the body and a smaller, square box was used for the dinosaur head.
We also used two different green tones acrylic paints to paint our dinosaur. The top green coat was painted on with a circle sponge brush to allow some of the lighter green color to poke through and to give our dinosaur a scaly, reptile-like texture.
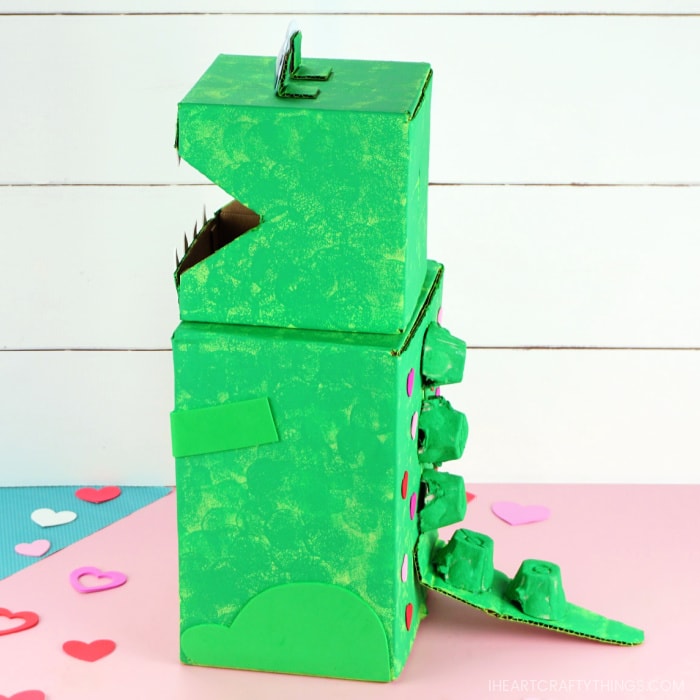
Read our step-by-step instructions below for how to create your own Valentine’s Day dinosaur box. We also have a video tutorial inside this post you will find helpful before you get started on your craft project.
Kids will need some assistance with the cutting and gluing steps in our tutorial so get ready for an afternoon full of fun creating this amazing dinosaur Valentine box together as a family.
Supplies needed to make your Dinosaur Valentine’s Day Box:
- rectangle cardboard box (we used 10″ x 8″ x 6″)
- square cardboard box (we 6″ x 6″ x 6″ size)
- acrylic paint
- clear adhesive (should only be used with parental supervision in a well ventilated area)
- hot glue gun (adult supervision required)
- sponge paintbrushes
- paper plates (for paint palettes)
- egg carton
- green, red and white adhesive foam sheet
- heart foam stickers (optional)
- large googly eyes
- scissors
Instructions for how to make a DIY Dinosaur Valentine Box
1. Prepare two cardboard boxes
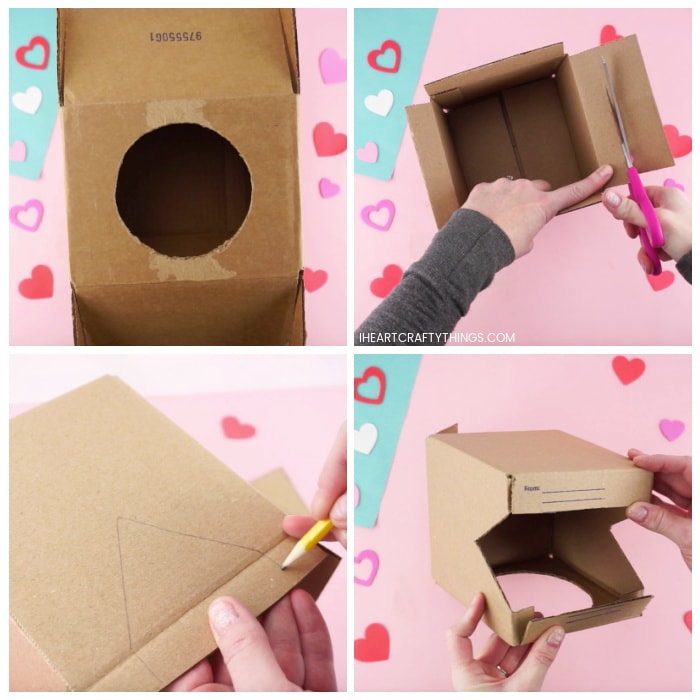
Start by prepping your two cardboard boxes. With the rectangle dinosaur body box, trace a circle at the top of the box and cut it out. With the square box, choose which of the open flap sides you want to be the dinosaur mouth. Trim down each of the four flaps around the box with scissors to start creating the mouth.
Now flip the box on it’s side and trace a triangle along the bottom edge for the mouth opening and draw lines down connecting the triangle to the box flap. (see photos below) Draw a triangle on the other side of the box as well.
Finally, trace a circle on the bottom side of the box, in the center. This should be the same circle traced on the rectangle box. Cut out each of the shapes drawn on the box.
2. Glue each of the box flaps closed
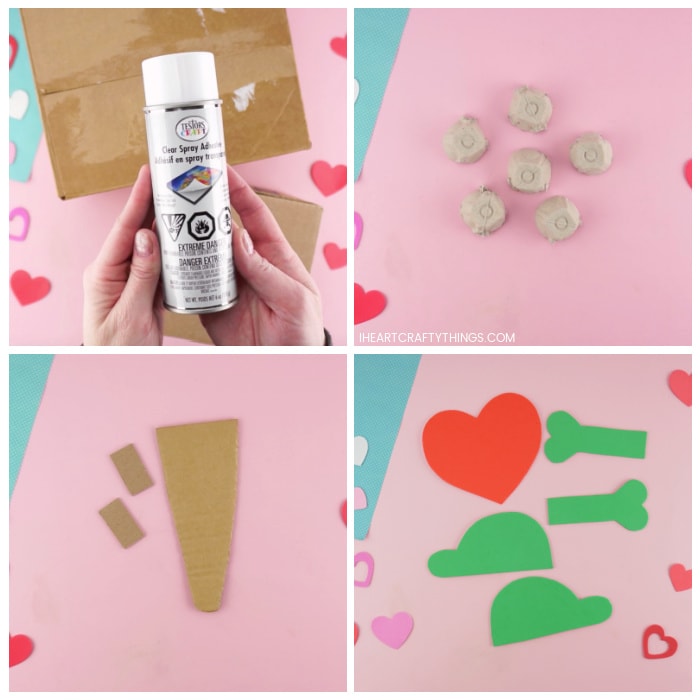
With parental supervision and in a well ventilated area, use clear spray adhesive to glue each of the box flaps closed. You can also use a hot glue gun with adults supervision if the adhesive spray is unavailable to you.
3. Cut out dinosaur pieces
While the glue on the boxes dries, cut out the additional pieces you’ll need for your dino box. From an empty egg carton, cut out 5-6 individual pieces. From your cardboard scraps, cut out a dinosaur tail and two small rectangle strips to help you attach the eyes.
Cut out two dinosaur arms, two dinosaur legs, several white triangle dinosaur teeth and a large heart from green, white and red adhesive foam sheets. Set all of the pieces aside to use in a later step.
4. Paint all the sides and top of both prepped boxes
Pour some of your acrylic paint onto a paper plate. Using a large spongebrush, paint all of the sides and the top of both of the prepped boxes. Also, paint the dinosaur tail and the two small pieces for your eyes. Let the paint dry completely.
Once your first layer of lighter green paint has dried, pour some green acrylic paint onto a paper plate. Dab a circle sponge brush into the green paint several times to coat it all over and then dab it onto the lighter green paint on the boxes. You’ll want some of the lighter green paint to show through to add to the texture of the dinosaur.
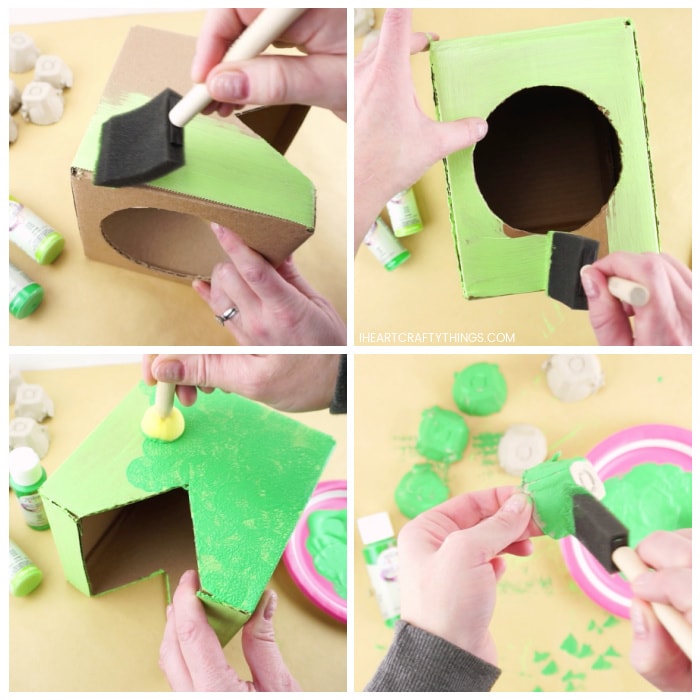
Continue dabbing into the green paint and then onto your boxes until all sides are painted. You’ll also need to paint the tail and small rectangle eye pieces. Let the paint dry completely.
5. Paint each egg carton piece
While you have your green paint out, use a small sponge paint brush to paint each of the egg carton pieces. Set them aside to dry with the boxes.
6. Glue dinosaur head onto dinosaur body
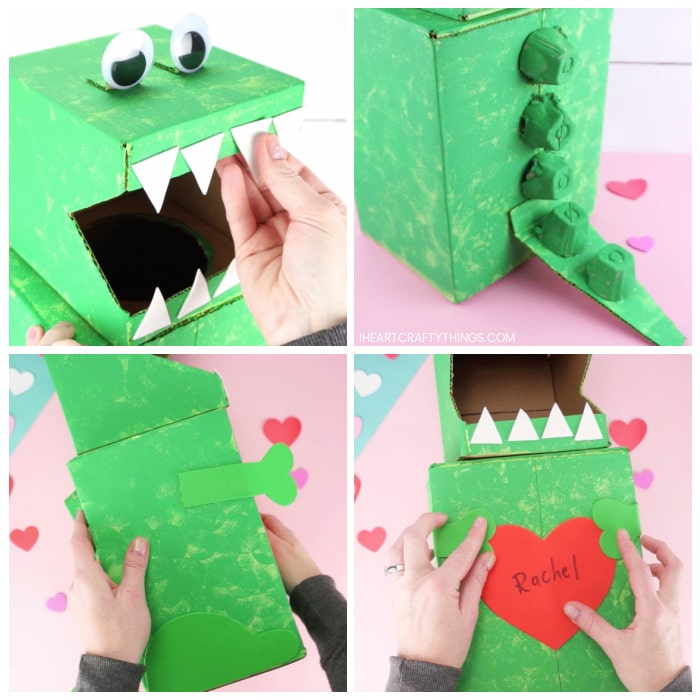
Align the two circles of the boxes together and glue the dinosaur head onto the dinosaur body.
7. Make eyes
Fold the two small painted rectangle cardboard pieces in half and glue the large googly eyes onto one half of the folded pieces. Then glue the eyes onto the top of the dinosaur head.
8. Create tail
Glue the dinosaur tail on the back of the dinosaur, near the bottom of the box. Then glue each of the painted egg carton pieces in a line down the center of the dinosaur back and onto the tail.
9. Add teeth and red heart
Peel the backing off the white teeth and place them on the top and bottom of the dinosaur mouth. Using a marker, write the child’s name on the large red heart. Then peel the backing off the heart and place it in the center of the dinosaur body.
10. Add arms and legs
Peel the backing off the dinosaur legs and feet and place them on each side of the dinosaur box. Then peel the backing off the dinosaur arms and place them on the sides of the box with the arms folded over the front of the box, holding onto the large heart.
11. Apply small foam heart stickers
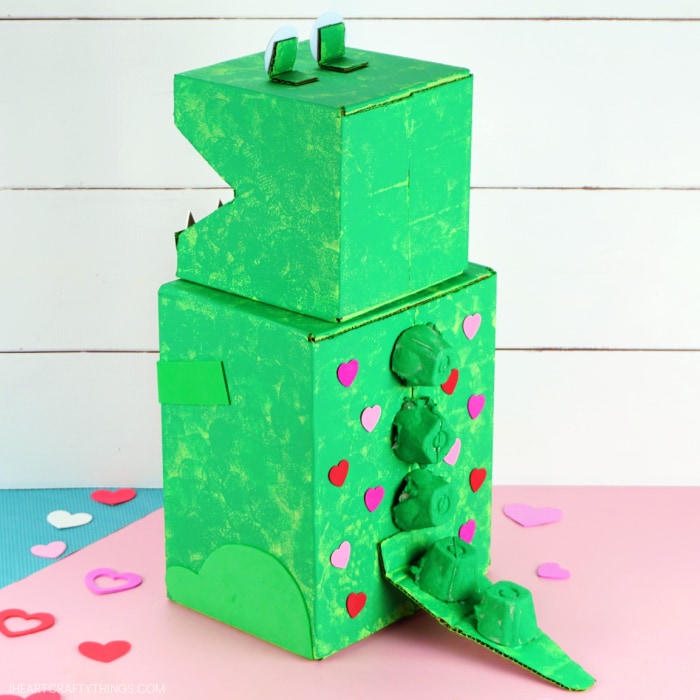
Finish your Dinosaur Valentine’s box by decorating the front and back of the dinosaur with small foam heart stickers.
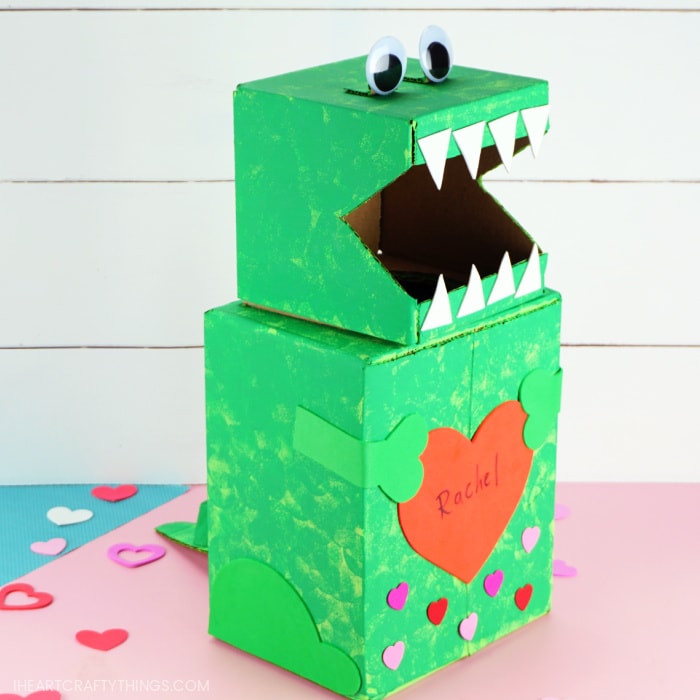
Your T-Rex dinosaur box is complete! It’s sure to be a hit at your classroom Valentine’s Day party. Friends feed their Valentine cards and candy right into the open slot in the T-Rex’s mouth.
Then after school, reach your hand inside the dinosaur to pull out and discover all of your fun Valentine’s and treats.
