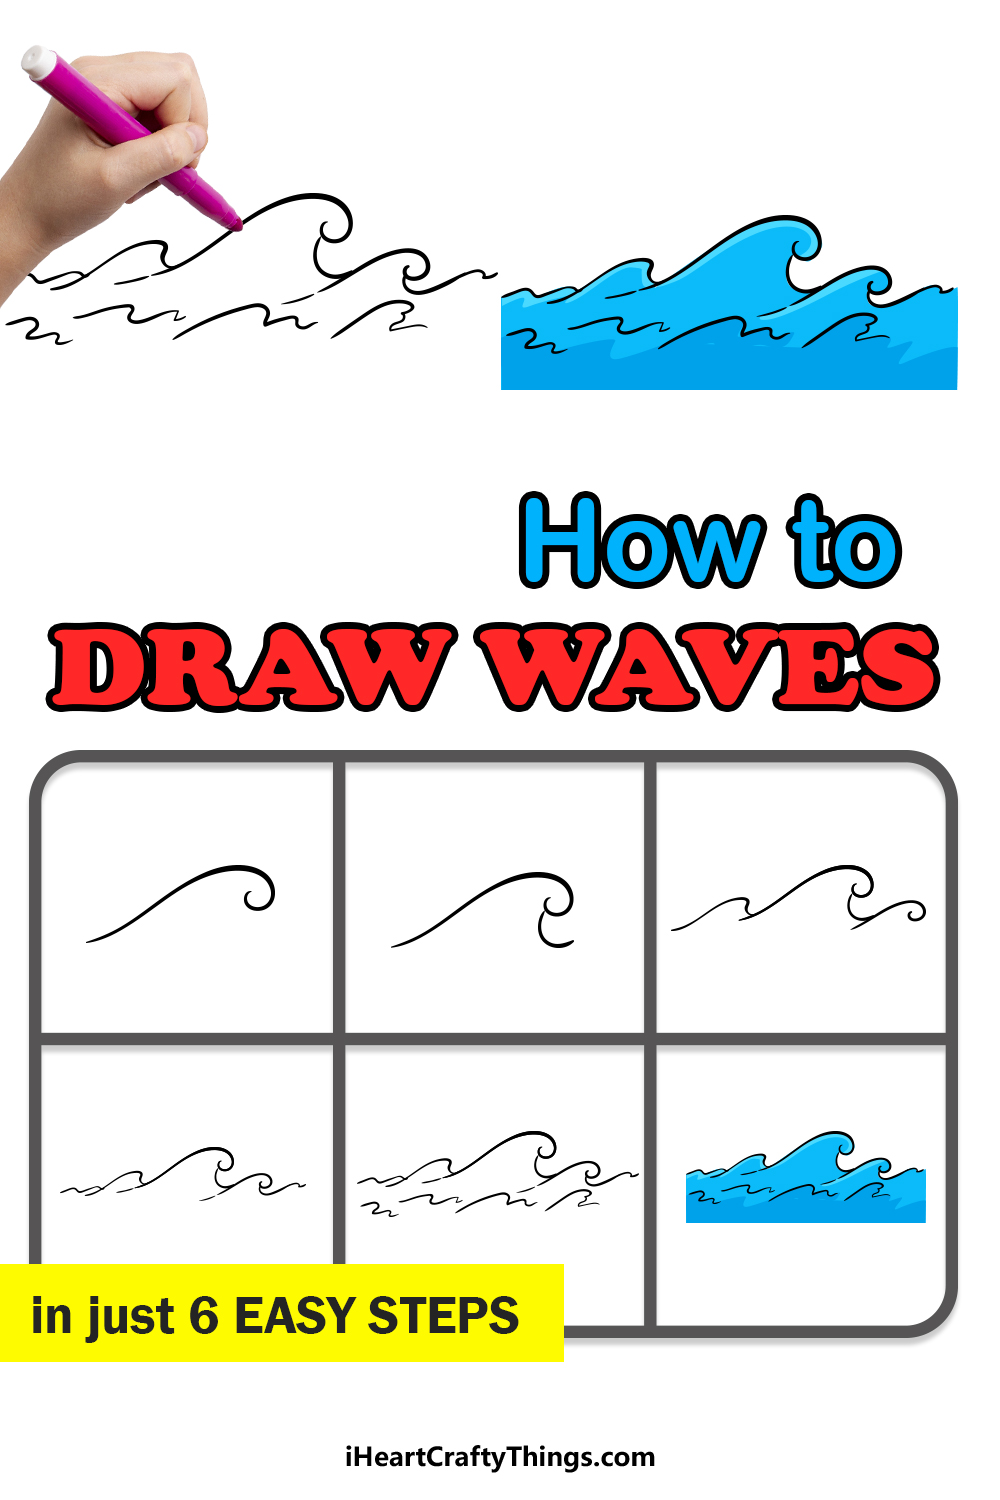
Learn how to draw a wave! This quick guide will take you through the process of drawing a cartoonish breaking wave, step by step. Think of ocean waves crashing on the shore—a wave of water in motion.
We’re keeping it simple and fun, no need for a pencil or complicated techniques. Instead, grab a marker and follow along to create a bold, dynamic design.
Perfect for anyone who loves the beach and wants to capture that ocean vibe. Whether you’re after a realistic wave or just a creative splash, you’ll have this breaking wave down in no time!
Watch Me Draw a Breaking Wave: Step-by-Step Tutorial
How to Draw A Wave – Let’s get Started!
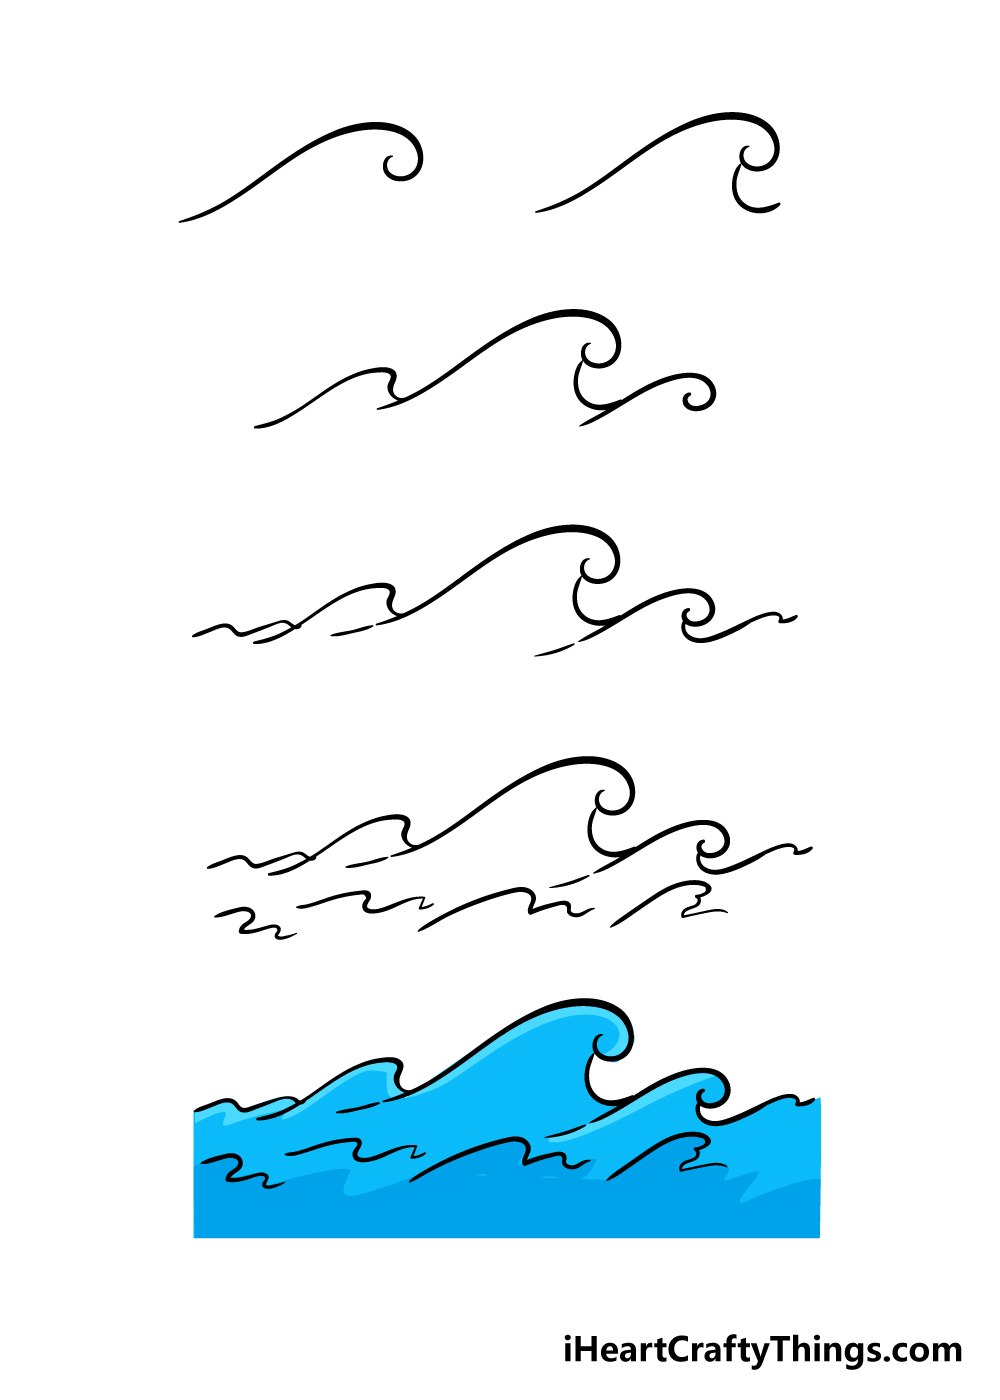
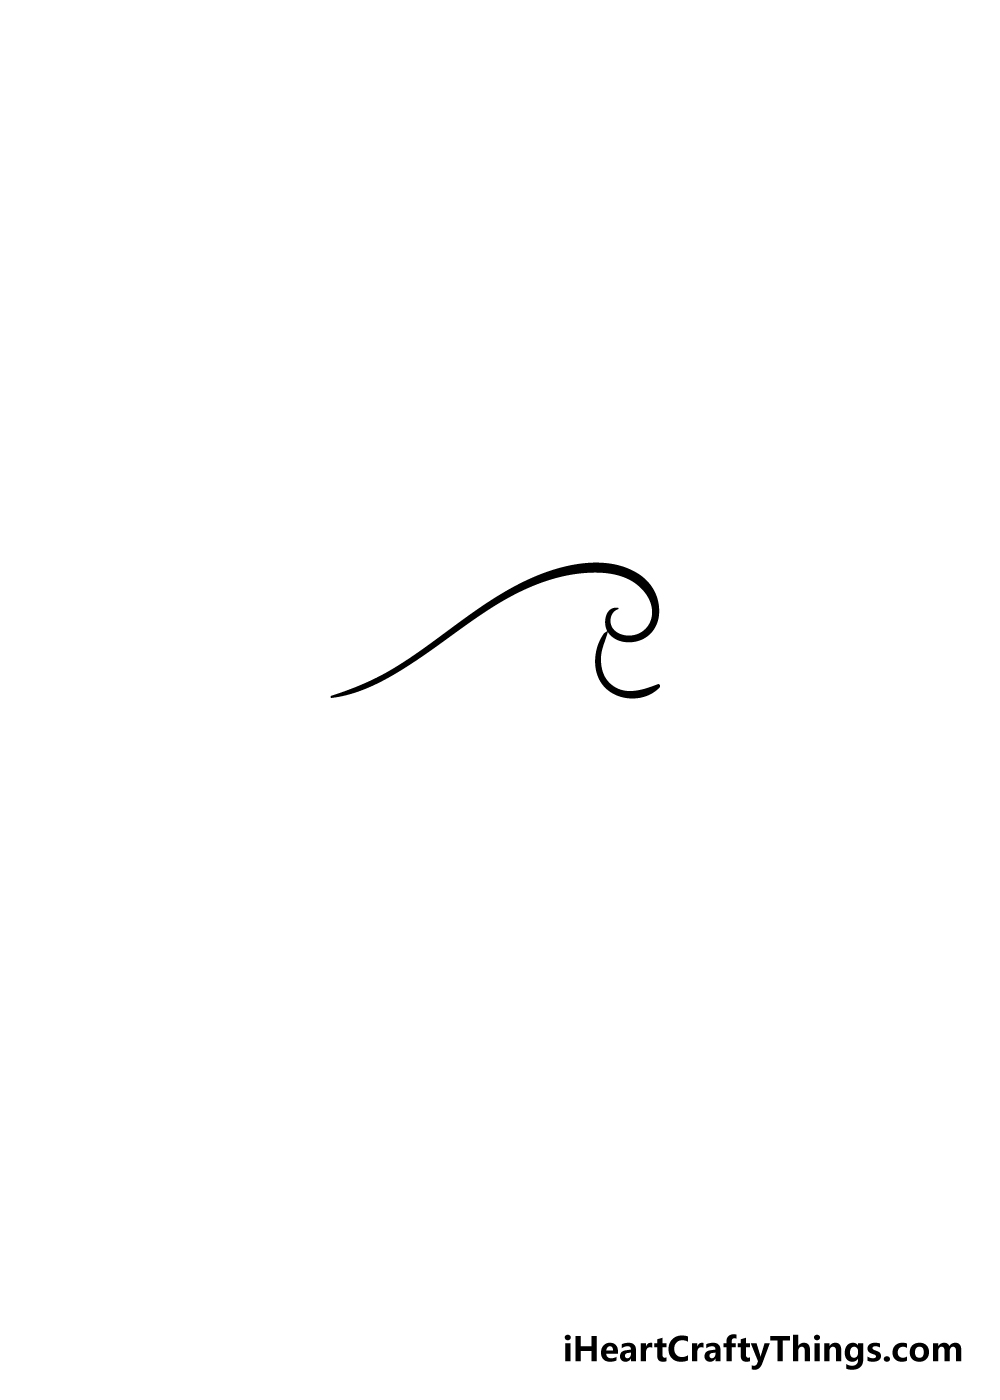
Step 1

Like all new drawing challenges, learning how to draw a cloud will be made easier if you break it down into smaller, more manageable steps.
With this in mind, we will start simply in this step. The first line we will be drawing in will be a very curly, curvy line as it appears in the reference image. It will end in a very curved line that we will be building on later.
Step 2 – Draw in another curved line for your wave
Continuing on with your wave drawing, we shall add in one more line underneath the one you just did.
This line will extend from under the ending curved line at the right-hand side that you drew in the first step and curve out. With that line added, we can move on to step 3!
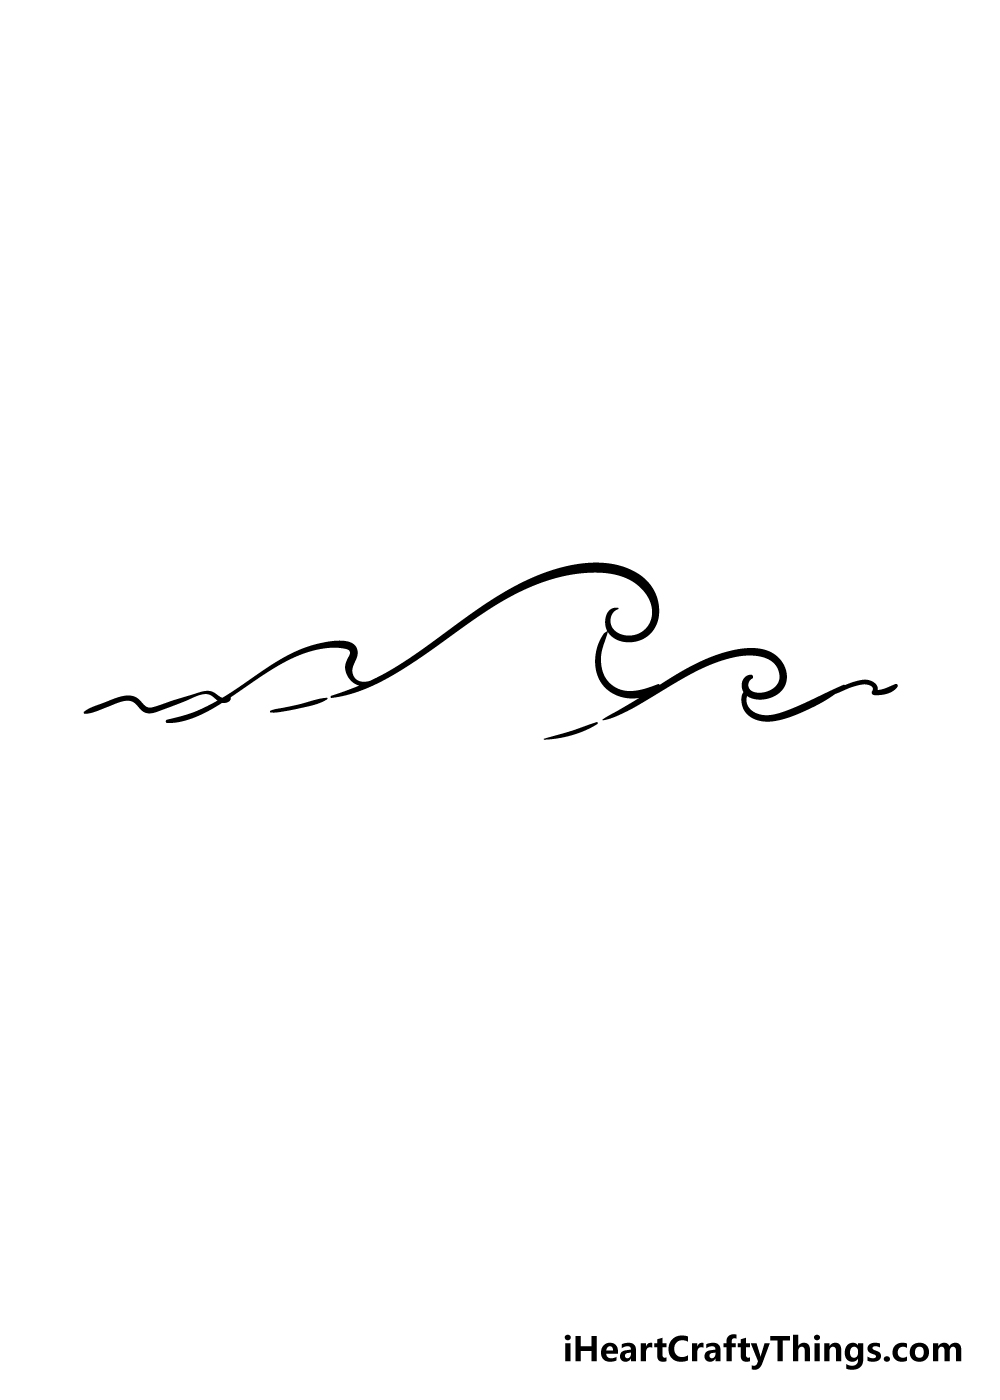
Step 3 – Continue adding in more curvy lines
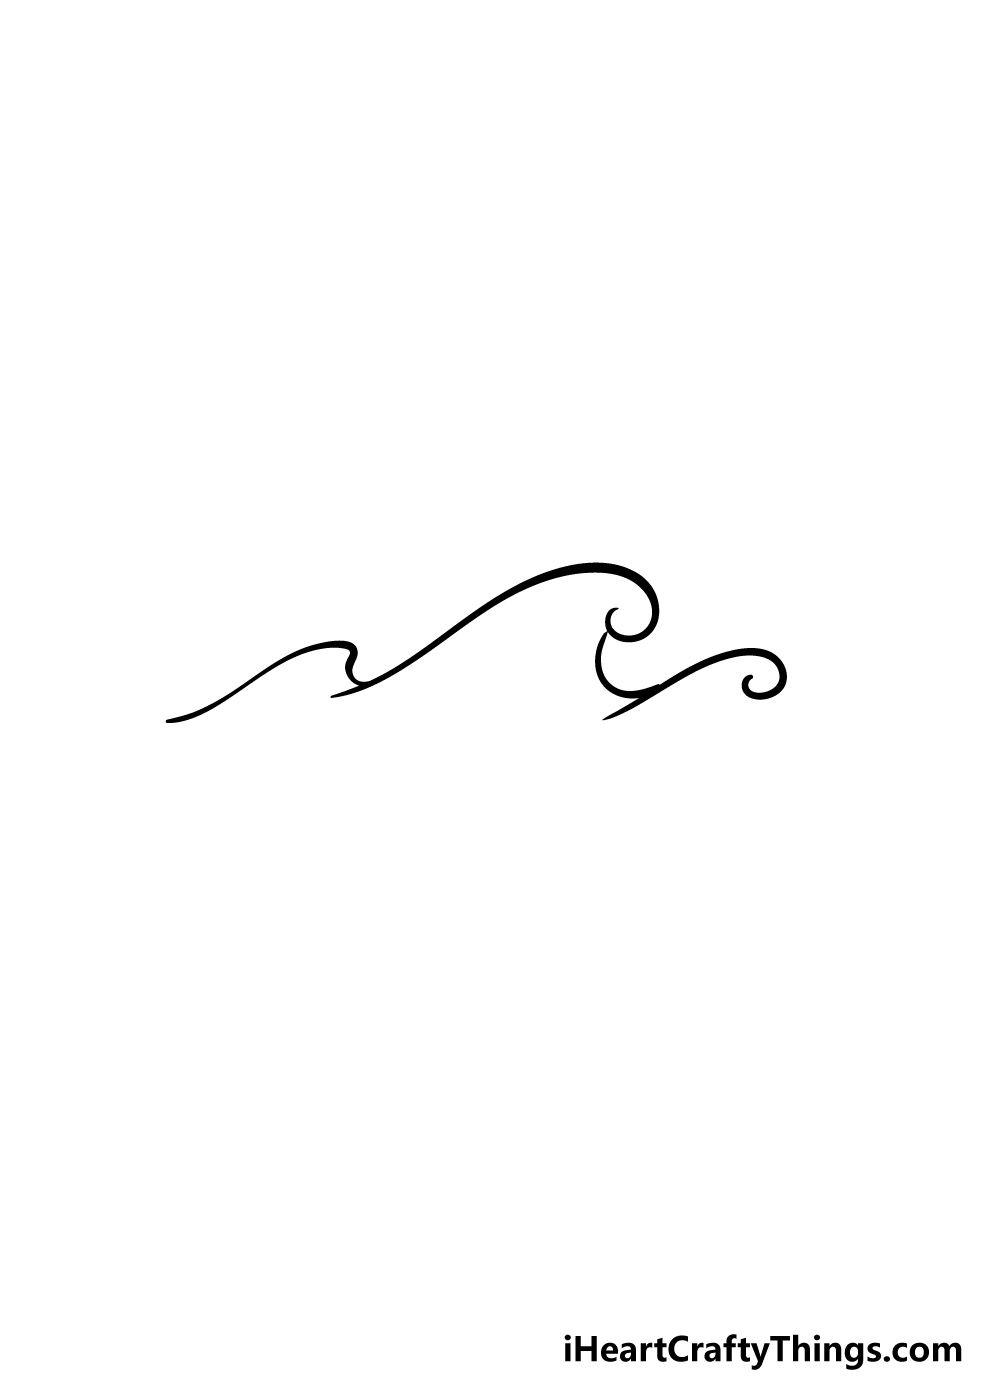
We’ve been taking it slowly and simply so far in this guide on how to draw a wave, so for this step, we will start to add in more drastic curved lines to it.
Firstly, draw in a more jagged but still slightly curved line connecting on the left-hand side of the wave as you can see in the image.
Then, you can add a much curvier line under the line at the far right of your wave. You can also vary these lines a bit to put your own unique spin on your wave drawing as well!
Step 4 – Now, add some more lines to your wave
Your wave drawing is starting to look more and more like a real wave the more you add to it! We shall be adding a combination of somewhat straighter and curved lines to your wave in this next step.
These lines will be building on from the lines you’ve already drawn so far, and will extend the wave further on both the left and right sides.
The reference picture will give you an idea of the placement for these lines, but once again, don’t be afraid to change it up a bit to make it more your own!
Step 5 – Complete the final details with some depth
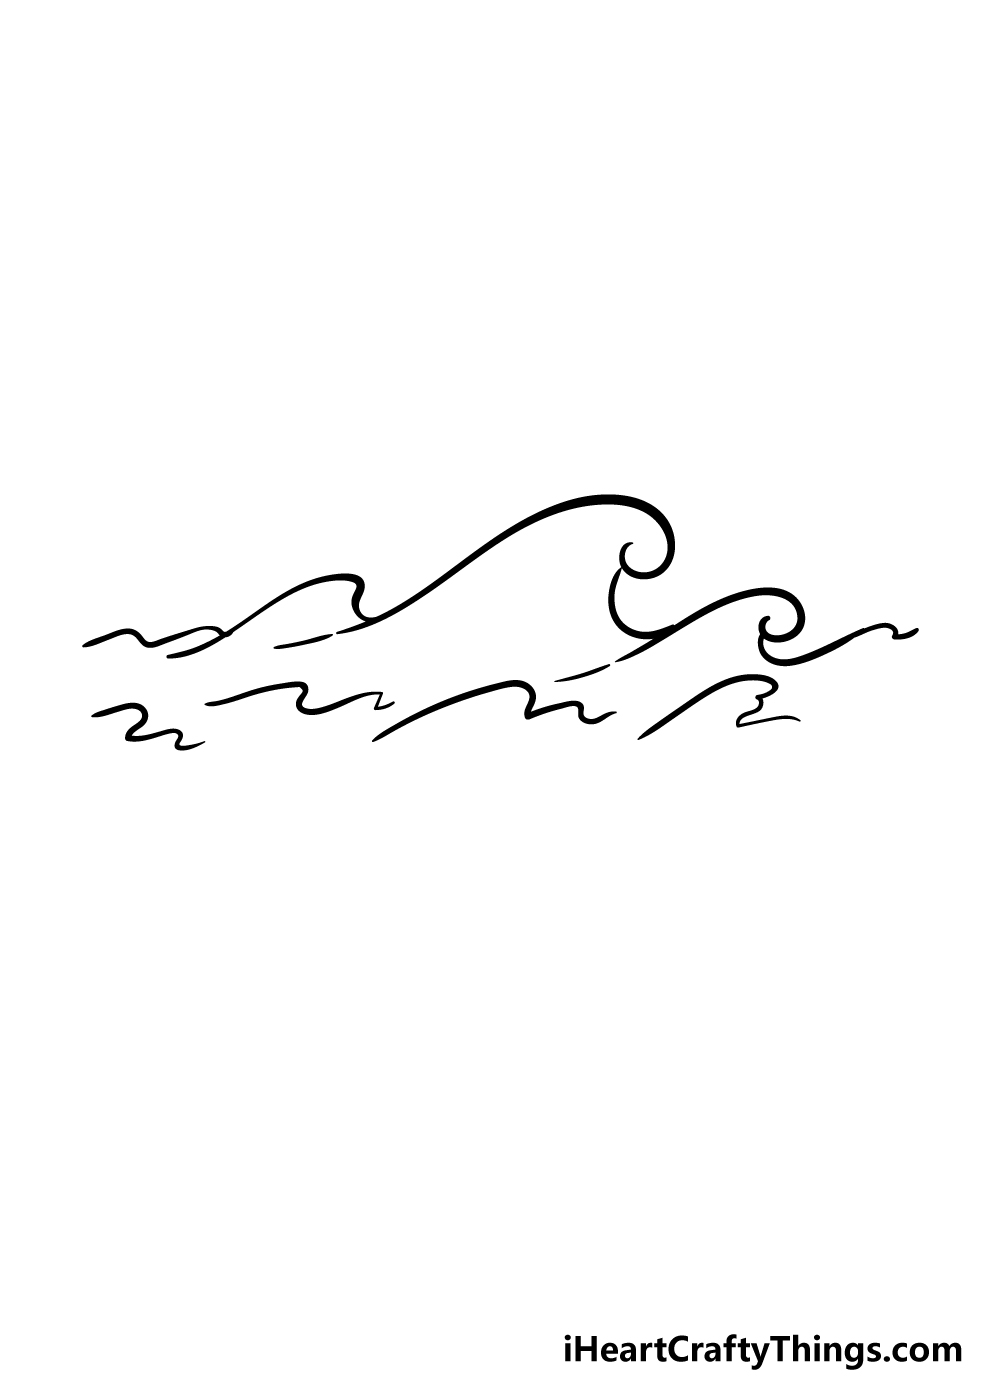
Before we move on to having some fun with coloring in the final step, we will keep building up some details with more lines in this step.
Your wave drawing is already looking great, but just a few more details will help to give it more volume.
Instead of connecting these new details to the lines you’ve already drawn, these details will be made up of smaller curved lines that are unconnected beneath the main lines of your wave drawing. With these details in, you have successfully learned how to draw a wave!
Bonus: Add Some More Fun To This Drawing Of Waves!
This guide on how to draw waves had some tough moments, but now you have seen what it takes to create this drawing. Before we add some color to this drawing, we have a few ideas for some details to add.
These details may be simple, but they will help to make your drawing even more fun! First of all, what’s the main thing someone would want to use an ocean wave for?
Surfing, of course! For that reason, it could be fun to add a surfer to the drawing, catching this awesome wave that you’ve created.
They could be drawn in a simple cartoony style if you’re not used to drawing people. Or, if you do like to draw more detailed people then that could work too.
It would be a fun way to add some action to this scene, and the way you design the surfer could be interesting as well. It could be based on a famous surfer or maybe someone you know!
It’s up to you, but you could also just have people swimming in the ocean near the wave if you wanted to. There are many different ocean creatures that you could add as well.
A dolphin, shark or a whale emerging from the wave could be really cool, and if there are people swimming then you could show their reaction.
You could also draw some details in the sky such as clouds, the sun or a passing airplane, for a few ideas. If you like only one of these ideas, then you could stick to that, but you could also use all of them!
If you can think of any other ideas, then be sure to incorporate them as well.
Step 6 – Finish off your wave drawing with some color
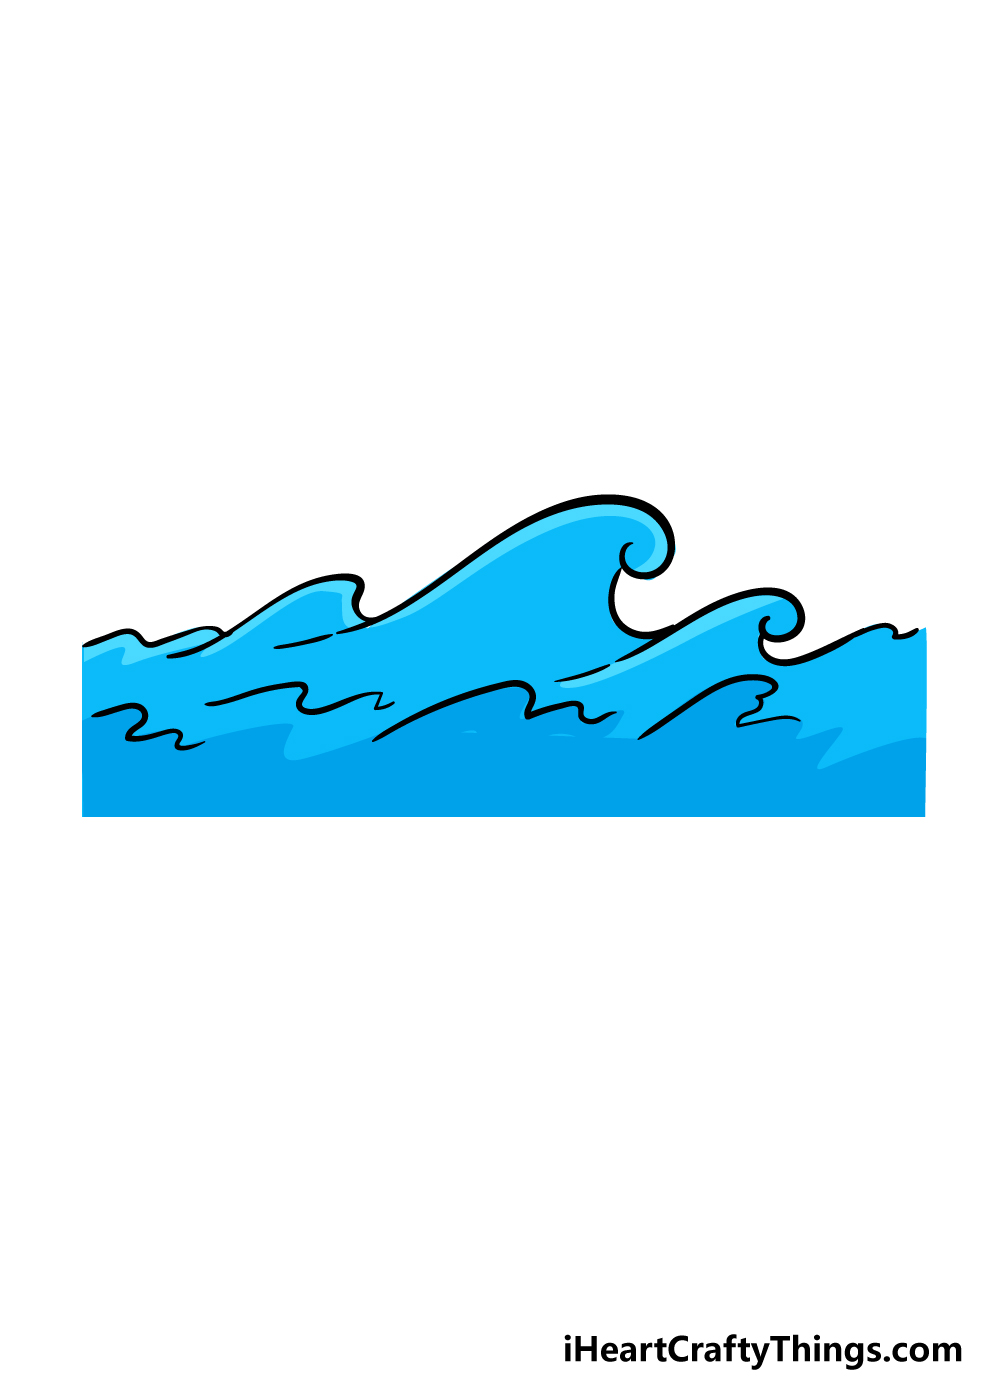
Your wave drawing is already looking amazing at this point! The only thing that could make it look even better would be to add in some beautiful colors!
You might immediately think of a bright blue for these ocean waves, and while that would look great there are also some variations you could go with as well.
Depending on the weather and water conditions, the ocean can look a bit grey, lighter blue or even more green.
You could also have some variations with how you color the sky above it.
Yellows or oranges could make a beautiful sunrise scene, whereas you could have dark blue with a bright moon for a stunning night scene.
You could even draw in and color some fun extra details to your drawing as well. For example, you could have a dolphin or even a mermaid leaping from the waves!
As for coloring in this drawing, if I were doing it I would use some watercolor paints, as those fit water scenes beautifully.
That’s just one out of many art mediums you could use to finish off this drawing, however, and I know whatever you choose will look incredible!
Your options include mediums such as acrylic paints, watercolors as we mentioned, colored pens, pencils, crayons and any other art tools you have at hand.
How will you bring your wave drawing to life with color?
3 More Tips to Make Your Wave Drawing Easy!
Make this easy to draw wave even easier with these helpful tips and tricks!
- Simplify the Wave Design
Creating a wave drawing can often be harder than it looks. One way to make it easier is by simplifying the design even further. For instance, we made the ends of each wave curl in quite sharply.
This can make it a bit harder to draw, but you could definitely make it easier on yourself! By making them rounder, you may be surprised at how much simpler it becomes. It may look a bit different, but it will still look great! If there are other ways you could make this easier by changing the design, go for it!
- Add More to the Scene
You could also make this wave sketch a bit easier by adding more around it. When the waves are the sole feature of the picture, that means all attention is drawn to that aspect. For example, you could add a sailboat on the waves or maybe some dolphins diving between them.These could be added quite simply, and if there are parts of the drawing you’re not happy with, these elements will draw attention away. Plus, you’ll make the drawing even more interesting, as there’s more to see! What additions could you add to the scene?
- Use Different Art Tools
If you want to keep the focus on the waves but still want to make it easier, you can use certain art tools and mediums to help you. For creating waves, using paint and brushes will be a great way to make it easier. If you want to do this, skip drawing the lines as shown in the guide.You can draw some light outlines with a pencil if you need guiding lines! Using larger paintbrushes, dip them in your watery colors, and use big, curving strokes to create the look of the waves. This is one suggestion, but what other mediums and techniques could you use?
Your Wave Drawing is Complete!
With the coloring stage complete, you have reached the end of our guide on how to draw a wave!
We really hope that you had a lot of fun taking this drawing journey with us.
It’s an amazing thing to take on a new drawing challenge and see the finished product in front of you, and you should be very proud of your beautiful drawing!
By following the steps of our guide and trying hard you have accomplished your goal!
Drawing and coloring is just half the fun, though. You can now show us how amazingly creative you can be by adding in some elements to really make this drawing your own.
Whether it’s with sea creatures enjoying the wave, dramatic weather effects above it or in the art mediums you decide on, we can’t wait to see how you express your creativity!
We have many more awesome step-by-step drawing guides on our site for you to enjoy!
We will also be bringing out many more soon, so please be sure to check in frequently so that you can enjoy many hours of drawing fun!
We would also be thrilled to see your amazing wave drawing, so please do share it on our Facebook and Pinterest pages for us to admire! We can’t wait to see how creative you all got with this guide!