• HOME
  • ABOUT
  • TERMS
  • PRIVACY POLICY
    • Facebook
    • Instagram
    • Pinterest
    • Twitter
    • YouTube

I Heart Crafty Things

  • KIDS CRAFTS
    • ANIMALS
    • OCEAN CRAFTS
    • INSECTS
    • BIRDS
    • PAPER PLATE CRAFTS
    • CUPCAKE LINER CRAFTS
    • BOOK INSPIRED CRAFTS
  • HOLIDAYS
    • VALENTINE’S DAY
    • GROUNDHOG DAY
    • ST. PATRICK’S DAY
    • EASTER
    • EARTH DAY
    • MOTHER’S DAY
    • FATHER’S DAY
    • FOURTH OF JULY
    • BACK TO SCHOOL
    • HALLOWEEN
    • THANKSGIVING
    • CHRISTMAS
  • SEASONAL
    • WINTER
    • SPRING
    • SUMMER
    • FALL
  • Kids Activities
    • FINE MOTOR ACTIVITIES
    • SENSORY ACTIVITIES
    • PRESCHOOL GAMES
  • Shop

September 25, 2013

Washi Tape Patterned Pumpkins

  • Share
  • Tweet
My daughter loves washi tape. In fact, if I get it out and use it and don’t involve her I usually deal with a palatial meltdown. With that in mind, and since I’m trying to justify the fact that I seem to order it every single time it’s on Pick Your Plum, I figured what better way to learn about patterns than with washi tape. Right?!!

HOW TO MAKE WASHI TAPE PATTERNED PUMPKINS
Supplies you will need:
  • orange, brown and green cardstock paper
  • orange/ fall colored washi tape
  • green pipe cleaner
  • hole punch
  • scissors
  • glue

Directions:

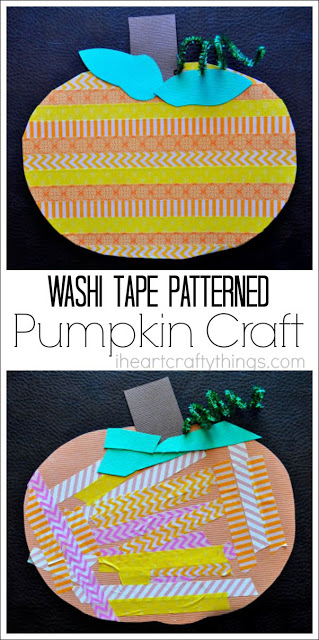
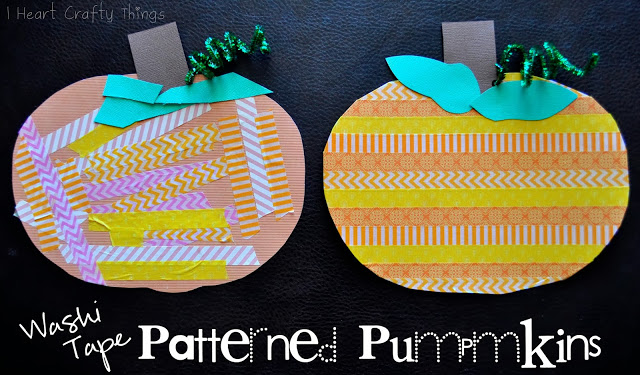
1. Start by cutting a big pumpkin out of orange cardstock paper and grab some of your pumpkin/fall washi tape colors. My daughter knows I have pink and not using it was out of the question to her, so we threw pink in there too.
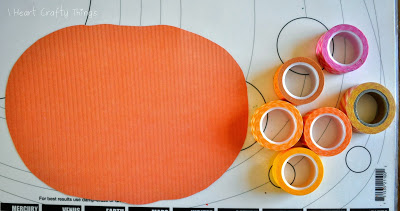
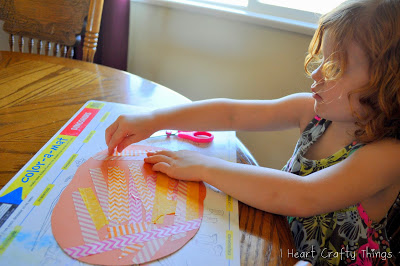
2. After we talked about the different patterns and colors on the washi tape, I let my daughter use her creativity to fill her pumpkin with different patterns. I helped hold the tape role for her and she cut all the tape herself and put it on her pumpkin herself. I used orange scrapbook paper for the background because I knew she wouldn’t cover it completely like I did.
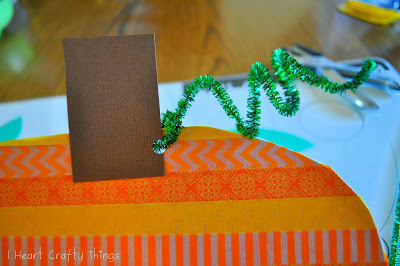
3. Once you are finished adding your patterns to your pumpkin, glue a brown stem on the top of your pumpkin. To add a vine, we punched a hole at the top of the pumpkin with a hole punch. Then we put a green pipe cleaner through the hole, twisted it around itself to secure it shut, and curled the pipe cleaner by wrapping it around our finger. You can fold down the end of the pipe cleaner too to get rid of the sharp point at the end.

4. Lastly, cut some leaves out of green paper and glue them on your pumpkin. My toddler wanted to cut out the green leaves all by herself and glue them on.

This project for toddler/preschool age children for exploring patterns but it’s also a project can be fun even for older kids (or big kids like myself).
Check out all of our Fall Crafts and Activities!

Sign up for our newsletter to keep up with all of our crafts and activities!


Follow I Heart Crafty Things on Facebook, Pinterest and Instagram for more crafty fun!

rachel

  • Share
  • Tweet

Related Posts

  • Washi Tape Turkey Craft

      After my daughter had so much fun making our Washi Tape Pumpkins, I decided a…

  • Washi Tape Rainbow Craft

    It's a week before St. Patrick's Day and we just had to get one more…

  • Washi Tape Flag Kids Craft

    The fourth of July is right around the corner so I wanted to share a…

Filed Under: Uncategorized 1 Comment

« Pumpkin Pattern Worksheet (for Sensory Bin)
Halloween Clothespin Clips »

Comments

  1. Rachel Kaylynn says

    September 26, 2013 at 1:34 PM

    Fun idea! We were given some wooden apple plaques that I've been trying to figure how to have the kids decorate (wanted to something beyond just paint) -this is perfect!

    Reply

Leave a Reply Cancel reply

Your email address will not be published. Required fields are marked *

This site uses Akismet to reduce spam. Learn how your comment data is processed.

POPULAR THIS WEEK

  • The Winter months are a great time to learn about Arctic and Antarctic Animals and there are so many fabulous children's books to accompany learning about them. Here is a round up of awesome Arctic and Antarctic Animal Crafts for Kids. Best Winter Animal Crafts for Kids
  • Two Valentine paper gnome crafts laying side by side on a pink background with heart stickers scattered around. Valentine Gnome Craft

I Heart Crafty Things is a participant in the Amazon Services LLC Associates Program, an affiliate advertising program designed to provide a means for sites to earn advertising fees by advertising and linking to amazon.com.

Copyright I HEART CRAFTY THINGS © 2021 · Website Design By Jumping Jax Designs