The turkey is a large bird with two species: the wild turkey of eastern and central North America and the ocellated turkey of the Yucatán Peninsula in Mexico.
The turkey we often see is called the common turkey, a native game bird that has been widely domesticated for consumption.
The peculiar appearance of turkeys have created a huge demand for a free turkey drawing tutorial.
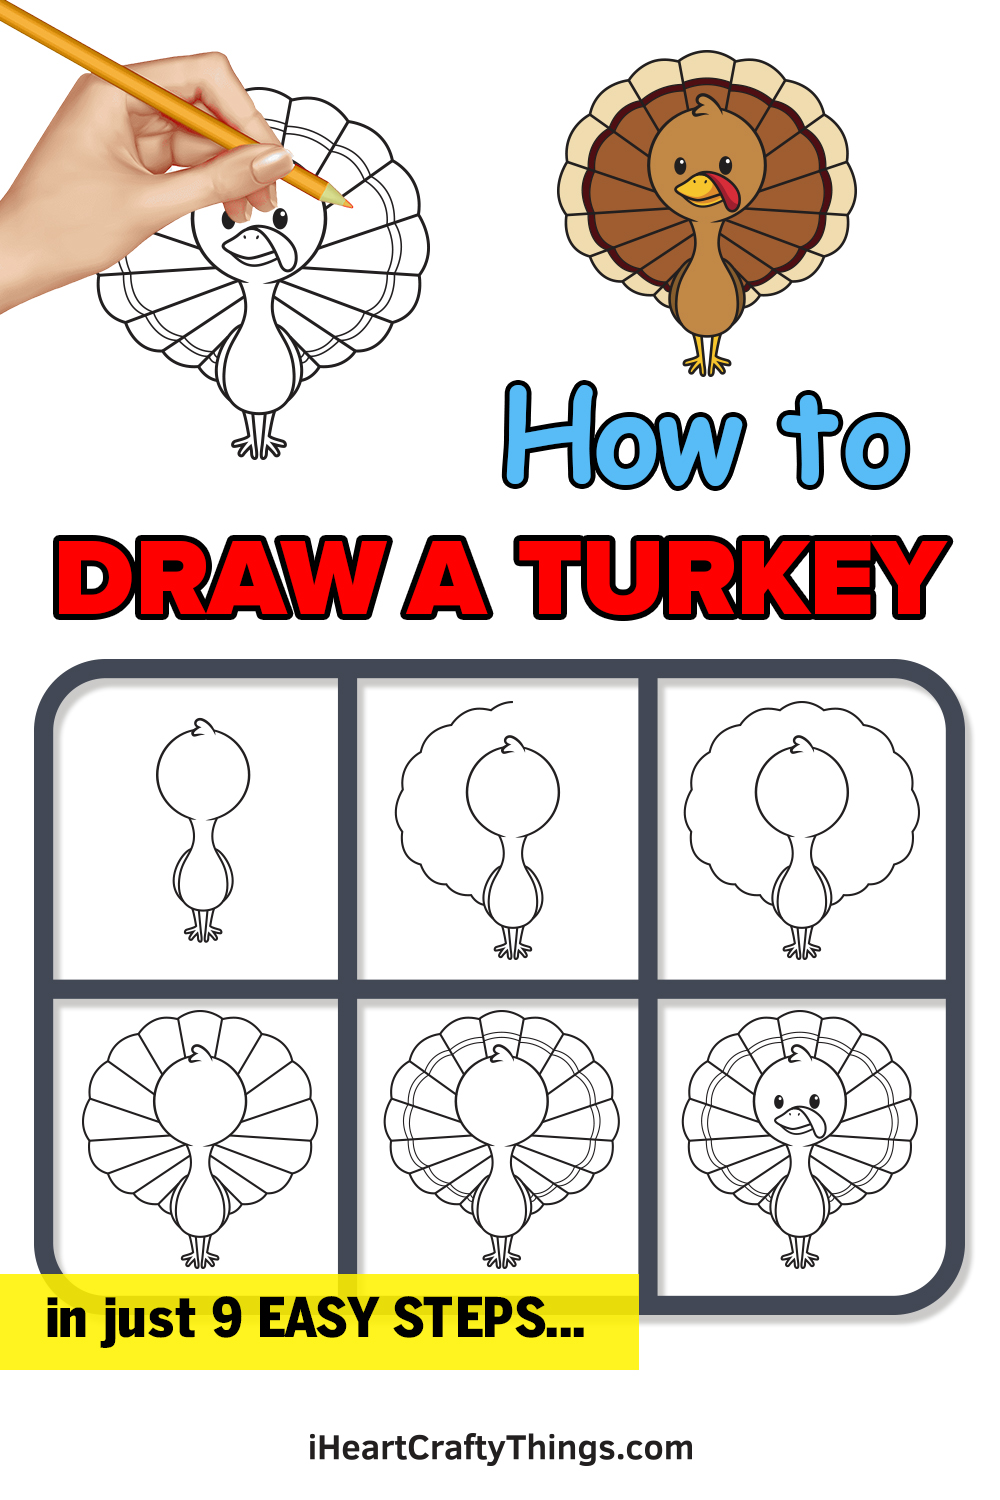
So, we have curated a step-by-step tutorial on how to draw a turkey, summed up in 9 easy instructions paired with simple illustrations.
Have fun and unleash your creative potential!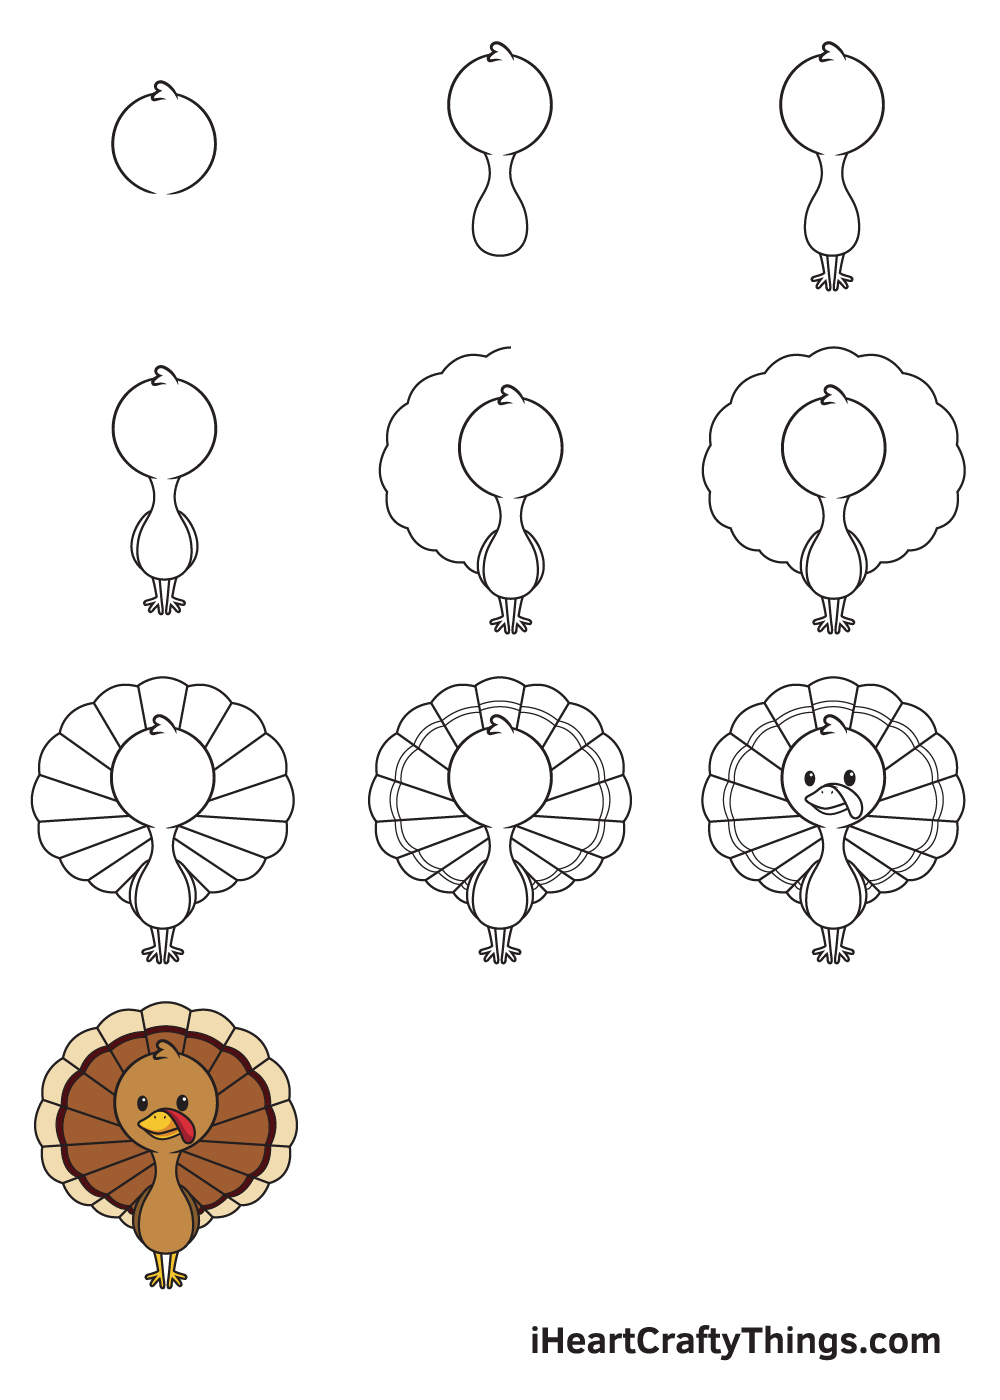
How to Draw a Turkey – Let’s get started!
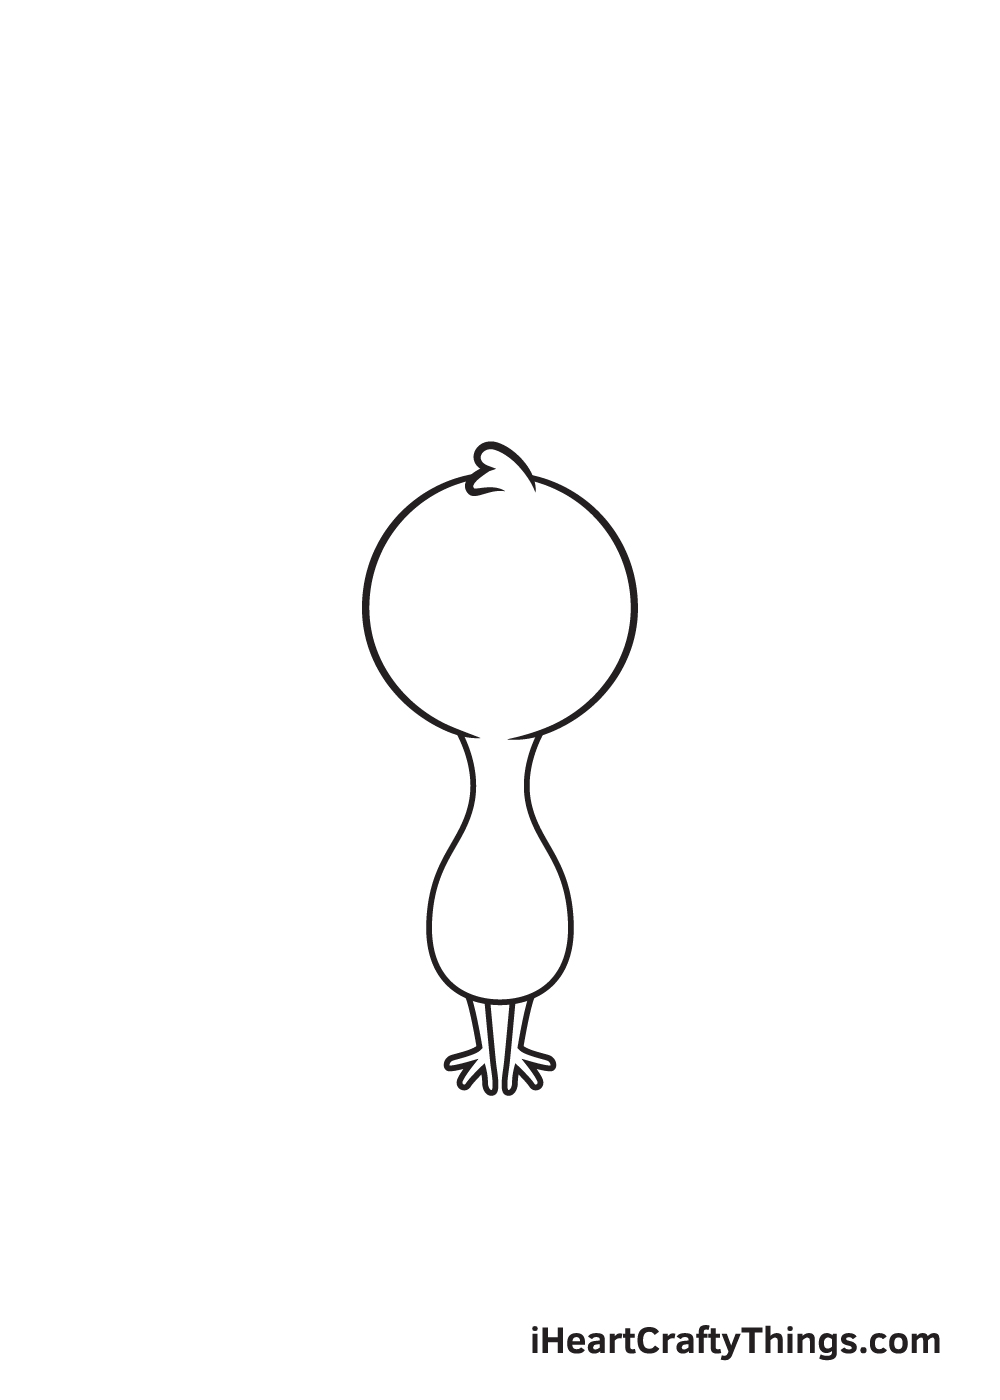
Step 1
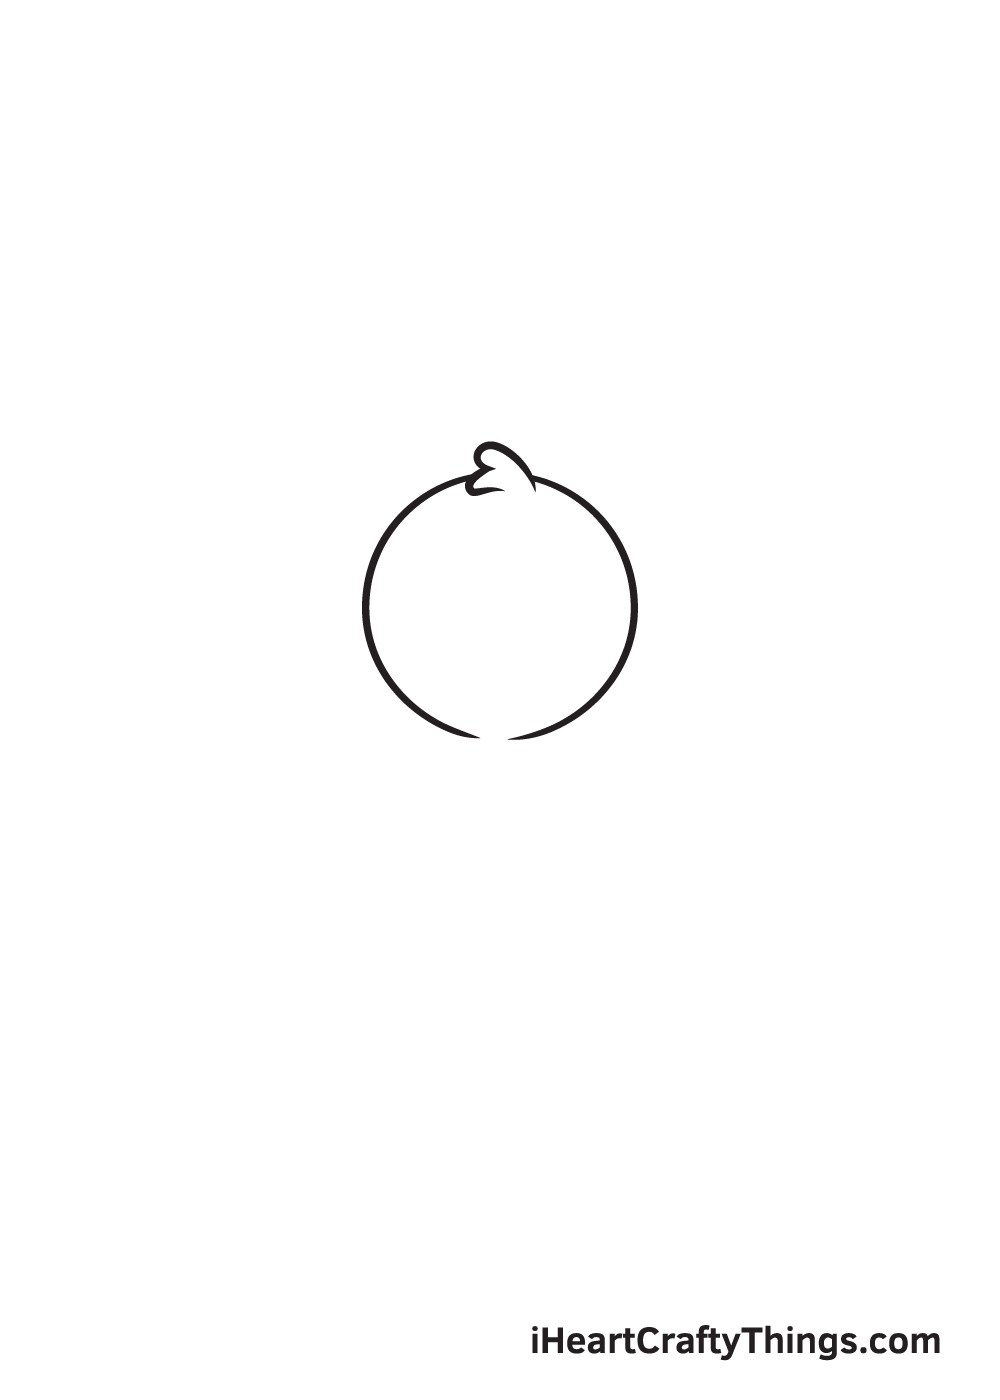
Begin by sketching a perfect circle just slightly above the middle of your paper. Then, draw a tilted and curved W-shaped line to create a feathery texture at the top of the head.
Remember, draw with light strokes when creating outlines and rough sketches. This is to ensure that you can easily get rid of any lines from the outline that you no longer need later on. This also helps keep your drawing refined and neat.
Step 2 – Outline the Turkey’s Head and Body
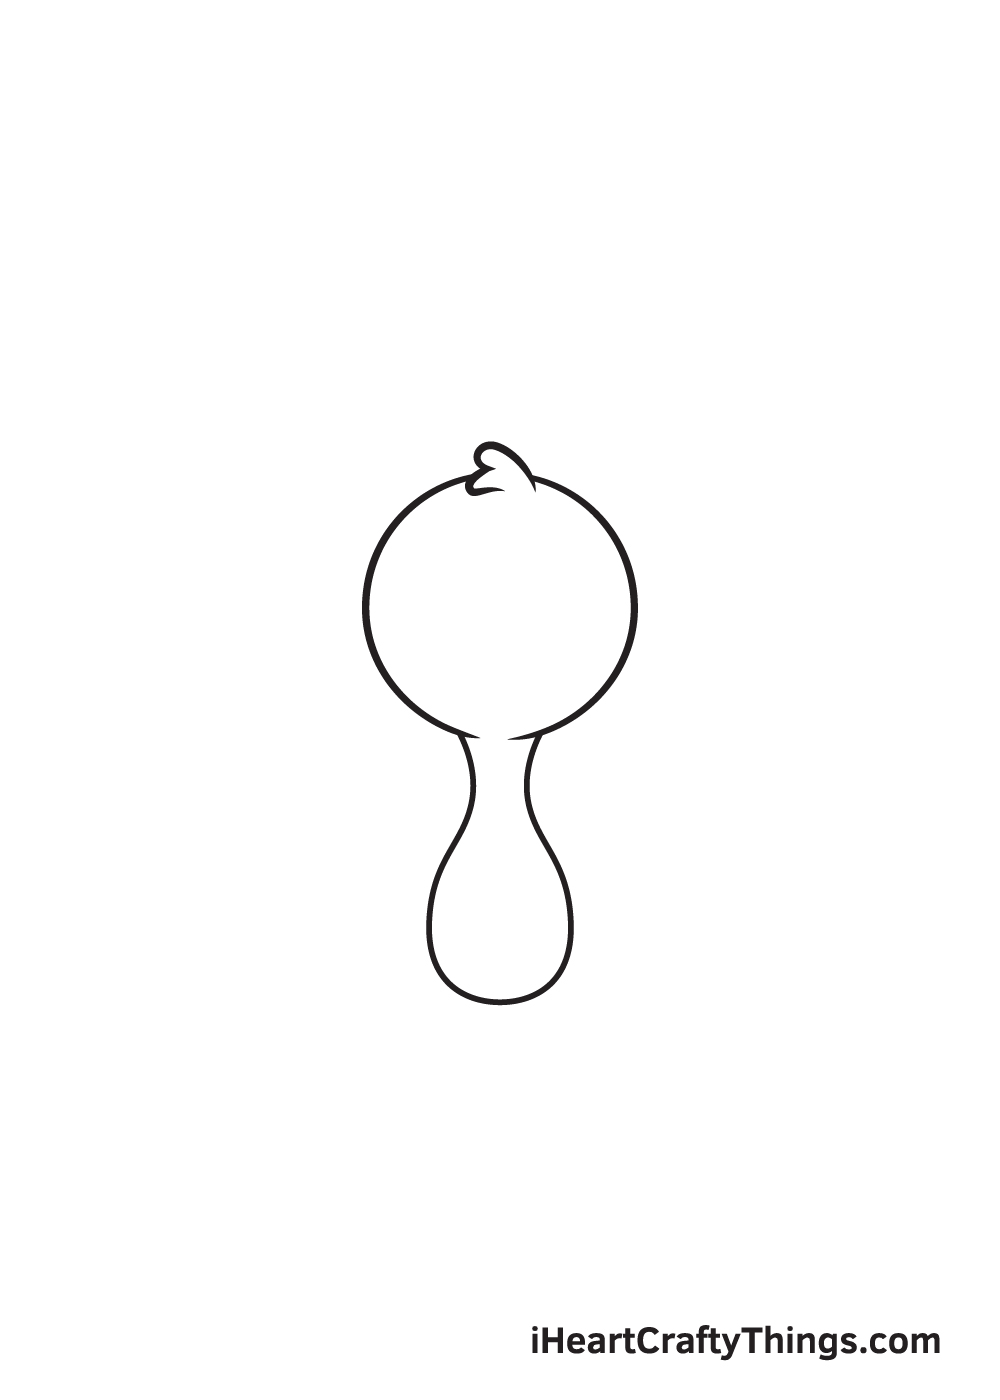
Right underneath the turkey’s head, draw an elongated shape with a narrow upper part and wider bottom to create the body.
Keep in mind that the bottom part of the turkey’s body should be round, as shown in the illustration above.
When drawn correctly, the shape of the body should look quite similar to a vase.
Step 3 – Next, Draw Both Legs of the Turkey
Draw thin legs side by side underneath the body of the turkey. Don’t forget to add a foot with three claws at the bottom of each leg.
Try to make the legs and the feet of the turkey ` identical as much as possible.
Step 4 – Then, Draw the Wings of the Turkey
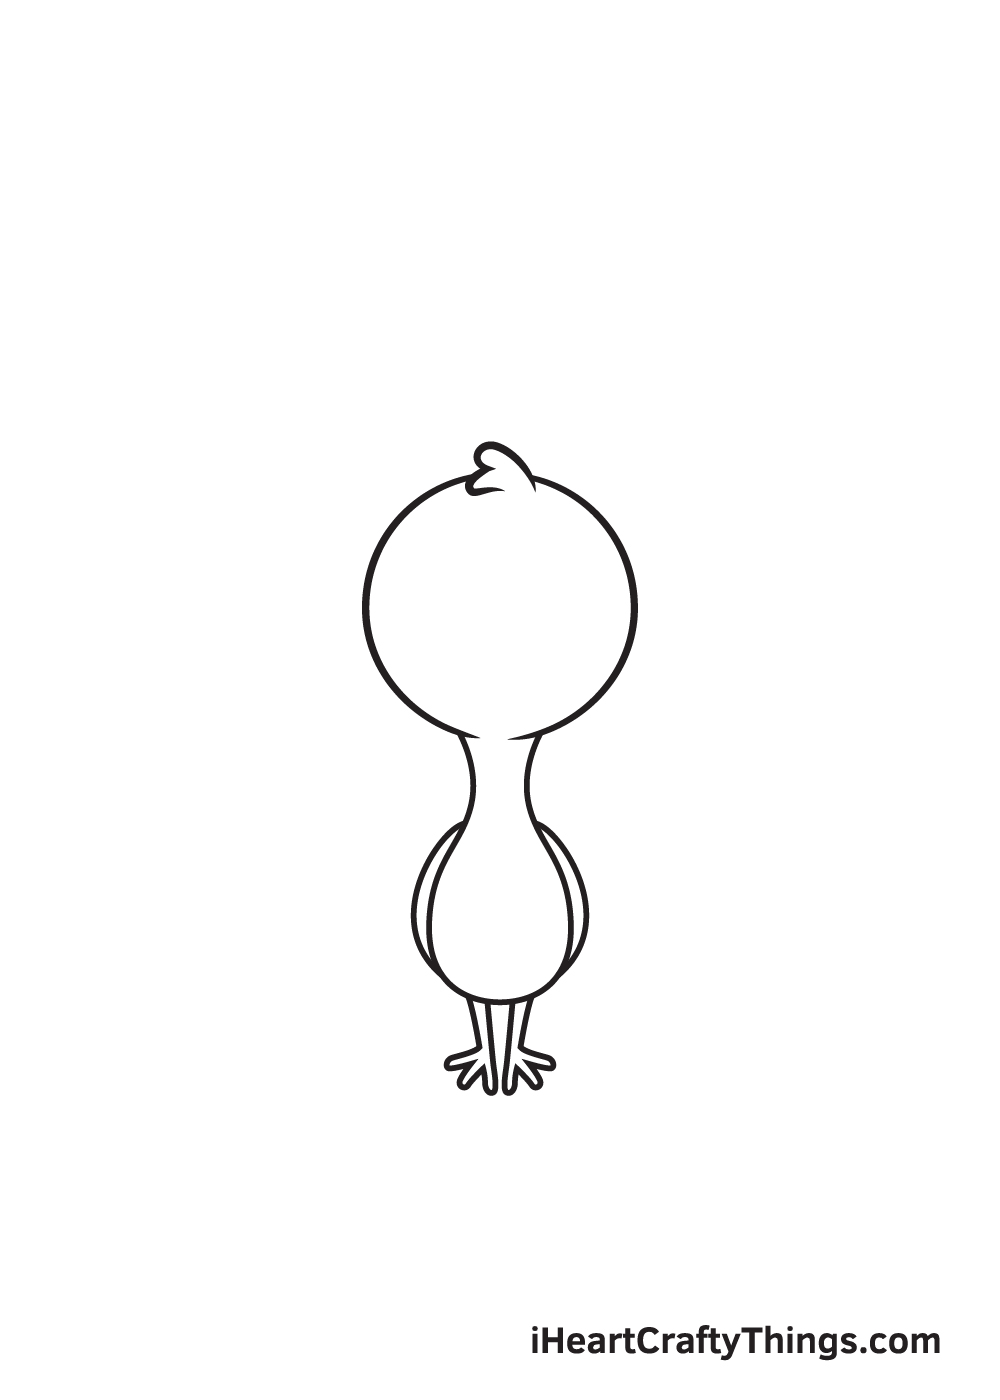
Enclose a curved line on each side of the turkey’s body.
The curved line should follow the outline of the turkey’s body, creating the appearance of a pair of wings perfectly still on the sides of its body.
Step 5 – Afterwards, Draw Half of the Feathers
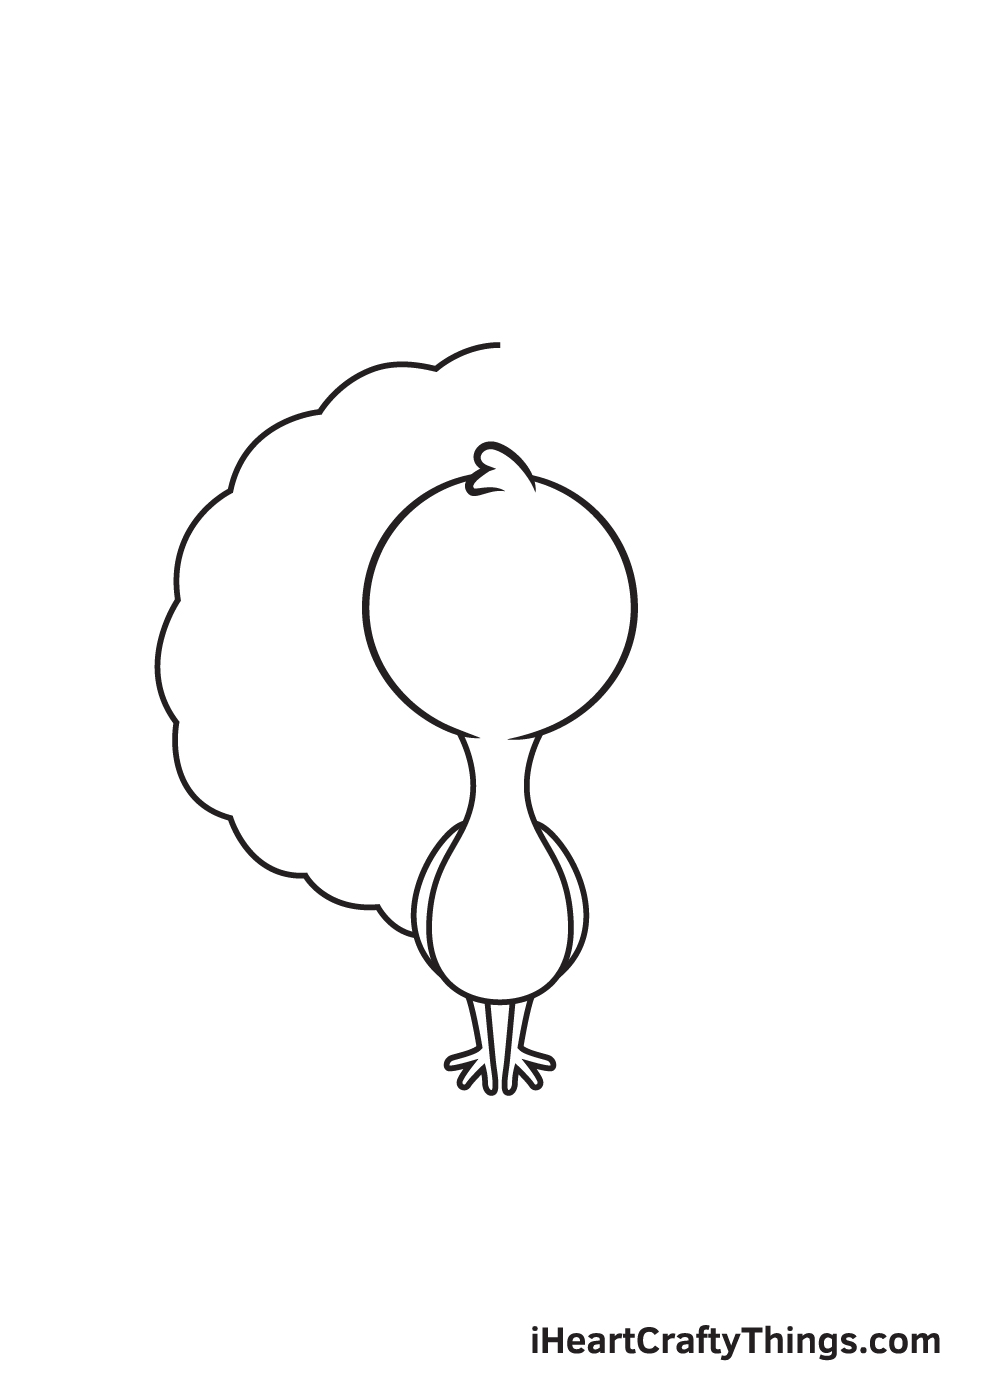
Now, it’s time to draw the most distinct physical features of the turkey, which is the feathers on its back!
It looks especially beautiful when it’s spread apart, so that’s exactly what we’ll be drawing in this step.
Draw a scalloped line beginning from the left side of the turkey’s body extending all the way up to the top of its head. This forms the outline of the feathers halfway through.
Step 6 – Now, Complete the Outline of the Feathers
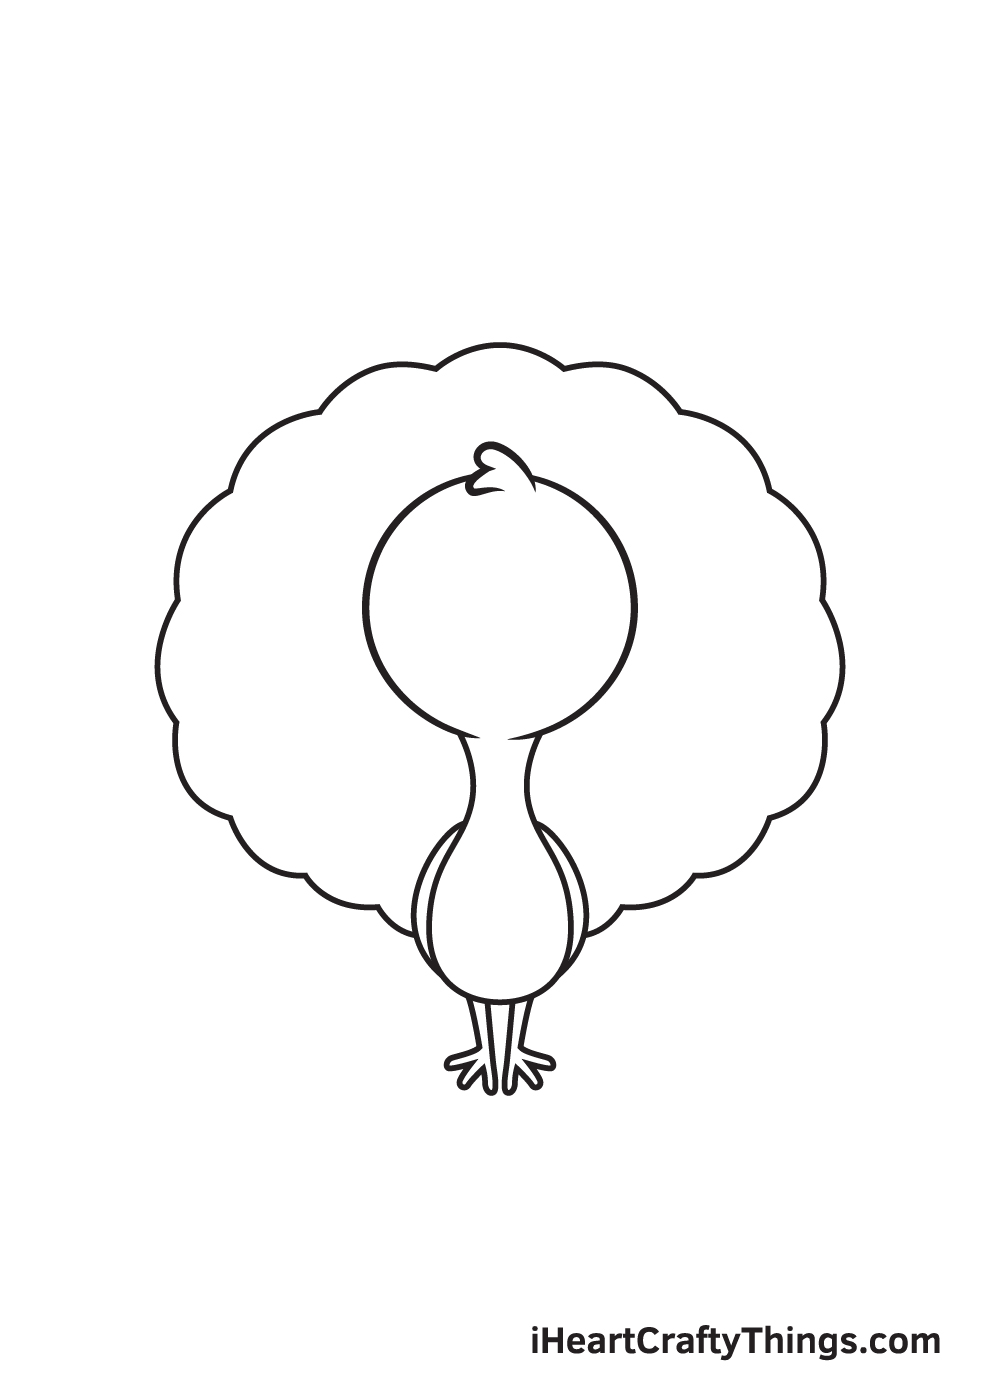
Repeat the previous step until the outline of the feathers is forming a full round shape, as shown in the illustration above.
The figure should go from one side of the turkey’s body all the way to the other side, encompassing the upper part of the turkey’s entire body.
At this point, the outline of the fanned out feathers is complete.
Step 7 – Add Details on the Fanned Out Feathers
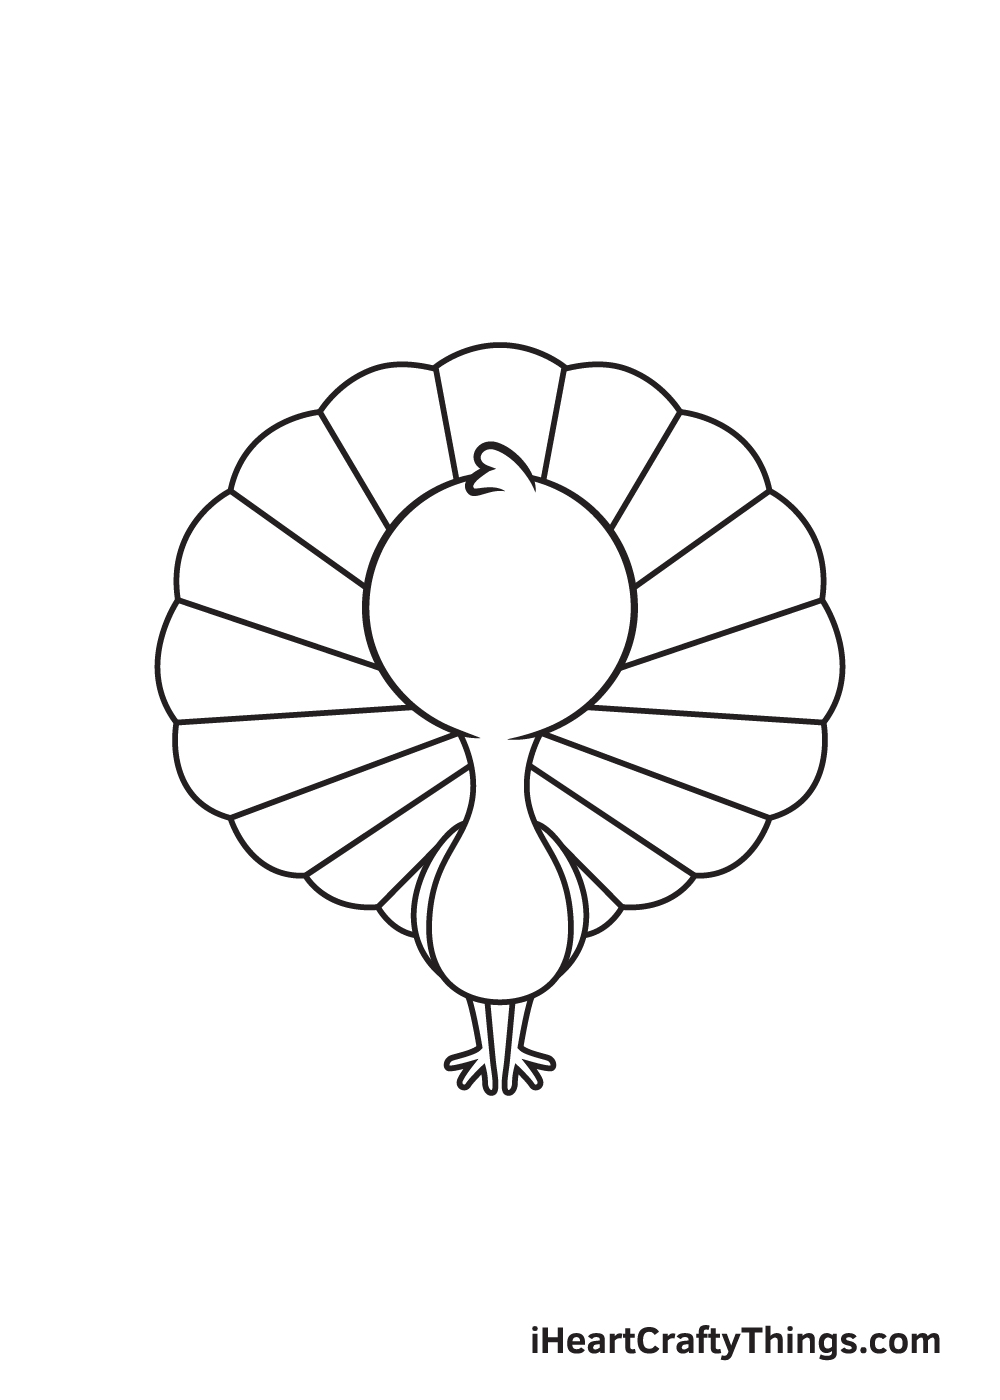
Draw multiple straight lines emerging from the center up to each pointed end of the outline that we drew in the previous step.
Keep in mind that all lines must follow the structure of the outline.
Step 8 – Afterwards, Add More Details on the Feathers

Draw two parallel figures within the outline following its original shape. Similar to the outline we drew previously, the figure should surround the entire upper part of the turkey’s head and body.
There should be a slight gap in between the edge of the feathers and this figure, as shown in the illustration above.
Step 9 – Now, Draw the Facial Features of the Turkey
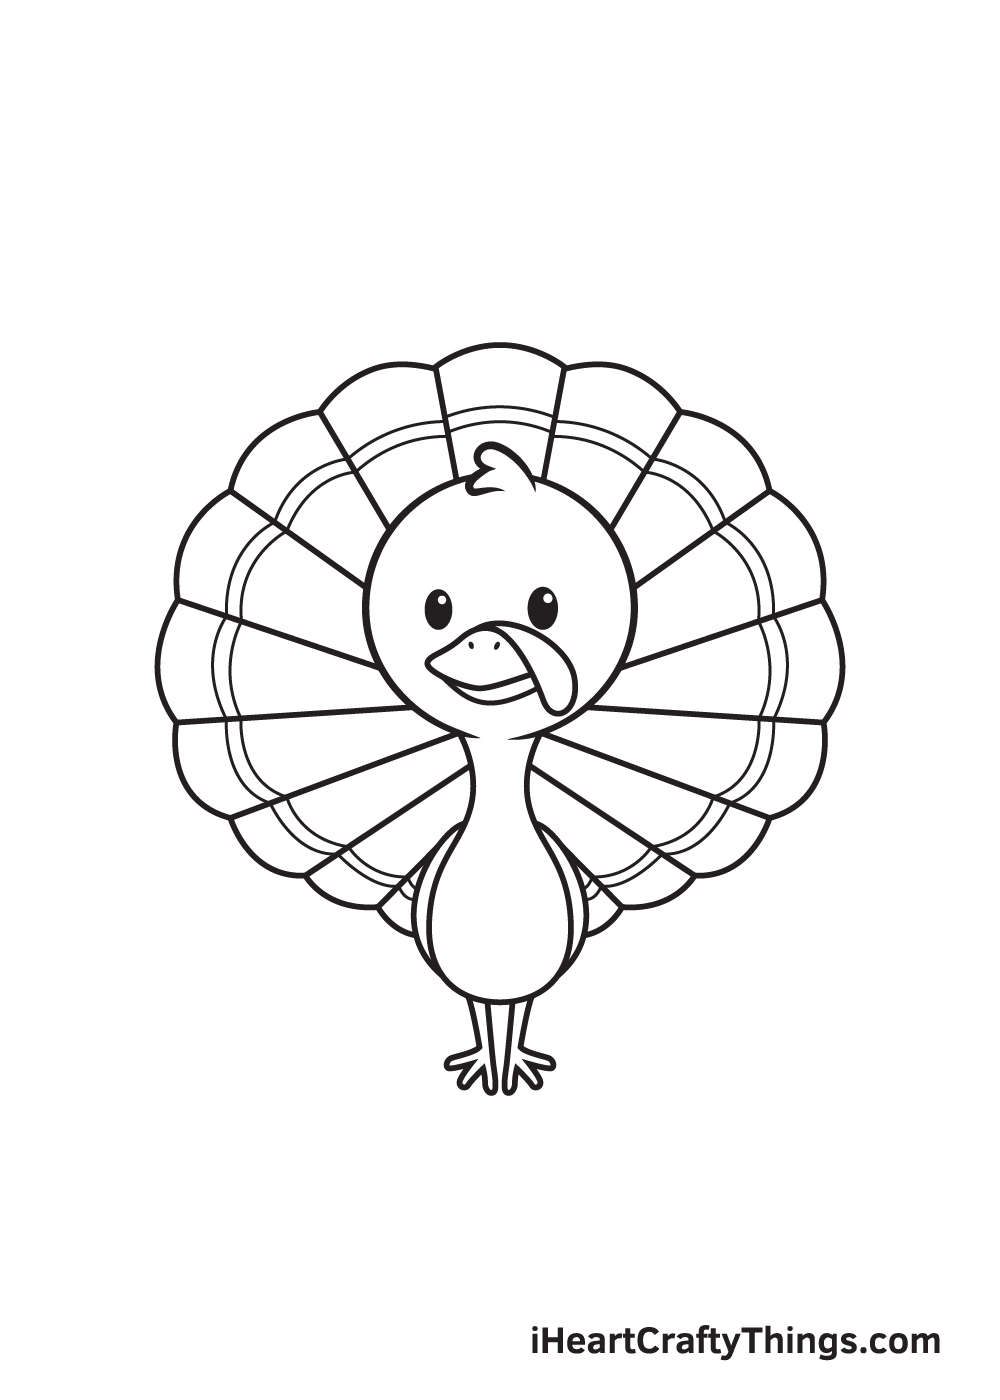
Finalize your artwork by drawing the features on the turkey’s face.
Proceed by drawing two standing oval shapes inside the turkey’s face to outline the eyes. Then, draw two small circles within each eye.
Now, shade the entire eyes except for the tiny circles inside. This adds a dramatic effect and makes the eyes look like it’s sparkling!
For the beak, simply draw an irregular rectangular shape with a small curve right underneath. Don’t forget to add an elongated, curved figure at the top of the beak!
This forms the snood, which is one of the turkey’s most distinct physical features!
Good job on successfully drawing a turkey! Now, we’re finally in the most exciting step, which is coloring the turkey!
Though the colors of turkeys widely vary, white is typically the dominant color accompanied with shades of black and dark grey especially on the back, wings, and tail feathers.
As you can see in the illustration above, we’ve kept the colors of the turkey plain and simple. We used different shades of brown to make the turkey colorful!
Feel free to use any color you like and color your turkey drawing however you like! Have fun playing with colors and watch as the turkey ultimately comes to life!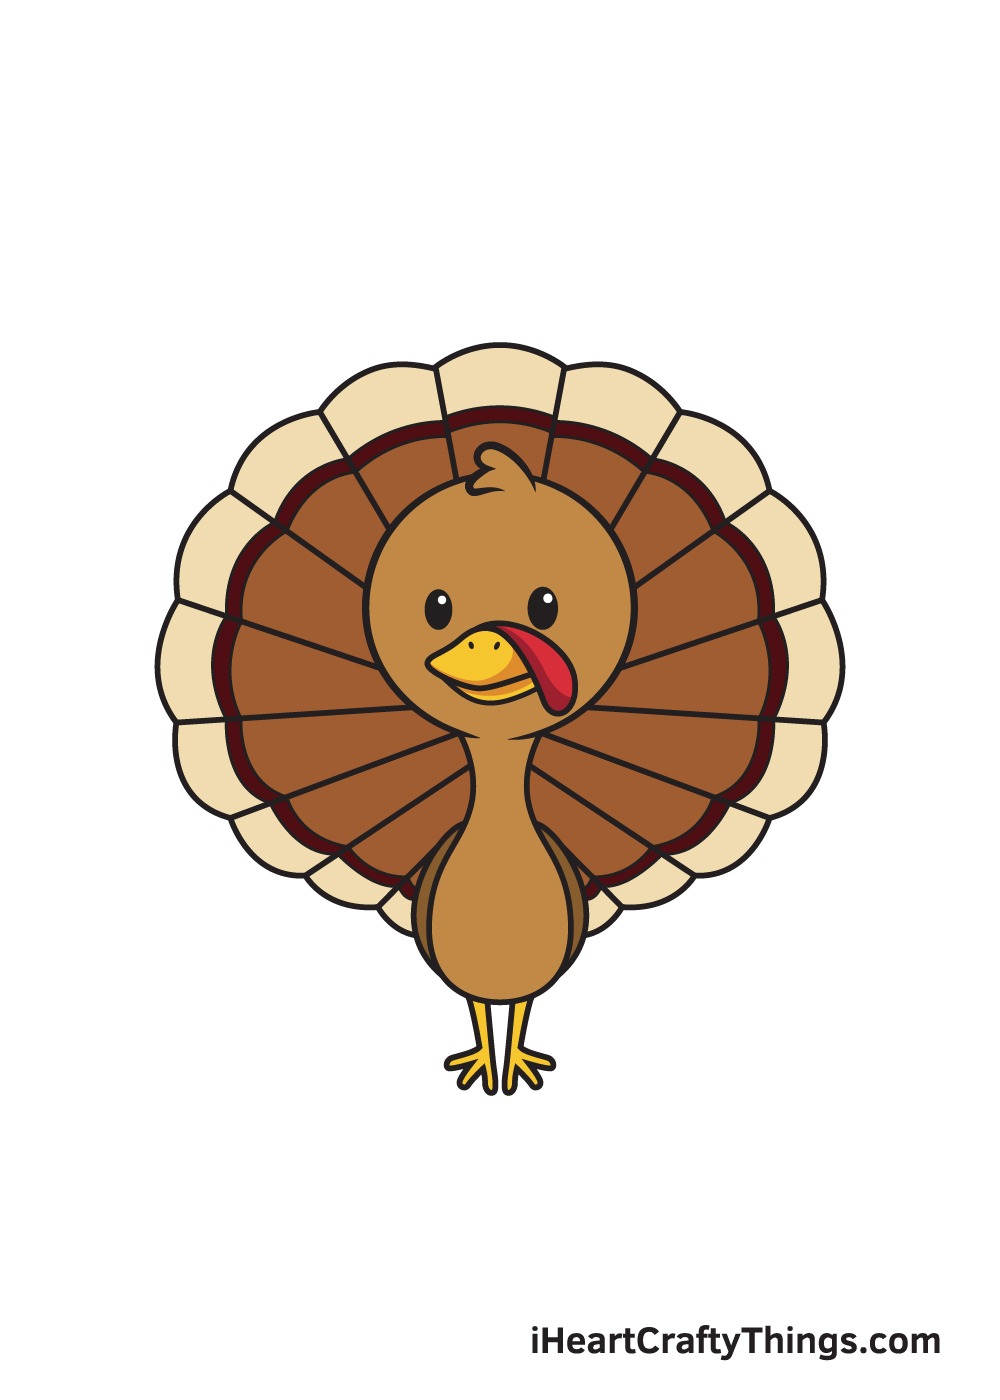
Bonus: Use Crafts And Other Techniques To Bring Color To This Drawing
In the final step, we will go over some ways that you can use some of your favorite art tools and mediums to bring some color to this turkey drawing.
Before we start using our regular art tools to color this bird, we first wanted to go over a few ways that you could bring color to the turkey in more unconventional ways.
When you think outside of the box, you can come up with some incredible results! One of the best ways to make a drawing look really cool on the page is by using craft paper.
This is a technique that lends itself well to simpler drawings like this. You could use craft paper to build up the entire drawing, or you could use it for some of the features.
For example, we think that craft paper would be perfect for the feathers of this turkey. Here’s how you can do it: start with some brown craft paper.
Carefully cut it into individual feathers, paying attention to how long each one should be to fit the design. Then, you can glue the base of each feather where they belong on the picture.
Then, they will flap off the page a bit, giving the picture some more depth! Using craft paper for the entirety of the design is a bit more involved, but it would be possible.
You could also cut the turkey out from the page and glue it to cardboard or craft paper. It could then be stuck to a cardboard cone that you could make with glue, making it a perfect centerpiece for a table!
What are some other fun crafting ideas you could use to make this drawing of a turkey even more unique?
4 More Ways To Make Your Turkey Drawing Unique
Make this turkey look even better than it already does with these fun and easy tips!
Turkeys are often associated with Thanksgiving, and they have become a symbol of the holiday. Because of this, we think it would be perfect to give this turkey sketch a Thanksgiving theme.
You could do this by drawing a cornucopia or by adding traditional foods such as pumpkins. Orange leaves would also help to give this image a feeling of Fall, and it would also just look really pretty!
What are some other Thanksgiving details that you could add to this image?
We kept the details a bit simpler for this turkey drawing, and it looks really cute! If you would like to have a more detailed picture instead, you could change some of the details of this design.
Looking at pictures of real turkeys would help you with details such as a more realistic beak, wings and feathers.
Or, you could keep it in a cartoon style but just go for a different approach. What style do you fancy for this picture?
It would be fun to have a background for this cute turkey no matter what style you end up drawing it in.
A few ideas would be a farm setting or in some other natural environment, but you could also go for a more creative setting.
This turkey could be at a shopping mall or an arcade for a few ideas that lean more into a creative setting. Can you think of any other environments you could put this turkey into?
Turkeys aren’t particularly brightly colored, and we covered this in our guide on creating an easy to draw turkey.
Even if you stick to these more muted colors, you can have fun experimenting with different art tools and mediums to make them look more interesting.
You can also use more stylistic, bright colors for a really unique turkey! It’s also always fun to mix various art tools to create a more dynamic look to the colors and shades.
Your Turkey Drawing is Complete!
We hope you had a fun drawing activity with this step-by-step turkey drawing tutorial! If you enjoyed drawing a turkey, then you might also be interested in drawing other kinds of birds.
Check out our “How to Draw” catalog to explore drawing tutorials on a wide range of birds including a peacock, hummingbird, and many more!
Drawing a turkey is an achievement, so you should feel proud of yourself for completing a masterpiece!
Celebrate your accomplishment by sharing your artwork on our Facebook page and on Pinterest.
Don’t be embarrassed! You’ve worked tirelessly for your drawing, so we can already tell that it looks impressive for sure!
We would love to see your colorful turkey drawing!