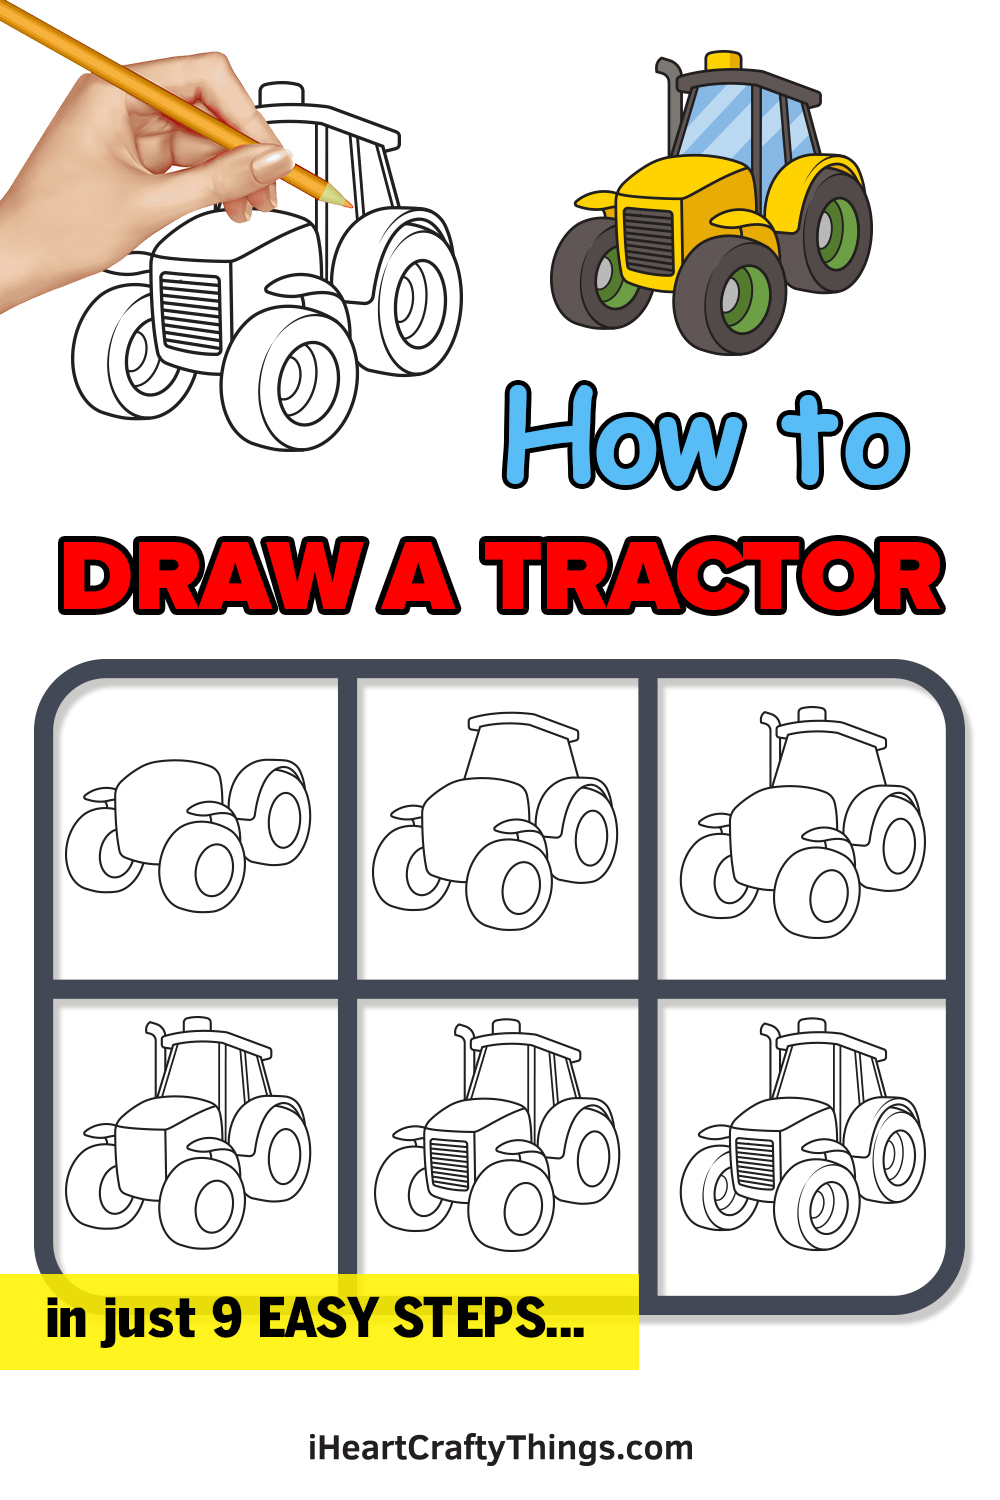
Get ready to learn how to draw a tractor by following this guide for kids! You won’t believe how simple it is when you know what to do.
Tractors are an important part of agriculture. They are used for working the land and transporting important tools and supplies where they need to go.
Tractors are famous for their endurance and ability to work in the worst conditions, so it’s no wonder why vehicle enthusiasts love them so much!
If you’ve ever wanted to make your own tractor design, then this guide is for you. I will show you how to build up the drawing piece by piece until you have a finished, detailed tractor.
After that, you could add a background or change the details to make your very own unique design!
See How To Make Your Tractor Drawing
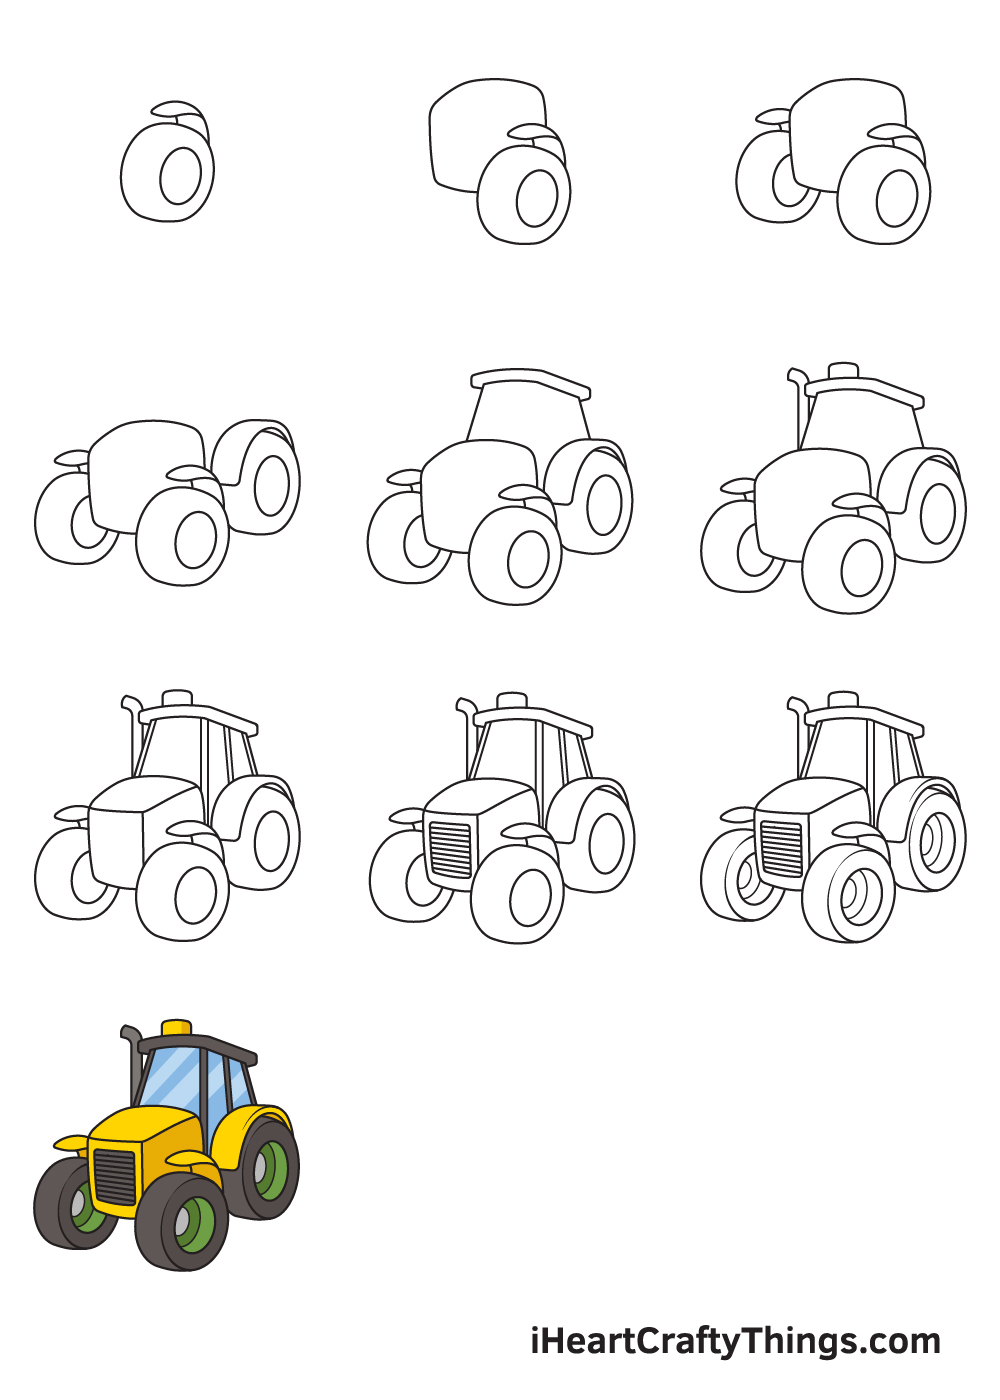
How to Draw a Tractor – Let’s get started!
Step 1
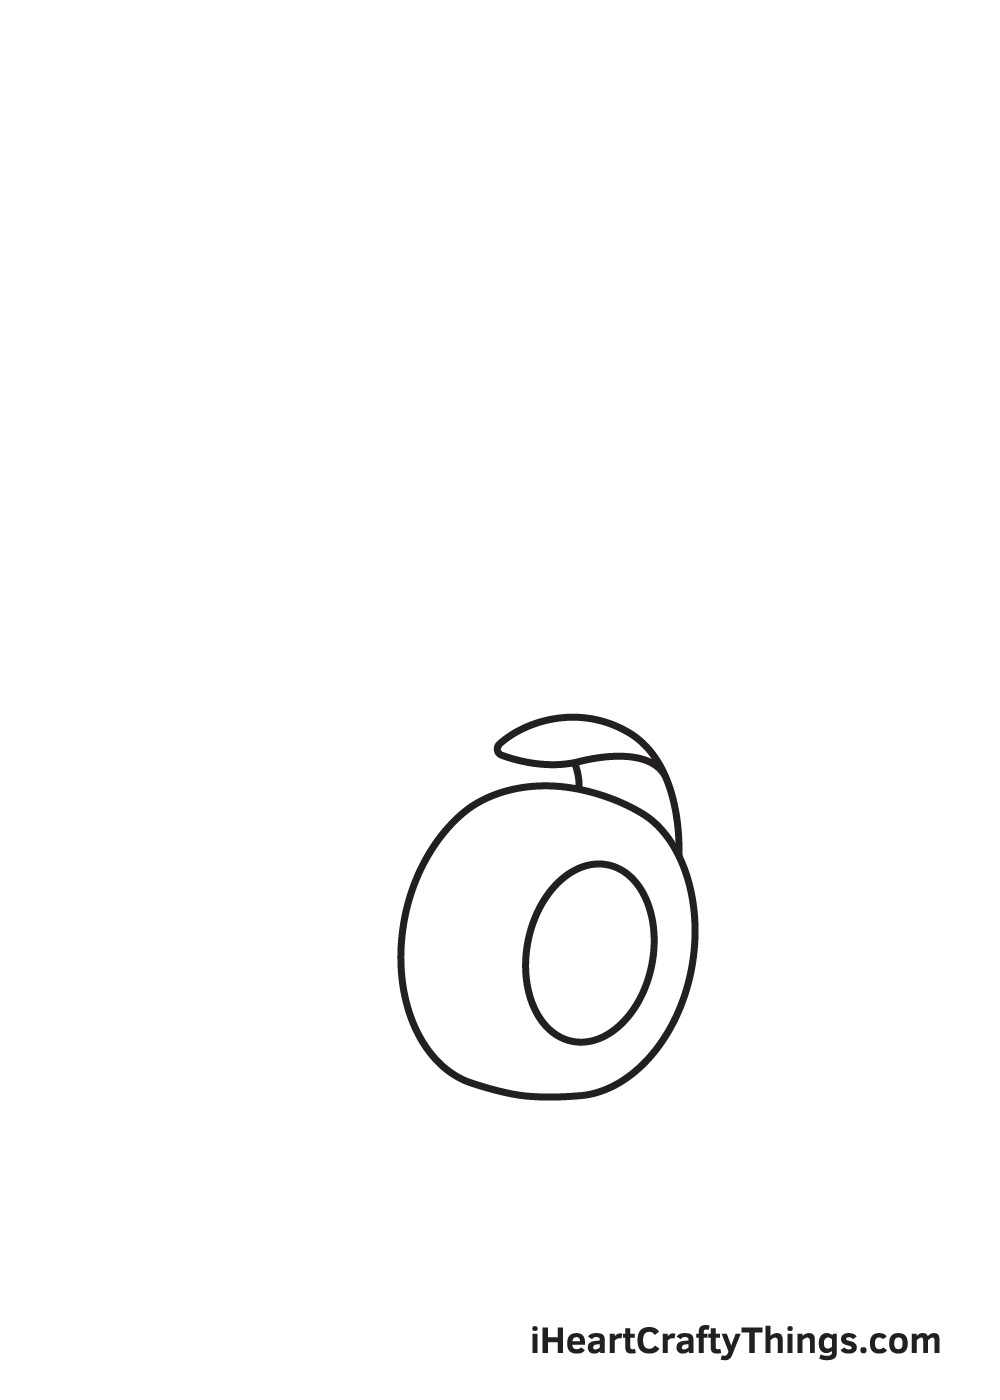
Start by creating the right front wheel of the tractor. Draw an irregular circle shape to form the tire.
Afterwards, draw a smaller oval shape on the right side inside the tire to complete the wheel. Now, draw a curved flap right above the wheel. This forms the platform at the top of the wheel.
Make sure to draw the wheel on the bottom portion of your paper. This ensures that there’s sufficient space for the other parts of the tractor.
Step 2 – Draw the Engine Compartment Next to the Front Wheel
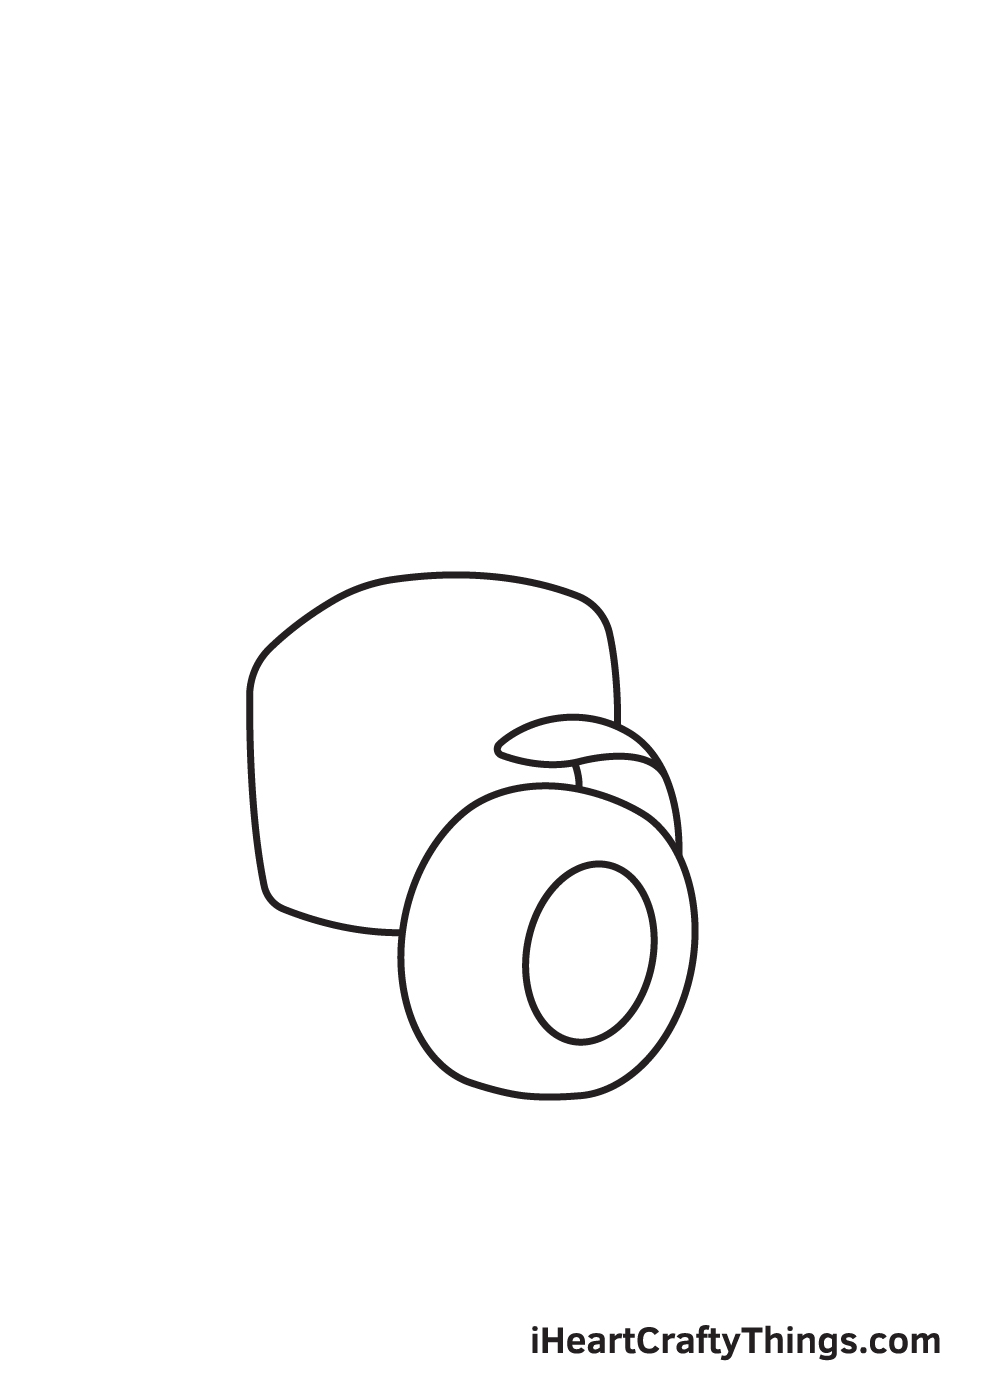
Continue by drawing an irregular square shape with round edges on the left side of the wheel that we drew in the previous step. This creates an outline of the engine compartment right next to the front wheel.
The wheel should be overlaid on the lower right side of the figure we drew just now, as shown in the illustration above.
Step 3 – Next, Draw the Second Wheel on the Opposite Side
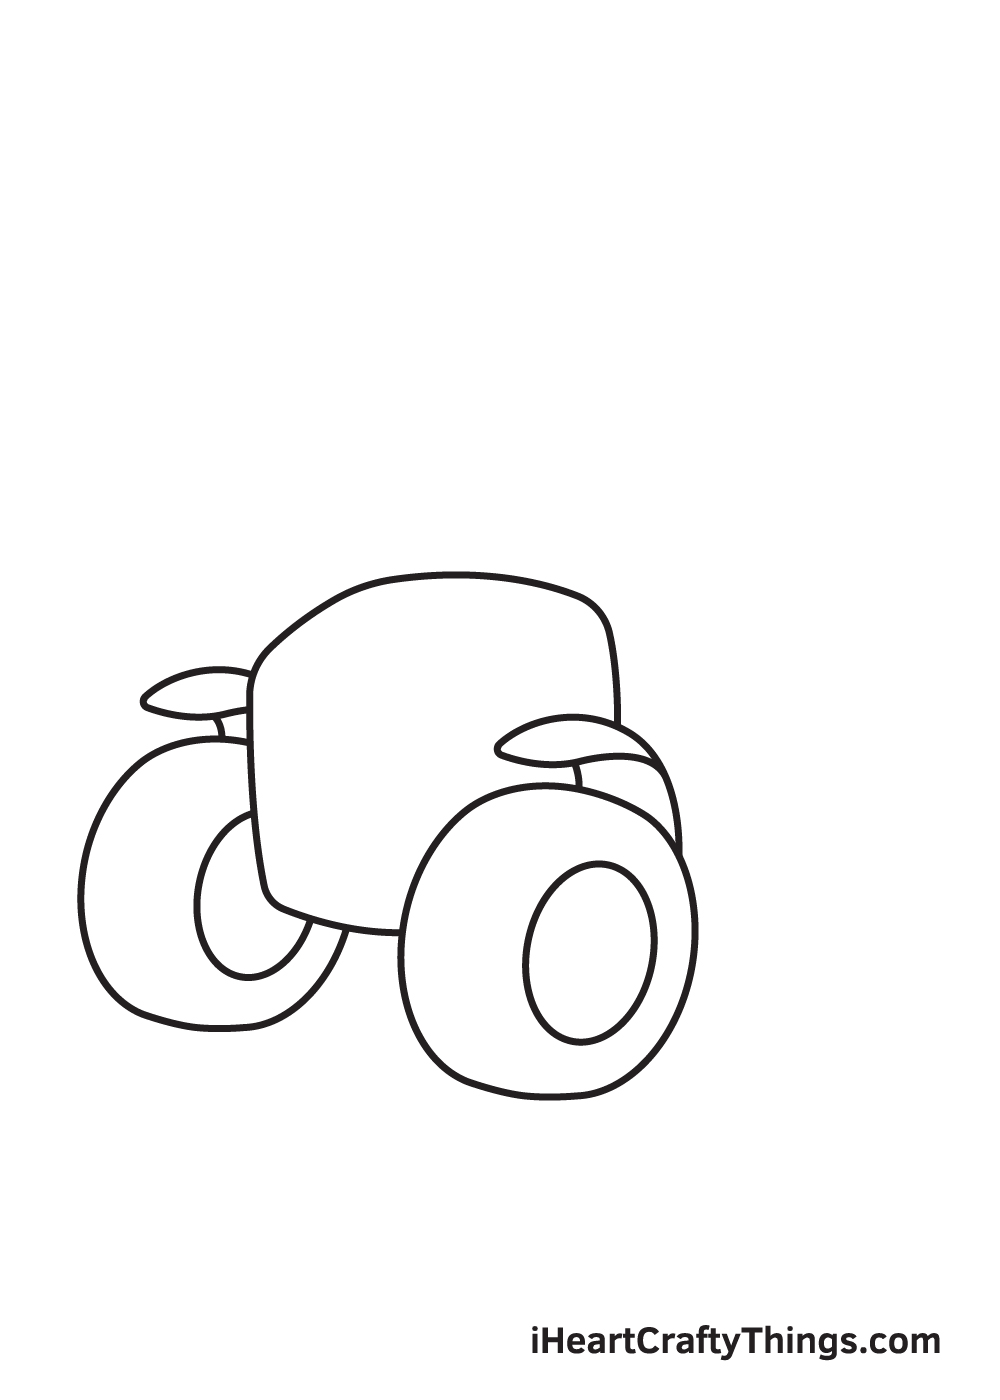
Draw the second front wheel on the opposite side of the engine compartment. This wheel should have a similar form and structure as the first wheel we drew previously in the very first step.
However, since the tractor is facing sideways, the upper right side of this wheel is covered by the engine compartment, thus it’s not entirely visible.
Step 4 – Next, Structure the Rear Wheel of the Tractor
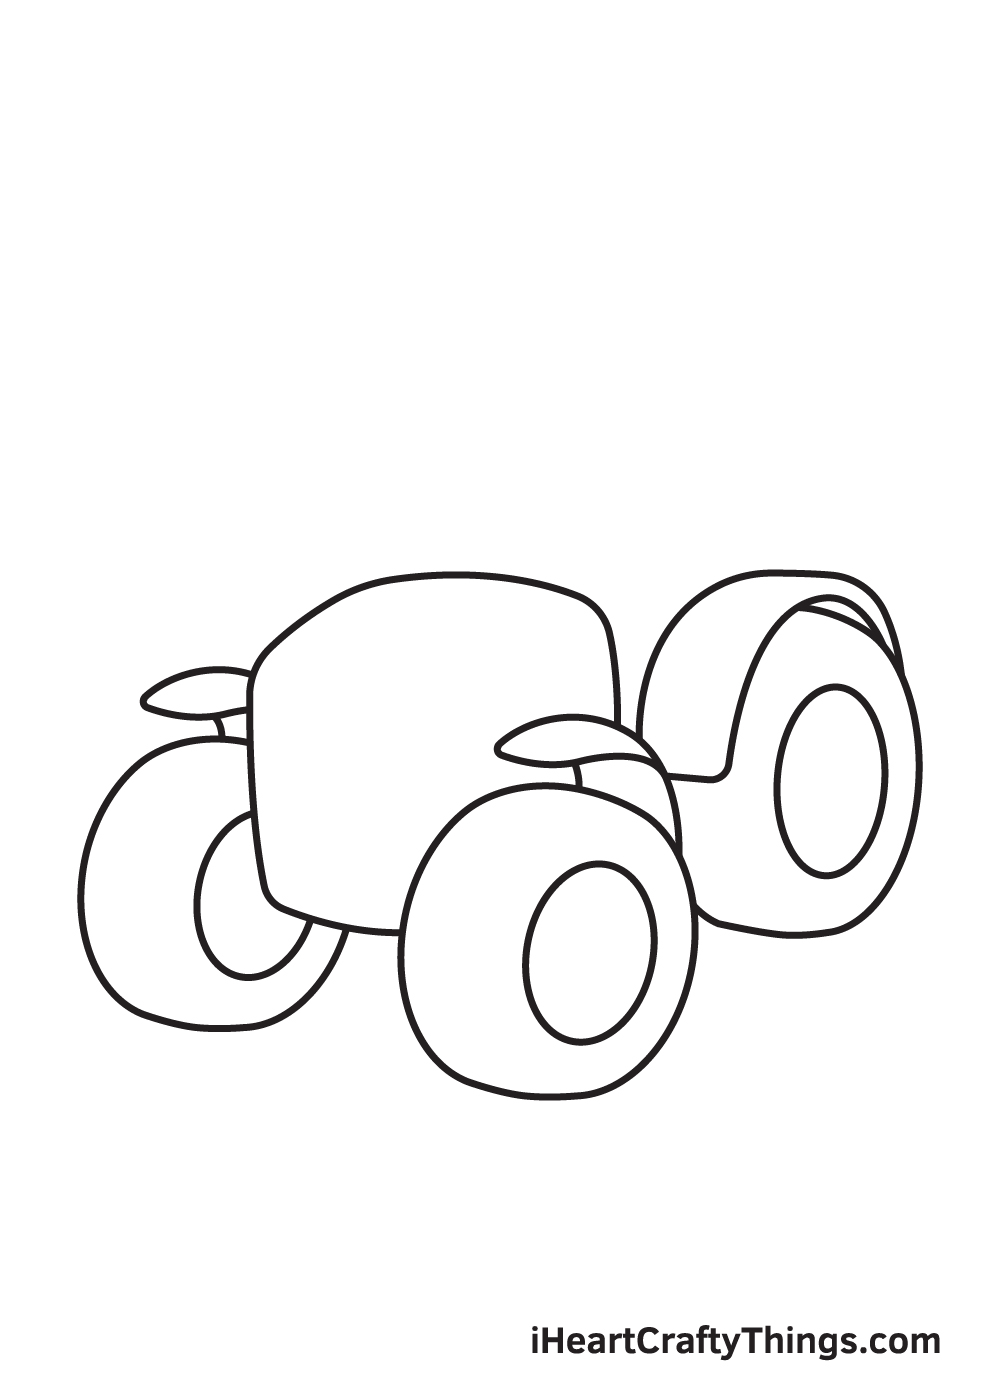
After drawing the front wheels, we will now be working on the rear wheel. Only the right rear wheel is visible because the tractor is facing sideways so we’ll only be drawing one rear wheel.
Create the rear wheel by drawing a figure similar to the front wheel. This time, however, the platform right above it should be relatively longer and fuller, encompassing the upper half of the wheel.
Step 5 – Then, Create the Body of the Tractor
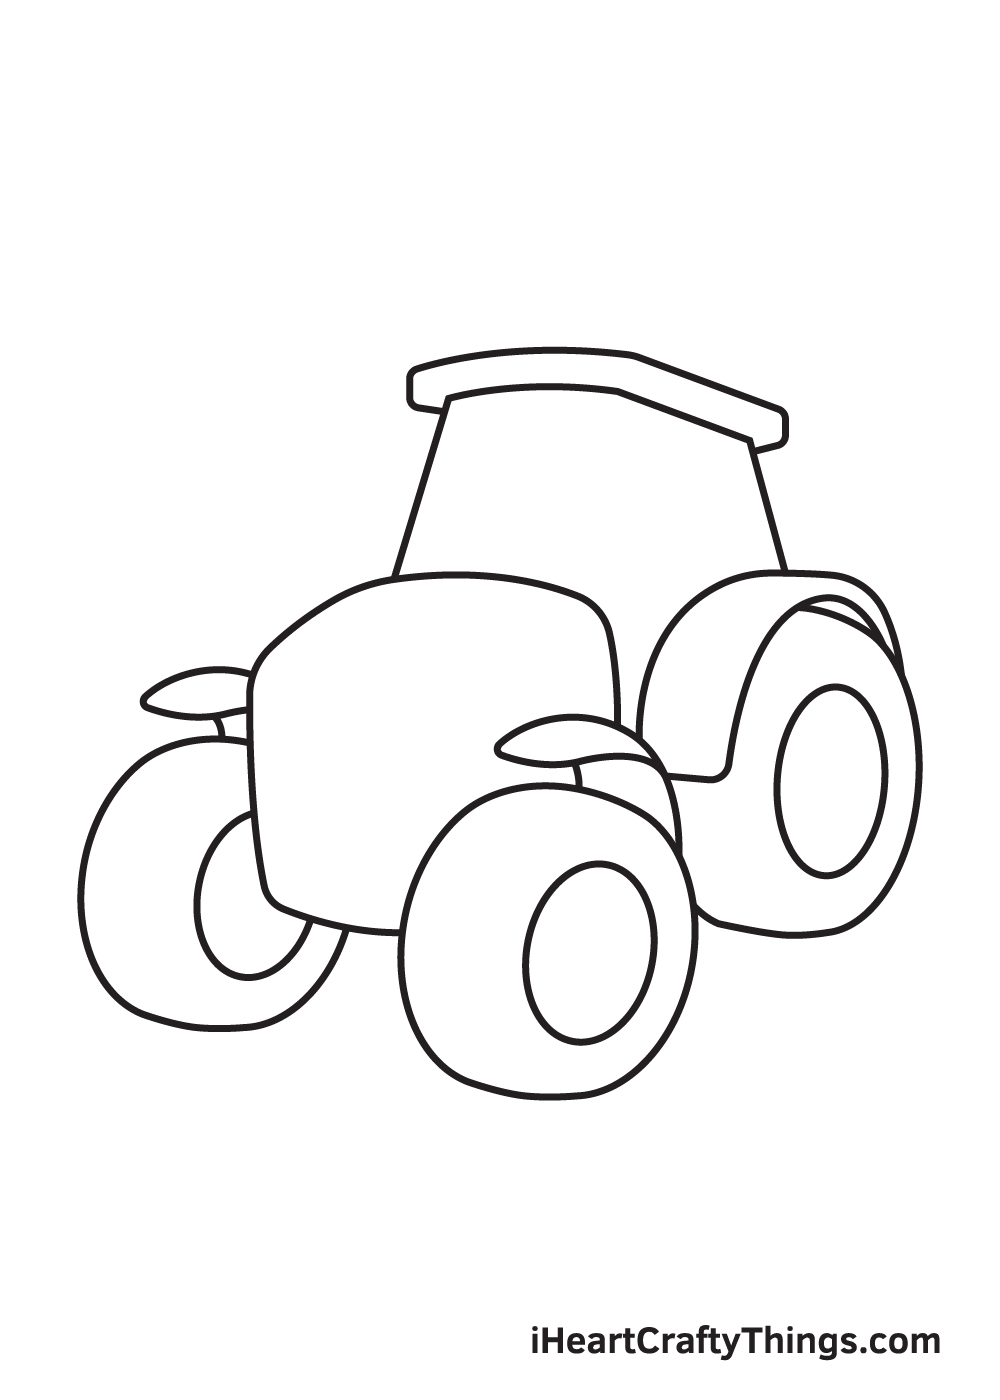
As you can see in the illustration above, the tractor is slowly but surely coming together!
In this step, we’ll draw the topmost part of the tractor. Proceed by drawing a diagonal line above the engine and another one above the rear wheel.
Then, finalize the figure by adding a slightly curved horizontal figure at the top, connecting both endpoints of the diagonal lines.
Step 6 – Draw the Exhaust Stack Beside the Body of the Tractor
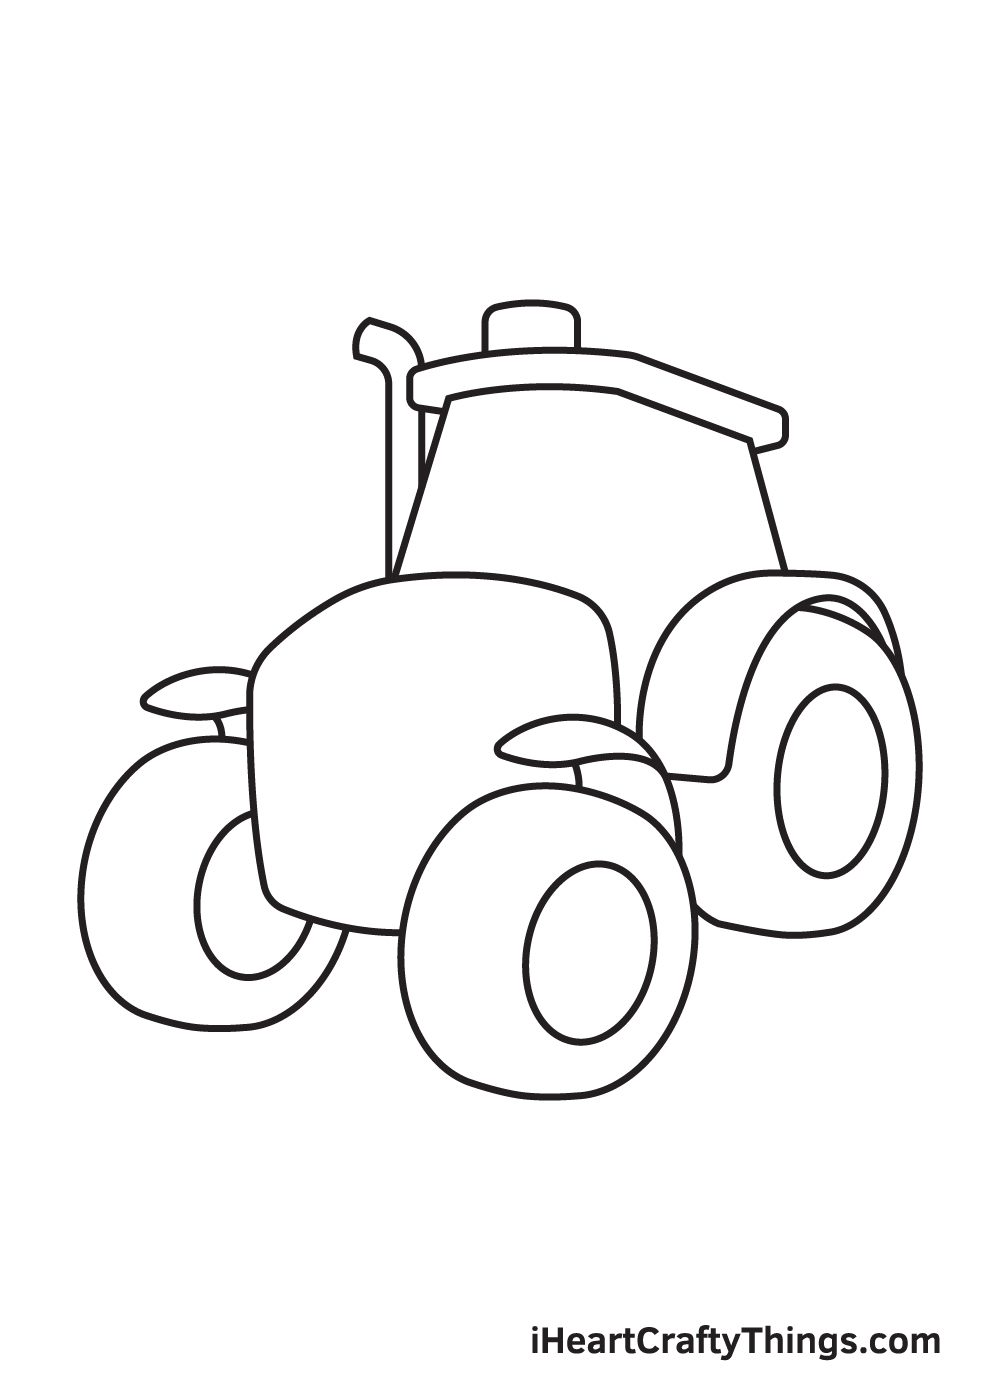
Make the tractor appear more realistic by adding various details such as the tractor exhaust pipe and something circular or cone-like right on the topmost part of the body, as shown in the illustration above.
The tractor in your drawing is almost finished—keep going!
Step 7 – Add Details on the Engine and the Topmost Part
Create the dimensions of the engine by adding three connected straight lines. This makes the engine appear like a three-dimensional cube, making it look realistic!
Draw parallel straight lines on the topmost part of the tractor. This refines the appearance of the tractor to make it come to life!
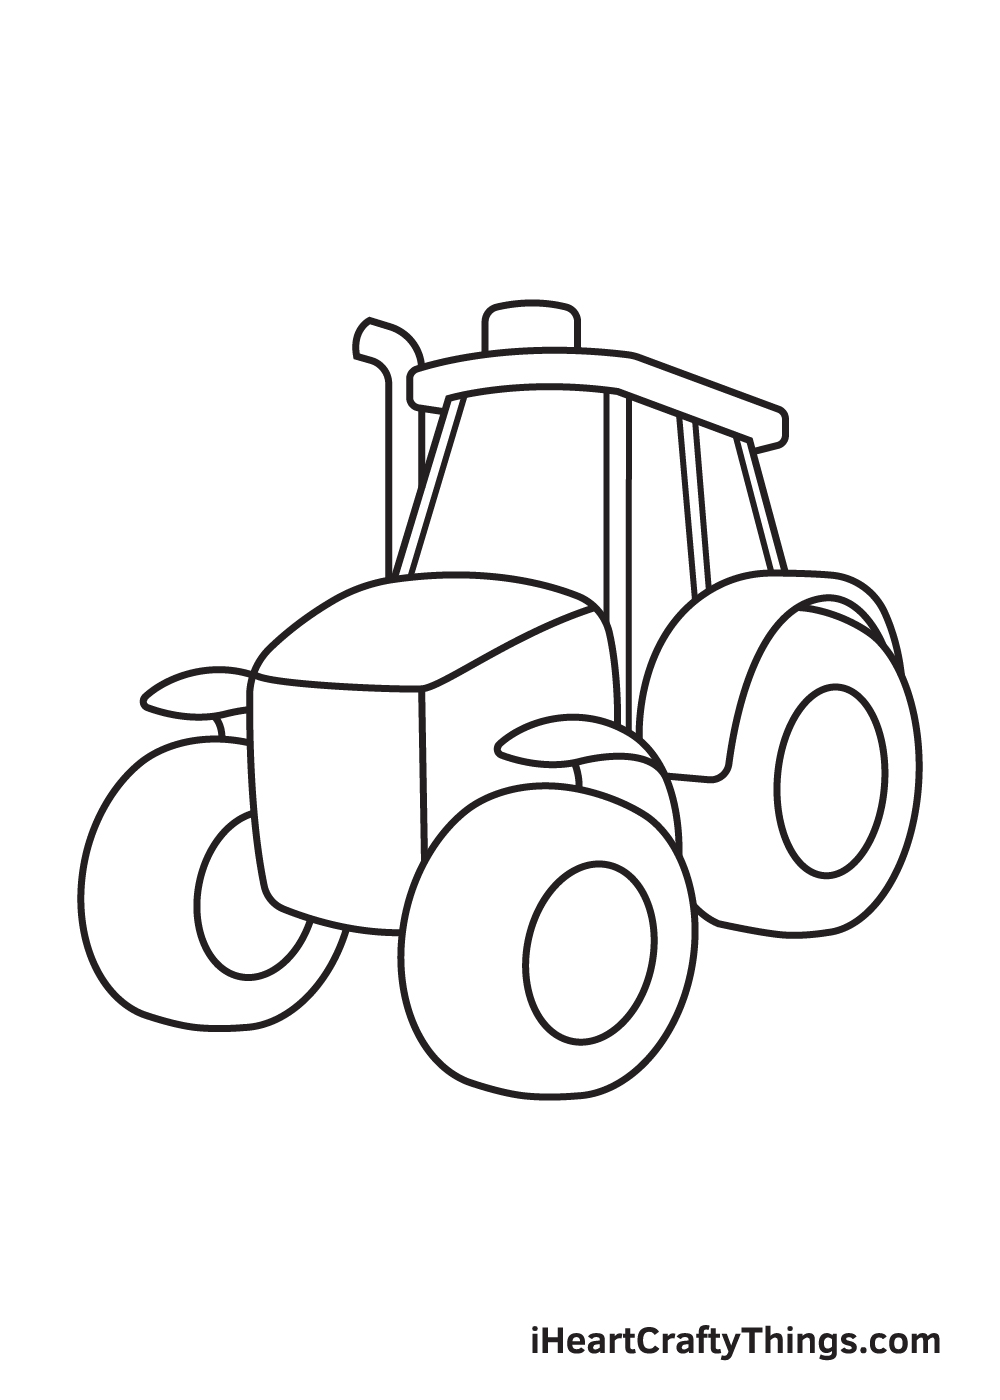
Step 8 – Afterwards, Create the Grills in Front of the Engine
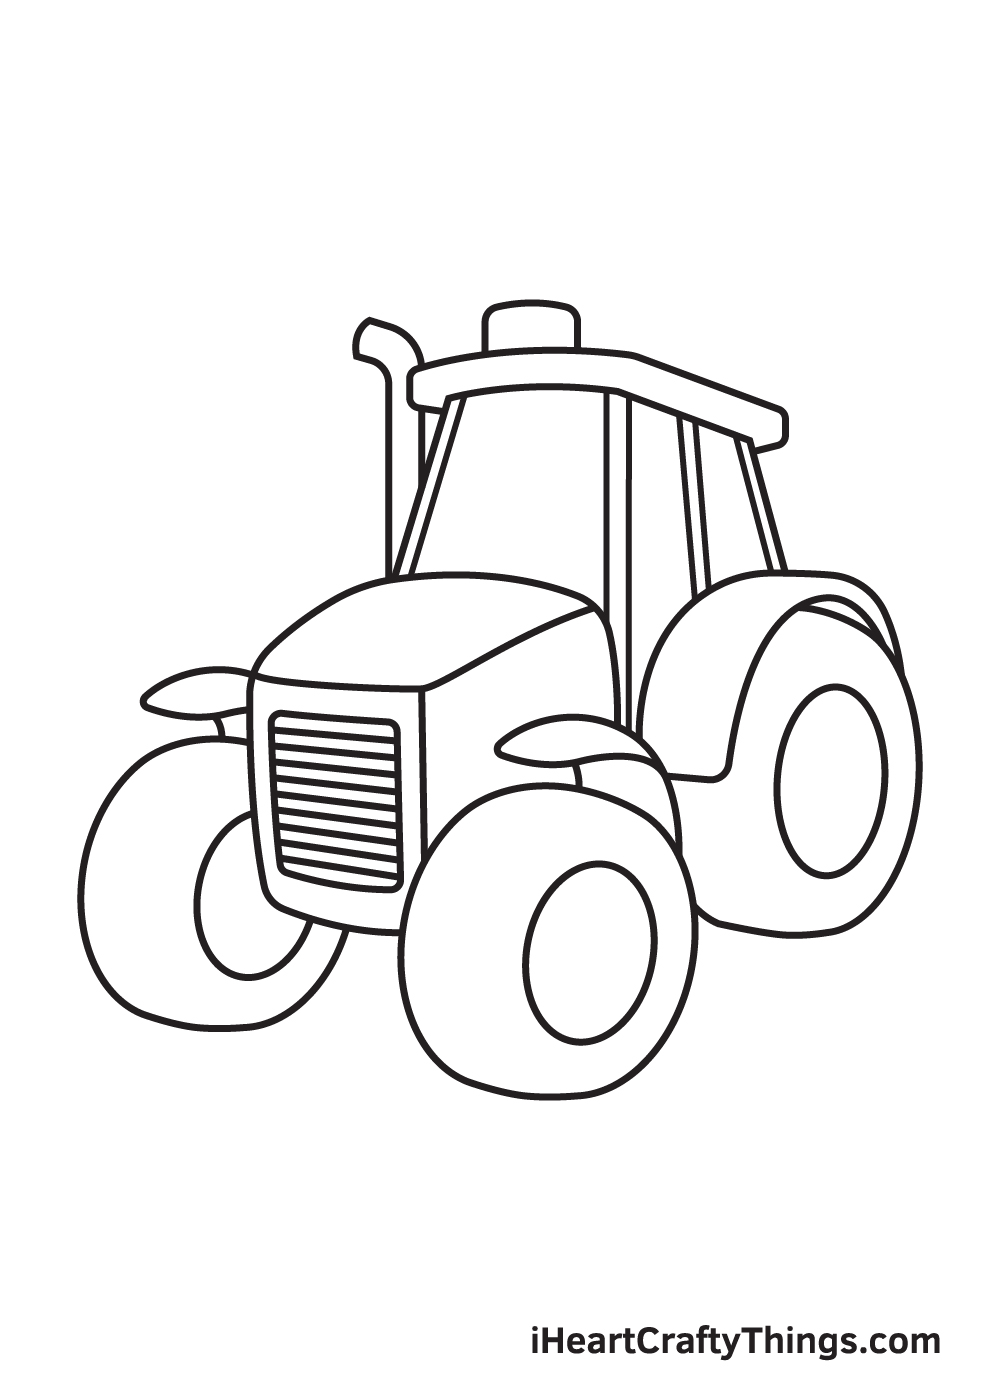
Continue by drawing a square shape with rounded edges on the front part of the engine compartment. Then, draw multiple parallel horizontal lines within the square shape to create the grills of the tractor.
Good news—the tractor is nearly finished! All it’s missing are some more details to complete the appearance of the tractor.
Step 9 – Now, Create the Dimensions of the Tractor’s Wheels
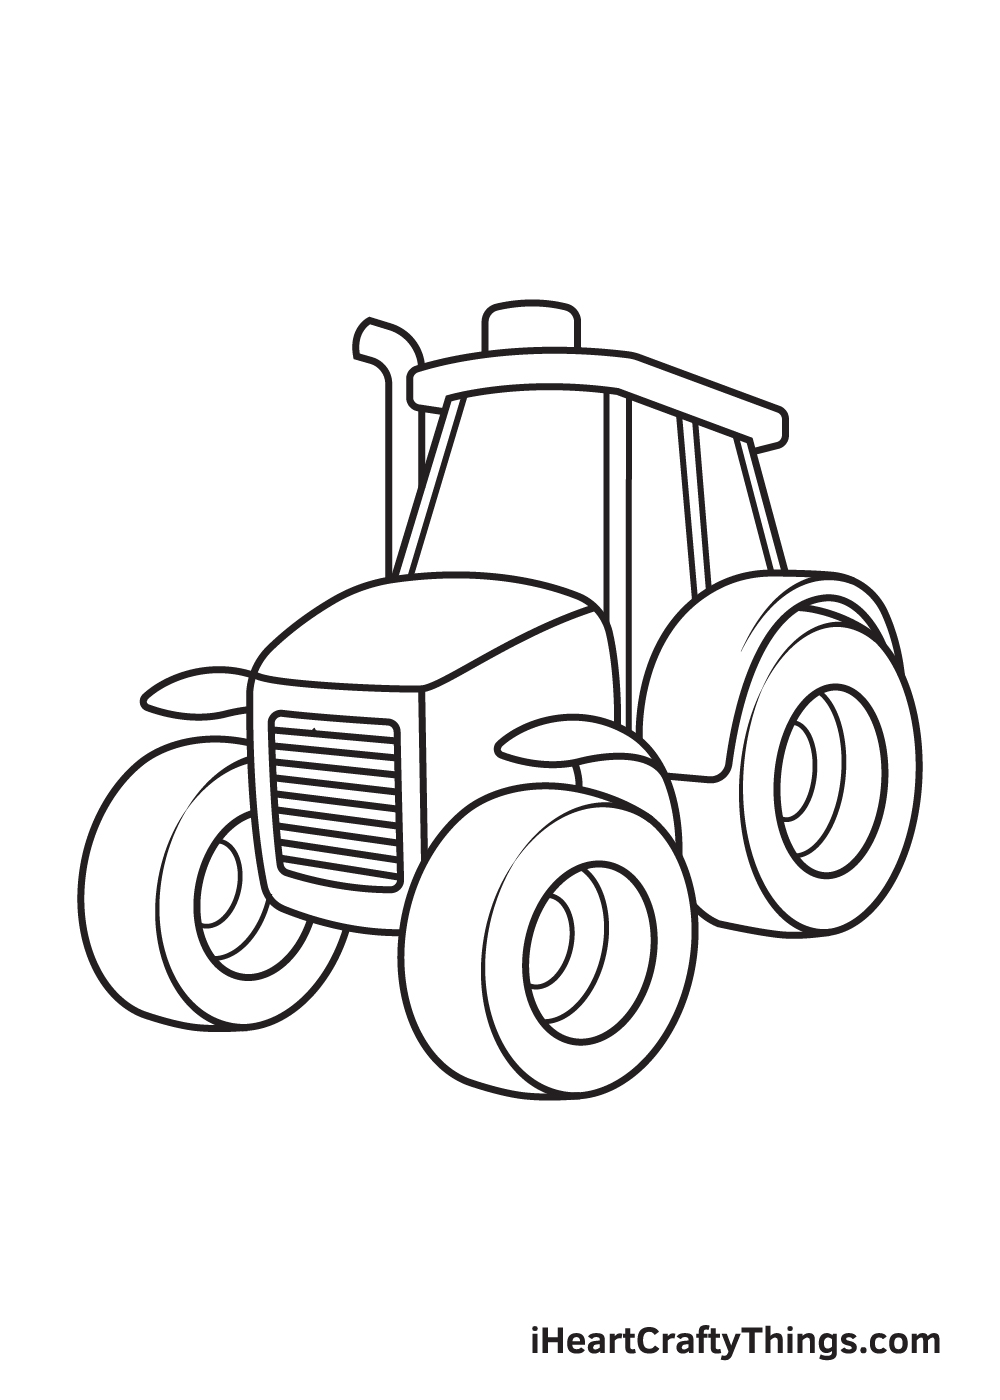
Complete your drawing by making all of the wheels appear three-dimensional! Simply draw a parallel curved line inside the inner circle shape of the wheel. This creates the insides of the wheels.
Afterwards, draw a few more lines along the surface of the wheels. Make sure that these lines are aligned to the outline or the shape of the wheels.
It’s finally time to make your tractor look a lot more realistic by adding colors!
As you can see in the illustration above, we used the color yellow for the body of the tractor, grey for its wheels and metal frames, and dark green for the inner part of the wheels!
You can opt to color the tractor similar to how we’ve done ours or use a unique set of color! Either way, we’re sure the colors will be impressive!
Have fun playing with colors until the tractor ultimately comes to life!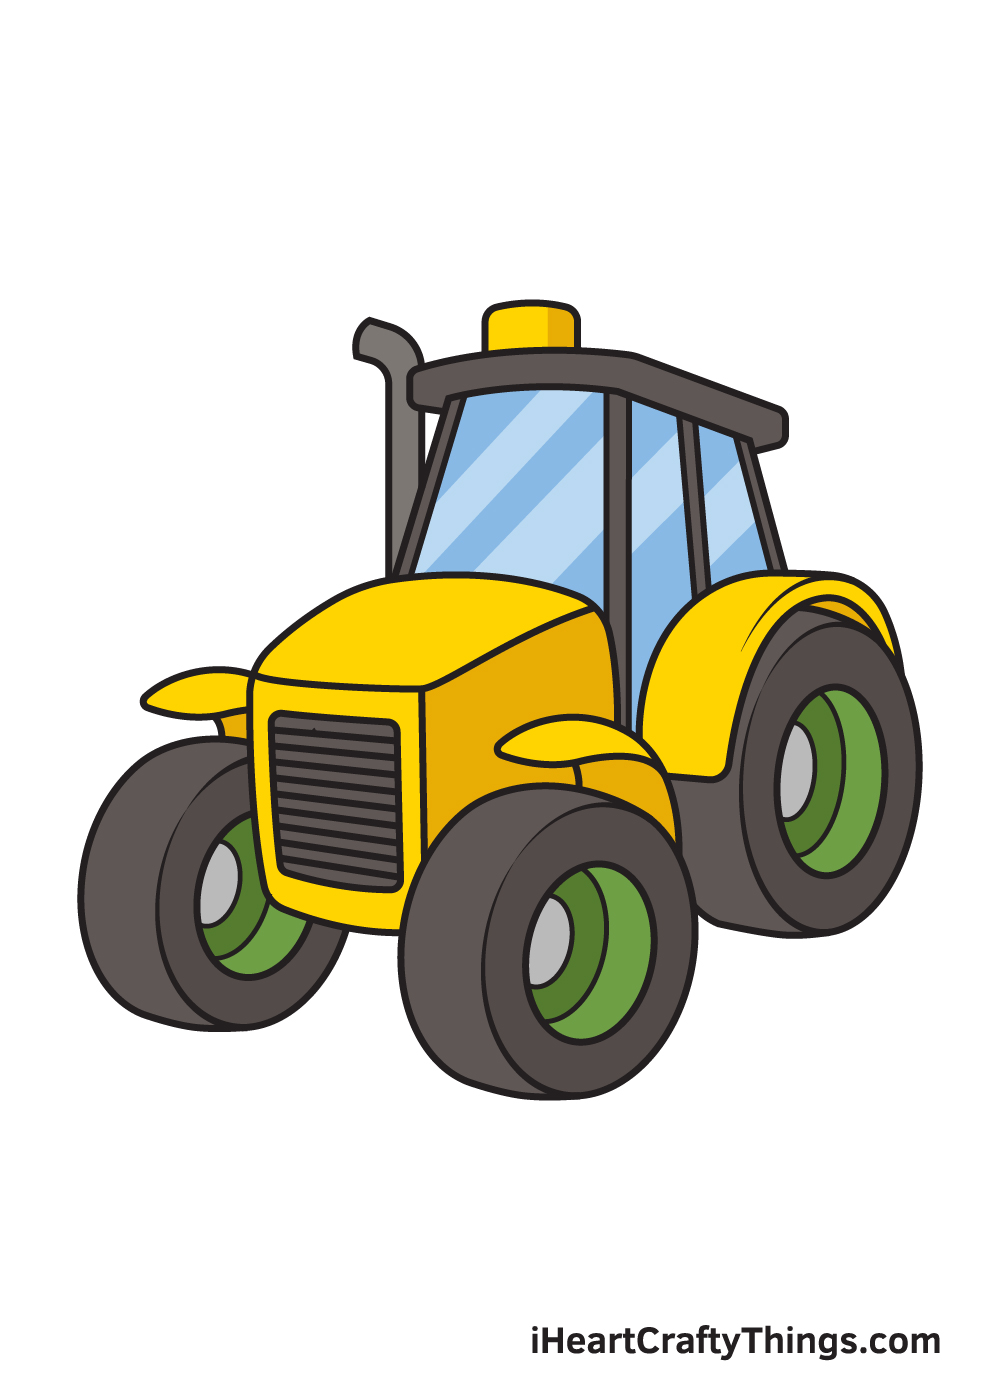
3 More tips to make your tractor drawing easy!
Make this easy to draw tractor a bit easier with the help of these 3 tips!
The design we created for this tractor drawing may look deceptively simple, but there are many aspects that can be really tricky!
When you’re working through the guide, you should feel free to change any aspects that are giving you a hard time.
For example, you may be having a difficult time drawing the mudguards over the wheels. Instead of toiling and making yourself frustrated, rather just simplify them or remove them entirely.
This is just one example from this drawing of an aspect you could change, but there may be a different part that you have a hard time with!
If you make it more comfortable for yourself it will definitely be worth it to sacrifice some details.
Another way you can make this tractor drawing easy to do would be to incorporate it into a larger picture. The setting that first comes to mind would be a farm setting.
You may be wondering how adding more to the image would make it easier, but it can in a few ways! For one, it would give you an excuse to make the tractor much smaller on the page.
This would make showing smaller, trickier details less necessary. Plus, you can surround the tractor with objects and details you may feel more comfortable drawing.
What kind of setting would you like to put this tractor into?
This drawing of a tractor is done in a cartoon style, but that doesn’t mean that you can’t use some real tractors to help you as you draw! You may know someone with a real tractor, and that would be the perfect model.
If you don’t, you can find many pictures of tractors online. They may not be a perfect match to our example one, but it can still be really helpful when depicting the details and proportions.
If you can, try to find pictures that are posed similarly to our example and take it from there!
Your Tractor Drawing is Complete!
Hopefully, you had fun with this step-by-step tractor drawing tutorial. What would you like to draw next? Let us know and we’ll do our best to create a drawing tutorial for it.
In the meantime, check out our “How to Draw” catalog to explore many more enjoyable drawing tutorials!
Drawing a tractor successfully is an achievement, so you should feel proud of yourself for completing a masterpiece!
Take a photo of your artwork and share it on various social media platforms. And while you’re at it, we hope you take the time to like our Facebook page too!
We’re excited to see your enormous tractor drawing!