{This post contains affiliate links for your convenience. Read our Disclosure Policy for more information.}
Supplies needed:
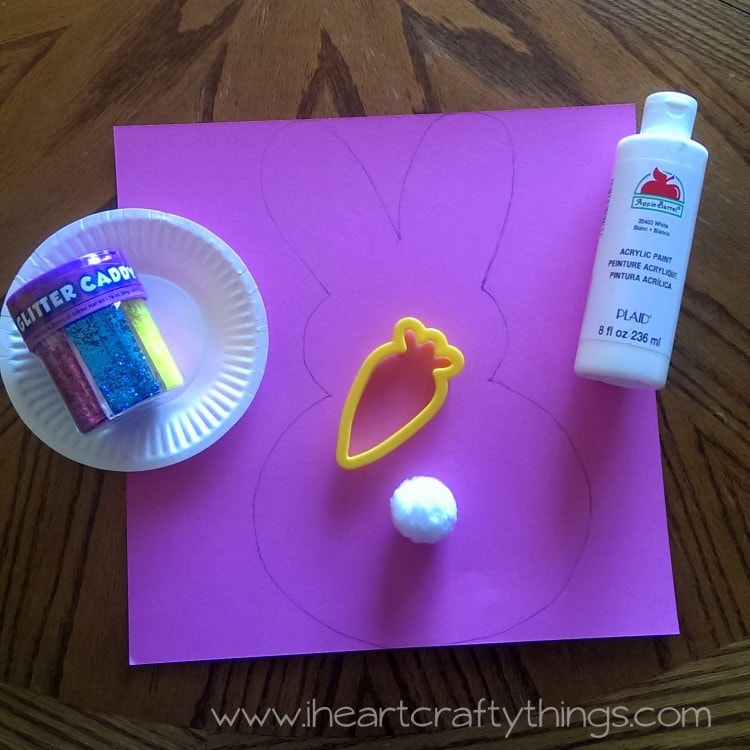
- cardstock paper (My daughter chose pink, but use whatever color you want)
- pencil
- carrot or bunny cookie cutter
- white paint
- large white Pom
- Glitter
- small white paper plate
Tutorial:
1. Draw a bunny shape
Use your pencil to draw a bunny shape on your cardstock paper.
2. Stamp bunny with paint
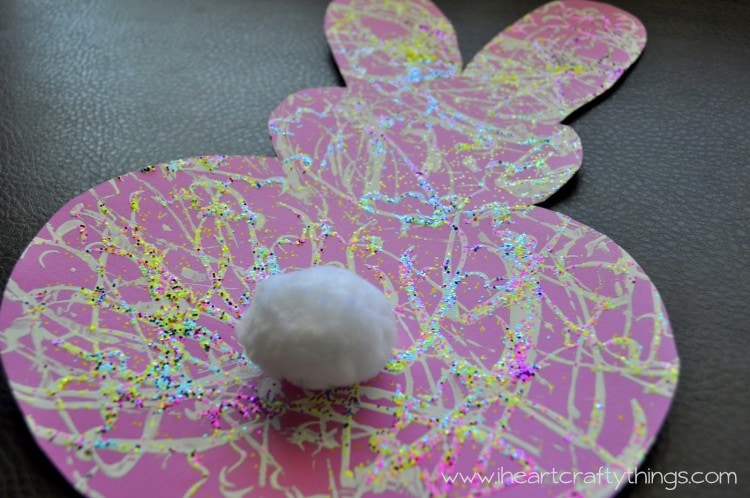
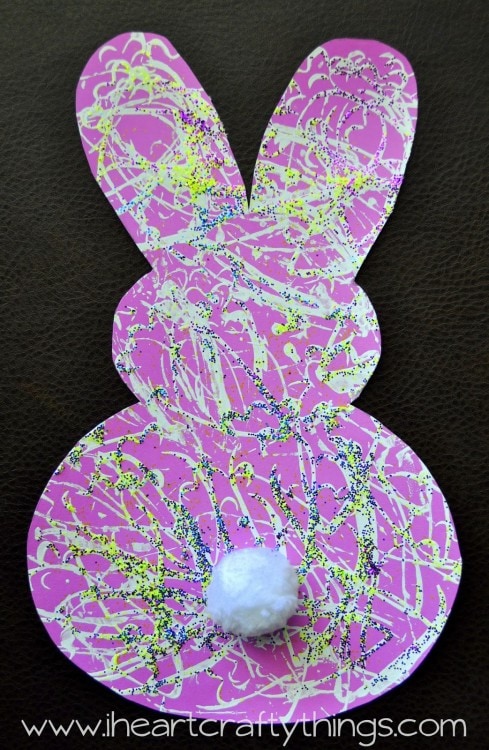
Pour white paint on your small paper plate. Dip the carrot cookie cutter into the paint and stamp the bunny. Continue dipping the cookie cutter into the paint and stamping the bunny as much you want. You can clearly see that the carrot shape is not recognizable in my daughter’s bunny. She really covered it well. Your child may not choose to cover it with as many stamps, but it will still look great!
3. Decorate with glitter
After you are done stamping, use your Neon Glitter Caddy to sprinkle different colors of glitter all over the wet paint. Dump off the excess glitter. The Neon Glitter Caddy comes with large holes for each color for pouring, instead of a standard glitter shaker. For that reason, I only open the hole a very small amount so my daughter can still shake the glitter out and it doesn’t pour all over. Just wanted to give you a heads up.
4. Finish with bunny tail
Glue on a large Pom for the bunny tail and let the craft dry completely.
The glitter makes it sparkle and shimmer and adds such a fun touch of color to the craft!