


Learning how to draw a shirt is easier than you thought when you follow this guide for kids. Some people assume that drawing this common piece of clothing is effortless, but there is a trick to it.
We all wear shirts, and some of us wear them pretty much every day. There is an assumption among some people that everyday objects must be easy to draw, as we are so familiar with them.
It’s often exactly the opposite case, though! Even though drawing a shirt isn’t that simple, I know a way to make it much easier.
I’ll show you how to use your pencil and some basic shapes to map out the general outline of your shirt, and then you can add the final details.
Then, you can have some fun adding some details and other markings to your shirt!

Watch This Guide To Make Your Shirt Drawing
How to Draw A Shirt – Let’s Get Started!
Step 1
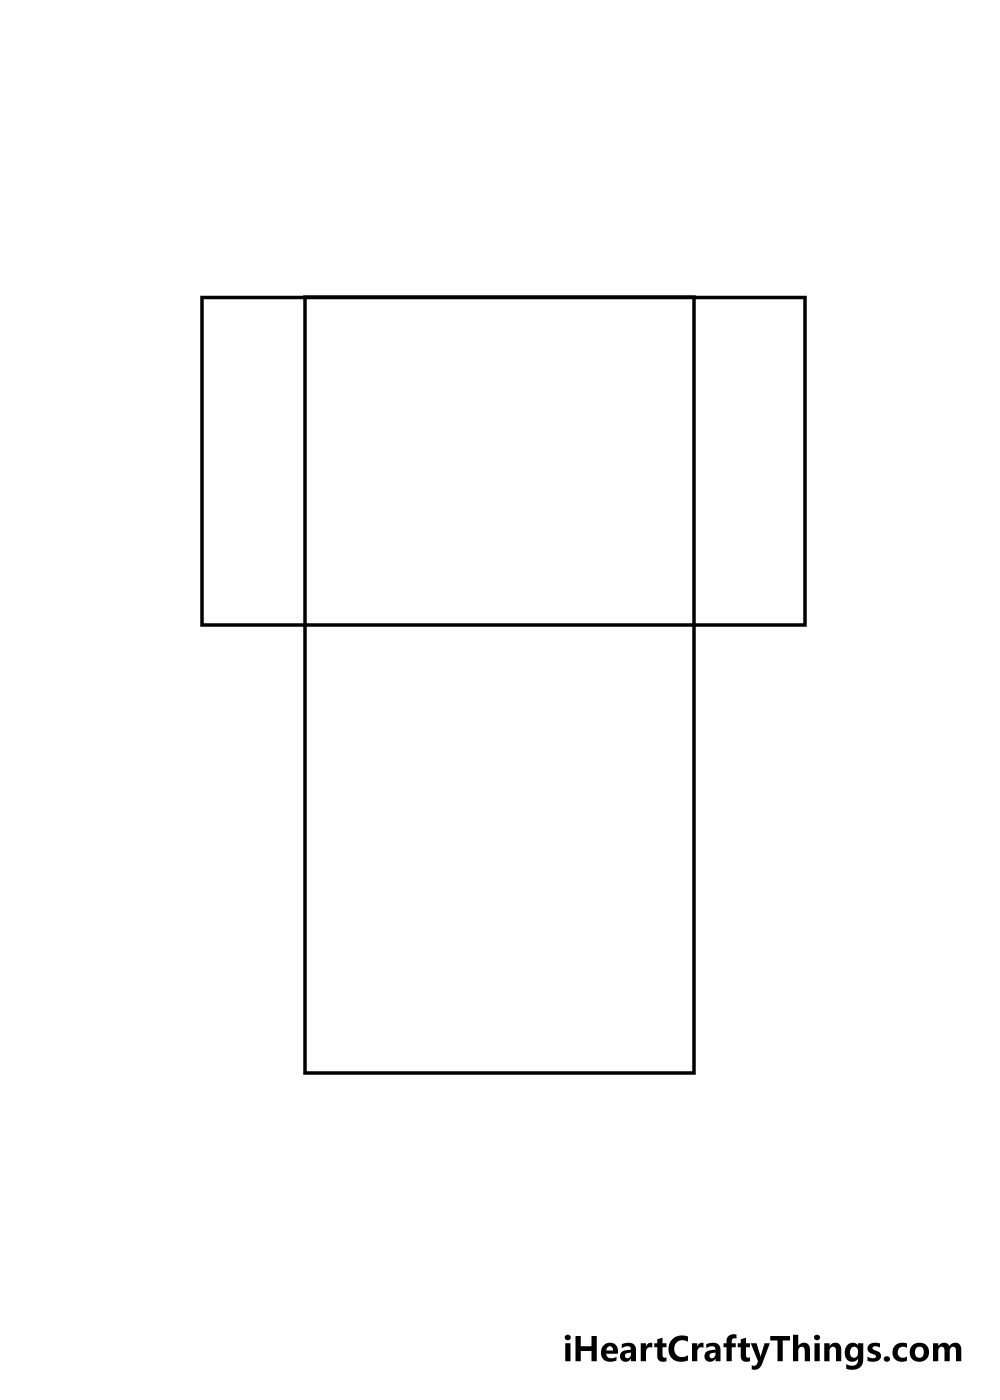
For the first step of this guide on how to draw a shirt, we shall start simply with some shapes that will be guiding you later on. To do this, you’ll want to use a light pencil for now.
We will be using a pencil because these lines will be erased later. Using the reference picture as your guide, draw two rectangles with one going horizontally and the other going vertically near the top.
These will helo to form the structure of your shirt in the next few steps.
Step 2 – Draw the center outline of your shirt
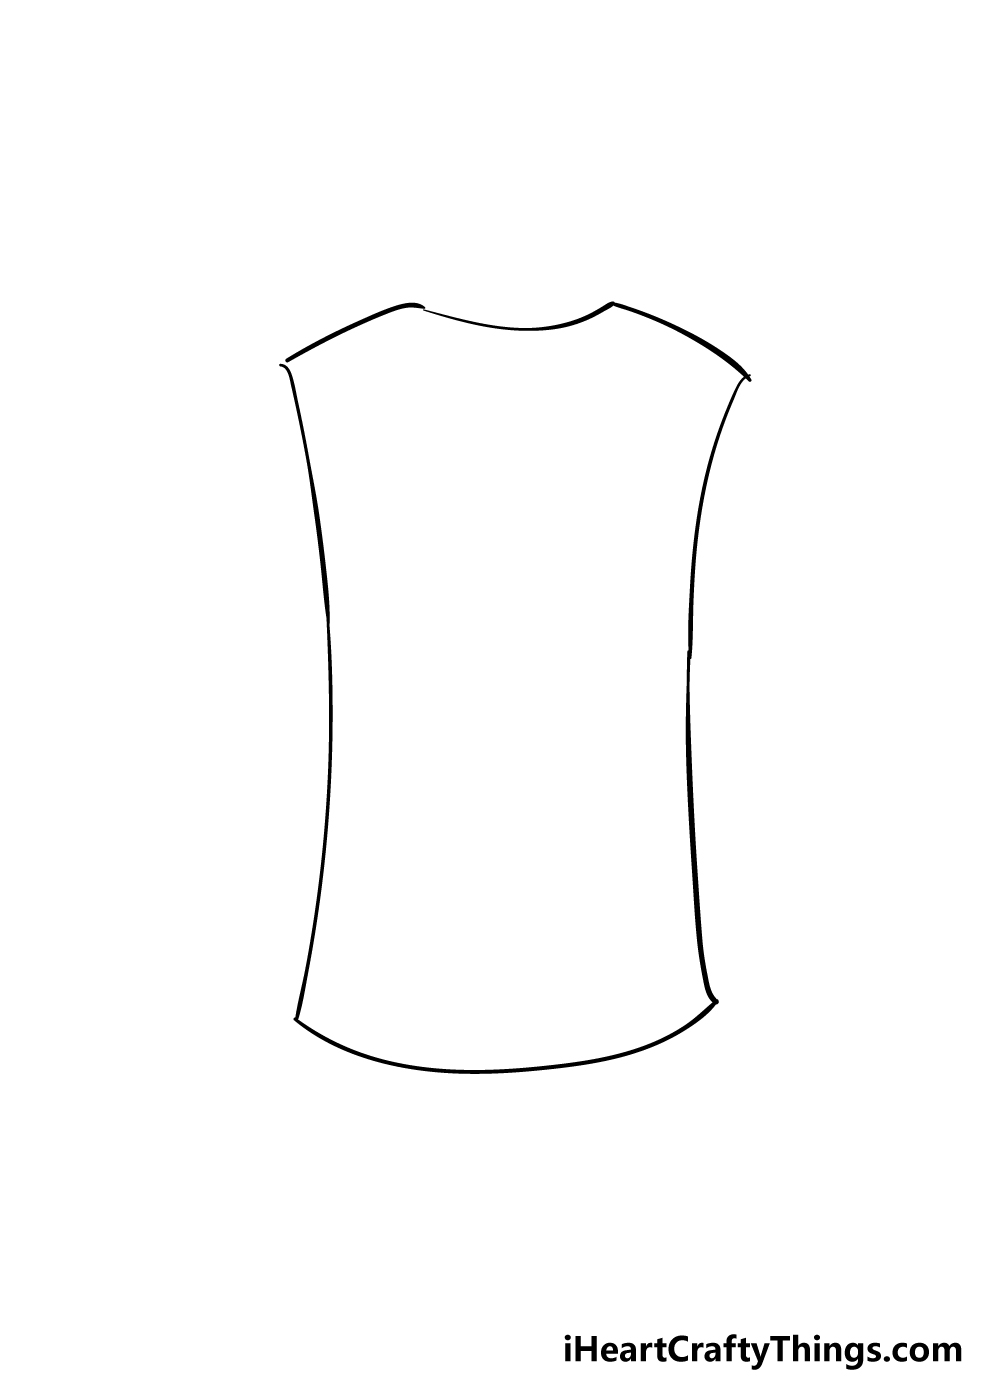
You will be using the shapes from step 1 for this part of your shirt drawing.
To draw the center of the shirt, you will be using several curved lines that all stay within the vertical rectangle from the previous step.
Following the reference picture will be very helpful for this step, as the curves in this part of the shirt have a very specific structure that we will be building on in the next few steps.
Step 3 – Now, draw the collar of your shirt
The third step of this guide on how to draw a shirt will focus on the collar of your shirt. This will be a simple, curved line near the top of the shirt.
It will fit into the curved shape that you drew into this area in the previous step, except this line will go further into the shirt interior.
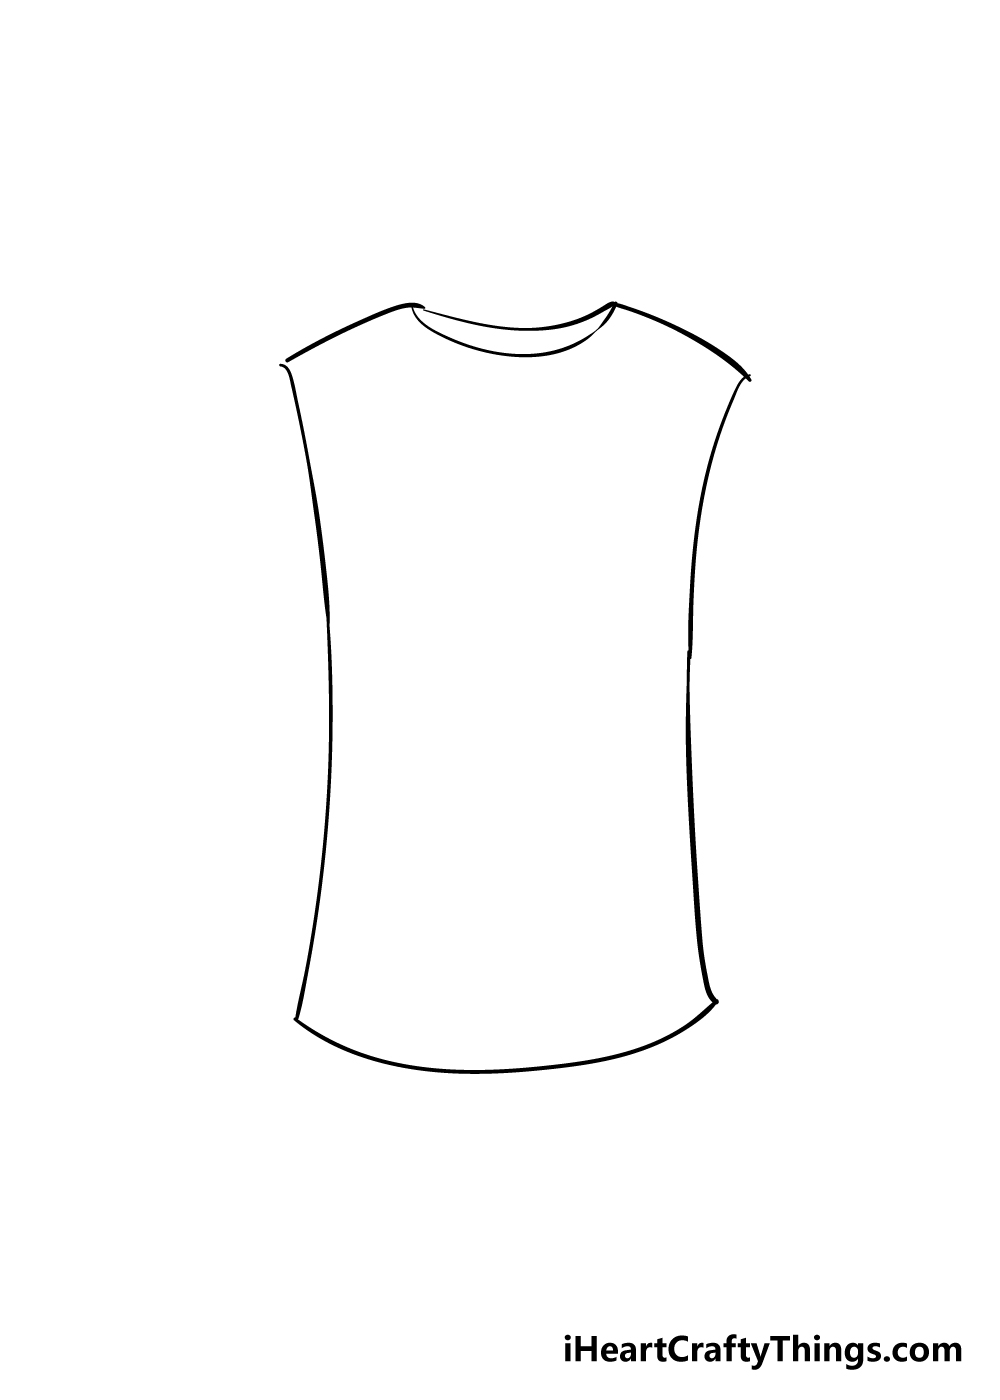
Step 4 – Add some sleeves for the shirt
A shirt wouldn’t be very well designed without holes for your arms, so we shall be adding some sleeves in this part of your shirt drawing.
To do this, keep using the rectangles from the previous step in order to position the sleeves correctly.
They will come down from the top corners of the shirt in a curved line and then connect to the body of the shirt with a straight line.
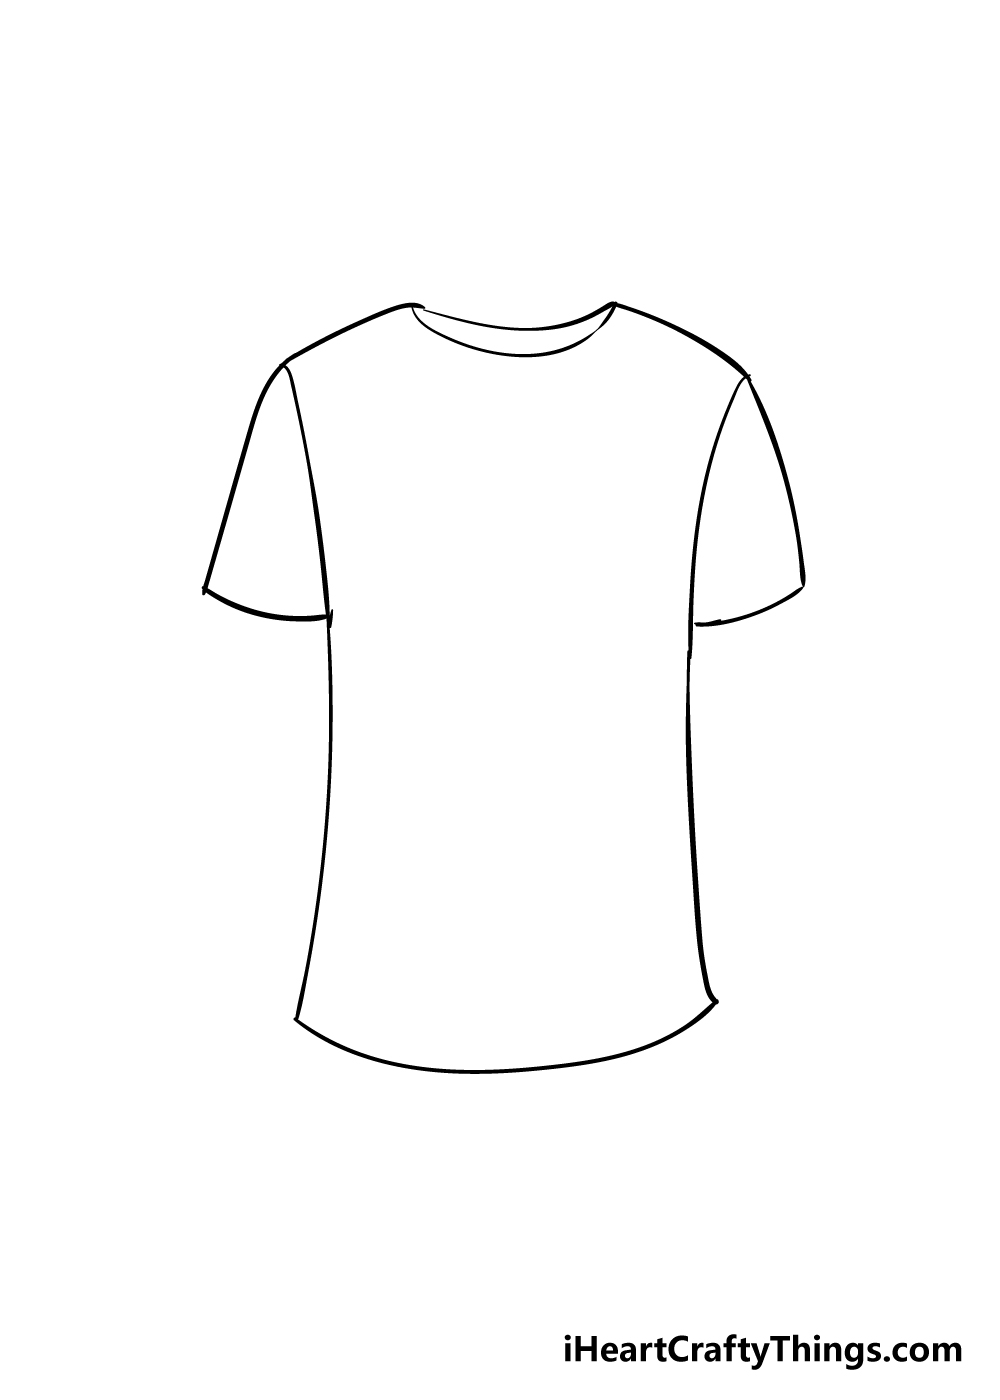
Step 5 – Finish off the final details
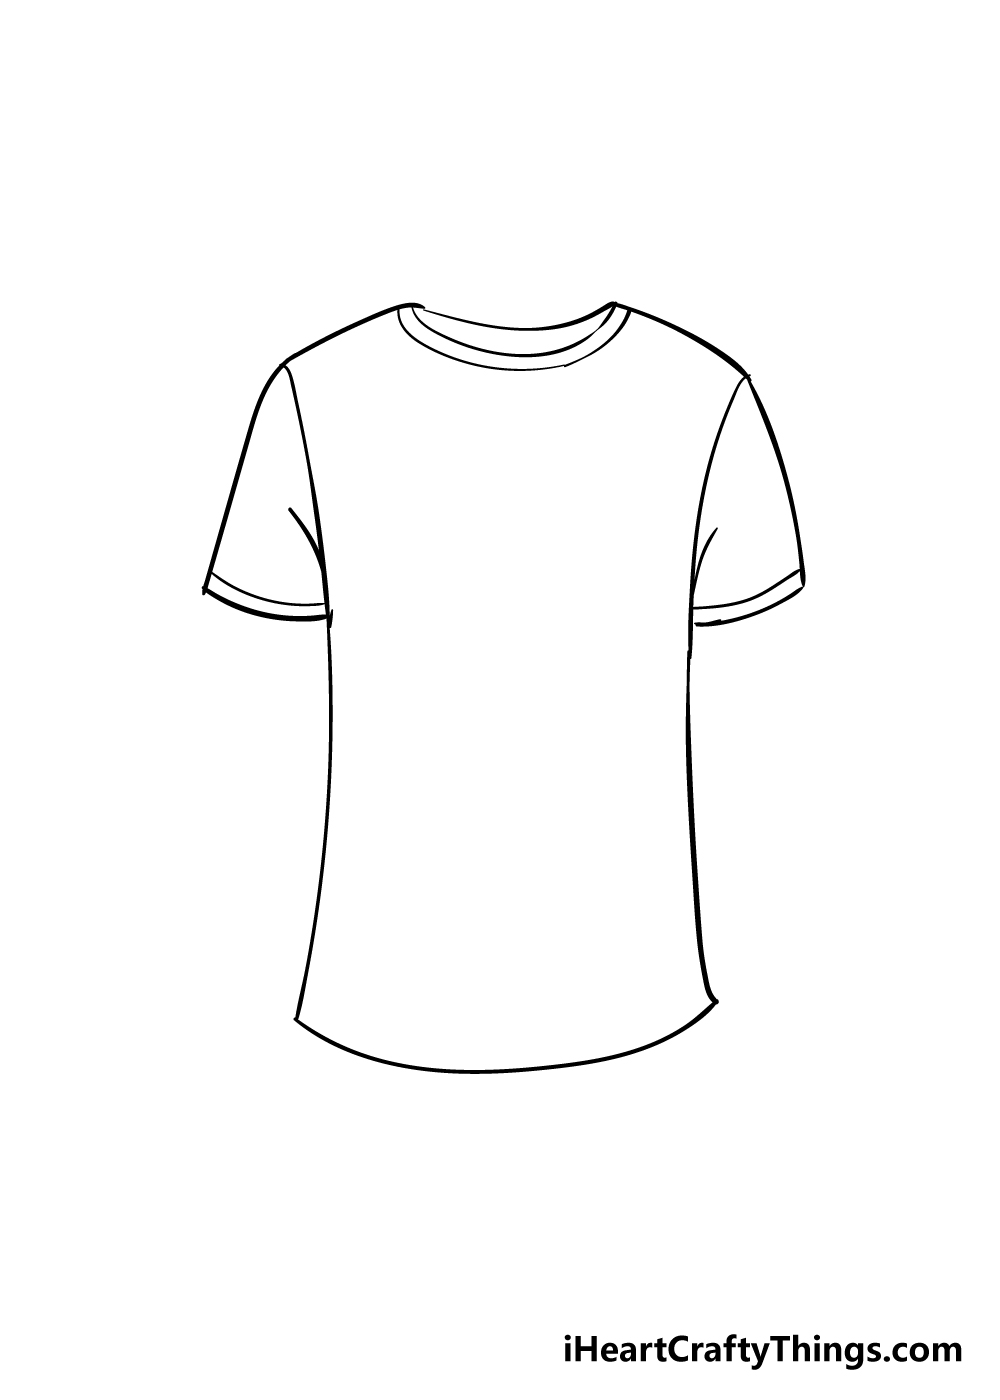
Before the final step of your shirt drawing, we need to draw some final details.
These details that we suggest are quite simple, and they include lines along the rims of the necks and the ends of the sleeves along with some lines inside the shirt for creasing.
Then, you can erase the pencil rectangles from the first step.
If you drew over it in pen, be sure to let the ink dry before you start erasing! Before you move on, this would be the chance for you to add any extra details that you would like.
There are lots of ways you can get creative with it! Some examples would be drawing a design on the shirt, or even by drawing a head and arms inside the shirt.
A background would be another great way to personalize your drawing, but what else can you think of to put your own spin on this picture?
Step 6 – Finish off your shirt drawing with some color
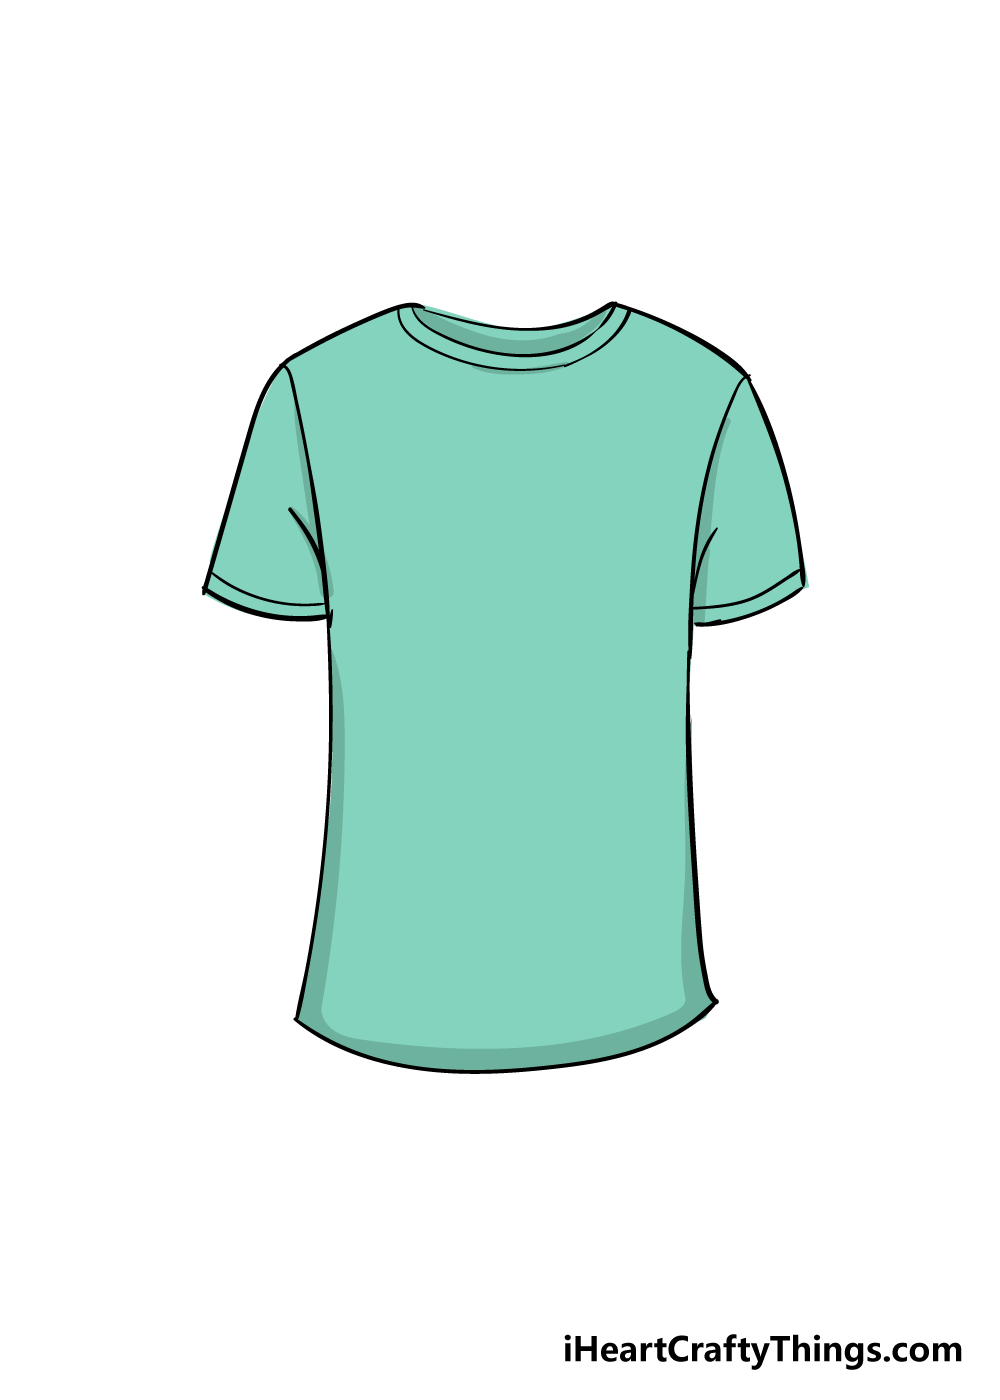
You’ve drawn the final details, added your own and finished your shirt. However, before you’re completely done there is still one thing left in this guide on how to draw a shirt, and that’s to color it in!
This step should be a lot of fun, as you will really get to stretch your creative muscles for this part.
We used a nice blue for our example image, but shirts can come in every design and color scheme imaginable, so that gives you a lot of room to express yourself with your colors.
If you drew a design or picture onto your shirt, then you can add even more bursts of color by filling that in!
Once you know how you would like to color in your shirt drawing, the only question remaining is what you will use to color it.
If you favor a brighter, more intense color scheme, then you’ll want to use a medium such as paints, colored pens or markers.
If you would prefer a more muted look, you can use mediums such as watercolors and colored pencils for a softer look.
There’s no wrong answer, and any look you choose will be stunning! What colors and mediums will you use to finish your shirt drawing?
3 More tips to make your shirt drawing easy!
Create your own perfect shirt drawing with these tips on how to make it easier!
Sometimes, adding something more to a drawing can actually make it easier, as it has more context.
The same could be true for this shirt sketch we’re working on!
That’s why we would suggest drawing someone wearing the shirt. It doesn’t have to be super detailed or realistic, but it can still make a big difference.
Even if you draw the person in a simple cartoon style, it can make it easier to form the shape of the shirt. It would be a good idea to get a friend or family member to pose for you if you wish to try this idea.
If that first tip doesn’t help, then you could also make this drawing of a shirt easier by simplifying the details. You could even go so far as to use a ruler and draw some straight lines for the outline of the shirt.
Otherwise, you could draw the shirt in a different position or maybe even turn it into a shirt with no sleeves. These are just a few of the ways that you can make the drawing simpler!
Another idea would be to draw a big colorful logo onto the shirt that will take the attention away from any imperfections.
In the first tip, we spoke about using a friend or family member as a model for your shirt drawing. You can do this on your own in a few ways, however.
One easy way would be to take a t-shirt you own and then lay it down on a flat surface. Then, you can use it to help you with drawing this shirt.
Or, you could take a selfie of yourself wearing the shirt and then use the photo to help you as you draw. Using the real thing will not only help with the shape but also with some smaller details like creases and shading.
If all else fails, you could also use a mirror to help you while you’re wearing a shirt.
Your Shirt Drawing is Complete!
That concludes our step-by-step guide on how to draw a shirt! As e mentioned earlier, drawing something like a shirt can be difficult despite our familiarity with them, as they are made out of soft fabric.
We really hope that this guide showed you that even though it can be challenging, it’s made a lot easier if you have a step-by-step guide showing you the tricks!
Now that you can draw an amazing shirt, it’s up to you to release your inner fashion designer.
We’ve covered a few ways that you can get creative with this image, and these have included anything from designs on the shirt to the amazing colors that you incorporate.
Don’t forget that you can also draw a background or extra elements such as a person inside the shirt! The possibilities are endless and we can’t wait to see what you come up with!
Finishing this shirt drawing is not the end of the fun, as we have many more awesome step-by-step drawing guides available for you on our website.
We waldo bring out new ones frequently, so be sure to check in often to never miss out!
We would also love to see your incredible shirt creations, so please be sure to share your finished shirt drawing on our Facebook and Pinterest pages for us to admire.
We look forward to admiring your creativity!