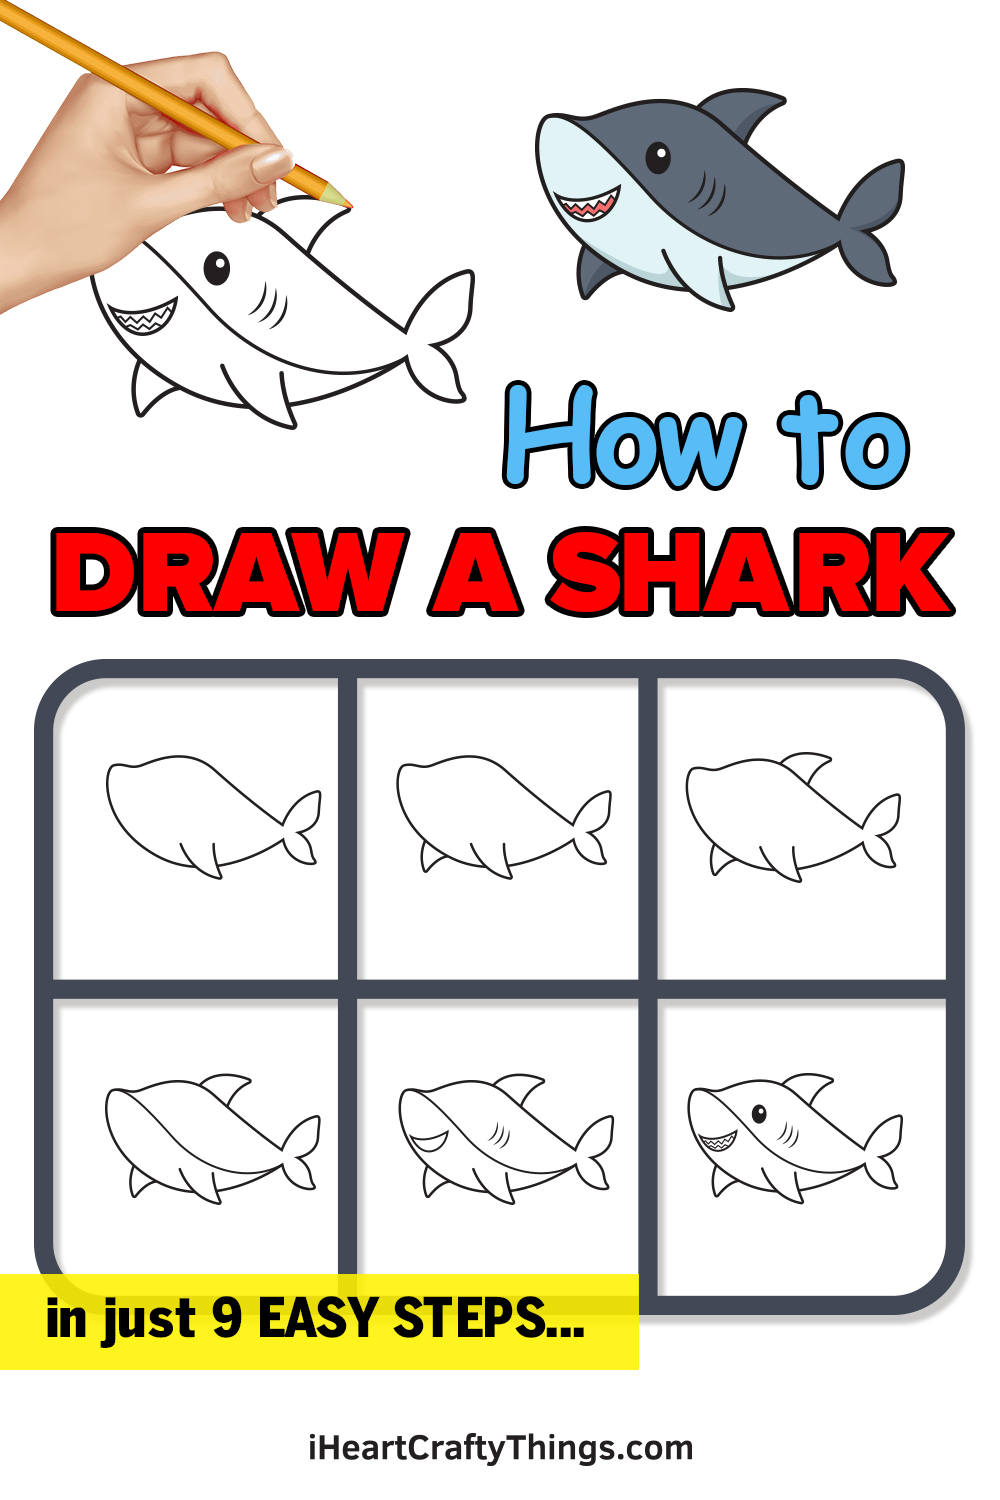
Discover the easiest method to drawing a shark with this step-by-step guide. You’ll soon see just how simple it can be to create a cartoon shark drawing when you have the right steps.
Sharks may be a bit scary in real life, but learning how to draw one doesn’t need to be. The cute cartoon shark you will soon create has been broken down into several basic shapes and lines that are so easy to follow.
It has a lot of personality and includes all the details you would expect such as the sharp shark teeth, dorsal fin, gills and dark eyes.
Even though it has these realistic details, it’s still a friendly-looking character! Once you have finished the drawing, feel free to get creative and draw an ocean background with fish and other creatures around your shark pal.
Let’s dive in and see just how fun it is for people of all ages to create this shark drawing!
Watch These Simple Steps To Easily Draw A Cartoon Shark
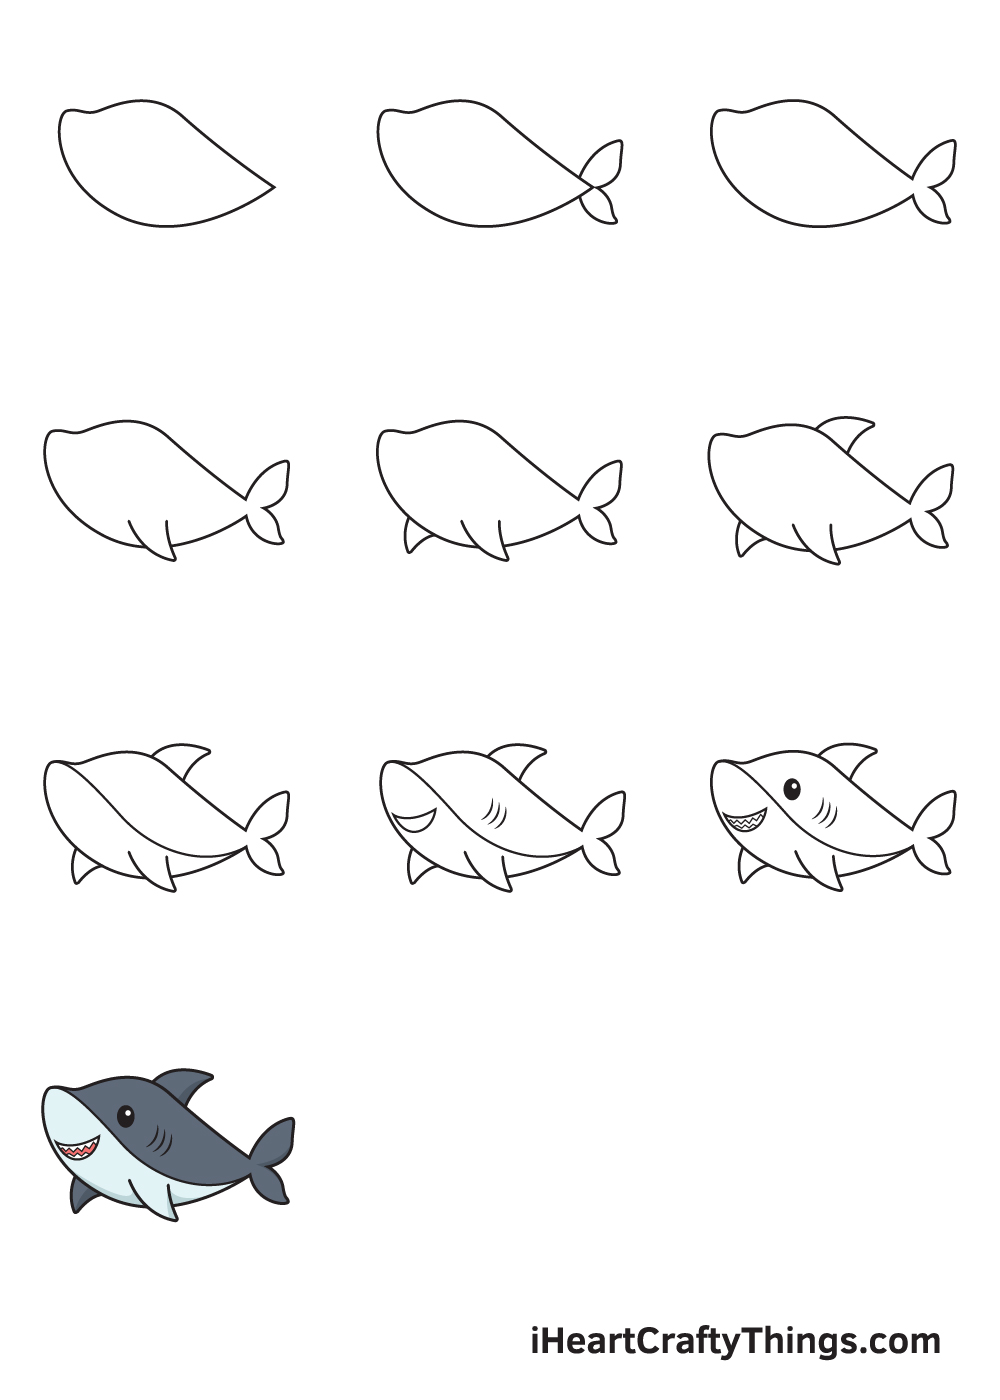
How to Draw a Shark – Let’s get started!
Step 1
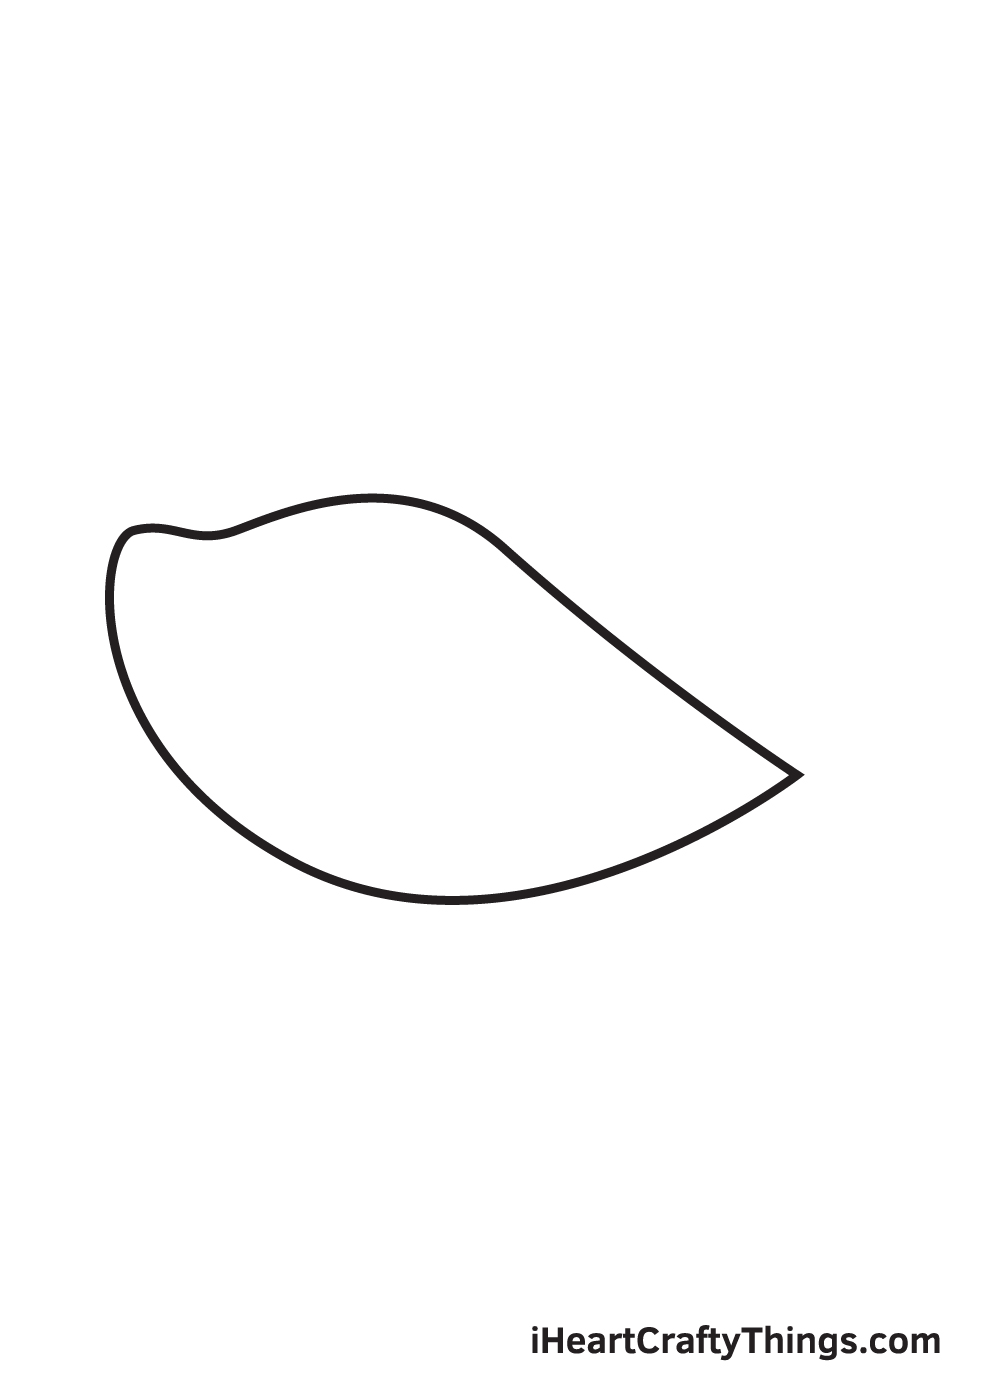
Start by drawing a diagonal irregular oval shape with a pointed right edge. There should also be a minimal bump on the opposite end of the shape. This creates the shape of the shark’s body.
When drawing an outline, it’s important to draw with light strokes. Avoid pressing down too hard with your pencil so you can easily get rid of any lines that you might no longer need later on.
To ensure that the shark will be drawn in the center, you can create reference lines by drawing an intersecting horizontal and vertical shape across your paper. The point where the two lines meet marks the spot where you should draw the outline.
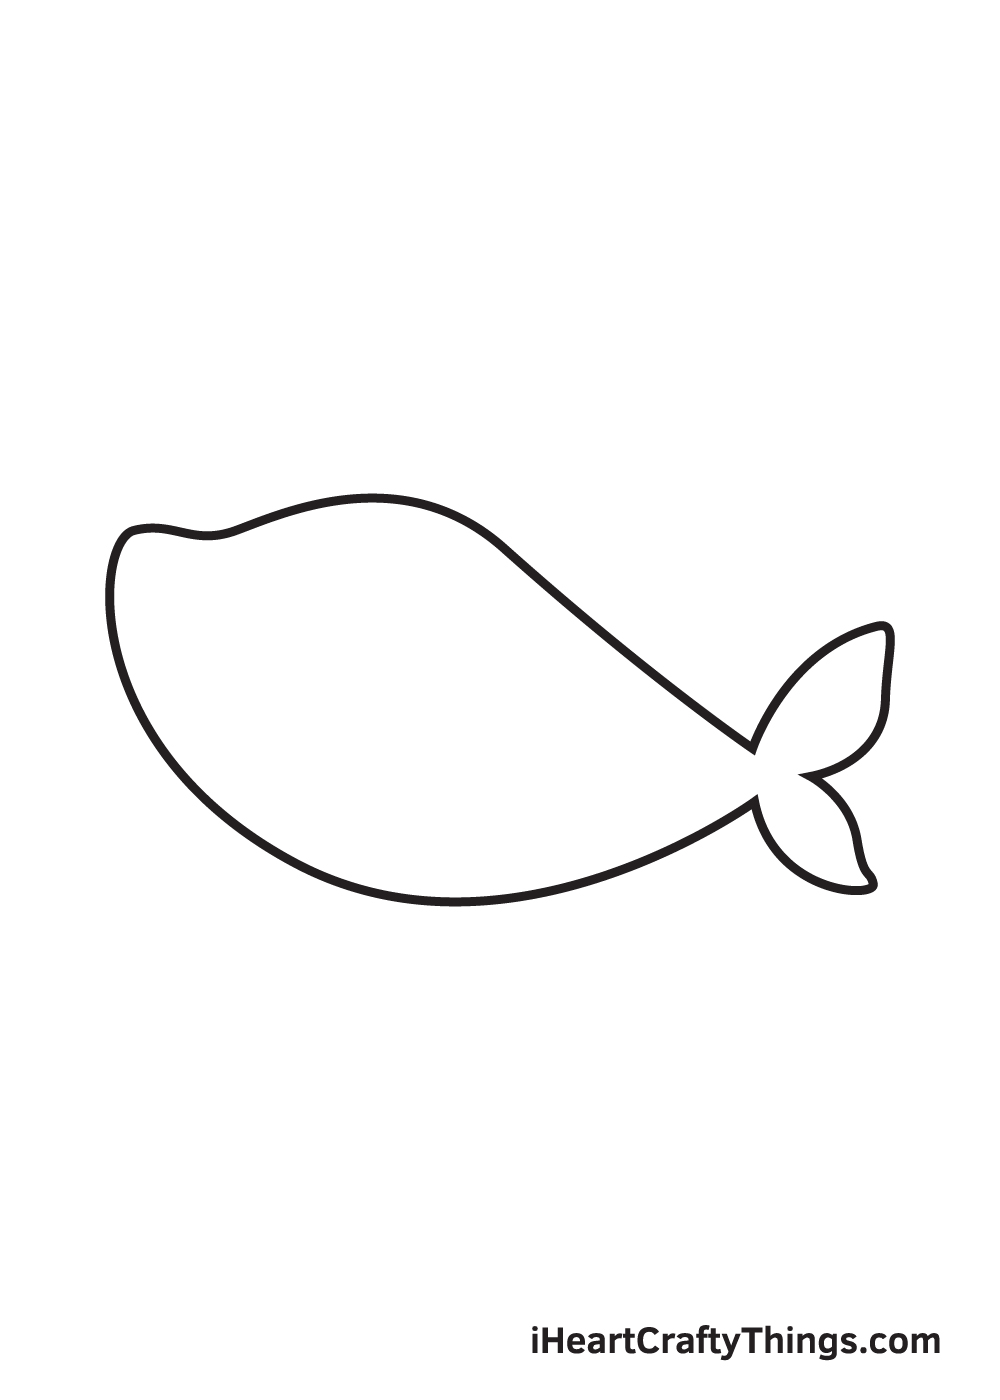
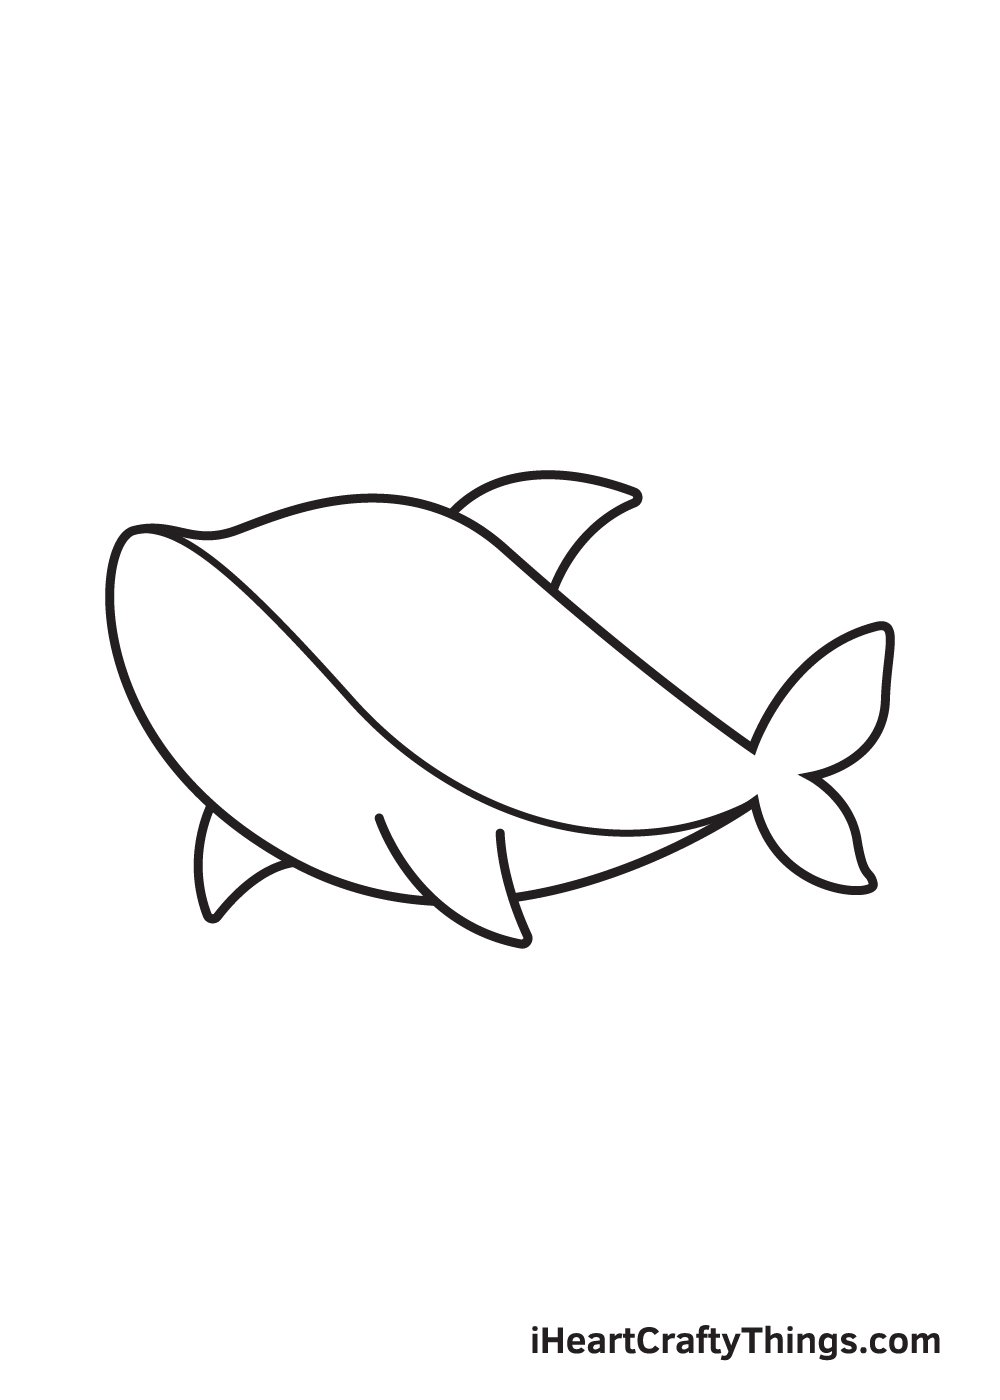
Step 2 – Outline the Shark’s Body and Tail
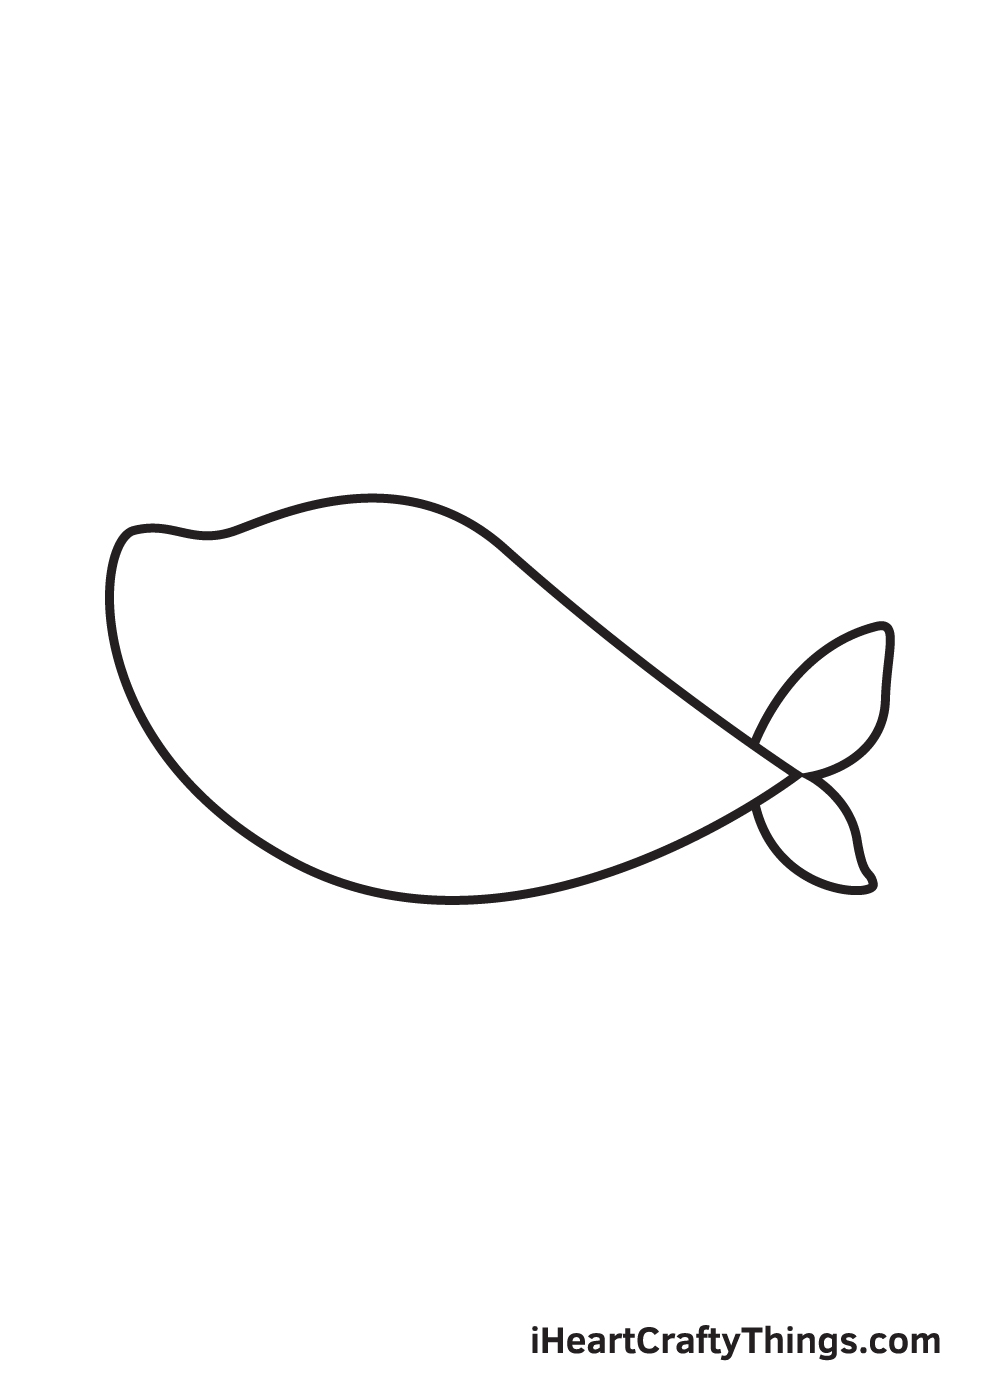
Draw two connected leaf-shaped figures to create the tail of the shark. Similar to a leaf, the middle part of these two figures should be rounded while the tip must be pointed.
Feel free to use the illustration shown above to make sure you got it right!
Step 3 – Refine the Shape of the Shark’s Body
Connect the shark’s body and its tail by getting rid of the line overlapping inside the figure.
This makes your drawing look more refined and neat.
Step 4 – Next, Draw the Shark’s Visible Pectoral Fin
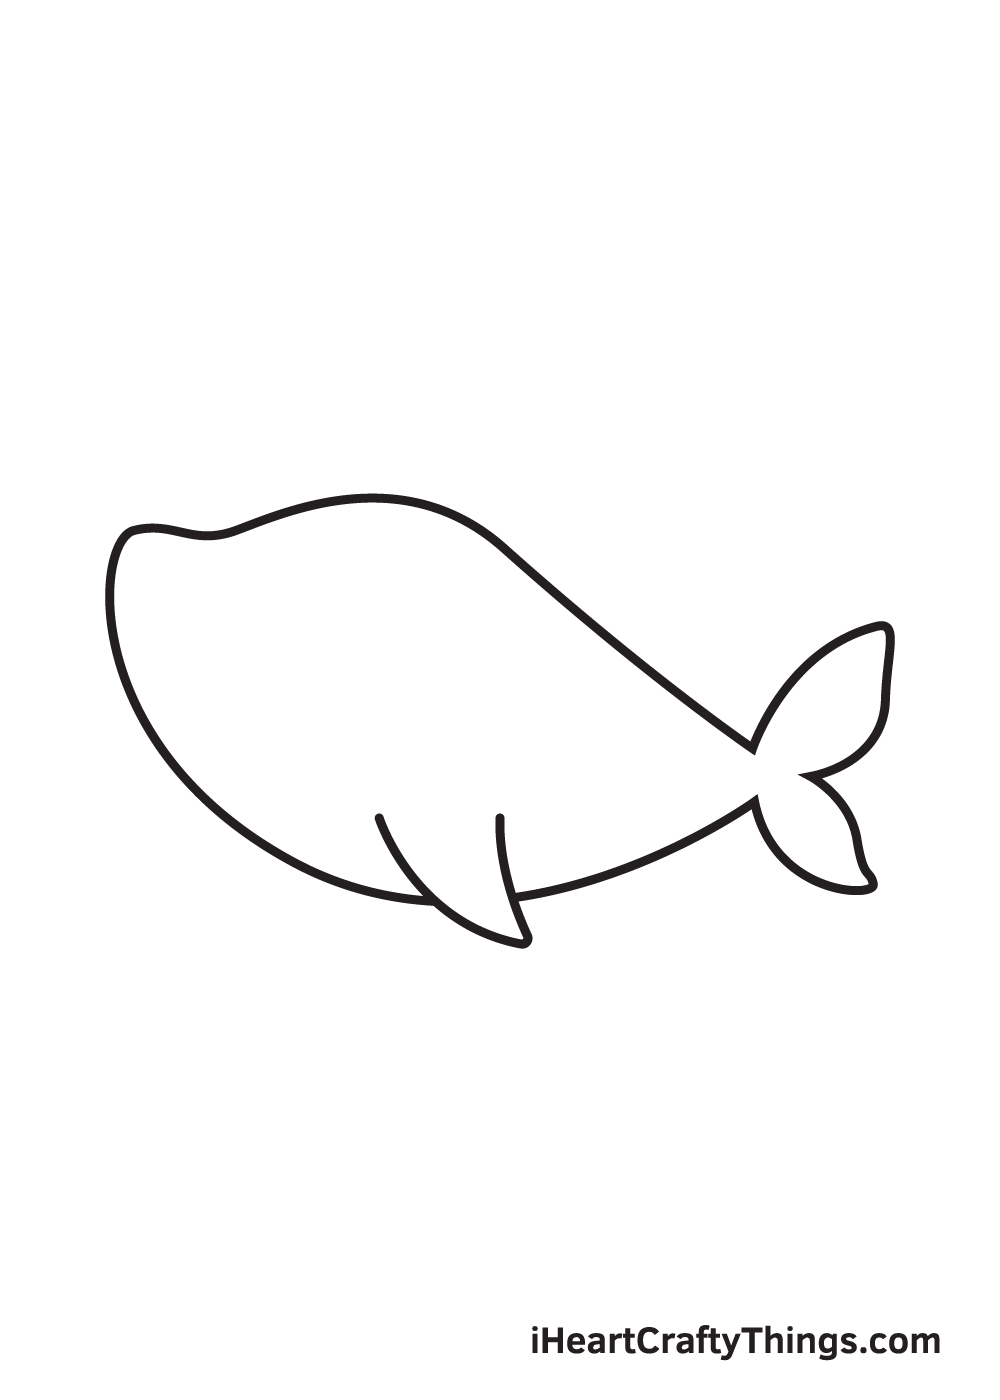
Draw a slightly curved V-shaped line on the left bottom side of the shark’s body. This forms one of the pectoral fins of the shark.
Again, take time to remove any overlapping lines from the original outline of the body. Keep your drawing neat and tidy!
Step 5 – Complete Both Pectoral Fins of the Shark
Draw another V-shaped line on the opposite side of the shark’s body.
At this point, both pectoral fins should be fully structured, as shown in the illustration above.
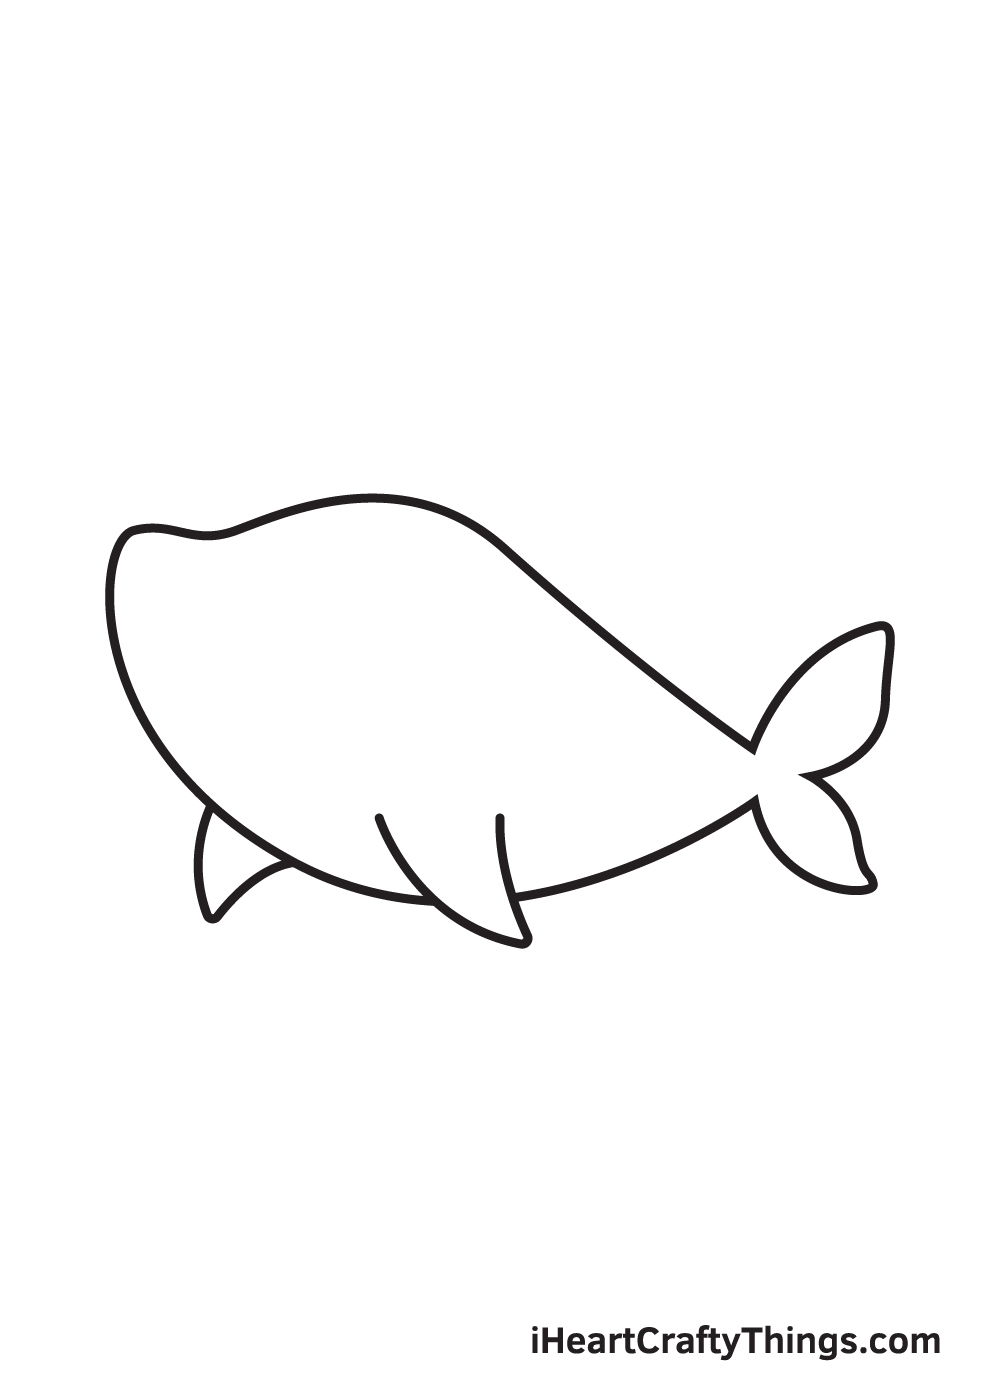
Step 6 – Then, Draw the Dorsal Fin of the Shark
Draw a curved triangular shape at the top of the shark’s body. This forms the dorsal fin of the shark.
Keep in mind that the dorsal fin must be slightly bigger than the shark’s pectoral fins, but not as big as its tail.
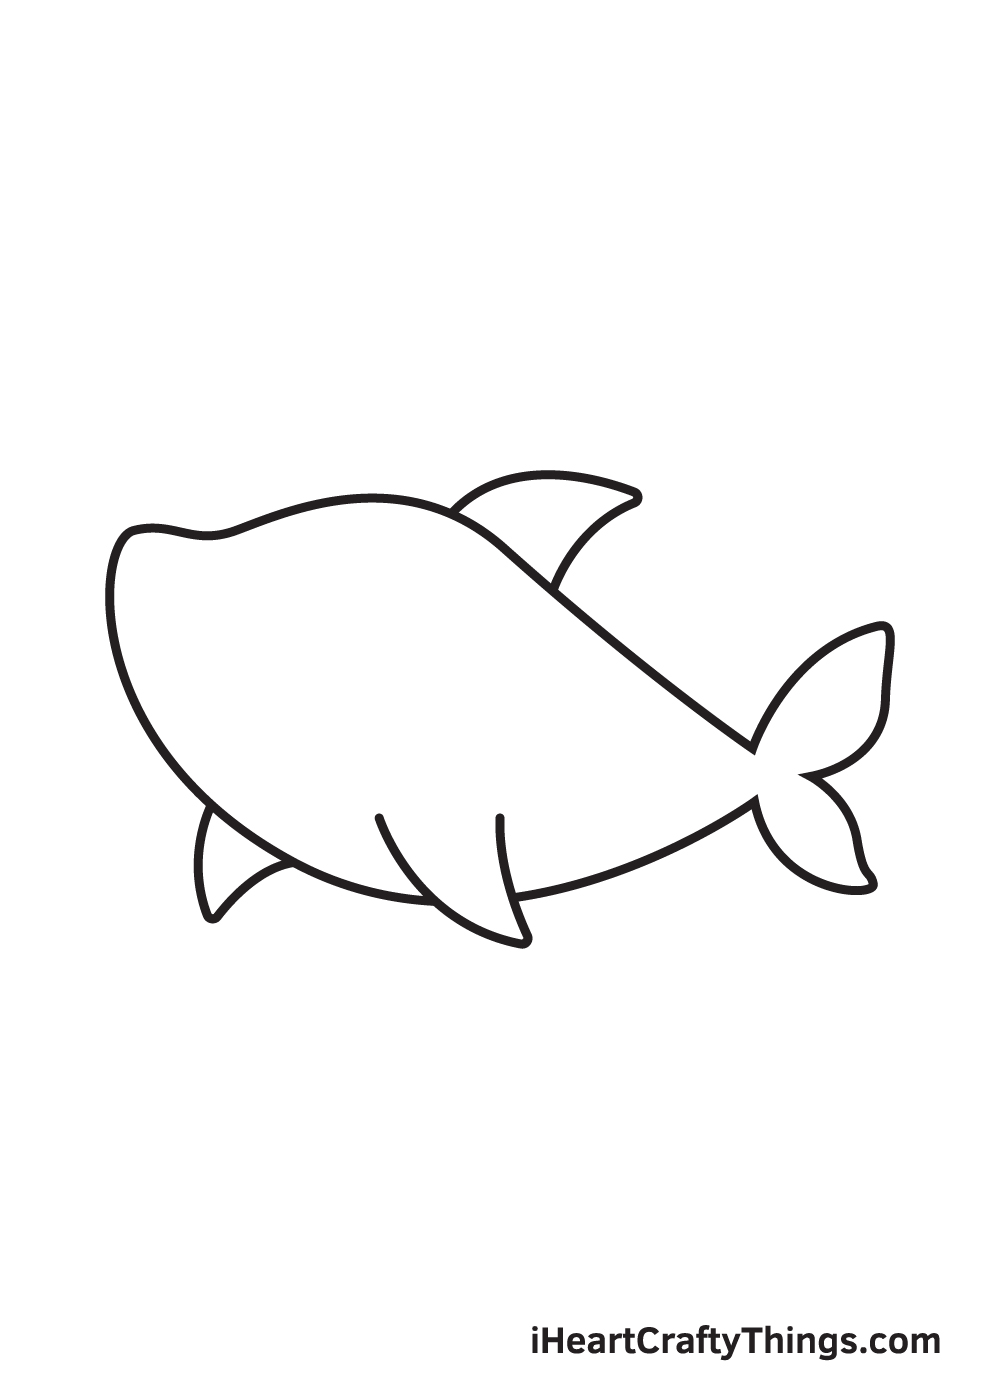
Step 7 – Outline the Underside of the Shark’s Body
Draw a curved line across the length of the body of the shark. The line should begin from the mouth of the shark extending all the way to its tail.
This creates a division between the upper part of the shark’s body and its underside.
Step 8 – Add the Gills and the Mouth of the Shark

Draw three parallel horizontal curved lines right above the pectoral fin of the shark. The lines should be on the upper part of the shark’s body, and not on the underside.
This creates the gills, which is what sharks use to breathe underwater, just like any other type of fish.
Afterwards, draw a curved line with a more concave curved line at the bottom forming the mouth of the shark. This should be drawn near the edge of the shark’s face.
Step 9 – Now, Add the Sharp Teeth and the Eyes
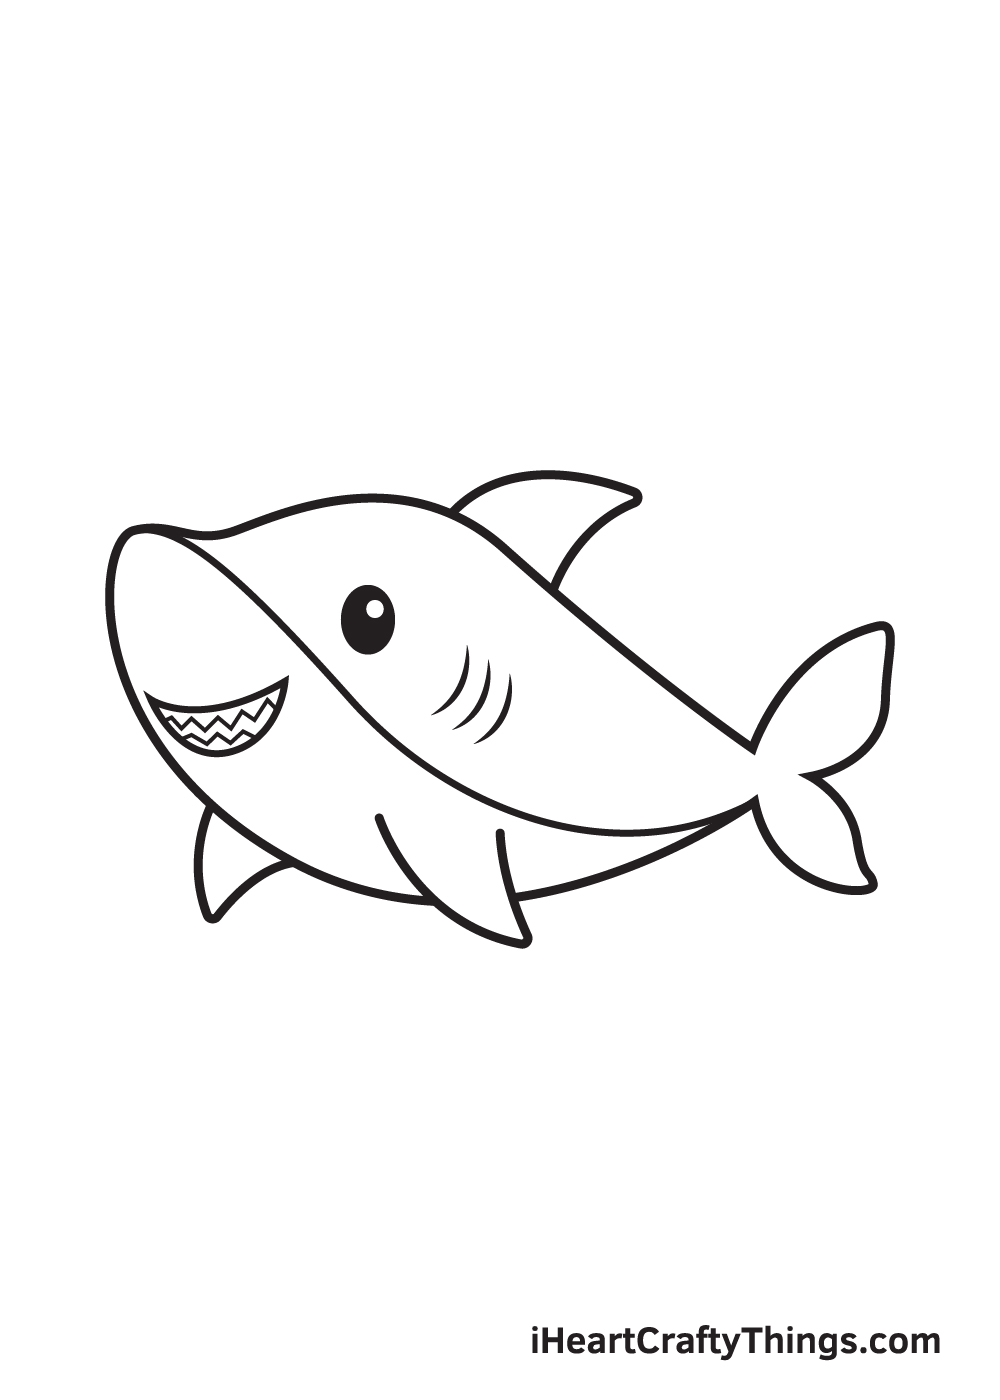
A shark wouldn’t be complete without a set of sharp, pointed teeth, so that’s exactly what we’ll be drawing in this step.
Simply draw parallel horizontal zigzag lines inside the outline of the mouth that we drew in the previous step. This creates the appearance of the shark’s distinct teeth.
For the eyes, draw a standing oval shape. Then, draw a small circle inside it. Shade the entire space within the oval shape while leaving out the tiny circle unshaded.
There you have it—you’ve successfully drawn a ferocious shark! Now, it’s finally time for the part we’ve all been waiting for, which is choosing the color and coloring the shark!
Though most sharks may look grey, they actually have no standard color. Their colors may appear as either grey, cream, brown, slate, yellow, blue and other neutral colors.
That means, the colors you will be using for your drawing are entirely up to you! Feel free to use a customized set of colors when coloring the shark. After all, it’s your work of art!
Have fun playing with colors and watch as the shark ultimately comes to life!
Get Bold And Creative With Your Colors
We looked at some colors you can use for your drawing of a shark, but we wanted to expand that a bit and look at some ways you can have fun with it.
One of the easiest ways to make the colors really look interesting is by using a variety of different mediums. Everyone who loves coloring has their favorite coloring tools that they like to use.
Getting stuck in using these mediums can help you get comfortable with them, but it can also be limiting. If you don’t try anything new, then you will never see all of the possibilities there are when it comes to coloring!
We would challenge you to use an art medium that is entirely unfamiliar to you with this drawing. Never mind if it doesn’t turn out how you want, as every mistake and failed experiment is just more experience!
Artists develop their styles by trying things and seeing what works, that way they can take risks and keep the ones that work and look good.
We think that watercolor paints would suit this drawing well, as it would create a softer look for this underwater setting. If you are already familiar with this, then you could use another kind of paint!
It could also get fun as you work in some fun crafts and other tools to achieve your colors. Start by thinking of the kind of color scheme you want to go for.
Do you want something subdued and realistic or bright and bombastic? Then, try to think of which tools would be best to achieve your vision.
Above all, have fun with it and don’t be afraid to try anything, you never know what may happen!
Here’s how you can make your shark drawing even better…
Create some shark-infested waters as we give you tips for your shark sketch!
When one thinks of a shark, you may immediately think of a big one, like a great white shark.
They can actually come in many shapes and sizes, however, and you could create a specific species for this shark drawing!
You would have a huge amount of different species that you could choose from, and it all depends on your preference.
You can look up different shark species online or in books to help you change the design.
Once you have chosen the design for your drawing of a shark, you could also create a cool background for it. You could show the shark in the ocean or maybe at an awesome aquarium.
Regardless of the setting you choose, you can add lots of details and create all sorts of fun scenes. Maybe the shark could be exploring a sunken ship with some glowing treasure.
What are some other ocean settings you could create for this drawing?
If you used the previous tip we suggested, then you could take it even further by adding some more ocean creatures. You would again have a huge selection of animals to choose from!
These could range from small fish, squids or maybe an octopus to larger ones like whales or an orca. Maybe you could even draw a diver that has been unlucky enough to encounter this shark!
You could draw these extra creatures in a similar cartoon style or make them look more realistic.
In the same way that sharks come in many shapes and sizes, they can also be found in many incredible colors and patterns. That opens up so many possibilities for your shark sketch!
Some have more muted color schemes while others even have stripes and other patterns of color on their bodies.
When adding these colors, be sure to try out all of your favorite art tools and techniques to create some interesting color combinations. What will you choose to finish off your artwork?
Your Shark Drawing is Complete!
We hope you enjoy this step-by-step shark drawing tutorial. It doesn’t matter if you’re a beginner or an expert in drawing. With the help of this comprehensive guide, anyone can draw a majestic shark in no time!
We are regularly updating our “How to Draw” catalog and uploading new drawing tutorials, so don’t forget to keep checking back to continuously learn how to draw something new.
Remember, all of our guides are completely free for you to use as learning materials.
As soon as you finish drawing and coloring a shark, take a picture of your artwork and share it on our Facebook page and on Pinterest.
Don’t be embarrassed to share your drawing! You’ve worked hard for it, so we’re sure it looks impressive!
We can’t wait to see your magnificent shark drawing!
Here Is A Fun Shark Drawing To Inspire You!
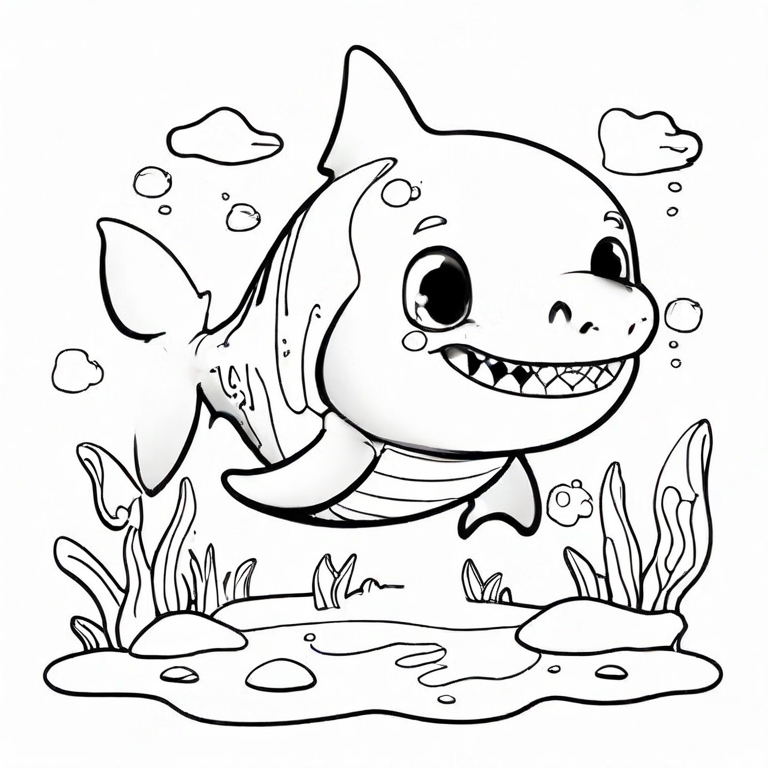
You probably wouldn’t want to encounter a shark in real life when swimming in the ocean. However, there is nothing scary about this fun shark drawing for kids!
Thanks to the guide, you probably have a better idea of how to create this drawing, but we wanted to help even more. This drawing was done by our artist Freddy to give you a bit more help when creating your own version.
He added so many details such as the sharp teeth in its mouth as well as the stripes and other details on the body. It really helps to give the shark a lot of character.
Not only that, but he also made a detailed background beneath the shark to make it feel more like a part of the environment. This will hopefully be very helpful while you work on your image!