Rats have gained a bit of a bad reputation among humans on account of all the plague and disease spreading.
While they have been responsible for things like this in the past, they’re actually fairly misunderstood creatures.
They can be pretty intelligent and resourceful, and they can make lovely pets as well!
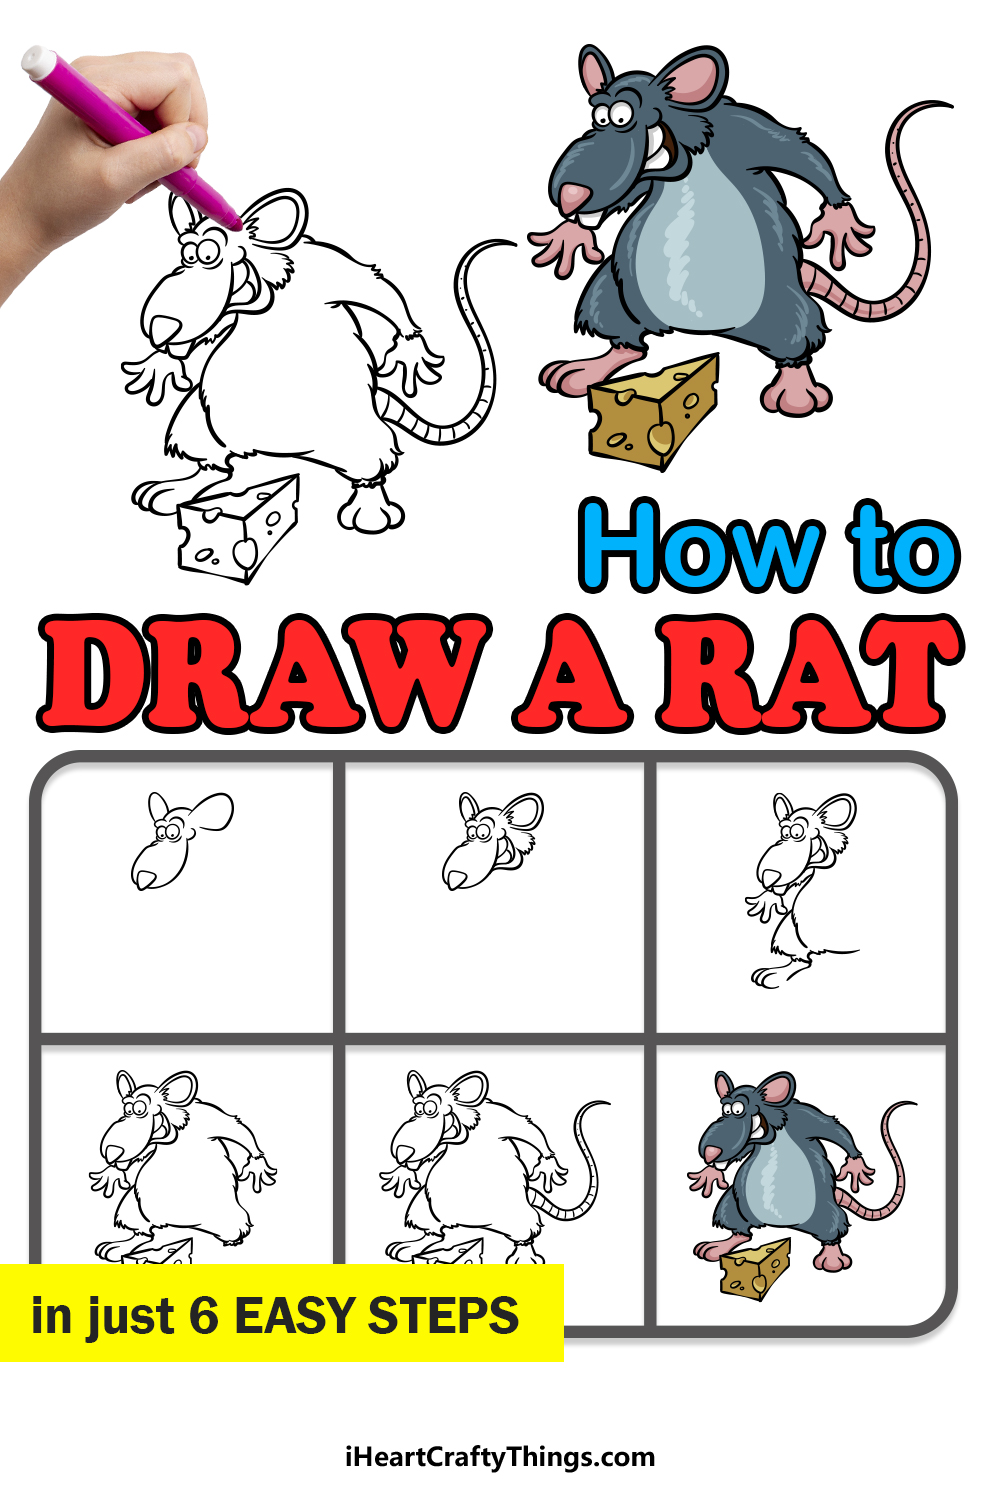
Rats often feature in cartoons as well, and learning how to draw a rat is a cool way to create your own rat scenarios.
If you love these misunderstood rodents, then this will be a drawing tutorial that’s not to be missed!
Our step-by-step guide on how to draw a rat in 6 steps will show you how to create a cute cartoon version of one of these crafty little rodents.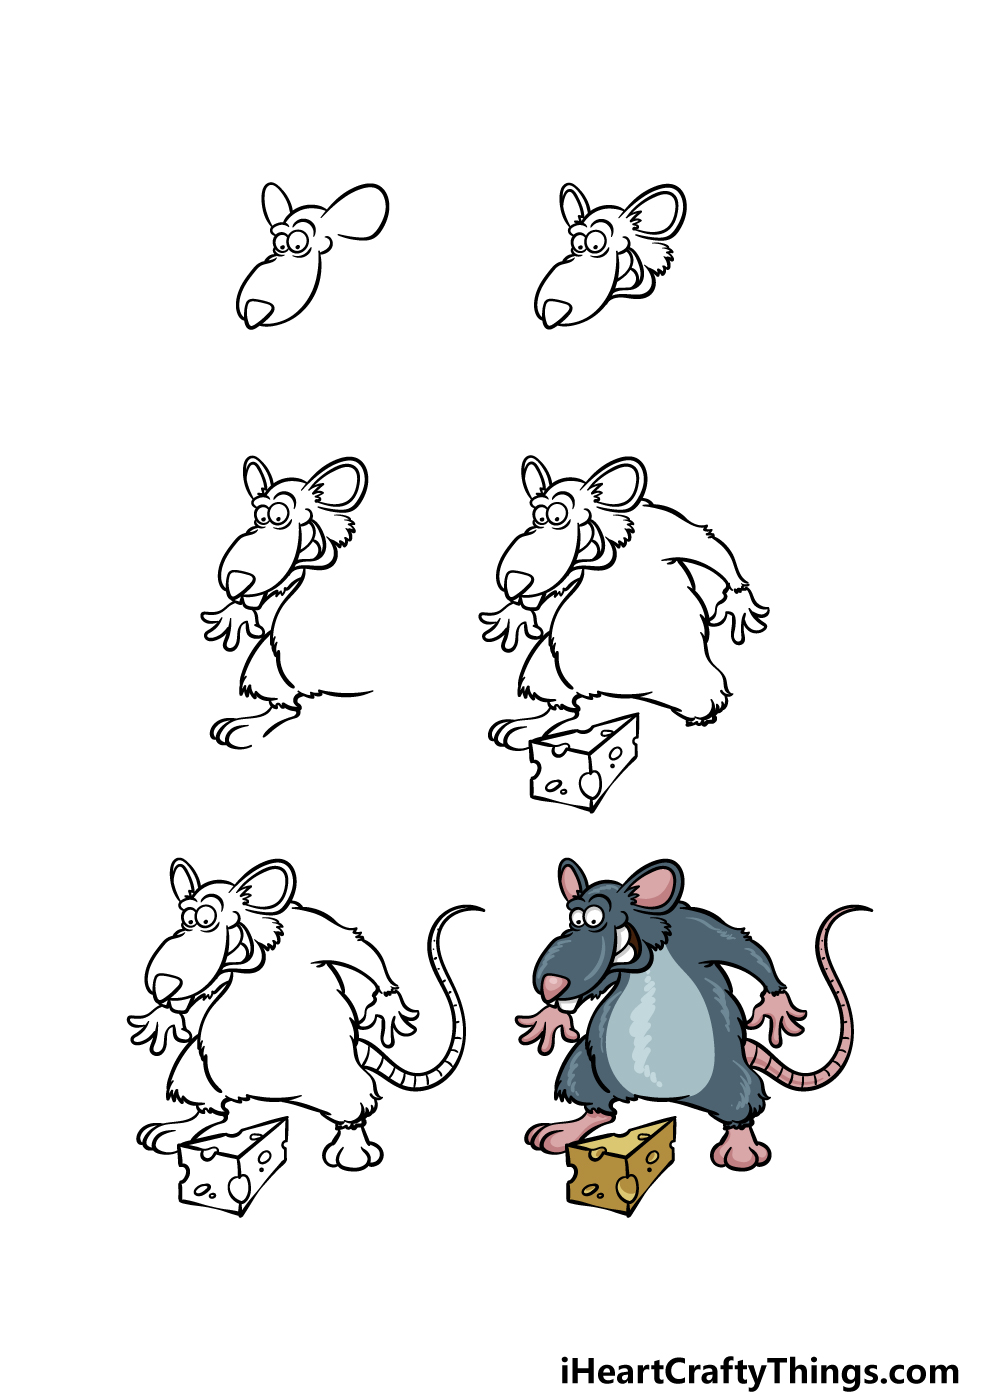
Easy Video Tutorial on How to Draw a Rat
How to Draw A Rat – Let’s Get Started!
Step 1 – Start by drawing the base for rat’s head
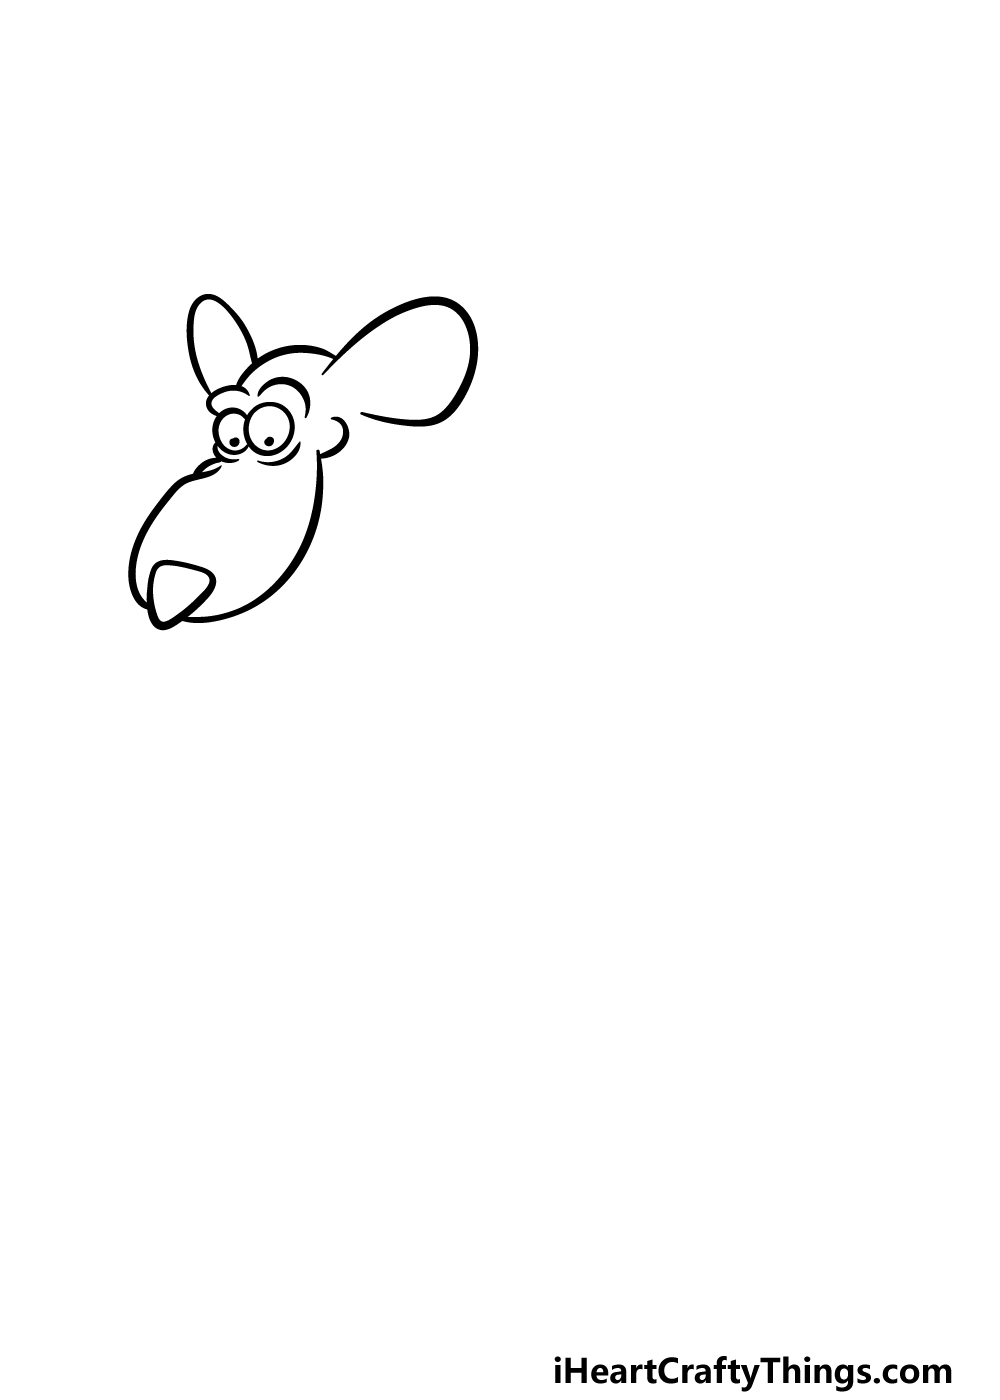
For this first step of our guide on how to draw a rat, we will begin with the head and face of the rat. First, draw two small circles with a dot inside of each one for the eyes.
These will have curved lines beneath and above them to add a bit more personality to the expression of the rat.
Then, draw the top of the head using a small curved line. You can then add the ears by drawing some large, round shapes next to the top of the head.
Finally for this step, we will draw the muzzle of the rat. In real life, this would be fairly small and pointy, but we will be making this one cartoonishly large.
Use a long, rounded line for the large snout, and then add a rounded triangular nose to the end of it.
Step 2 – Now, draw the bottom of the mouth and some ear details
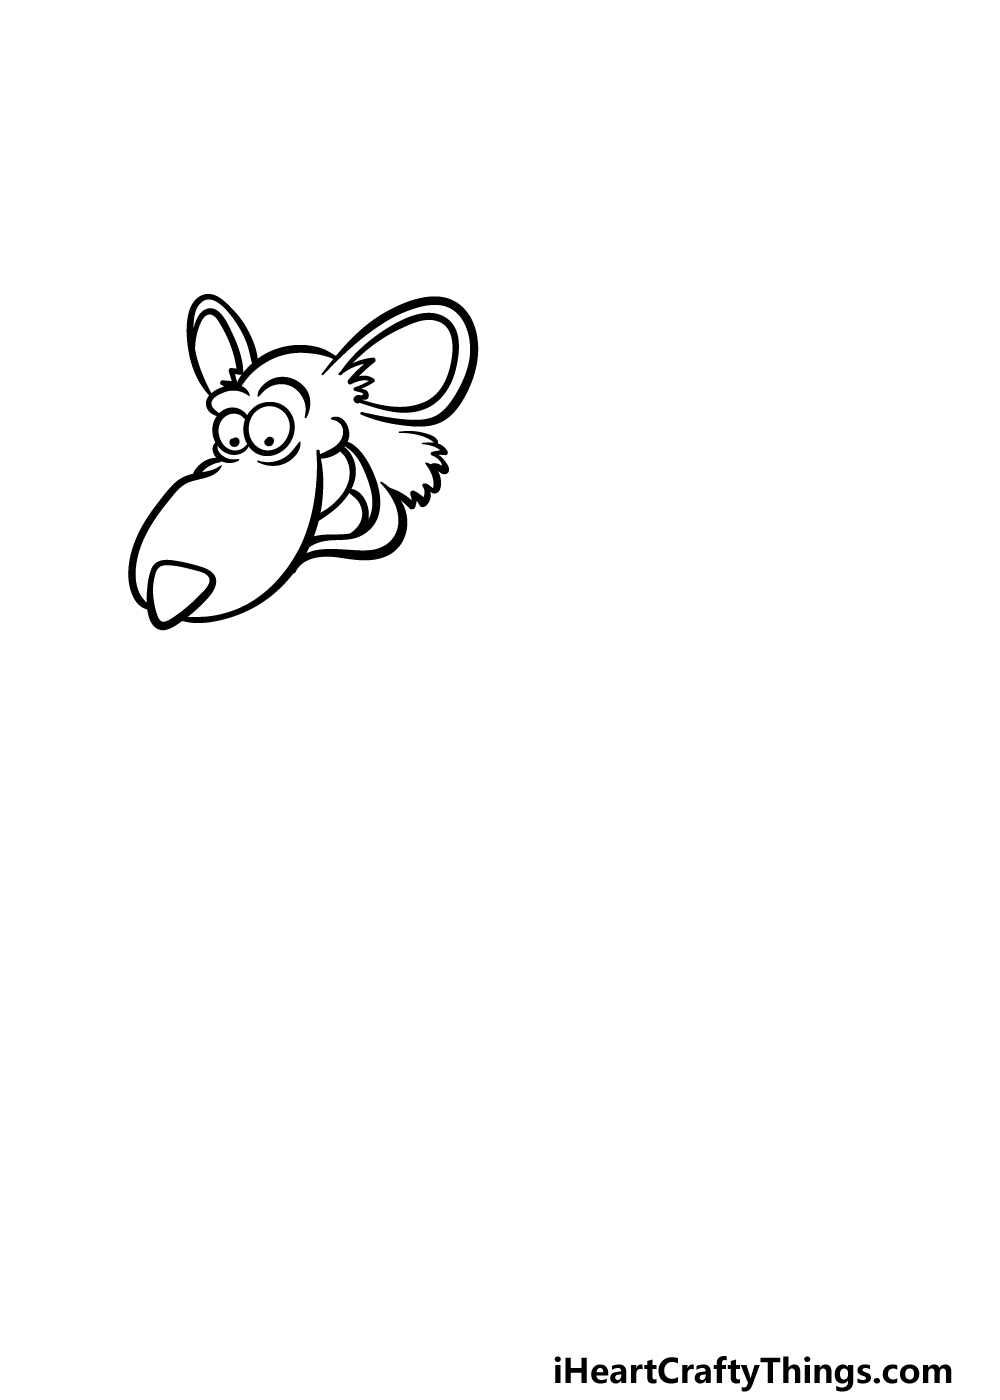
Now we will be drawing the rest of the mouth as well as some ar details for your rat drawing in this second step.
First, draw some more curved lines to form two long shapes beneath the mouth for the teeth of the rat.
Then, add a rounded line beneath these and connect some pointy lines to that for the furry bottom of the mouth.
The reference image will show you what this should look like! Then, we will be drawing the inner shapes of the ears.
Draw some lines along the inner perimeters of the ears and add some pointy lines near the bottom to again make it look furry.
Step 3 – Draw the start of the body and legs
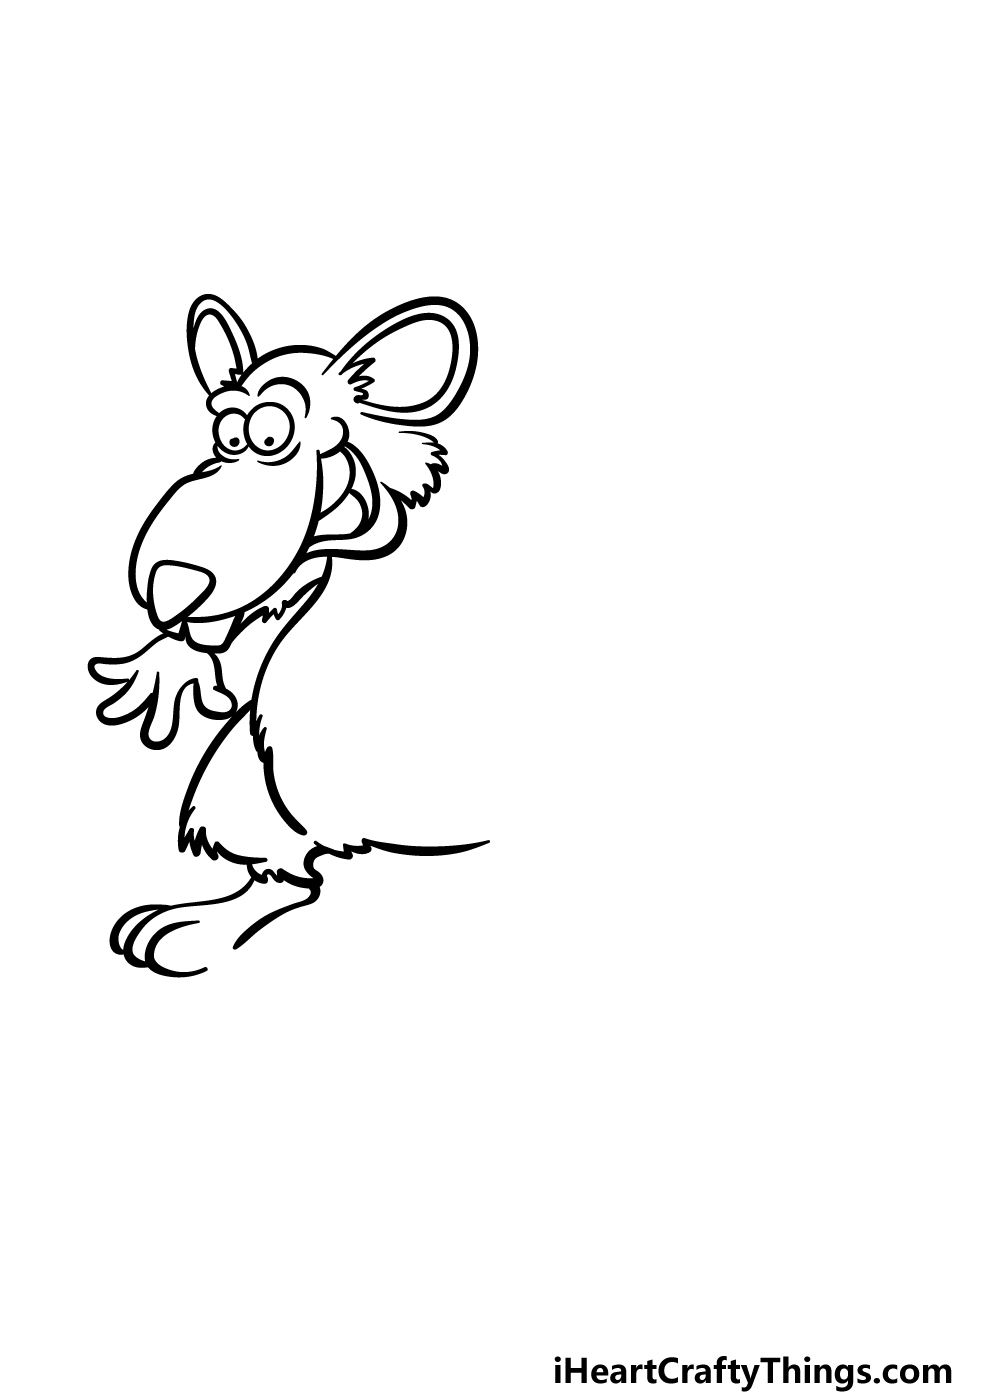
We’re finished with the head of the rat for now, so in this third step of our guide on how to draw a rat, we will focus on the body and limbs of the rodent.
First, there is actually one last element to add to the face, and that is a squared shape at the bottom of the tip of the snout for some buckteeth.
Then, you can draw the small paw of the arm on the left beneath the face.
We will then use a combination of curved and jagged lines for the chest and belly of the rat, and then use similar lines for the top of the leg.
Finish off by drawing the large foot on the left, and then we can proceed.
Step 4 – Next, draw more of the body outline
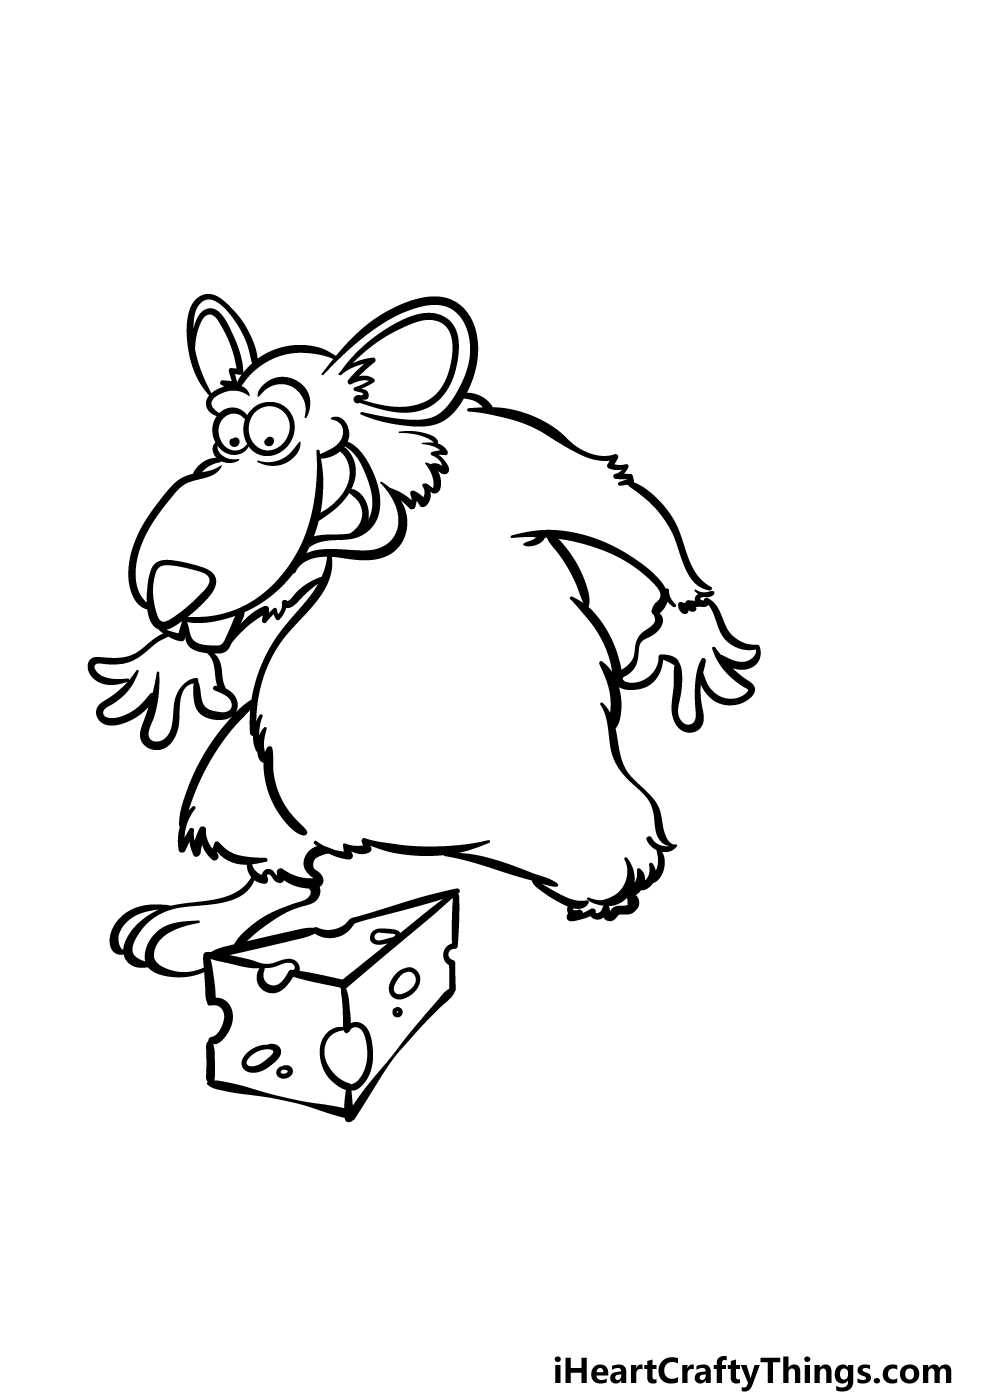
You will be adding quite a lot to your rat drawing in this fourth step!
Using some similar linework to what you used for the rest of the furry body, we will add another arm with a foot at the end of it on the right.
Then, draw some curved lines for the other side of the body and the top of the other leg.
As everyone knows, rats love a chunk of cheese! For that reason, we will also add a triangular wedge of cheese for the rat to look at. Then we will be ready for some final details in the next step!
Step 5 – Add the final details to your rat drawing
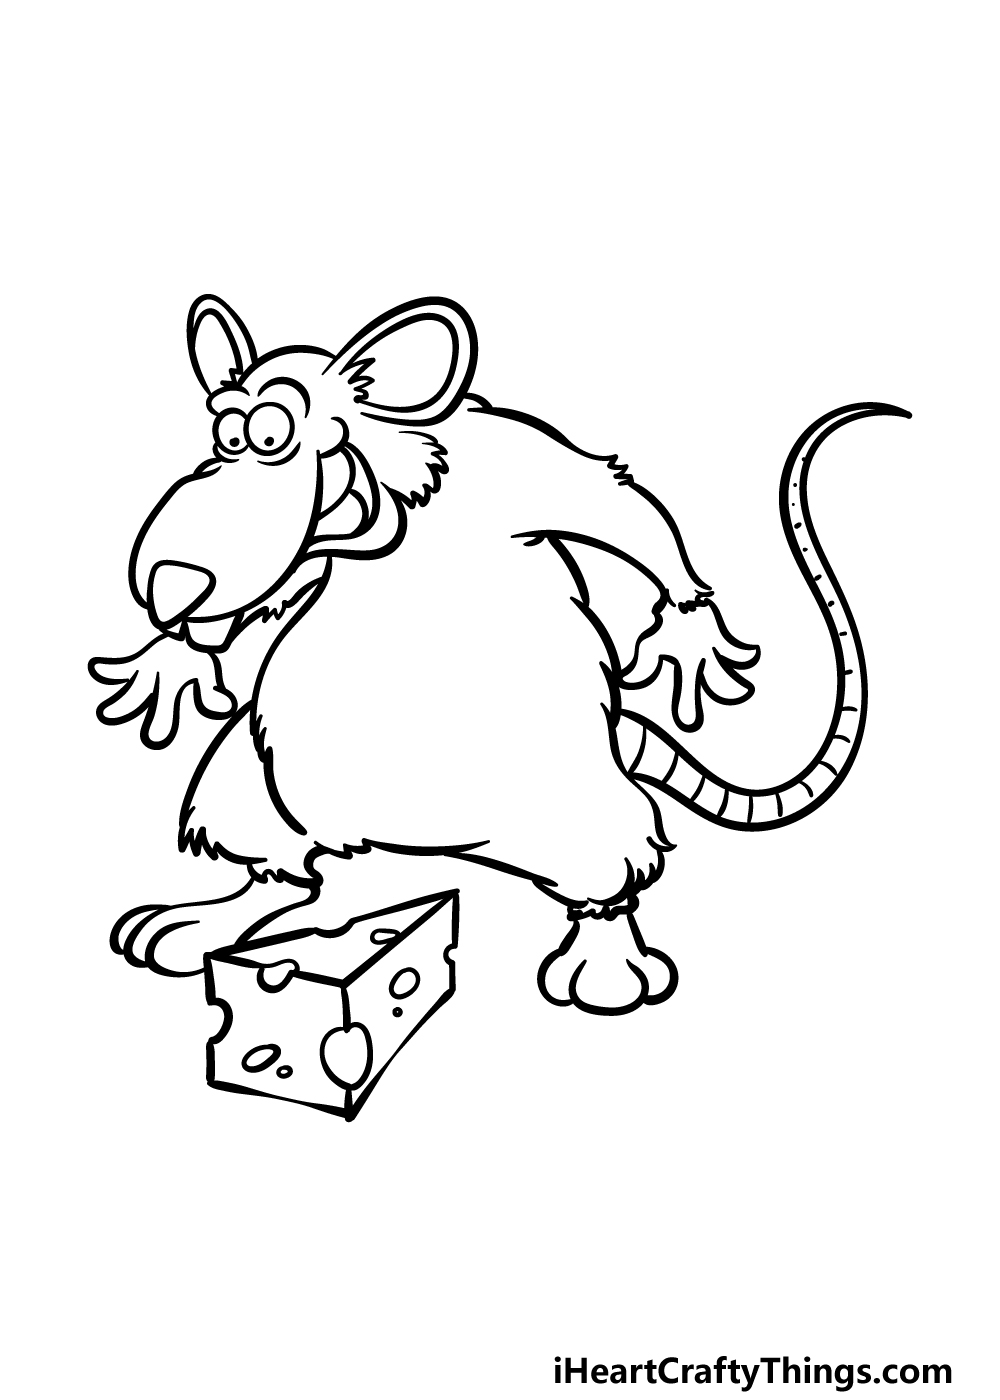
Before we add some colors to this picture, we have just a few final details to add in this step of our guide on how to draw a rat.
First, draw another foot with some rounded toes to the end of the leg on the right. Finally, it wouldn’t be much of a rat without a long leathery tail, so we had better add one now as well!
The outline for the tail will be drawn using some wavy lines, and then you can add some texture by drawing lines across it.
Be sure to add any extra details or background elements, and then we can move on to the final step!
Add Some More Rodents To This Drawing
The final step of this guide on how to draw a rat will focus on bringing some color to your drawing, but first we have a few more ideas for how you can fill the page.
Later on, we will cover some of the background and character additions you could bring to the drawing, but for now, we wanted to keep the focus purely on rodents.
This would be the perfect way for anyone that loves rodents to fill the page! First of all, you could start by adding more rats, as this would be easy to do.
It would be easy because you merely need to follow the guide again and then make some minor changes to the new characters. However, there are so many more rodents that could be added!
One of the most obvious choices would be to add a mouse or two to the image. Mice are generally smaller than rats and have a few differences, so you could look up some pictures to help you.
Of course, there are many other rodents as well. You could go for something cute like a squirrel to hang out with this rat.
There are other animals that some people don’t know are rodents that could be added. Some examples would include a bat or a beaver, as some people are not aware they belong to the rodent family.
These are just a few, and even if you choose some of these, you will have various sub species and variations to further choose from. Now that we have given you some ideas, can you think of any rodents?
We would be interested to see which ones you choose and whether they are common ones or lesser known rodents.
Step 6 – Finish off your rat drawing with color
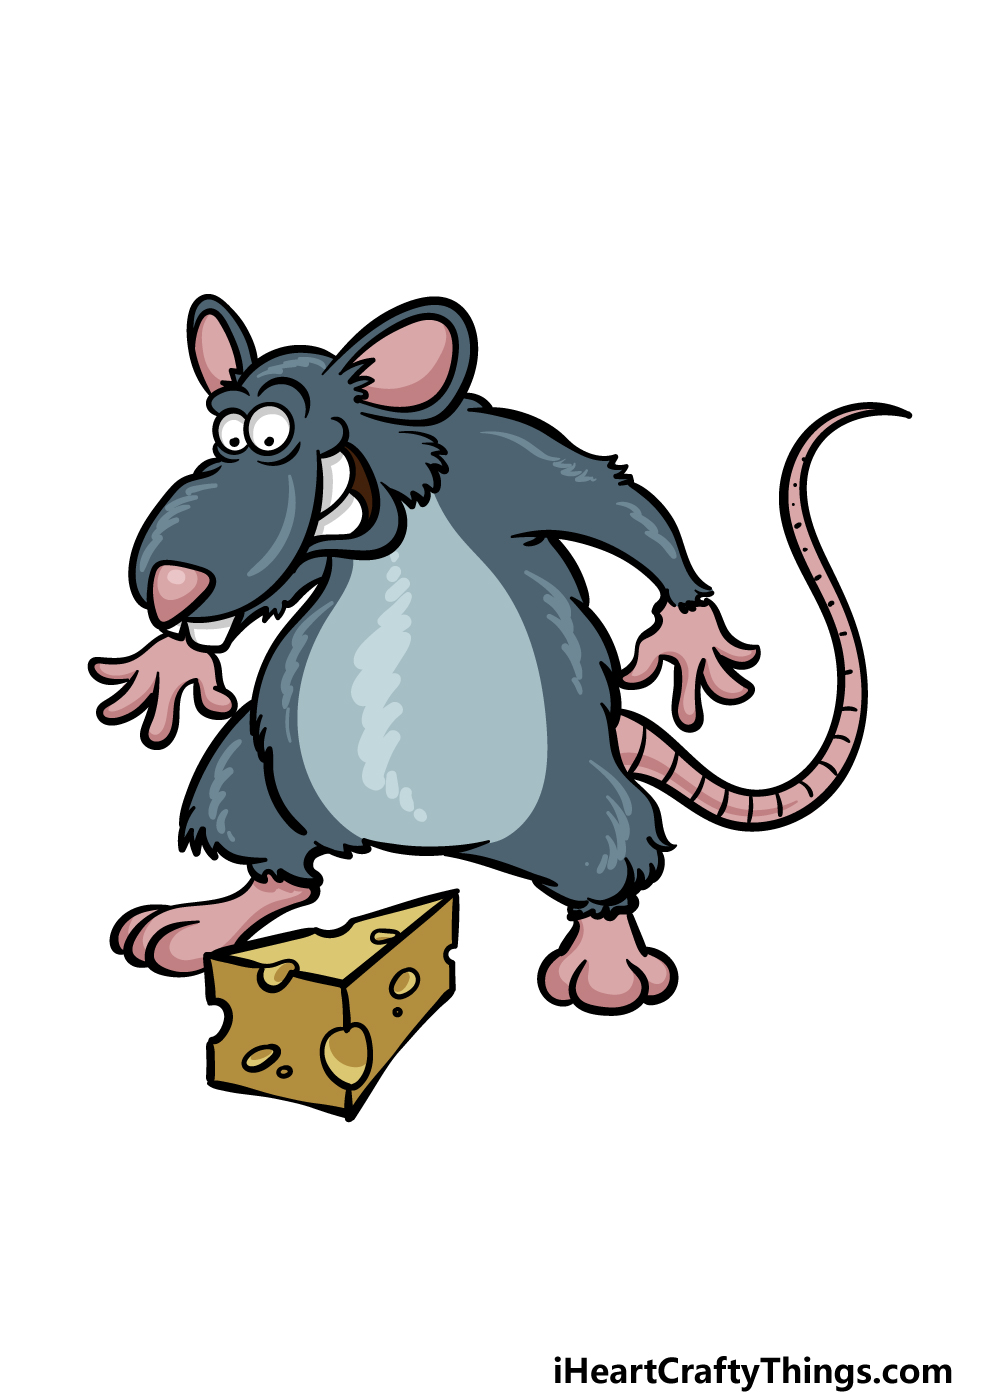
This is the final step of your rat drawing, and in it we shall finish off with some colors.
Rats can come in many different colors, but in this reference image we went with dark shades of greys for most of the body with lighter shades for the belly.
Then, we used some pinks for the feet and tail and finished off with some yellows for the cheese.
Do you think you will go for some similar colors, or will you rather go with some unique color choices of your own? We can’t wait to see what you go for!
4 More Ways To Make Your Rat Drawing Unique
Find out how to make your rat sketch even better with these 4 fun tips!
Everyone knows from cartoons that rats love cheese above all else. That’s why we included some in this rat drawing we created together!
It’s the perfect addition to this drawing, but why not make this rat even luckier? You could add a lot more cheese to the image, and they could all be different kinds for some variety.
If you have some favorite types of cheese then you can have a lot of fun adding some more to your picture!
Cheese isn’t all that rats like, however. It would also be fun to add different kinds of food that this rat has happened upon.
You can really make it seem like it has won the rat lottery! As with the cheese, you could pick some of your favorite foods to add to the scene.
These could include donuts, candy or maybe even a birthday cake! These are just a few ideas, but what else could you add to the scene to make it even better?
Another fun idea for your drawing of a rat would be to add a rat friend for it. If you were to do this, you could follow the steps of the guide and then change up the design a bit.
Maybe they could both be about to tuck into the food stash you’ve been creating for this picture! What other scenarios could you put a couple of rats into?
Once you have added all of your extra touches to your rat sketch, you could finish it all off with a background. This could be something standard like a house setting, but you could go with anything you like!
You may be surprised how creative you can get with your backgrounds. The rat could even be at a rat birthday party for one fun idea!
Once you have added your background, you can then finish it all off by adding some fun colors to everything to rally make your artwork pop.
Your Rat Drawing is Complete!
We mentioned at the beginning of this guide on how to draw a rat that this is a creature that has been a bit misunderstood over time.
We hope that you enjoyed going against this reputation as you worked on this cute cartoon representation of this wily rodent!
We also hope that this guide made it easier than you may have expected to draw such a cool picture.
If you enjoyed working on this guide, you’ll be glad to know that we have many more on our website for you to enjoy.
We will be bringing out many more soon, so be sure to keep checking in to make sure you find your next guide to have fun with!
Will you finish off this drawing by adding your own details, background ideas and color choices? Have fun getting creative with it!
When you have completed this rat drawing, please also share your creation on our Facebook and Pinterest pages so we can see how it turned out!