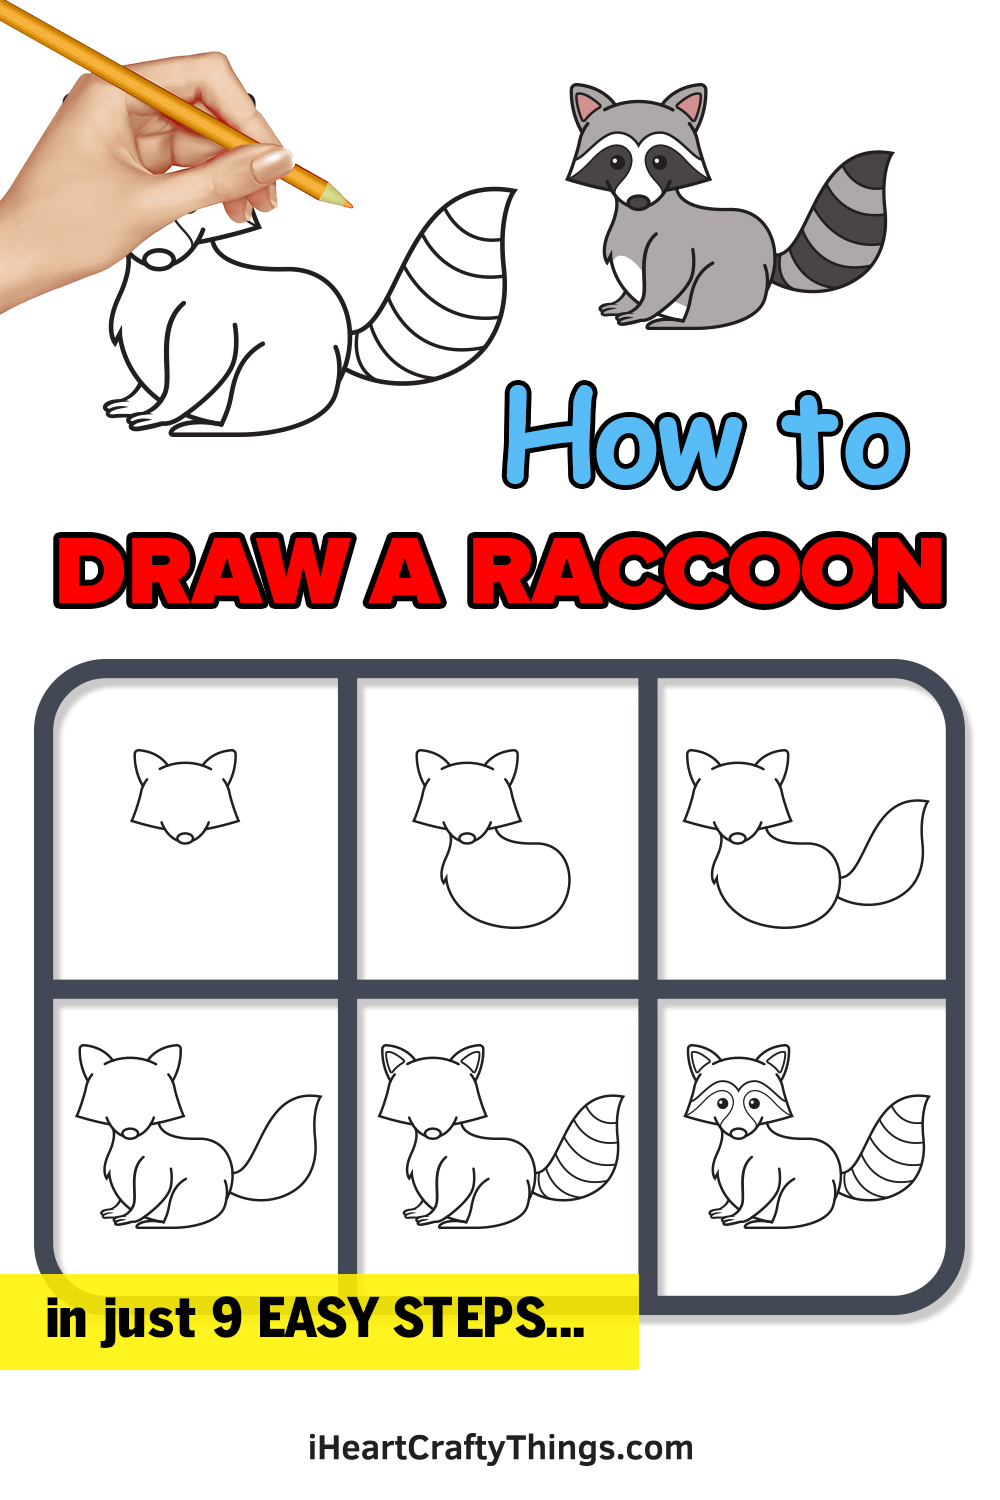
If you want to learn how to draw a raccoon, you’ve come to the right place! This step-by-step guide for kids will help you to recreate these lovable, mischievous creatures.
Even though raccoons can be a nuisance, I still love them. They break into garbage cans and cause havoc sometimes, but they manage to do it with a sort of rebel spirit and charm.
Maybe it’s because of the little bandit mask markings they have on their faces! Regardless, it can be fun to create art based on these lovable rogues, but how can you do it?
It’s a surprising challenge to draw their features and aspects like their striped tails. This guide aims to break it down into smaller steps that anyone can follow.
By the end, it will click and you will see that drawing a cartoon raccoon isn’t as difficult as all that! So let’s begin the process of making your own raccoon pal.
Watch And See How To Make Your Raccoon Drawing
How to Draw a Raccoon – Let’s get started!
Step 1
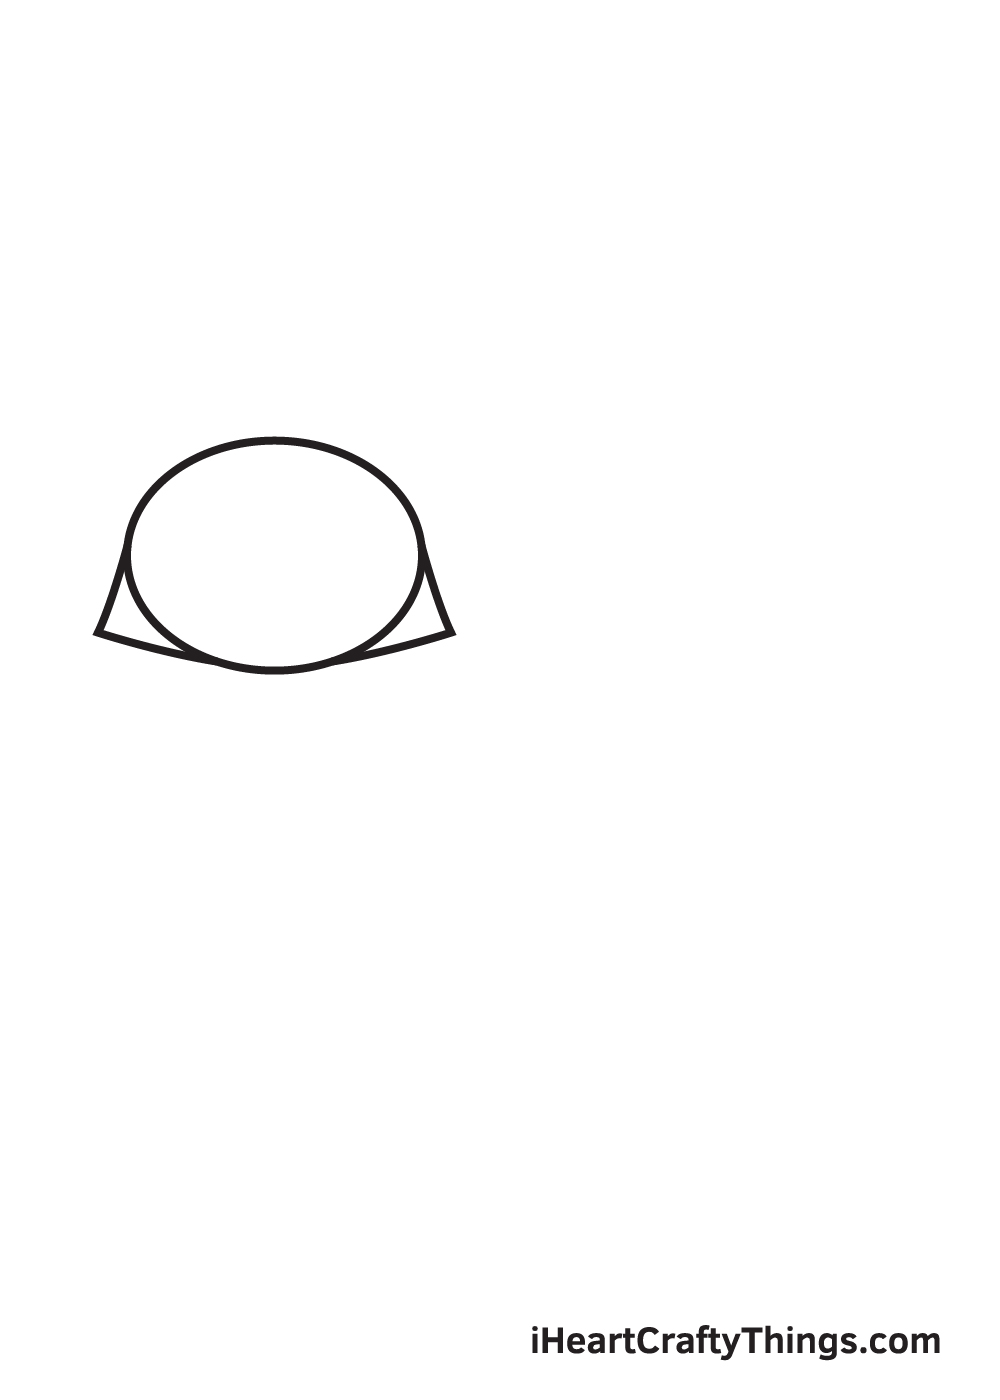
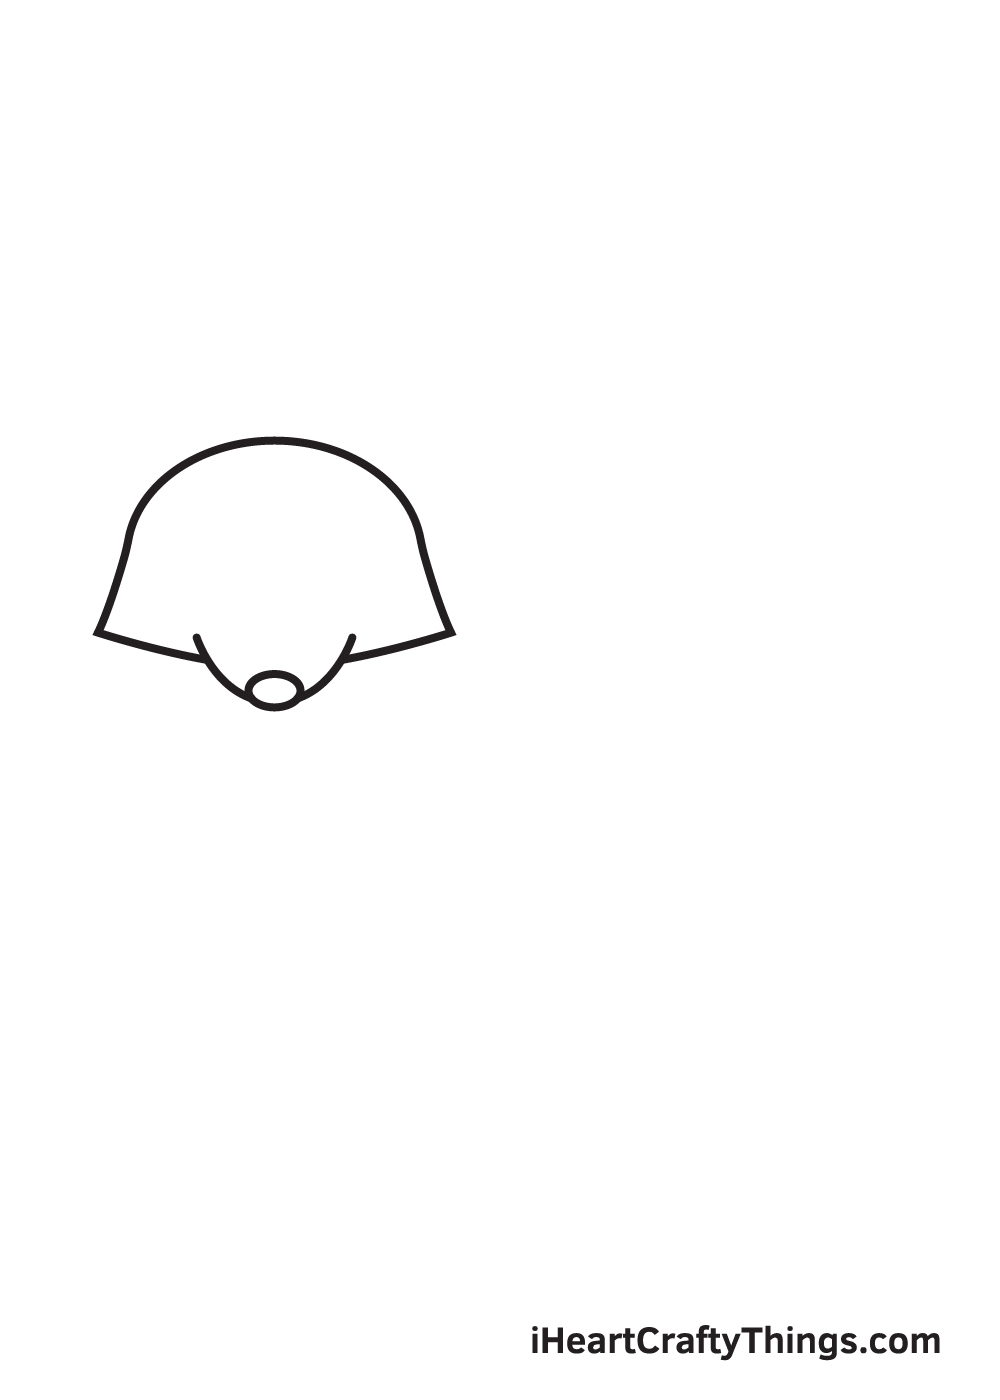
Begin by drawing a sideways oval shape on the upper left side of your paper. This forms the shape of the raccoon’s head.
Afterwards, draw an angled figure on both sides of the lower part of the head. This creates the distinct furry cheeks of a raccoon!
When drawing an outline or a rough sketch, it’s important to draw with a light grip and gentle strokes. This ensures that you can easily erase some parts of the outline you may no longer need later on.
Step 2 – Create an Outline of the Raccoon’s Head
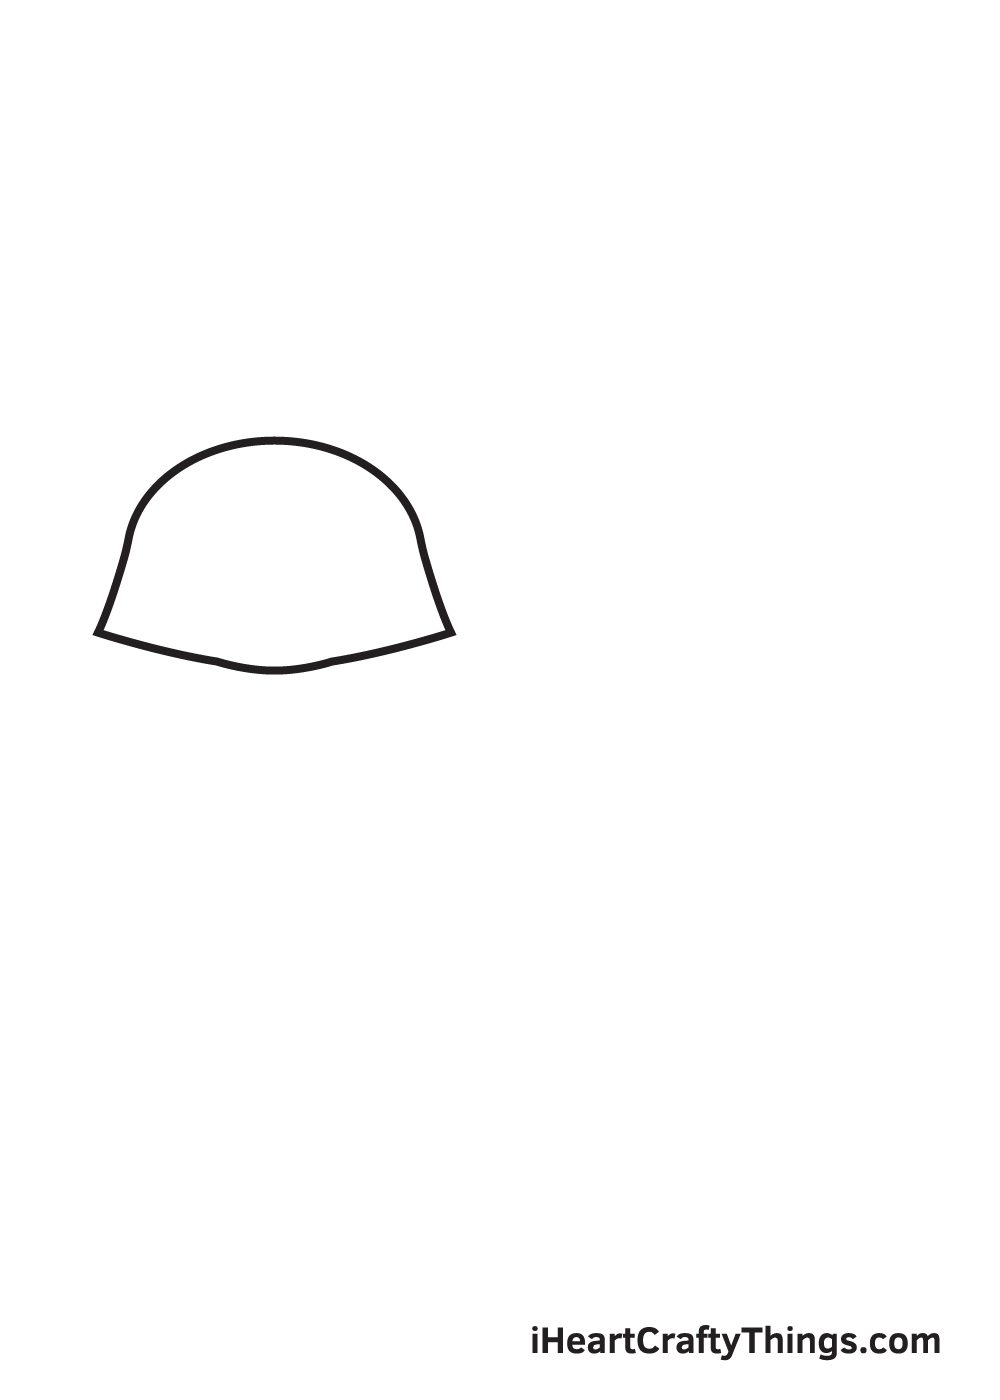
Erase the bottom part of the oval shape that overlaps within the figure. This refines the shape of the raccoon’s head.
After finishing this step, the outline of the raccoon’s head should now be polished up. Thus, it should look more refined and visible.
Step 3 – Afterwards, Draw the Snout of the Raccoon
Draw a curved line on the lower middle part of the head of the raccoon. Then, draw a small sideways oval shape at the bottom of the curve. This forms the snout and the nose of the raccoon.
Make sure that the snout is slightly pointed towards the end—it’s one of the raccoon’s most distinct features!
Don’t forget to remove the part of the outline that overlaps with the snout!
Step 4 – Next, Draw the Raccoon’s Pair of Ears
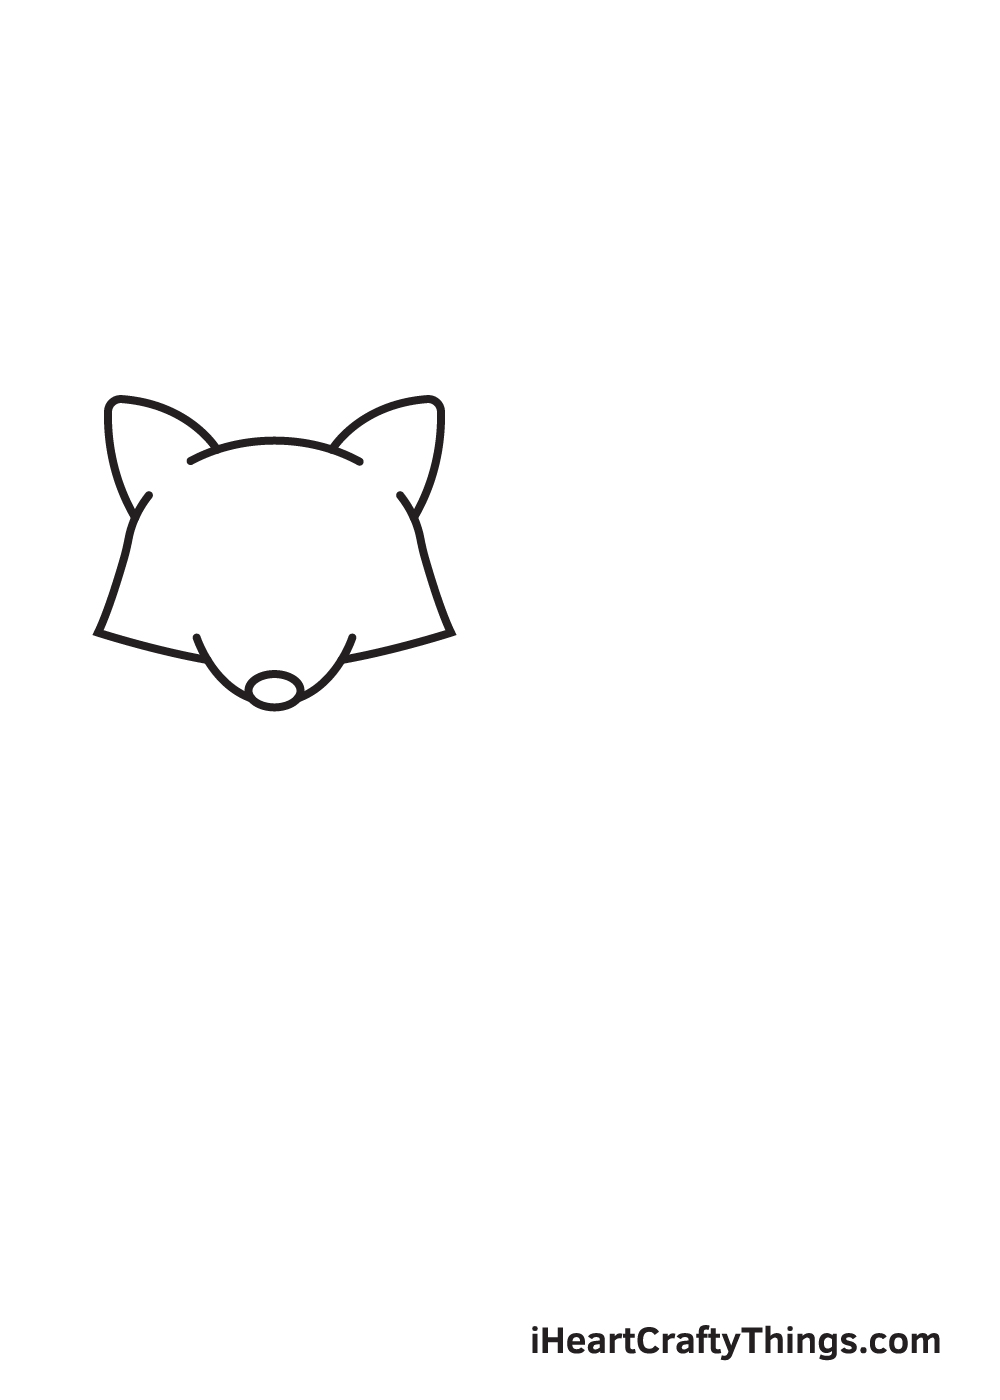
Draw two inverted V-shaped lines on both sides at the top of the raccoon’s head. This forms the pair of ears of the raccoon.
Similar to the previous steps, make sure to remove the lines that overlap within any part of the raccoon’s body. This helps keep your drawing neat and tidy, and most importantly, refined.
Step 5 – Then, Outline the Body of the Raccoon
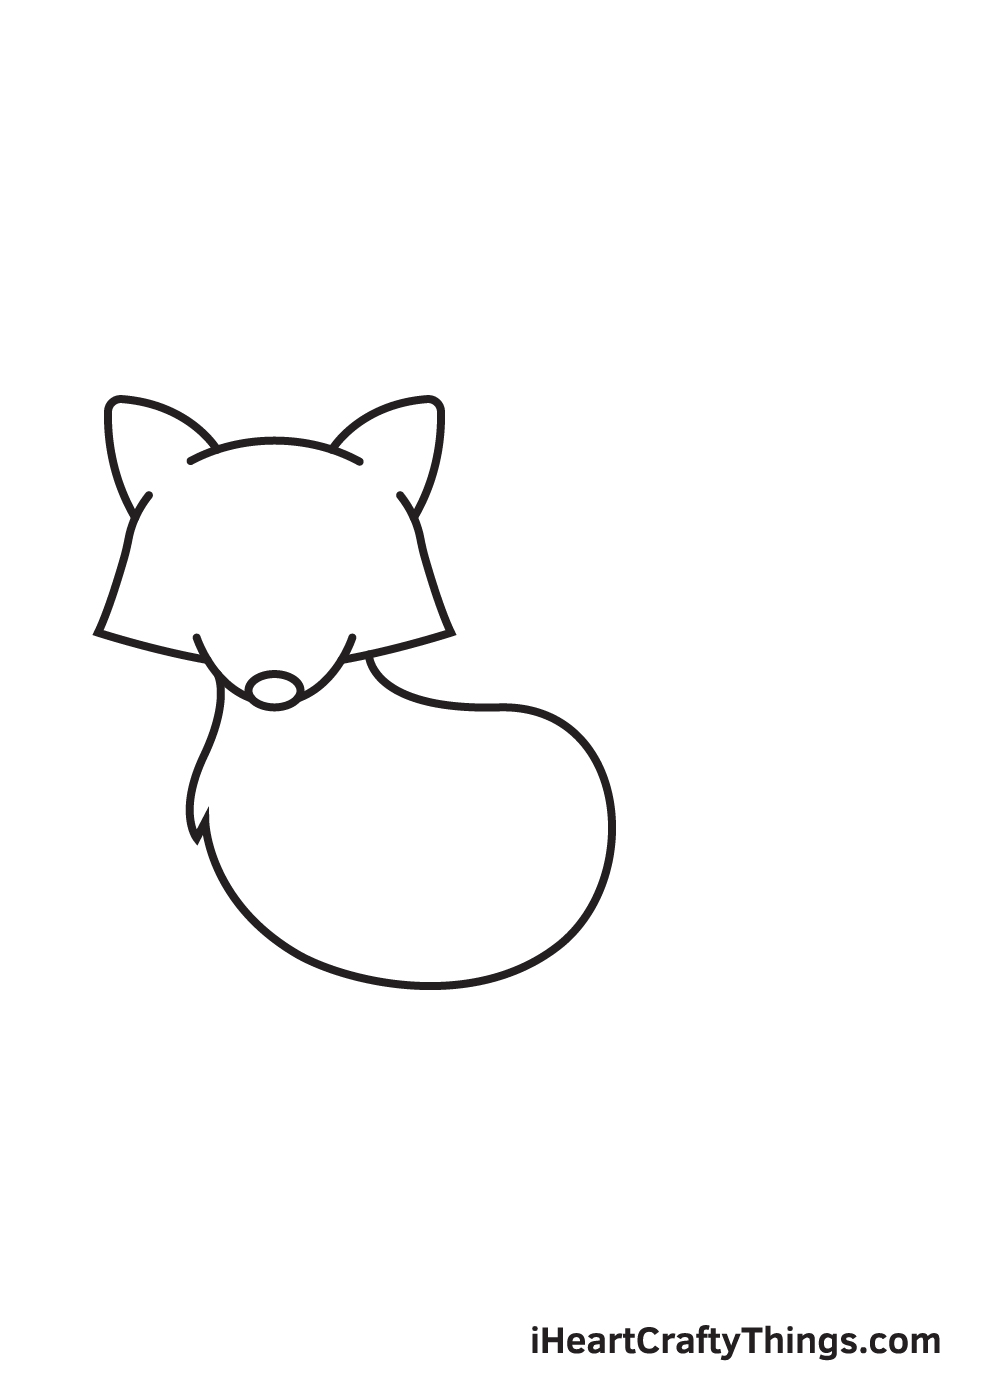
After creating the head of the raccoon, it’s time to structure its body. Proceed by drawing a round figure right underneath the raccoon’s head.
Make sure to draw some pointed clumps of fur on the surface of the body to add texture, making it appear furry and realistic!
Step 6 – Now, Draw the Fluffy Tail of the Raccoon
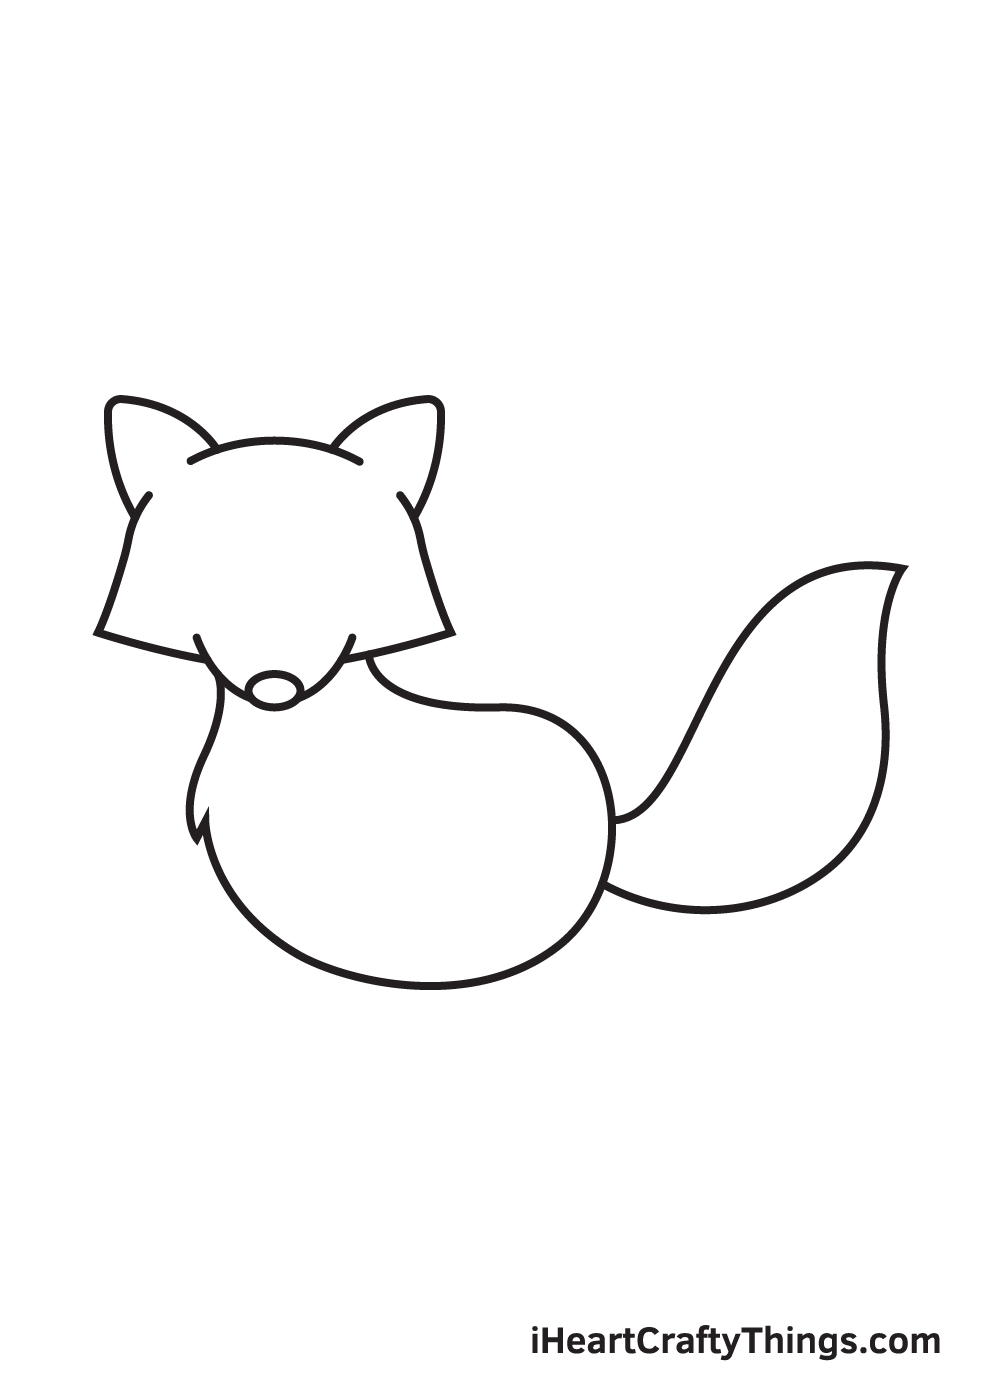
Draw an elongated, pointed figure connected to the bottom back of the raccoon. This forms the raccoon’s tail.
Raccoons typically have thick, fluffy tails, so make sure to keep that in mind when drawing the tail!
Step 7 – Draw All Four Limbs of the Raccoon
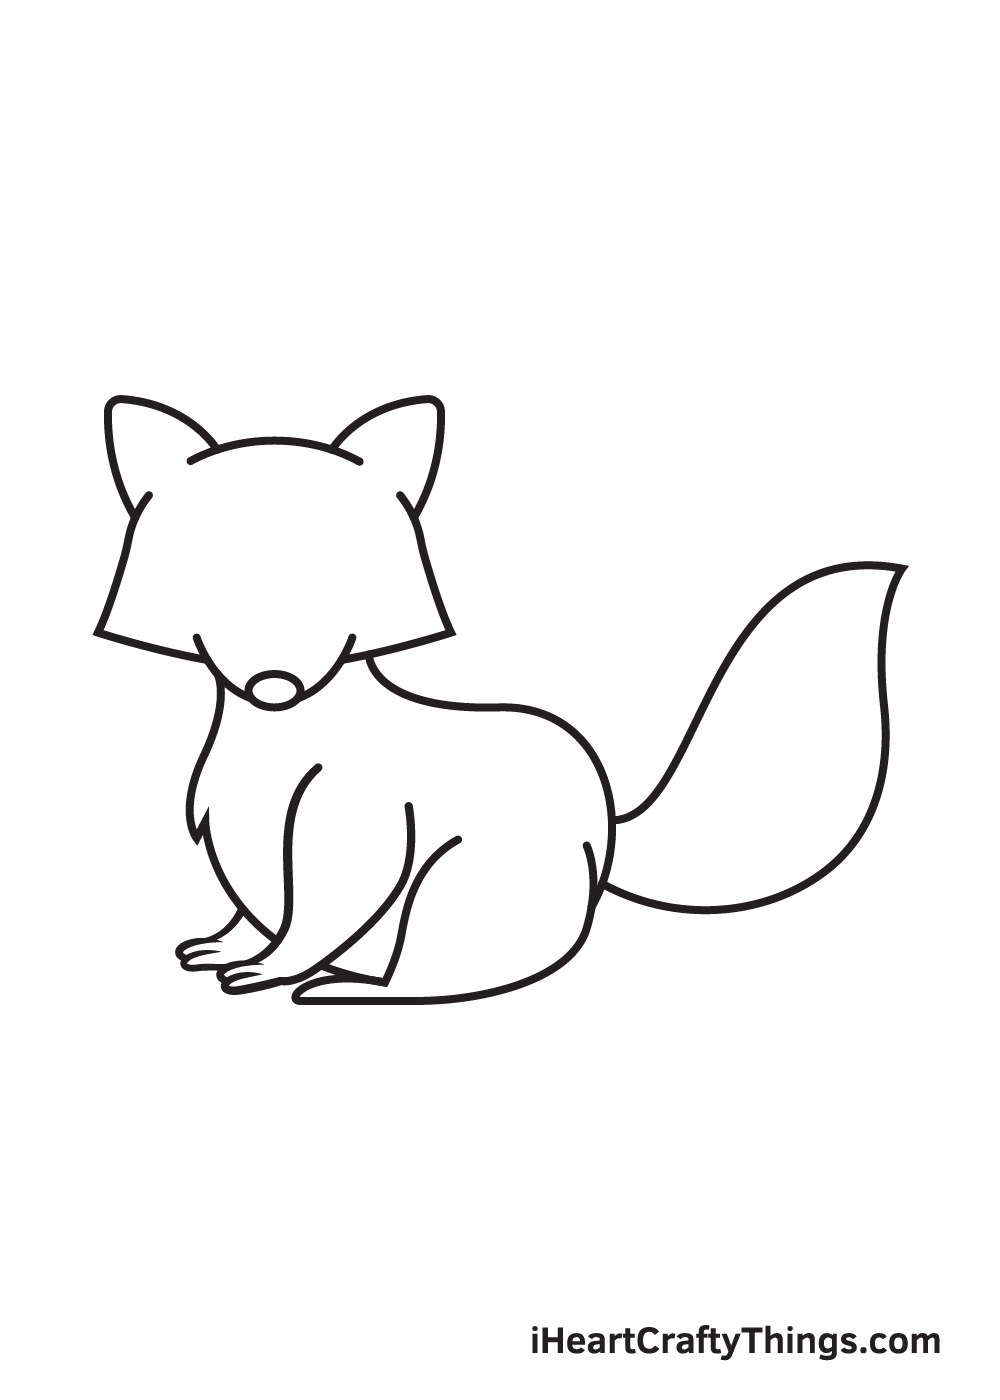
Draw a curved elongated figure with claws on the right side of the raccoon’s chest to form its right front leg. Then, draw the visible claws of the left front leg on the opposite side.
Afterwards, draw a wider curved figure with a foot to structure the right hind leg. Bear in mind that the hind leg of the raccoon should be a bit thicker than its front legs.
Since the raccoon is facing towards the left side, its left leg isn’t visible, as seen in the illustration above.
Step 8 – Add Patterns on the Raccoon’s Ears and Tail
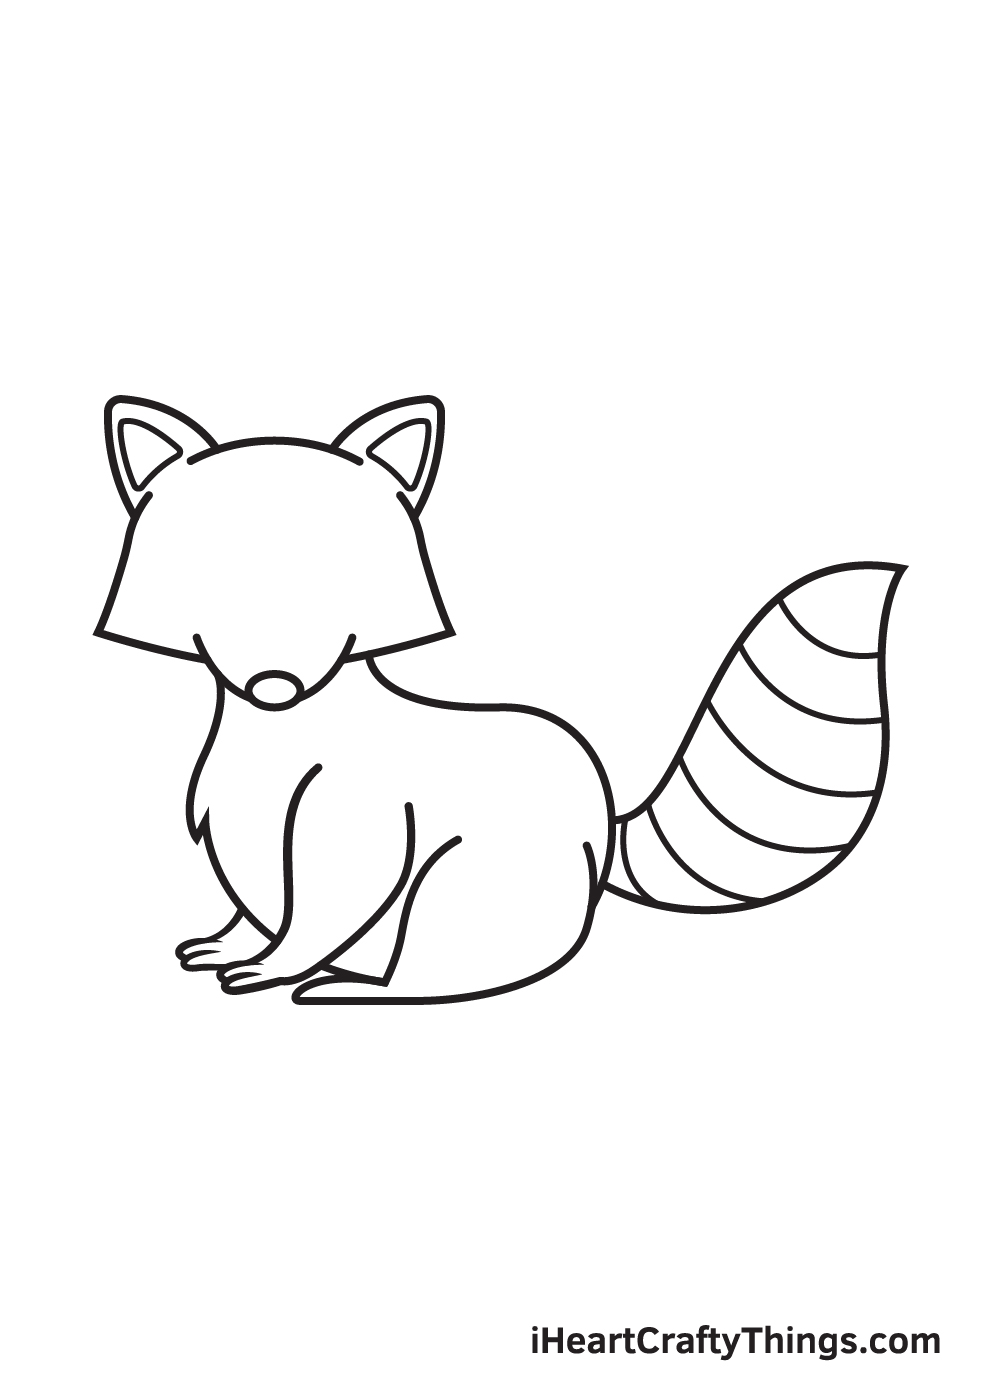
Raccoons have distinct patterns on their tail, so that’s exactly what we’ll be working on in this step.
Continue by drawing multiple parallel lines across the entire tail. When drawn correctly, it should create a “stripes” pattern on the tail of the raccoon.
Now, draw a triangle shape inside each ear of the raccoon. This creates the appearance of inside or inner ears.
Step 9 – Now, Draw the Raccoon’s Facial Features
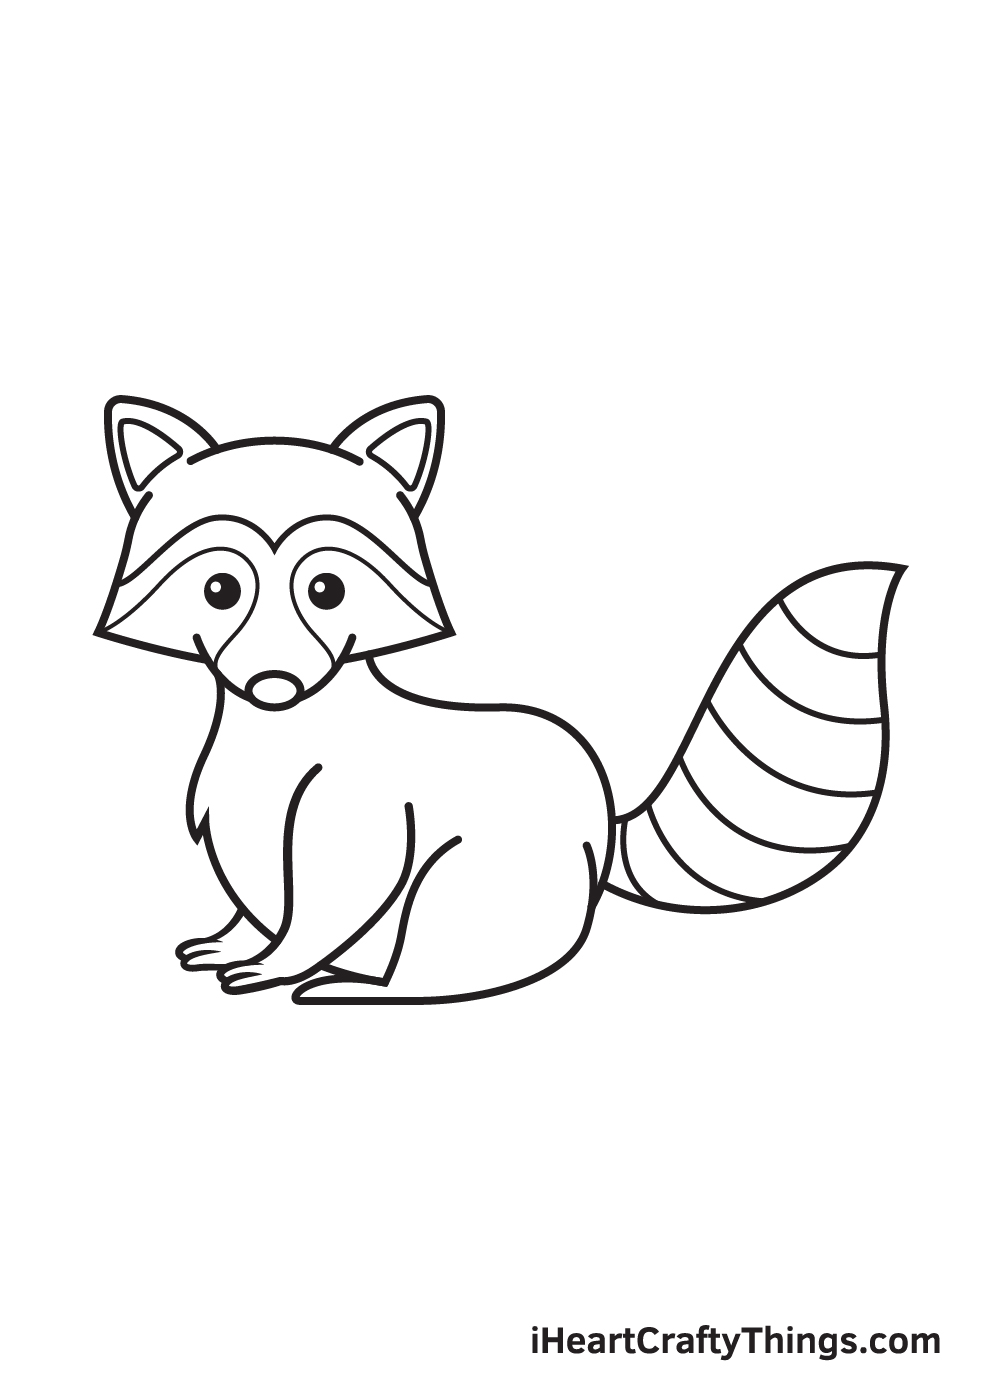
Draw two small circles with a smaller circle inside on the upper portion of the raccoon’s face. This forms the pair of eyes of the raccoon.
Afterwards, shade the entire eyes while leaving out the tiny circles inside unshaded to create a dramatic “sparkling eyes” effect.
After drawing the raccoon’s facial features, we’ll move on to the distinct patterns on its face. Proceed by drawing two curved lines that connect in the middle on the forehead of the raccoon.
Then, draw two curved figures surrounding each eye. This is usually the part of the raccoon with a darker fur color.
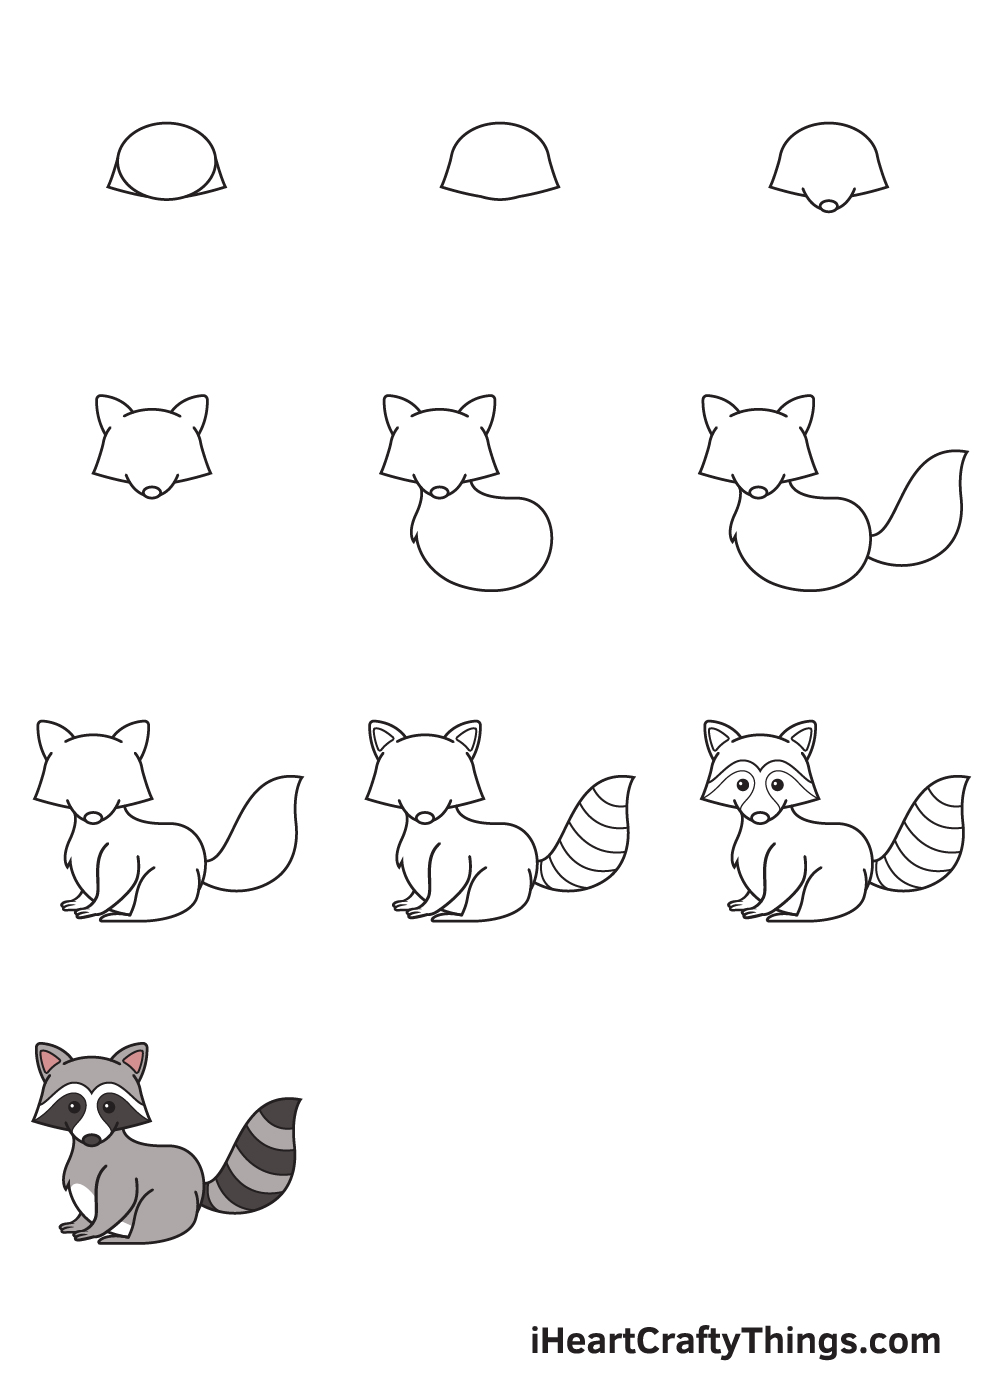
There you have it—you have successfully drawn a raccoon! Now, it’s finally time for the part we’ve all been waiting for, which is coloring the raccoon!
Depending on its place of origin, the fur of racoons varies from grey to blackish with brown overtones to silver.
You can opt to color the raccoon using its original colors or use a unique set of colors. Either way, we’re sure the colors will turn out beautifully!
The colors of your drawing is entirely up to you! After all, it’s your work of art! Have fun playing with colors!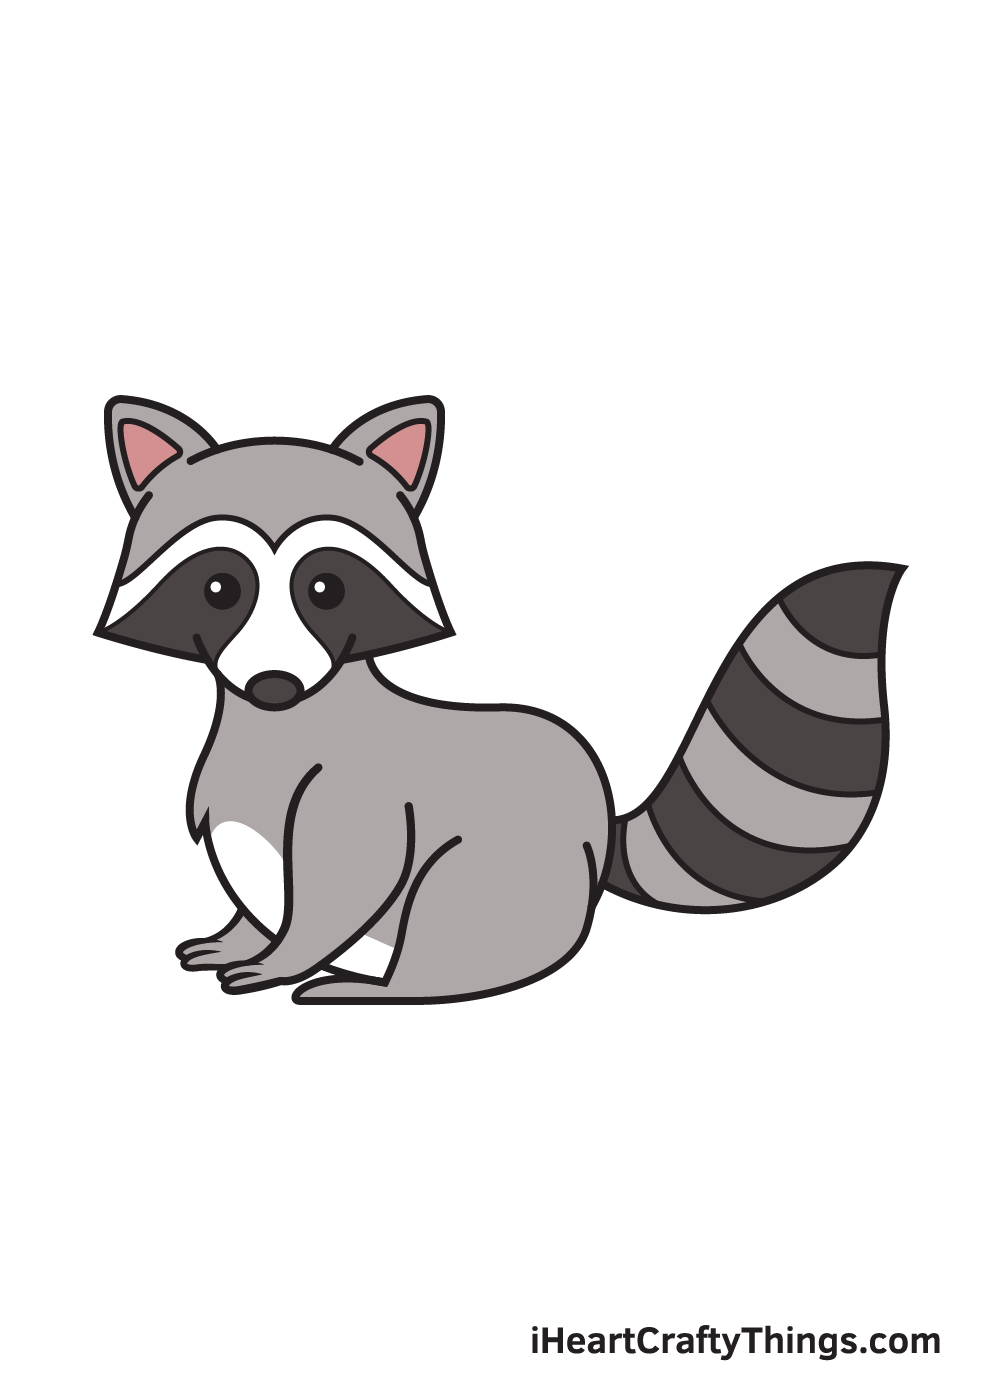
Bonus: Make A Fun Comic Or Story Starring This Racoon Drawing!
Raccoons have a lot of character, and there is a reason why so many cartoon characters are based on this species. Because of this, it could be fun to make a story around this raccoon drawing!
There are a few ways that you could do this, and you could make it as simple or as involved as you like depending on how confident you feel with creating a story.
One way we think would be a great way to create a story would be to make a comic featuring this character. Using a ruler, you could start by drawing various squares and rectangles filling the page.
Then, use a pencil to sketch out the story. It could be something that you could imagine a raccoon doing, such as going on a hunt for the best trash in the neighborhood.
That would be a simple idea where you could still get some funny situations and add other animal characters. But, if you have something more elaborate in mind then that could work too!
If you would prefer to keep it to one panel and add some text, then that would work too. If you want to add other characters, then you could look up some pictures online and then convert them to the same style.
Maybe you could add a cat, other raccoons or even a human character. It would be fun to see what approach you would take to a story, whether it would be something fun and simple or complex and elaborate.
Whatever you choose will be great in its own way, so be sure to share what you decide to do! Then, we have a few more tips for making this raccoon drawing even better coming up, so let’s have a look at those.
Do this to take your raccoon drawing to the next level
Make your raccoon sketch even better with the help of these 4 fun tips!
This drawing of a raccoon that we created is drawn in a fun cartoon style. We love the way that it looks, but you may want to create a more realistic, detailed raccoon.
If that sounds like something you would like to try, then you could look up some photos of raccoons online. Try to find photos that have the raccoon posed similarly to our one.
Then, adapt the steps of this guide with the photo guiding you, and then you will have a more detailed raccoon artwork!
Whether you decide to make the raccoon more realistic or keep it as it is, you could also add another raccoon pal for it to hang out with!
If you want to stick to the style of the raccoon we made, then simply follow the steps again. You could then change certain details such as the face or pose to make the new raccoon unique.
How many raccoons would you like to add to this image?
You could also add other animals that you love to your raccoon drawing. These could be similarly small mammals and rodents such as squirrels or badgers.
Or you may want to add something bigger like a wolf or a horse. These are just a few examples, and you could add any other animals that you like.
That way, your artwork would look even more dynamic than it already is! What other animals would you like to add?
Finally, you could add a background to finish off your raccoon sketch nicely. Raccoons can be found in many different environments, from forests to backyards and anything in between.
You could also add other objects and details that would be appropriate for a raccoon. For example, raccoons are well known for rummaging through trash.
You could draw a trash can that this raccoon is about to sample, for one idea. What kinds of settings can you think of for this raccoon?
Your Raccoon Drawing is Complete!
We hope you had a good time drawing a raccoon with this step-by-step drawing tutorial! Now that you can draw a raccoon, why not try drawing a raccoon clinging on a branch of a tree next time?
Check out our tree drawing tutorial from our catalog if you’re interested!
Drawing a raccoon is an achievement, so you should feel proud of yourself for completing a masterpiece!
Don’t forget to share your artwork on our Facebook page and on Pinterest! You’ve worked hard for it, so it’s absolutely worth sharing!
We’re excited to see your charming raccoon drawing!
Here Is A Fun Raccoon Drawing To Inspire You!

Raccoons are such adorable little critters, as they have a rather mischievous reputation. This fun raccoon drawing for kids was done by our artist Amanda to help you with your own artwork.
She has made this such a cute depiction of a raccoon, and it looks so happy and friendly! It’s a really fun design to work on, as it’s full of detail but not too complicated.
When you have mastered drawing the raccoon, you will also see that there are some amazing background details as well. This helps to make the raccoon seem like part of a living world.
When you make your own drawing, you could change the background if you like, and you could even add some props and objects to create a fun little scene out of it.
What kind of setting could you create?