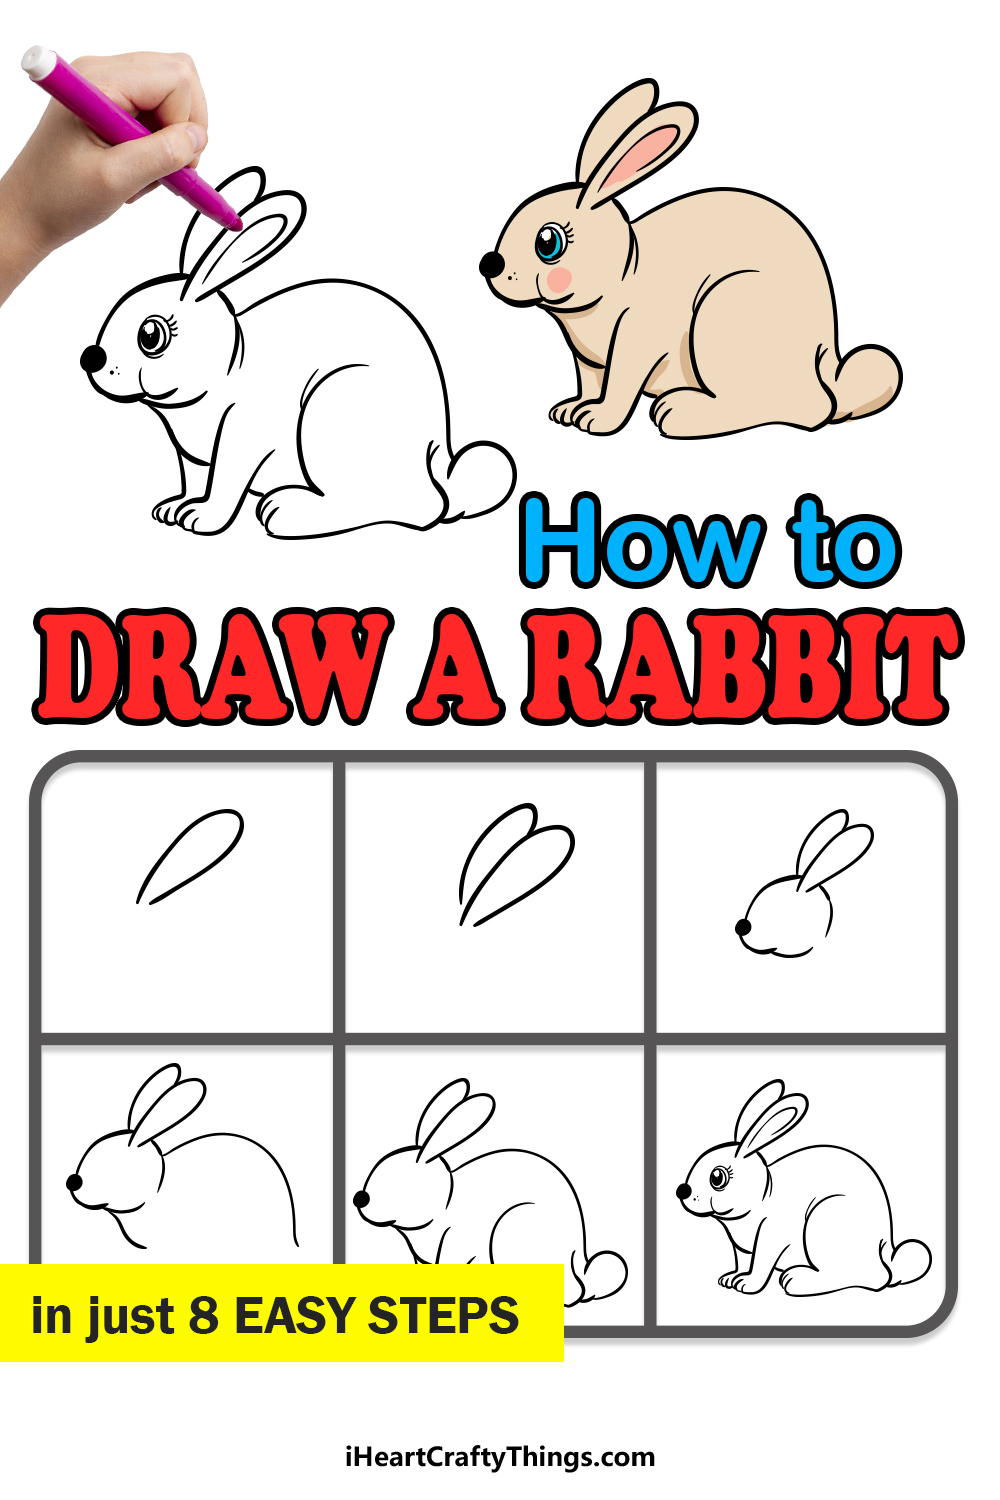
This step-by-step guide on how to draw a rabbit for kids is perfect for beginners and experienced artists alike! Anyone can follow along and create their own rabbit pal.
Rabbits are such cute critters, and people around the world love them for their fluffy, unique appearance and quirky personalities. This leads a lot of people to want to learn how to draw this little creature only to find that it’s not as easy as expected.
I have created this guide for all rabbit lovers who want to recreate this adorable little animal. This design is detailed yet simple at the same time, so all ages can appreciate the steps to recreate it.
Then, you could even add a few of your own details such as a carrot for the rabbit, a rabbit hole or perhaps even some more rabbits for it to be friends with.
So let’s begin the guide together and see how it’s done!
Watch And Learn How To Make A Cute Rabbit Drawing!
How to Draw A Rabbit – Let’s get Started!
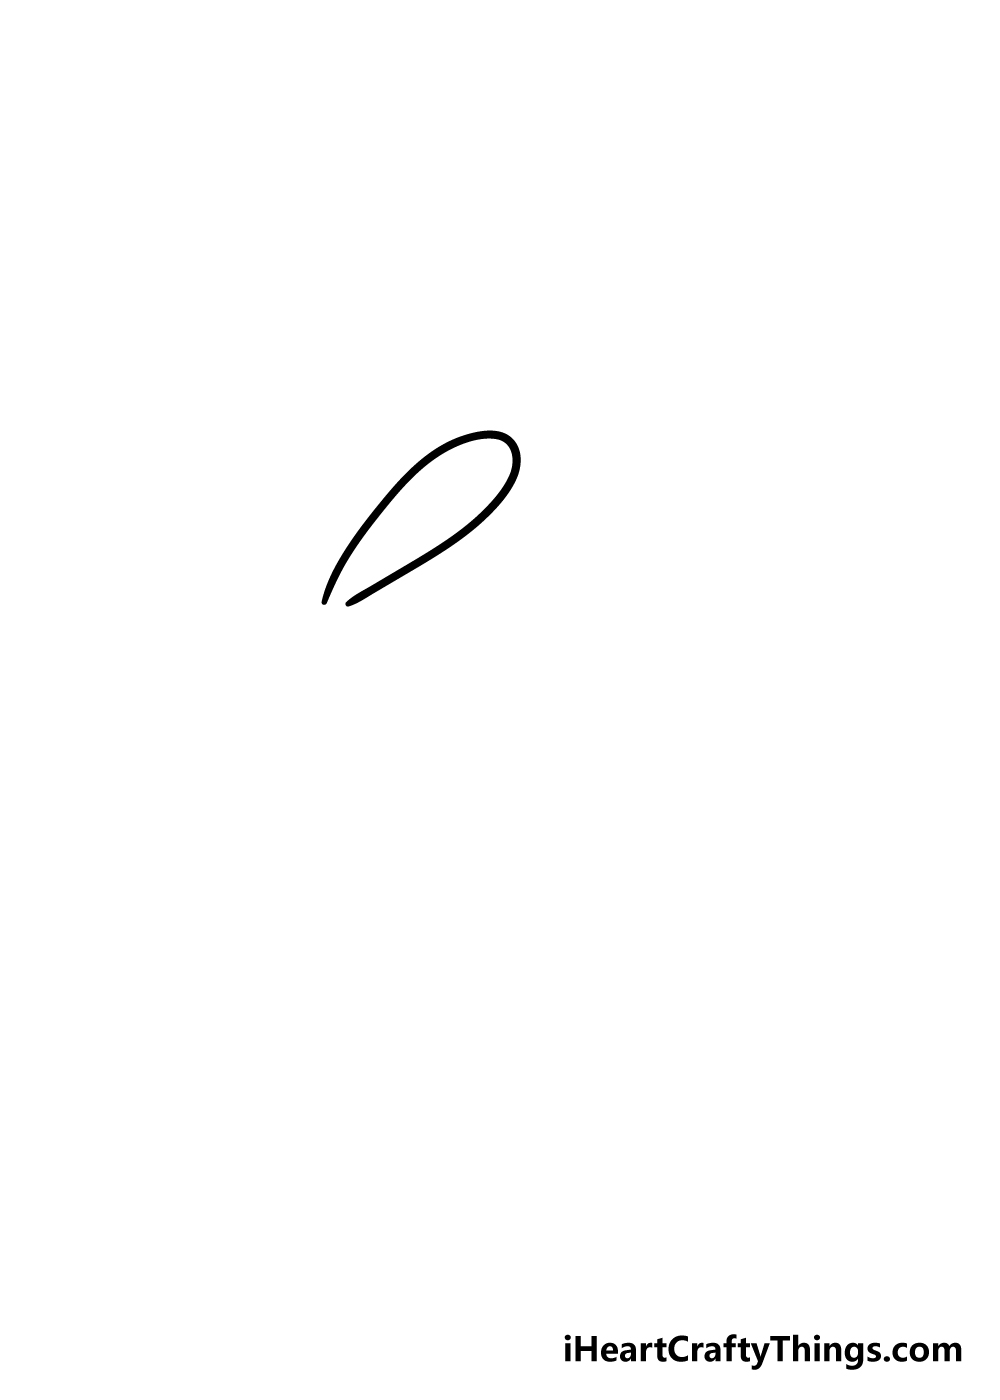
Step 1
When you think of a rabbit, what’s the first thing that comes to mind?
I would bet that one of the first things would be big, floppy ears, and that’s what we’ll start with for this first step of our guide on how to draw a rabbit.
To start, simply draw a line that curves in on itself as the one in the reference picture does. That’s all there is to it for this step, so now we can move on to step 2.
Step 2 – Next, draw the other ear
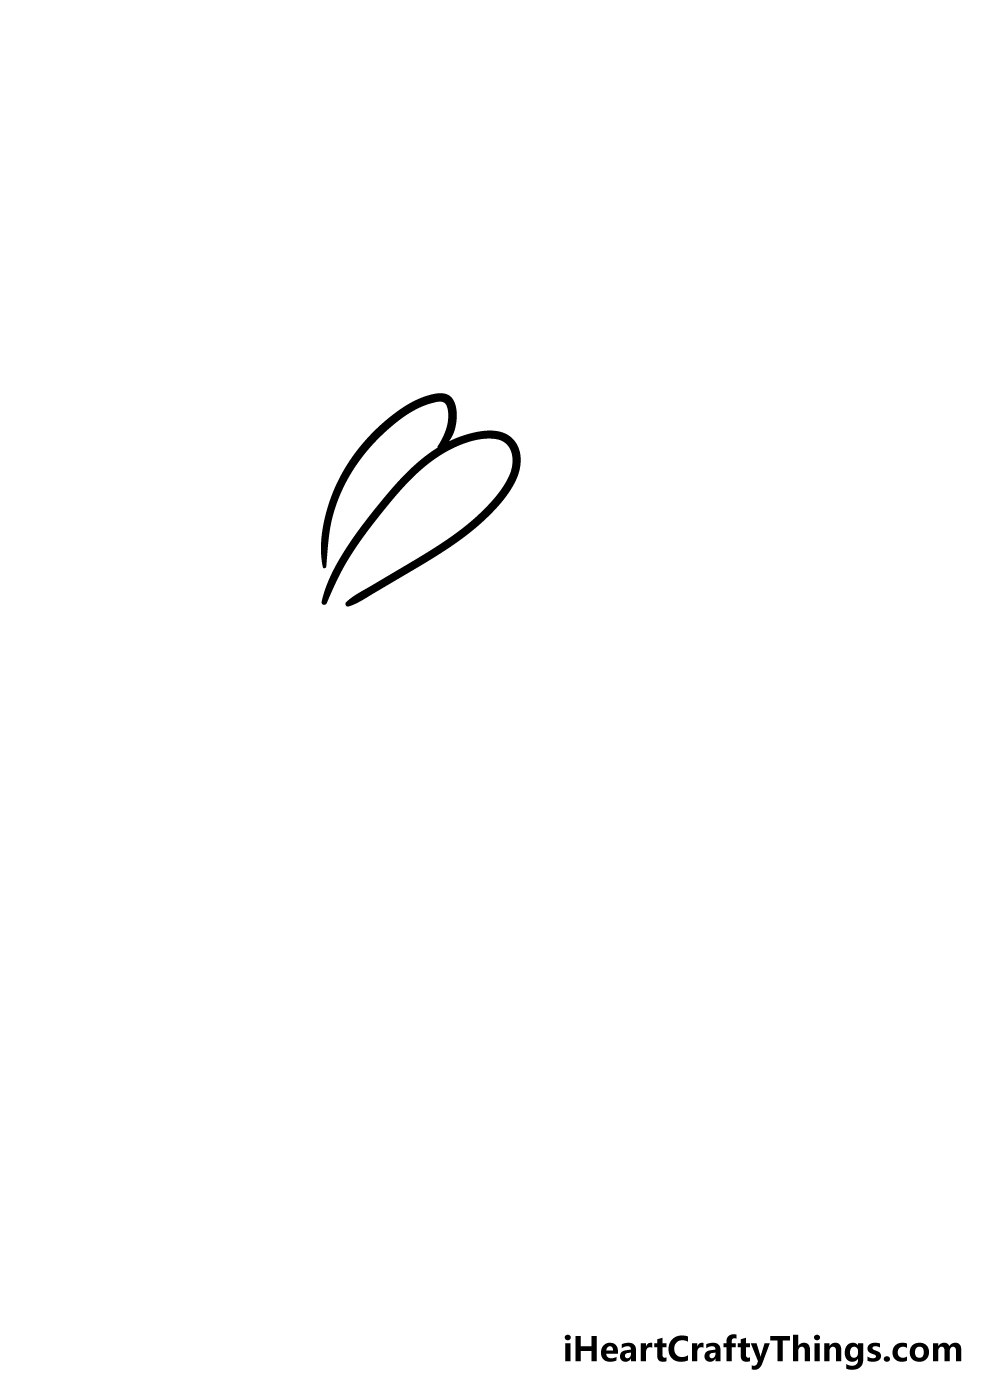
Your rabbit needs two ears to be complete, so we shall add another one in this part of your rabbit drawing.
Simply draw another curved line on top of the previous one to have both ears ready for the rest of the drawing.
Step 3 – Now, add a head for your rabbit
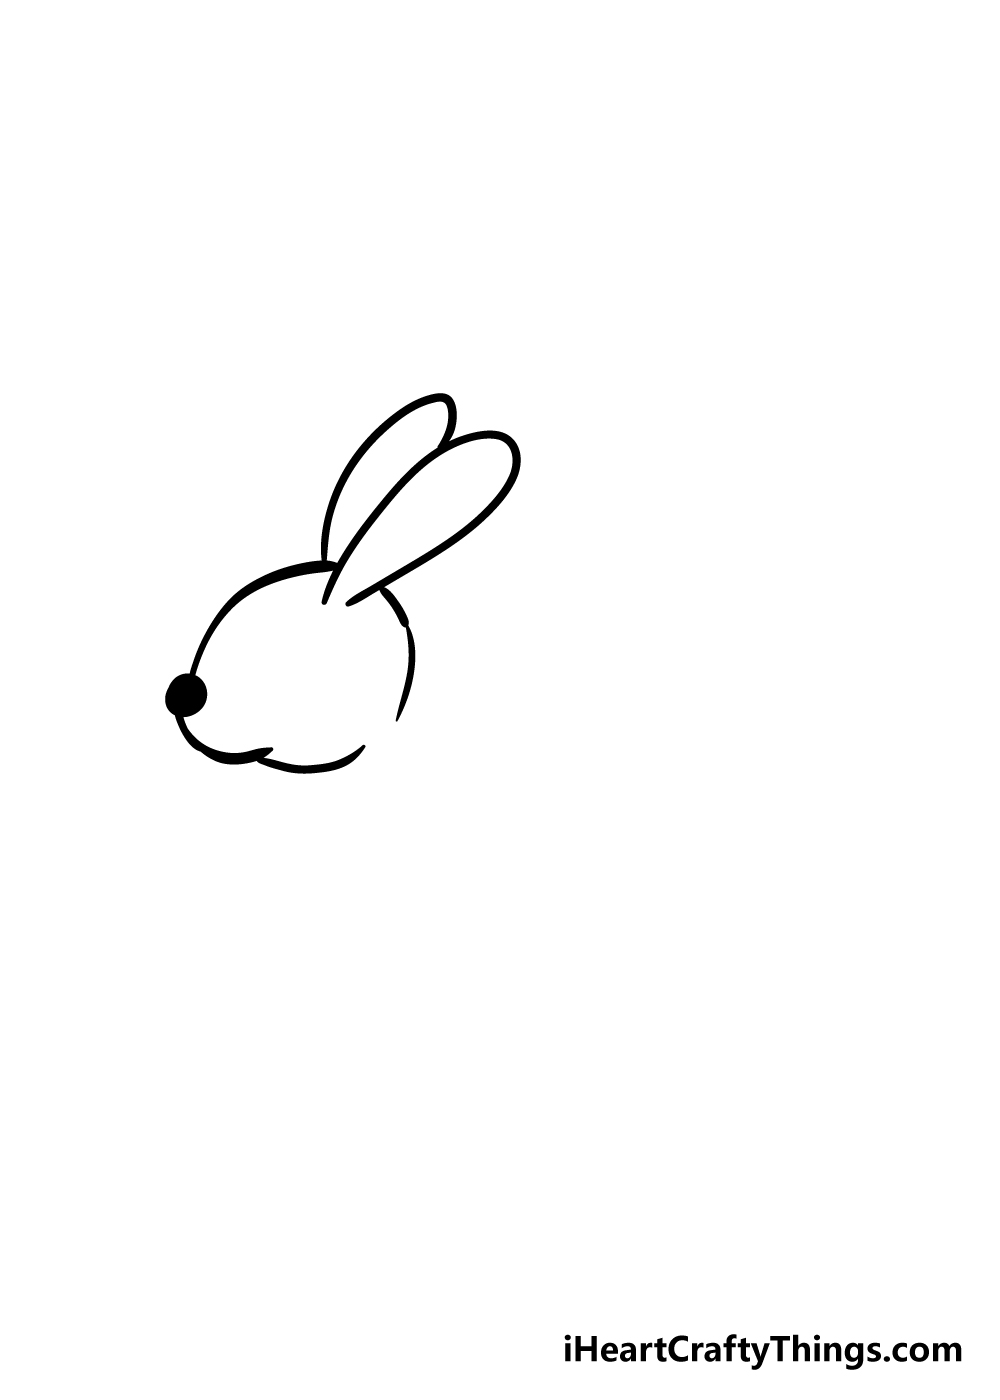
Step 3 of this guide on how to draw a rabbit will be dealing with adding a head outline for your rabbit.
The rabbit’s head is quite rounded, and has a small section jutting out a tiny bit at the front to form the mouth of your rabbit.
Then, you can add a nose onto the face using a simple black dot like the one in the reference picture.
Step 4 – Draw a body for your rabbit
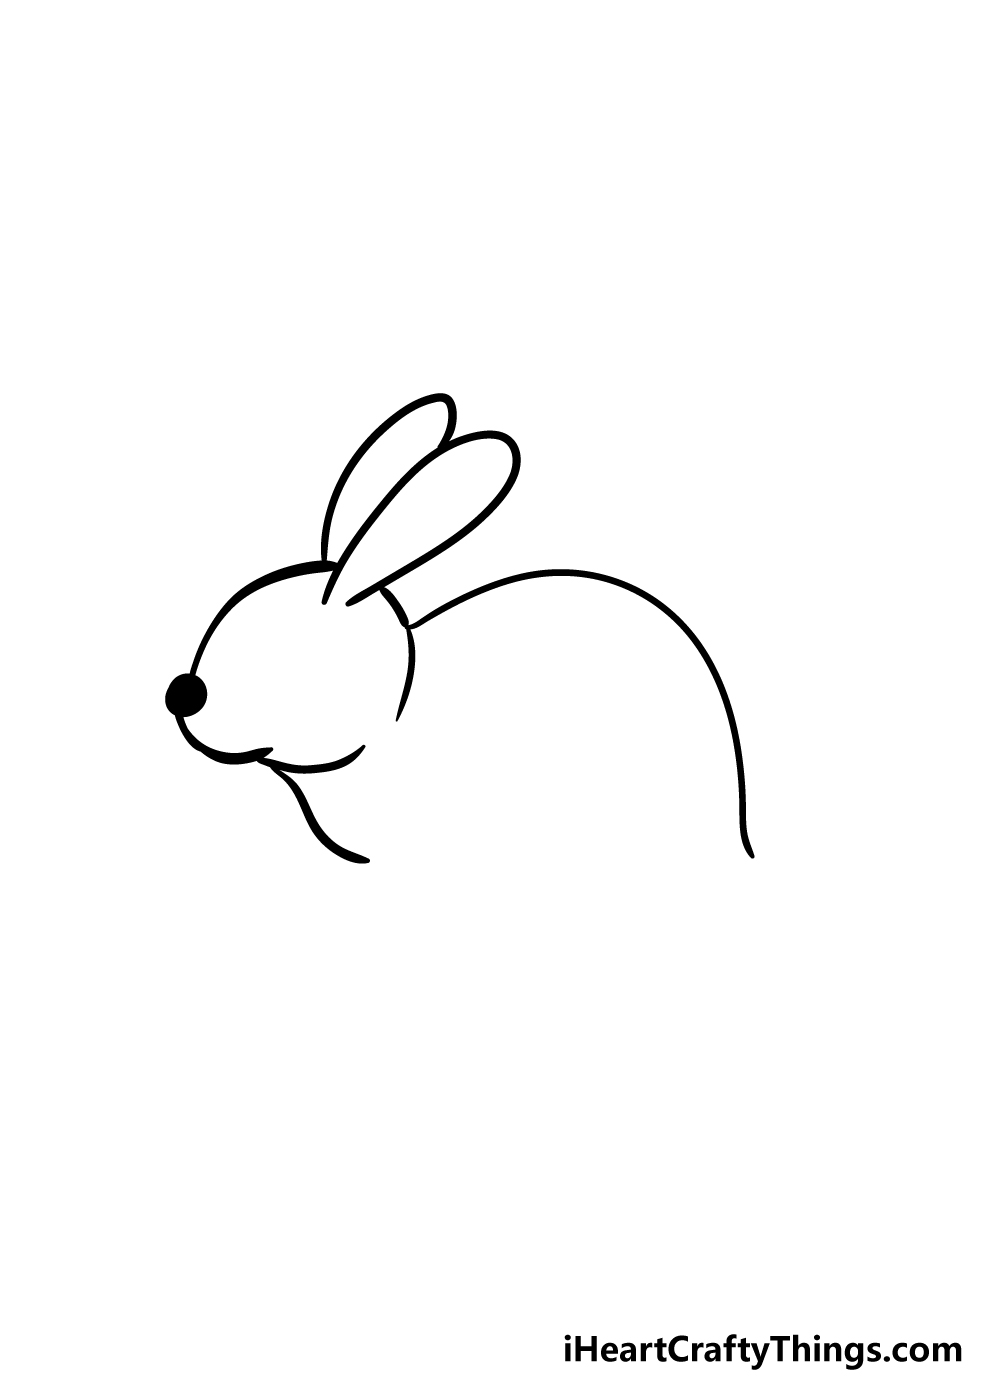
We shall start to draw a body for your rabbit drawing in this fourth step. First, draw a short, curved line underneath the head of your rabbit to make a little chest.
Then, you can extend a line from the back of the head to make the back of your rabbit.
As you can see in the final images, the rabbit will be sitting hunched over, so this line will be rather curved to give that appearance.
Step 5 – Next, draw some limbs for your rabbit

Your rabbit is really starting to take shape now! This step in our guide on how to draw a rabbit will show you how to draw some legs for your rabbit.
First of all, draw in a smaller, very slightly curved leg at the front like the one in our reference image.
The back leg will be much larger and rounder, so use some curved lines to draw the hip before adding a big, floppy foot.
Lastly, be sure to add a round, fluffy tail to your rabbit!
Step 6 – Draw the last leg
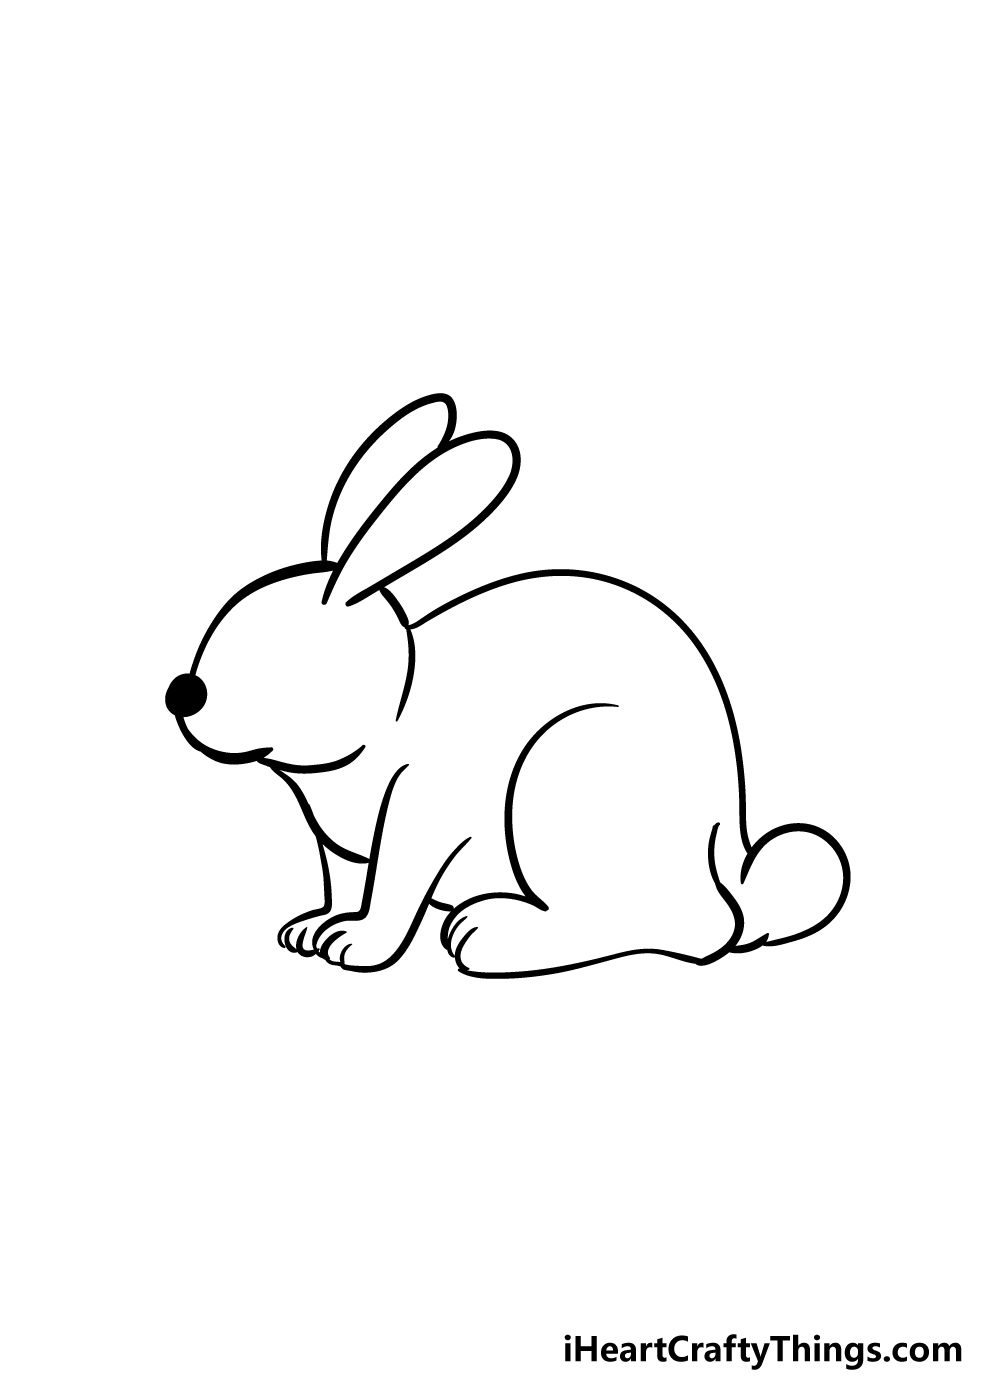
This step of your rabbit drawing will be quite a simple one. All you need to do is add the other front leg of your rabbit, which will look very similar to the other one.
That takes care of all the limbs, so we shall focus on the smaller details in the next step.
Step 7 – Draw the eye and final details
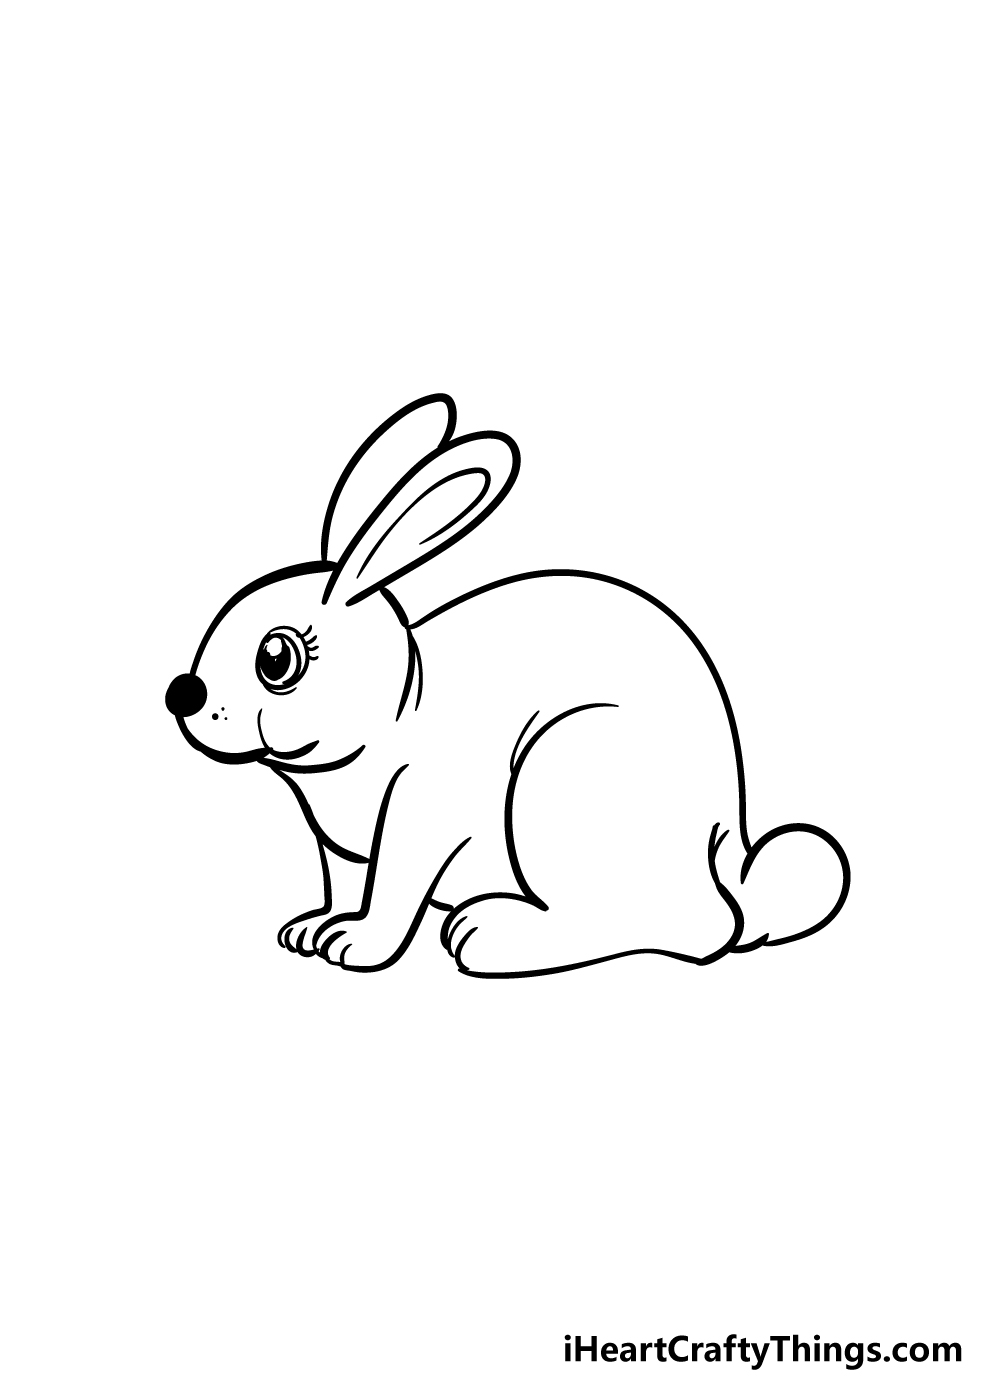
You have almost reached the end of our guide on how to draw a rabbit! There are just a few details left before we move on to the final step, so let’s take care of them now.
The first thing you should make sure to add is an eye for your rabbit. We made our one by drawing some circles within other circles with some long eyelashes for extra cuteness.
You could replicate this look, or use some simpler shapes for the eye!
Finally, we drew some lines in the ear and around the various limbs of the rabbit for some extra definition and texture.
These are the details we used, but what additional details will you use for your adorable rabbit drawing?
Bonus: Add Some Details To Make Some Unique Rabbits!
We created a fairly standard rabbit in this guide, but any rabbit lover will know that they come in many different variations. You could customize this rabbit drawing into many different kinds with just a few small detail changes!
One of the easiest details to customize is the hair of this rabbit. Some rabbits have short hair like this one. Others have long, luscious hair that flows around them, and some are a bit fluffy.
You could think of any rabbits you have seen and then recreate how some of them looked. If you need some inspiration, you could also look up some rabbits online to use as research.
That would be some fun research to undertake, as you would get to see tons of cute bunnies! Some rabbits are also much larger than others depending on the species.
You could either make a few different drawings showing the different rabbits, or you could have a rabbit extravaganza by adding a whole bunch on the page.
It would be quite a fun challenge to see how many different kinds you could recreate. The hair length is just one aspect to play with, however.
Some may have floppy ears that flop over their faces, for instance. Others have smaller ears that stand up straight.
You could make the ears as floppy or as pointy as you like, and it could also drastically change the look of the rabbits. When it comes to coloring, you can choose the fur color and also add spots or patches.
There are seemingly endless ways you could customize this drawing of a rabbit! Don’t forget to add carrots and other tasty snacks to make your drawing even more personalized.
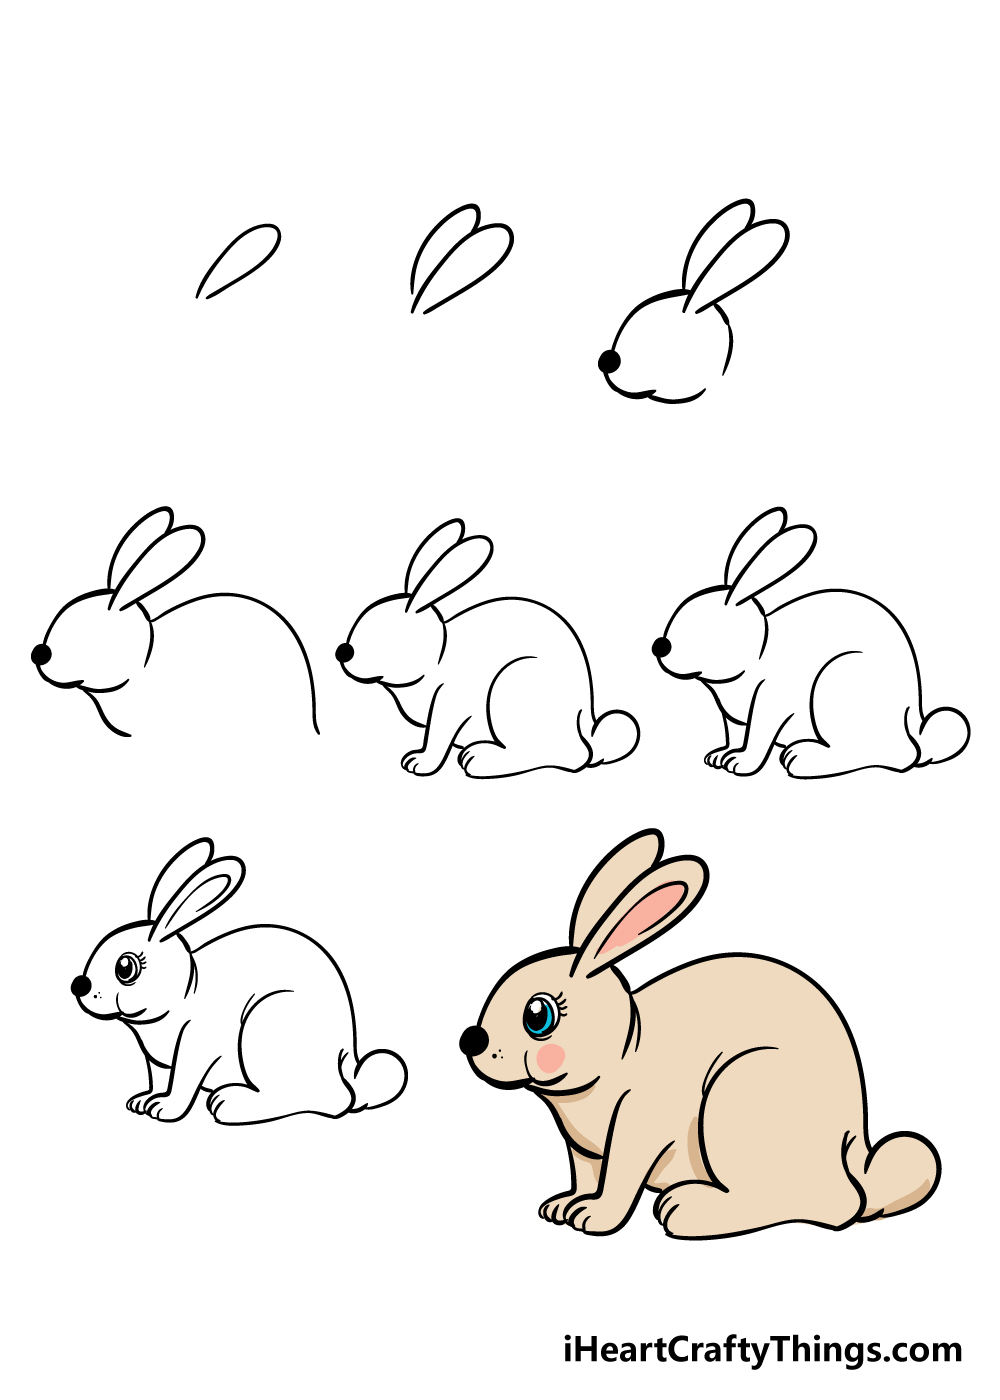
Step 8 – Now finish off your rabbit with some color
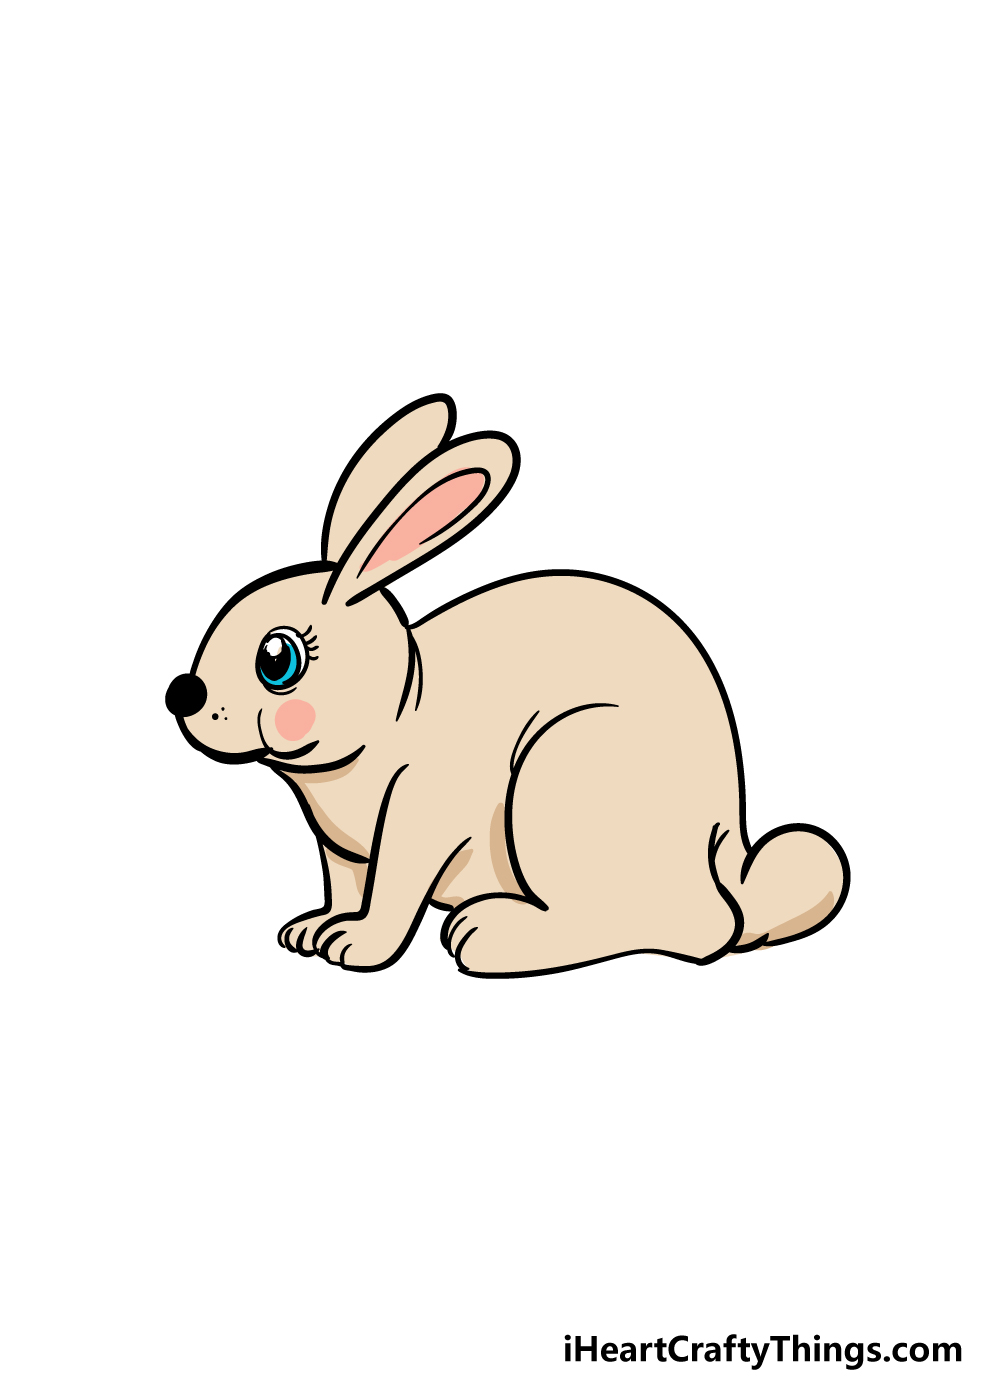
Reaching step 8 means that your rabbit drawing is now almost complete! All it needs now are some beautiful colors to finish it off.
This is a step where you can really show us how creative you can be with some amazing color choices and styles!
We’ve shown just one way that you could color in your rabbit in our example, but you should feel free to use any of your favorite colors on it.
You can also try out some fun art mediums to finish up your rabbit drawing! If you want a more vibrant, colorful image then you can use mediums like acrylic paints and colored pens.
On the other hand, watercolors and colored pencils are two examples of mediums for a more subtle color look.
What will you use for your rabbit?
Here’s how you can make your rabbit drawing even better…
Make this adorable rabbit sketch even better with these fun tips to try out!
Rabbits love to hang out with their rabbit friends, so you could add some bunny pals to this drawing of a rabbit! Now that you know how to draw one, you could add as many as you like.
If you follow the guide again and add lots of rabbits, you could change small details to make each one unique. How many rabbits do you think you would like to add to this artwork?
Adding more rabbits is just one of the ways that you could make this drawing more lively. There are lots of cute animals that you could add to make this drawing even more delightful.
Maybe you could have some cute squirrels hanging out with it, or maybe there could be a guinea pig or some hamsters. These are just a few cute creatures that you could add to the scene!
What are some other cute animals you love that would be at home in this scene?
Bunnies love to feast on all manner of vegetables and other tasty treats, and you could add some for this one to munch on in your rabbit drawing.
Of course, carrots would always be welcome in any picture involving rabbits, so that would be a good place to start. Rabbits also love to eat things like lettuce and spinach, though.
What are some tasty bunny treats that you could add to this drawing to make this rabbit even happier?
Finally, you could add a background to this rabbit sketch to give the bunny a place to play in! There are so many possibilities for a fun background setting you could use.
For instance, the rabbit could be hanging out in a lush garden with plenty of plants and vegetables to nibble on. Or you could craft an elaborate rabbit hutch that it could be staying in.
These are just a few ideas, but don’t be afraid to get creative with it!
Your Rabbit Drawing is Complete!
With that, you have successfully completed this guide on how to draw a rabbit! You should be very proud of the incredible drawing that now sits in front of you.
With this guide, we tried to make it so that it was not only easy for you to learn, but also a really fun process. We hope that you did have a lot of fun as you conquered this drawing challenge!
Now that your drawing is done, you can express your creativity with some personal touches. The colors you use are one way to put your own spin on it, and the mediums you use can as well!
There is plenty that you can do as well, though. For example, you could change the position of the rabbit to have it in different situations, or you could draw a pretty background for it!
Maybe it could even be an Easter-themed rabbit? There is no limit to what you can do, so let your creativity flow!
Please be sure to check in to our site frequently, as we have many more step-by-step drawing guides in store for you to enjoy, and e will be uploading more constantly!
We would love to see your amazing rabbit drawing, so please do share it on our Facebook and Pinterest pages once it’s done!
Here Is An Easy Rabbit Drawing To Inspire You!
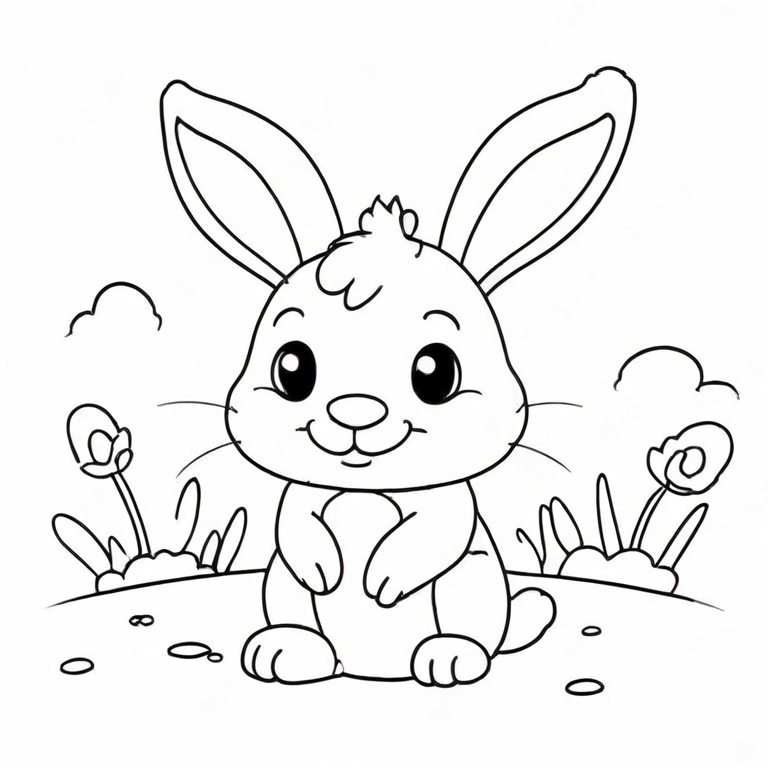
This adorable easy rabbit drawing for kids is a picture drawn by our artist Freddy to help you with your own bunny artwork. It’s meant to offer a bit more inspiration to you as you draw.
You can see what the finished drawing can look like, and so it gives you something to aim for. Freddy kept the focus on the rabbit design, but he also added some background elements.
The background has some lovely flowers and other plants to make it look like a lovely day outside. With these background elements, you could also add more ideas and details to the background.
This way, you could keep the design close to Freddy’s initial design while adding your own spin to it.
There are so many fun outdoor elements you could add to the background to make this rabbit even happier!