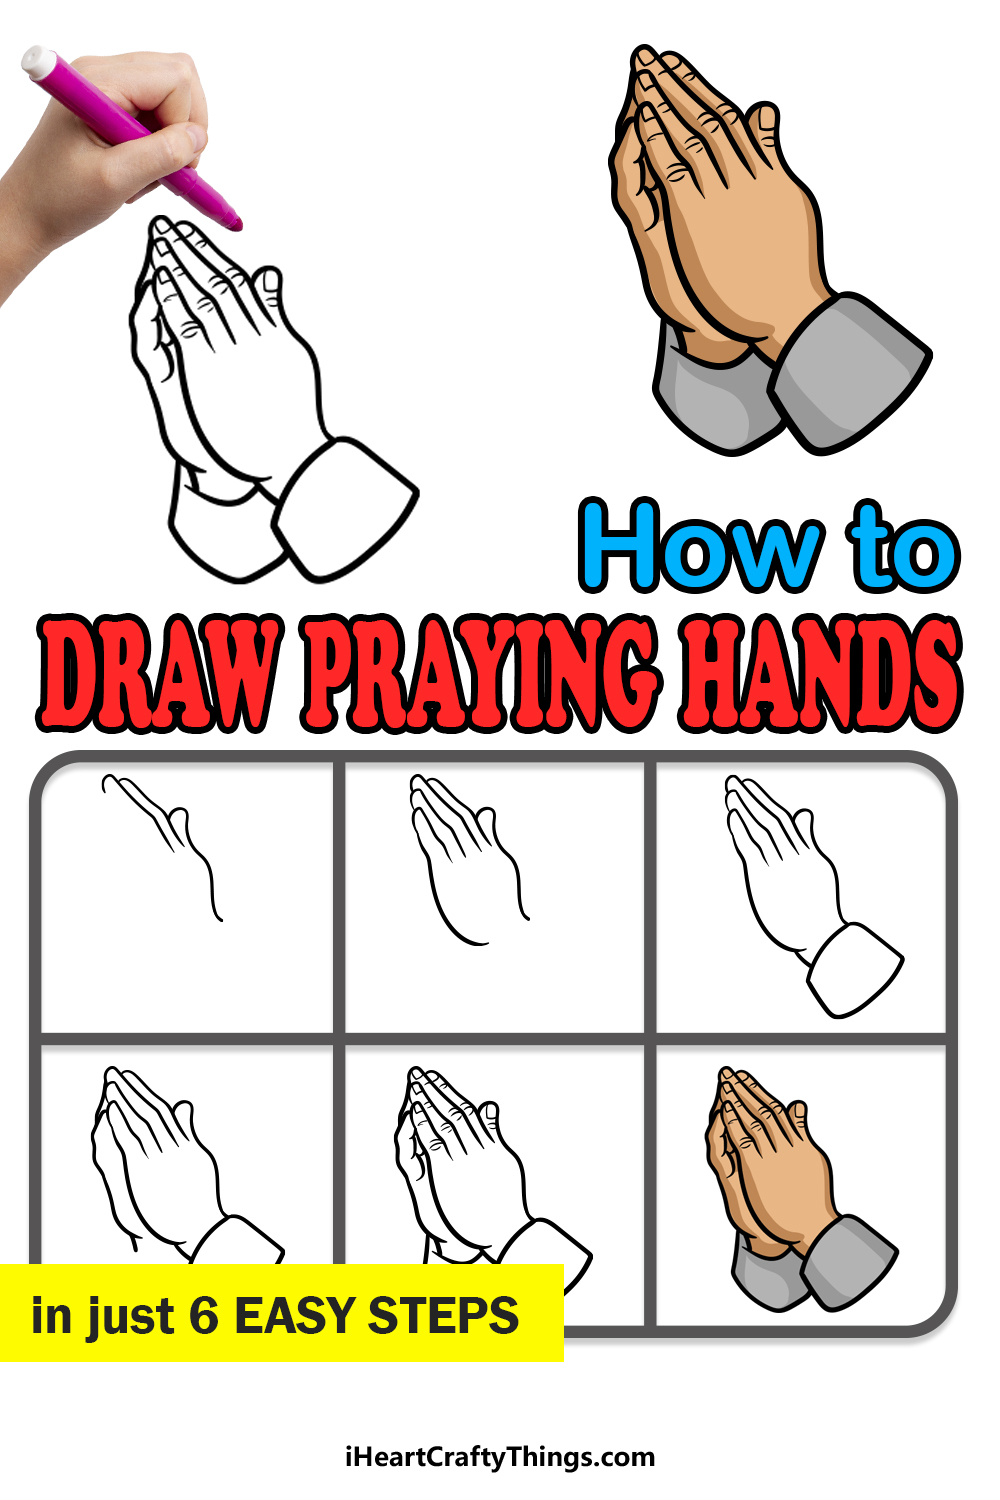
If you want to know how to draw praying hands, then you’ve found the right place. This tutorial for kids will make this notoriously difficult design much easier for you.
Drawing hands is never an easy feat, even for skilled artists. There is something about hands that makes it difficult to get right and it can be very frustrating.
This is especially the case when it comes to dynamic poses such as the one in this guide. If you’re intimidated by this challenge, then I have good news for you!
I’m about to make it much easier for you by taking you through each and every step. Even if it takes a few tries, you will discover the best way to make your drawing and even customize it with your own extra elements and ideas.
Make Your Praying Hands Drawing Much Easier
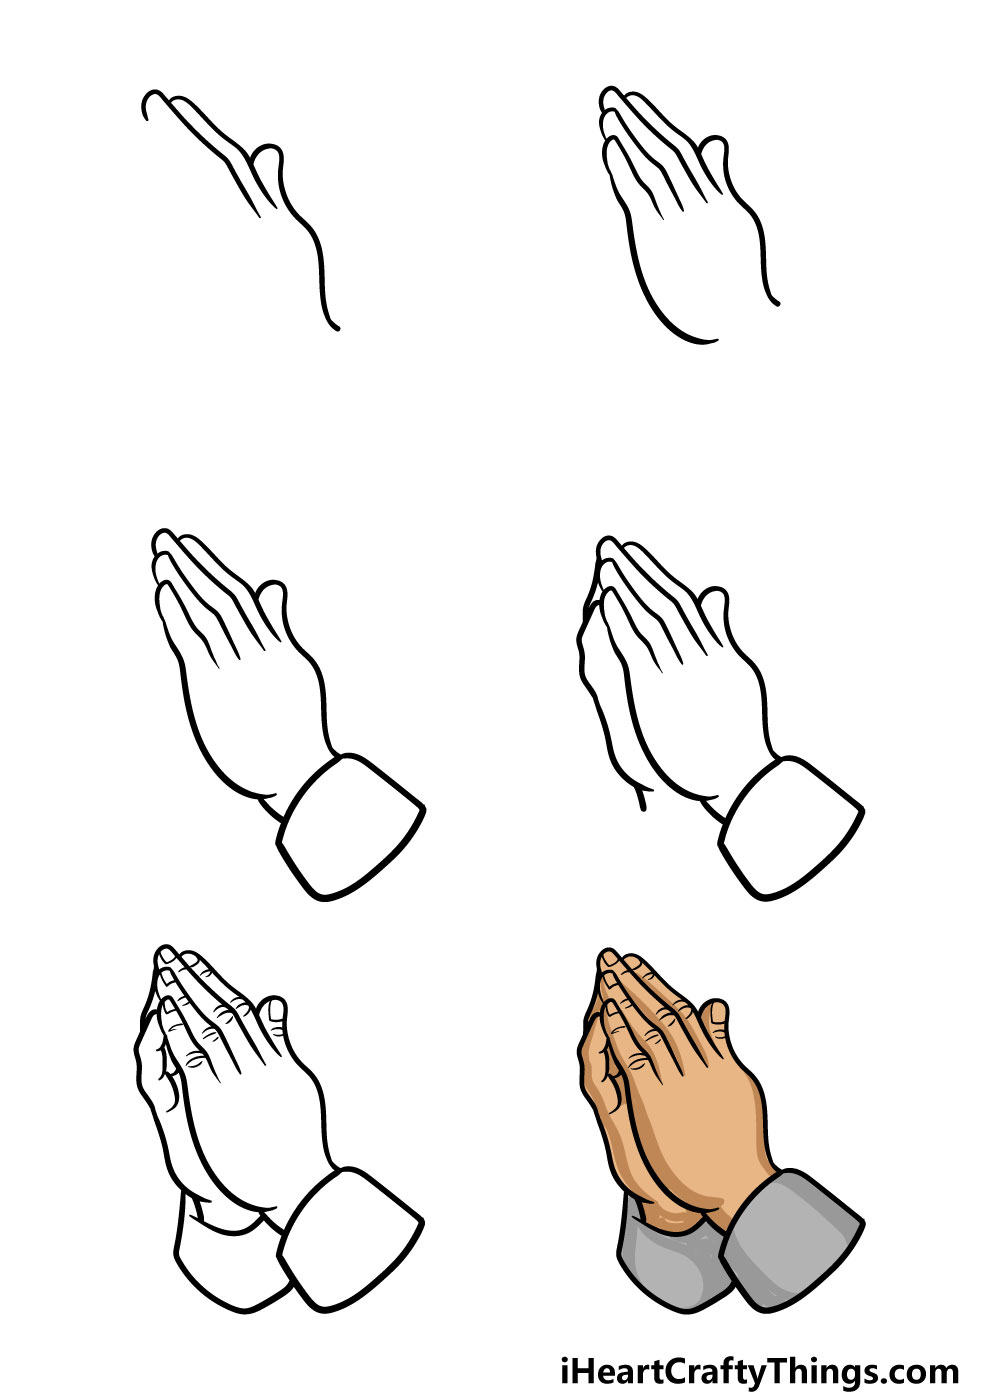
How to Draw Praying Hands – Let’s get Started!
Step 1
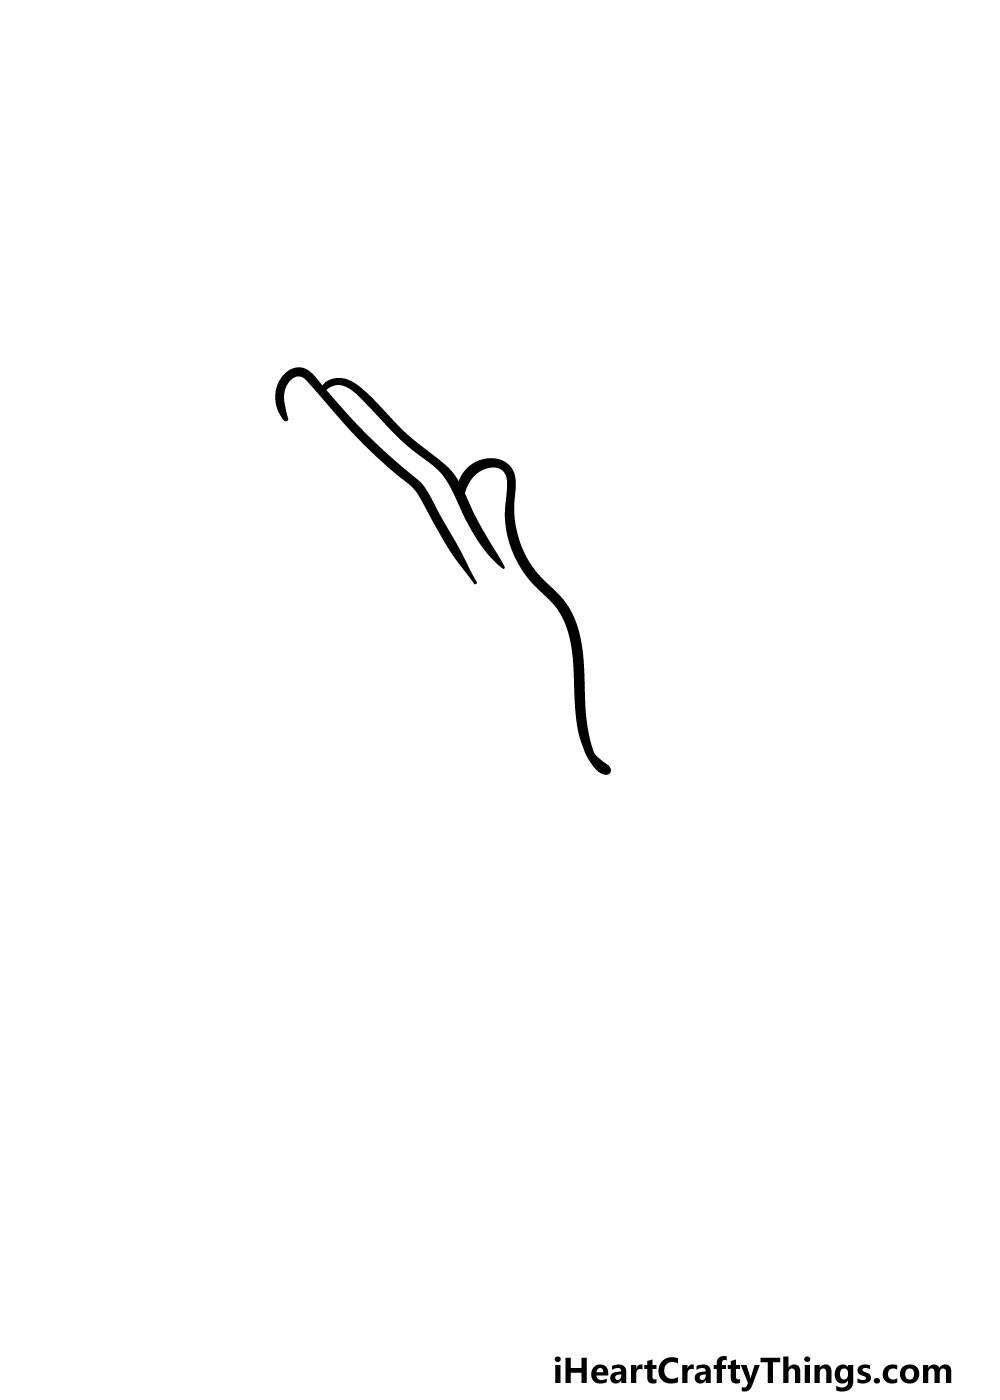
To get this guide on how to draw praying hands started, we will start with the hand that will be closest to us as the viewer.
For this first step, we will be using some mostly pretty curved lines. This will start at the bottom of the wrist, will curve up a bit and then loop over to form the tip of the thumb.
Then, you’ll be using two more long, curved lines for the first two fingers of the hand. That’s all there is to it for this step, so let’s move on to step 2!
Step 2 – Draw the next two fingers and palm
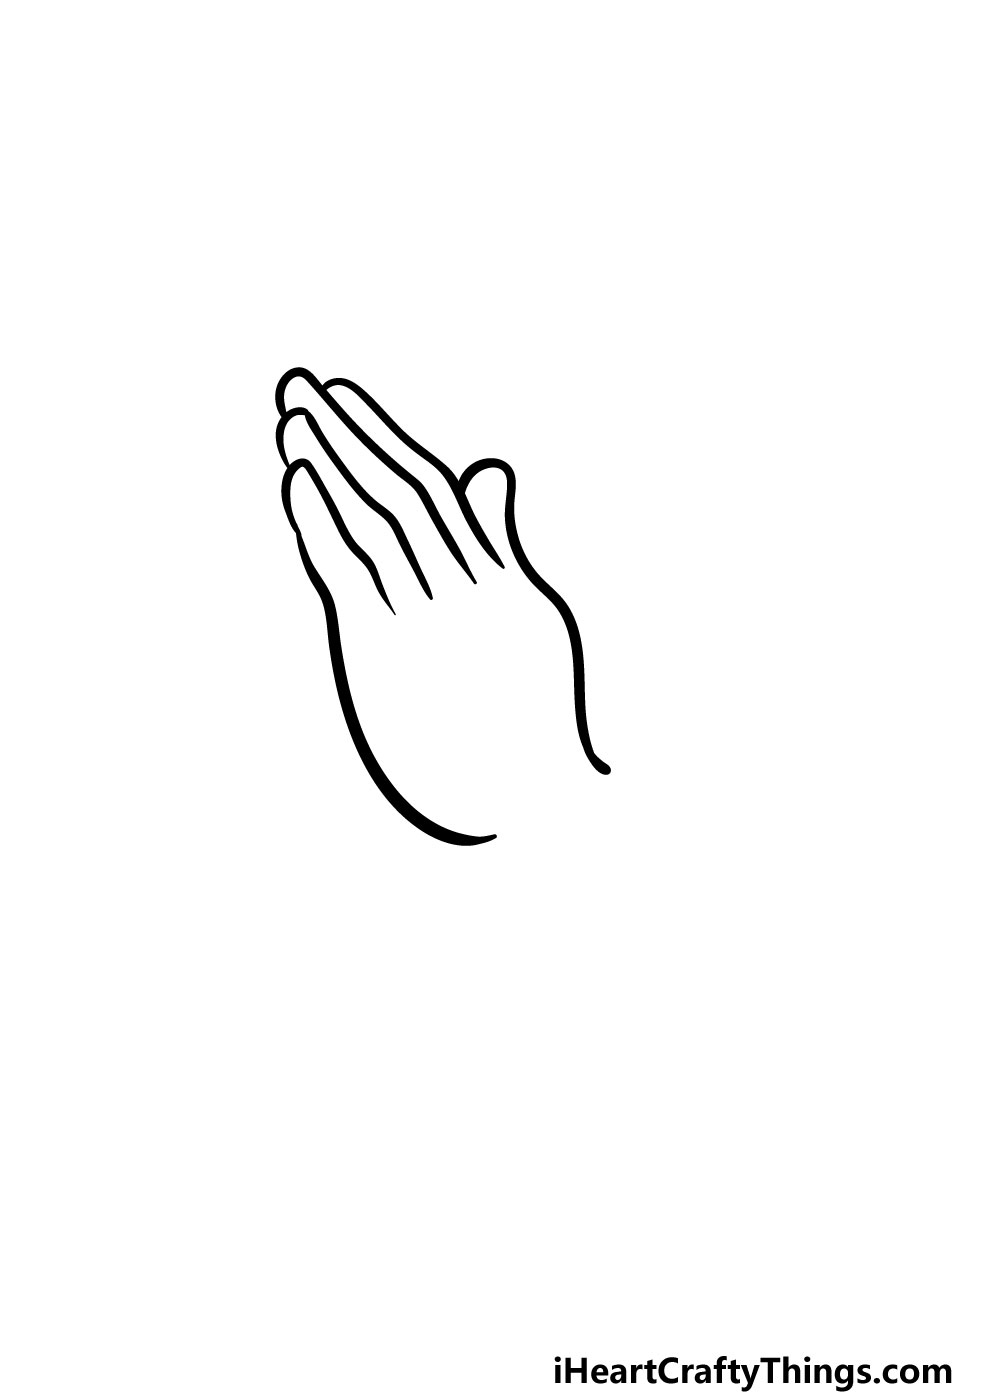
You’ve drawn a couple of fingers already, so for this next part of your praying hands drawing you need only replicate what you did in the previous step!
There will be two more fingers in this step, and the remaining fingers will get progressively shorter as they go.
Finally, you will be using one more curved line for the palm of the hand. That will do it for that hand for now, but we will be adding some details to it in one of the future steps!
Step 3 – Now, draw the sleeve of the hand
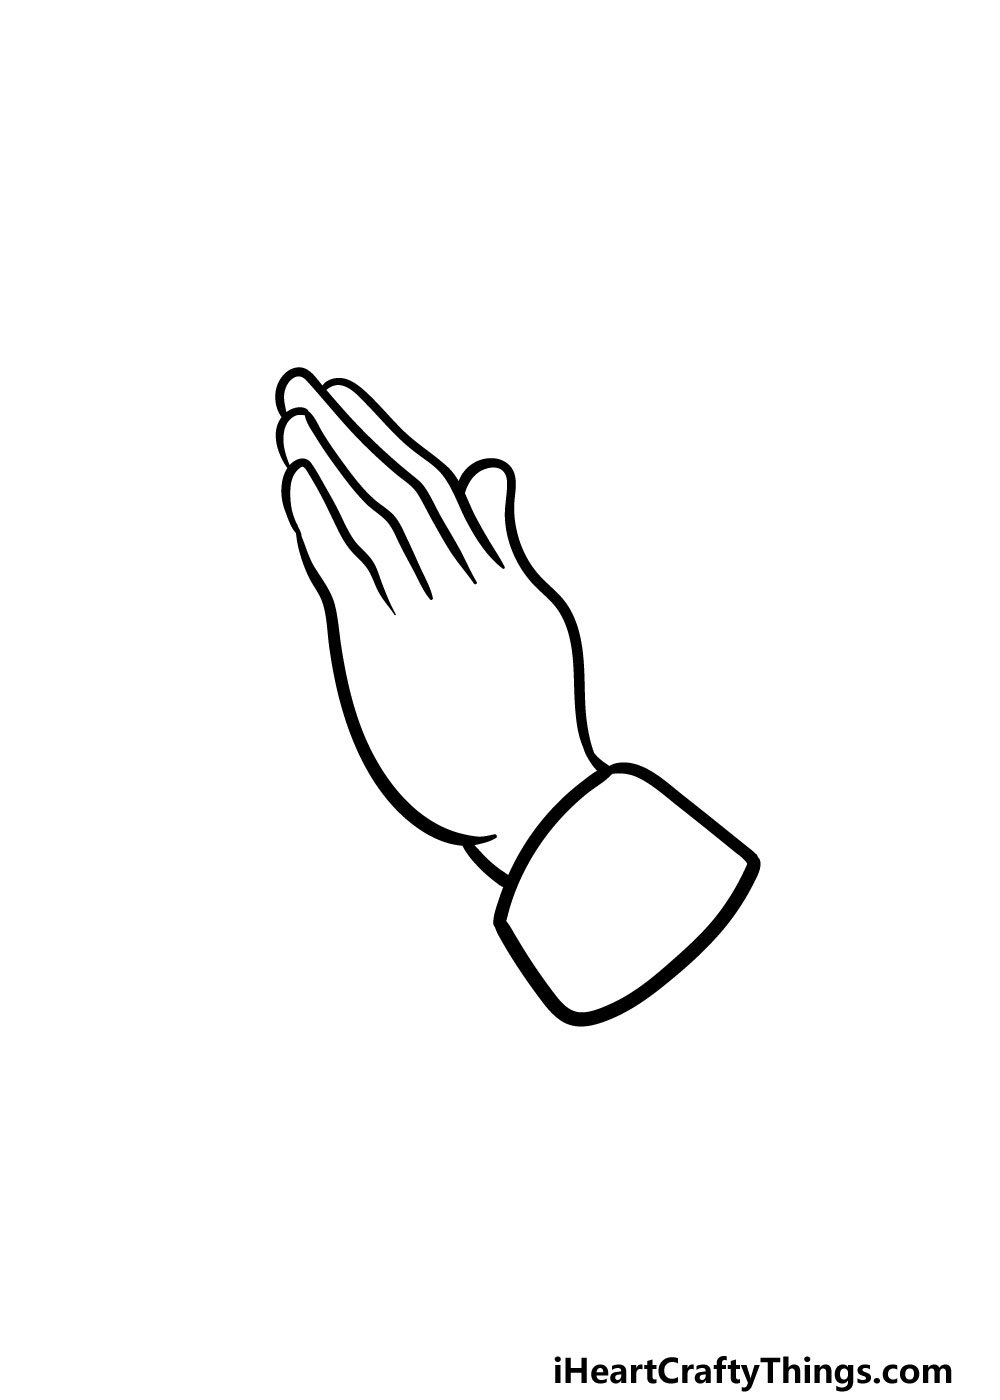
Before we move on to drawing the second hand, we will be drawing the sleeve in this step of our guide on how to draw praying hands.
This should be a much easier step for you, as it will be a fairly simple shape that you’ll be drawing.
To draw this sleeve, you will be using a sort of rectangle shape, except the edges will be a bit more angular and rounded. This will go at the base of the hand that you finished drawing in the previous step.
Once you have it looking as it does in our reference image then you’re ready to proceed!
Step 4 – Next, draw the other hand
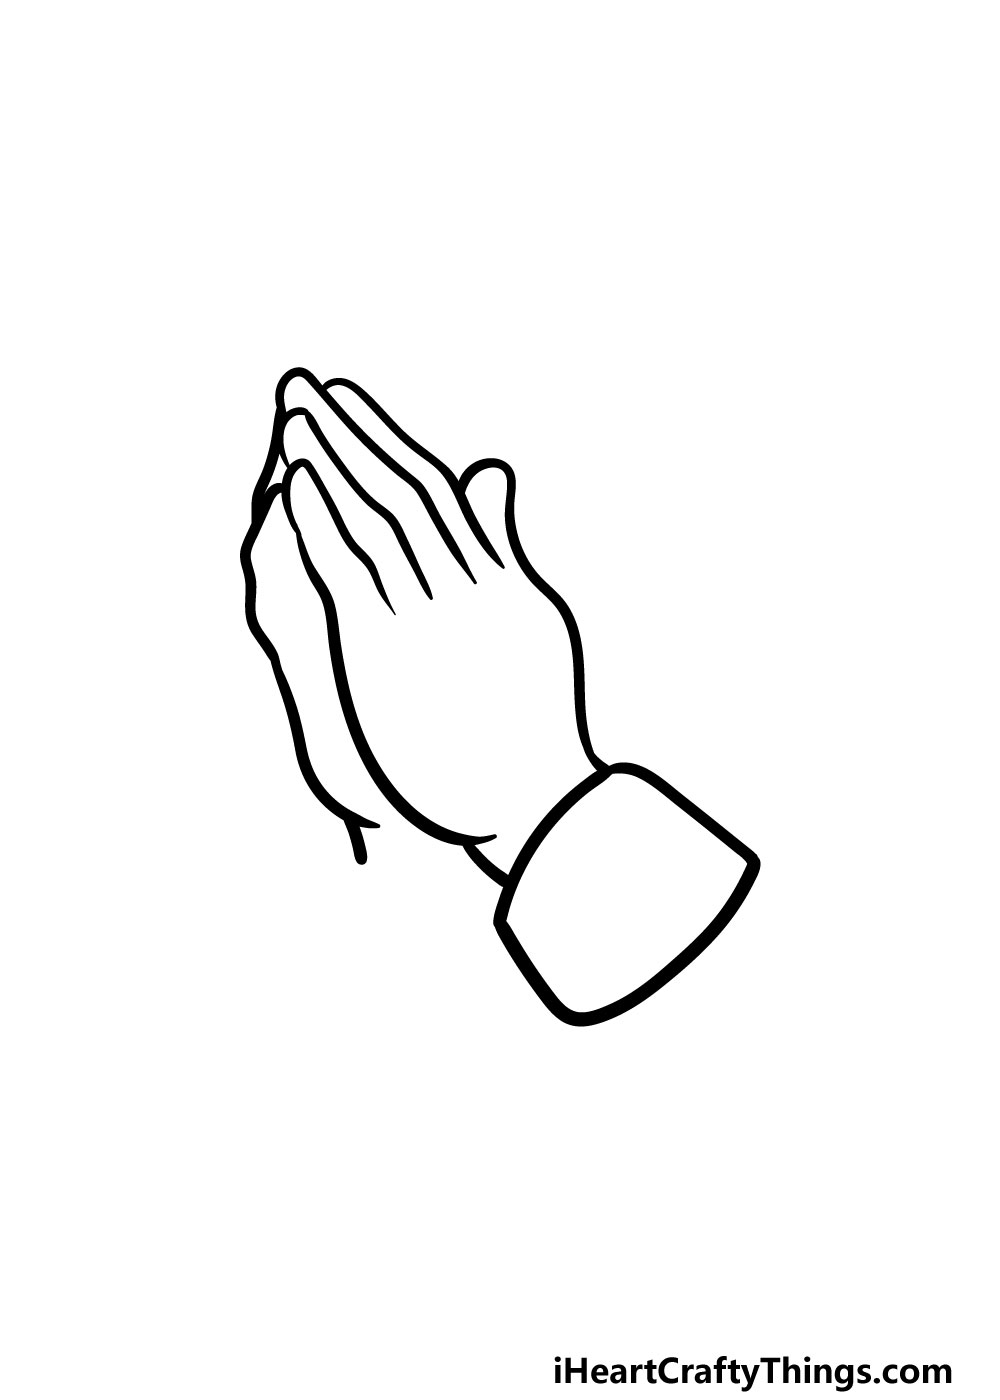
There’s some good news, as you’ve already passed the hardest part of your praying hands drawing!
Drawing the first hand was the trickiest part, and seeing as we can’t really see the other hand much because of the angle, it will be much easier.
For this second hand, you will be using some simple curved lines to make the palm and fingers that are visible at this angle.
That’s all there is to it, so now we can add some final details before you color in your praying hands drawing.
Step 5 – Now, you can finish off the final details and elements
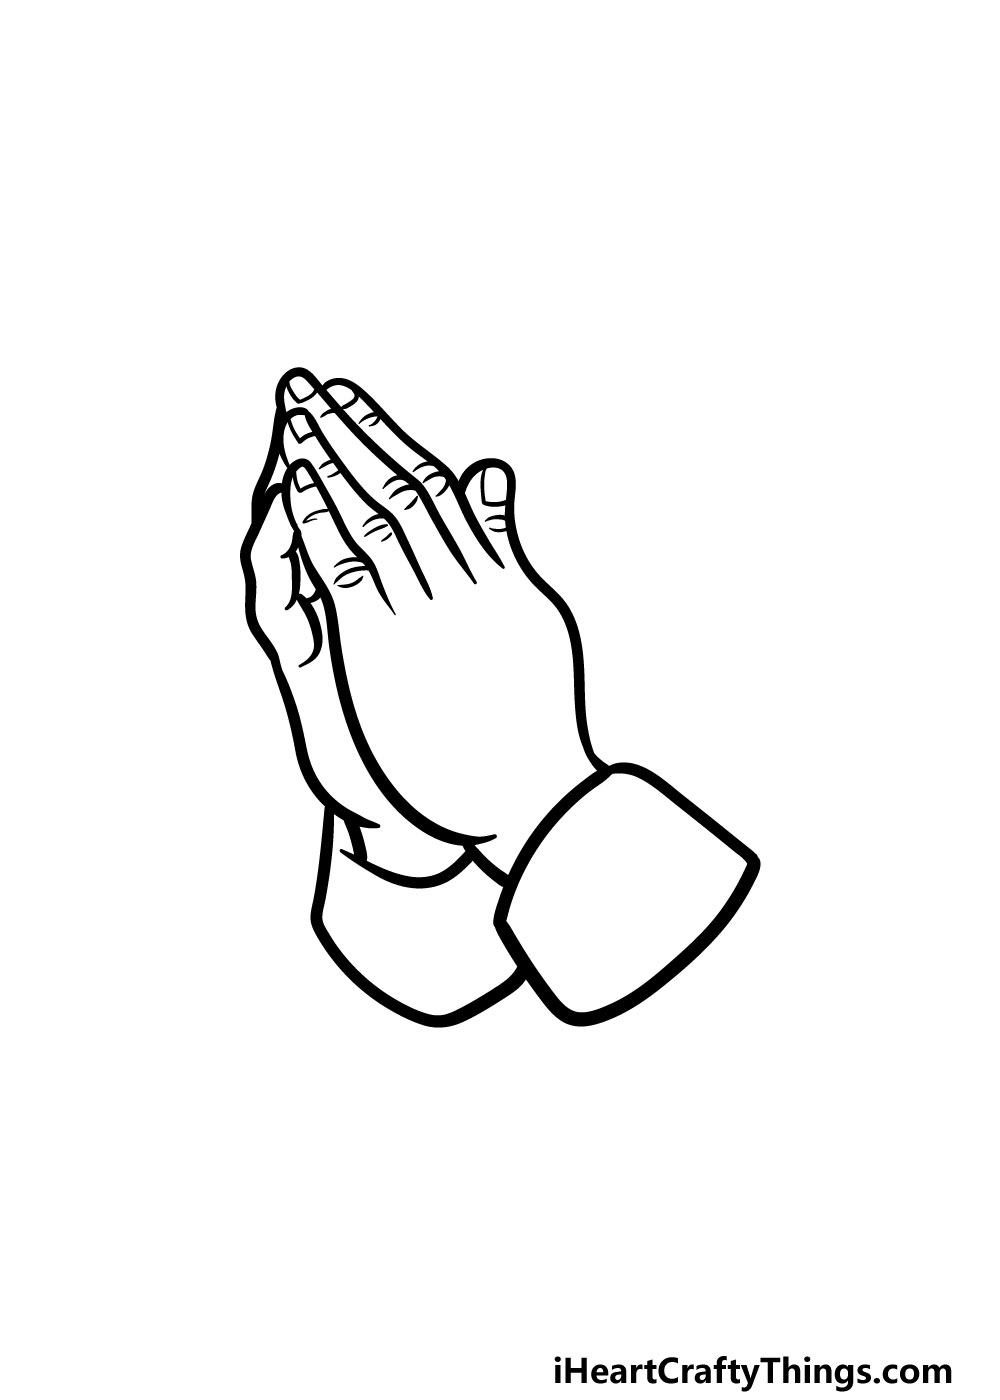
For this part of our guide on how to draw praying hands, we will be adding some final details and elements before the final step.
Before you start adding some finer details, be sure to draw the other sleeve for the second hand! It will look very similar to the first one that you drew, as seen in the reference image.
Once you’ve got these done, it’s on to the final details! The reference picture will be your guide as you draw, and we will be adding some lines to the knuckles of each hand. This just helps to make the hands look more realistic.
Then, you can draw some fingernails onto the tips of each finger of the hand closest to us. With that, you’re all ready to move on! Before you do, however, you could add any details of your own that you may want.
These extra details are up to you, and you could do anything from adding a background to drawing some inspirational text. It’s up to you, so let your creativity flow and see what happens!
Bonus: Use These Tips To Make This Drawing Easier
As we touched on in the guide, drawing hands is no easy feat. Even highly experienced artists could have trouble with this praying hands drawing, as hands are commonly listed as one of the most difficult things to draw.
We tried to simplify the hands to make them easier, but you may have still had a hard time with them. There are things you can do to make it easier while keeping to the design.
Perhaps the best way is to look at the real thing in real life and then use it as a way to help you. We would recommend getting a friend or a family member to recreate the pose in the image.
Then, you can look closely at how it looks in real life as compared to the reference images. This may help you to get a better idea of how to draw the details you struggle with.
If they don’t feel like posing for a long time, you could take pictures of their hands or take pictures of your own hands in the pose.
Another way you could make it easier would be to practice drawing this pose in a much simpler cartoon style. This way, you can get your head around the shapes and proportions of the drawing.
Then, you could work your way up to the more realistic proportions in our reference image. You could even make them more realistic and detailed when you really have the hang of it.
If you like the look of a simpler cartoon style regardless, then you could use it for the final drawing while still maintaining the idea of the drawing.
We hope that these will help to make this praying hands drawing a bit easier for you to take on!
Step 6 – Finish off your praying hands drawing with some color

This sixth and final step of our guide on how to draw praying hands is all about bringing it to life with some amazing colors.
We kept the colors a bit more muted, but this is a step where you can take over and use your creativity to incorporate any colors that you love! You could also create some thematic, stylistic visuals by incorporating some bright colors.
Bringing these colors to life with your favorite art mediums is also lots of fun! There is a wide variety of art mediums that you can use, so make sure that you have fun with your creativity as you experiment.
You may be surprised with what you come up with!
5 Tips To Make Your Praying Hands Drawing Even Better!
When you have gone through these 5 tips, your drawing will look more incredible than ever!
In the guide you have just completed, we spoke about adding some smaller details such as fingernails, but there are others you could add as well!
For example, you could add a pretty ring onto one or more of the fingers. You could also add some wrinkles and other realistic details onto the hands and fingers to make this praying hands drawing even better.
Drawing these hands was quite a challenge, but you can take it even further! For example, you could draw more of the arms and body that the hands are attached to.
You could even draw a face to make a whole character. For a fun touch, you could use your own face as a model for the face of this character.
This praying hands sketch would be very inspirational for lots of people, as prayer is an important aspect of many lives.
We mentioned adding some inspirational text, but you could also add some angelic rays or effects surrounding the hands.
Drawing some background details featuring symbols and pictures you find comforting could work brilliantly as well!
Coloring a picture is always a fun part of the creative process, and you have a few ways that you could color these praying hands.
You have many options for the skin tones and colors you use, but you can also add some stylistic colors behind them. For example, a light wash of yellow watercolor would make it look like the hands are gently glowing. What other colors could you use?
One final way to improve this drawing of praying hands even more would be to draw them in a realistic setting.
They could be resting on a table surrounded by religious objects such as rosary beads or a bible.
You could also add detail such as a stained glass window behind the figure, and that would also allow you to add some stunning and bright colors! What other objects could you use?
Your Praying Hands Drawing is Complete!
That brings you to the end of this guide on how to draw praying hands! As we mentioned at the start of this guide, drawing hands is usually no easy task.
However, for even the toughest drawing challenges you can make it so much easier on yourself when you have some helpful steps to follow.
We really hope that this guide made it not only much easier but also loads of fun for you to do!
Now that you have completed your picture, you can keep the creativity going. We mentioned a few ideas such as adding a background or some text for the picture, and you can also create some amazing imagery with the colors and art mediums that you choose.
It’s up to you to have fun and be creative with it, so be sure to have a great time with it!
Completing this guide doesn’t have to be the end of the drawing fun, however. You can keep it going on our website, as we have tons of amazing guides for you to enjoy there.
You’ll want to check in often as well, as we upload new guides frequently.
Once your praying hands drawing is complete, we hope you will share it on our Facebook and Pinterest pages! We can’t wait to see your amazing artwork.