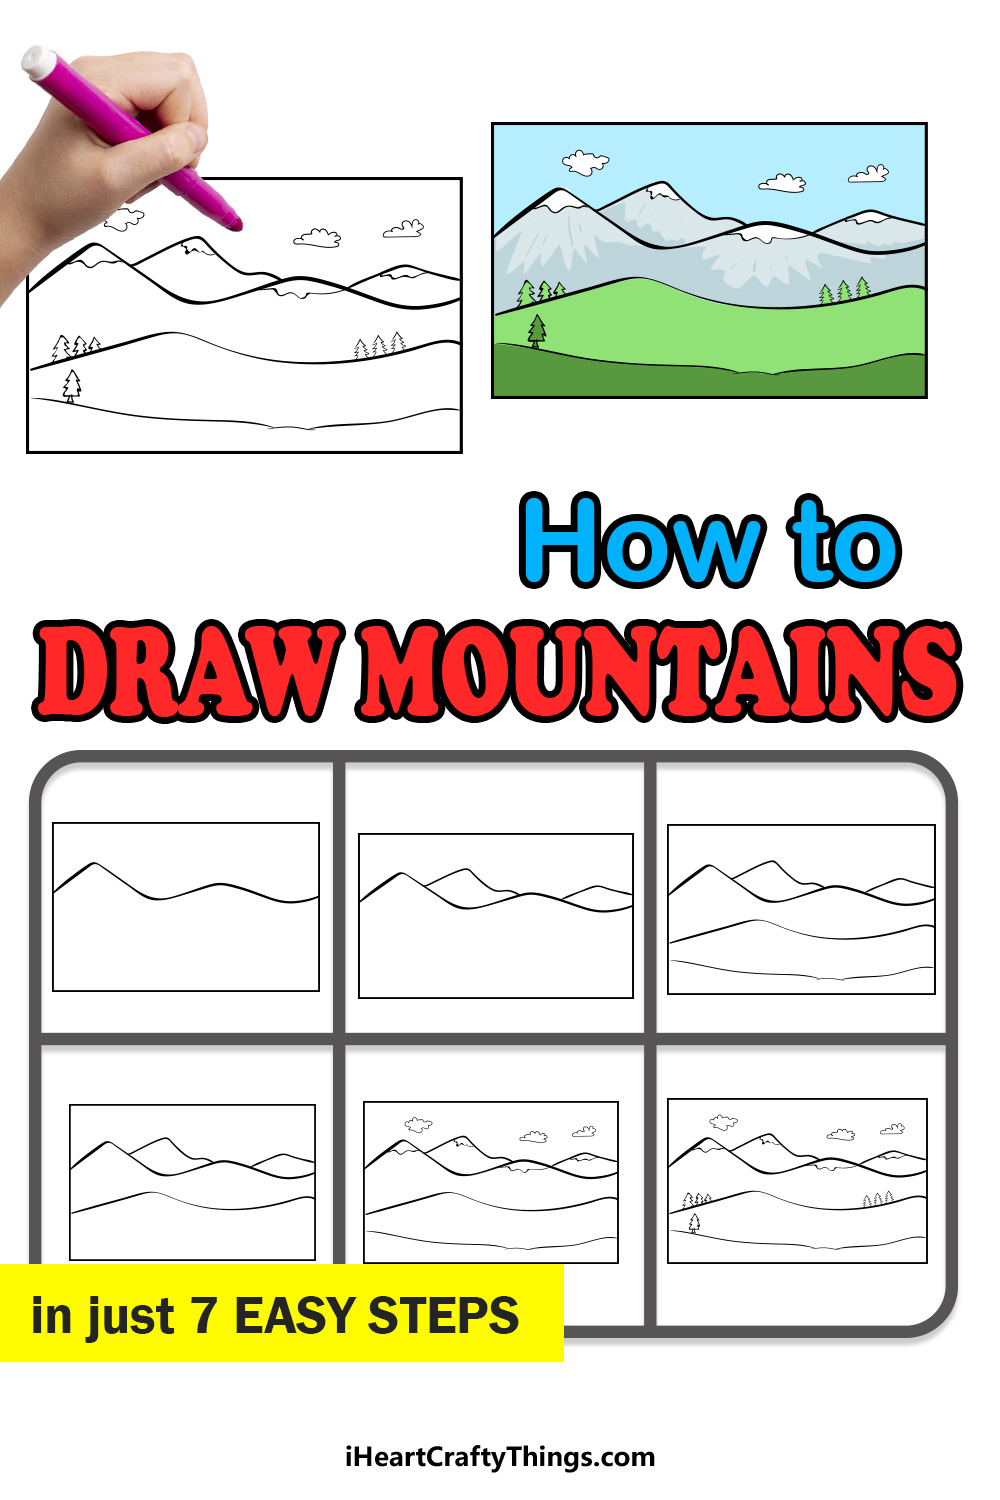
Learn how to draw mountains by following these steps! Create a stunning mountain landscape with this simple guide for kids.
Mountains are some of the most magnificent features we see in nature, and there’s a reason why we love to be around them so much. This leads many people to want to learn how to depict them in art, but there are many challenges in doing so.
In this guide, I will show you how to build up layers of mountains to create a gorgeous mountain range. I will also show you how to add different details like snow on top of them and small details like trees.
These are all details you can customize and change as you wish in order to create your ideal mountain paradise. It’s all laid out in these steps that you can follow, and people of all ages and skill levels can learn something by the end!
Watch This Guide On How To Create A Drawing Of Mountains
How to Draw Mountains – Let’s get Started!
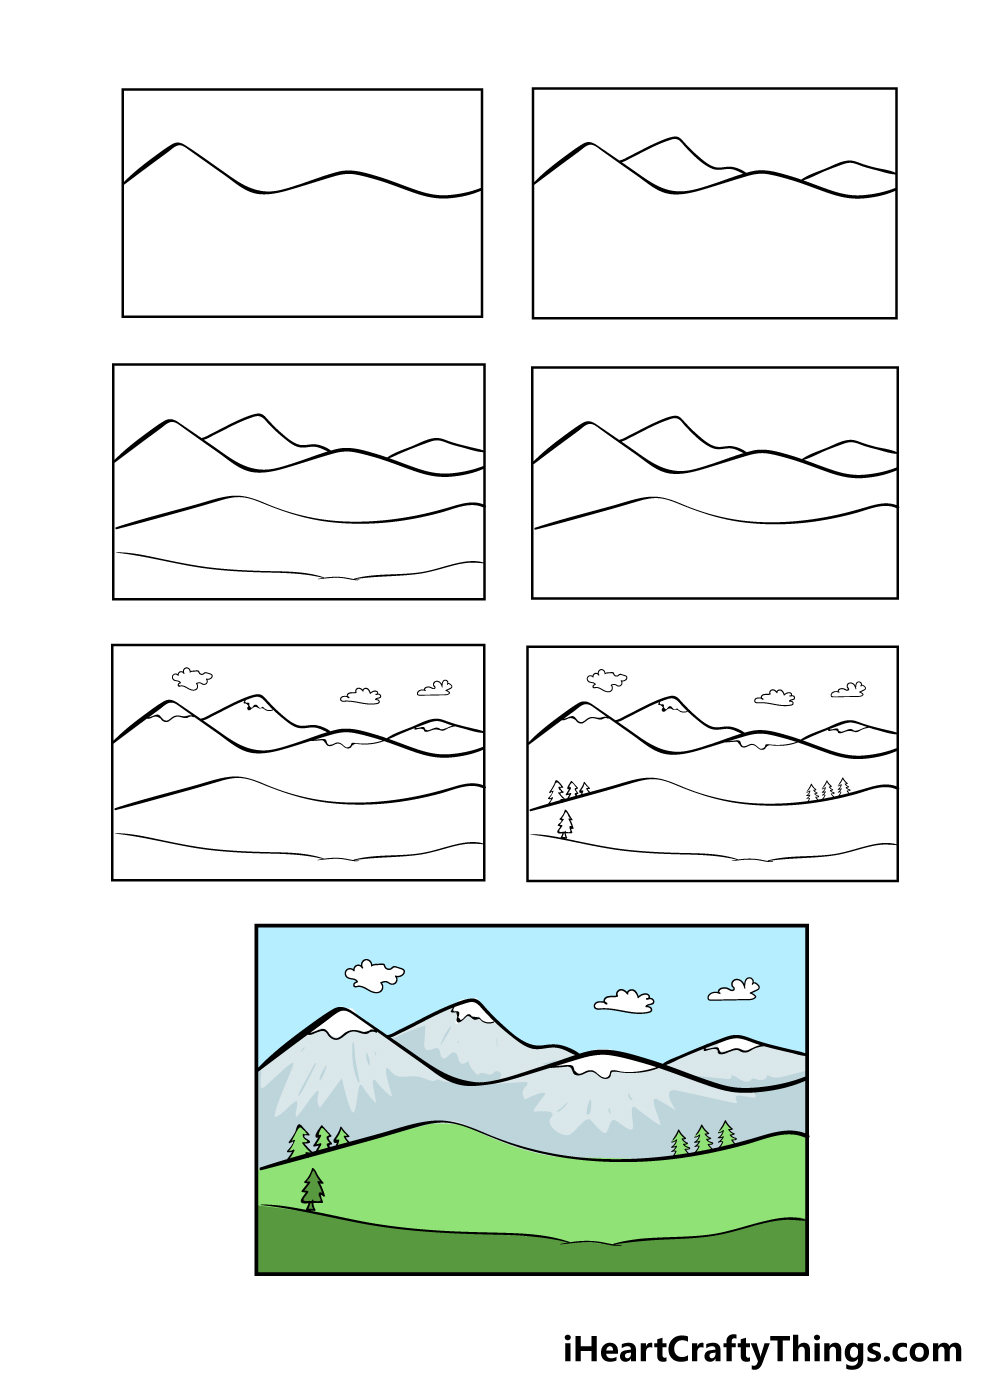
Step 1
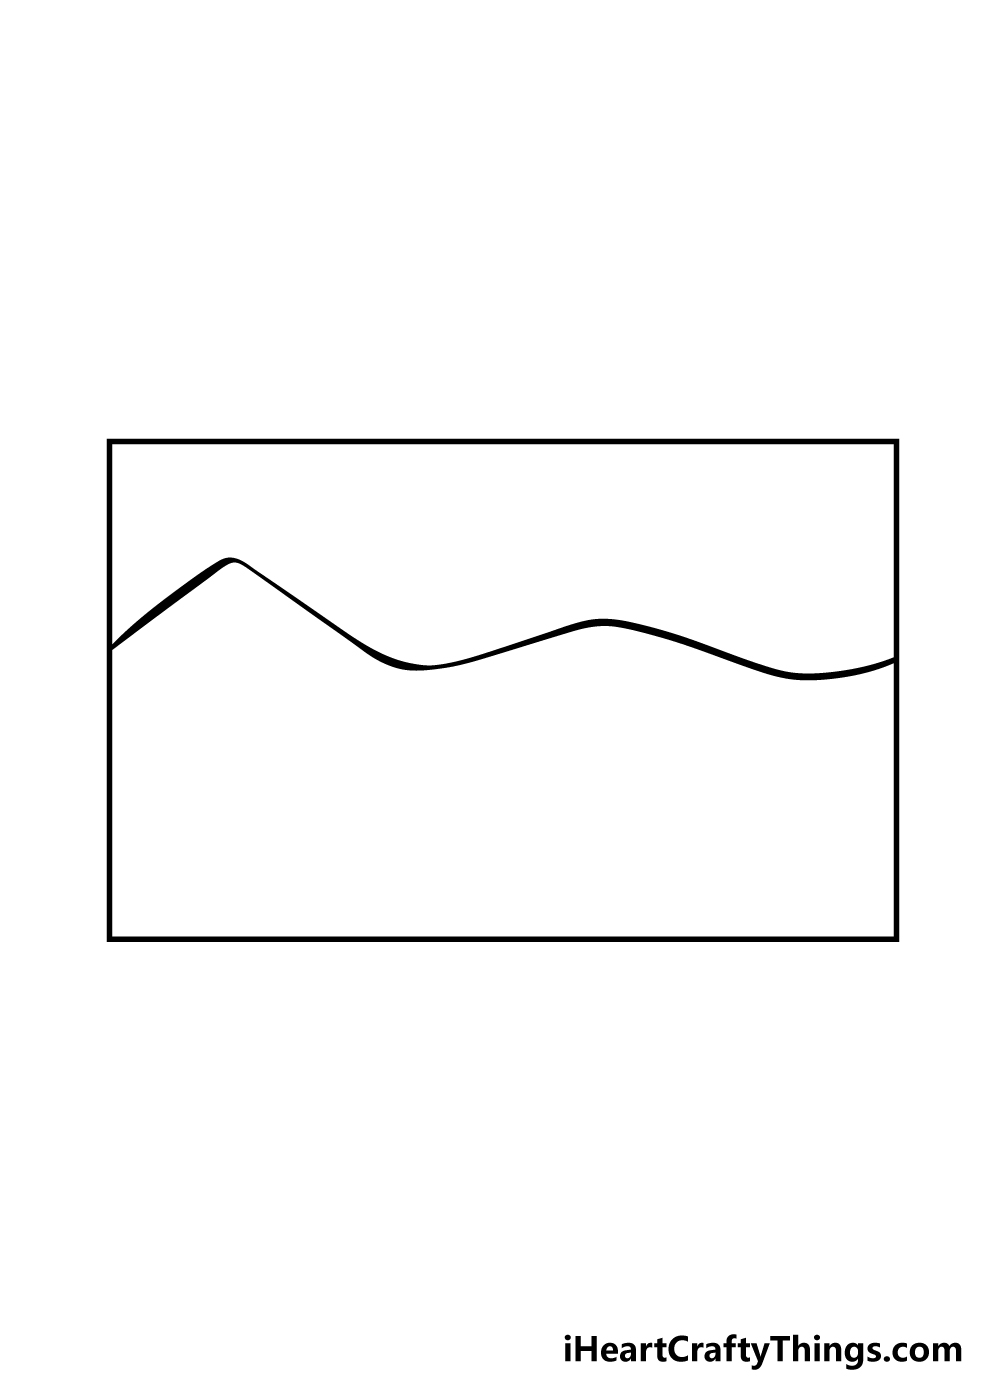
In this first step on how to draw mountains, we shall start quite simply. To start with, simply draw a rectangle that will act as a frame for your mountains drawing.
With that drawn, you can start to draw the first part of your mountains. These will be made using a sharply curving line going horizontally along your rectangle.
There will be a sharp triangular curve near the left-hand side of the picture as you can see in the image. This will be to show one of the taller mountains in the image.
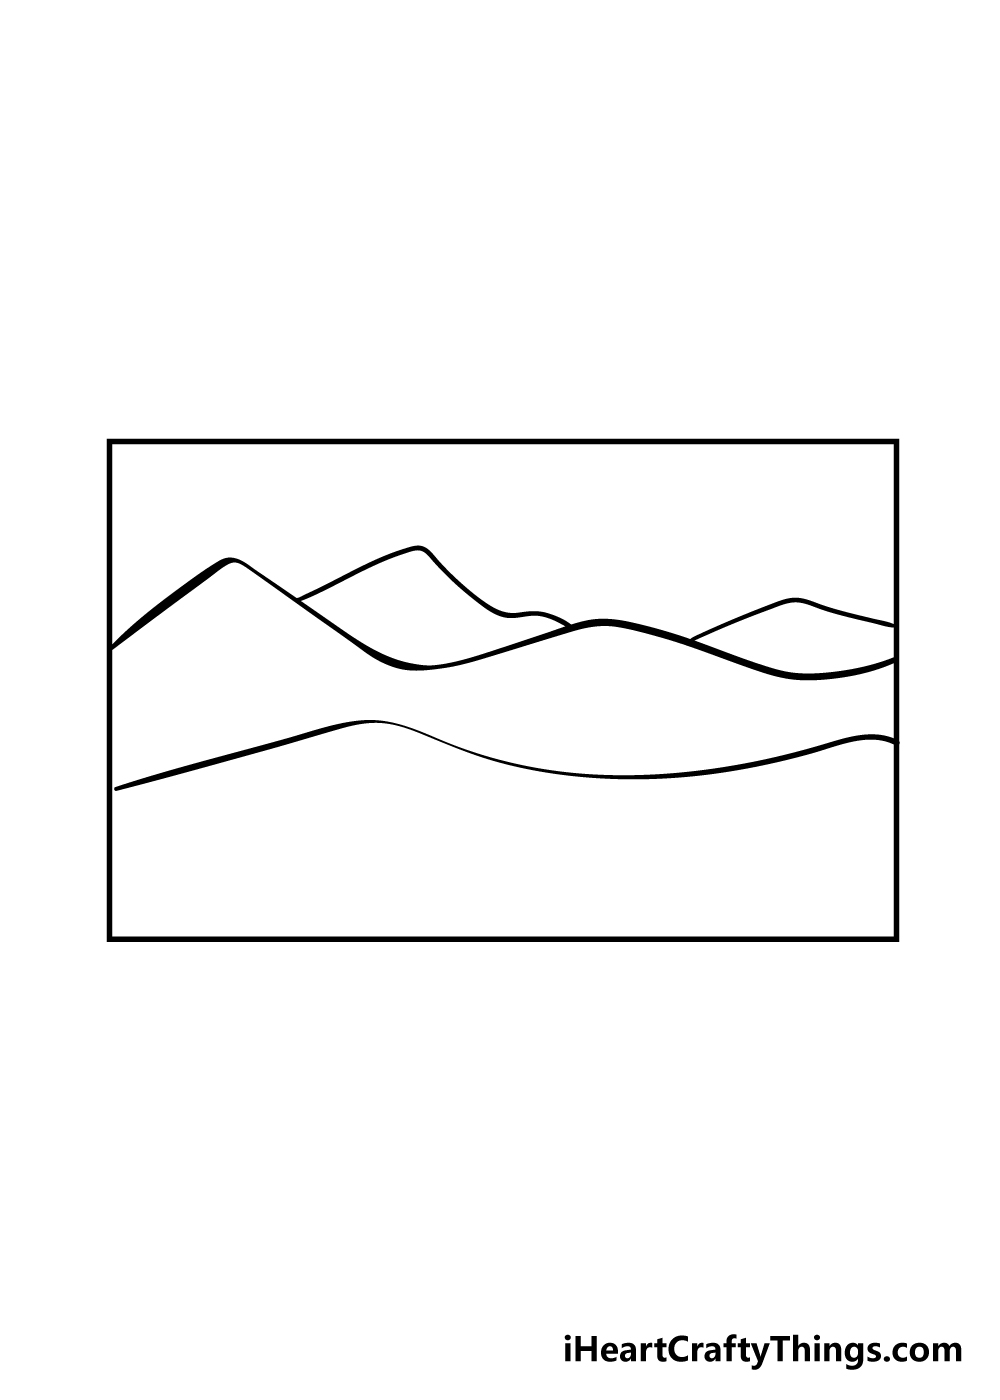
Step 2 – Now, draw some more mountains
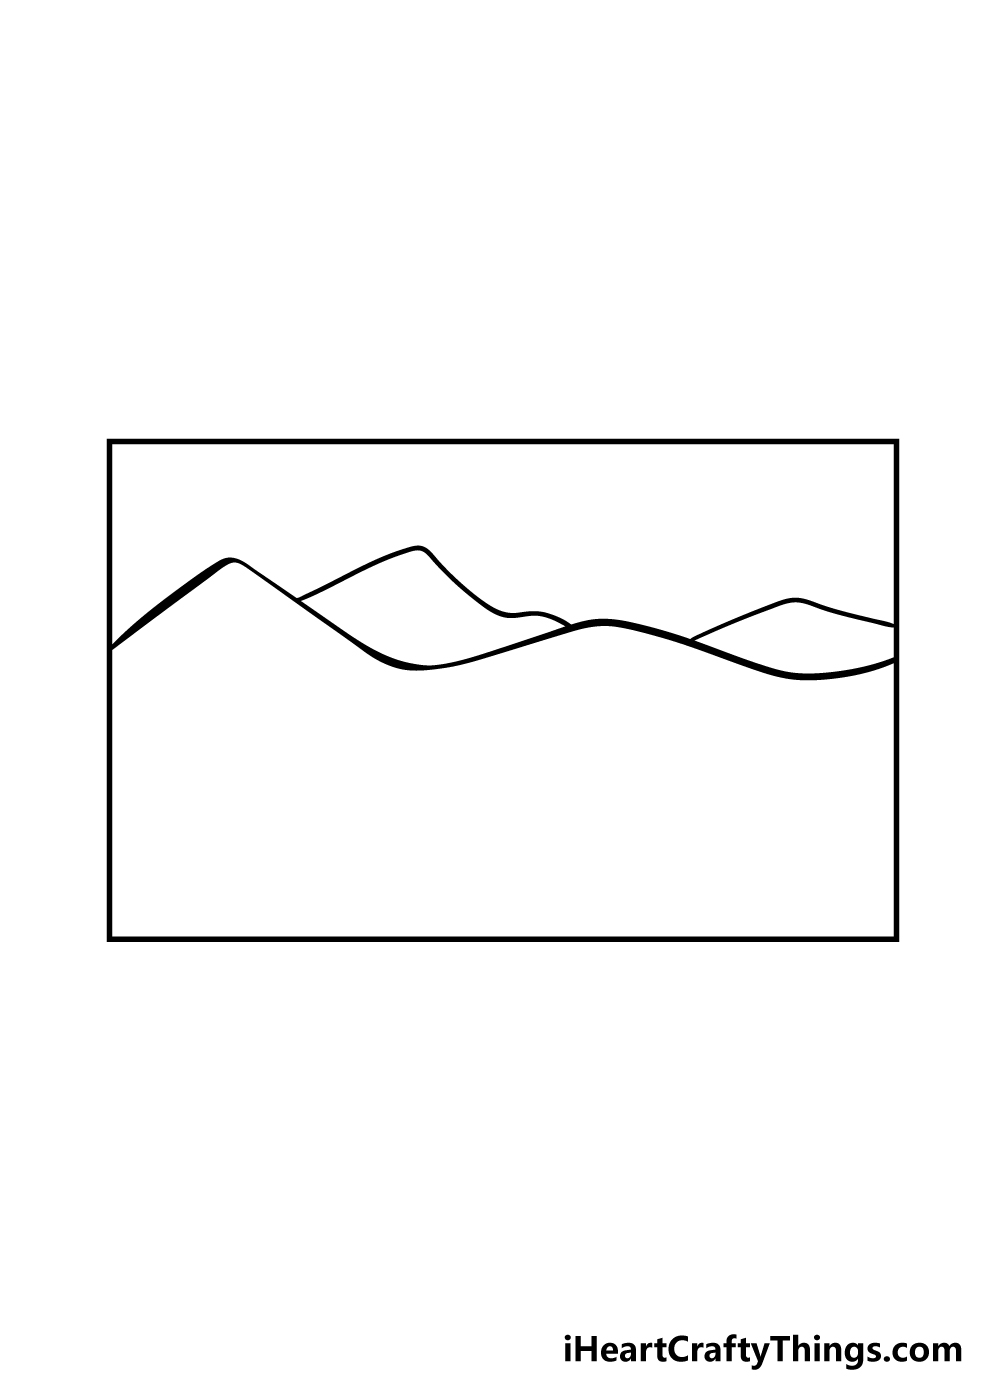
In this step, we shall add some more mountains to your mountains drawing. To do this, we shall use some more sharply curving lines between the dips in the mountains that you drew in the previous step.
These will make it look like there are some more tall mountains in the background, and will give this drawing some more depth.
Step 3 – Next, add some hilly terrain to the foreground
Let’s add some slightly flatter hill areas to the foreground of your drawing in this step of our guide on how to draw mountains.
To do this, we will draw another horizontal line below the others that you have drawn so far.
This line will still have some curves to make it look hilly, but it will be a lot less sharp than the previous ones. With that element added, we can move on to step 4.
Step 4 – Draw in one more layer of terrain
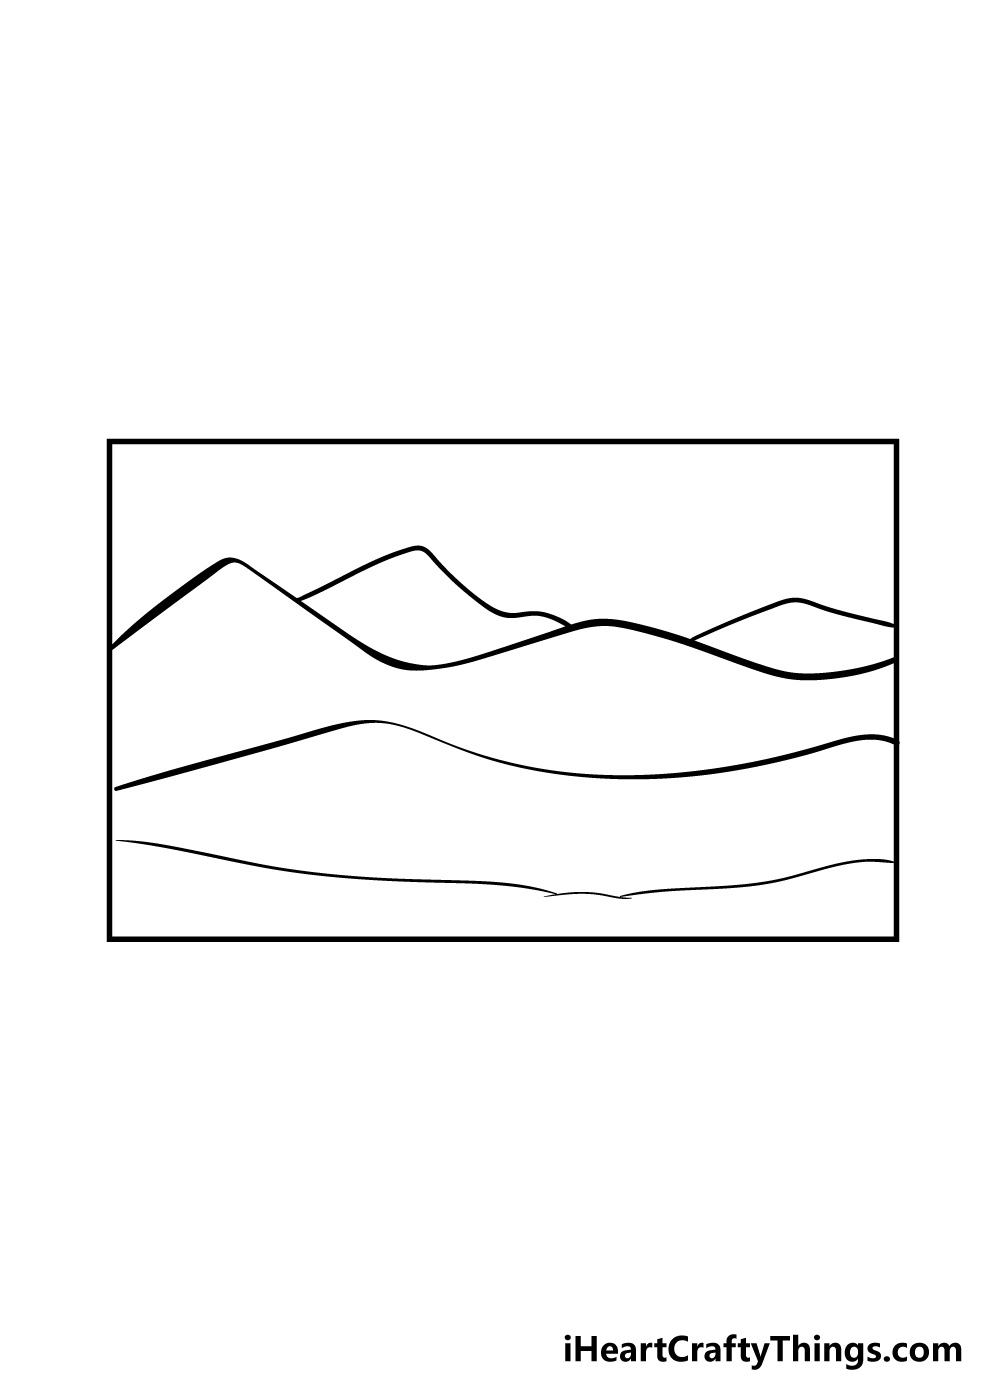
Before we head on to some details for your mountains drawing, we shall draw in one more layer of terrain to give this picture even more depth.
Simply draw in some more slightly curved lines beneath the hilly area that you drew in the previous step.
It will also be just above the bottom line of the rectangle from step 1. This line should be the flattest of all the mountain layers so far, but it should also still have a bit of curve to it.
Step 5 – Next, draw some snowy peaks

Mountains are even more magnificent when they have snow on their peaks that bring a chill rolling down, so we shall add some snowy peaks in this part of this guide on how to draw mountains.
To do this, simply add some curvy lines near the tops of the mountains in the first two layers of your drawing, as you can see in the reference image.
This simple yet effective detail will add a great atmosphere to your drawing!
Step 6 – Draw the final details for your mountains

Your mountains drawing is already looking great at this point, but you can make it look even better with some small details.
First of all, you can draw in some puffy clouds over the mountains to make it look like a beautiful, clear day for these mountains.
Then, you can draw some beautiful pine trees dotted along the mountains.
This is a detail where you can change it up a bit to suit your preference, and you could add lots more trees to your mountains if you would like! What other details do you think would suit this picture?
You could even add some of your own details such as a house on the mountains for an extra touch!
Bonus: Add Some Beautiful Extra Details To Your Mountains Drawing
Before we color in this mountains drawing you’ve worked so hard on, we wanted to go over a few extra ideas you could use to make it even better. We love how it looks now, but adding your own details can make it so much more special!
First, let’s talk about weather details, as in the image we have now there are only a few small clouds. If you wanted to drastically change the composition, you could do so with a change of weather.
Maybe the clouds could be much larger and darker to show a storm brewing. With a series of small lines coming down from the clouds, you could show that rain is pelting down from the clouds.
A crack of lightning would be great as well, and these are just a few examples! Then we can focus on the mountains themselves.
Who doesn’t love the sight of mountains covered in pine trees? If you agree, then you could add a blanket of trees over the mountains.
It would require some patience, but it would be so worth it. In some places, you will even see mist snaking down through the trees, and you could show that with some subtle white paint.
Adding structures such as little cottages, cabins and even something like a cable car would be awesome too. Speaking of which, you could also add some living characters to the image.
They would probably be quite small on the image, but you could have some people and animals standing on and hiking on the mountain. This would really add some life to the image!
These are the ideas we had, but how else would you like to make this mountains drawing even better?
Step 7 – Finish off your mountains drawing with some color
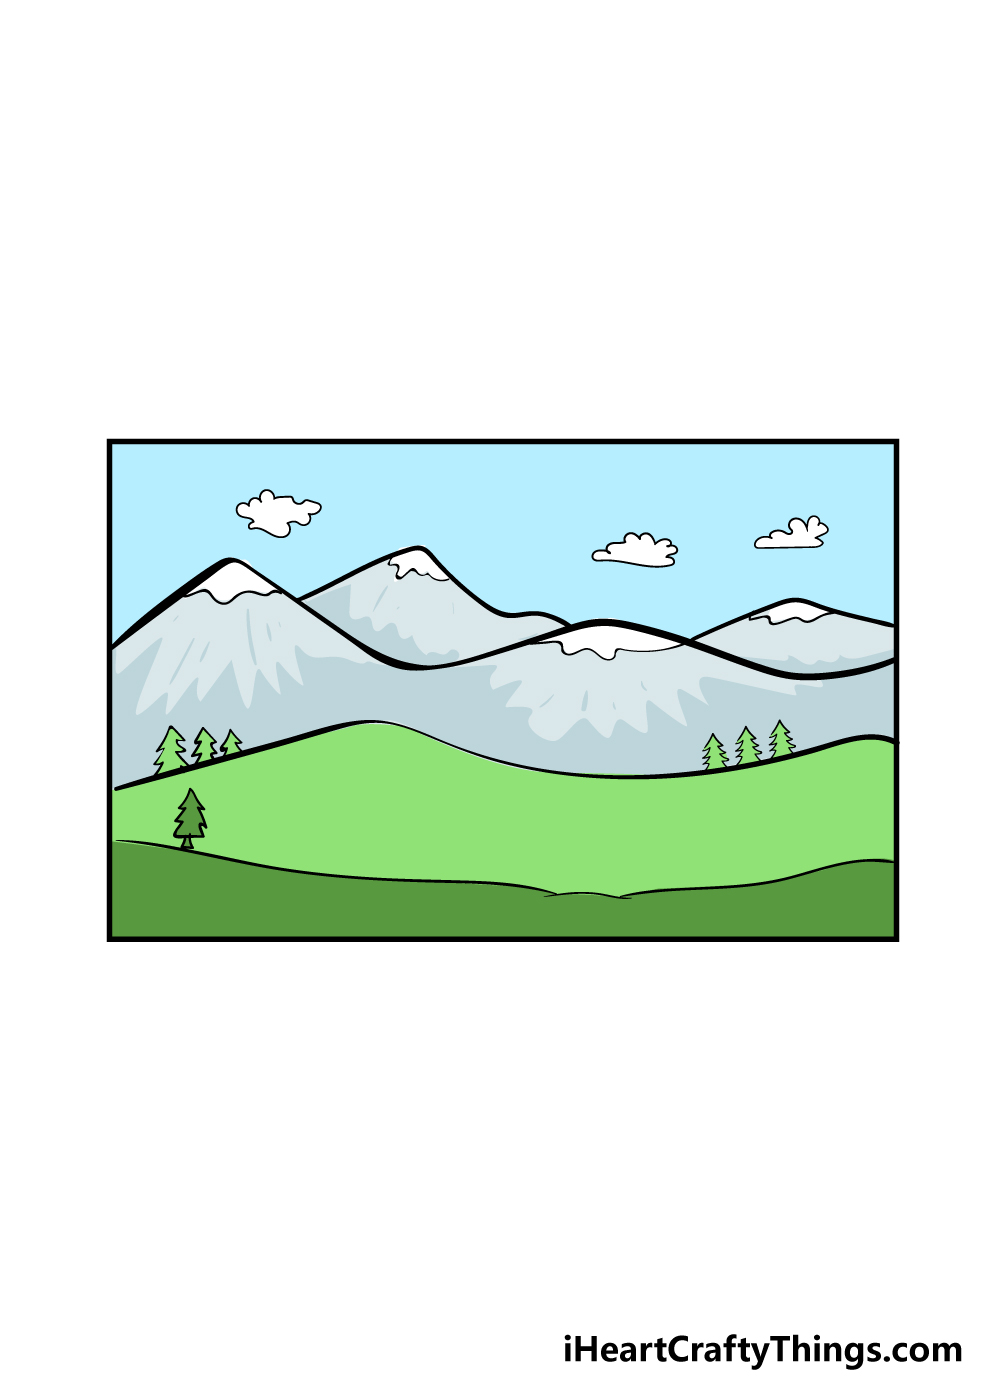
It’s time to get out your favorite art tools, because in this step you can add some beautiful colors to your mountains drawing!
Some colors will really bring this peaceful scene to life, so you should really let your creativity flow on this one. We’ve shown you just one way to color in your amazing drawing with our image, but you should feel free to show us how creative you can be with your colors for this step!
This image is also perfect to use for some art medium experimentation. I would use some watercolor paints to give this picture a softer feel to it.
Because the snow on the mountains makes me think of a chilly morning, I would also use some cooler colors to give it a chillier feel.
That’s also just one way you could go about it, though, and any art mediums and color schemes that you use will definitely look incredible!
3 More tips to make your mountains drawing easy!
Make these easy to draw mountains even easier with the help of these fun tips!
This mountains drawing we created looks amazing with all of its details. These details can trip you up sometimes, however, so it could be useful to remove a few of them.
This would be something you would want to do in moderation, as the details do look really nice. It can also be worthwhile to make a few different versions of these mountains.
For the earlier ones, you could keep the detailing to a bare minimum. This would be great in order for you to get the hang of the basics of the drawing.
When you feel more confident, you could slowly start adding more and more details until you are satisfied with how it looks.
Next, you could make this mountains drawing easy by modifying it to suit your strengths. Everyone has things that they find easy or hard to draw, and you could use your own strengths.
For example, you may love to draw buildings and structures. If you find that is the case for you, then you could add some on and around these mountains.
If you prefer to draw cartoons, then you could make this drawing even more cartoony in its style. These are just a few example of how you can work with your strengths to make this even easier for you specifically.
No matter what you are drawing, you will always make it easier for yourself if you use additional resources.
The steps in this guide are a huge help, but you can supplement the steps with additional resources.
If you live near some real mountains, then that would be a great place to start. If not, you can find many photos and drawings online to help you as you create this mountains sketch.
By using photos, you can also add different details such as more trees and maybe some mist rolling down the mountain. Most importantly, it will really help to make it so much easier!
Your Mountains Drawing is Complete!
You have reached the end of our guide on how to draw mountains, and you have a beautiful drawing to show for it!
We really hope that you had a fun time learning to draw this beautiful picture alongside us.
We created this guide to show you how easy it can be to create an amazing picture if you break it down into steps and take it slow.
Now it’s up to you to personalize your mountains drawing with your own fun details. You could draw some extra elements for the picture, such as some little houses, more trees, or even more mountains in the background.
If you’re feeling extra creative, you could even draw a cool dragon circling the mountaintops to give the image a fantasy feel!
Details like this along with your color and art medium choices can really help to put a personal spin on your picture, so we can’t wait to see the creative additions you choose for your picture!
We hope that you will check out our site frequently, as we have many more great step-by-step drawing guides like this one coming out constantly for you to enjoy!
Also, please do share your finished mountains drawing on our Facebook and Pinterest pages for us to enjoy! We can’t wait to see your incredible and creative artworks.