There are many different beverages to enjoy, and there is a type to suit every mood!
Whether it’s an icy drink on a hot day or some hot chocolate on an icy Winter evening, there is something to fit every taste.
Milkshakes are an example of a delicious treat that can be enjoyed at any time!
They come in such a wide variety of flavors and variations that there’s truly something for everyone when it comes to milkshakes.
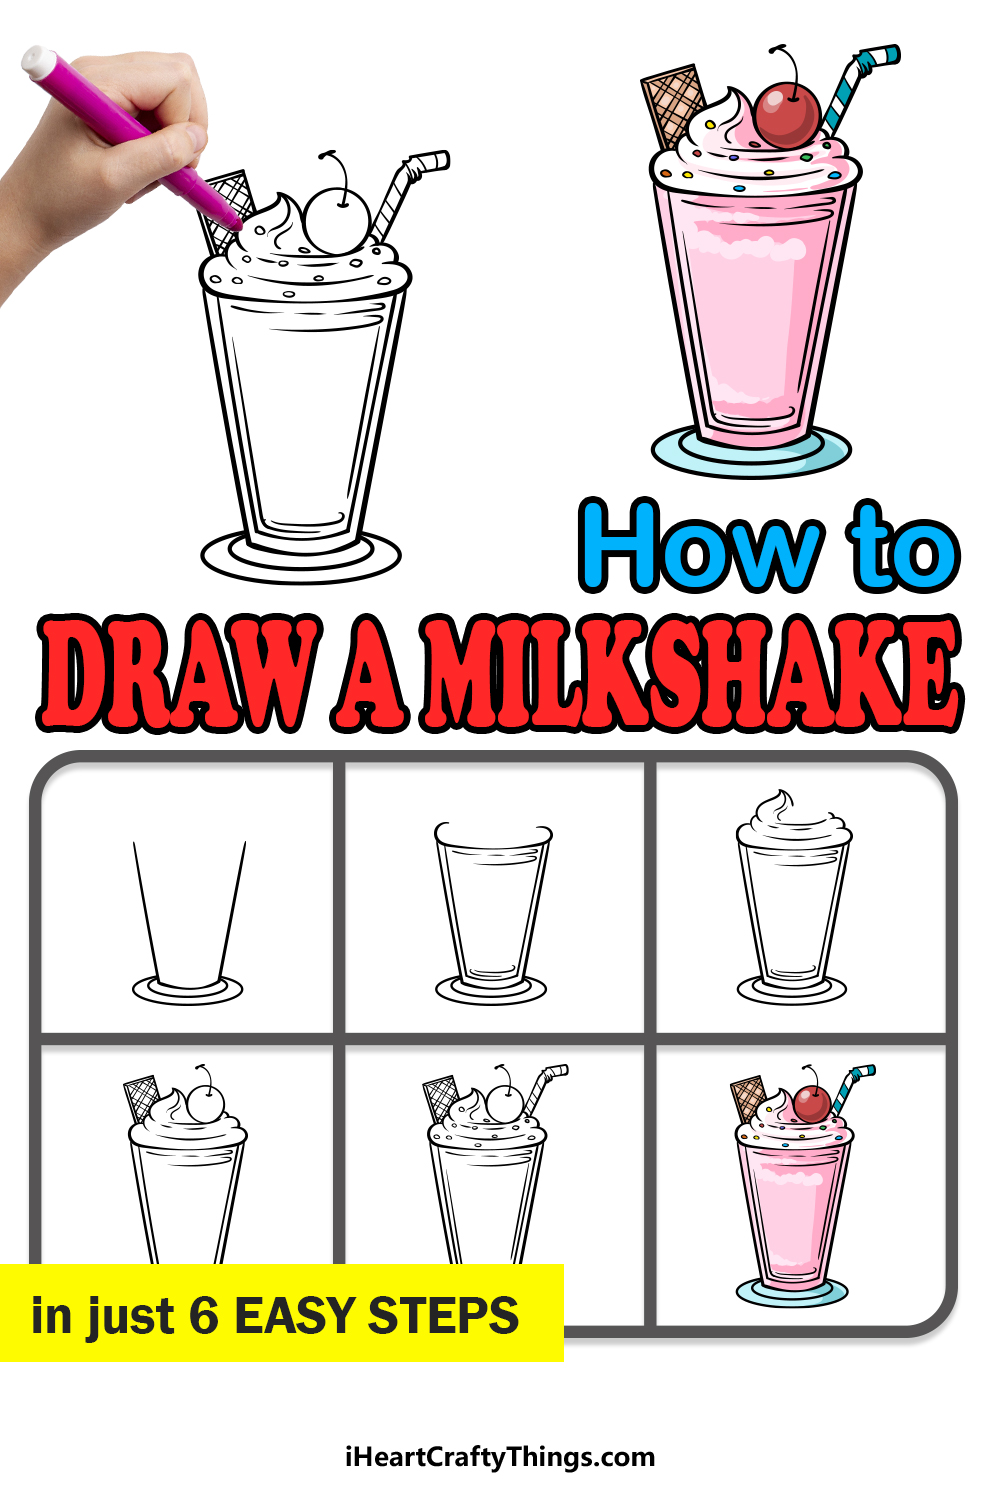
Learning how to draw a milkshake is the perfect way to design your ideal milkshake creation!
That’s what we’re here to do in this tutorial, so you’ll want to read all the way to the end of it!
Our step-by-step guide on how to draw a milkshake in just 6 easy steps will show you just how fun and easy designing your own milkshake creation can be.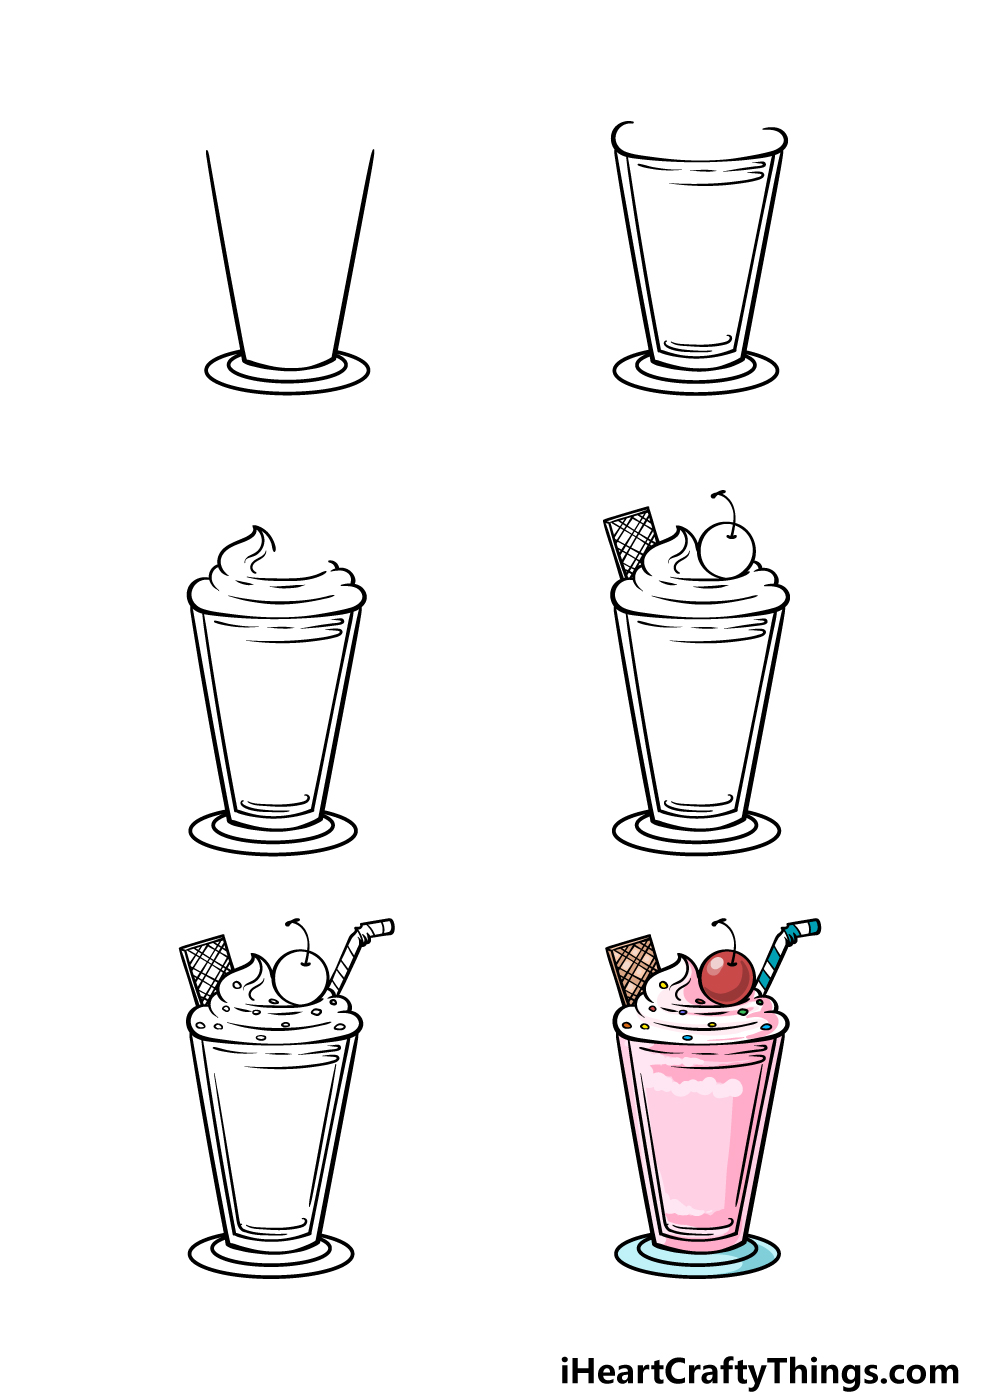
How to Draw A Milkshake – Let’s Get Started!
Step 1
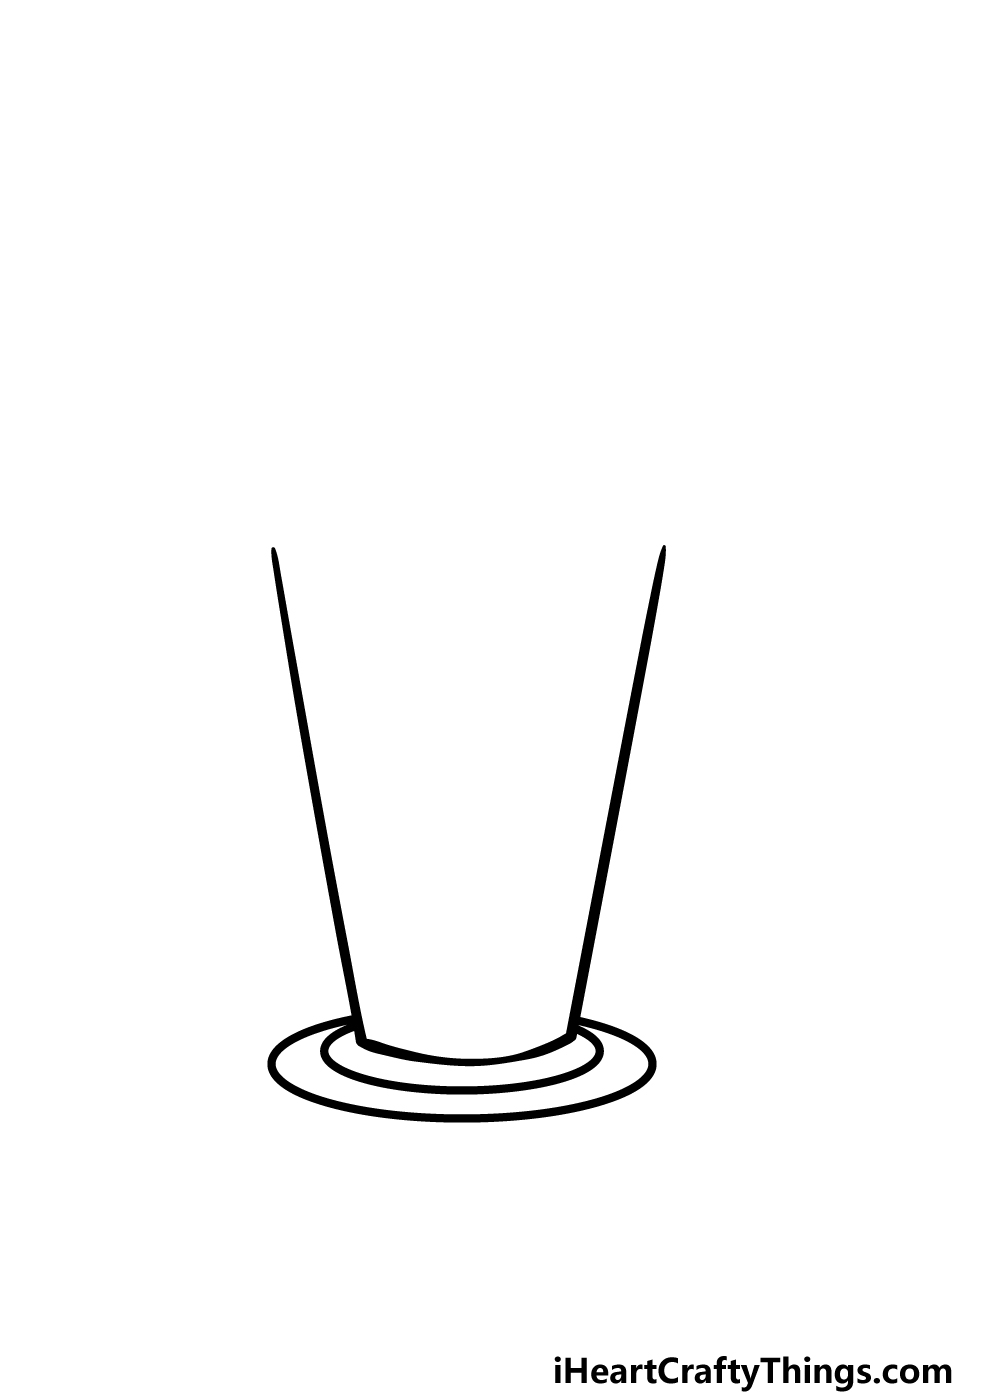
When ordering a milkshake, it will often come in a tall glass, and this is the element that we will begin with in this first step of our guide on how to draw a milkshake.
For this first step, you will need a ruler if you would like to make sure that the lines are perfectly straight.
For the sides of the glass, we will be drawing some long, straight lines that go up at a bit of an angle.
Then, draw some curved lines for the base of the glass, and then add another curved line surrounding these for the rest of the base.
We will leave the top of the glass open for now, as we will be drawing the milkshake itself into that space soon.
Step 2 – Now, draw the start of the milkshake and more of the glass
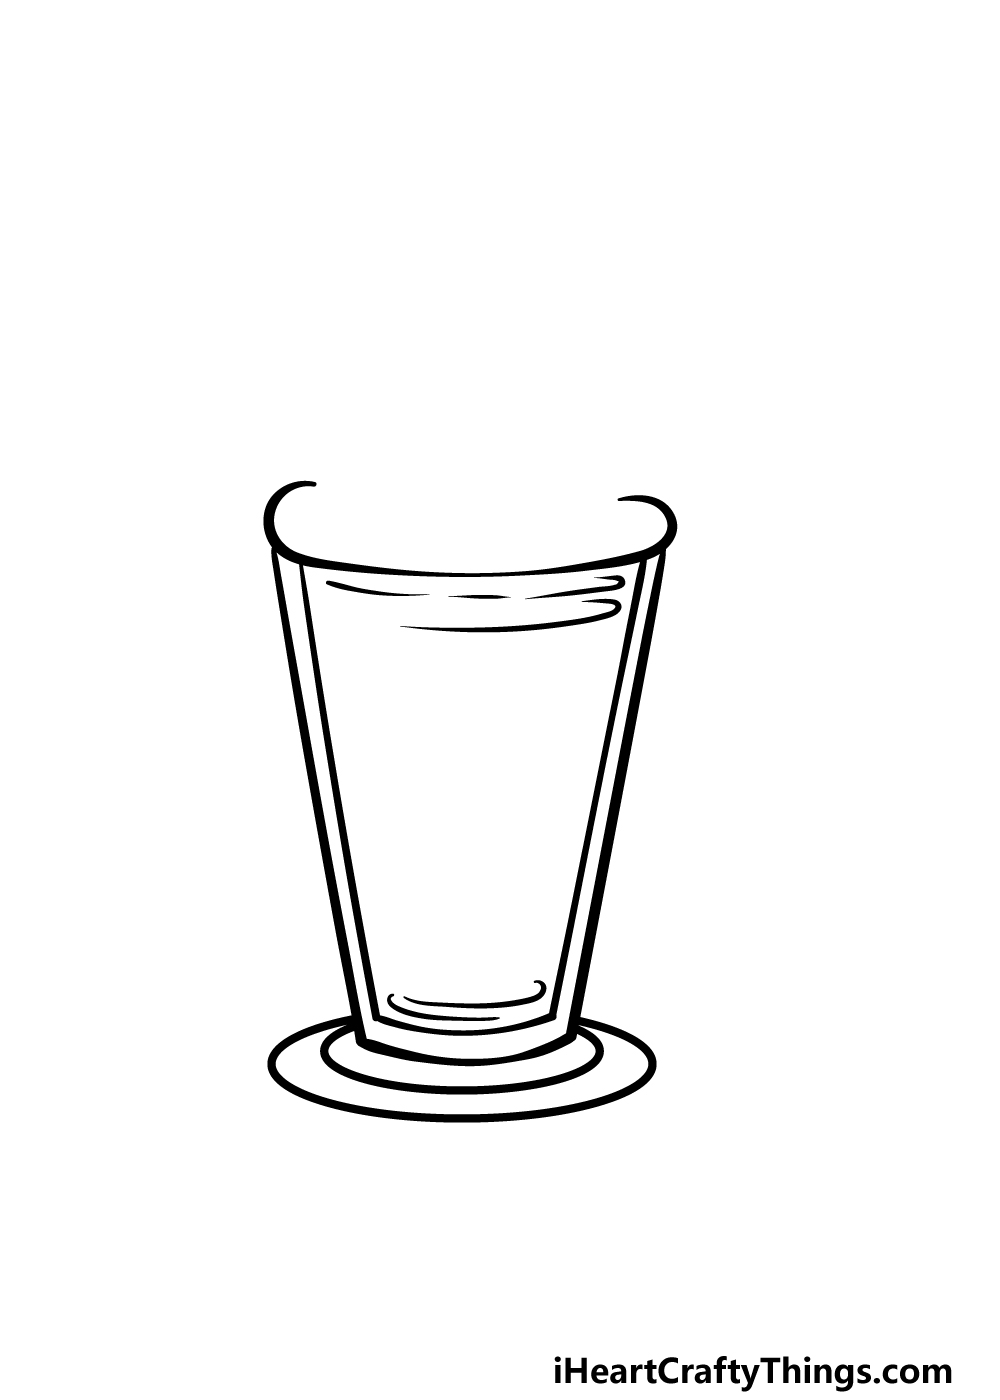
This step of your milkshake drawing will see you beginning to draw the beverage itself! To start this, we will be drawing a curved line across the opening of the glass.
This line will curve inwards at the ends, and it will extend slightly over the rim of the glass.
Then, we will be drawing some more straight lines along the inner perimeters of the sides of the glass.
These can be connected at the bottom with another curved line, as shown in the reference image. Then, you’ll be ready for the third step of the guide!
Step 3 – Draw the top of the milkshake coiling up
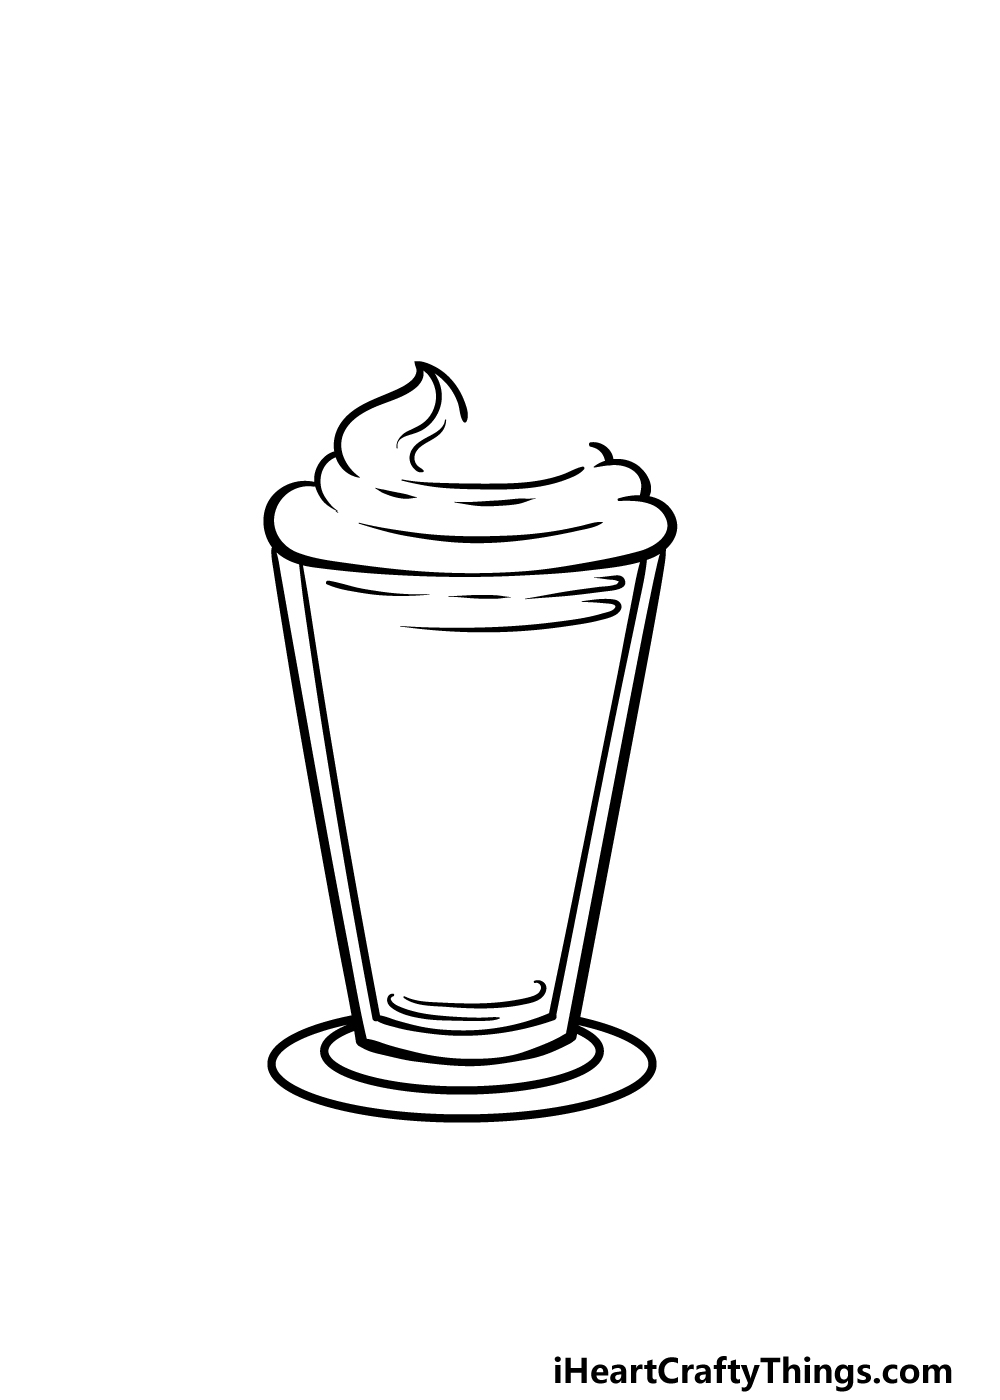
Next, we will be drawing the top of the beverage in this step of our guide on how to draw a milkshake.
This can be started by using some horizontal curved lines to make it look like the milkshake is coiling up on itself.
Then, for the top of the milkshake we will use a pointier curved line, and this will show where the machine pouring out the milkshake stopped the stream.
There will be a small space left at the top of the milkshake itself, as this is where we will be adding some of the toppings in the next step.
Step 4 – Next, draw the first of the toppings
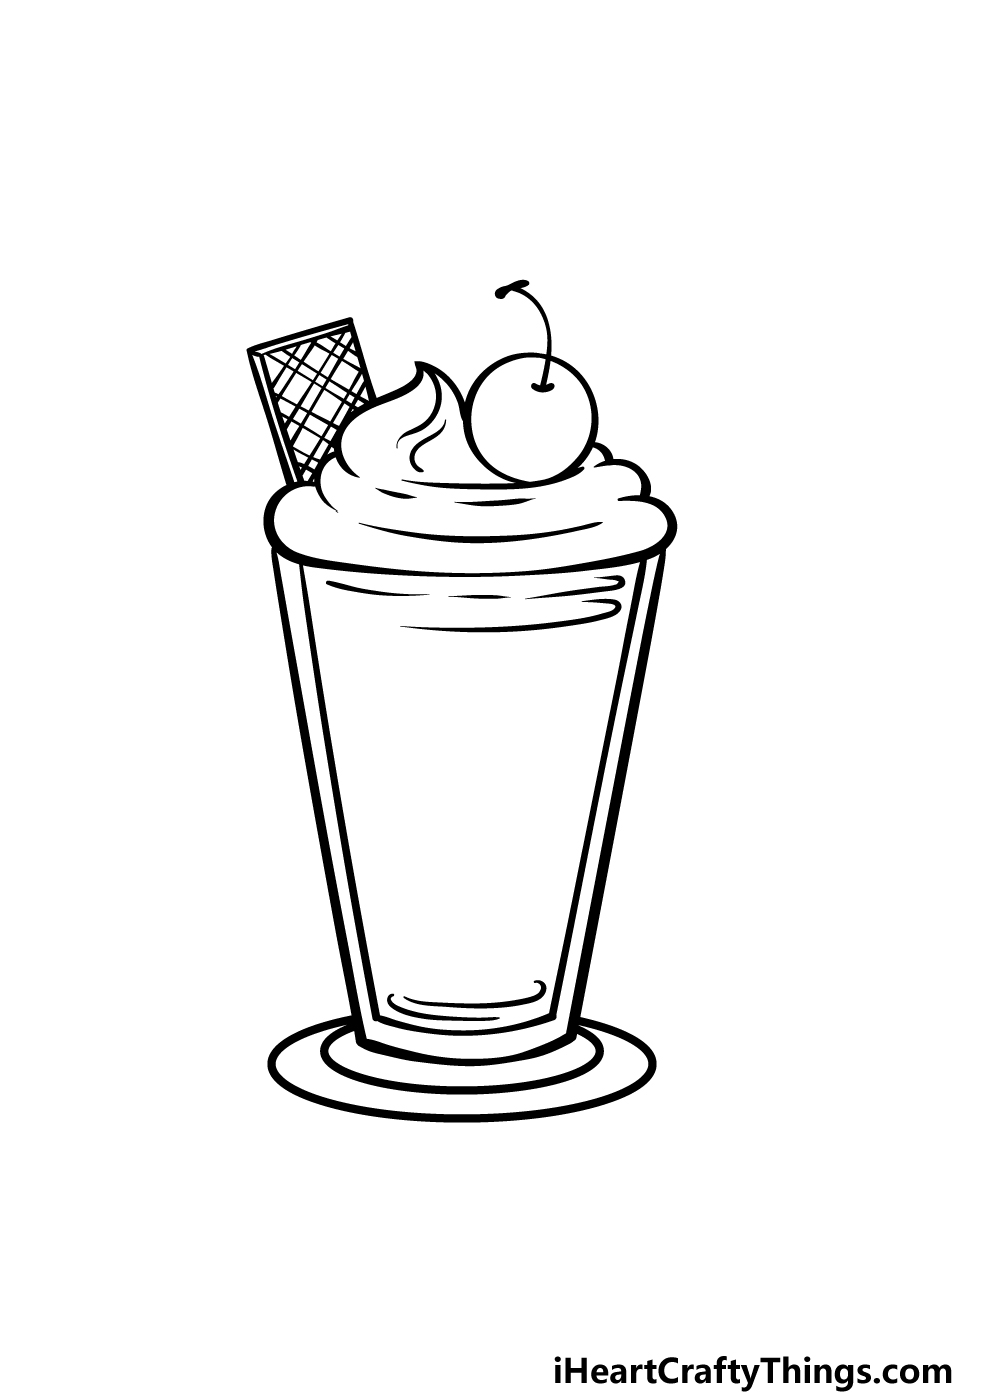
Having a delicious milkshake is one thing, but it can be made even better when you bring some tasty toppings into the mix.
We will be adding some of these tasty toppings to your milkshake drawing in this step.
The ones that we show in the guide are just some examples of what you could go for, but you could also add some unique toppings of your own!
For ours, we added a circle to the space that you left in the milkshake in the last step. This will have a stem poking off of it to form a cherry sitting in the milkshake.
Then, we will draw a rectangular shape poking out of the upper left-hand side. This will have lines crisscrossing along it, and this will be a wafer poking out.
You can then proceed to the final details of the drawing in the next part!
Step 5 – Add the final details to your milkshake drawing
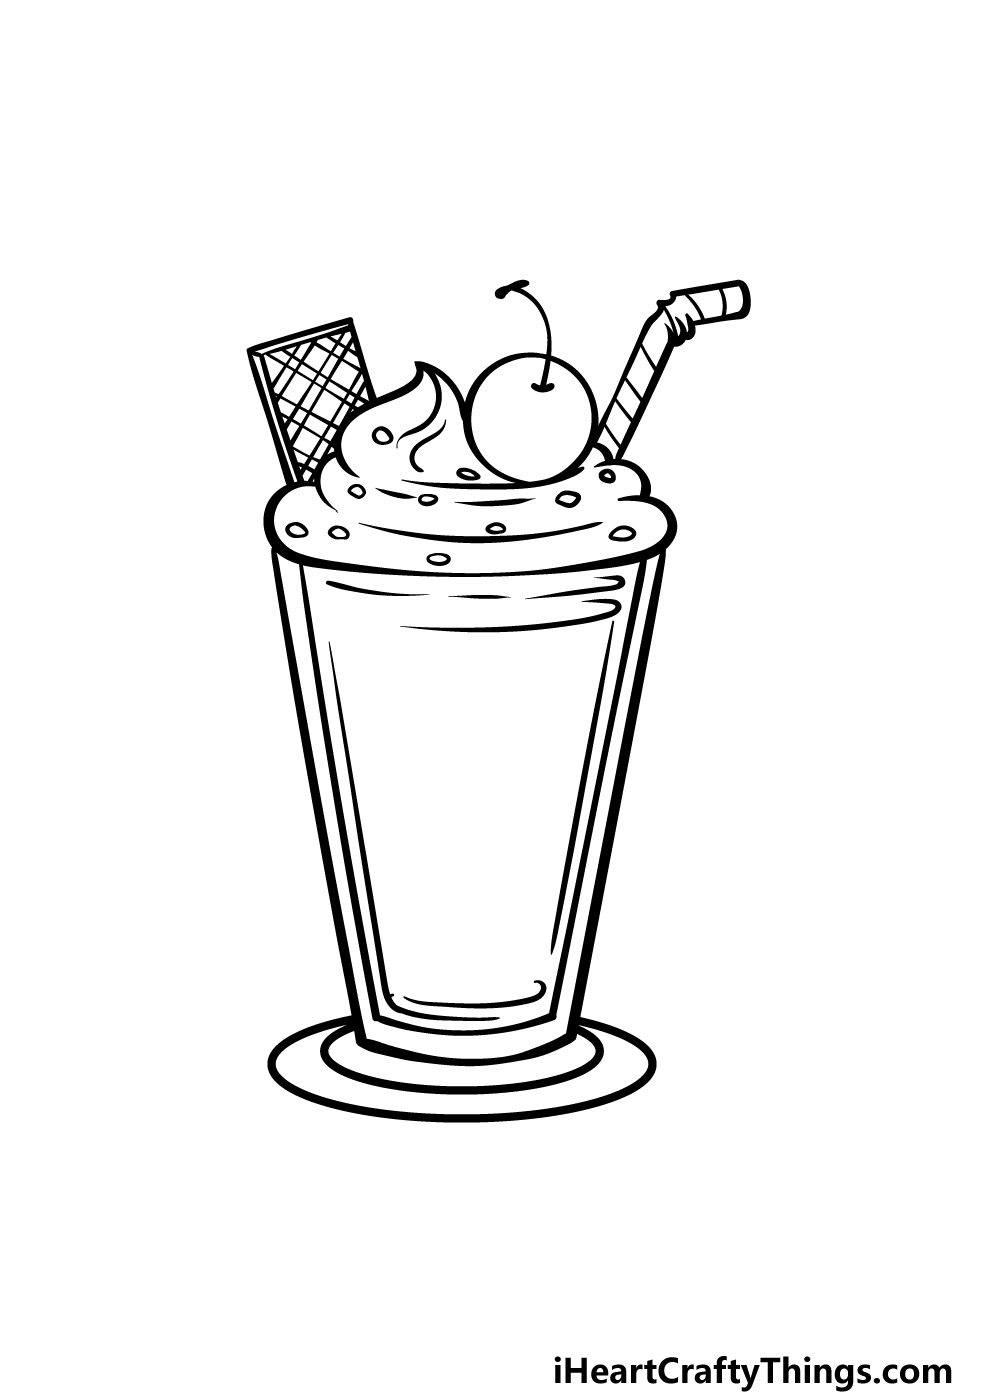
To finish off this picture before the final step of this guide on how to draw a milkshake, we will be adding a few final details.
This milkshake needs something to help with consuming it, so you can use some straight and curved lines to draw a striped bend straw poking out.
You can then finish off with some small rounded shapes on top of the milkshake for some sprinkles. With these added, you could also draw some extra details of your own!
Adding a background would be one idea, and if you did that then what would you draw to be enjoyed with this milkshake?
Step 6 – Finish off your milkshake drawing with color
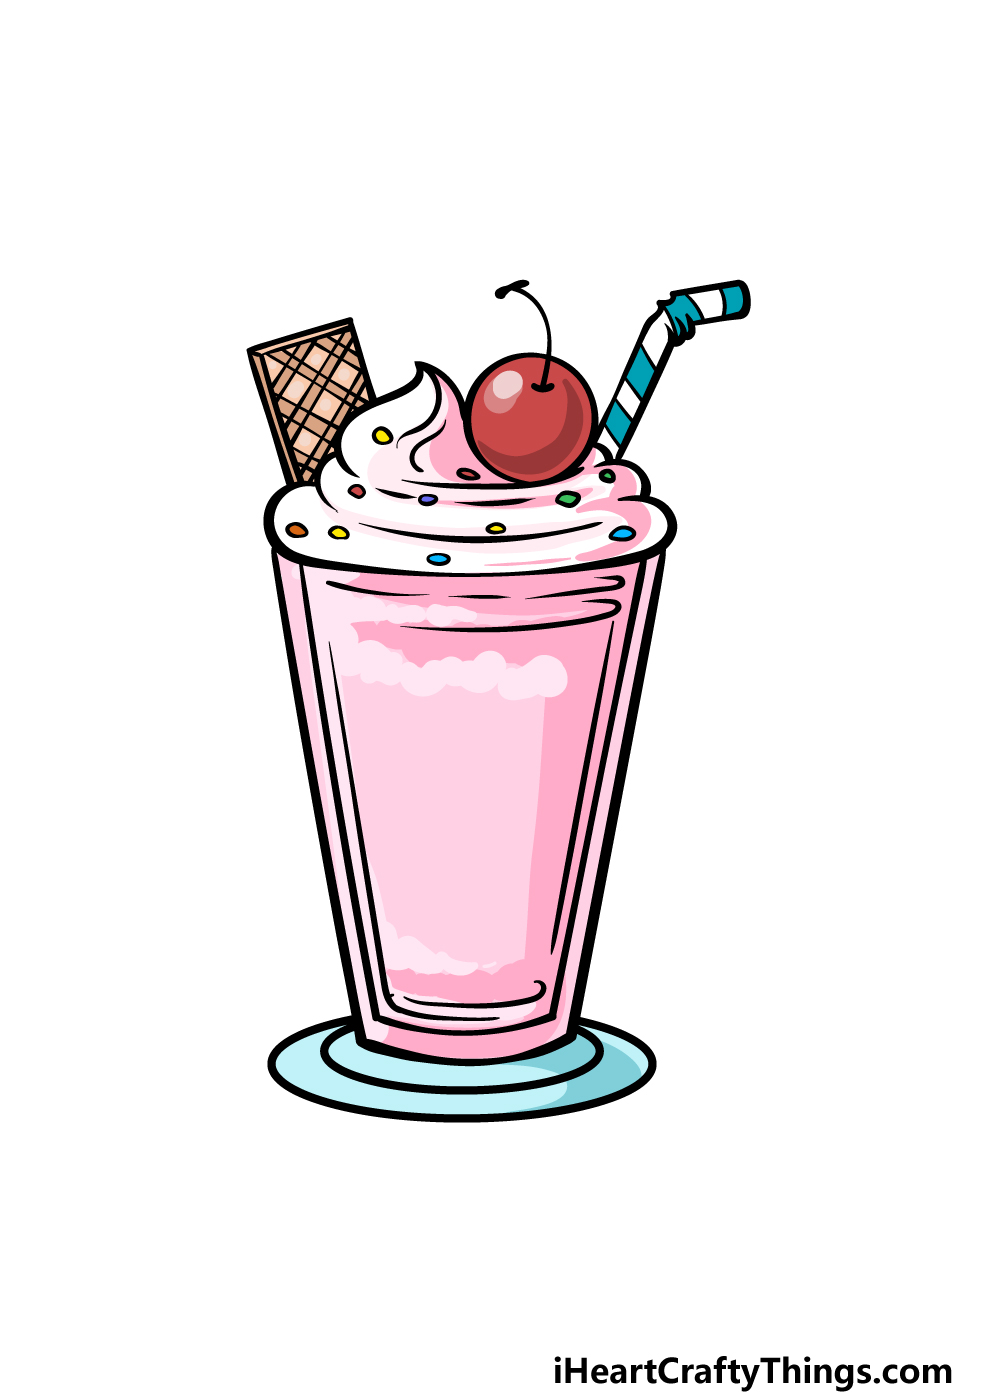
Now it’s time to complete this milkshake drawing with some color! With a drawing like this, color is especially important as it helps to define the kind of milkshake it is.
In our reference image, we used some pink shades for the milkshake itself to suggest that this is a strawberry flavored milkshake.
Then, we used a nice rich red for the cherry on top, some browns for the wafer and blue with white stripes for the straw.
Finally, we used a variety of bright colors for the sprinkles. Will you use a similar color scheme for your own drawing?
This is your chance to show off what your favorite milkshake flavor is with the colors you use, so have fun getting creative with it as you finish off!
3 More tips to make your milkshake drawing easy!
Make this tasty milkshake sketch even easier to draw with these handy tips.
The first tip we have for this drawing of a milkshake will be one we think you will like! First, we would suggest using a real milkshake to help you as you draw.
This could be ordered from a restaurant or an ice cream shop. Before you tuck into the tasty treat, be sure to take some photos of the milkshake from different angles.
The more photos you get, the better! Then, you can use these photos along with our reference images to make the drawing so much easier.
If getting a real milkshake isn’t possible, then you could get the next best thing and look up some images of real milkshakes online.
Next, you could make this milkshake drawing a bit easier by altering the design a bit. This would pretty much depend on your own drawing preferences.
For example, you may be a fan of drawing in a simple cartoon style, in which case you could adapt this portrayal to your chosen style.
Not only would this make the drawing easier for you specifically, but you could end up with a picture more suited to your tastes.
We gave one example of a new style you could use, but there are many more!
What kind of art style could you use for this drawing?
Using arts and crafts is a great way to make a picture even more vibrant. There are some you could use for this milkshake sketch that would also make it a bit easier!
For example, drawing small sprinkles could be a bit of a frustrating endeavor. You could make it easier by sticking small beads and stickers on the milkshake instead.
Not only would this be easier than drawing them, but it would make it look even tastier! There are many other crafts you could use, too.
For example, you could sprinkle some sparkly glitter onto the milkshake to make it look even more delectable! What other crafts could you use?
Your Milkshake Drawing is Complete!
That will conclude this guide on how to draw a milkshake, and we hope that this process helped to quench your creative thirst!
Drawings like this may seem simple at first, but there are some elements that can definitely prove to be more challenging than expected.
With the help of these steps, we also hope that it was made even more fun and enjoyable for you!
Now that you know the basics, it’s your chance to create a brand new design of your own! You could do this by adding toppings, ingredients and other details to create your own ideal milkshake.
Combined with the colors and art mediums you can use, there is unlimited potential for how to finish it off!
When you would like to find your next awesome drawing challenge, you can find it on our website. We have tons of amazing drawing guides there, and we upload new ones often as well.
Please also remember to share your finished milkshake drawing on our Facebook and Pinterest pages for us to enjoy!
