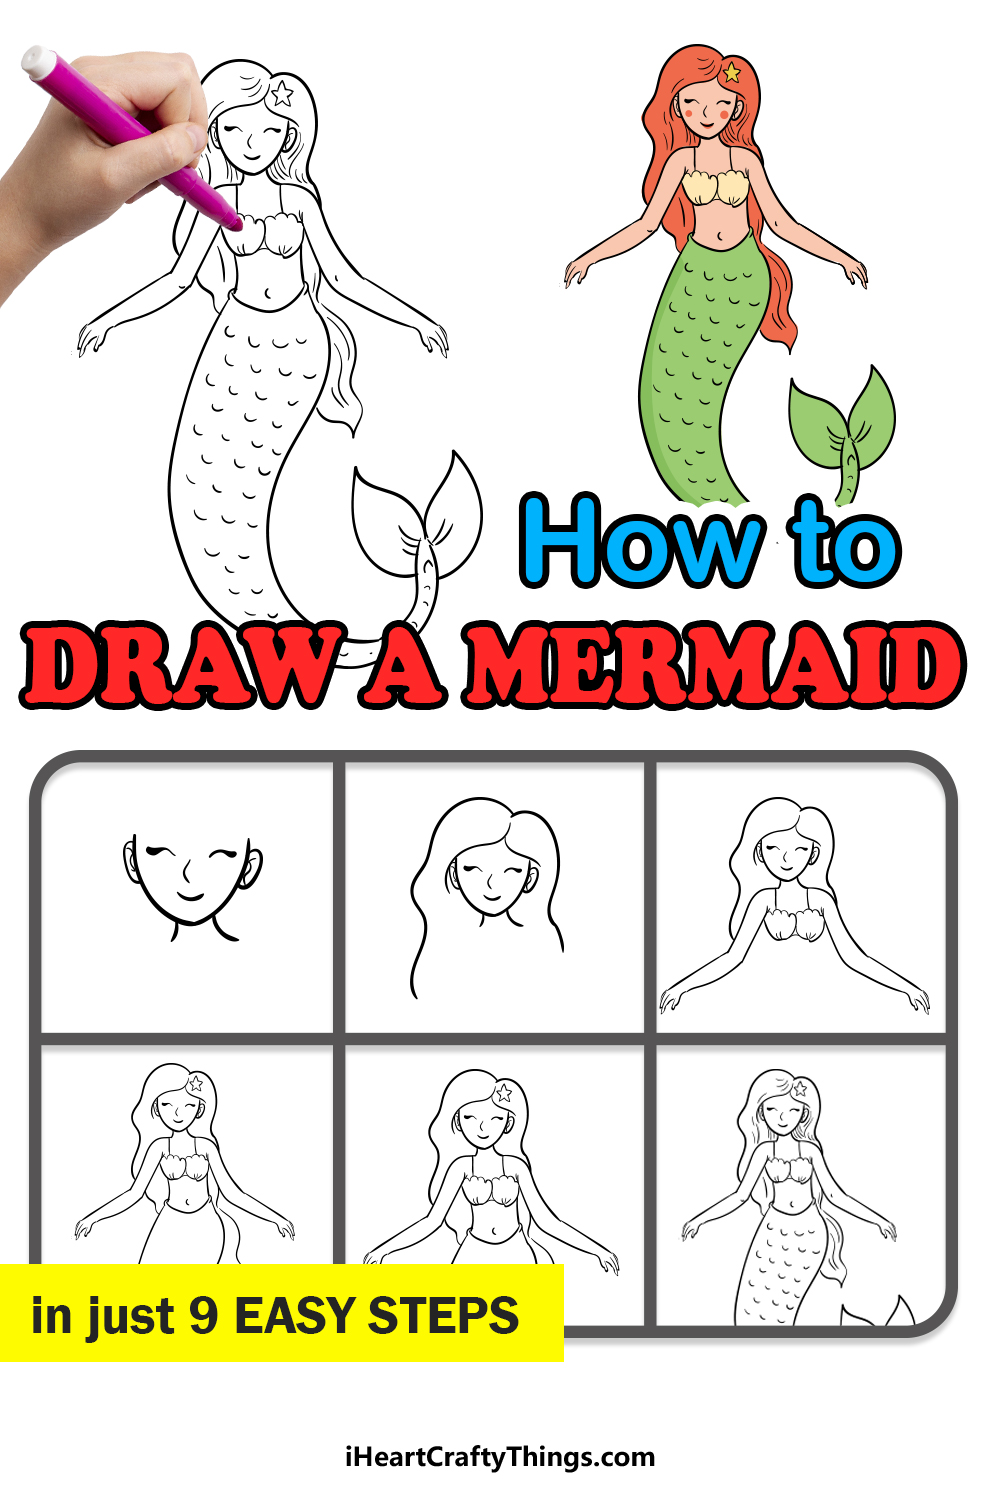
Learn how to draw a mermaid easily by following the steps of this guide! This tutorial for kids is perfect for anyone wanting to create their own beautiful mermaid.
Mermaids have captivated our imaginations for thousands of years and have been depicted in many legends, fairytales and stories. They have even starred in popular animated films, video games and other media!
These ocean beauties are half human, half fish and can traverse the oceans with grace. It’s easy to see why so many people wish they could live the life of a mermaid.
This guide will provide the next best thing as you make your own mermaid character. Then, you could draw an ocean background for her to exist in. let’s begin and meet your new mermaid friend!
Watch And See How To Make Your Mermaid Drawing
How to Draw A Mermaid – Let’s get Started!
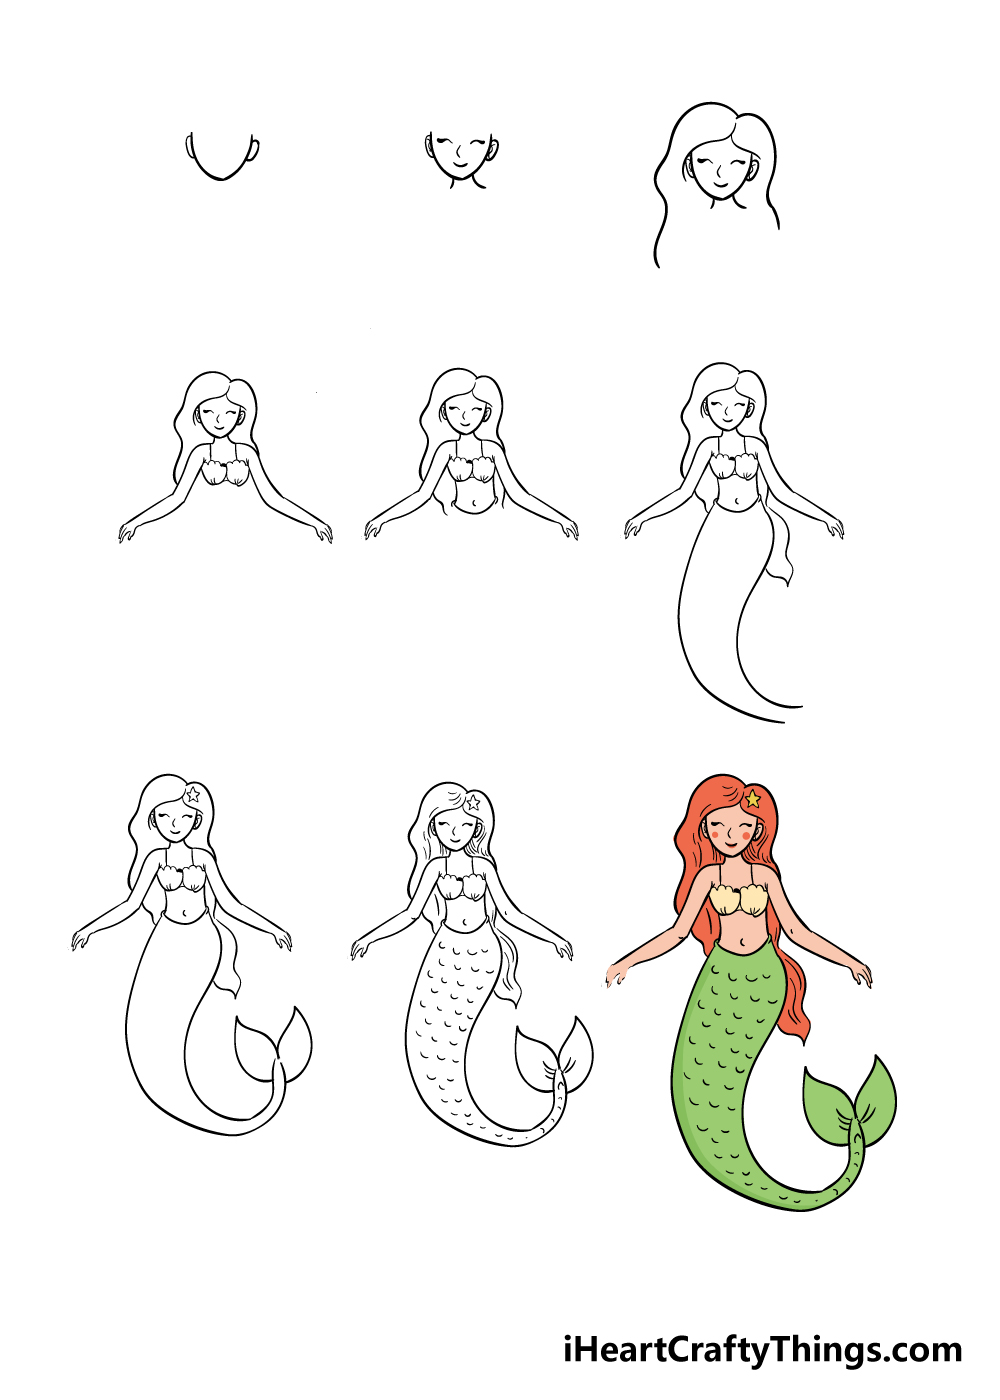
Step 1

There are some rather intricate details to this mermaid picture, so to make things easier e will take things slowly and break it down into smaller steps.
For this first part of our guide on how to draw a mermaid, we shall start with the face of the mermaid.
To draw in the face, start with a sharply curved line that ends in a bit of a point as you can see in the reference image.
Once you have that line, simply add two squat shapes to the sides for the ears.
Step 2 – Now, draw in some facial details and a neck

The facial details of the mermaid may look intricate, but they’re all made up of fairly simple lines! The eyes are drawn with two small, curved lines, with a more angular small line for the nose.
Then, give her a little smile with a curved line under the nose.
Once you have the face in, add in a neck for your mermaid drawing and draw in some details to the ears.
For small details like these ones, it’s best to use a thin-tipped pen or a very sharp pencil to make the details easier.
Step 3 – Next, we shall give your mermaid some hair

Mermaids are almost always depicted with long, luscious hair, and this mermaid will be no exception.
Firstly, use two lines over the top of the face to make a parting in the hair. Then draw two lines coming down from above that heading towards where the shoulders will be.
Once you have it looking like it does in the reference picture, we can move on to step 4.
Step 4 – Now, start with the arms and body

For step 4 of our guide on how to draw a mermaid, we shall tackle the arms and chest of your mermaid. For this step, referring closely to the reference image will help a lot!
The arms will extend straight out from where the lines of the neck end. They will be in a relaxed position to suggest that she is lazily floating in the water.
Once you’ve used some curved lines to draw n the arms, you can draw in the shells for her bikini top.
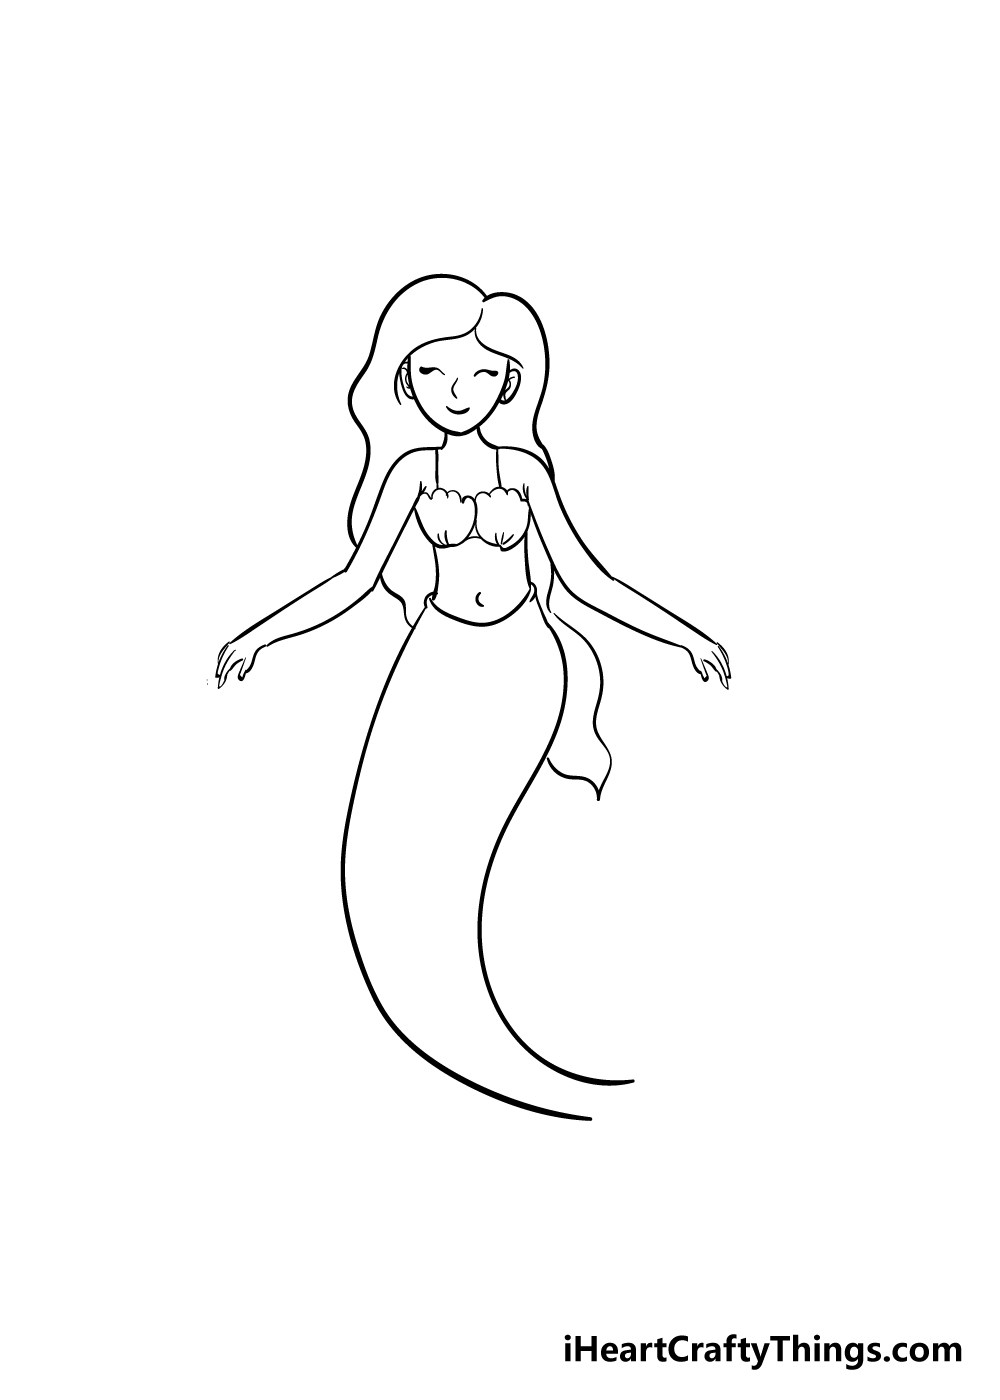
Step 5 – Let’s add in a waist and more hair

Using some fairly straight lines, simply draw down from the shell bikini to make a waist for your mermaid drawing.
Then, draw some wavy lines coming down from the arms to show the hair flowing behind her.
Make sure that you position the lines to look like they would connect to the hair above the arms.
Lastly, draw in a slightly curved line under the waist, as this will be the start of her fish tail.
Step 6 – Now, give your mermaid a tail
Every mermaid needs a fishtail, and we shall start to add it to your mermaid drawing in this step.
This will be done by using two curvy lines coming down from the waist and curving to the right as you can see in the image.
Once you have these lines in, you can also draw in the end of her hair flowing to the right of her waist.
Step 7 – Draw in the end of the tail
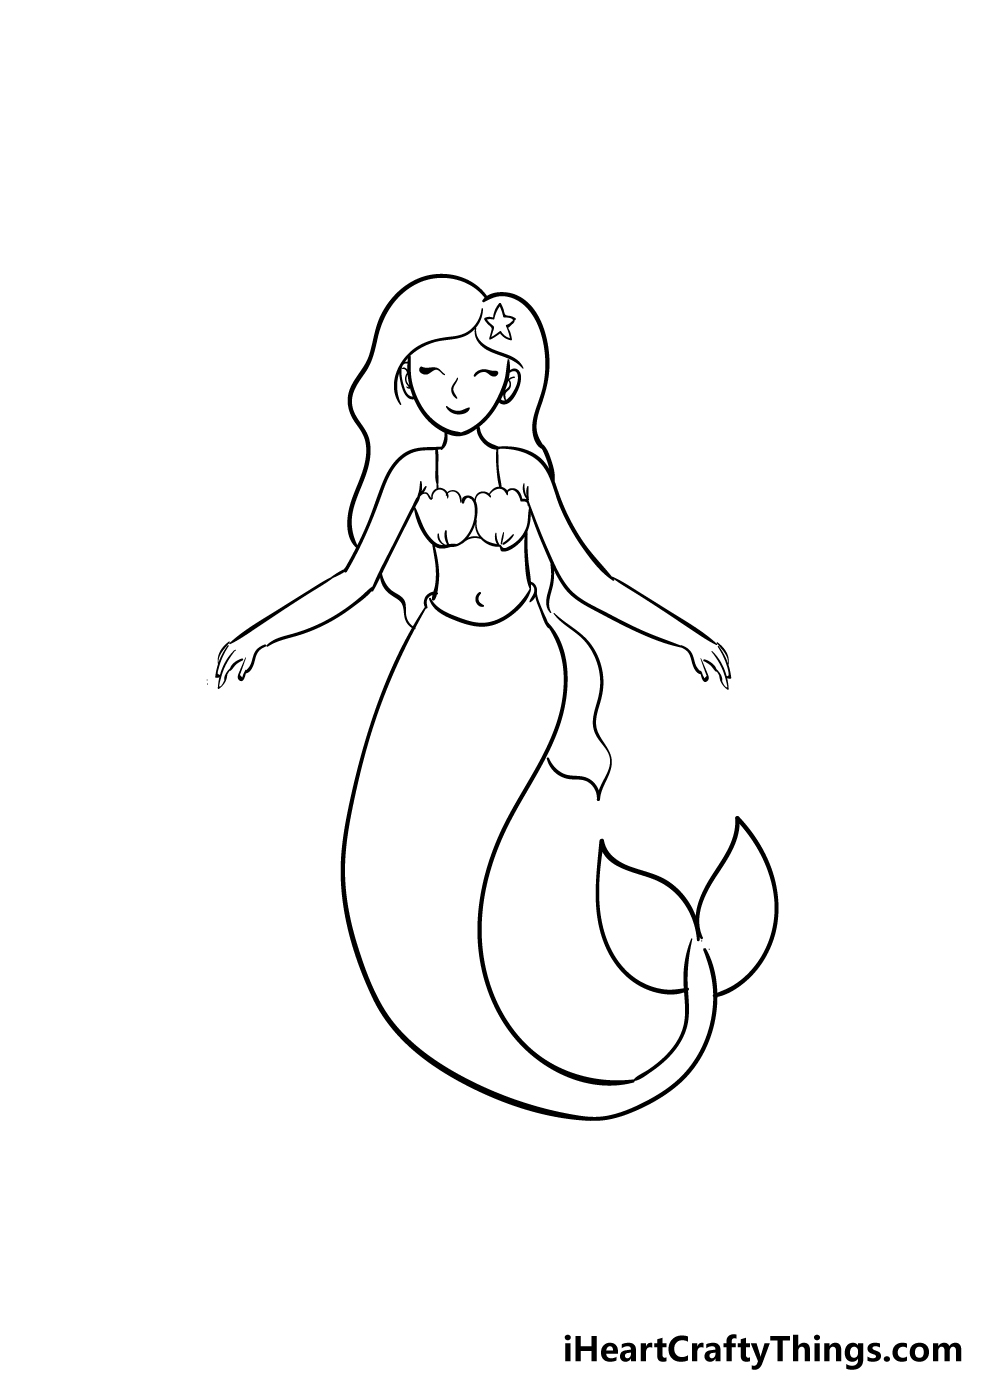
Now that you have most of the fishtail drawn in, you can extend it a bit and then add in the end of the fin using some sharp lines like the ones in the image.
Then, you can draw in a cute little flower in her hair for a pretty look!
Step 8 – Next, we shall add some final details
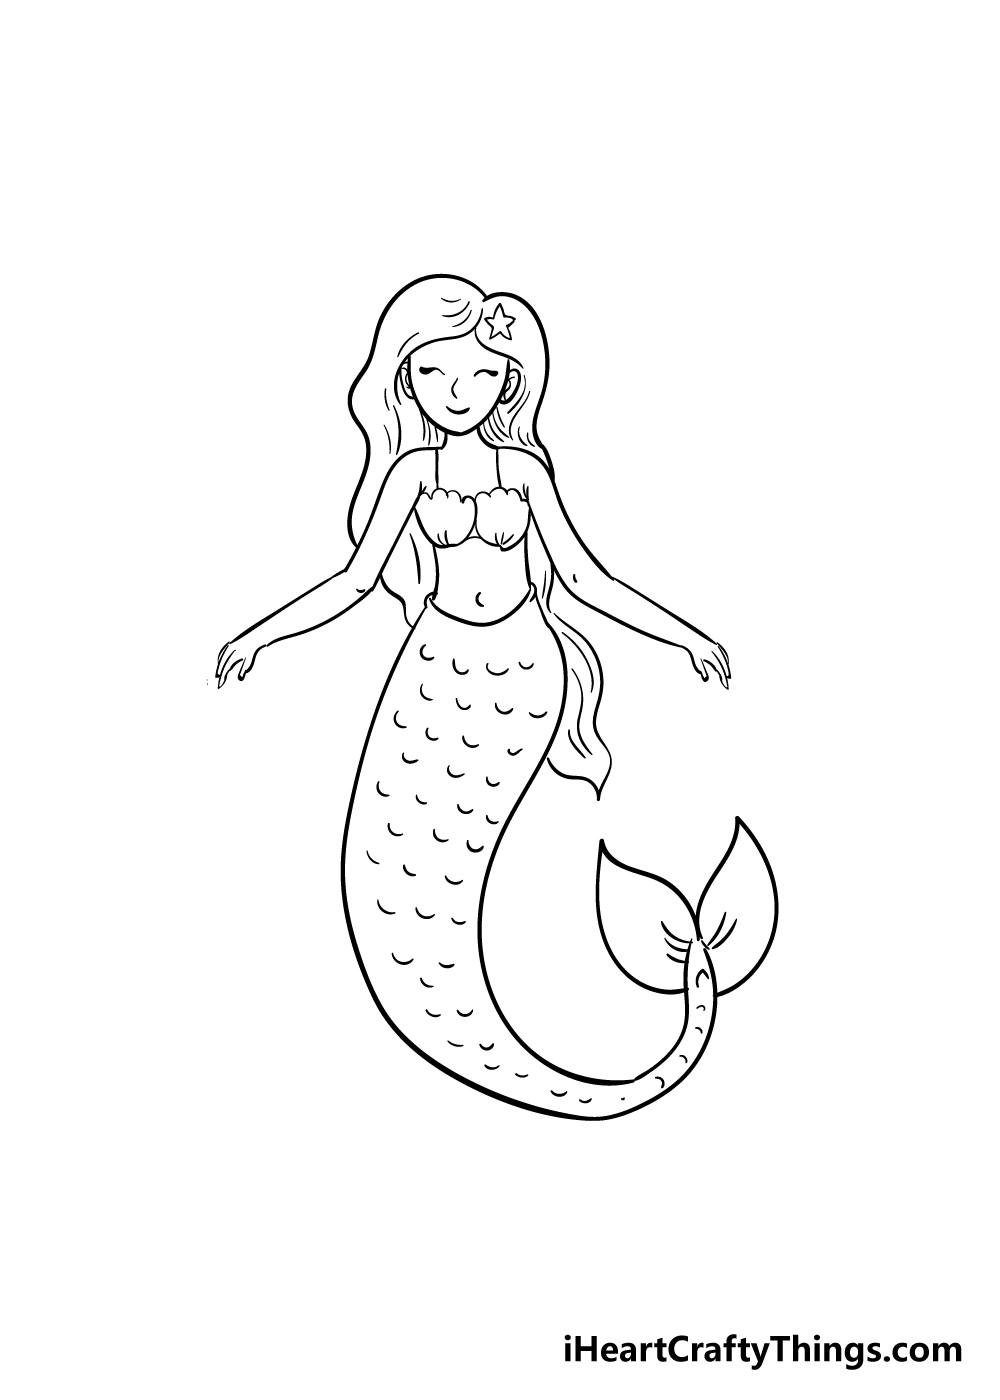
Your mermaid drawing is almost finished! In this step, we shall focus on some final small details.
These will consist of some long, thin lines in the hair to give it some texture. Then, use a series of small, curved lines throughout the fishtail to give a scaly look to it. Finally, add some lines to the tail for more texture!
These are the details we would add, but what details do you think would look good?
Bonus: Use Some Additional Inspiration For This Mermaid Drawing
This guide on how to draw a mermaid looks beautiful as is, but there are many ways that you can make it even more personalized. There are a few ways that this could be done, and we wanted to give you a few ideas.
One would be to use some real people to customize this mermaid drawing. If you’ve ever dreamed of being a mermaid, then this would be the perfect opportunity!
In order to do this, first choose the person you would like to use for inspiration. It could be you, a friend, a family member or maybe a famous character or celebrity you’re a fan of.
Once you have chosen the person, you can then gather different pictures of them and then use the pictures to change the facial features and other details of the mermaid in the guide.
This could be in the facial features, the hair style or the colors you use for the drawing. By the time you’re done, you will have a totally unique image to show off!
For another angle, you could also look at drawing this mermaid in different art styles. It could be a classic cartoon art style, such as the classic Disney style.
Or, you could really challenge yourself to draw her in a more realistic style, which would be quite a contrast to the design in this guide!
Once you’re happy with how she looks, you can then add a background that suits the changes. For example, if you used yourself as inspiration, then she could be sitting in an underwater version of your bedroom.
Now it’s up to you to decide how you’d like to finish off this drawing! Who would you like to use as inspiration?
Step 9 – Now finish off your mermaid with some color
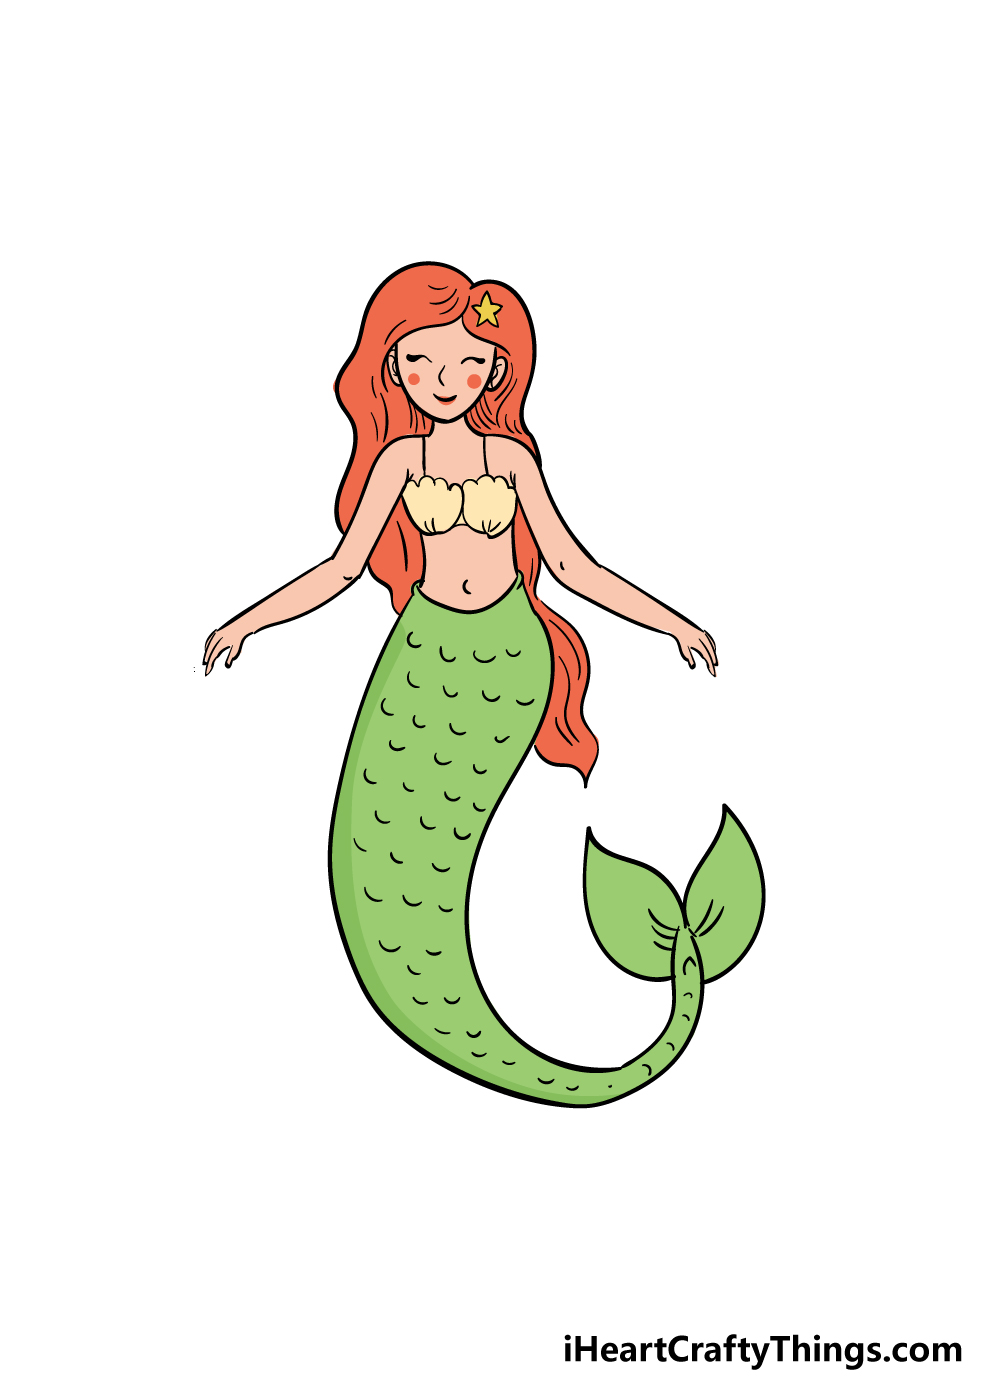
The final details are complete and you can take on the most fun out of all the steps: coloring it in!
This is a great chance for you to use some of your favorite colors to finish off your beautiful mermaid.
We’ve shown one way to color in the drawing, but you should use your creativity to express yourself with color!
There’s also a lot of fun to be had with the art tools and mediums that you choose.
Will you go more painterly with some acrylics or watercolors, be more detailed with some colored pens and pencils or go bright and bold with some crayons? We can’t wait to see what you choose!
5 Tips To Make Your Mermaid Drawing Even Better!
Create a magical mermaid sketch with these 5 amazing tips we have for you!
As you know, mermaids live in the ocean. That means that you could add all kinds of ocean details to this mermaid drawing!
You could have her perched on a rock with the waves crashing behind her for one idea. She could also be under the water on the ocean floor.
If you went with this second idea, you could add all kinds of amazing fish, coral and other sea life with her!
Once you’re confident with how to create this drawing of a mermaid, you could depict her in other activities and positions.
For example, by changing the position of her arms and hair, you could have her diving out of the ocean.
What are some other activities you could depict her doing?
It would be fun to have this mermaid hanging out with some other merfolk. This would also be a great opportunity to show how creative you are as you design other mermaids!
Now that you have drawn this one, designing other ones should be easy for you to do. Simply follow the steps of the guide again and change a few details.
You could add as many as you like to make this mermaid drawing a real party!
Even if you want to stick to just one mermaid, you can make her look very unique with your own details. For instance, you could add some accessories for her, change her hairstyle or put her in a swimsuit.
There are so many ways to customize this artwork, so have fun showing off your creativity!
Finally, you can really make this mermaid sketch even more amazing with the colors and art mediums that you use. We usually like to recommend watercolor paints for images featuring the ocean.
These softer colors are great for this subject matter, but that doesn’t mean that brighter colors can’t look great as well!
You could use any amazing colors, art tools and crafts you have to make her look even more stunning.
Your Mermaid Drawing is Complete!
You should be very proud of yourself, as you have reached the end of this guide on how to draw a mermaid! This was a more intricate drawing, but look at the amazing drawing you completed!
Even when a picture is more detailed, it can be easier than you think to draw it if you follow the steps and take it slow.
After finishing this guide, you will be amazing your friends and family with your beautiful mermaid drawing!
Once it’s done, we can’t wait to see how you finish and color it! You could even draw in a stunning ocean background for your picture, and there is no limit to what you can do for your picture!
We have lots more step-by-step drawing guides for you coming out soon, so keep an eye on our site to never miss out on the fun!
We would love to see your incredible mermaid drawing once it’s finished, so please feel free to share your drawing on our Facebook and Pinterest pages!
We can’t wait to admire your colorful artwork.