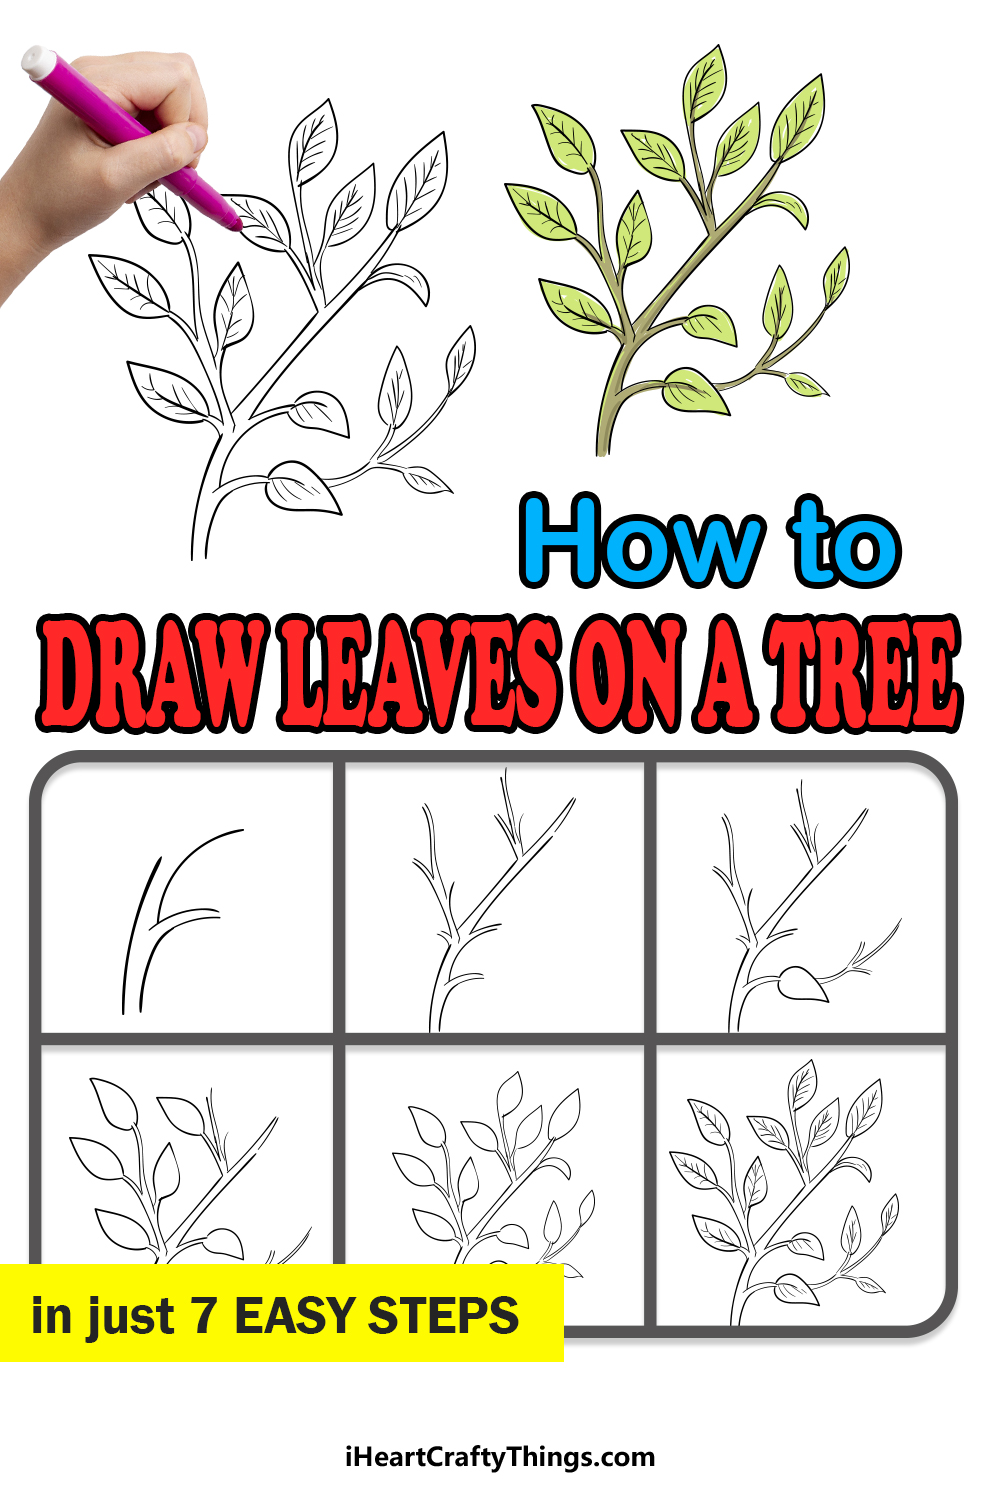
When going out into nature there are many beautiful sights to behold. One of the best sights in nature is a tree full of wonderfully colorful leaves!
Because a tree is made up of thousands of individual leaves it can make it difficult to master how to draw leaves on the tree due to the intricate nature of all these separate parts.
However, if you know what to do and have some steps to follow then you can easily recreate the wonderful sight of a trees leaves yourself!
This step-by-step guide on how to draw leaves on the tree will show you how to create your own leafy artworks.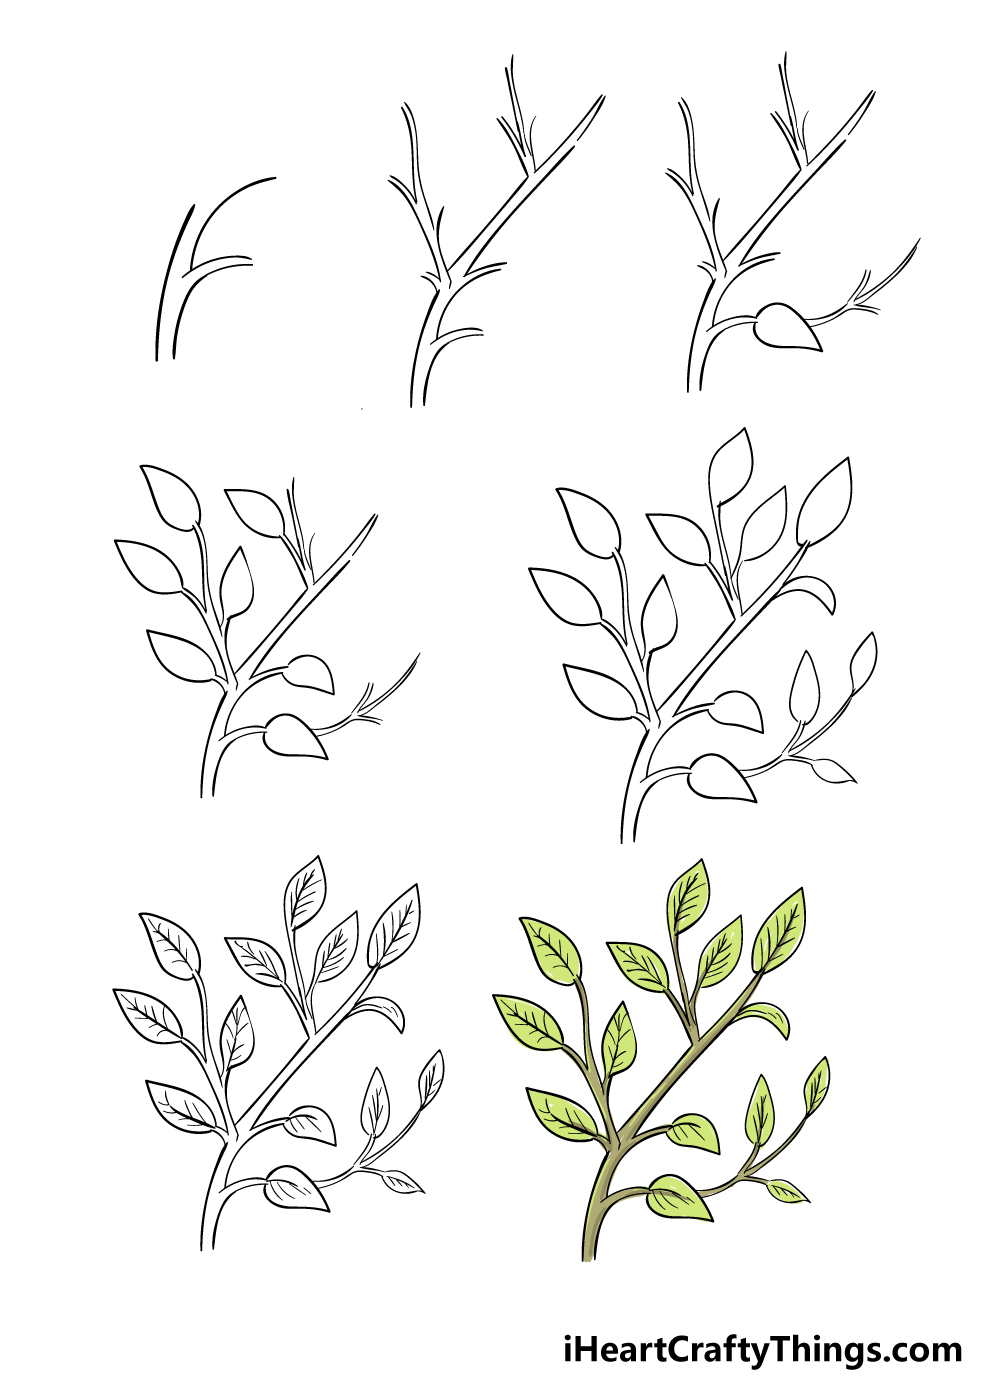
How to Draw Leaves On The Tree – Let’s get Started!
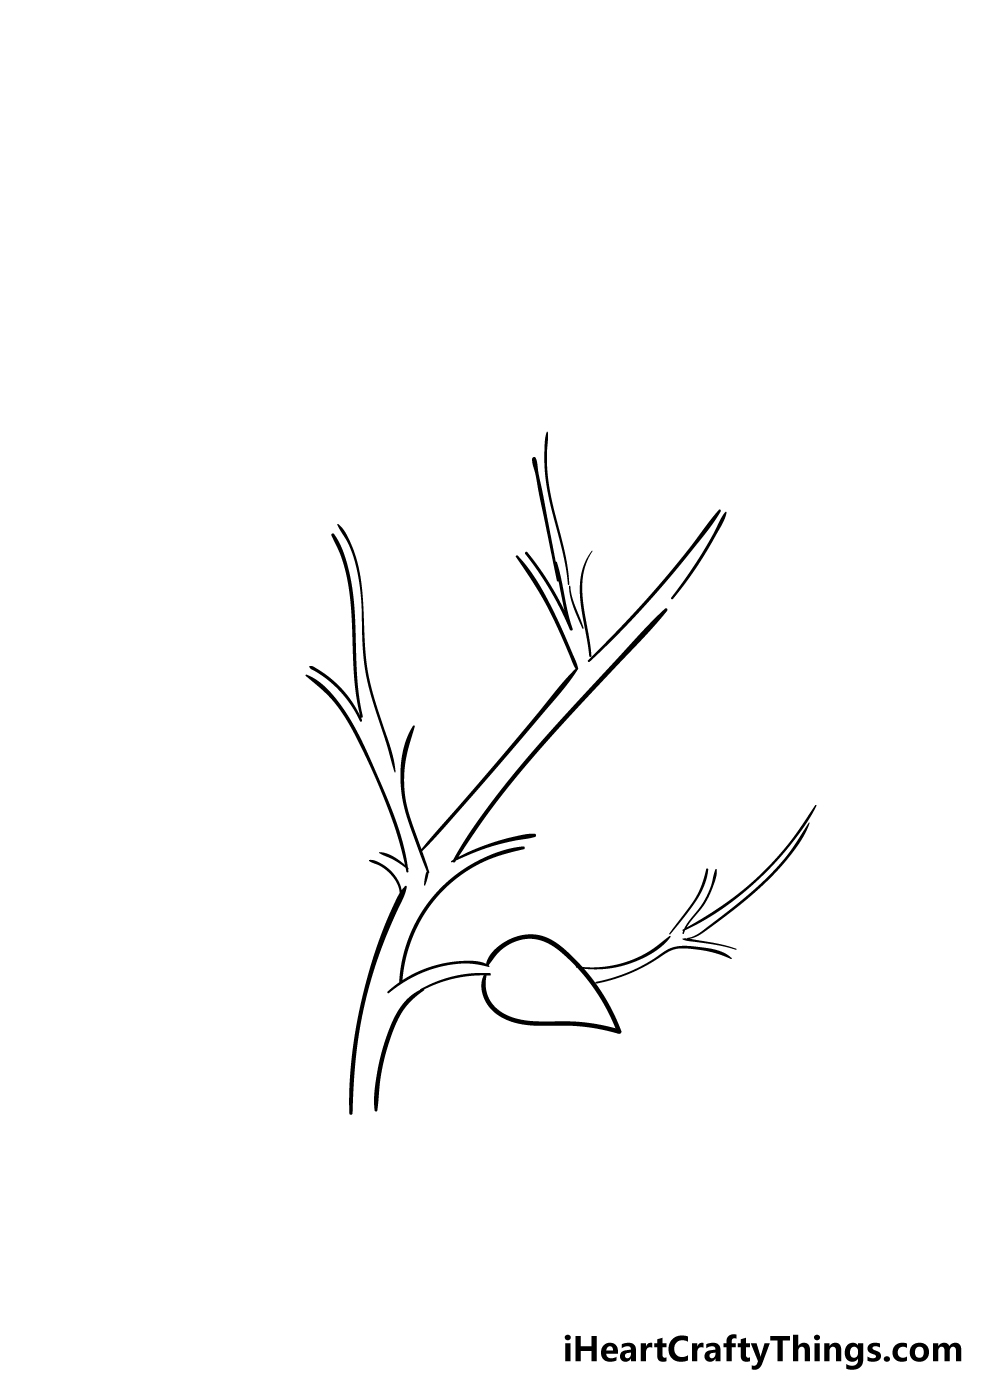
Step 1
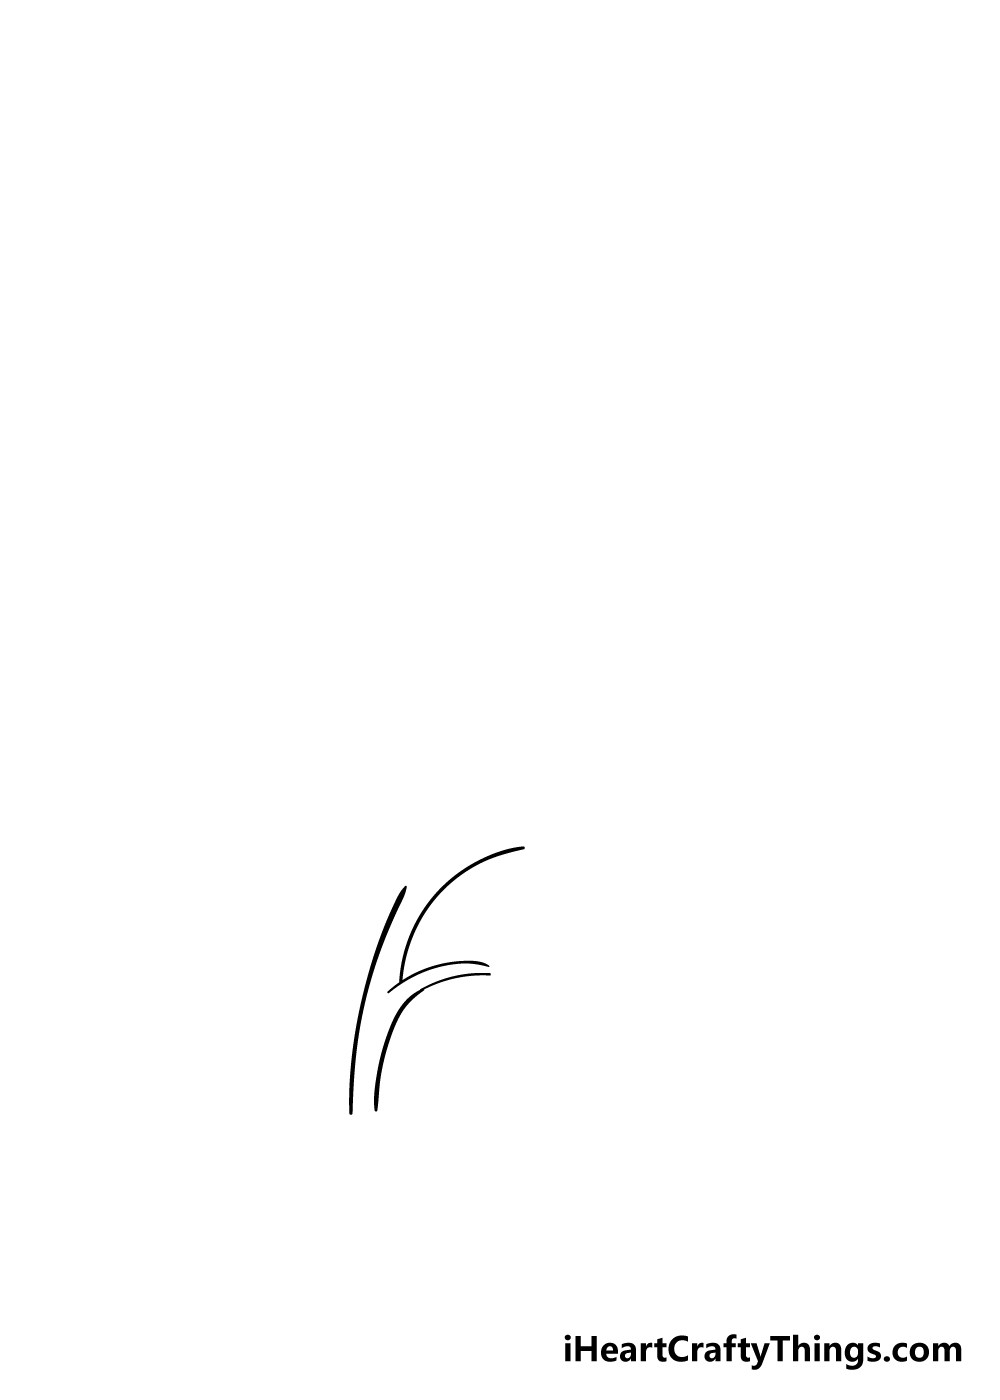
In this first step of our guide on how to draw leaves on the tree, we won’t actually be drawing any leaves.
At least not quite yet! Instead, we shall be drawing some of the branches and twigs that the leaves will be attached to.
To do this, you can draw a series of curved lines that will start to make up these branches.
The line on the left will be unbroken as a curved line, and on the right you can draw one little stick jutting out as shown in our reference image.
Then, once you have that part drawn we can add to it in the next few steps!
Step 2 – Next, draw some more of the branch
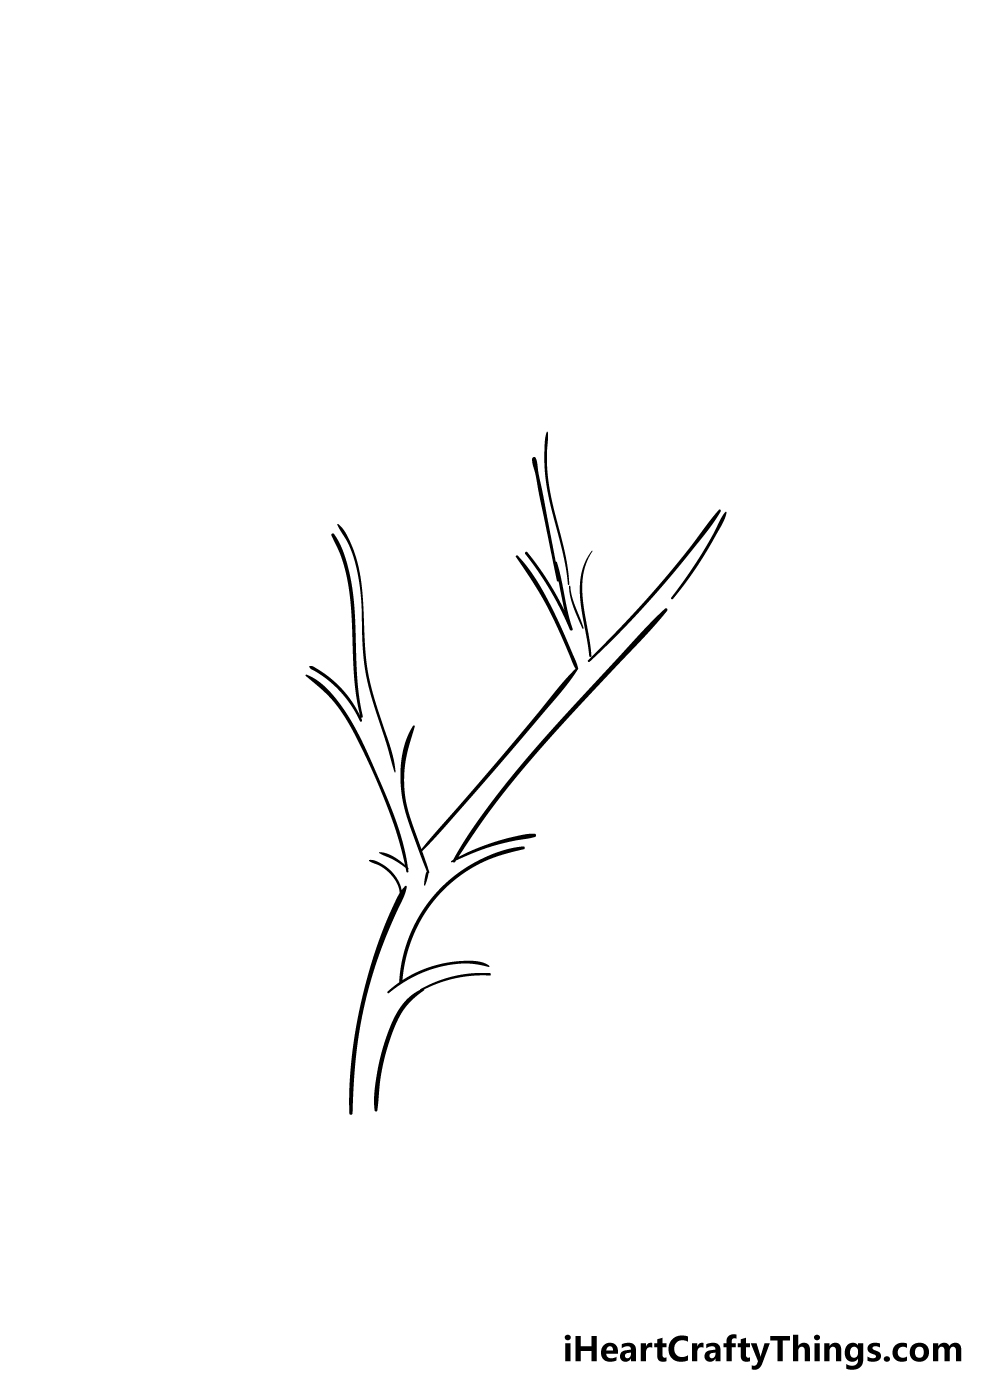
For this second part of your leaves on the tree drawing, we shall be continuing on from what you did in the previous step to extend the branch.
The branch will have a long central part with several smaller branches coming off from the central one.
In our reference picture it can look quite complicated, but if you take it slow you should have no problem replicating the look of our example.
Step 3 – Now, start drawing some leaves and more branches
You came to this guide to draw some leaves and you’ll get to draw the first one in this step f our tutorial on how to draw leaves on the tree!
You can draw the first leaf on the lower right-hand branch from the first step. Once you’ve drawn that leaf, you can extend the branch from behind it and further out from the main branch.
This little branch from behind the leaf will also have a few small branches coming out from it.
Step 4 – Next, draw some more leaves
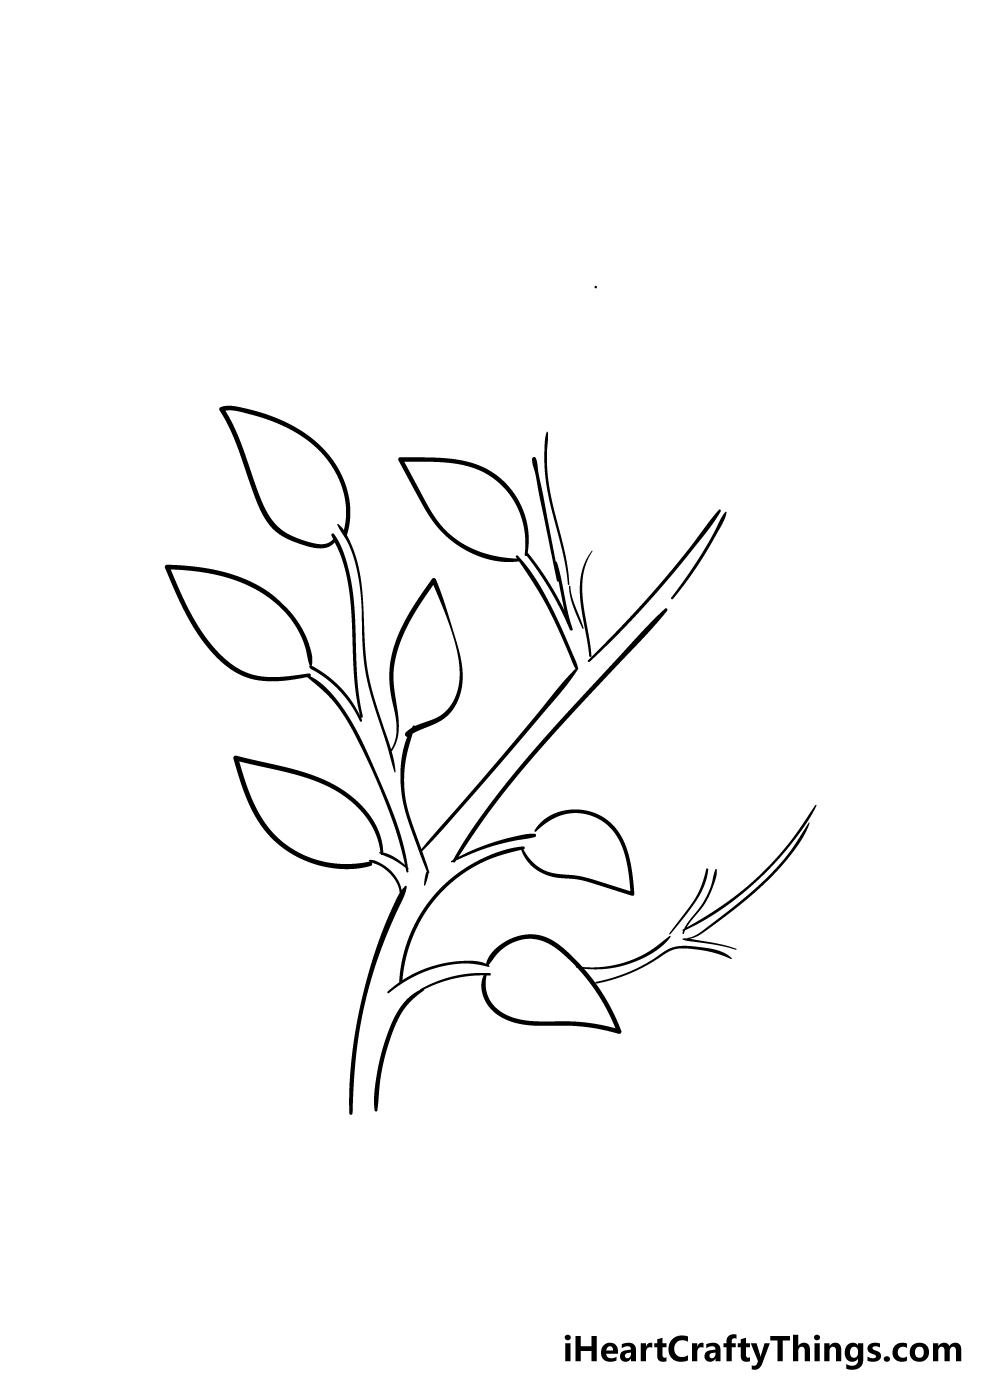
This part of your leaves on the tree drawing is where you’ll get to add many more leaves to the picture!
For this step, you will be adding some more leaves onto most of the smaller branches that you have drawn in the last few steps.
You will be adding 6 new leaves in this step, and after you do that your branch will look much fuller!
Step 5 – Finish off the final leaves on the branch
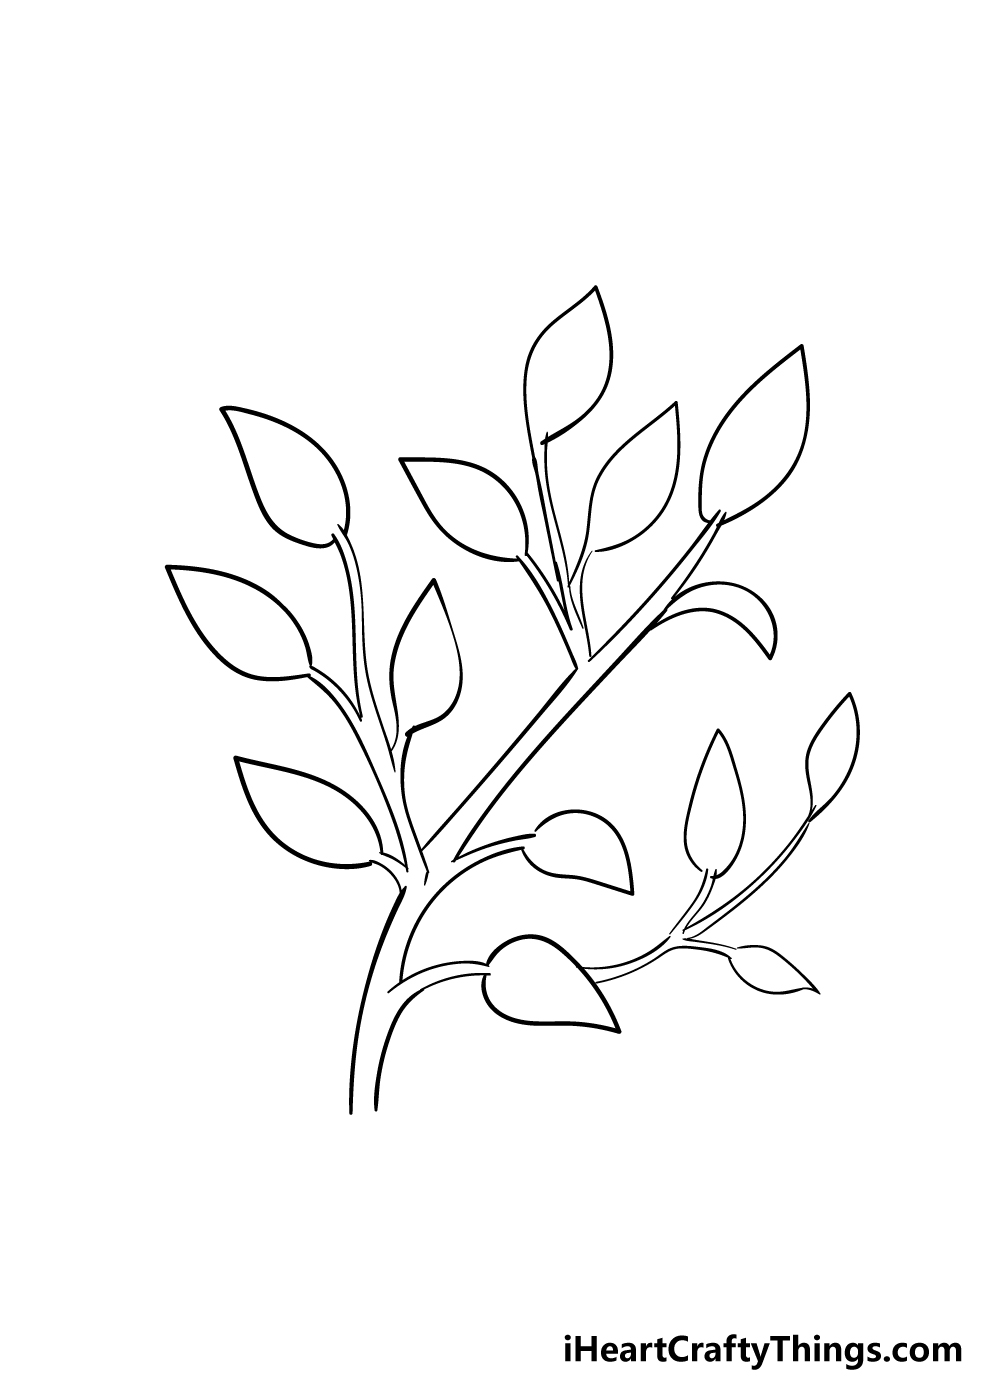
You can finish off drawing all the leaves of this branch for this fifth step of our guide on how to draw leaves on the tree.
These leaves will go on all the remaining empty twigs of the branch. In total, you should be adding 7 leaves to have them matching our reference picture.
Now that you have all the leaves drawn, there are only a few final details to add!
Step 6 – Next, draw the final leaf details
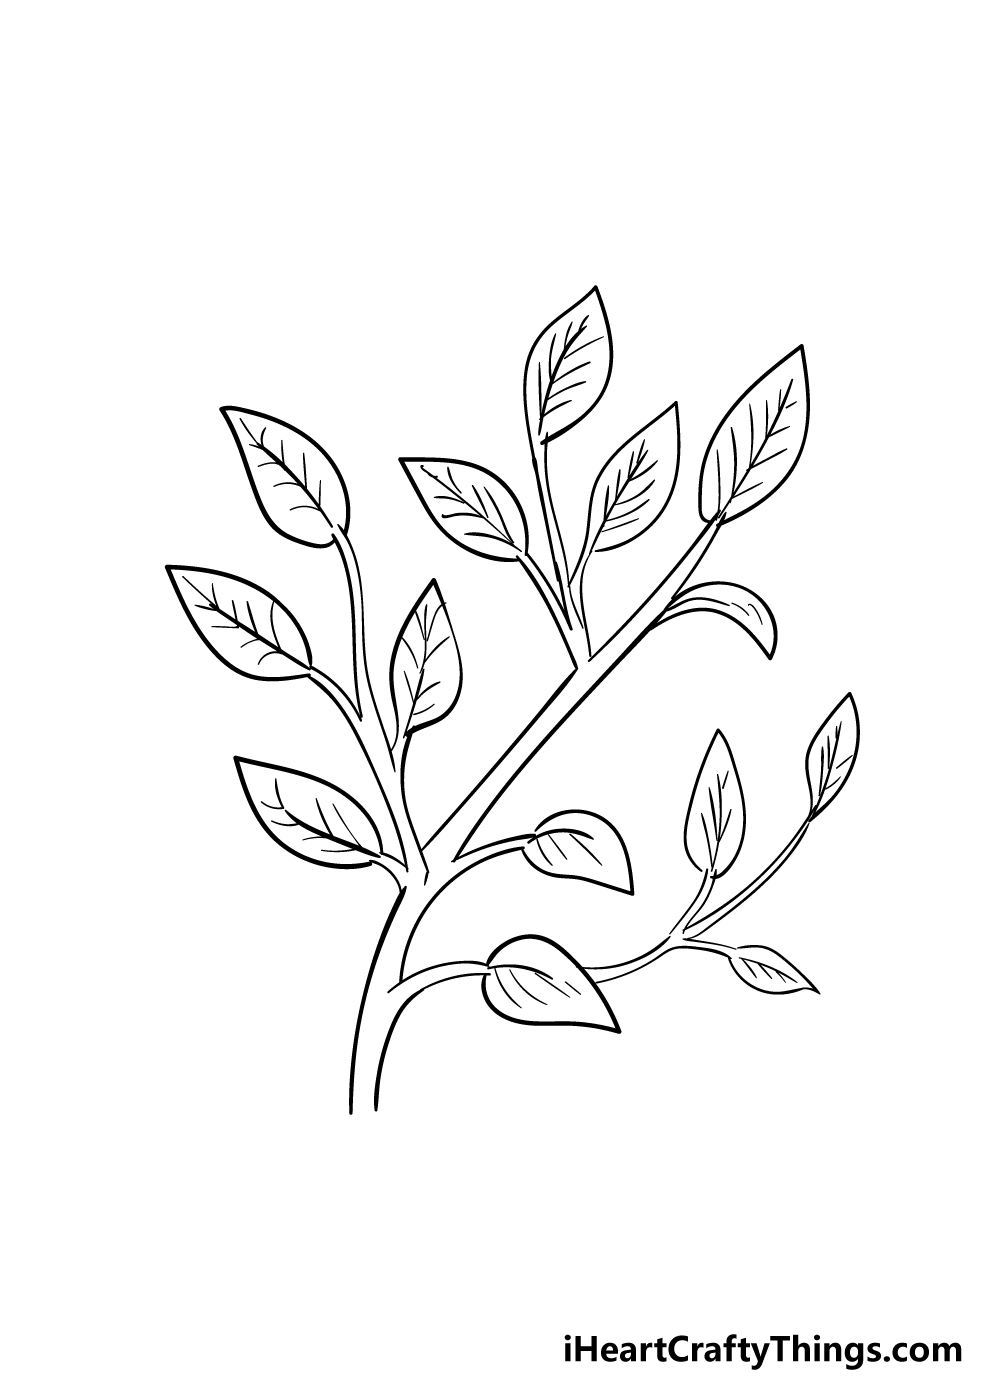
You’ve done a great job drawing all of these branches and leaves, and in this part of your leaves on the tree drawing you can add some final little details.
These details will be comprised mainly of some veins on each of the leaves. To do this, simply draw a central line through each leaf and then have some smaller lines coming off of this middle line.
That does it for all of our details, but you should feel free to add any of your own additional details and elements!
You could draw some little flowers onto the branch or add some lines to the branch for some woody details.
How will you finish off this drawing before the final coloring step!
Step 7 – Now finish off your leaves on the tree drawing with some color
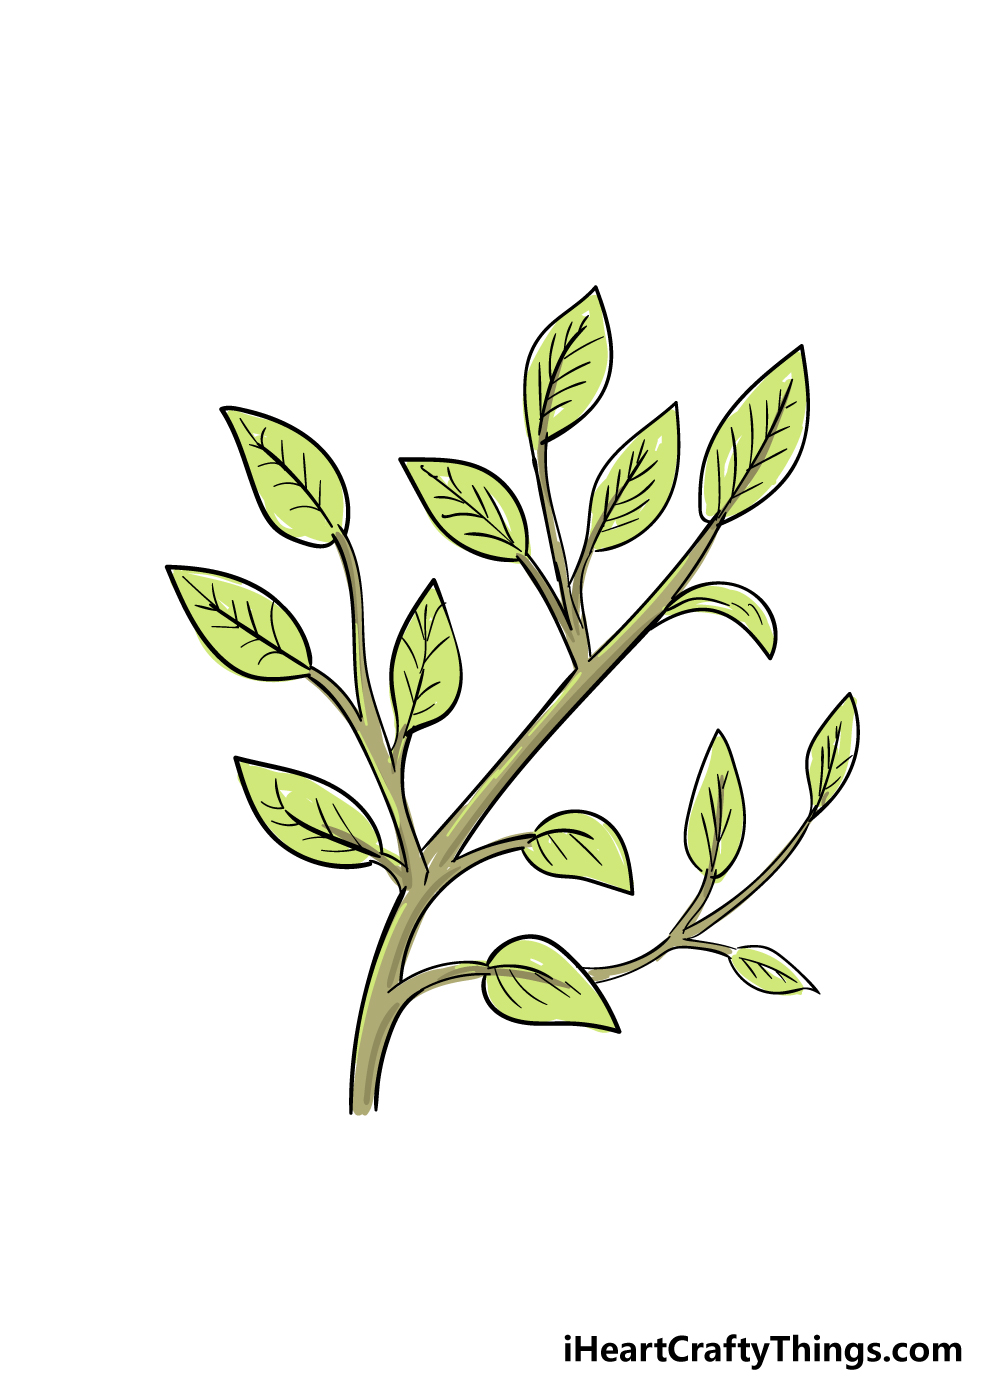
You have reached the final seventh step of this guide on how to draw a tree. This step is all about expressing yourself with some beautiful colors for your drawing.
As you can see in our reference picture, we used a simple yet pretty brown and green color scheme.
You could go for this look for your own drawing, but there are many other options you could go for as well!
If you want some brighter, more warm colors then you could make this an Autumn tree by using some orange and red for the leaves.
When coloring in your image, you have many options for how you can color it in.
For images dealing with nature, it can be nice to use more muted mediums such as watercolor paints or colored pencils, but anything you use will look amazing!
5 Tips To Make Your Leaves On A Tree Drawing Even Better!
Help to grow your leaves on a tree sketch with these 5 fun ideas!
This drawing of leaves on a tree focuses on just that, the leaves. Many trees will have flowers, fruit and other plants growing on them.
That could be great to add to your drawing! Some flowers or nice fruits will help you add more details and colors to your artwork in a way that will make it look more complete as well.
Once this branch looks as you want it, you could extend more of the tree it is attached to. This could be limited to drawing some more of the branch, or you could draw the whole tree.
It depends on your preferences as well as how much space you have left on the page!
Another fun way to add to your leaves on a tree drawing would be by adding some small animals on the branch. There would be a huge amount of animals you could choose from!
These could include small birds or maybe small mammals like a squirrel. You could even go a bit more exotic and add a cute monkey on the branch!
What other animals could you add?
Many trees will also have small man-made structures on them. You could add some of these to your branch!
For a few examples of small things, there could be a bird house or feeder on the tree. If you want something larger, you could even have a tree house or fort up in the tree.
What are some other structures you could add to this tree that the branch is attached to?
Finally, when you have decided which of these tips to take or leave, you could finish off your leaves on a tree sketch with a background setting.
This would be your chance to show off your favorite place in nature to relax! It could be a yard or garden, or it could be your favorite park.
Where would you like this tree to be growing?
Your Leaves On The Tree Drawing is Complete!
That brings you to the end of this guide on how to draw leaves on the tree! We created this guide to make drawing this beautiful natural wonder not only easy to learn but also lots of fun for you to do.
We hope that we succeeded on both counts for you as you went through this guide!
Taking on a new drawing can provide many challenges, but when you have simple steps to follow it can really make things much more manageable.
Now that you have mastered this guide, you can add your own elements and details to really make it your own! How will you personalize your awesome drawing?
We have tons of amazing drawing guides for you to enjoy on our website, and there’s something for everyone to like!
We upload new guides all the time so be sure to check in often to never miss out on the fun!
We would love to see your leaves on the tree drawing when it’s done, so please be sure to share it on our Facebook and Pinterest pages for us to enjoy! We can’t wait to see your amazing artwork!