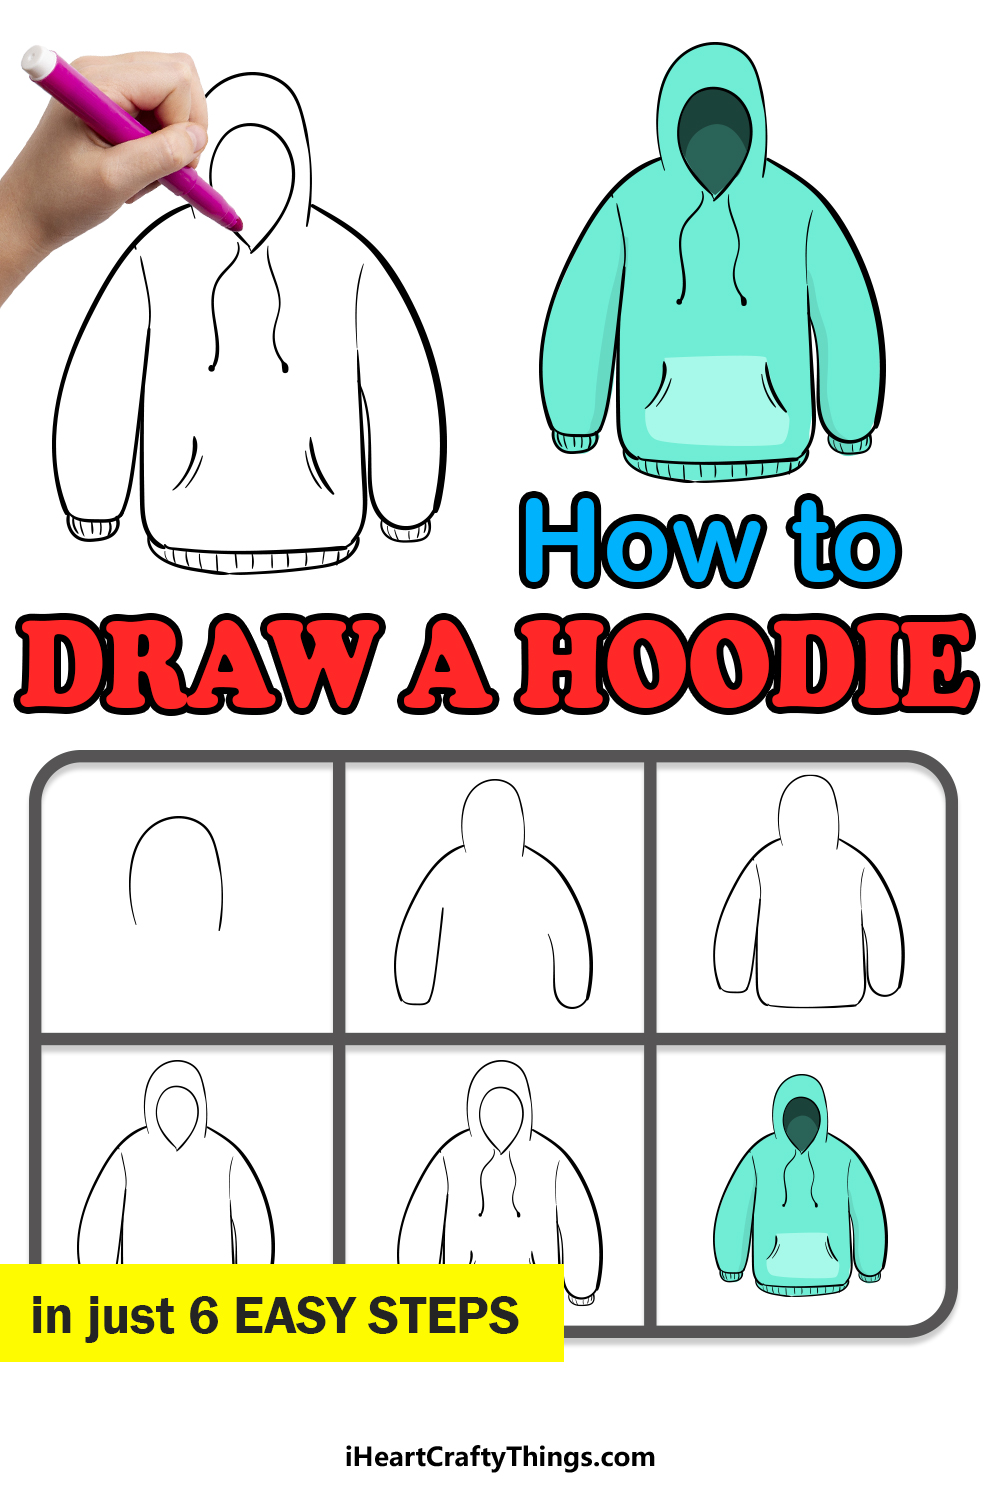
It’s time to learn how to draw a hoodie by following this fun and easy guide for kids. In just a few steps, you will be able to make your very own hoodie designs.
Hoodies are not only cool-looking garments but also very practical. If it’s rainy or windy, you can raise the hood and be protected from the elements!
They’re also good for making a statement, as you can often find them with logos and artistic designs on them. It’s fun to imagine what your own unique hoodie would look like, and now you can plan it out!
By the time you have finished this guide, you will be able to make a simple hoodie design that you can then change and add to as you wish.
So let’s begin and see how you can design your very own personalized hoodie.
Find Out How To Make Your Hoodie Drawing
How to Draw A Hoodie – Let’s Get Started!
Step 1
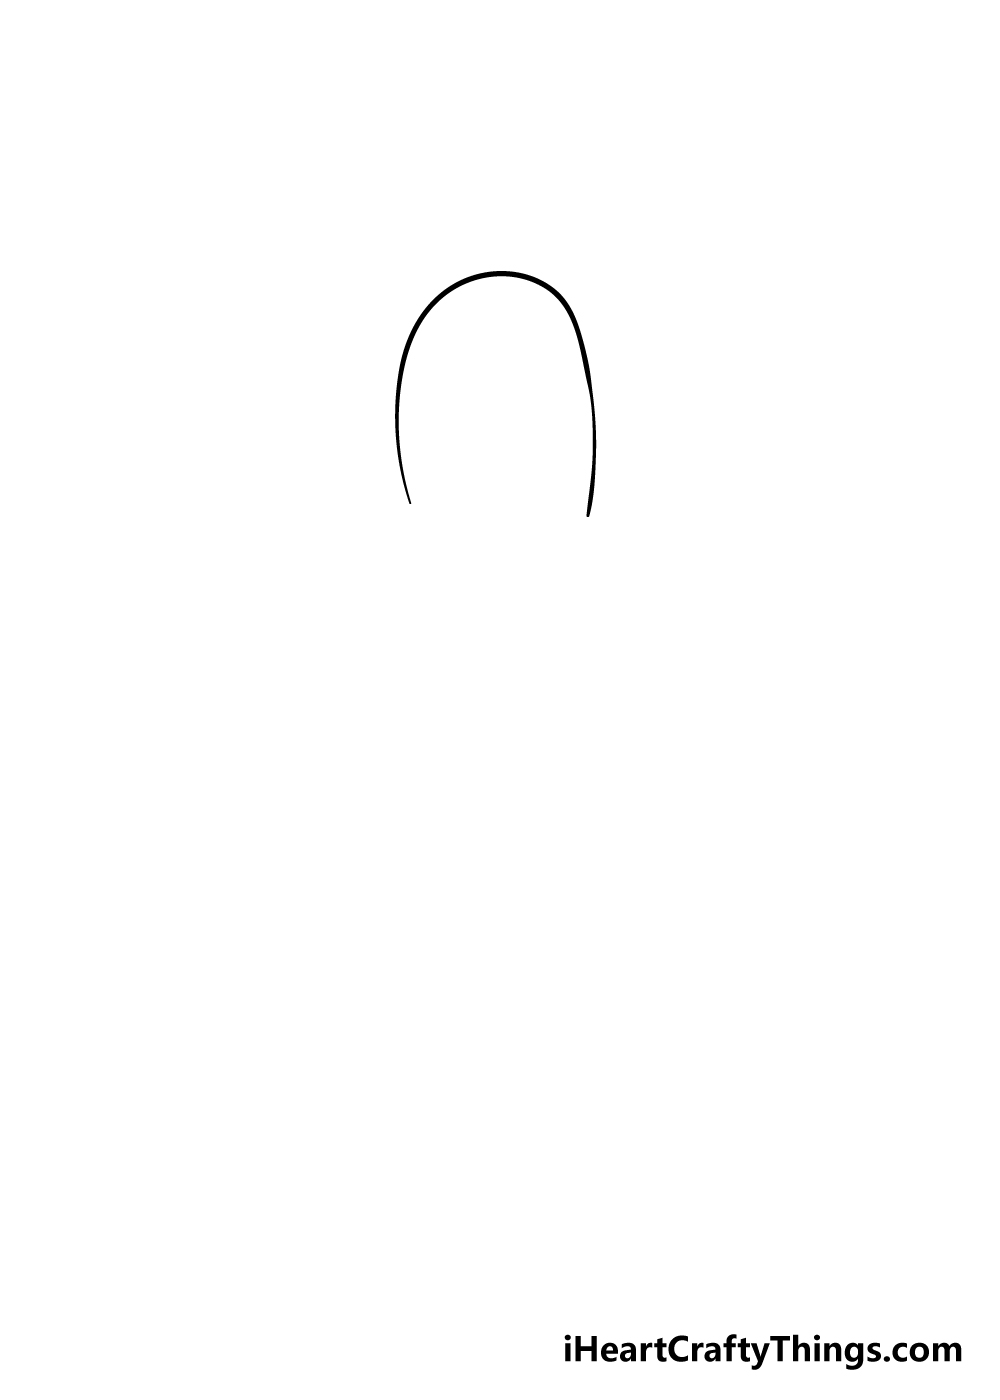
To begin this guide on how to draw a hoodie, let’s begin with the part of the garment that it gets its name from: the hood!
This will be quite a simple step, and we shall draw in the hood by drawing in a sharply curved line that looks like the one in our reference image. With that drawn, we can move on to the next step!
Step 2 – Now, start on the arms of the hoodie
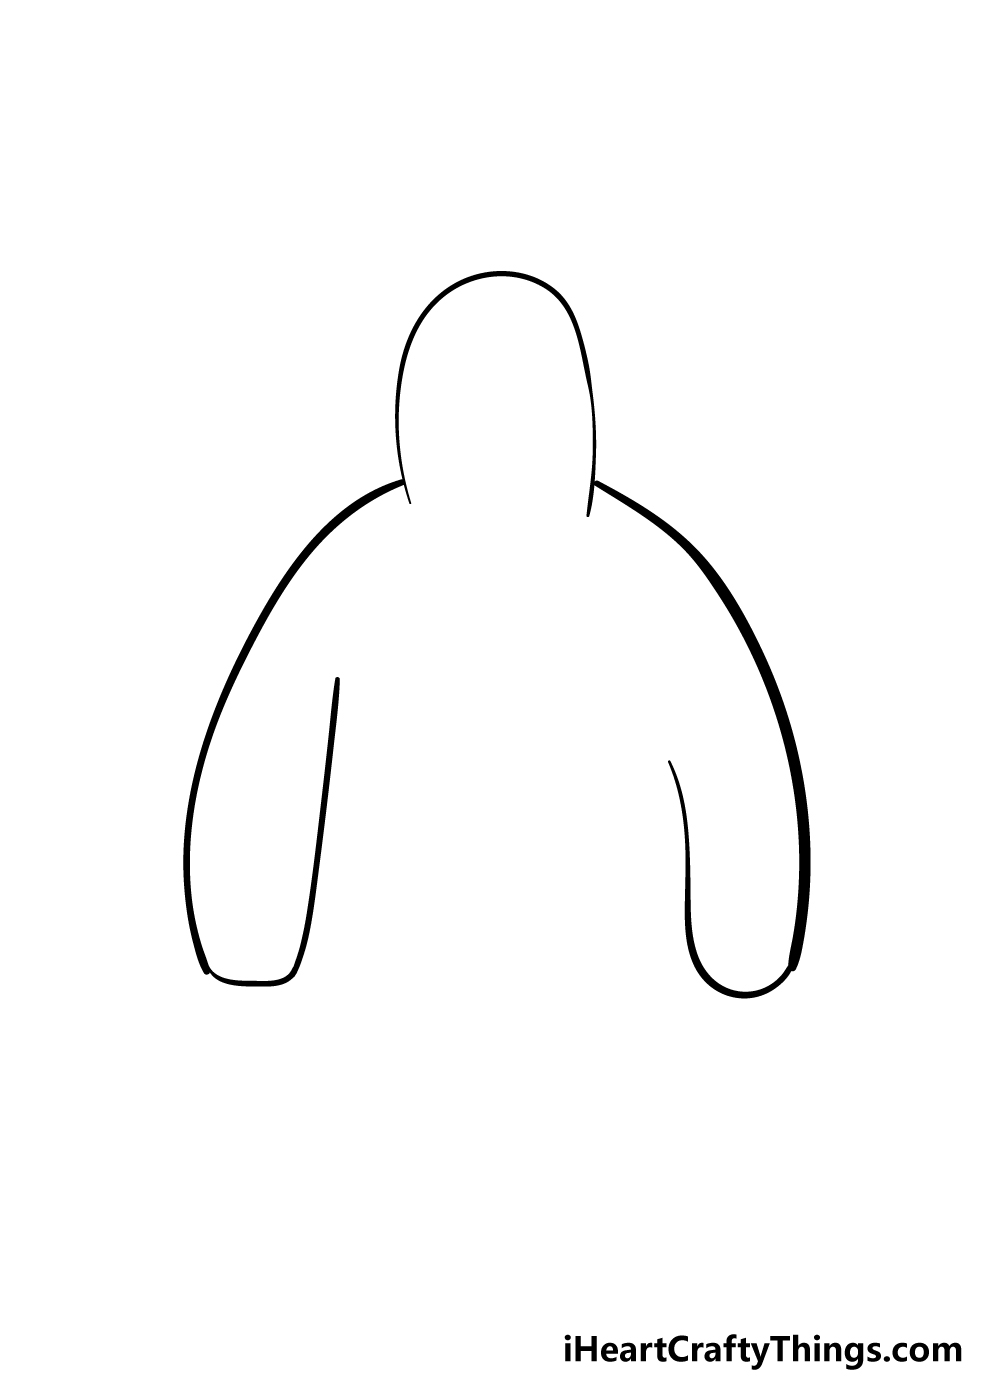
With the hood drawn in, you can now begin on the arms of your hoodie drawing. For the arm on the left, simply draw a line from just above where the left side of the hood ends.
The line for this arm will curve sharply before heading up towards the hood again. With that arm done, you can then repeat the process except mirrored on the right-hand side.
Step 3 – Next, let’s add a body to the hoodie
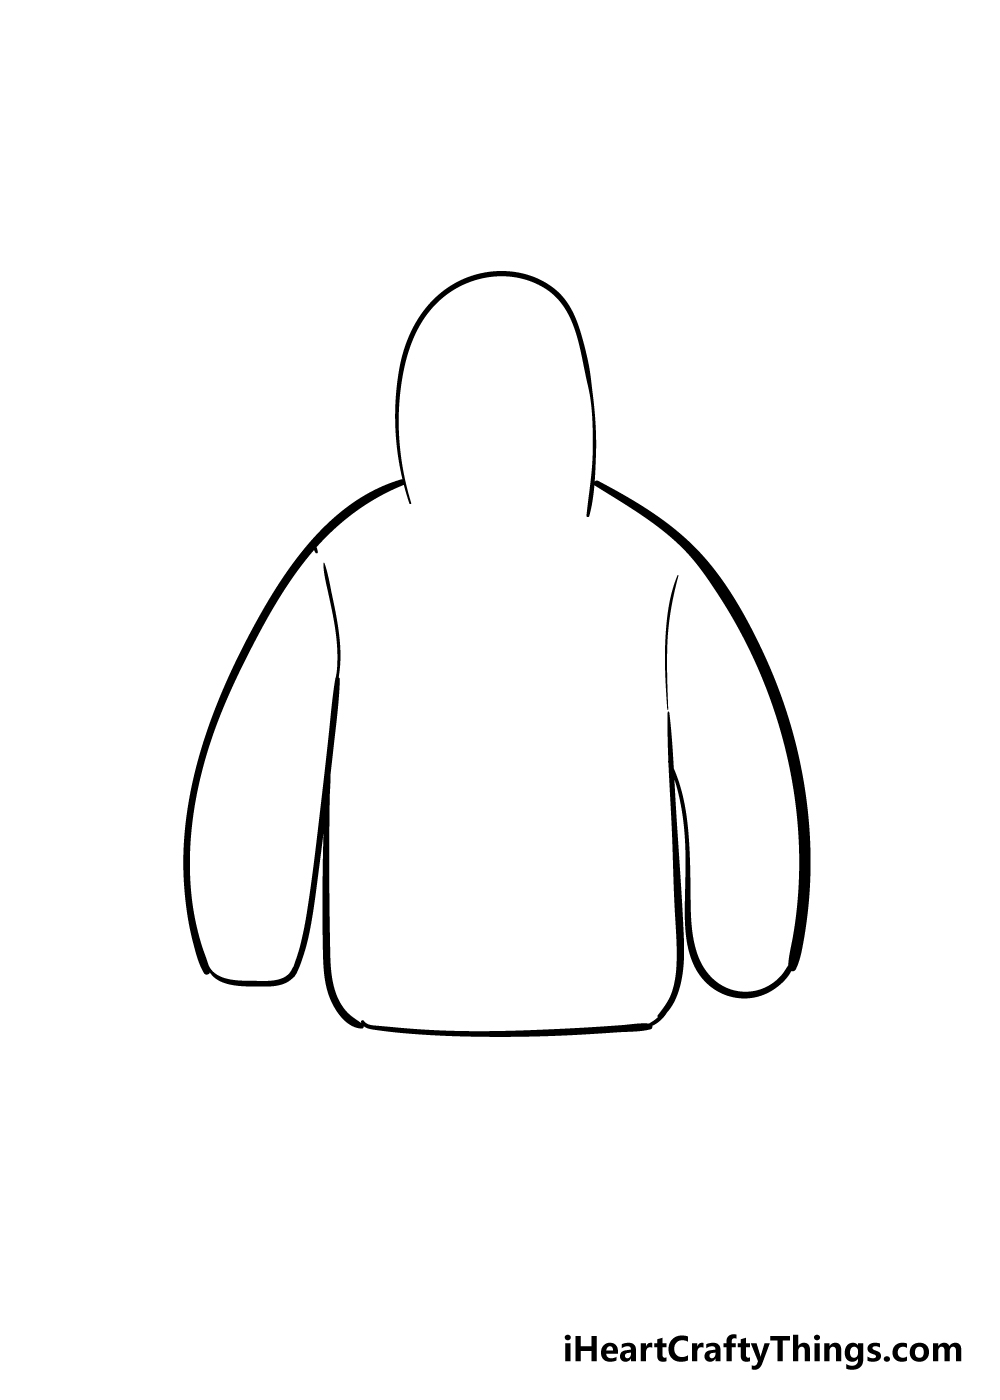
Now that you have the hood and arms done, you can move on to the body of your hoodie drawing! This is another step that shouldn’t be too challenging if you have made it this far!
Using the reference picture as a guide, the line for the body of the hoodie will start from under the arm.
It will almost touch the top of the arm line, but there should be a little space between the lines.
The body of the hoodie will take on a fairly rectangular shape, and will begin and end under the arms.
While the shape will be vaguely rectangular, be sure to have a slight curve at the corners of the hoodie.
Step 4 – Draw in some more features for your hoodie
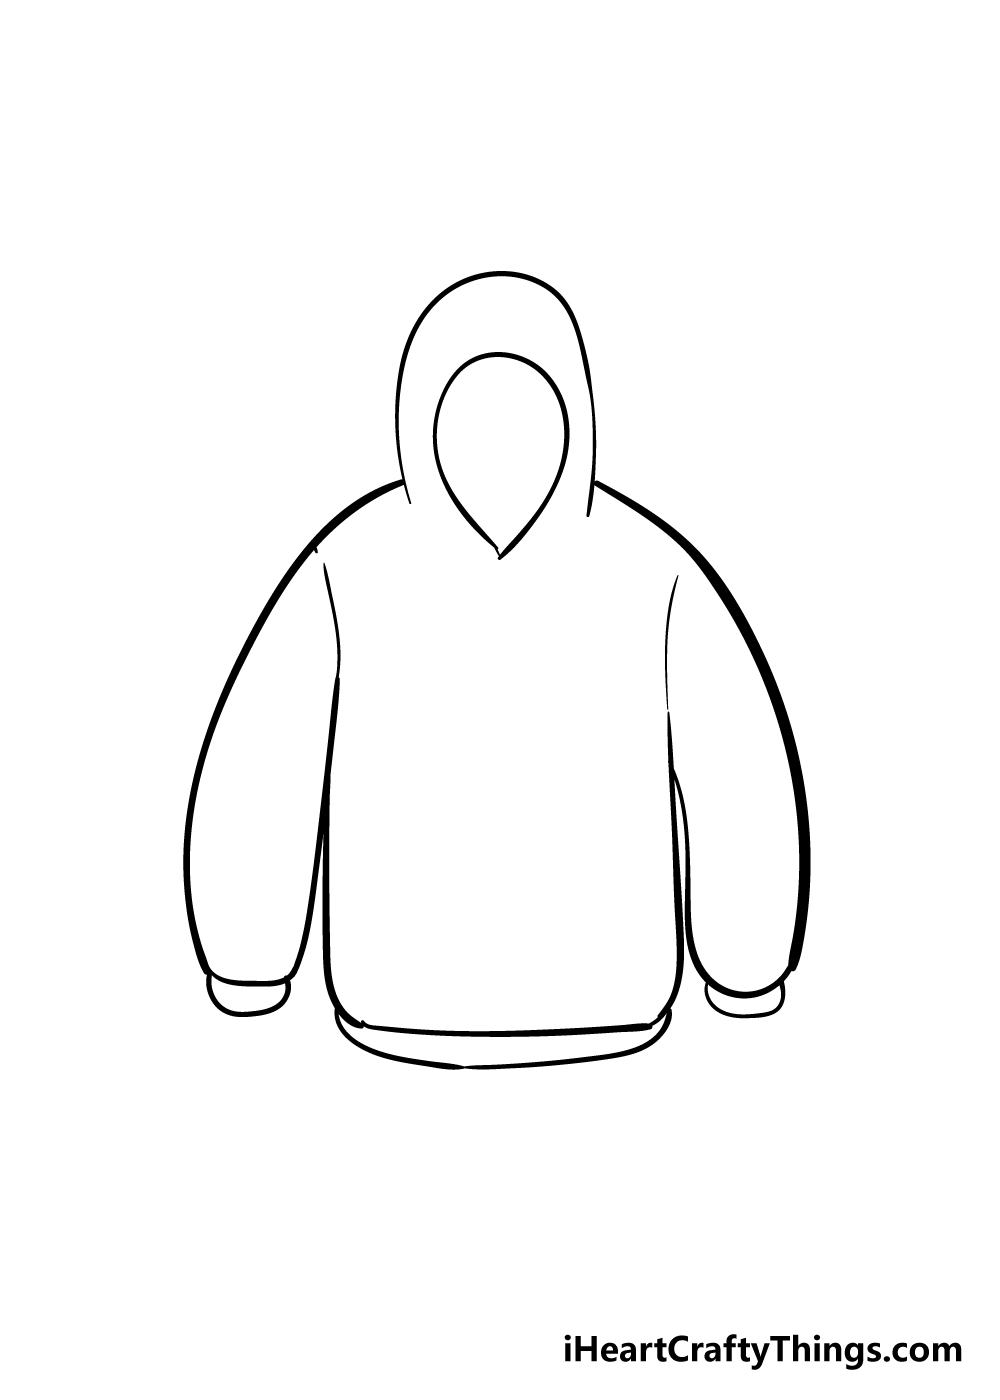
In this step of our guide on how to draw a hoodie, we shall be adding in even more details to it.
Firstly, a hoodie would be a bit pointless if it didn’t have a hole for your head to go through! We don’t want this to be a pointless hoodie, so let’s add a hole to your hoodie drawing.
The shape for the hole will be rounded at the top, but end in a sharper, thin point at the bottom of the hoodie.
Now that you have this vital part of the hoodie, we shall add in some cuffs to the hoodie. To do this, simply draw in some thin shapes to the ends of the arms of your hoodie.
Once you have that done, you can draw in a similar shape to the bottom of the body of the hoodie. Once it looks like the picture, you’re good to go for some final details!
Step 5 – Let’s draw in some last details now
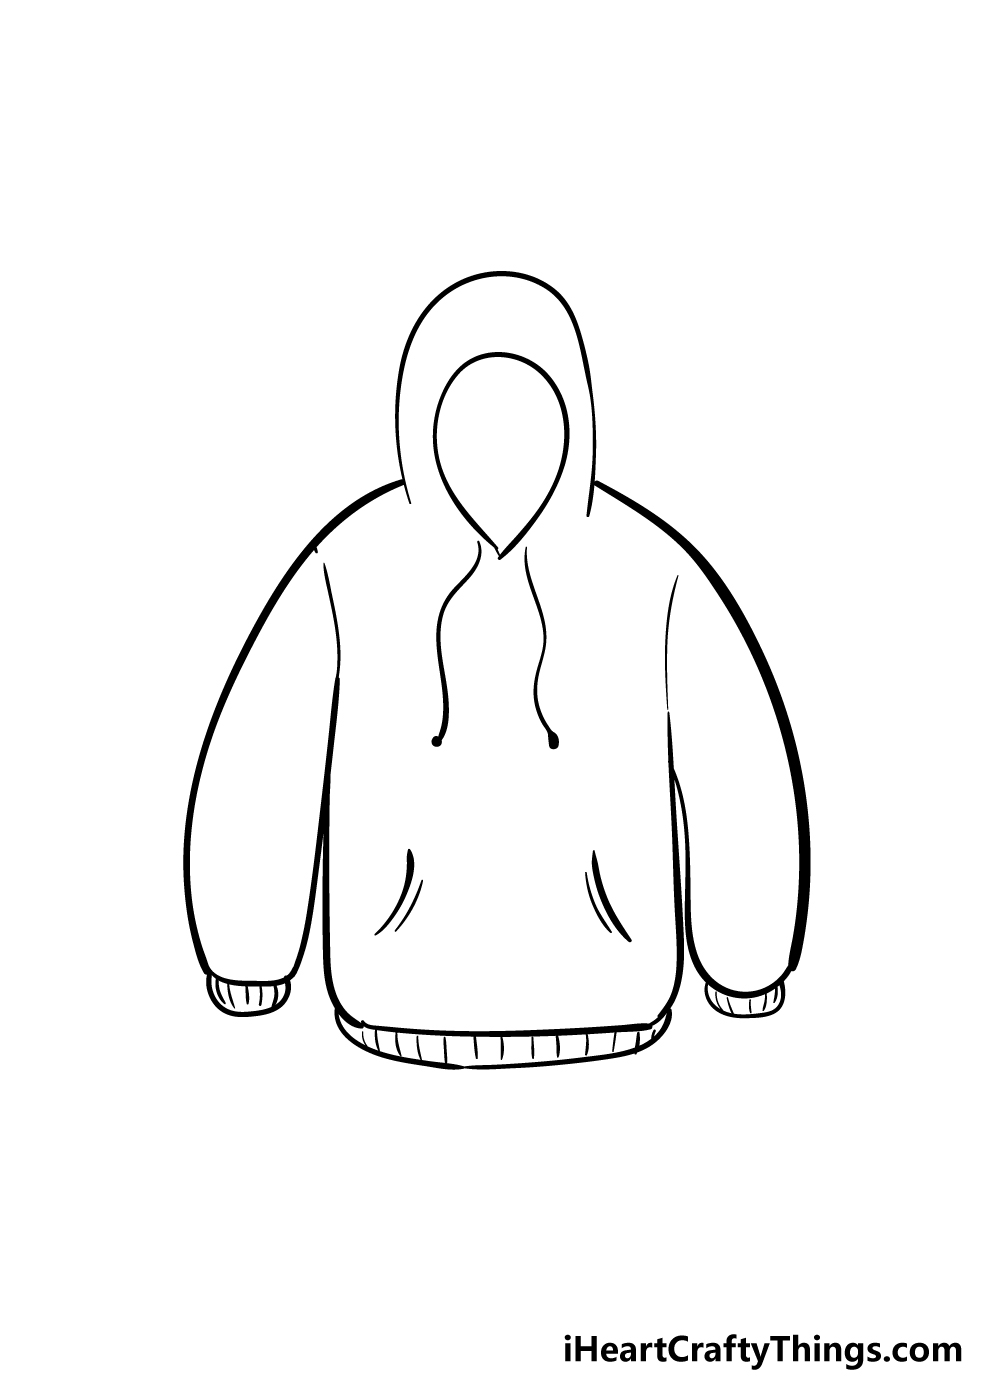
Your hoodie drawing is almost finished now! You’ll be ready to add in some color very soon, but before that, we should add some final details to your drawing.
Firstly, use some wavy lines underneath the hole for the head to make the strings of the hoodie.
Then, draw in some slightly curved lines to the body of the hoodie to make some pockets for it.
Lastly, simply draw in some lines to the shapes you made at the ends of the arms and the body of the hoodie for some extra texture details.
These are the final details that we would add, but feel free to add in any fun details you would like!
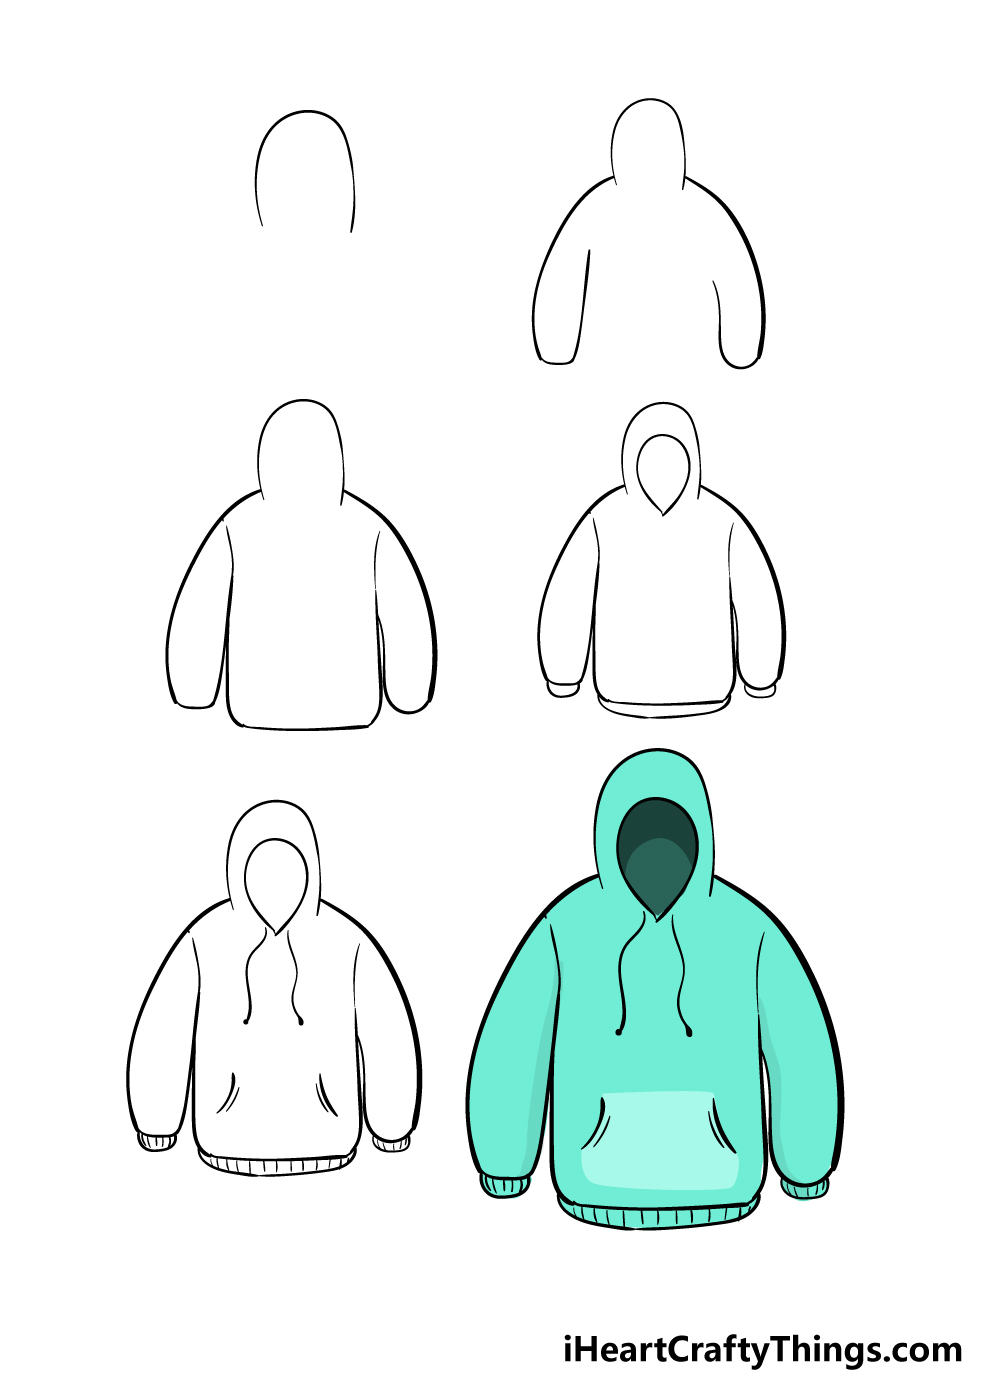
Step 6 – Finish off your hoodie drawing with some color
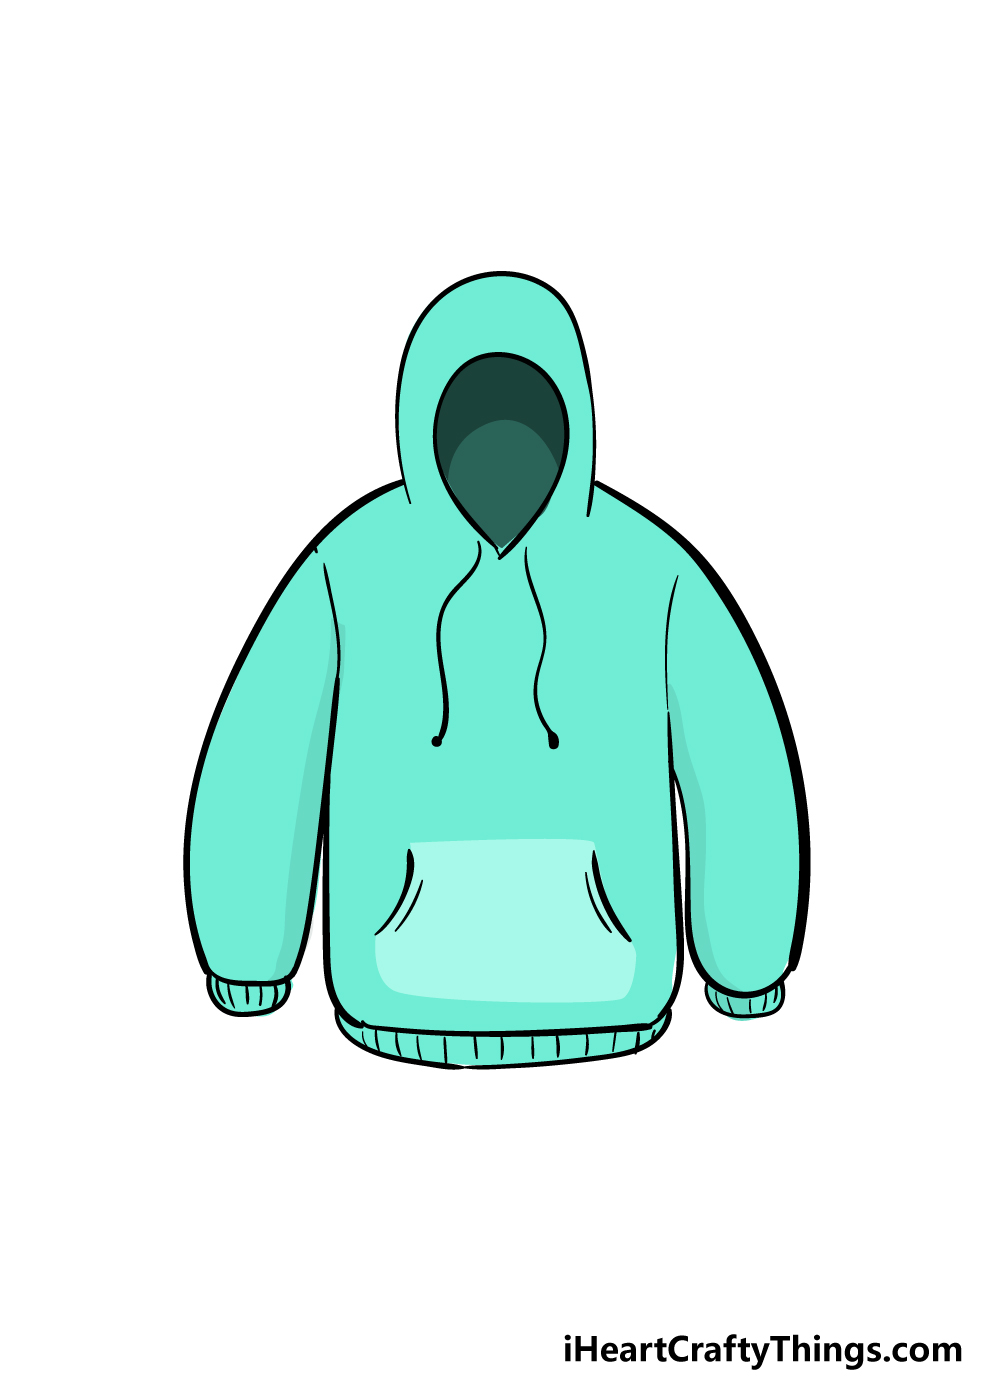
The hoodie is drawn, the final details have been added and you’ve almost reached the end of this guide on how to draw a hoodie!
We hope that it was fun drawing your hoodie, because at this step the fun only goes on! For this step, you should really let your creativity run wild and show us what creativity you have!
We colored in our image with a pretty light blue, so this is one way you could go about it! You shouldn’t let this limit you though, and you should go with whatever colors you love!
Another fun way you could personalize your hoodie drawing would be to add a fun design to the front of the hoodie.
This could be anything from the logo of your favorite music artist, a movie you love or the face of a beloved pet!
What design and colors do you think you would add to this hoodie? You can also have a great time trying out some great art mediums such as paints, watercolors or colored pens for some wonderful color details!
4 More Ways To Make Your Hoodie Drawing Unique
Make your hoodie sketch even better with these 4 fun tips!
The design of this drawing of a hoodie is pretty simple, colored with a pleasing light blue. Hoodies can come in many different colors, though, and you could use all sorts of great colors for this one.
It could be one solid color, or you may want to make a pattern with several different colors instead.
This is a great chance for you to use all of your favorite shapes and patterns to bring this hoodie to life!
Which colors will you choose?
Many hoodies will have designs, pictures and text on them to decorate them even more. This is another aspect you could add to this hoodie to personalize it even more.
What you add would be up to you! It could be a brand you like, or it could be a character from a movie or TV show you like.
It’s all about creating a hoodie that you would like to own in real life, so you should add some of your favorite things to the hoodie.
Once the hoodie looks as you want it, you could add more of the outfit this hoodie drawing is a part of. It could be clothing that is similarly casual, such as a pair of jeans and sneakers.
You could also add accessories such as gloves or a beanie. These are just a few suggestions, but what other items would you like to add to the outfit this hoodie is a part of?
Once the outfit in this hoodie sketch is complete, you could also add a human character that is wearing it. There are many possibilities for how you could do this!
For instance, the character could be based on someone real that you know. It could even be based on yourself!
Once you have chosen the person you would like to add to the image, you could then put them in a fun pose or a situation. Who would you choose to put into this artwork?
Your Hoodie Drawing is Complete!
Now that you have added your colors and final designs, you have successfully reached the end fof this guide on how to draw a hoodie!
We created this guide to make this drawing much easier for you to tackle by breaking it down into manageable steps, so we really hope it was fun and helpful for you.
We are confident that if you follow the steps and take your time you’ll be drawing an awesome hoodie in no time.
Once you have the hoodie drawn and colored, how will you further personalize the drawing? By using some fun color choices, art mediums and details like a logo, you can really put a unique spin onto this drawing. We can’t wait to see how you express yourself!
We have many more step-by-step drawing guides coming out soon, so please remember to check our site frequently to never miss out!
Lastly, we would be thrilled to enjoy your amazing hoodie drawing, so please do share the finished drawing on our Facebook and Pinterest pages! We can’t wait to admire your drawing skills.