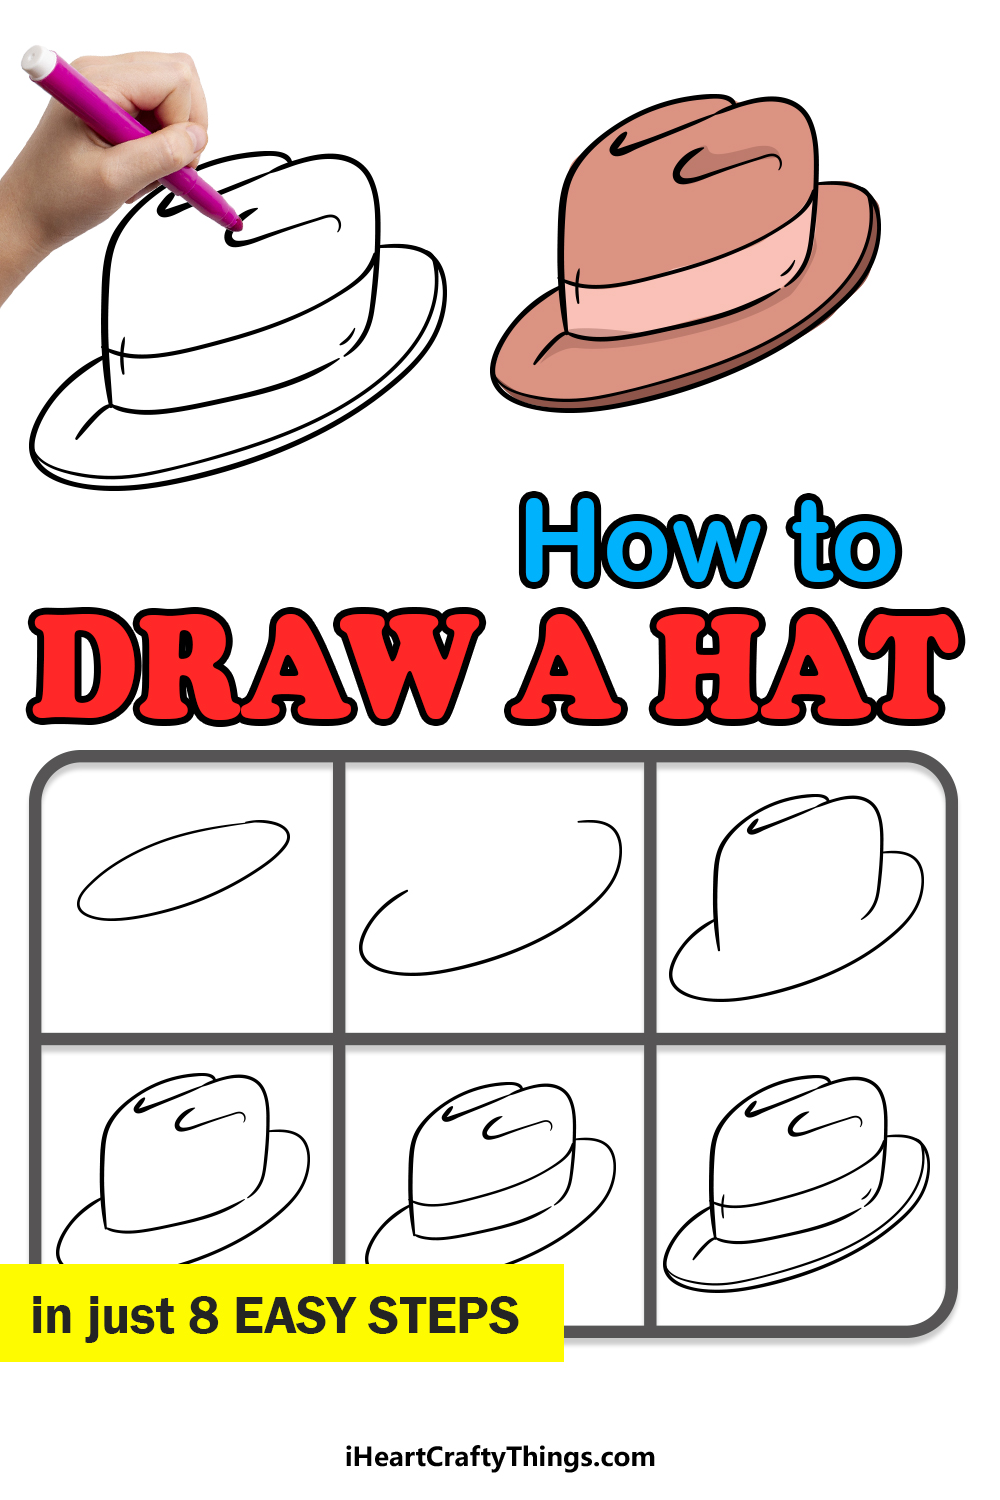
It’s never been easier to learn how to draw a hat! This guide for kids will make it fun and simple for anyone to design their very own hat.
Hats come in many different styles and are used for different purposes. Some are intended to keep the sun out of your eyes as you work outside and some are merely for fashion purposes.
For many years, it was common for men and women to wear hats every day, even for casual occasions. They are a bit less common these days, but they are making a bit of a comeback!
Many people like to imagine what a hat of their own design would look like, and this guide allows you to imagine it. Once you have finished the steps, you will have everything you need to make your very own stylish hat designs.
Watch These Steps On How To Make Your Hat Drawing
How to Draw A Hat – Let’s get Started!
Step 1
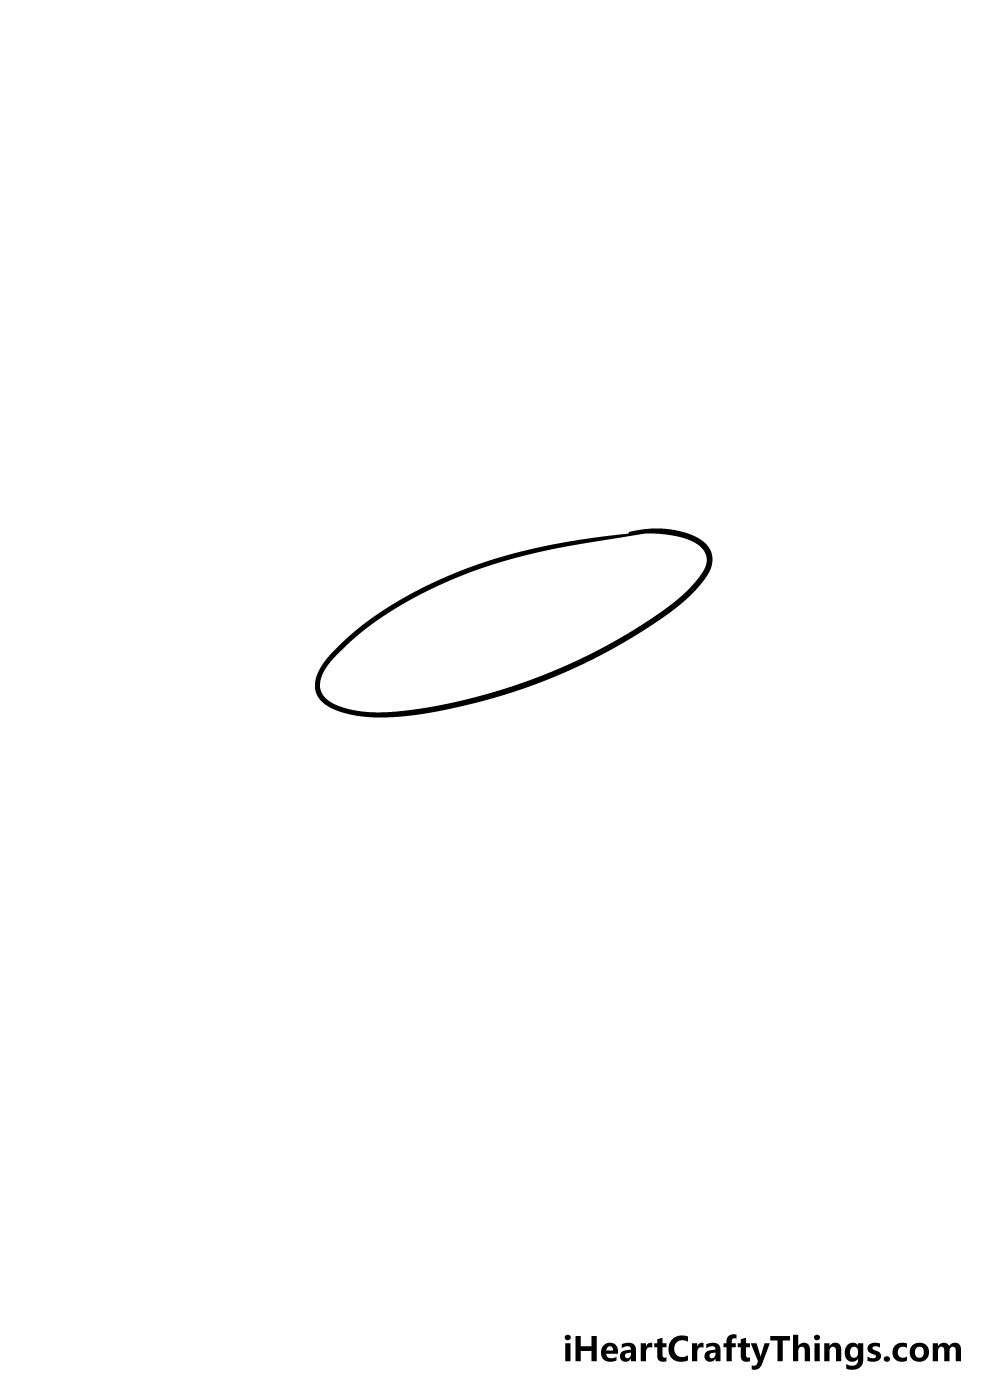
We will be drawing a fedora hat for this guide on how to draw a hat. To get started, we will be drawing an oval with a light pencil.
We are using a pencil, as this oval will just be to guide you as you draw. The oval will represent the hole of the hat, and while we won’t be able to see the hole the oval will help you to position the hat properly.
Once you’ve drawn the hole with your pencil so that it looks like the reference image, you can use it for the next few steps.
Step 2 – Next, draw the rim of the hat
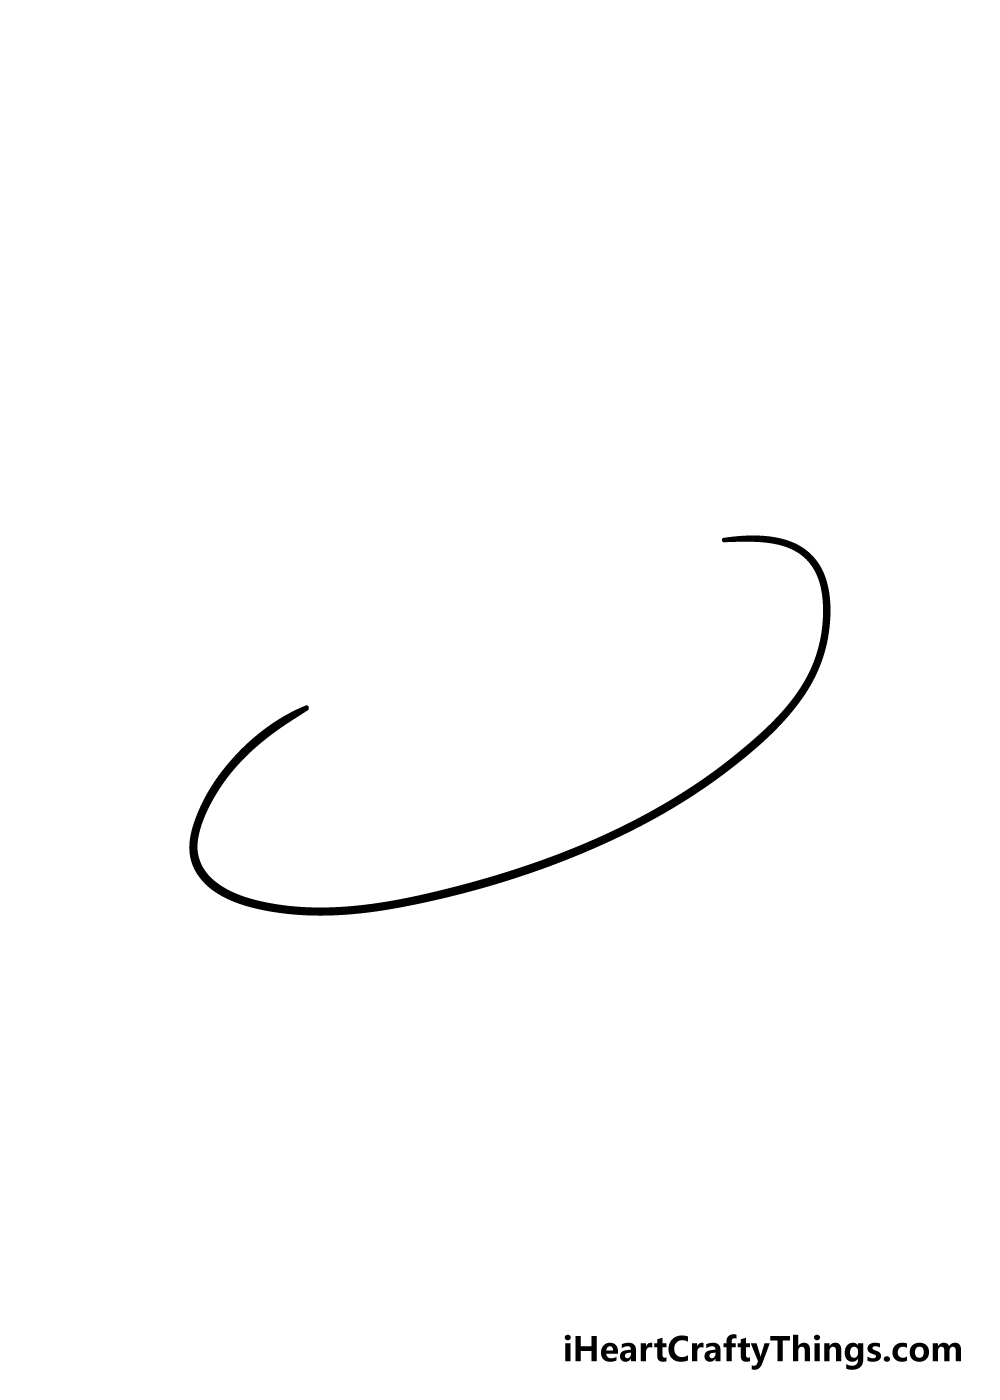
Using the oval that you drew in the previous step, we will draw the rim of your hat drawing now.
Starting from one end of the oval and looping around to the other, draw a curved line that looks like the one in our picture.
The line should be drawn so that the bottom of the oval is inside the new shape while the upper part isn’t. That may sound complicated, but it will make sense once you’re drawing it!
Step 3 – Now, draw the top of the hat
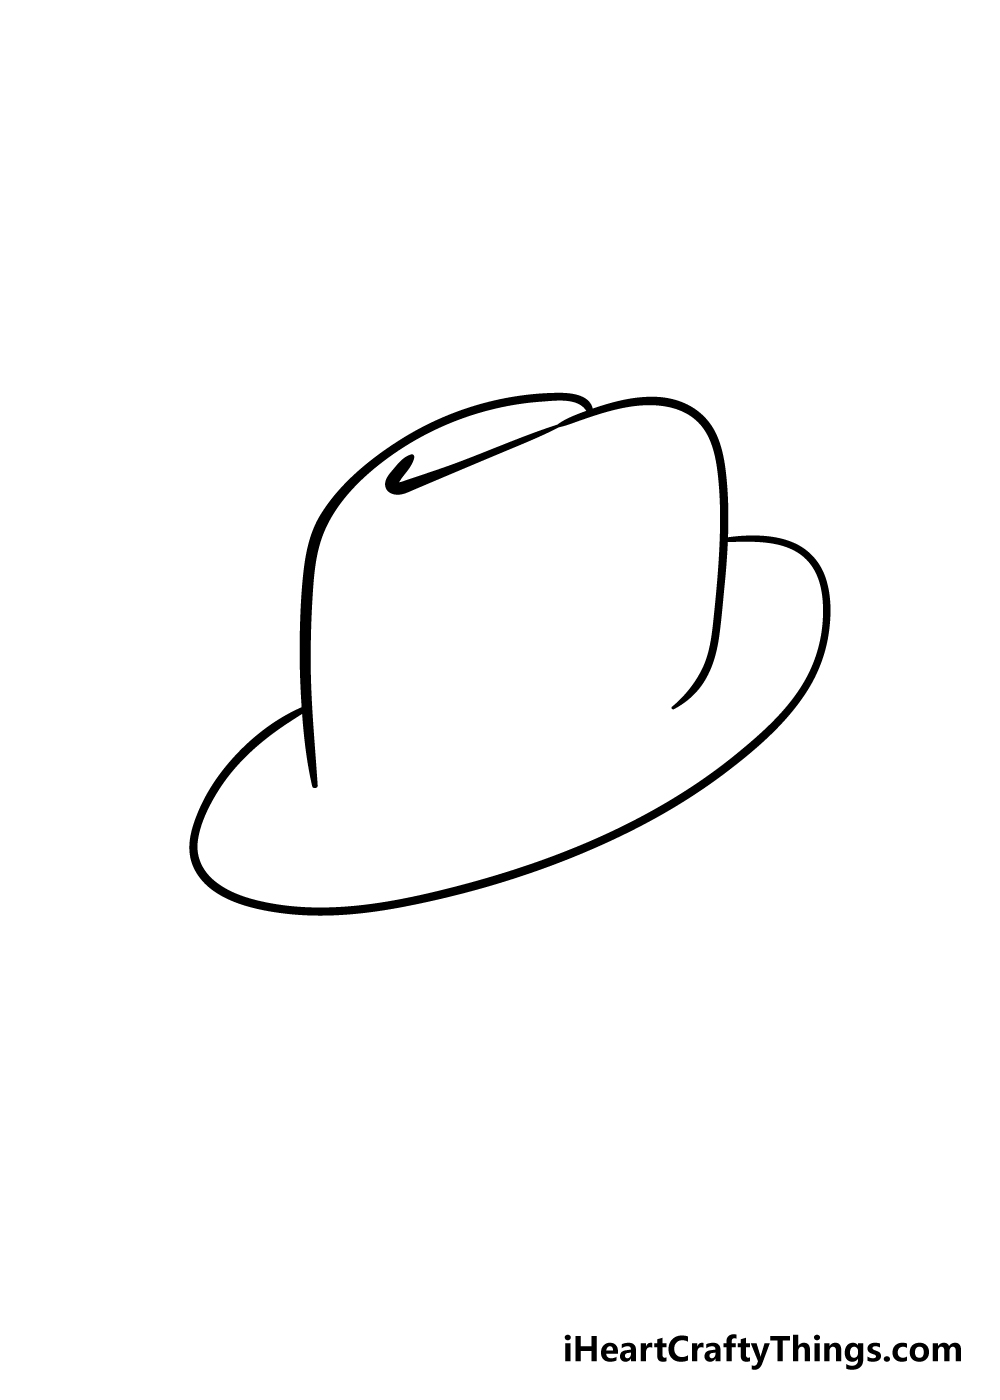
The top of the hat is the part that often throws people off when drawing it. To draw the top of this one, we will use two lines.
First, the line on the left will be curved and extend up from below the rim, as you can see in our reference image. Then below it, there will be another line that starts below the one you just drew.
This line will have a sort of tick at the beginning before extending backward below the other side of the hat’s rim. The reference image will help you to have it looking right as you draw.
Step 4 – Next, draw a fold in the hat
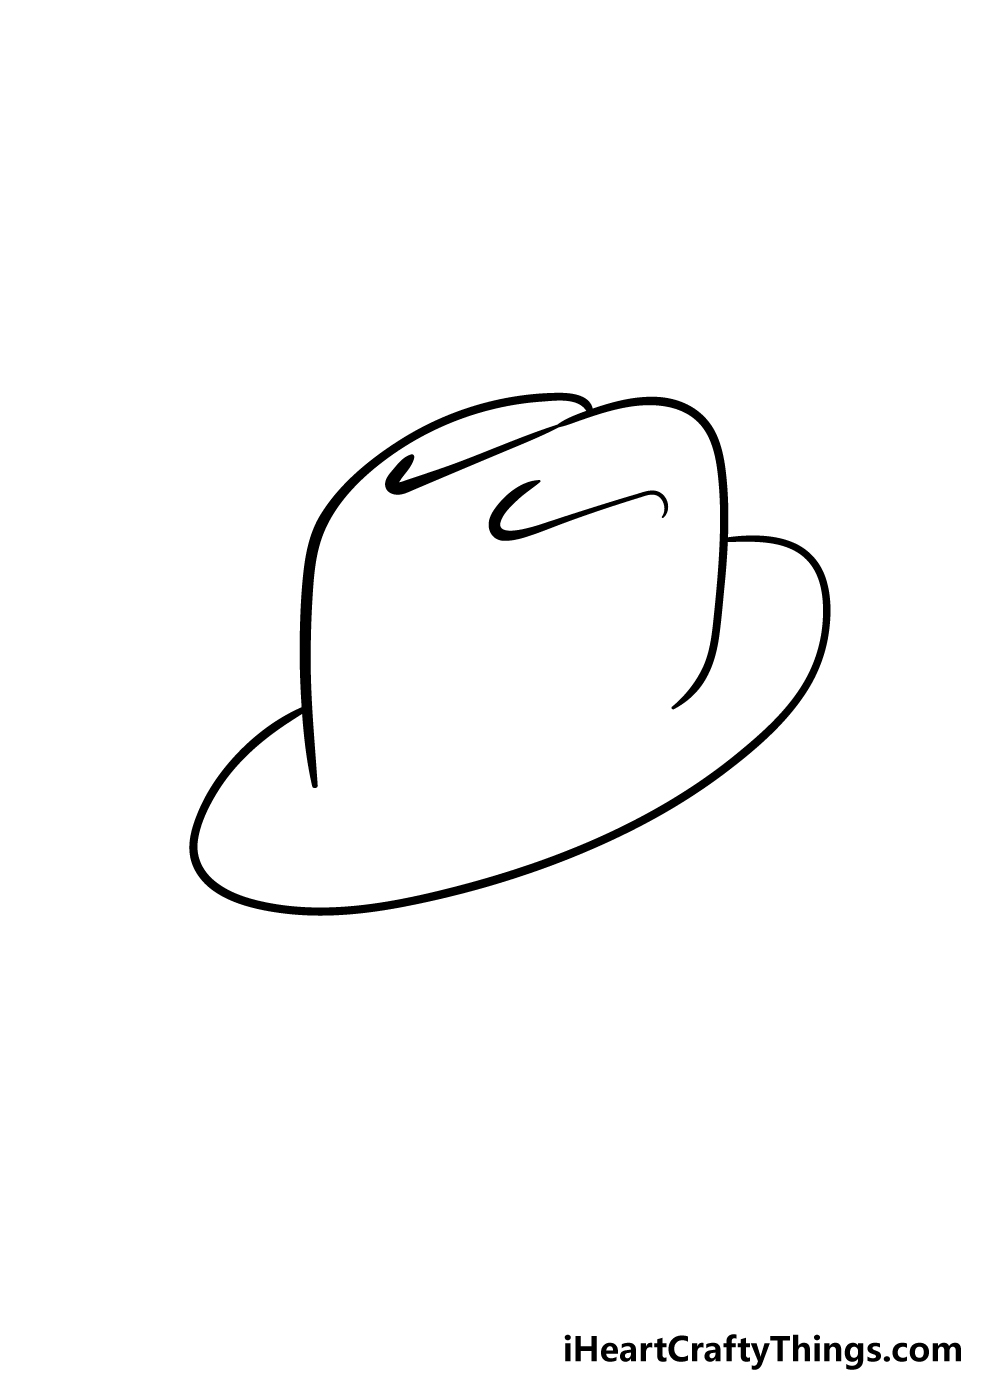
Hats are made out of material, so that means they aren’t solid and have creases and folds. We will add one of these folds in this guide on how to draw a hat.
To draw this, simply draw a line near the top of the hat that has a sort of fishhook shape to it.
Step 5 – Draw the base of the hat
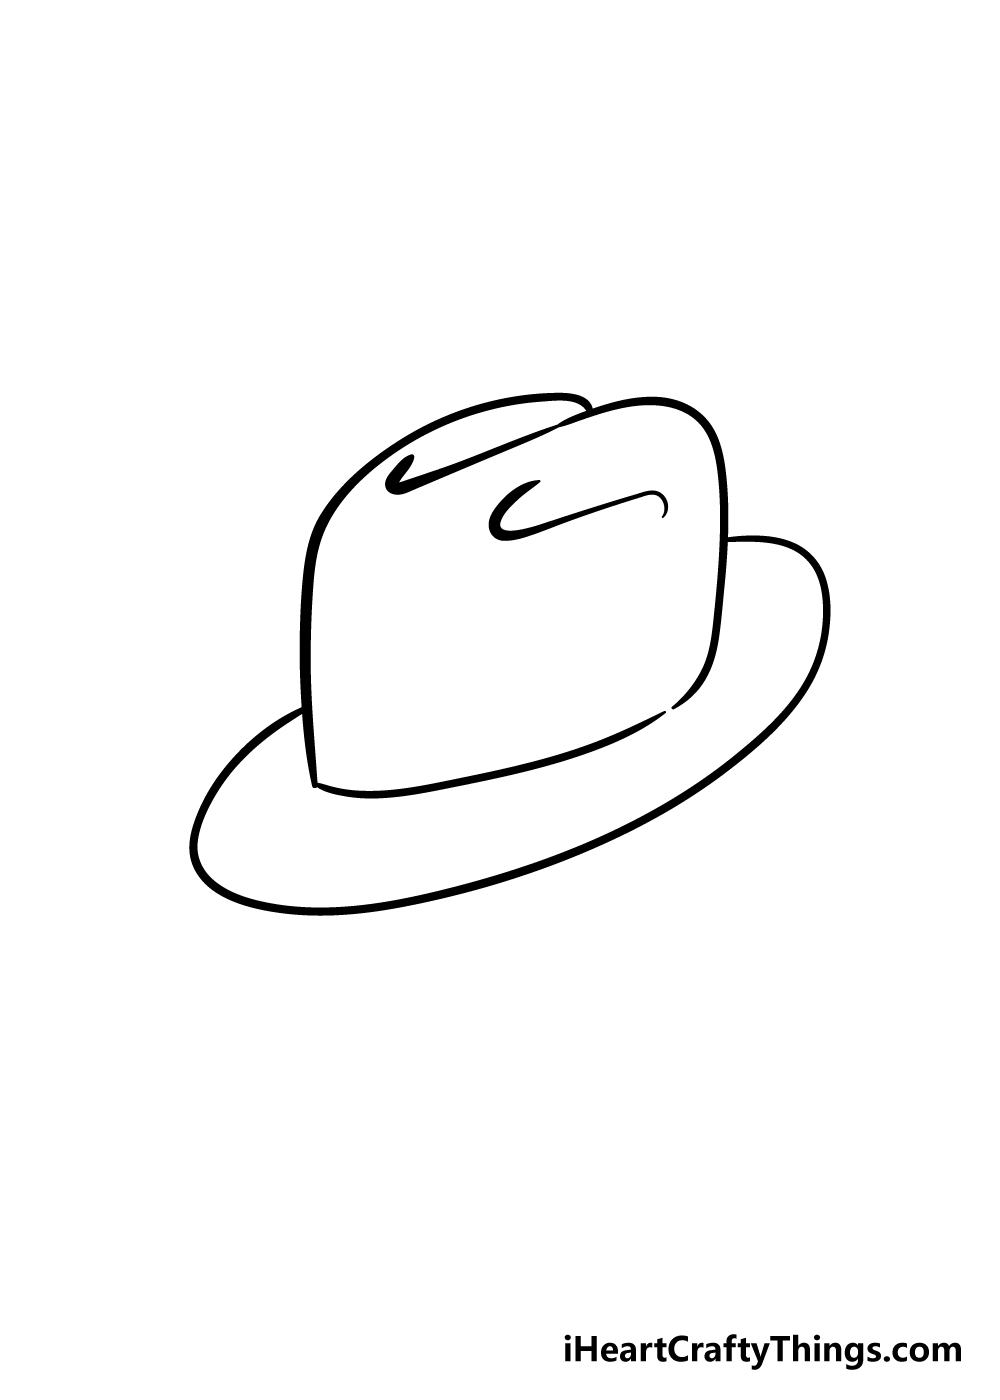
We have another simple step for your hat drawing up next! Simply draw a line between the lines of the bottom of the top of the hat in a curved direction.
This will form the bottom of the hat that connects to the rim.
Step 6 – Now, you can draw the band of the hat
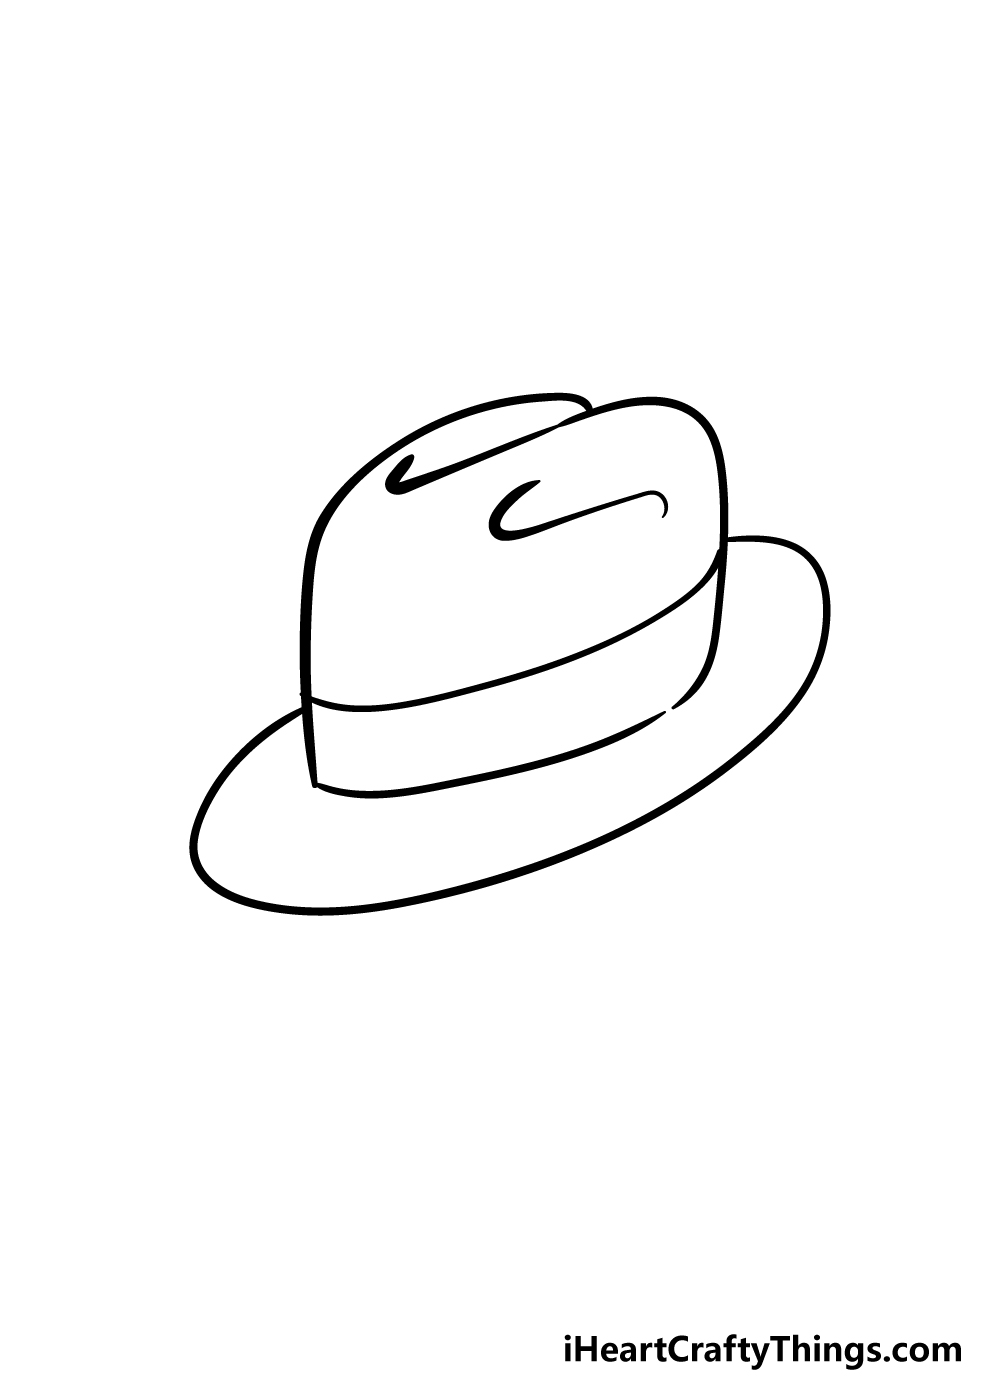
Using the line from the previous step, we will be drawing a band for your hat in this step of this guide on how to draw a hat.
To do this, simply draw another line running parallel above the line from the previous step. It’s as simple as that, and you’re ready for the final details!
Step 7 – Draw the final details of the hat in this step
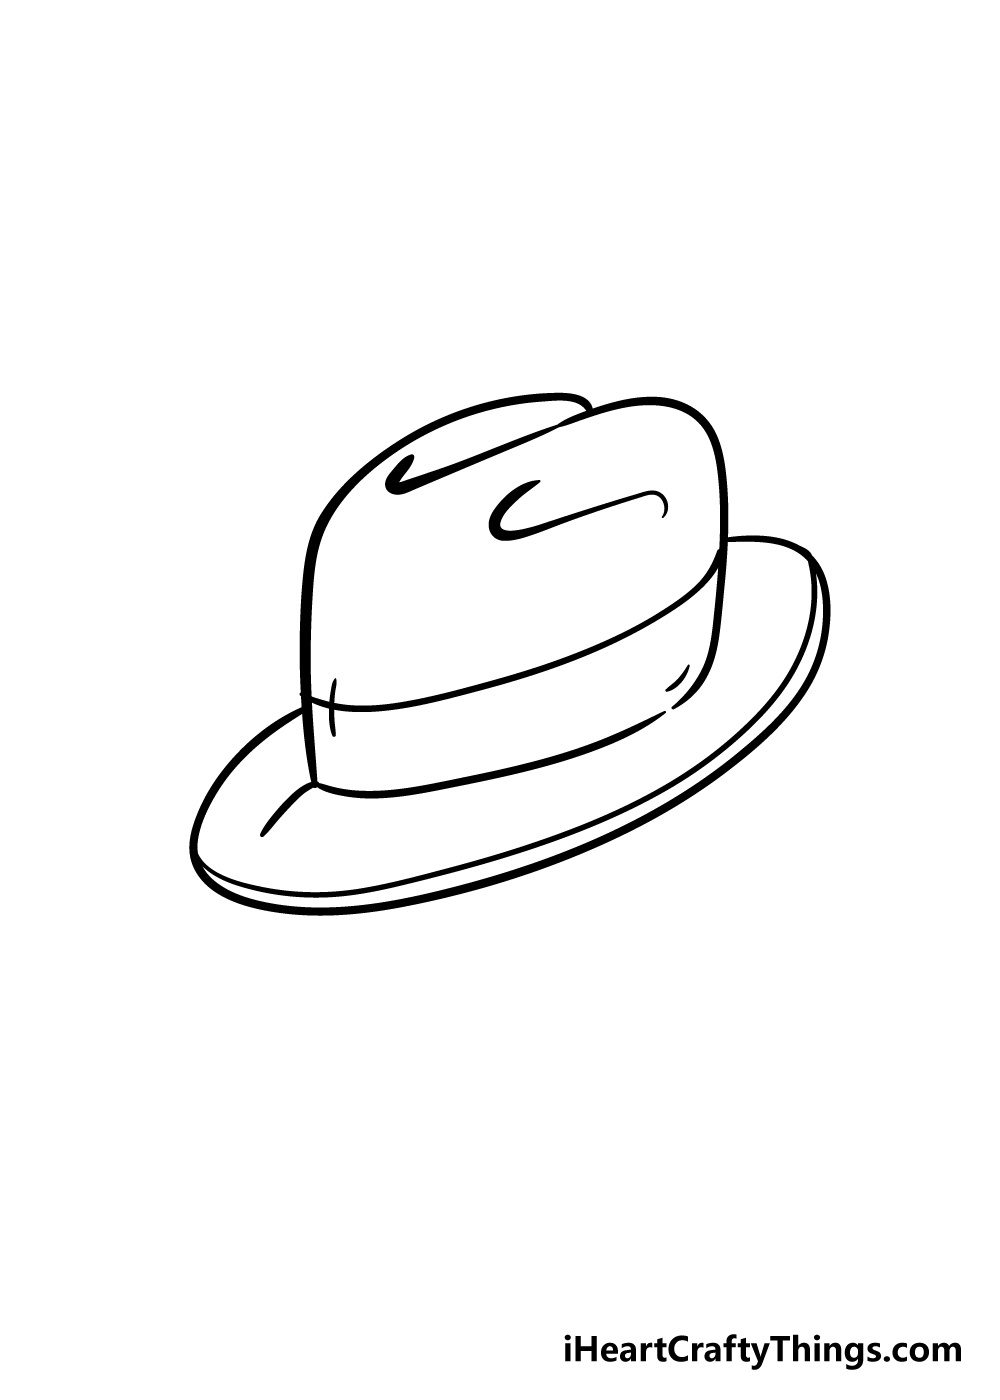
Often in drawing, the smaller details can really help to finish off a picture. That will prove the case for your hat drawing, as we will be adding some final touches before moving on to the coloring in stage.
First, draw a line running closely parallel to the rim of the hat. This will give the rim the look of slight thickness.
Finally, draw some lines near the base and band of the hat to finish it off. Before moving on, be sure to add any more details that you would like! Perhaps you could even draw a head beneath the hat to show us who is wearing it.
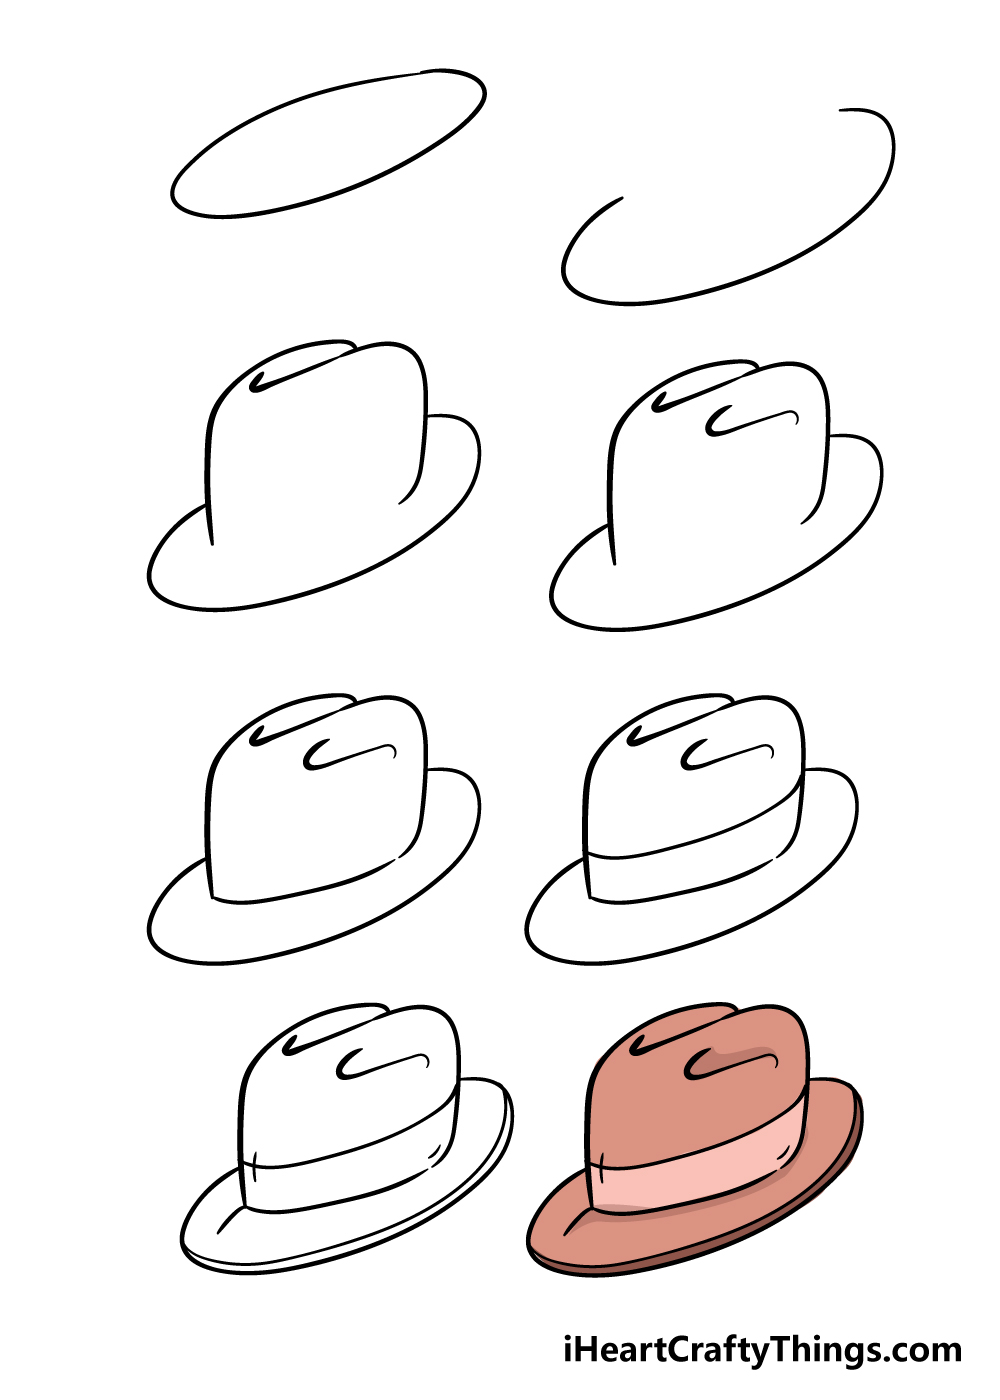
Step 8 – Now finish off your hat drawing with some color
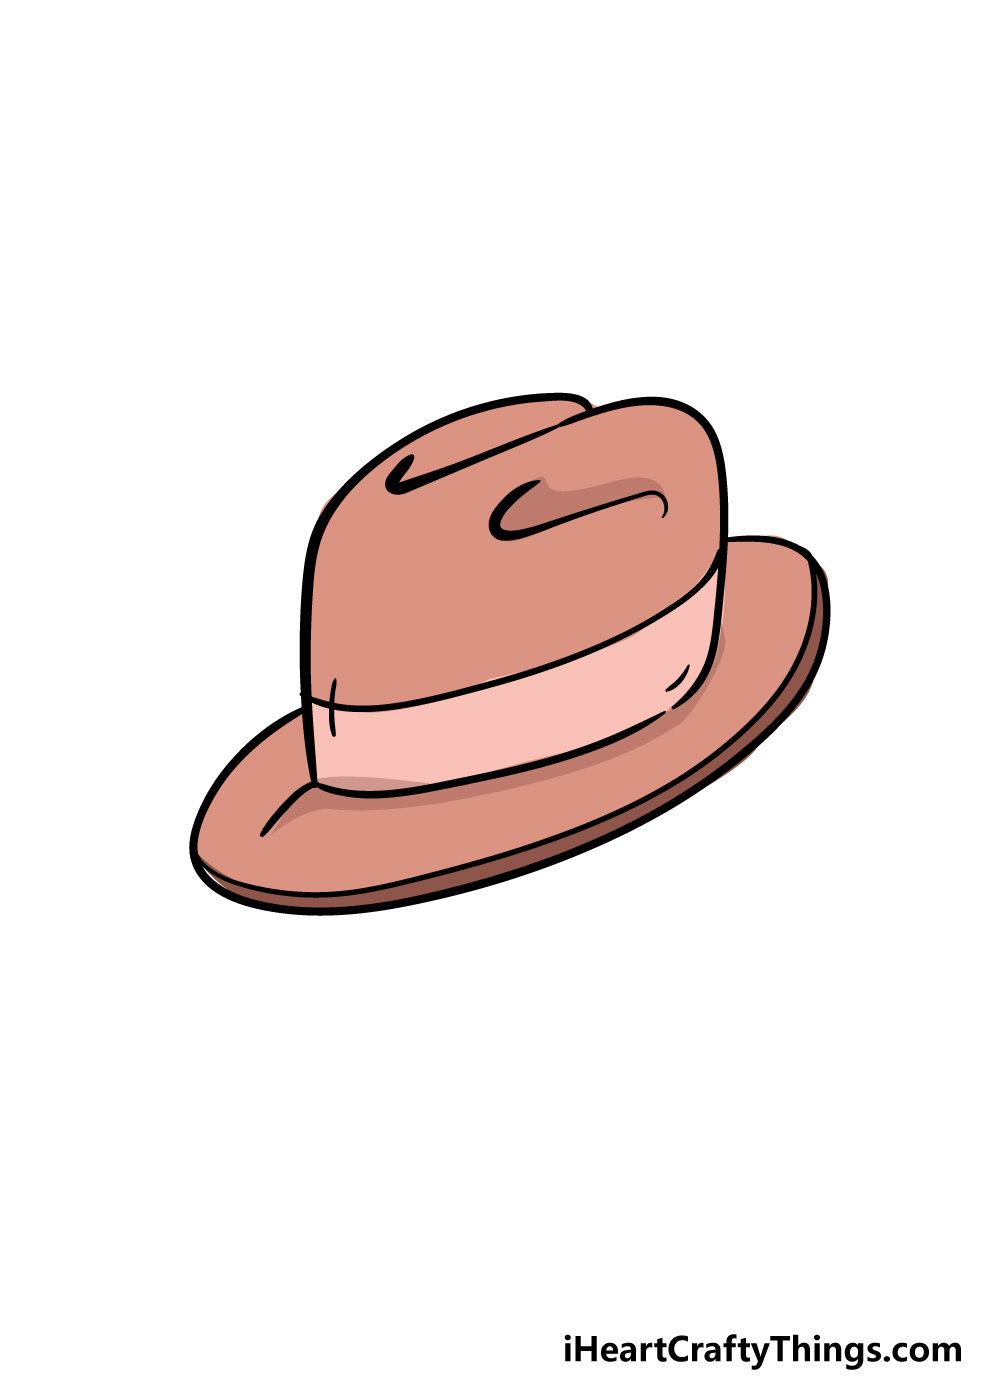
In this eighth and final step of your hat drawing, we will be finishing it off with some colors. We used a brown color scheme to give a classic leather look to the hat, but you have many options to choose from!
Hats come in many different colors, fabric and material variations, so you can achieve lots of cool looks using just your colors.
Choosing the colors that you would like is just part of it though, as you can also experiment with some different art mediums.
Depending on the art tools that you use, you can get bright, vibrant colors or a more muted, moody feel for your image.
Which colors and art mediums are you thinking of for your hat drawing?
4 More Ways To Make Your Galaxy Drawing Unique
Create some fancy hat artwork as we show you some tips for your hat sketch!
In real life, people will often add little extras to their hats. You could do the same for this hat drawing you have created!
These little extras can take many forms, and they can be used to represent the personality of the person wearing it. For a few ideas, there could be a pin or a small badge pinned to the hatband.
For a more extravagant look, you could have a feather poking out from the hatband as well. What other small touches could you add?
Every hat needs a wearer, and you could add one to this drawing of a hat! If you were to go with this suggestion, it would be up to you to decide who you would like to wear the hat.
It could be yourself, a friend, family member, a celebrity or even an original creation. Once you have chosen who you would like to depict, you could also have fun choosing the style you would like to draw them in!
Once you have added any extras and a person wearing the hat, you could then finish off the scene with a background. This is a tip where you could create anything you can imagine!
The setting you go for could be a themed one that goes with what you previously added, and there are all sorts of fun settings you could create.
Where would you set this image?
Finally, in this guide we created just one kind of hat. Once you have the hang of this hat sketch, you could take it further by adding different kinds of hats!
There are so many hats to choose from, and each one would suit a different need or mood. There are fancy ones like top hats and classic ones such as a bowler hat.
These are just a few of the hats you could depict, but we’re sure you can think of many more examples to depict!
Your Hat Drawing is Complete
This step-by-step guide on how to draw a hat was created with two goals in mind. The first goal was to show you that drawing a hat can be a simpler process when you have steps to help you out along the way.
The second goal was to make this a process that would be lots of fun for you! We hope that we achieved both goals and that you found this tutorial to be both helpful and enjoyable to use.
Now that you can draw this hat, it’s up to you to show us how creative you can be with it!
Will you draw a fun, colorful background for this hat, or draw some objects around it to show us a bit more about who could own this hat? We can’t wait to see what you can come up with!
We have many more awesome step-by-step drawing guides like this one on our website coming out all the time, so be sure to check in often to make sure you never miss out!
Once you have completed your hat drawing, we would also love it if you would share your artwork on our Facebook and Pinterest pages for us to enjoy!