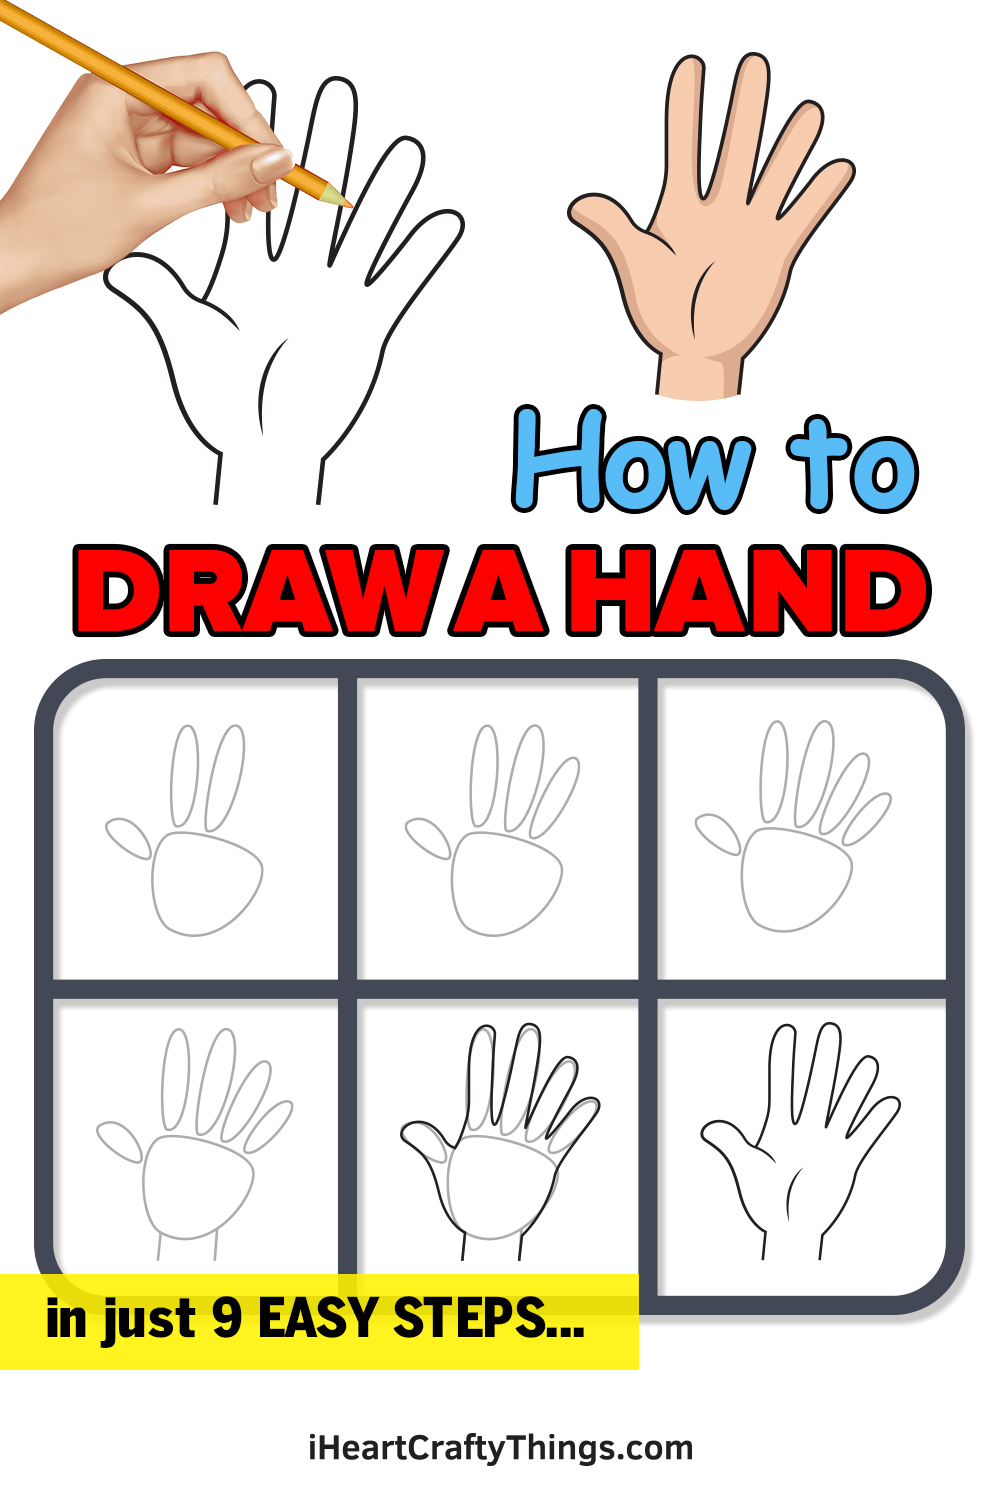
Creating a drawing a hand doesn’t have to be challenging when you know how. This guide will make creating your cartoon hand drawing easier than ever before.
Any artist will tell you that drawing a hand is notoriously difficult. It can be so tricky that some will avoid including hands in their drawings at all costs.
As with any challenge in life, you can make it easier by breaking it down. This guide will show you how to break down the design into the simplest shapes with your pencil to map it out.
You will start to see the basics of the fingers, palm, and wrist forming as you prepare. Then, you will be able to use your pen to draw the final outlines and details, and your finished cartoon hand will appear like magic!
Then, you can start to draw variations with different gestures and details, and it all comes from following this fun and simple guide. Let’s begin and make this famously difficult subject a breeze to draw!
Follow This Guide To Easily Create Your Hand Drawing
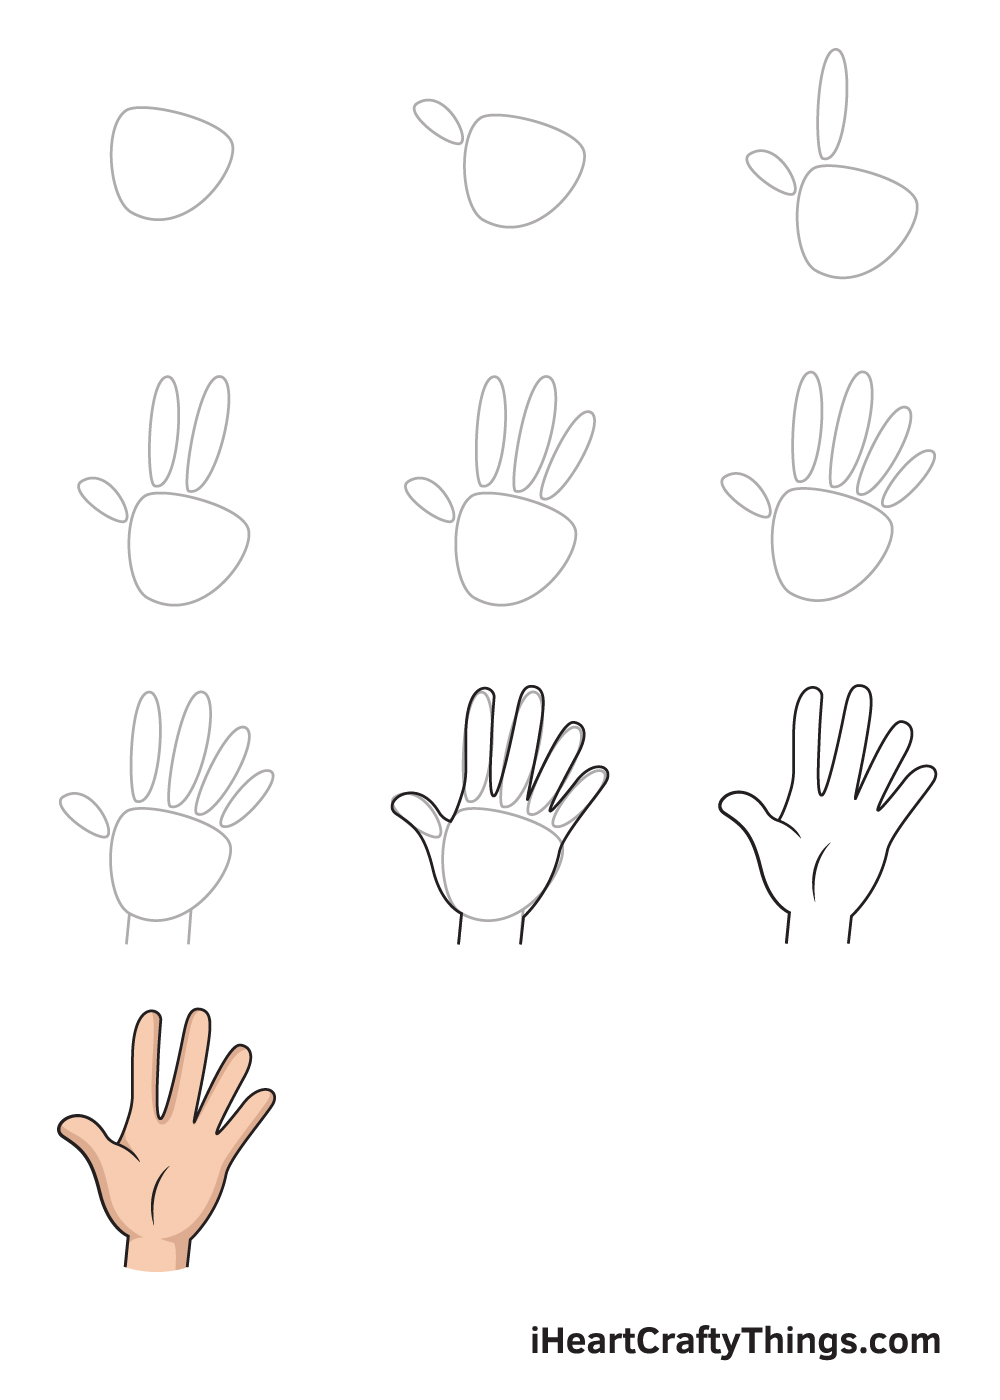
How to Draw a Hand – Let’s get started!
Step 1
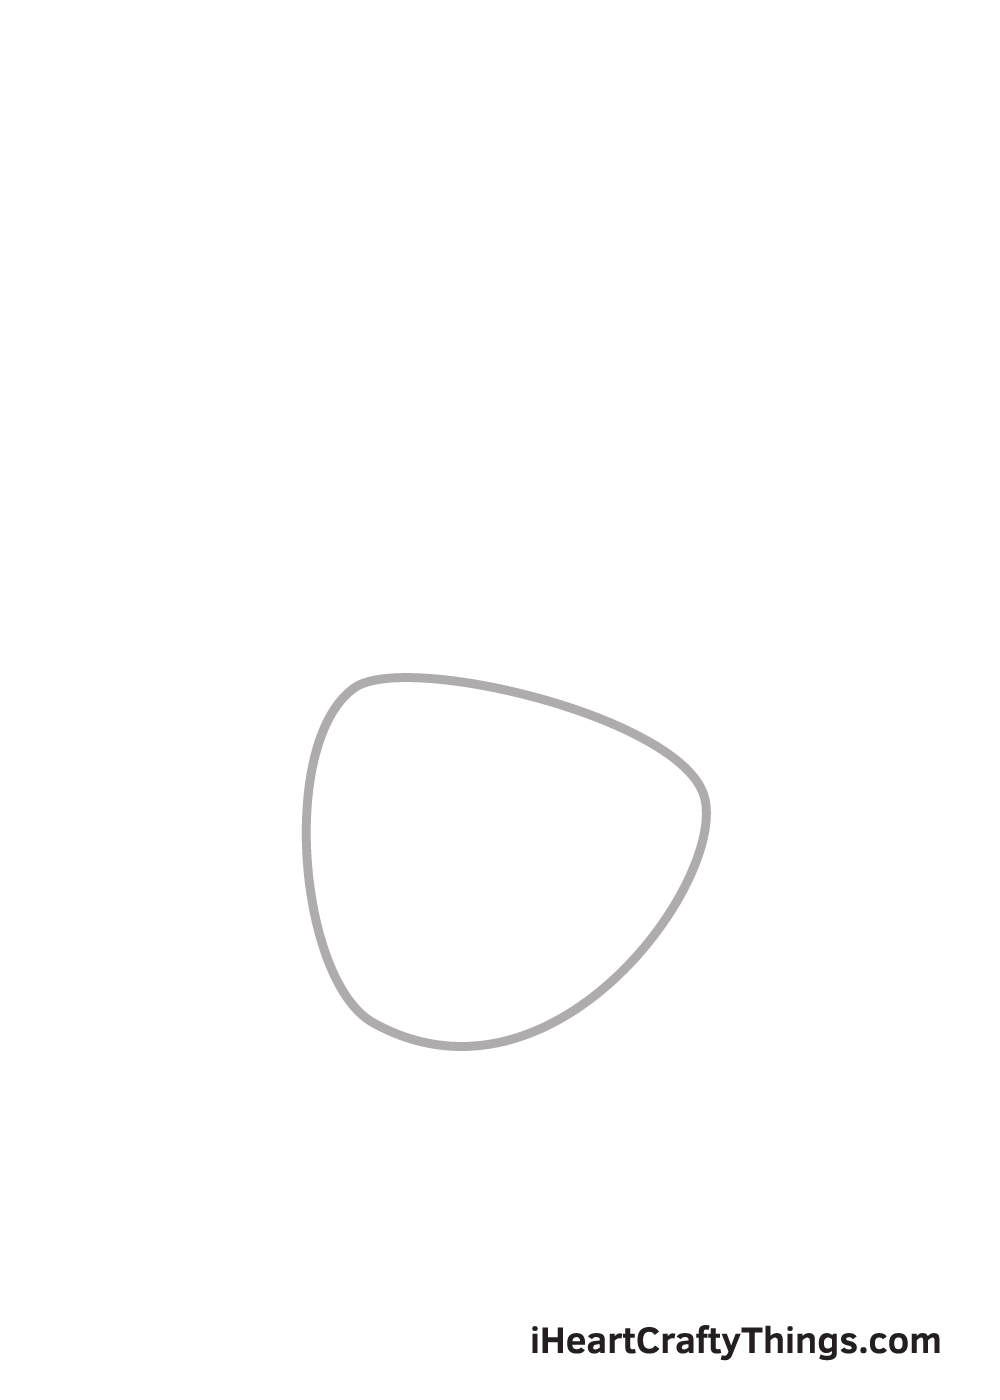
In this tutorial, we will be drawing the open palm of a left hand. Starting at the middle bottom of your paper, draw the outline of the palm. It’s as easy as 1-2-3: simply draw a tilted irregular circle shape with a flat wide top and narrow curved bottom, as shown in the illustration.
To ensure that the outline will be positioned in the middle correctly, draw a horizontal and a vertical line across the paper to create reference lines. Make sure that you draw the outline of the palm on the bottom vertical line.
Starting at the bottom of your paper provides sufficient space for you to draw the fingers.
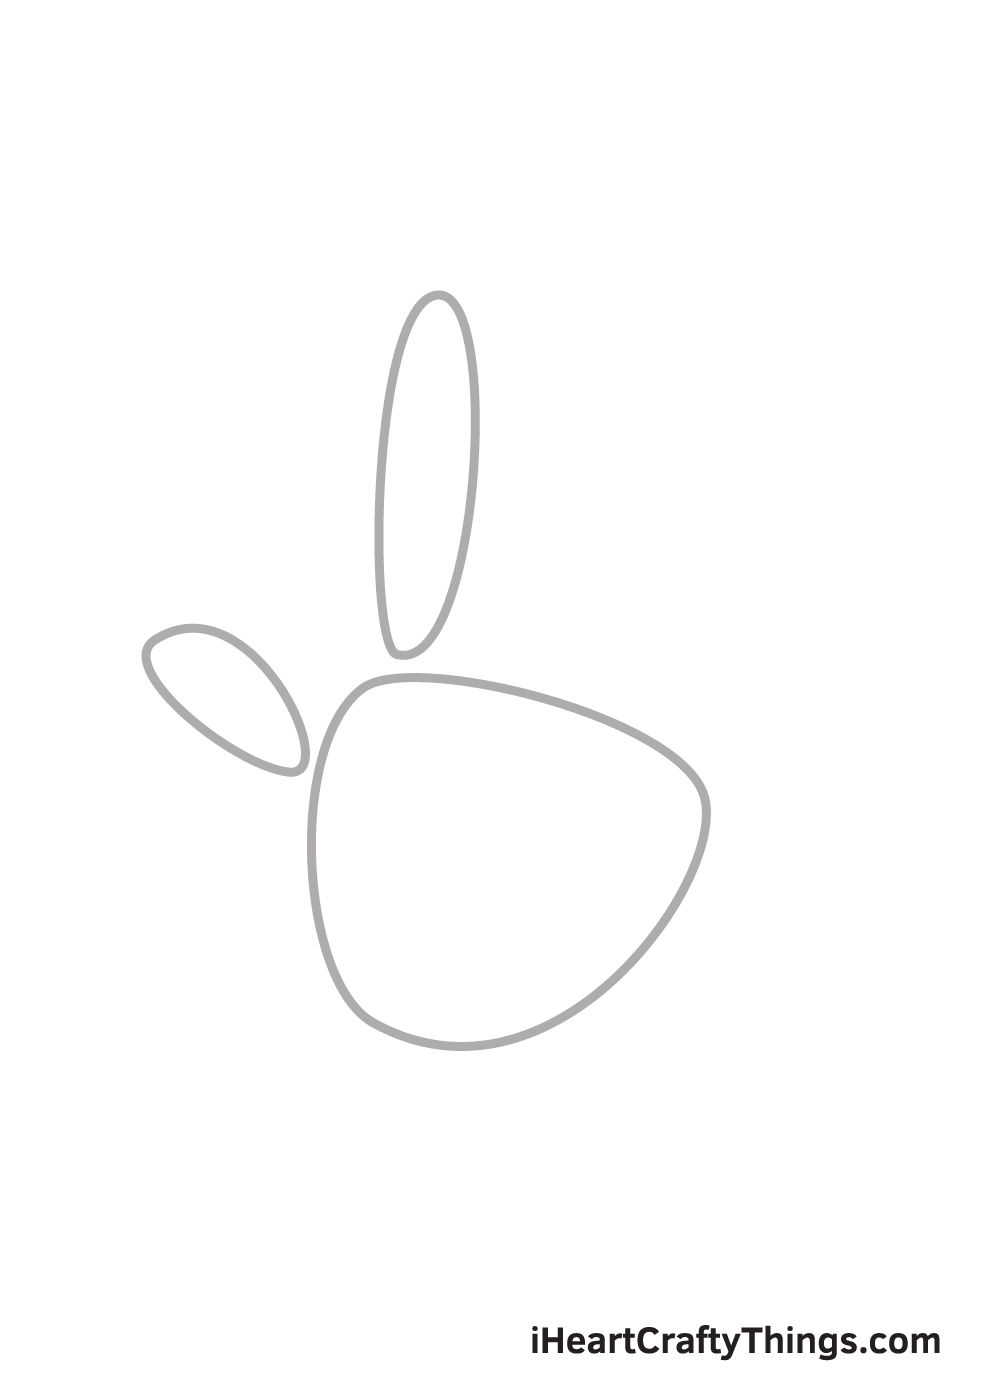
Step 2 – Draw the Outline of the Thumb
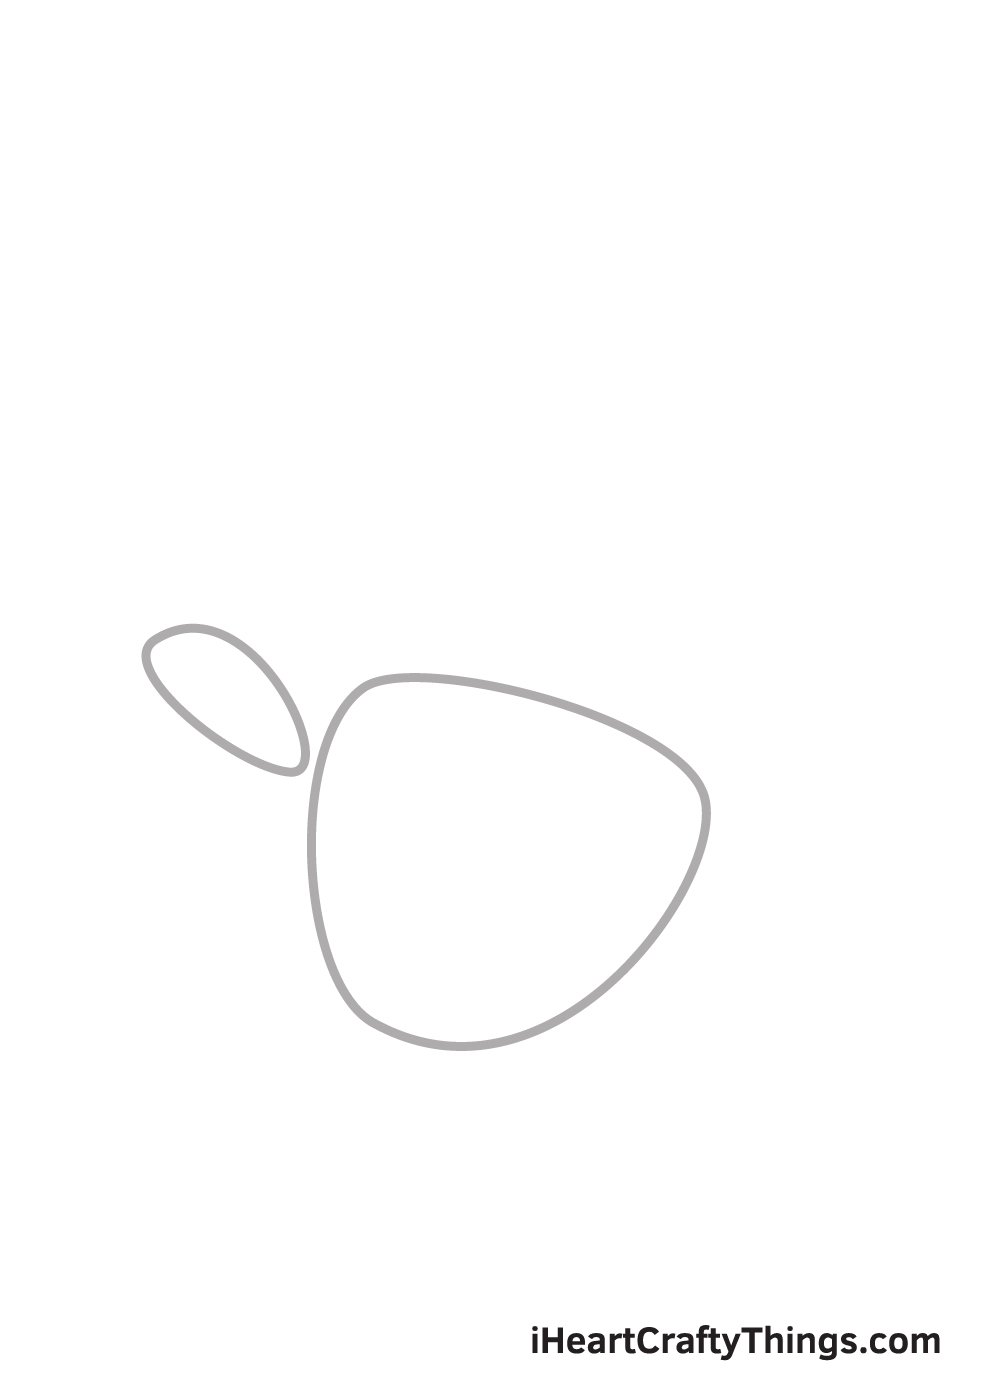
On the left side of the palm, draw an oval shape to outline the thumb.
Bear in mind that the outlines should be slightly apart from each other and not overlapping. We will be able to connect all of them once we go over and trace the outlines.
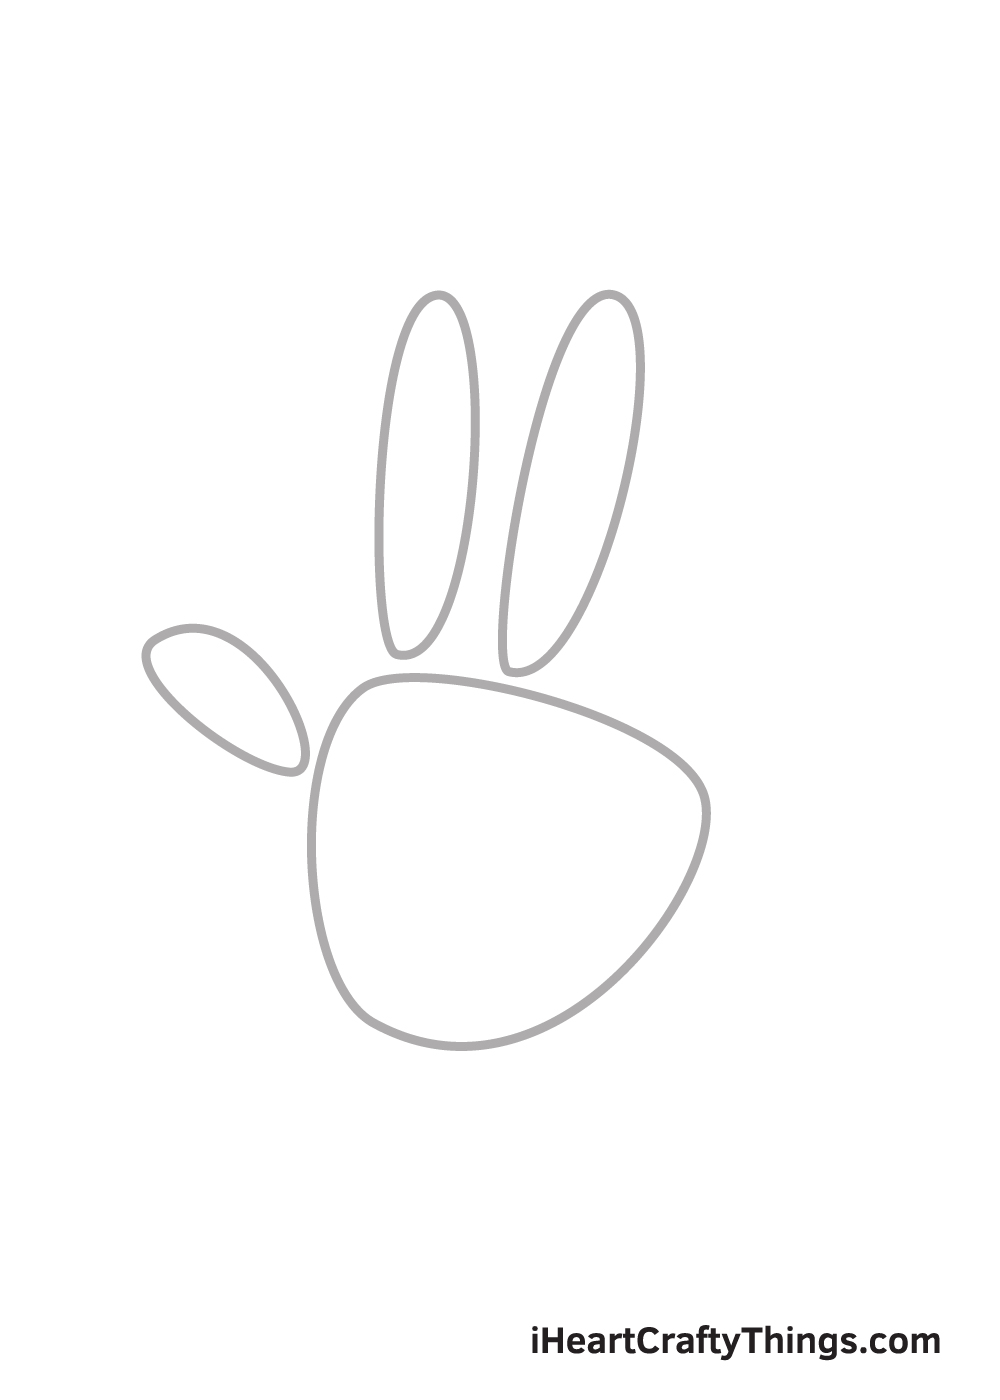
Step 3 – Then, Draw the Outline of the Index Finger
Draw a long oval shape on the leftmost top of the palm. This outlines the index finger.
The length of the index finger’s outline must be as long as how your hand’s index finger would be. Needless to say, you can customize the length and width of every finger.
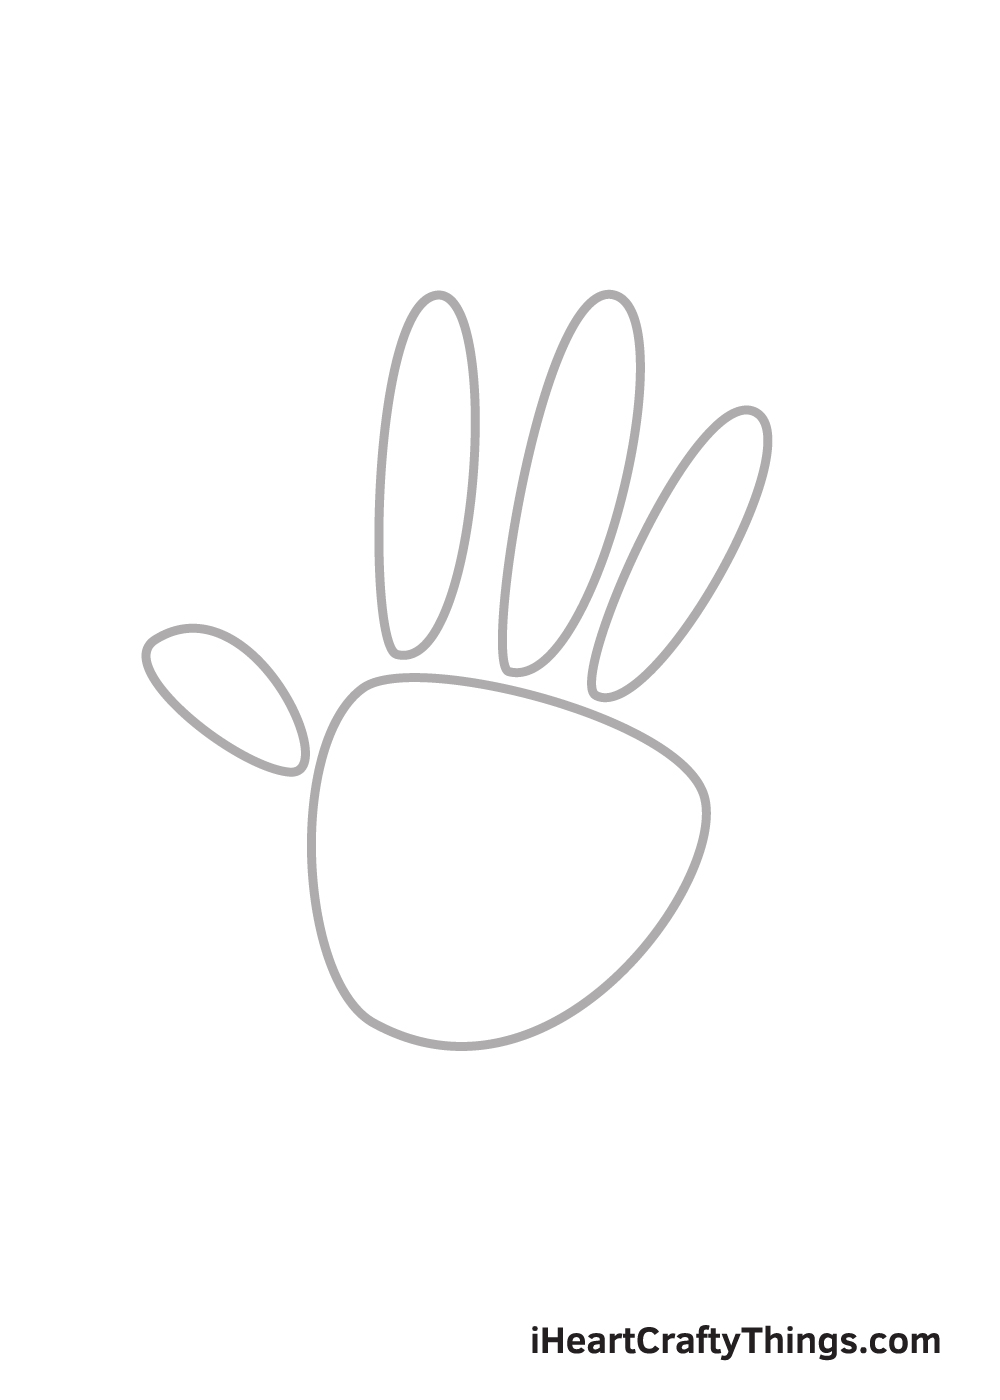
Step 4 – Next, Draw the Outline of the Middle Finger
Moving on to the next finger, draw another long oval shape right beside the index finger’s outline. The middle finger must be relatively bigger than the index finger, as how it naturally is.
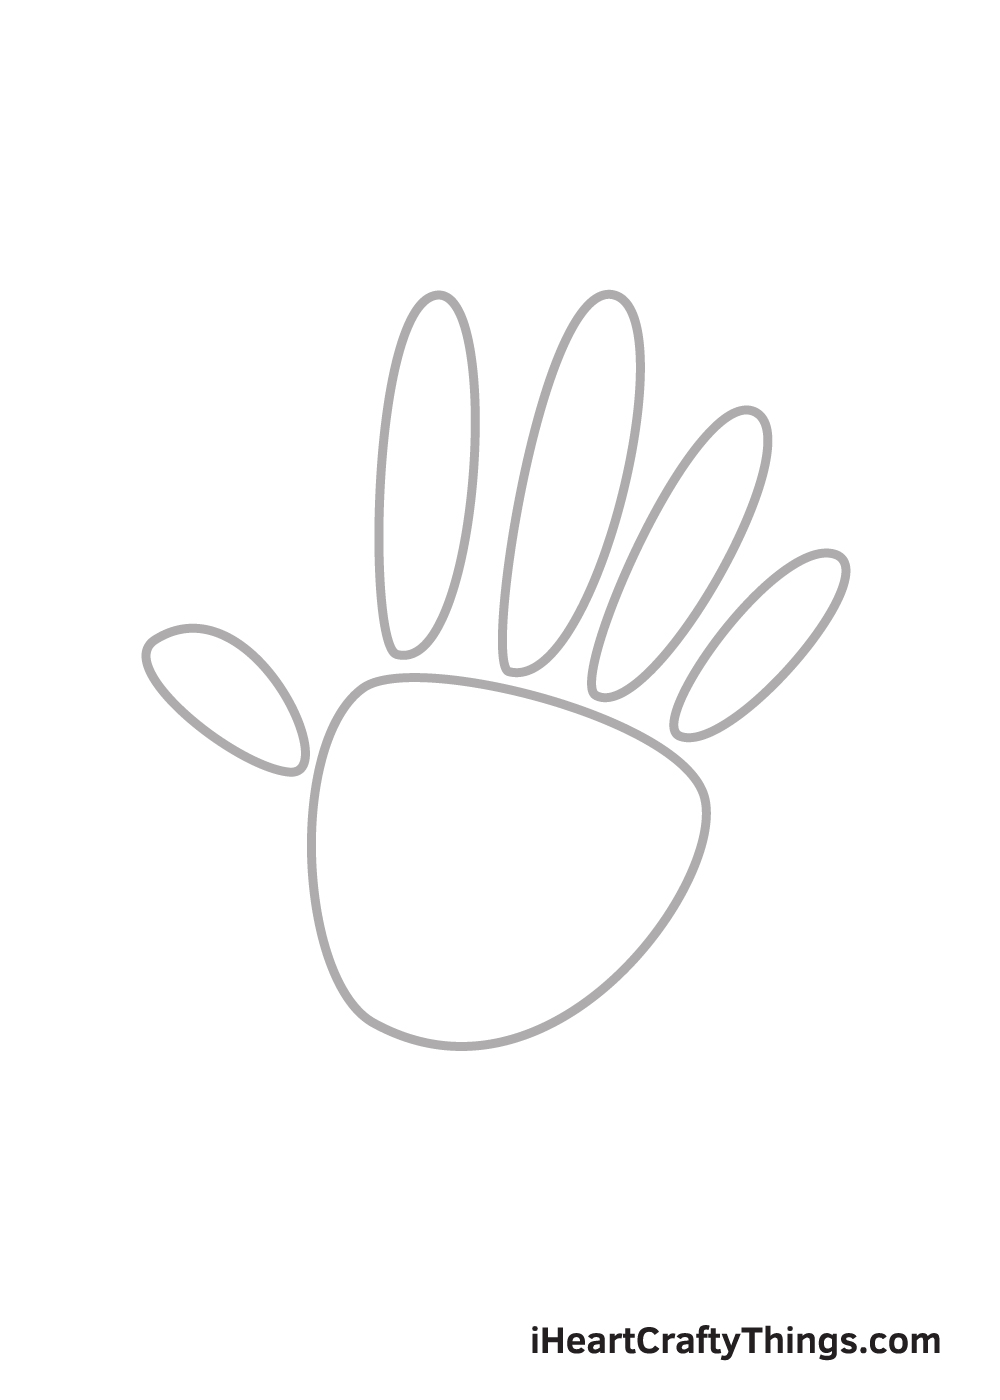
Step 5 – Afterwards, Draw the Outline of the Ring Finger
Now, we will be working on the next finger after the middle finger. Draw an outline of the ring finger right beside the middle finger.
The ring finger must be slightly smaller than both the index finger and the middle finger.
Step 6 – Next, Draw the Outline of the Pinky Finger
Beside the ring finger, draw an oval shape that is smaller than the ring finger but still bigger than the thumb.
When you’re in doubt, check your own hands to determine if the sizes of the fingers are accurate. Generally, the middle finger is the tallest, followed by the index or ring finger, while the thumb and pinky finger are the smallest.
Step 7 – Now, Draw the Wrists Below the Hand
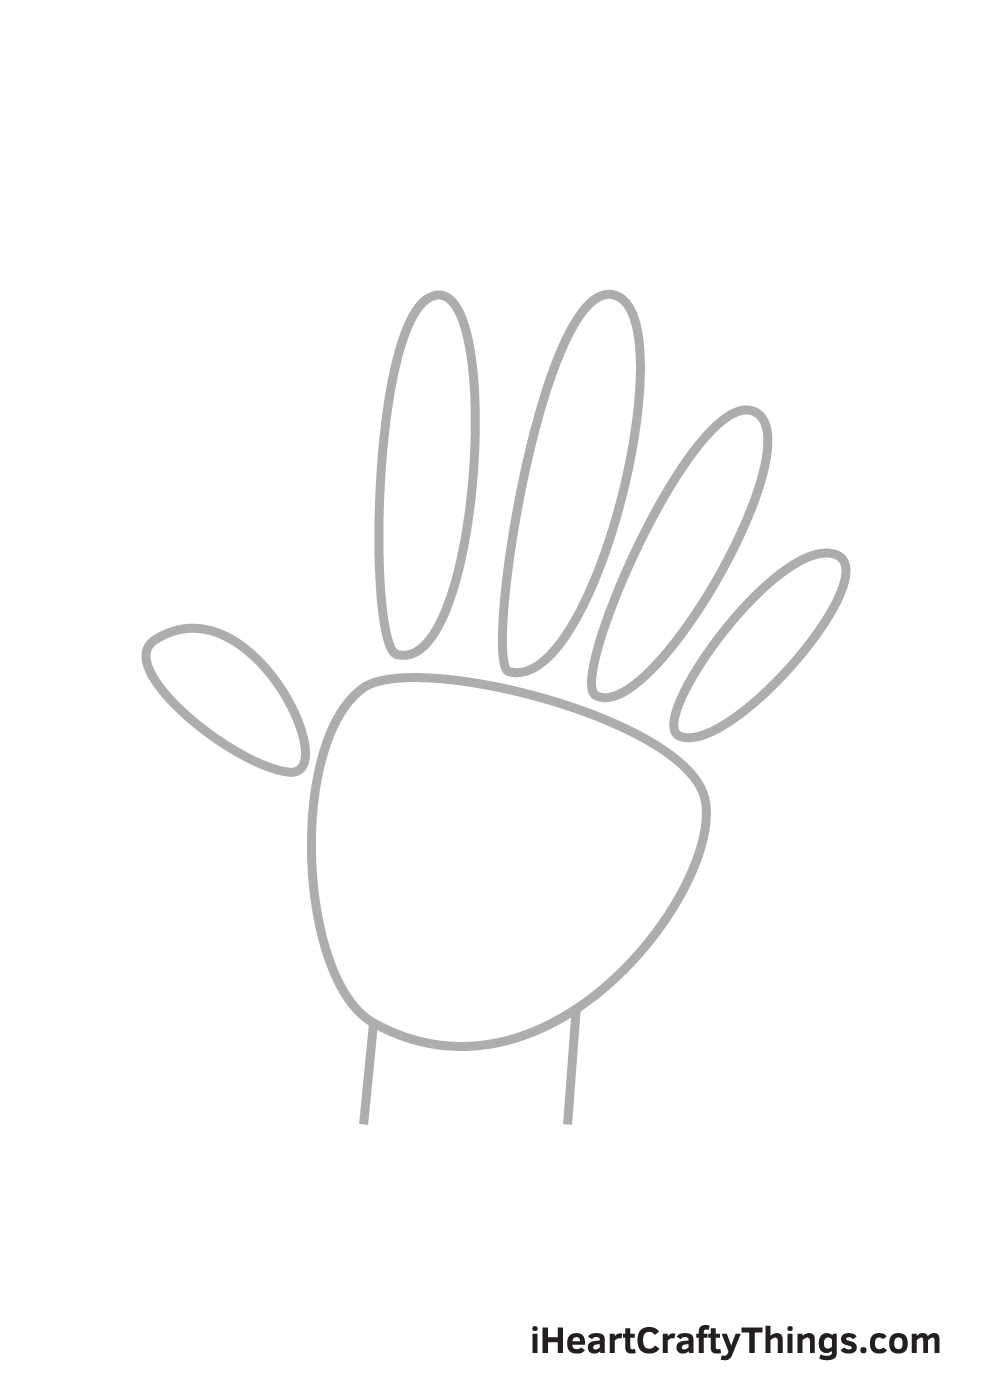
Right underneath the palm, draw two short vertical lines at the bottom. The distance between the lines should be how thick or thin you want the wrist to be.
Step 8 – Trace and Structure the Outline
Draw over the outlines we have drawn in the previous steps to finally create the structure of the hand. Draw curves whenever necessary, but keep your lines straight especially on the fingers. This finally forms and structures the hand.
As you can see in the illustration, the hand is gradually coming to life!
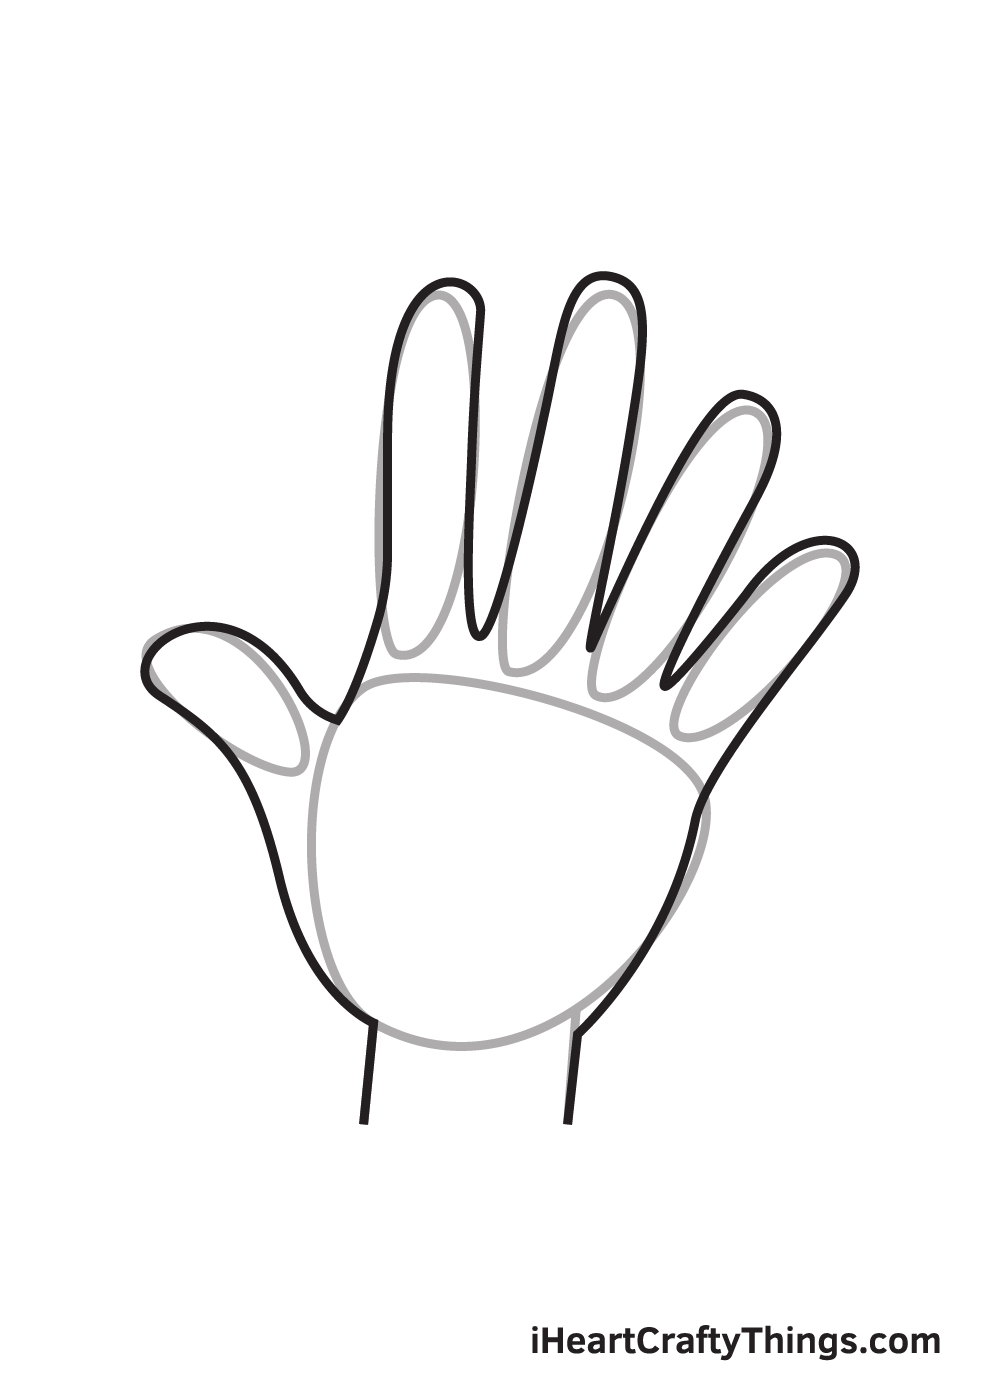
Step 9 – Erase the Outline Add Palm Lines
Now that you have successfully structured the form of the hand, you no longer need the outlines we have drawn in the previous steps. So, grab your eraser and erase all the unnecessary marks on your paper, leaving a neat, structured form of the hand.
Afterwards, draw a sideways curved line facing towards the thumb. This will create an outline for the palm lines, making the hand appear dimensional and realistic.
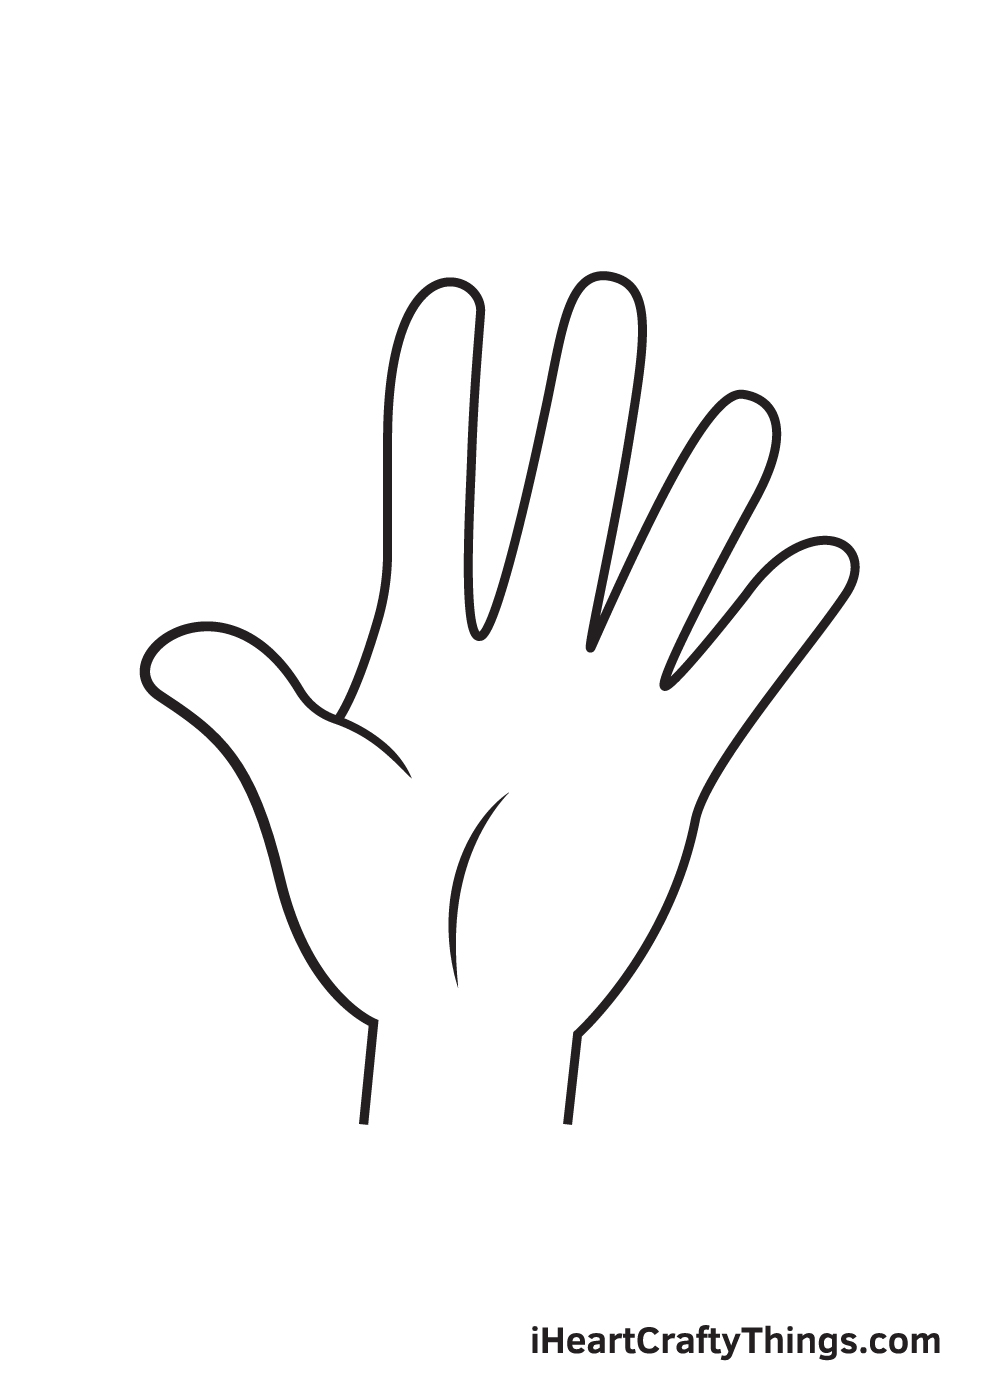
Here, you can see the hand is nearly finished! The only thing it’s missing is a dash of multiple colors to complete your artwork!
Finally, here is the most exciting part—filling in the colors for your awesome drawing! This is the part where you can show off your artistic skills and your ability to mix and match various colors.
To create a skin tone color, mix the colors red, yellow, brown, and white. Depending on the complexion you’re aiming for, you may want to add more of a specific color than the rest.
Feel free to color your hand drawing however you like and use any colors you prefer! And while you’re at it, why not try experimenting with different coloring materials as well?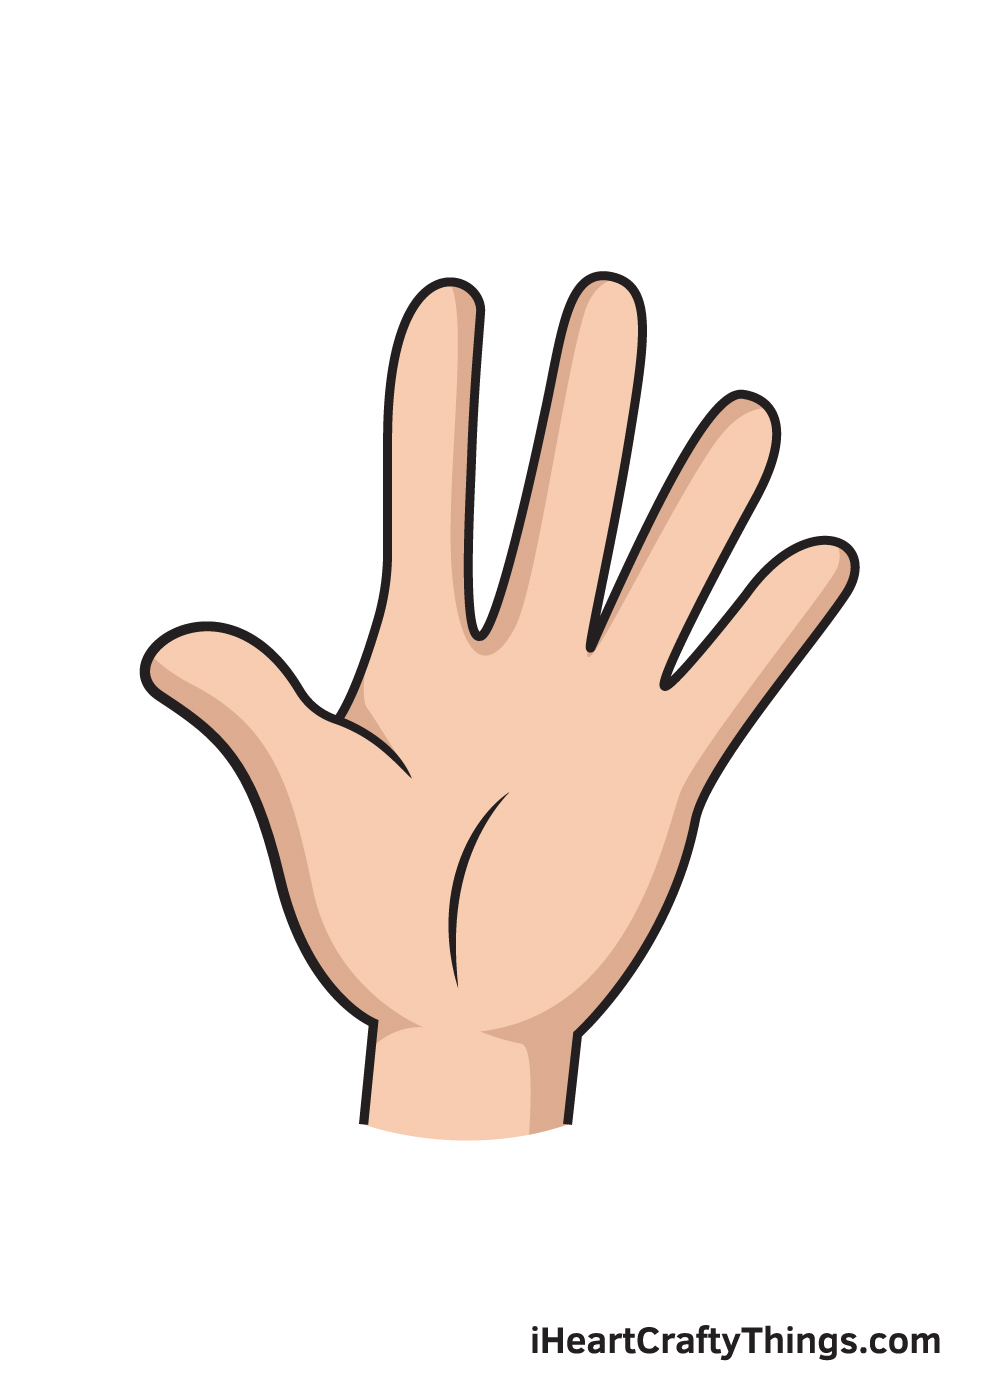
Here’s how you can make your hand drawing even better…
Find out how to make your hand drawing even better than it already is with these fun tips.
To make this hand sketch easier, we went with a simple cartoon style. If you want to challenge yourself once you’ve mastered it, then you could try and make it more realistic.
To do this, you can use your real hand and the guide we provided in order to change details to make it look more realistic. This can be quite hard, so take your time with it and don’t give up!
Another way to make this hand drawing even better would be to draw some more of the character it is attached to. If you stuck to the cartoon design of the guide, then you could draw the character in a similarly cartoony style.
You could even keep the hand exactly as it is to make it look like the character is waving. Or, you could change the position and pose of the hand as well.
How would you have this character posed if you were to use this idea?
It would be fun to add some articles of clothing and jewelry to your drawing of a hand to really take it to the next level. This could include some rings on the fingers which you could have fun designing.
Or, maybe the hand could be covered in a glove or a mitten. You could ask friends and family if you can borrow items such as these to help you out as you add them to the hand.
What would you outfit this hand in if you were to use this idea?
You could also have some fun creating a background by adding some objects this hand could interact with. There are tons of fun ideas for how you could do this!
For example, this hand could be going over the keys of a piano or maybe holding a flute. You could draw some art supplies around the hand to make it look like someone is creating some artwork.
What other ideas do you have?
Your Hand Drawing is Complete!
We hope you enjoy this step-by-step tutorial on how to draw a hand. With this guide, you can surely draw and color a hand along with its complex features and elaborate details in no time.
And the most fun part is, you can customize its physical attributes and play with various colors as much as you like!
We are always updating our “How to Draw” catalog, so make sure to keep checking back on our website to take advantage of newly uploaded tutorials.
All you need is a pen and paper and you’re all set to start drawing! We are excited to see what you will draw next. We’re sure it will be just as amazing as this one!
Once you’ve finished your masterpiece, we’re certain you must be feeling very proud of yourself—as you should be! Completing this hand drawing is definitely fulfilling.
Make sure to show off your work of art and share it on our Facebook page and on Pinterest. We’re sure it looks amazing! We can’t wait to see your colorful hand drawing!