Graduation is one of the most important days in a person’s life. It represents the culmination of years of hard work and study and serves as a celebration of academic achievement.
One of the most recognizable aspects of this occasion is the flat-topped hat that graduates can wear.
Learning how to draw a graduation hat can be a great way to capture the occasion’s excitement.
If you would like to learn how to do just that, then this is the right guide!
This step-by-step guide on how to draw a graduation hat will teach you how to draw this distinctive hat!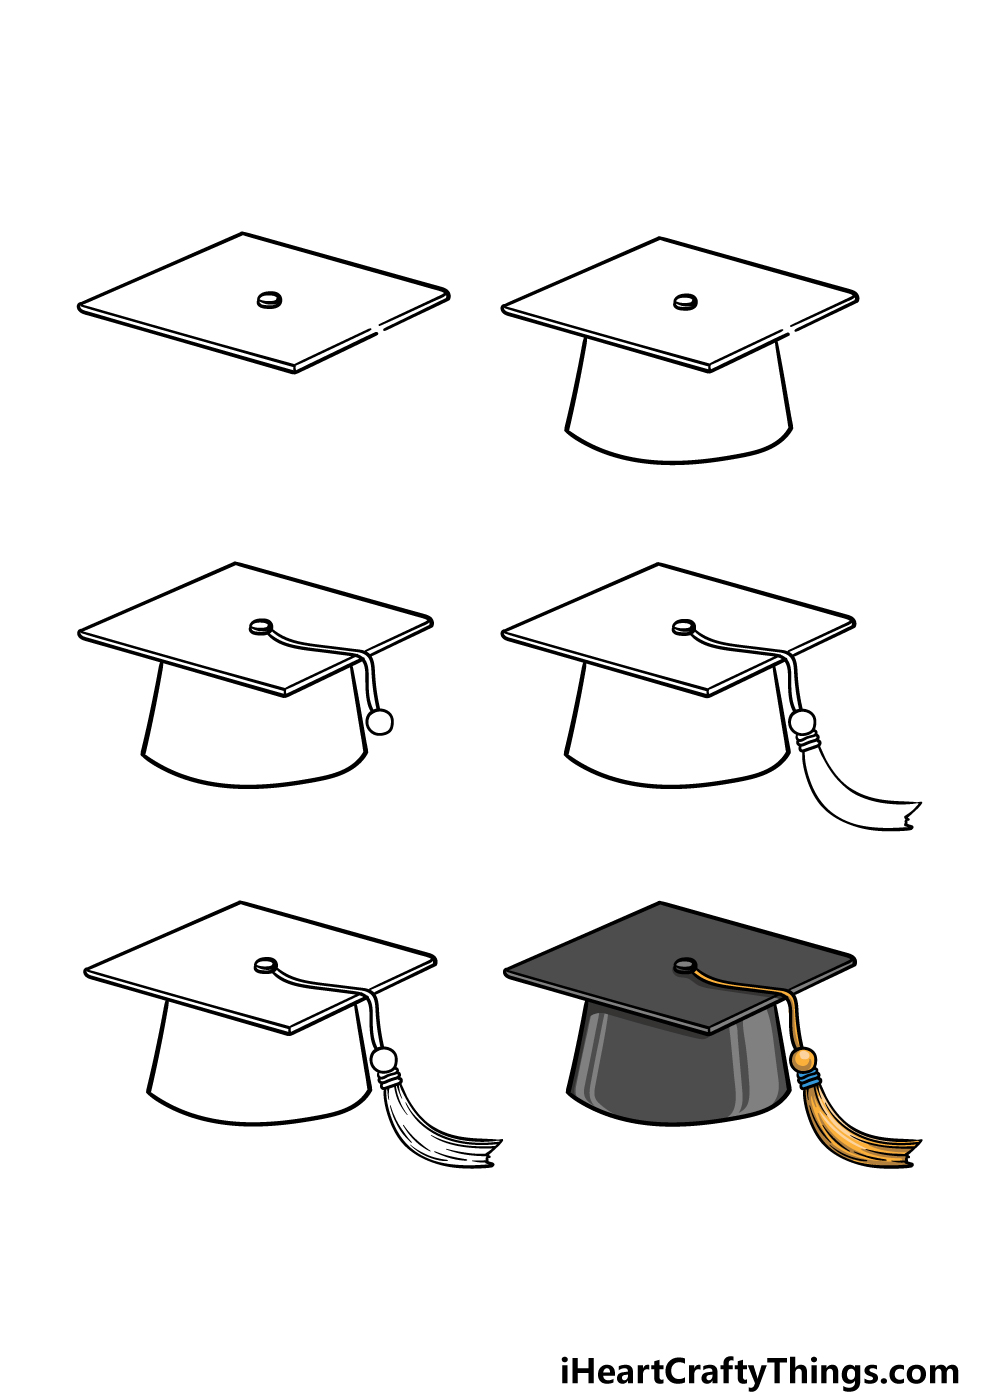
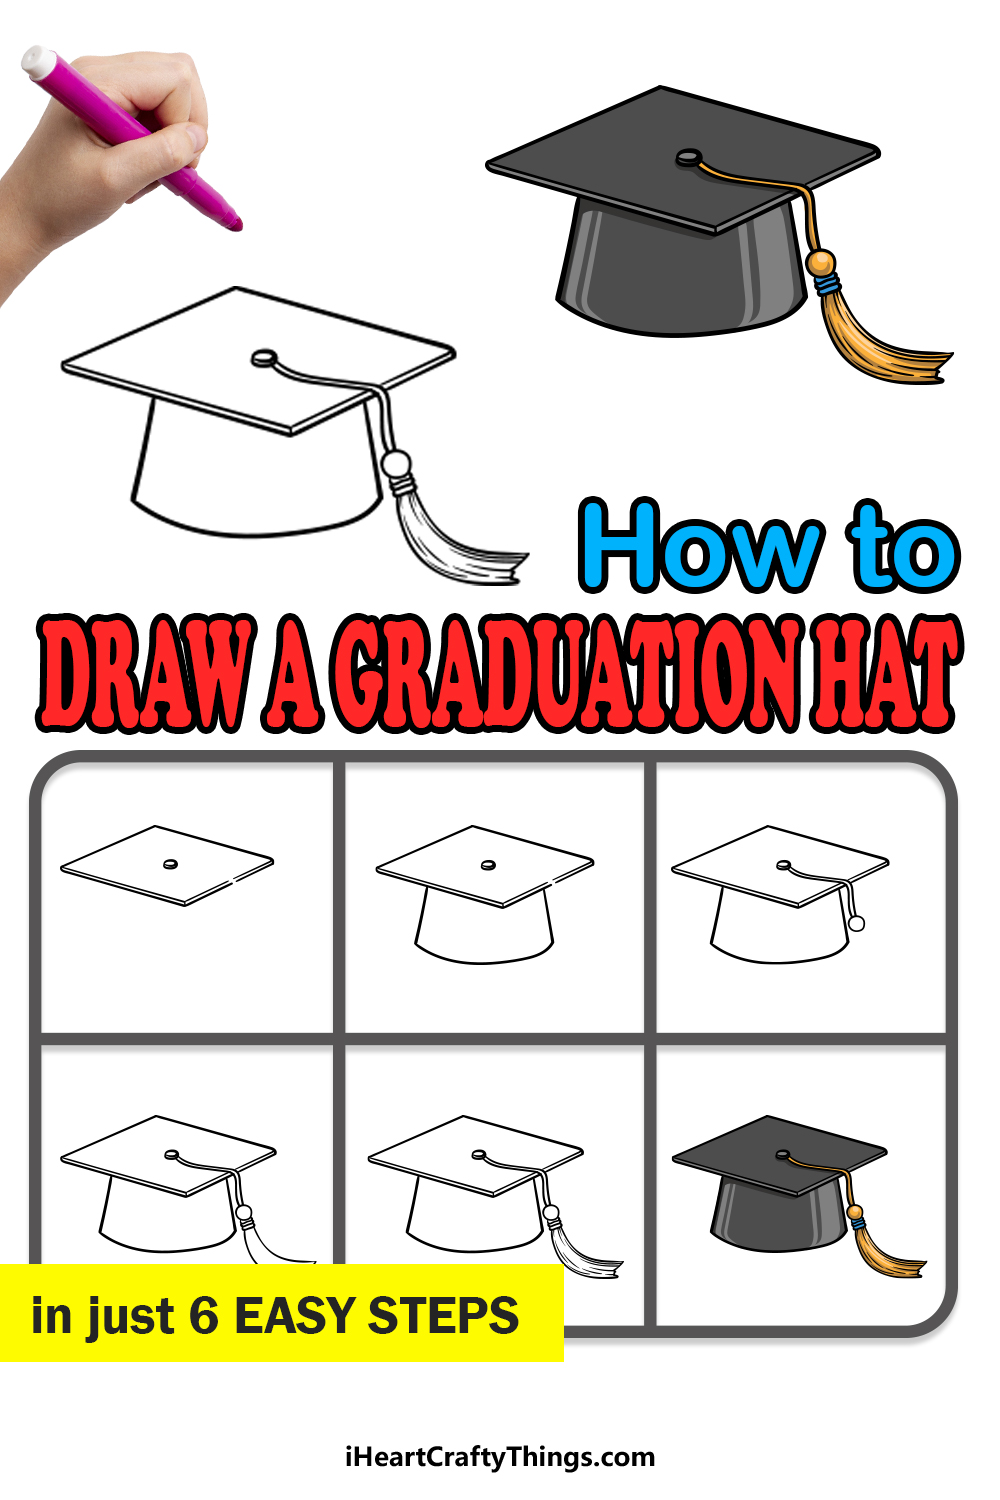
How to Draw A Graduation Hat – Let’s Get Started!
Step 1
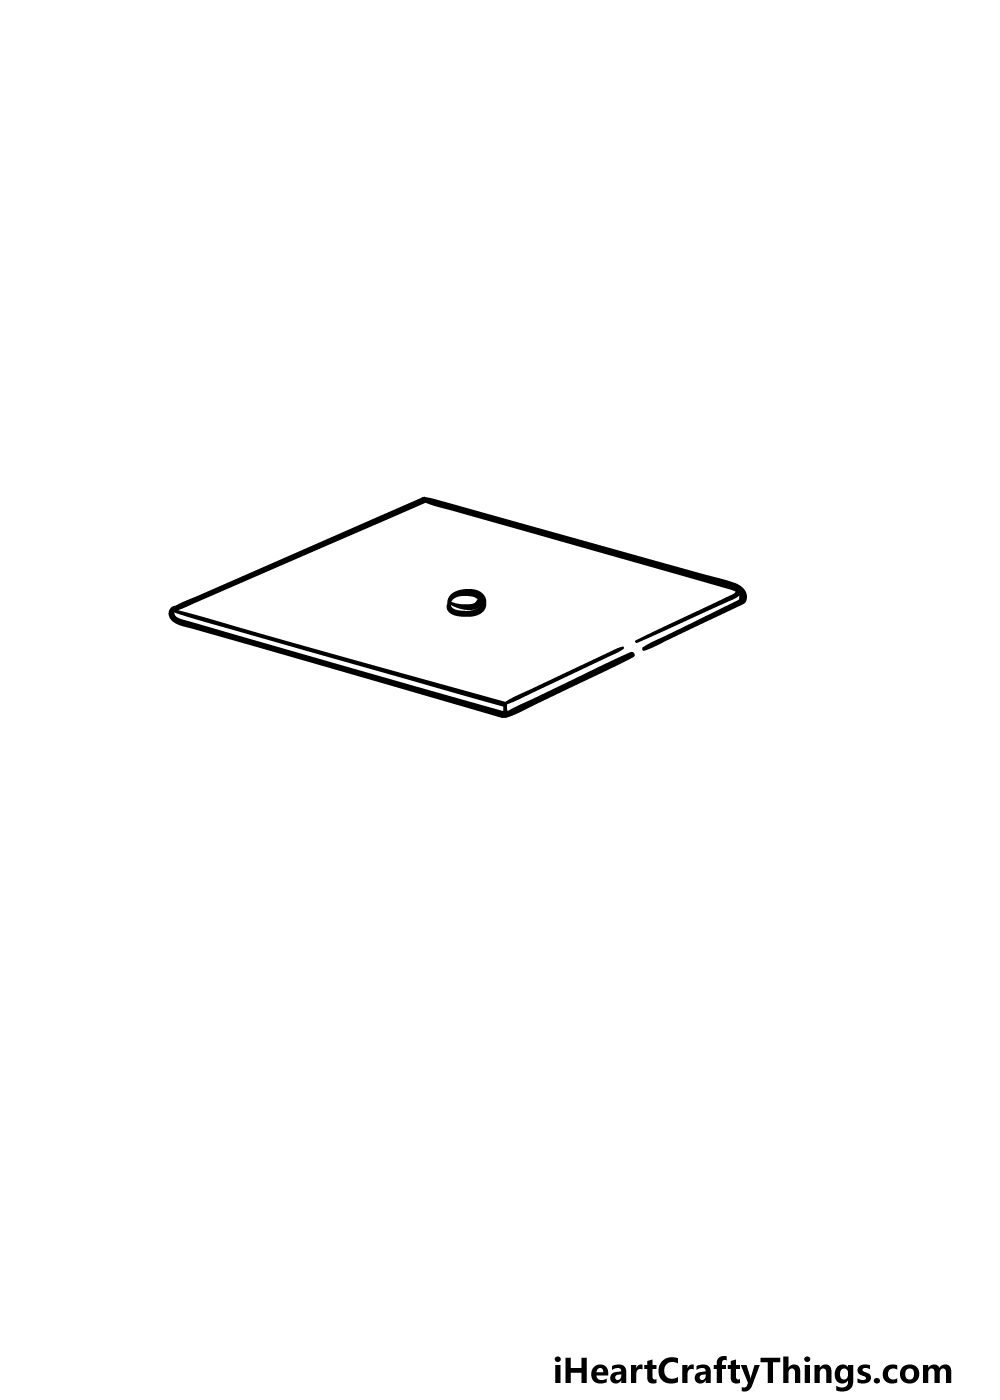
In this first step of our guide on how to draw a graduation hat, you will find it much easier if you have a ruler on hand. Once you have your ruler ready, then you can use it to draw a sideways square.
It will be at a bit of a sideways angle to show that it’s at a bit of a slant. Then draw a line close to the perimeter on the bottom two lines, leaving a small gap on the right-hand angle.
Then, draw a circular shape in the center of the square for the button on top of it.
Step 2 – Next, draw the underside of the graduation hat
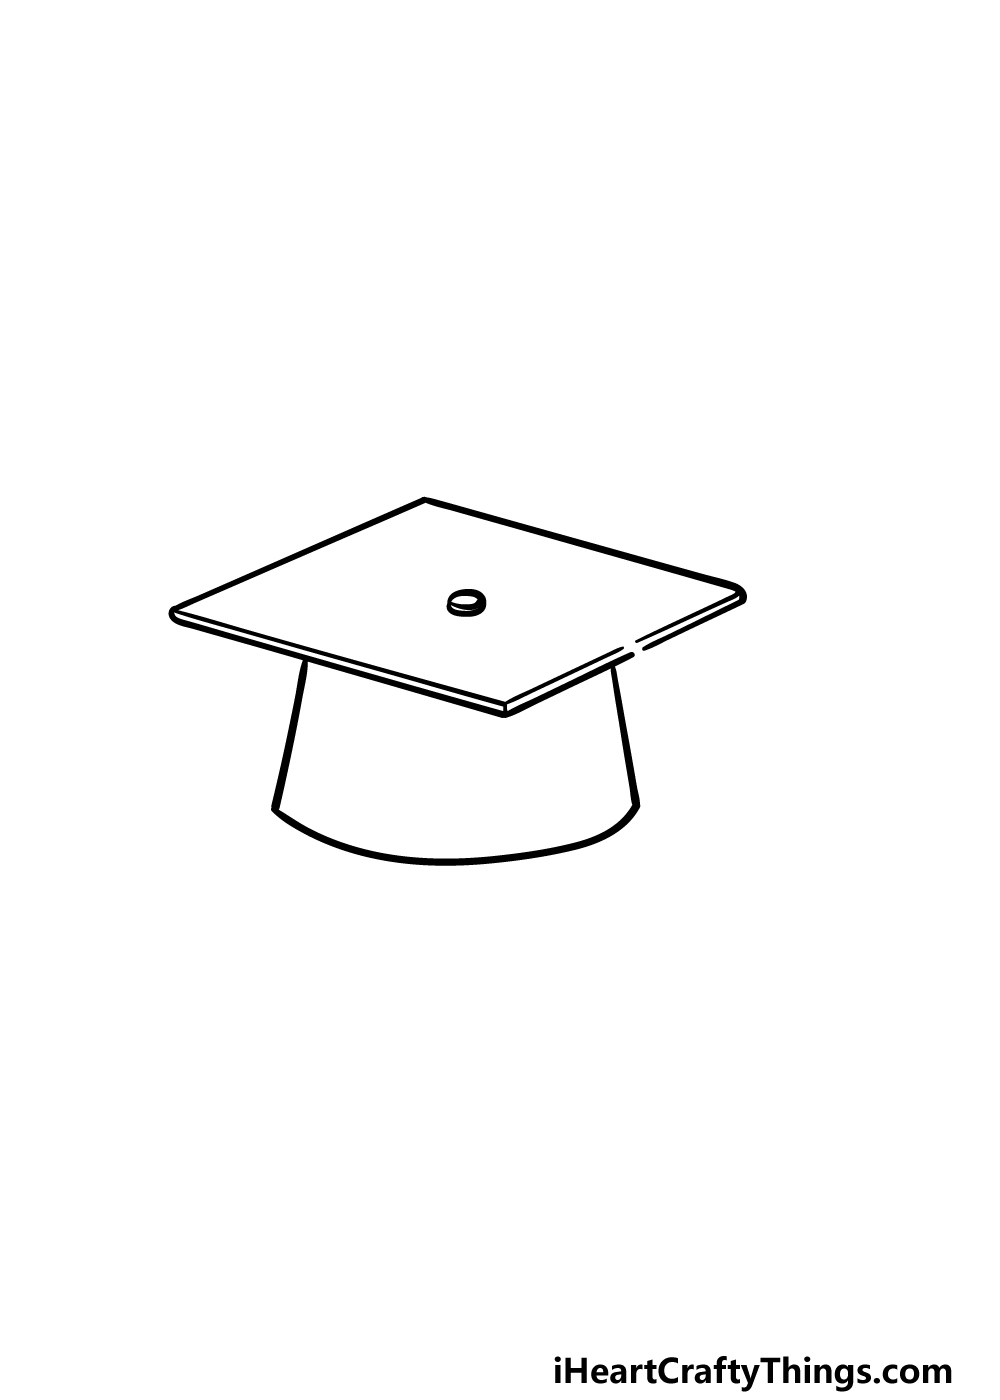
You have the flat top of the hat, so now you can draw the underside, which will be the part that goes over your head.
Use some straight lines down from the base of the flat top for the side of this portion, and then use a curved line underneath that connects the two vertical lines.
That’s all you have to do for this step, and once you have added this portion, you are ready to move on to step 3!
Step 3 – Start drawing the tassel of the hat

Graduation hats will generally have a tassel dangling from the top of the hat. In step 3 of this guide on how to draw a graduation hat, we will be starting with this aspect.
First, we will be drawing the string that the tassel will be attached to. To draw this string, draw a curved line from the button on top of the hat that trails off to the side so that it is hanging off the edge.
Then, draw another line running closely next to it to finish off the string.
With that string complete, we will then draw a circle at the end of the string, as this is what the tassel will attach to later.
Step 4 – Now, draw the rest of the tassel for the hat
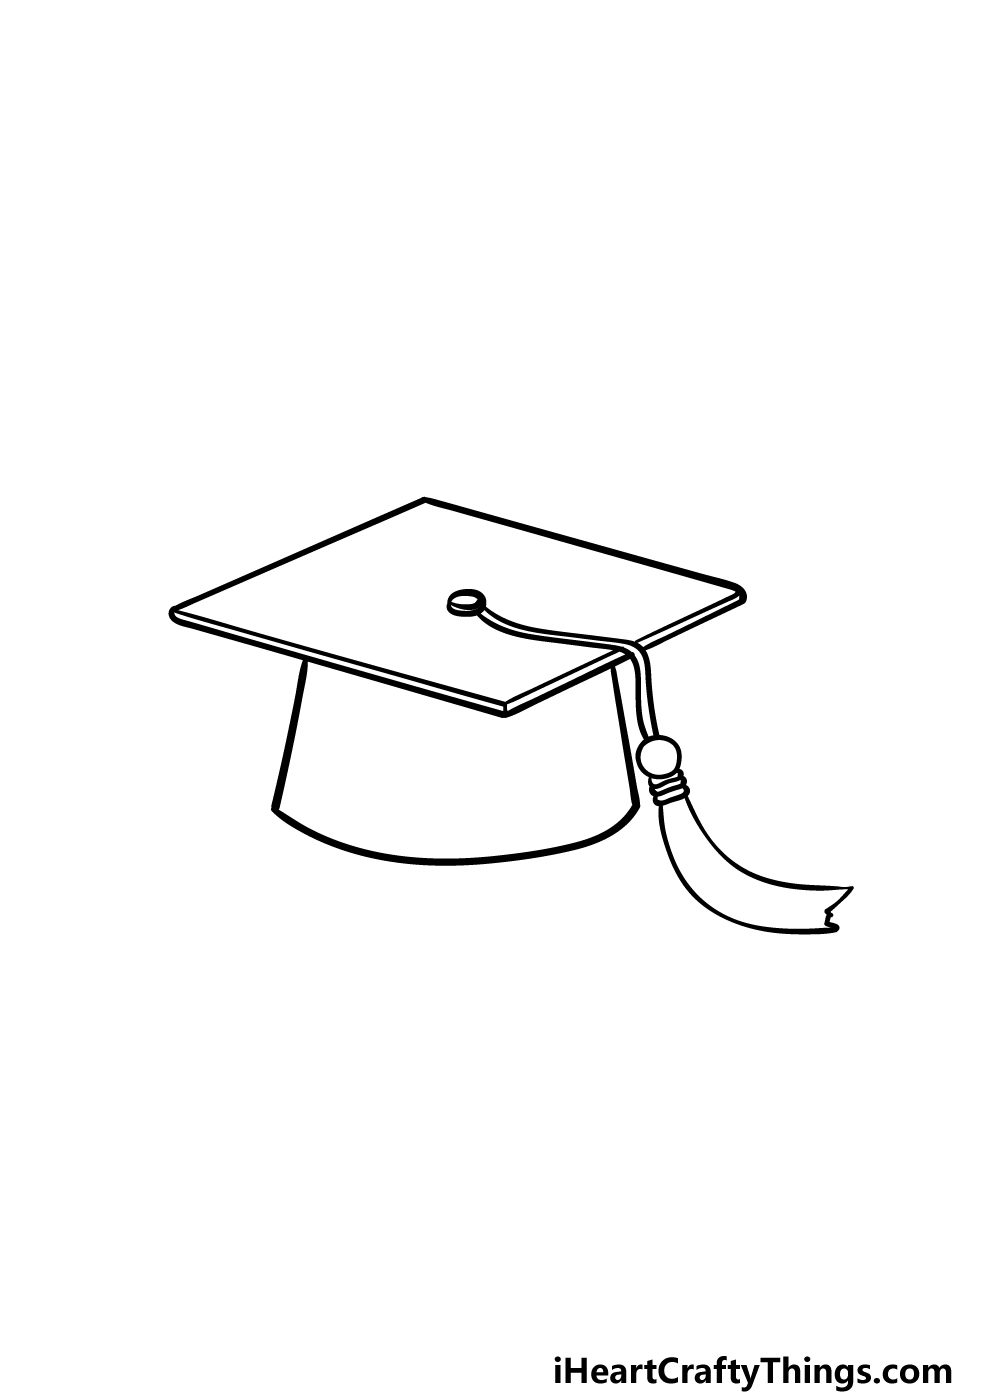
Now that you have the string for your tassel, we can start to draw the tassel itself for this step of your graduation hat drawing.
The tassel will attach to the circle that you drew at the end of the string dangling off the side of it. To begin with, draw three thin shapes onto that circle for the start of the tassel.
Then, we can draw the outline for the flowy part of the tassel. You can draw this with two curving lines that connect at a jagged flat line at the end.
Be sure to refer closely to the reference image as you draw so that you can see what we mean!
Once this tassel is complete, we just have a few details to add in the next step, and then you’ll be ready to finish it off!
Step 5 – Finish off the final details of your graduation hat drawing

This step of our guide on how to draw a graduation hat will be all about adding the final details to have you ready for the final step.
Once we have added these details, we will also go over a few touches of your own that you can add!
First, let’s begin by finishing off the tassel. We will be adding some line detail to the tassel to make it look like it’s made up of many individual strands as a real one would be.
That will finish off our details, but you should be sure to add any of your own that you may like!
These could include drawing someone wearing the graduation hat. It could even be a self-portrait! Sometimes people will draw pictures or messages onto the mortarboard, so maybe you could do that to personalize the hat.
These are just a few ideas that you could try out, but what else can you think of to finish off this graduation hat drawing?
Step 6 – Finish off your graduation hat drawing with some color

Now that you have finished your graduation hat drawing, this is the part where you can complete it with some amazing colors!
We kept the colors more muted with some dark grey for the hat itself and a darker yellow for the tassel.
These are just a suggestion, but you could use any colors that you love for this picture. If you drew any extra details such as someone wearing the hat or some decoration on it, then you can incorporate more color into these aspects as well.
We look forward to seeing which incredible colors and art mediums you choose to finish off this drawing!
5 Tips To Make Your Graduation Hat Drawing Even Better!
Get ready for 5 fun tips on how you can make your graduation hat sketch look amazing
The image we’ve created for this graduation hat drawing is quite static, but you could make it more dynamic.
There are a few ways you could do this, from making the tail flap in the wind or having the hat fly through the air.
What are some other ways you could think of to make this picture look even more dynamic?
Often, people will personalize their graduation hat in real life by adding some pictures or words to the board of the hat. That’s something you could do for your drawing of a graduation hat!
You could add any kinds of decorations you like to the board, and this will help you to add your own personal touch to the design. This would also be a great way to add some more color to the picture.
Another way that you could make this drawing look even more amazing would be by adding a human element. Naturally, these hats are made to be worn, so you could draw a human to wear it.
If you were to go for this tip, you could draw the person in any style you like, whether it’s cartoony or realistic.
This next tip would go great with the previous one, as we would recommend adding a background for this graduation hat sketch. You could do this regardless of whether you added a human to the image, but it would be even better to have both!
The obvious choice for a setting would be a graduation ceremony, but what other settings could you use?
Lastly, you can really take this drawing to the next level with the colors and mediums you use. You can mix paints, colored pens, markers or anything else you like to use.
If you added any additional details or elements, then don’t forget to add colors to those as well! You also don’t need to keep the colors realistic, as it’s good to express yourself with colors.
Your Graduation Hat Drawing is Complete!
You have graduated from this class on how to draw a graduation hat, and you have the headwear to show for it!
We hope that you had a great time learning how to draw this important and iconic hat, and we also hope that this guide made it easy for you to take on as well.
Now you can show off how creative you can be with this drawing by adding your own details.
We mentioned a few ways that you could go about doing this, and these ideas included drawing someone wearing it or some decorations on the mortarboard.
There are many more cool ideas you could go for, so be sure to get creative and have fun with it!
Don’t forget to check out our website for more amazing drawing guides! We upload new ones often, so we hope to see you there frequently.
Once your graduation hat drawing is complete, we would love to see how you finished it off! Please be sure to share it on our Facebook and Pinterest pages when it’s done.