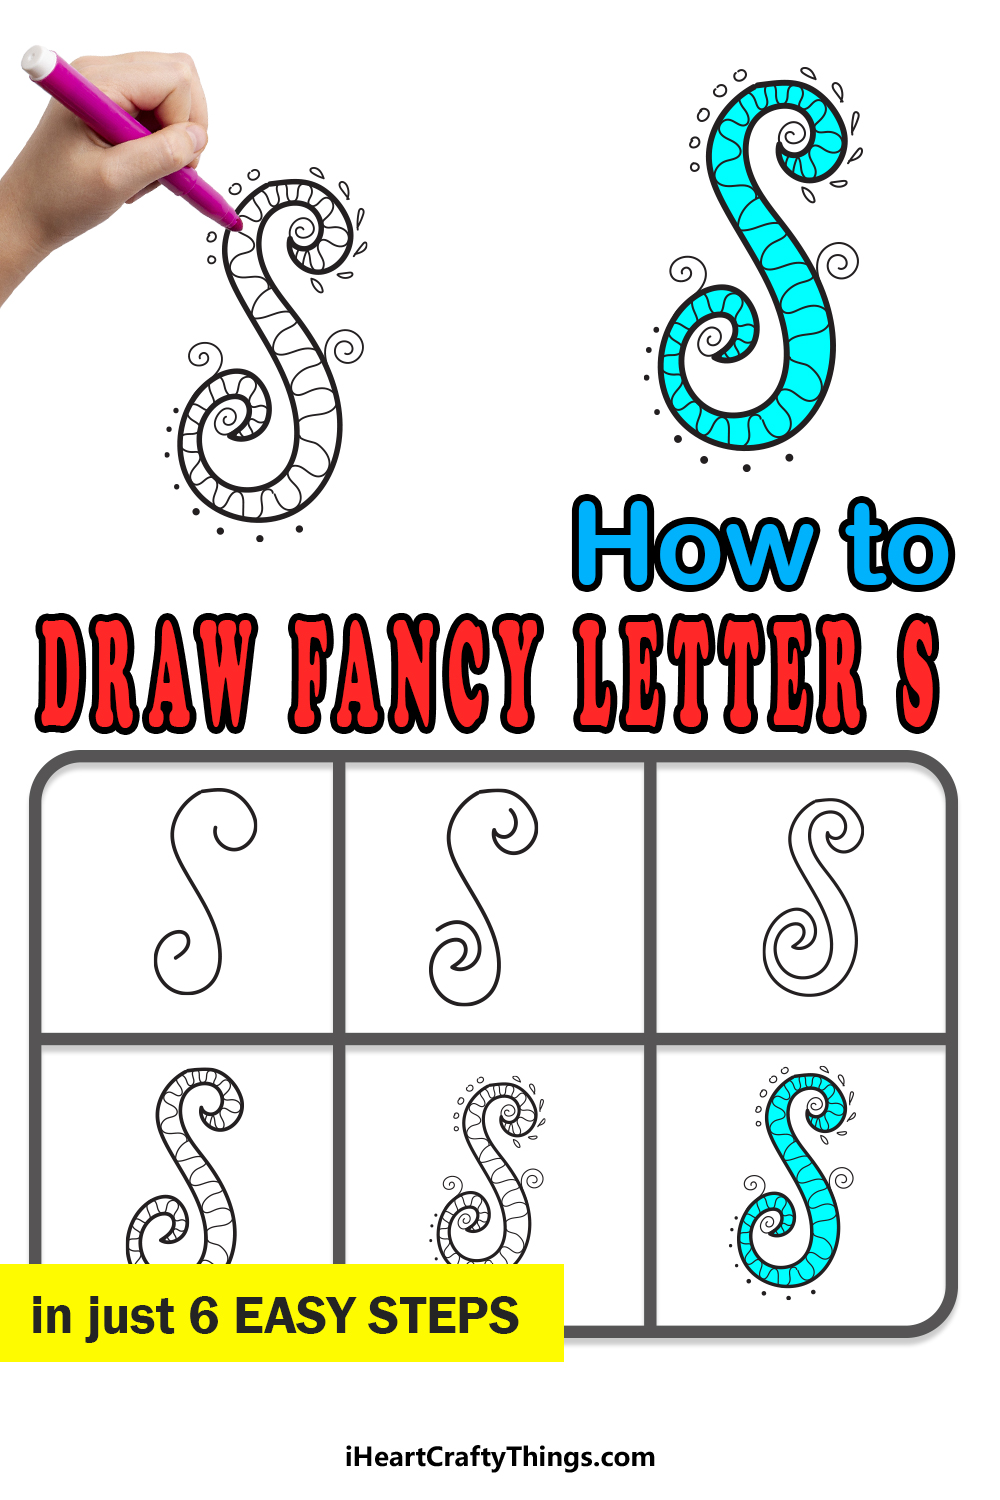
As the nineteenth letter of our alphabet, the letter S is one of the softest letters when said out loud. It also happens to be an easy and fun letter to write.
We see it in many words and names, so it’s a good one to learn early on. You may know everything there is to know about writing it, but what about creating a fancy letter S?
In this guide, we will take you through 6 steps that will make this simple letter a lot more intricate and fancy. By the end of the guide, you will see how easy it can be!
Not only will we show you how to draw it, but we will also go over some ideas on how to color and decorate it to make it even cooler.
Without further ado, let’s begin the first of six steps on how to draw the letter S in a whole new way.
Let’s Get Started
STEP 1:
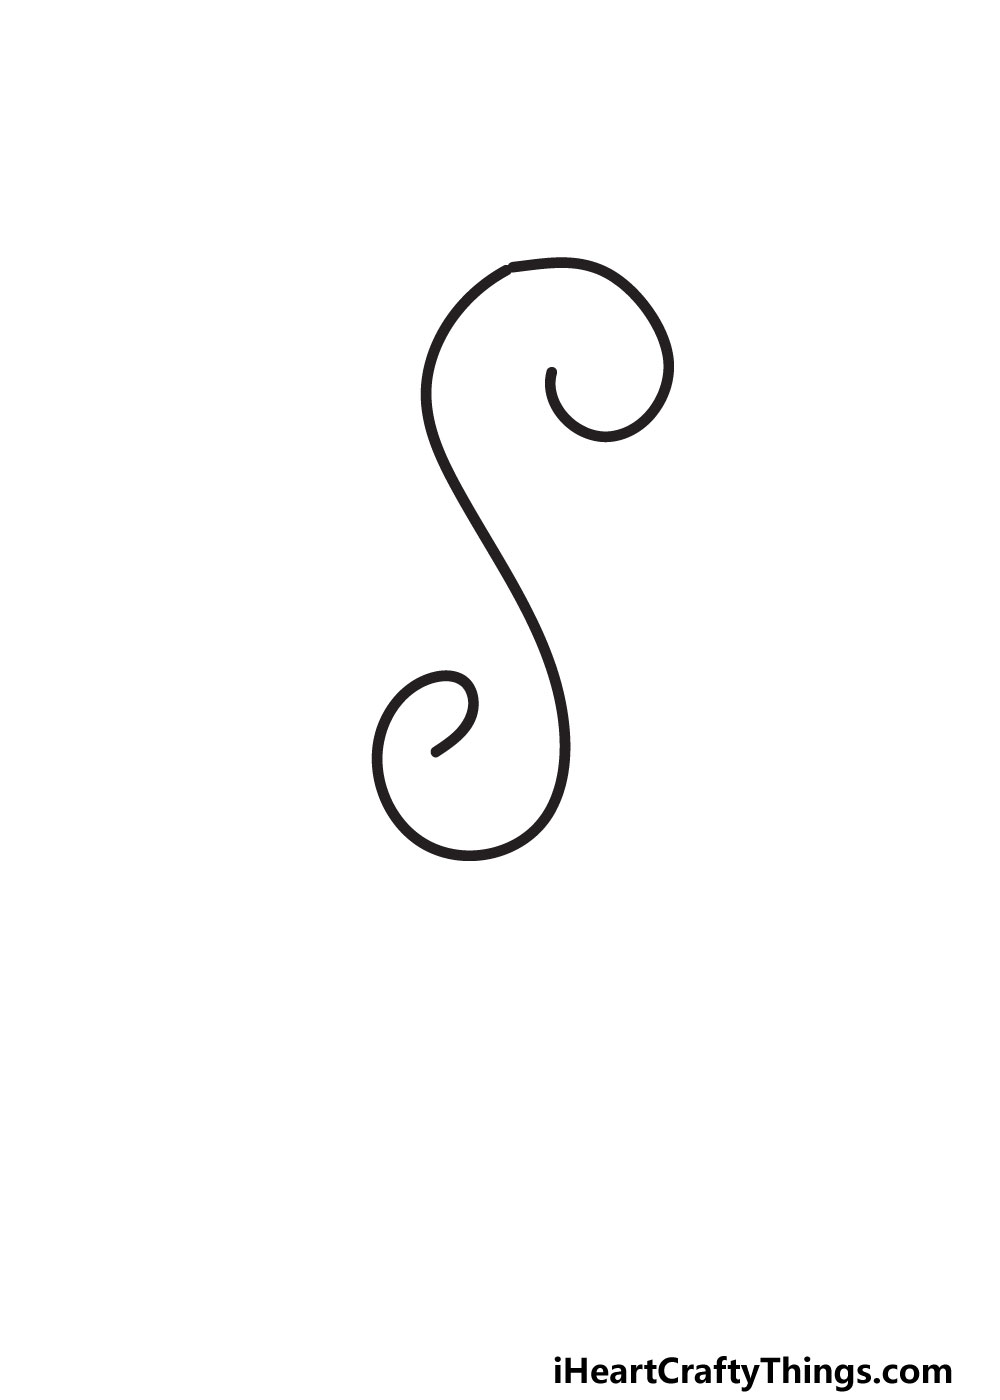
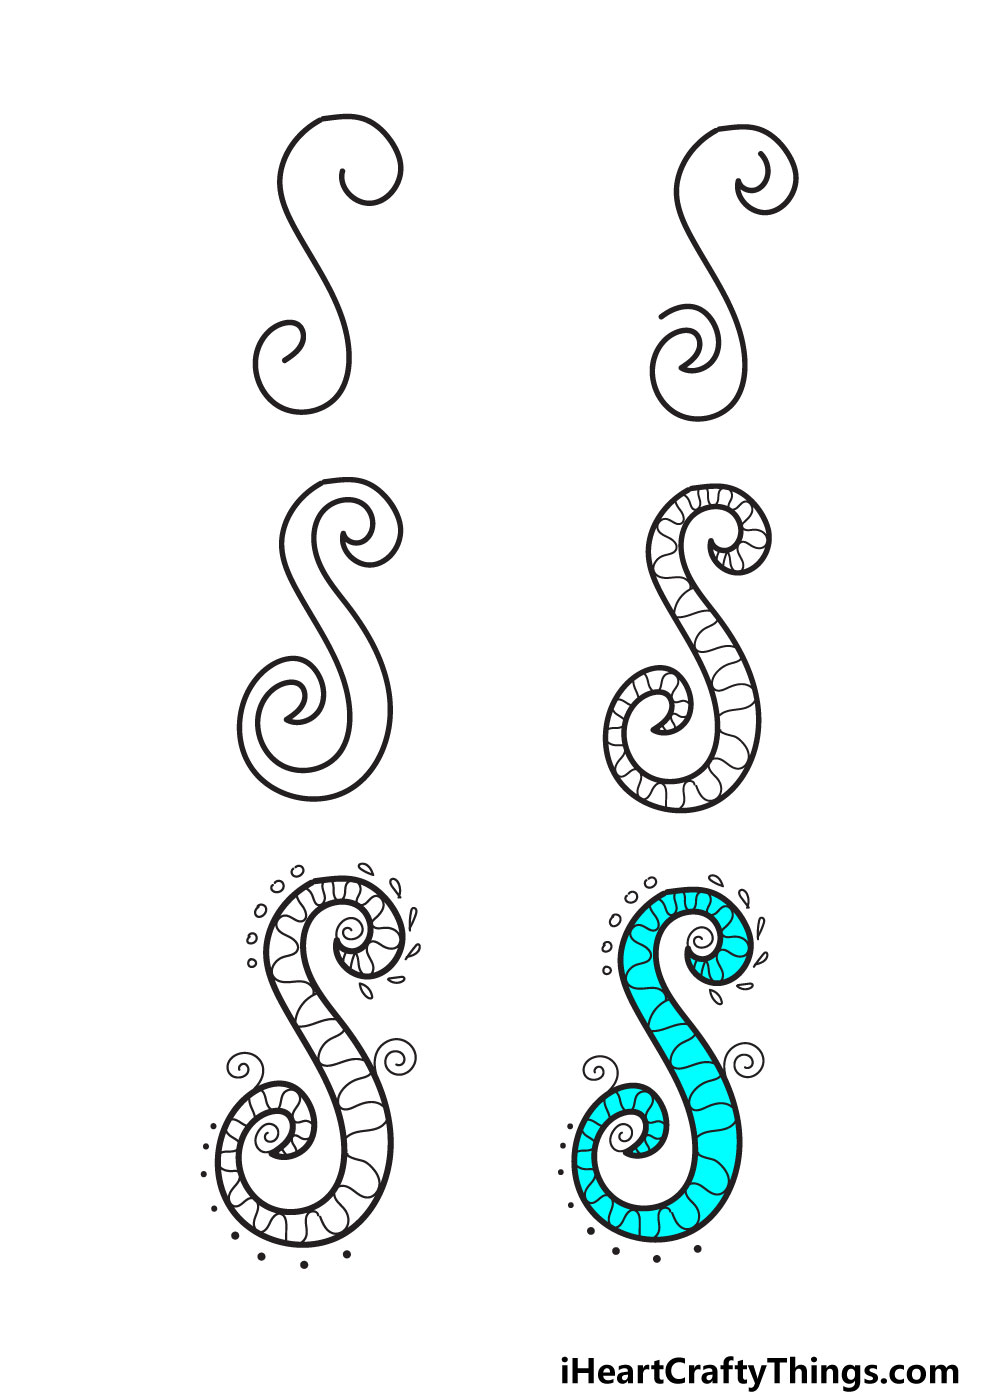
In this first step of the guide, we will actually be drawing a line that already looks like a fancy letter S! Of course, we will be adding a lot more to the design later.
To begin with, you can draw this line with a pencil first to get the hang of it. Try to follow the reference image and replicate the curvy, twisty lines.
When you think you have the hang of it, you can then go over it with your drawing tool of choice. It could be a dark pencil, but using a pen is always a great idea.
It doesn’t need to be identical to the one in our example, as you can have it shaped to your liking! If you do decide to go with our design exactly as it is, you will notice some small details.
The curl at the top of the letter is wider than the one at the bottom, for instance. This will come into play later when we add the other outlines.
For now, let’s proceed to step 2 and continue the outline.
STEP 2:
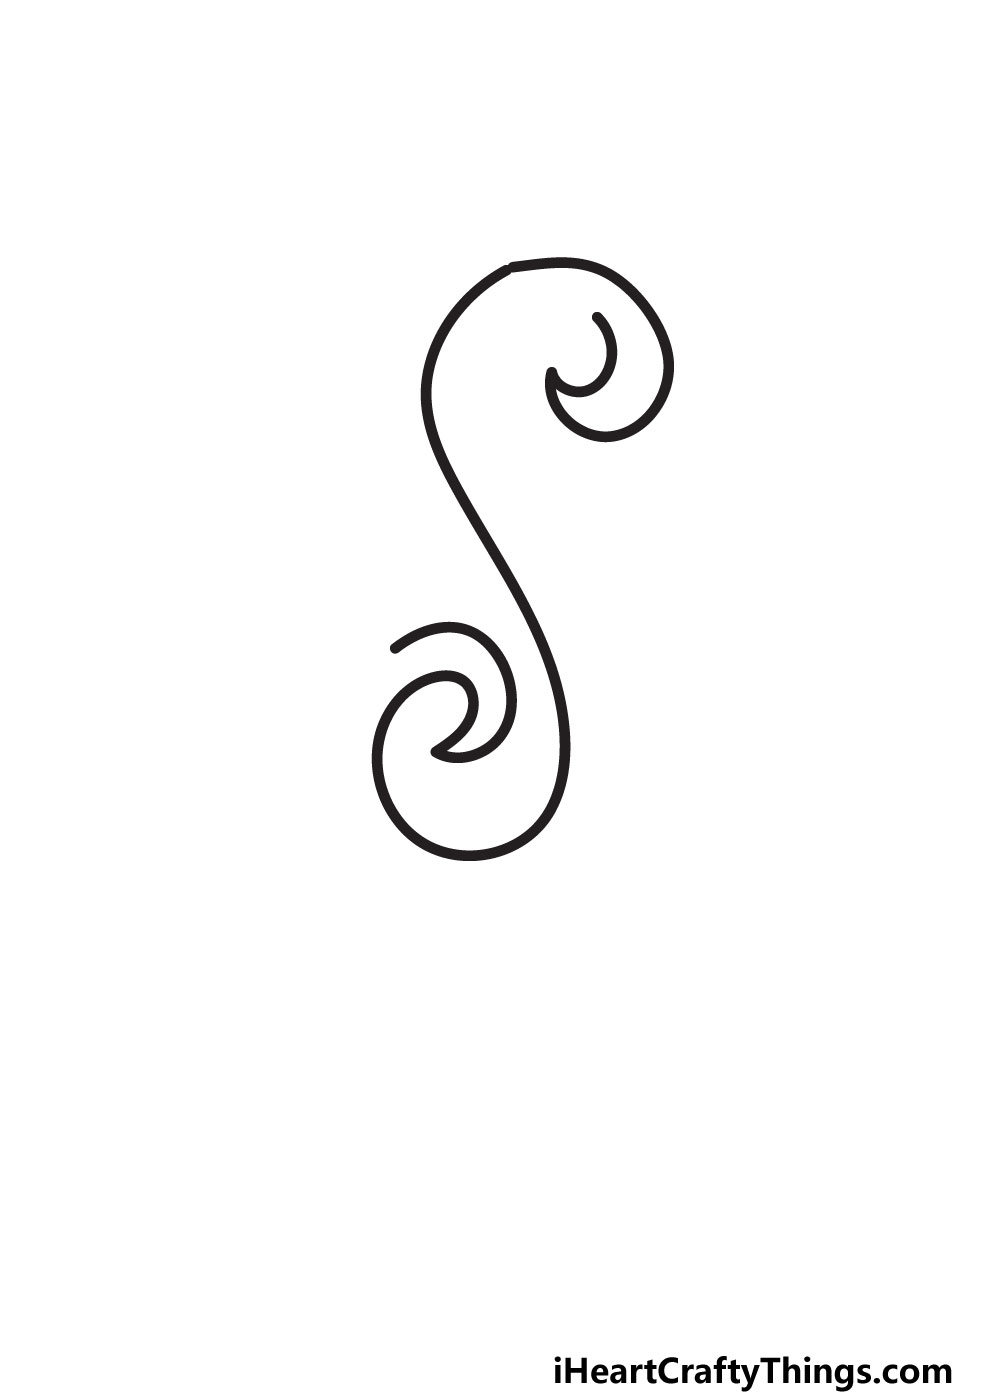
Your drawing of the letter S is looking pretty fancy already, but we’re far from done! We want this letter to have a more robust design, and we will begin adding some more in this step.
We will keep it nice and simple for this step by adding some pointy tips to both ends of the letter. To begin this, simply draw a small curved line at the upper tip of the letter.
Try to angle it as it appears in the reference image, as it will connect to the rest of the outline later on in the guide. Then, we will be adding a similar curved line.
This one will go on the lower tip of the letter, and it will be at a different angle to the first one, as you will see in our example.
Once these two small lines have been added, we can then add the rest of the outline for this letter in the third step of our guide.
STEP 3:
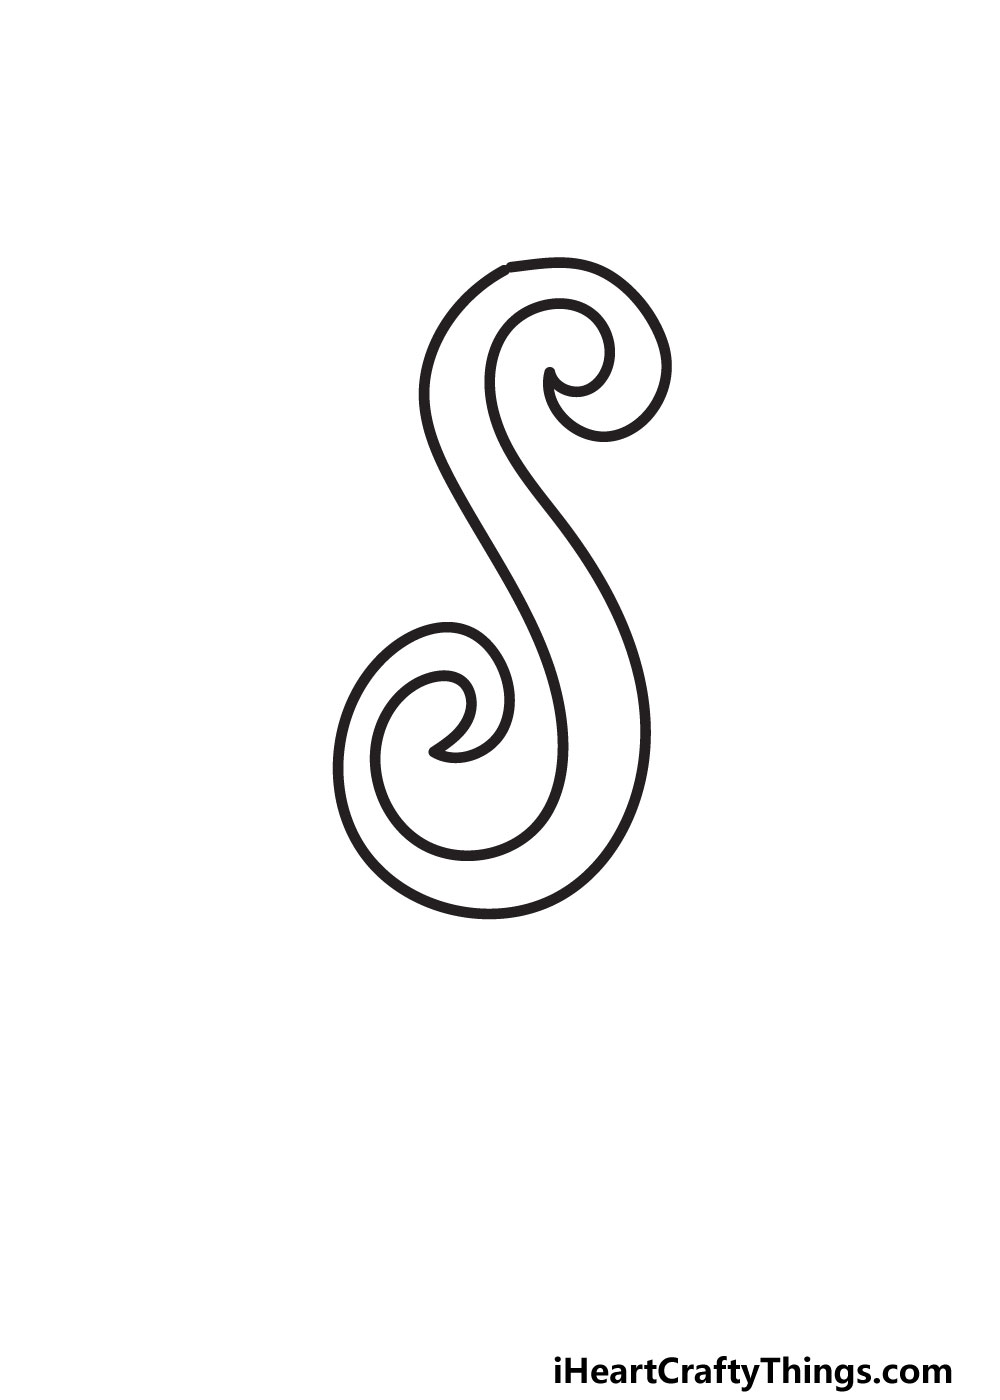
Now, we can add the remainder of the outline to your fancy letter S. This could be one of the trickiest steps of this guide, as it requires a steady hand.
For that reason, we would recommend taking it slowly. Let’s start from the upper side of the letter where you left off. From this pointy tip, there will be a line curving inward.
It will then curve out again, running parallel to the line that you drew in step one. At the base of the letter, it will curve to the left.
Then, it will curve up gradually until you have closed the gap to finish off the outline. It may not look that complicated looking at it, but it can be tricky to make the line smooth!
Once you have finished the outline, we can then add some cool details to the letter in the next steps of the guide. Before moving on, be sure to make sure you’re happy with what we have so far.
You can do this by smoothening and neatening up all the lines. You can also go ahead and erase any pencil lines you used as a guide.
STEP 4:

Now the outline is complete, and there are many ways that you can decorate the interior of the letter. In our example image, we show you just one of the ways you could do it.
We chose to fill the letter with some curved, wavy lines. These lines are simple, but they make the letter more interesting to look at with all the extra detail.
They look really good, but there are other ways you could decorate this letter S. Another way would be to make a similar pattern but with straighter lines.
You could also fill the letter with some small shapes or symbols. Another option is to not add any interior details at all and instead use solid colors to fill the design.
These are all just suggestions, but you can see how many ways there are to decorate the letter in your own way.
When you’re happy with how it looks, we can then add some more details around the letter in the next step.
STEP 5:

In this fifth step, you will notice that we have made the letter look even more extravagant with some cool details surrounding it!
To begin, we added some simple spiral lines poking off various parts of the letter. We kept this to three, but you could add a few more if you like.
Next, we added some small dots below the base of the letter. Once again, you could add a lot more of these if you wanted to!
We also drew a series of small circles along the upper left side of the letter. Then, we added some small teardrop shapes on the upper right side of the letter.
None of these details are particularly complicated, but they all work together to make the letter look so much more intricate!
Now you can decide how you would like to decorate the letter with your own ideas and choices. You can also fill the background with some details and additions.
It could be a fun idea to create a theme for the picture as well, and this is something we will cover in greater detail after the final step of the guide.
STEP 6:
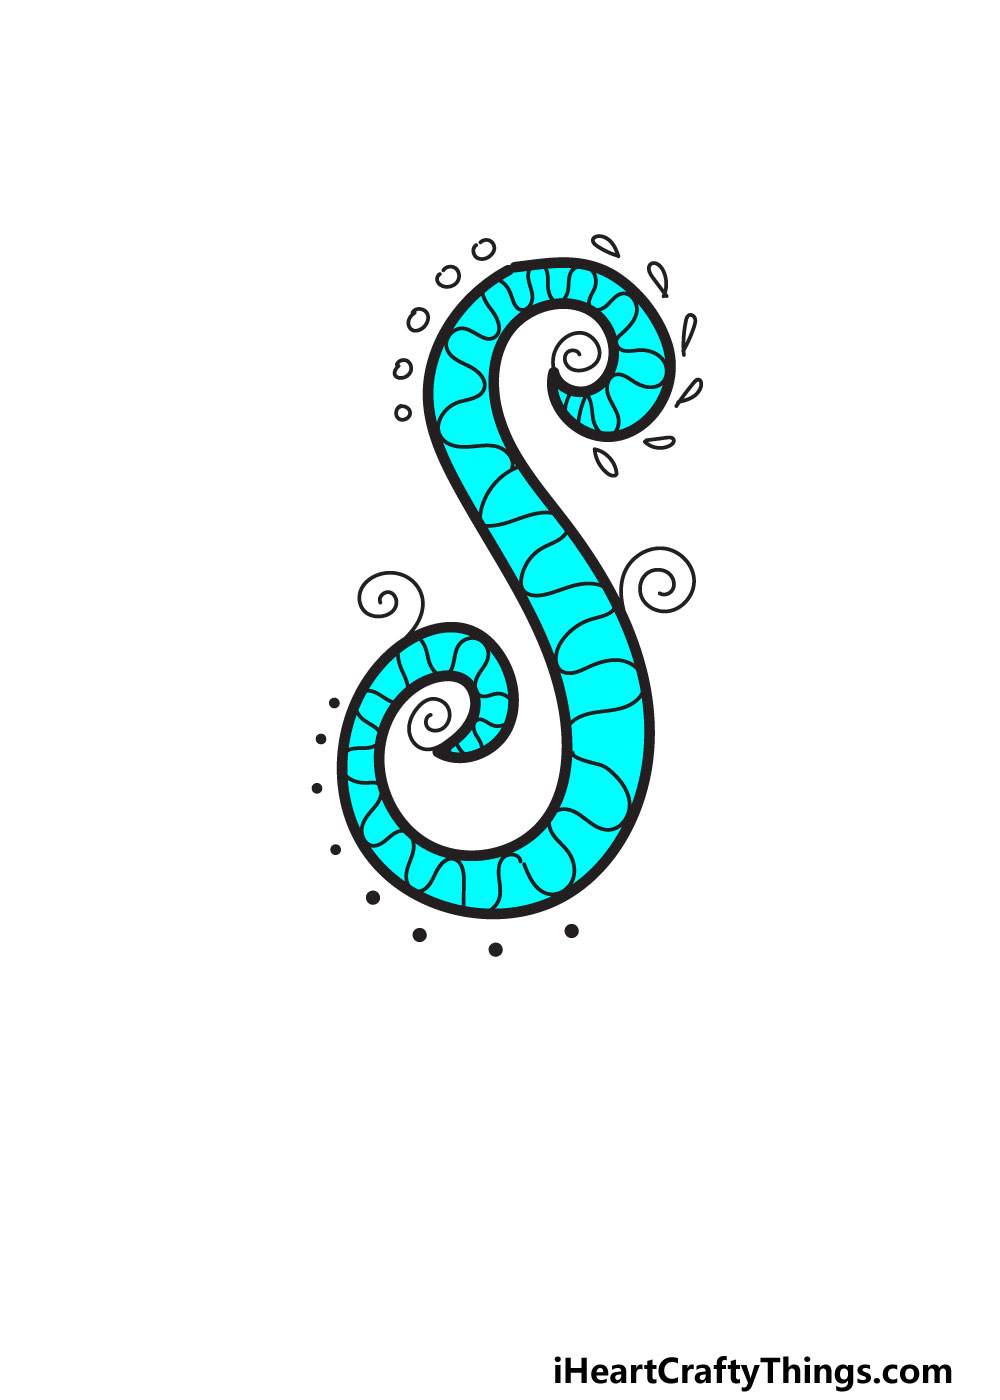
Now it’s time to close off this guide with a final step where we will color in this design. In our example image, we went with a light blue color for the letter.
This is a great choice, and you could easily replicate it with whichever coloring tools you prefer to use. Of course, there are hundreds of other colors you could use if you prefer as well.
These could be other shades of blue or other colors entirely. You also don’t need to stick to just one color, as there would be ways you could incorporate multiple colors.
Not only can you play around with your color choices, but you can also use other art tools, mediums, techniques and combinations of all of these.
The background is also open for color experimentation, and this is especially true if you added some details and extra elements there.
Now that you have some ideas for how to add color, you can have fun finishing off the design! But we’re not done quite yet.
Before we close off this guide, we will first go over a few more ideas on how to make this drawing even more special.
My Final Tips To Make Your Fancy Letter S Drawing Even Better!
Earlier in this guide, we mentioned how you can choose a theme to fill the background of your picture. We will go over a few ways that you can begin this process!
One way would be to start with the subject of this guide, the letter S and all the ways it can be used. To begin, try to think of some words that start with S.
It could be a simple word like Snake or the name of a place like Siberia. With your chosen word, you can then write out the rest of the letters in a similar fancy style.
You could also draw elements that relate to the word to further create a theme. Another way to go about it is to use a name instead of a word.
There are many names that start with the letter S, and you may know a few people with such names. You can choose a name and then challenge yourself to write out the whole name.
What are some details you could add to a depiction of the name?