


You don’t need magic to learn how to draw a fairy! The steps of this guide for kids will show you how to create a pretty fairy of your very own.
Fairies have populated some of the most beloved fairytales and stories, and they convey a sense of elegance and magic. These mythological creatures look like little ballerinas with wings, and they’re so gorgeous!
If you have ever tried to draw one on your own, then you may run into frustrations that make it not worth the hassle. I want to fix that problem by showing you how to make it easier than ever!
You will see how to draw this little character complete with wings that look like the wings of a butterfly. You can customize it with all sorts of colors, effects and extra details as well!
Let’s find out how you can recreate this cute character.
Watch And See How To Make A Cartoon Fairy
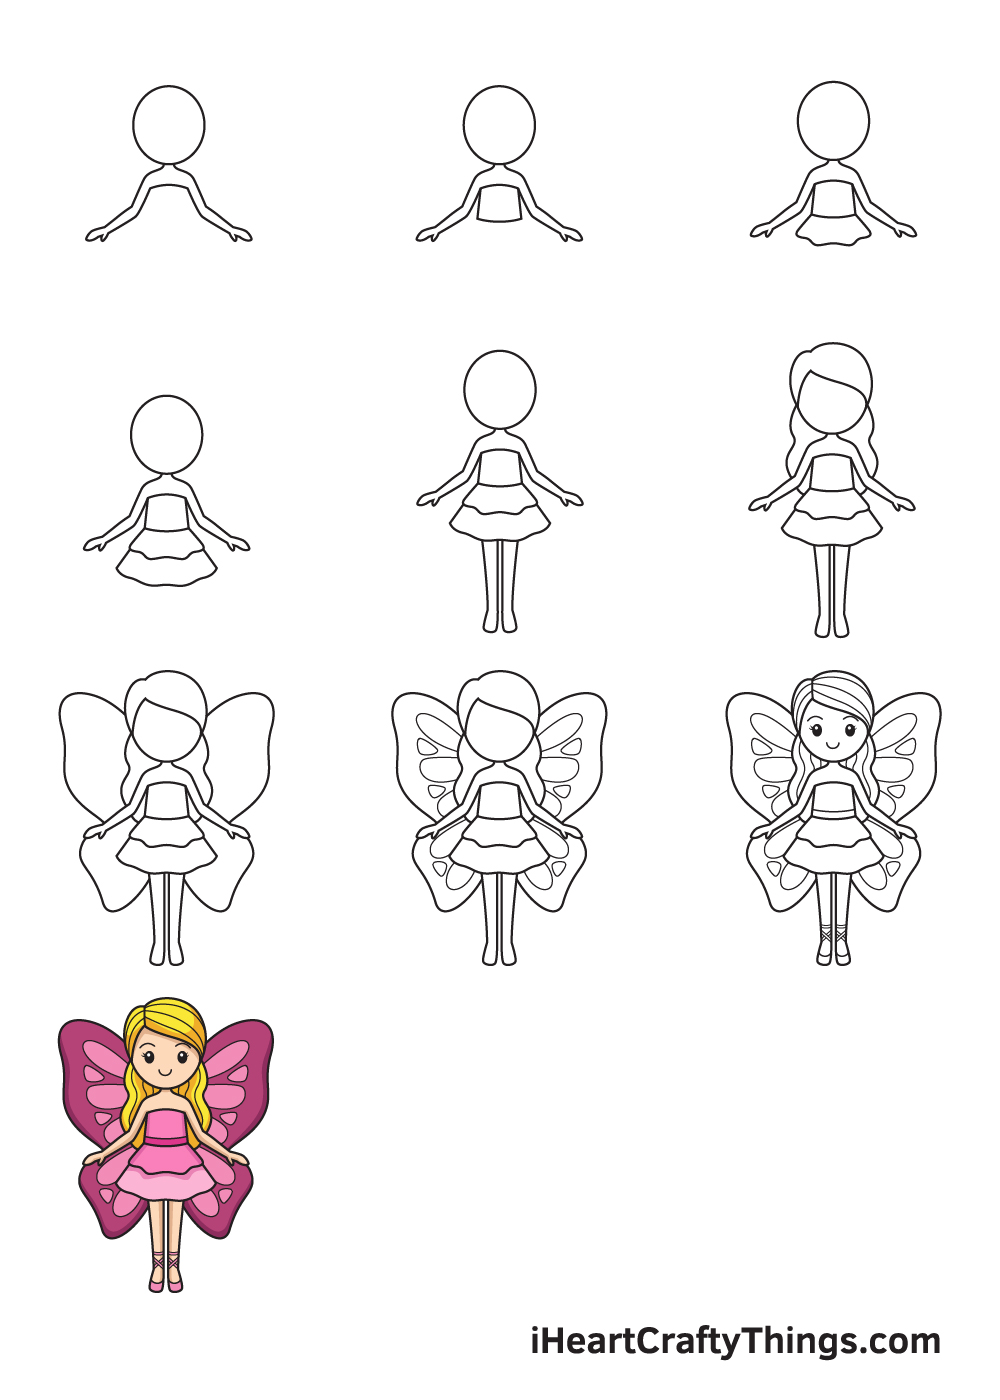
How to Draw a Fairy – Let’s get started!
Step 1
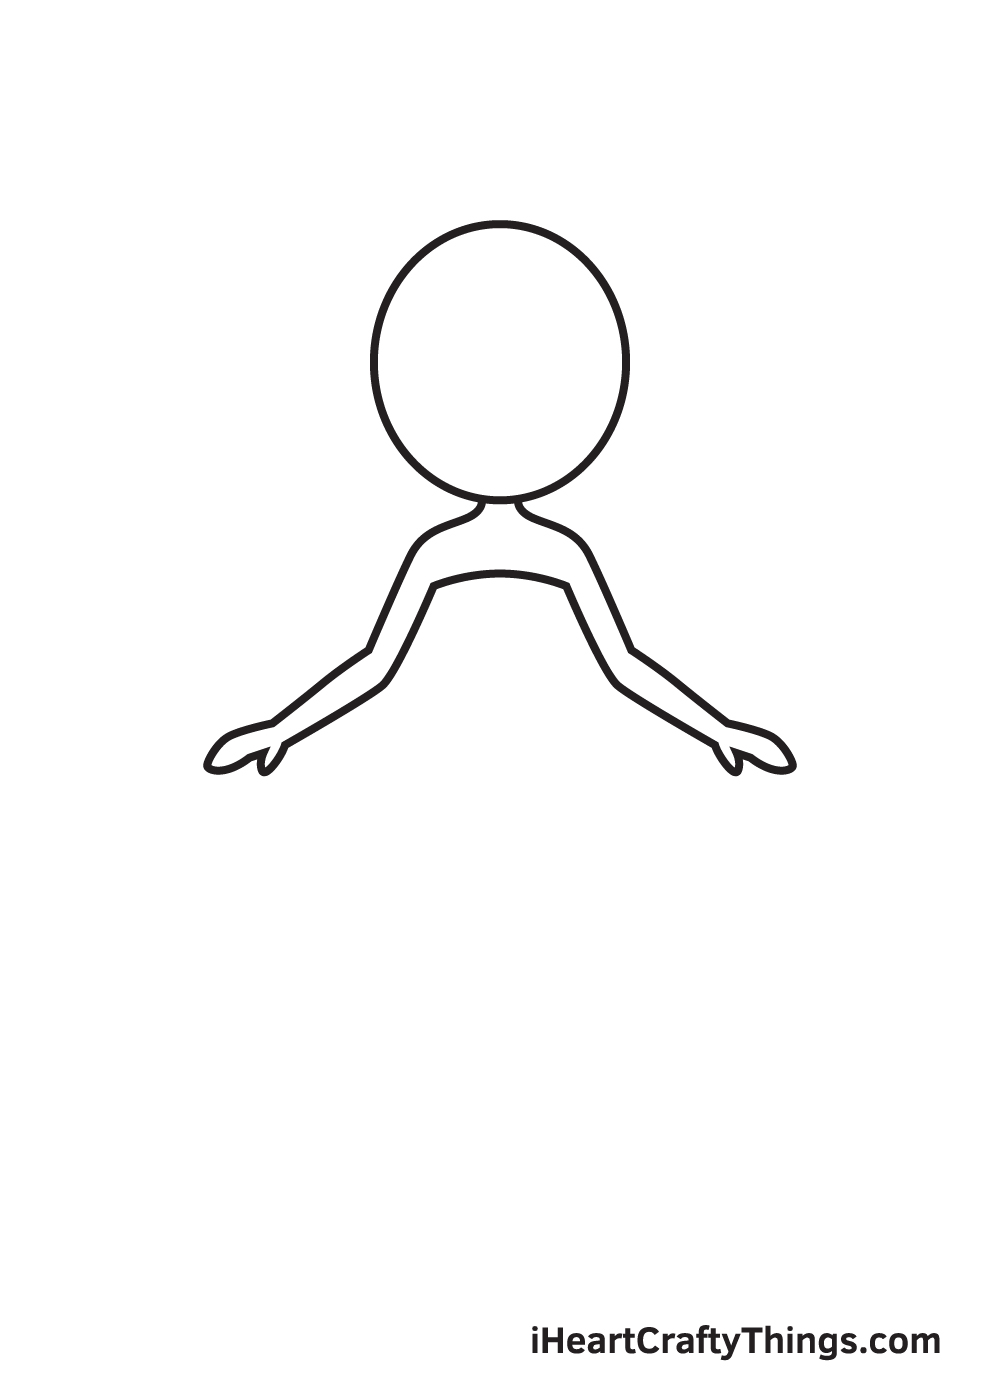
Starting in the middle of your paper, draw an irregular circle shape to outline the face. The shape of the face must have a greater length than width.
Then, right underneath the face, draw two curved lines for the neck. Extend the lines to create the outline of the shoulder all the way to the arms and hands. The arms should be aligned and drawn evenly.
Here’s a useful tip: draw a horizontal line and a vertical line across the paper to create reference lines. This will ensure that your fairy drawing will be positioned correctly in the middle.
Step 2 – Draw the Fairy’s Upper Body

Now, it’s time to give this fairy a cute top. Draw two vertical lines, each starting from the underarm.
Then, connect both ends of the line together with a horizontal line at the bottom. When drawn correctly, it should look like a cropped bandeau top.
Step 3 – Draw a Skirt to Complete the Outfit

Now that we have drawn the top, it’s time to draw the skirt to finalize the clothes of your fairy drawing.
Below the top, draw a skirt with multiple curves down the hem. Needless to say, you can draw the skirt in any form you want to customize it. You can even add patterns and designs to it to make it more creative!
Step 4 – Add a Second Layer to the Skirt
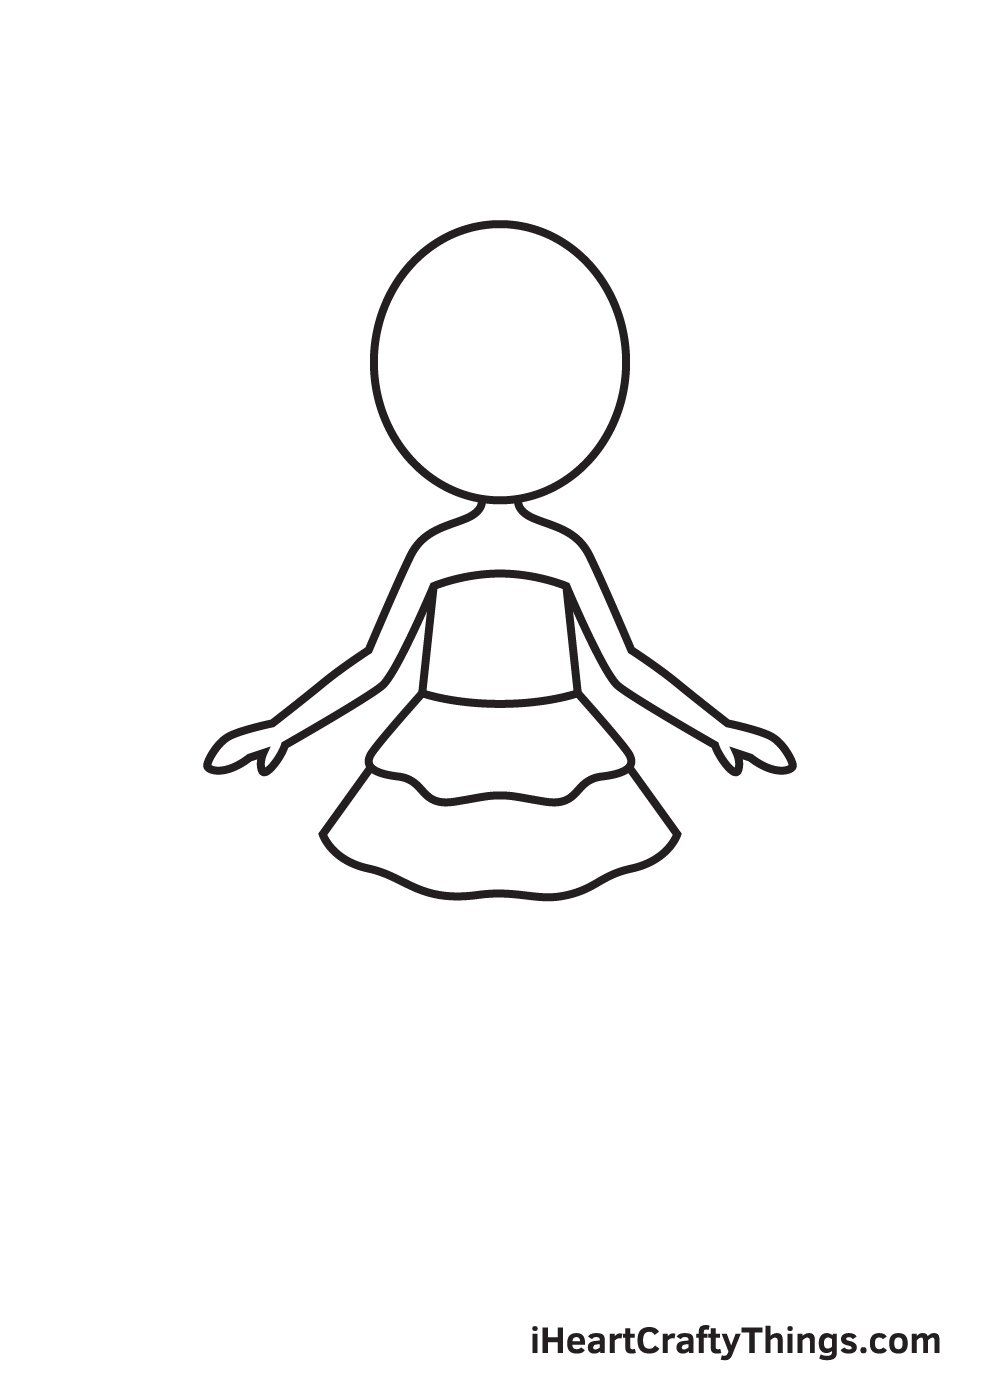
Right underneath the first layer of skirt, draw a second layer with the similar form. This time, however, the second layer must be slightly bigger than the first one. This will create a stylish flowing skirt!
Step 5 – Then, Draw the Fairy’s Legs
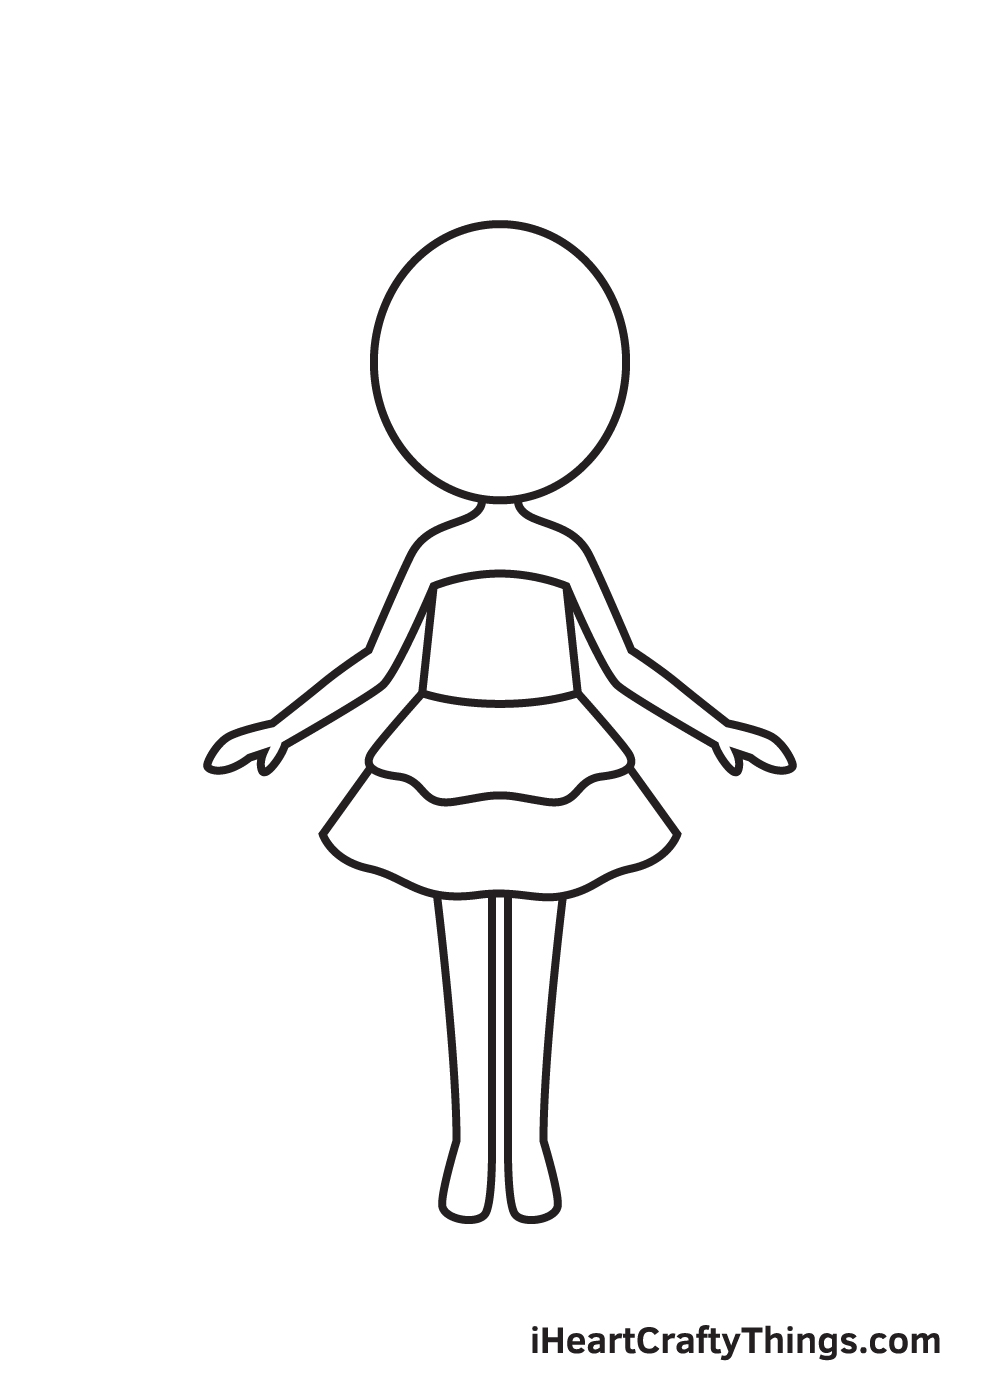
Draw a pair of legs below the skirt. Make sure that the legs are aligned and drawn evenly.
Step 6 – Next, Draw the Fairy’s Hair

Draw a hairline just above the forehead. Then, draw a wavy strand of hair all the way down to the fairy’s lower back.
Don’t hesitate to draw the hair in any style you prefer! You can make the fairy have straight or curly hair. You can even draw the hair in a ponytail or in a bun. It’s all up to you!
Step 7 – Afterwards, Draw the Fairy’s Wings
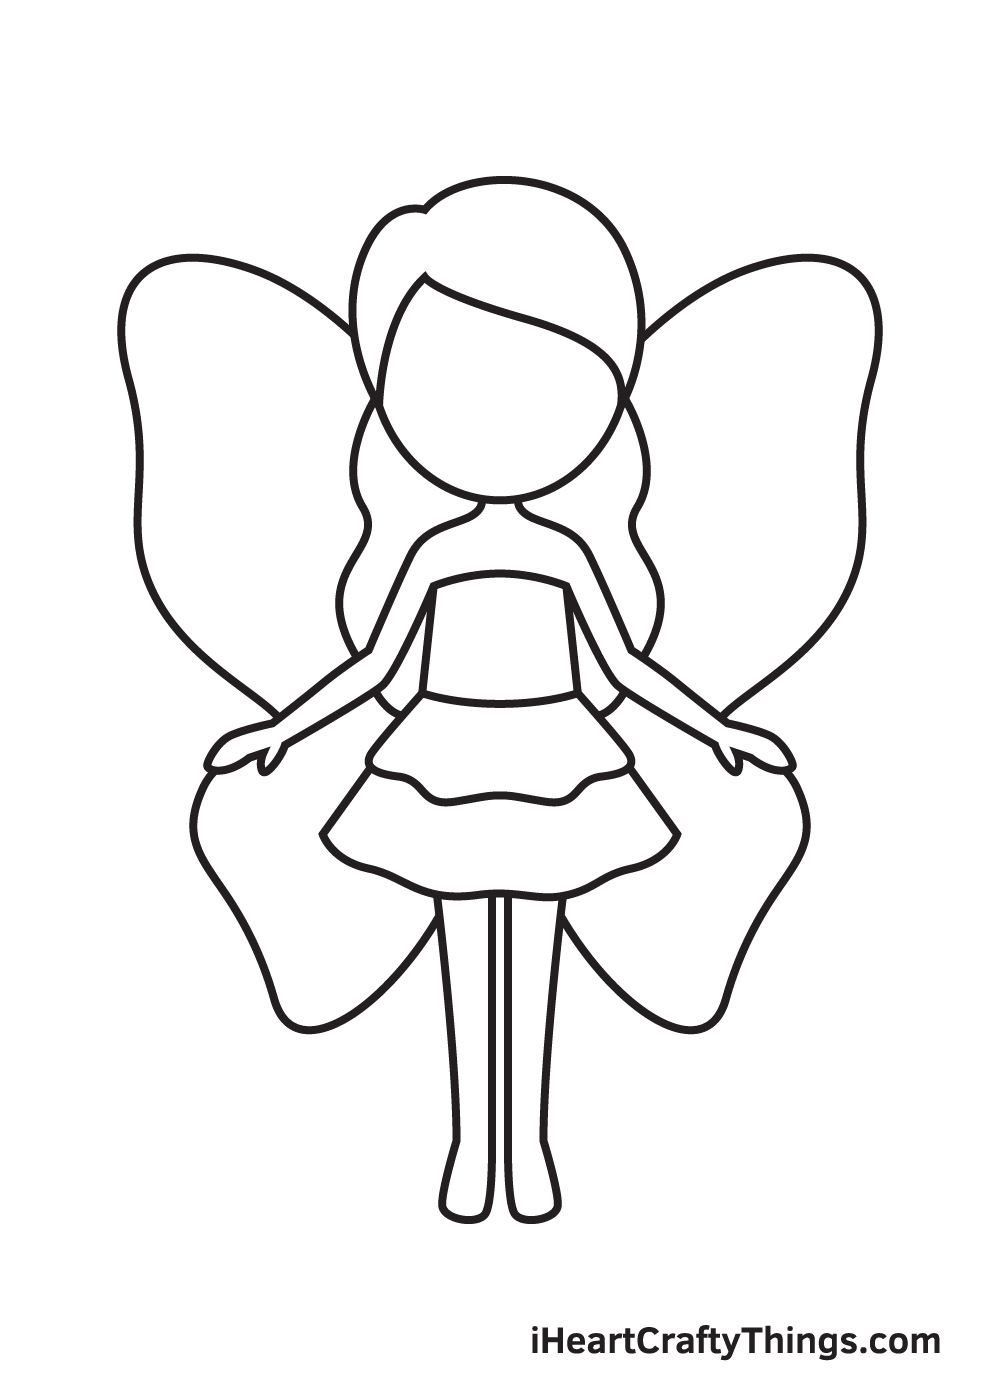
Draw a pair of wings at the back of the fairy. A fairy’s wings are usually enormous, so make sure that the wings you draw extends from the head all the way down to the legs.
Fairies’ wings come in a wide range of shapes and sizes. Some wings are shaped like a butterfly’s wings, while some are formed like a dragonfly’s wings. Draw whichever shape you think would look best on your drawing! Whatever you choose, we’re sure it looks amazing!
Step 8 – Add Patterns on the Wings
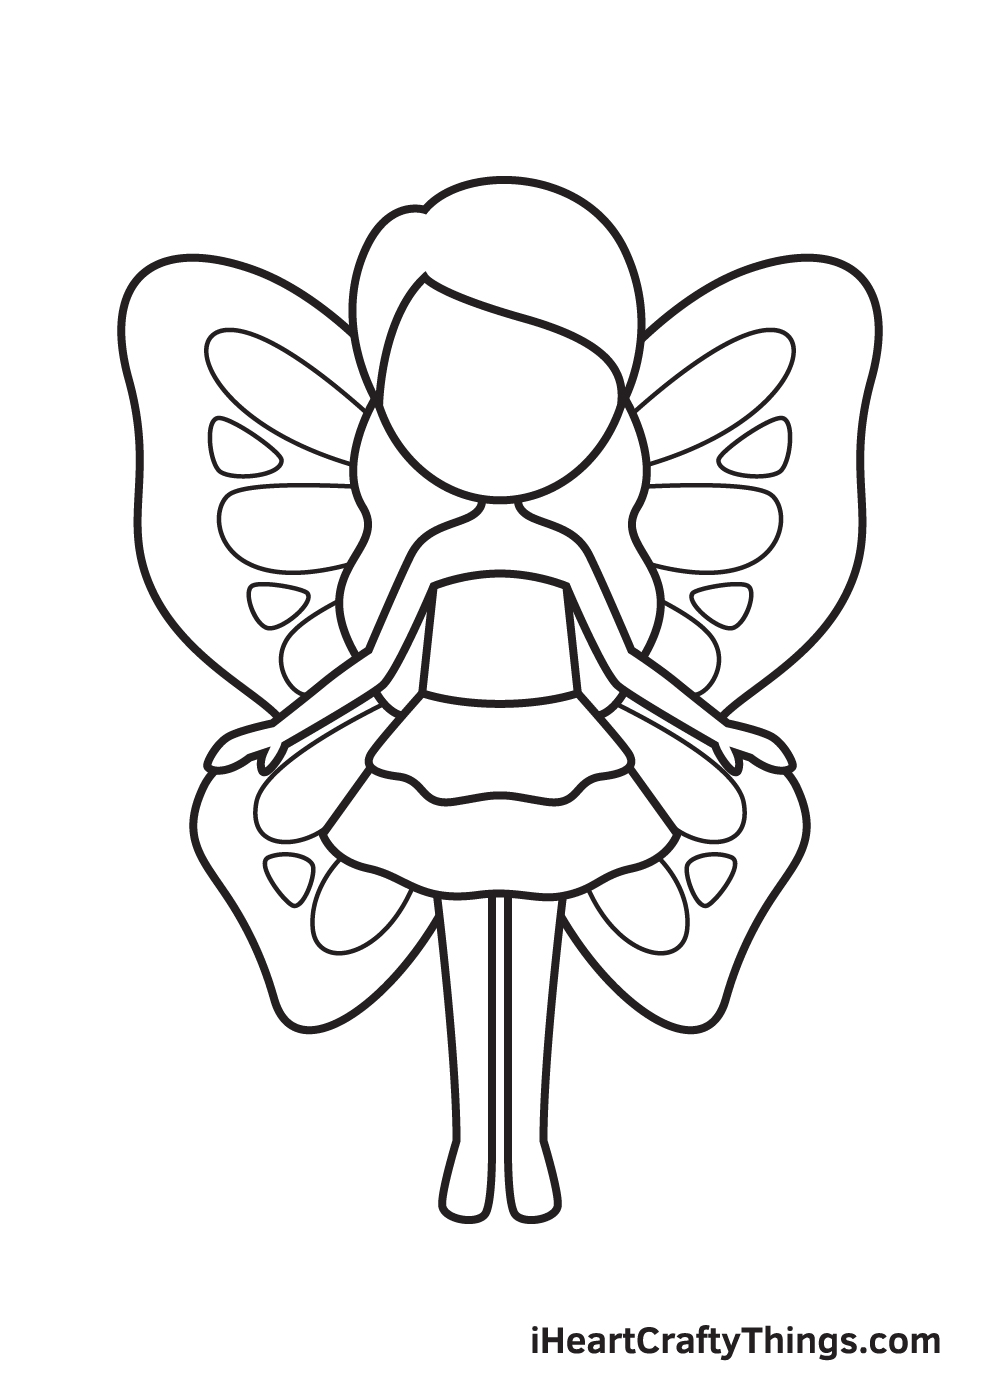
Now that we have finished drawing the outline of the wings, the next step is to design the wings to make it look even more prettier!
Draw various shapes and patterns within the wings. Let your imagination and creativity take the lead when styling the wings!
Step 9 – Put a Smile on the Fairy’s Face
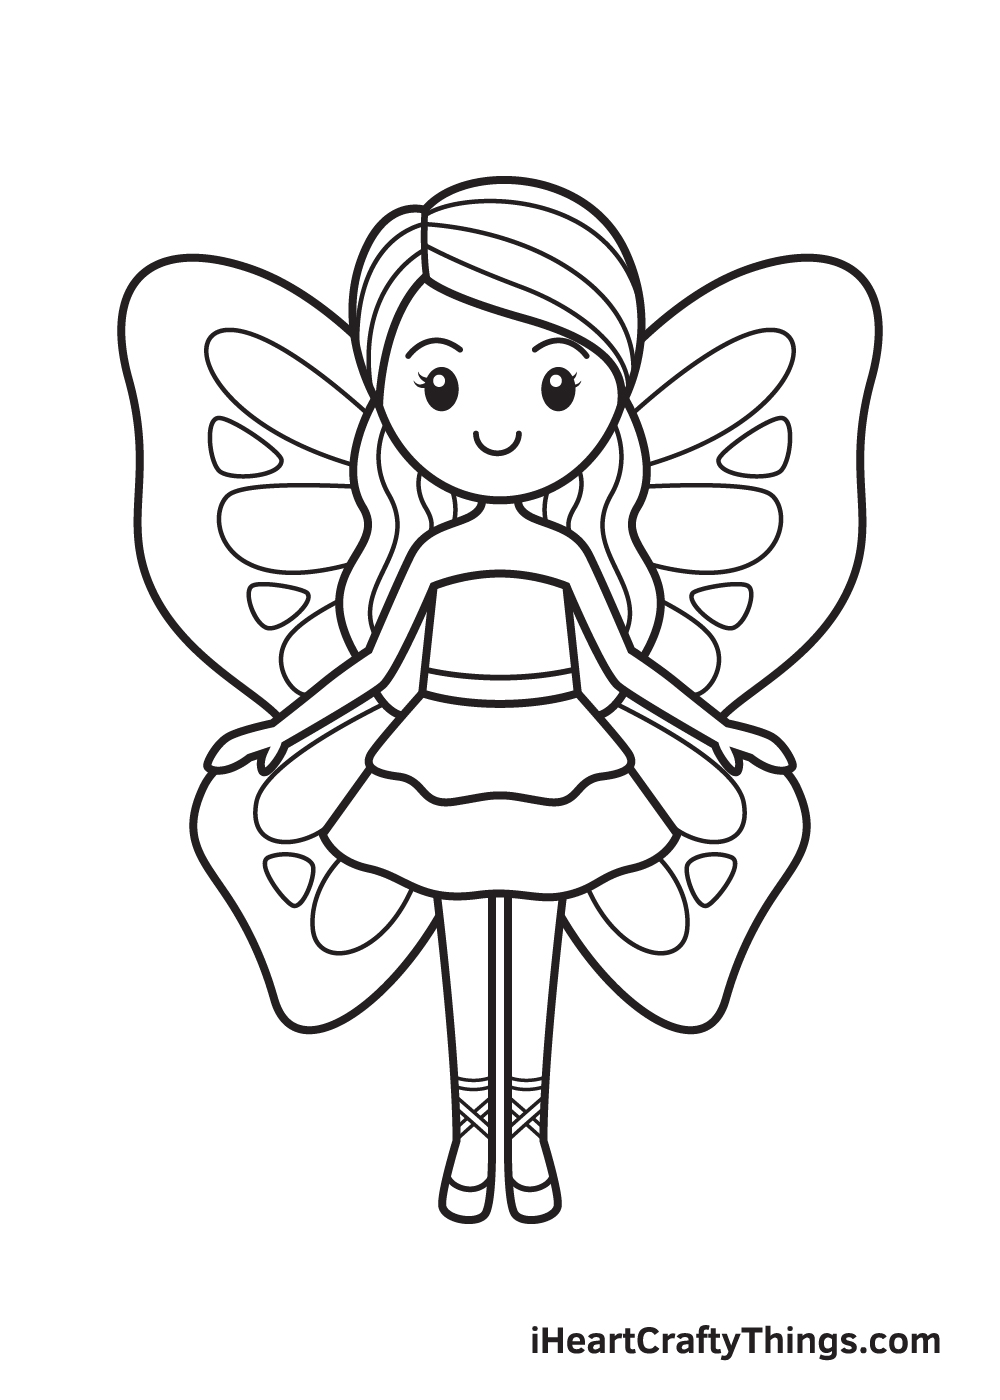
As you can see, we’re almost done! Now, it’s time to draw the fairy’s facial features to finally complete the look!
Going back to the outline of the face, draw a pair of arched eyebrows with two eyes right underneath. Draw another tiny circle within the eyes and shade the entire eyes while leaving the tiny circle inside unshaded. Don’t forget to add eyelashes for a more fabulous look!
Then, at the bottom of the face just above the chin, draw an upward curve to make the fairy look like she’s happy and smiling widely.
And there you have it; you have successfully drawn a fairy. Now, all it’s missing is a splash of vivid and vibrant colors to finally complete your artwork!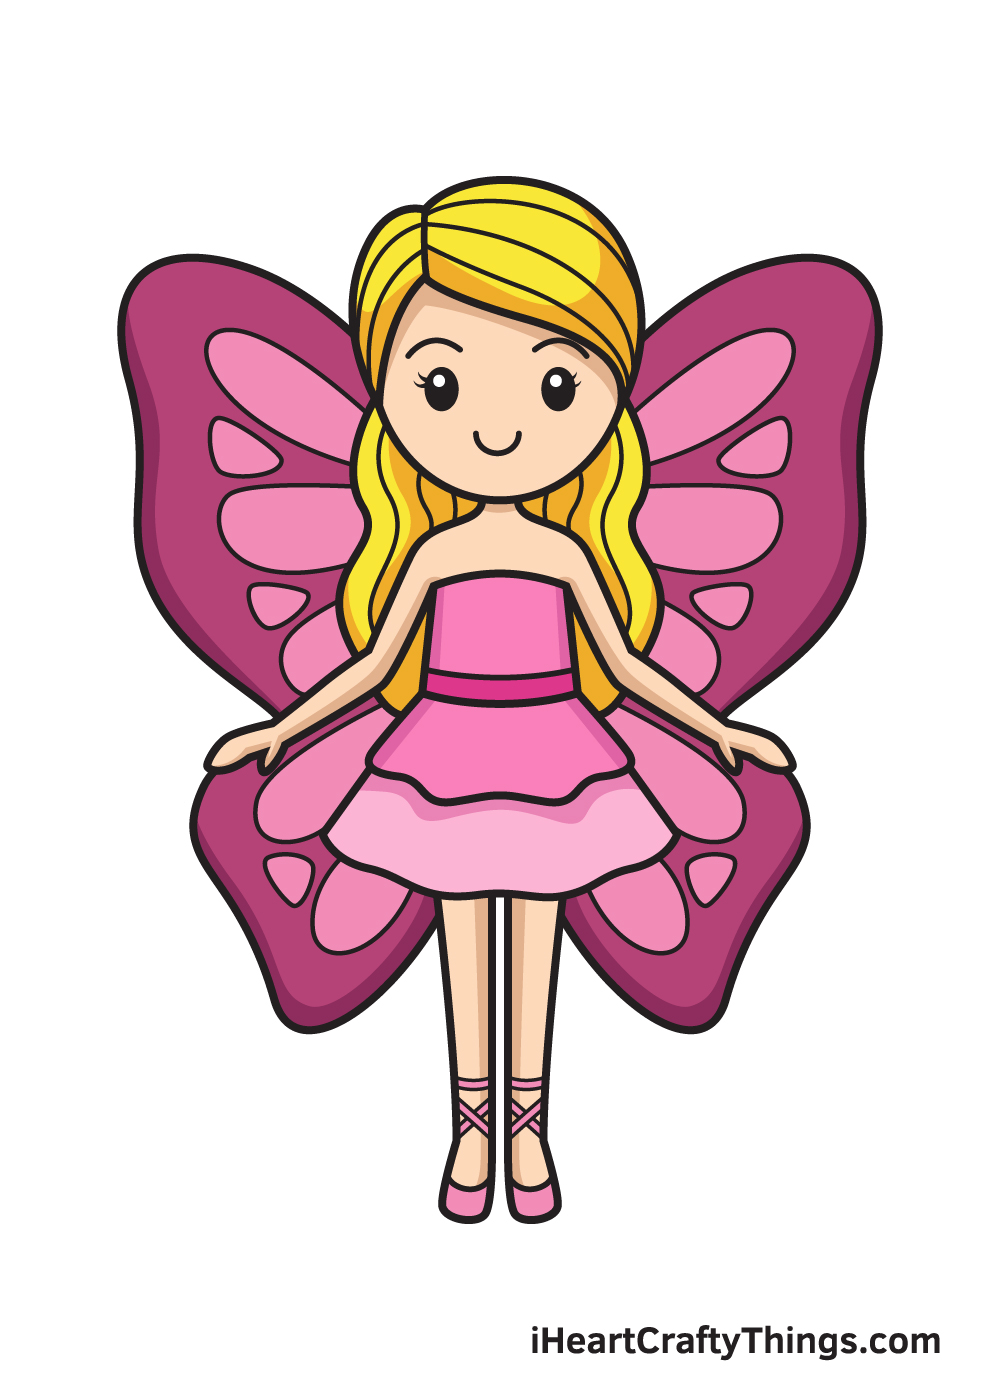
Finally, here is the most exciting part—filling in the colors for your awesome drawing! This is the part where you can show off your artistic skills and your ability to mix and match various colors.
Fairies are believed to have green or blue skin. There are also differences in the color of their clothing. In traditional folklore, fairies are often depicted wearing green clothing. In modern fiction, on the other hand, they typically wear pink or purple clothing.
Feel free to color your fairy drawing however you like and use any colors you prefer! And while you’re at it, why not try experimenting with different coloring materials as well?
Get Creative With How You Add Colors
In the final step of this guide on how to draw a fairy, we showed you some of the ways that you could color in this adorable fairy. However, the colors you choose are only a part of the fun!
There’s also the matter of deciding how you will apply the colors. We would like to challenge you to try out a brand new medium you’re not so familiar with!
If you enjoy coloring, you probably have some go-to mediums. Some people like to use colored pencils and pens, but others like to use paint.
There’s nothing wrong with using the same mediums for the most part, but it’s also good to challenge yourself with some new mediums.
For example, we feel that some watercolor paints would look amazing on this drawing. That would result in a softer look, but this fairy would also look equally good with brighter colors.
There isn’t really a right or a wrong way to go about it, it just depends on what you like and what you feel will best suit this fairy.
You can also use different craft tools to make the colors more interesting. Glitter would be a perfect fit for this fairy drawing, as this adds a touch of magic to any picture.
You could also use stickers and other similar crafts to make the textures and details a bit more dynamic. Of course, you also don’t need to stick to just one medium or color scheme when you color.
You can mix different ones to bring out the best in the colors and mediums you choose. Hopefully this has gotten your imagination going, and we can’t wait to see what creative ways you use to color in this fairy!
Here’s how you can make your fairy drawing even better…
Make your fairy drawing even more magical with these fun tips!
This fairy has some pretty butterfly wings, and we added a lovely pattern to them in the guide. You could keep improving the pattern on the wings as a way to make it even more personalized!
To do this, you could look up some pictures of butterfly wings and use them as inspiration for the patterns you draw.
What other patterns can you think of to add to the wings? There are so many fun designs to try!
In this guide, you were shown how to draw a pretty fairy, so now you have everything you need to add some fairy friends to this fairy sketch!
You could surround her with lots of pals, and you can draw them by following the steps of the guide while changing certain small details.
It would look really great to fill the page with little fairies, and you can see how many you can fit on one page. It would also be fun to design their various outfits and wings.
All this drawing of a fairy needs now is a fun background to finish it off. In the previous tip we spoke about adding fairies to the background, but you could also draw a background setting.
It would look lovely to draw a magical fairy forest setting behind the fairy. That’s just one idea, but there are many different fun scenes you could put this fairy into. What are some that you can think of?
The last tip we have for you concerns adding colors to your fairy drawing. We used a lovely pink color scheme for the fairy we created with you, and as we mentioned that is a modern look for fairies these days.
Because they are fantasy creatures, you could really use any colors you can imagine for the fair. Her clothes and her wings.
This is a drawing that you can really unleash your imagination on, so have fun being creative and see what you come up with!
Your Fairy Drawing is Complete!
We hope you enjoy this step-by-step tutorial on how to draw a fairy. With this guide, you can surely draw and color a fairy along with its complex features and elaborate details in no time.
And the most fun part is, you can customize its physical attributes and play with various colors as much as you like!
We are always updating our “How to Draw” catalog, so make sure to keep checking back on our website to take advantage of newly uploaded tutorials.
All you need is a pen and paper and you’re all set to start drawing! We are excited to see what you will draw next. We’re sure it will be just as amazing as this one!
Once you’ve finished your masterpiece, we’re certain you must be feeling very proud of yourself—as you should be! Completing this fairy drawing is definitely fulfilling.
Make sure to show off your work of art and share it on our Facebook page and on Pinterest. We’re sure it looks amazing! We can’t wait to see your colorful fairy drawing!
Here Is A Cartoon Fairy DrawingTo Inspire You!
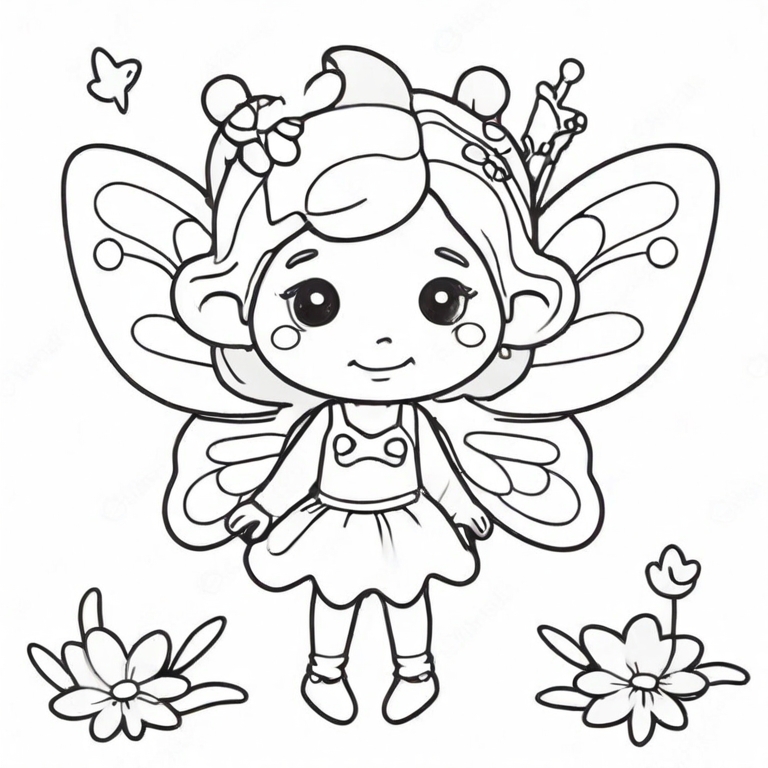
This wonderful cartoon fairy drawing for kids was created by our artist Freddy, as we wanted to show you one of the ways you can go about creating this picture.
Freddy has managed to create a beautiful, cute cartoon fairy, and you can easily create one yourself! All you need to do is follow the steps of the guide and then look at Freddy’s example.
Of course, you don’t need to make yours an exact copy of Freddy’s image! You can change a few details if you feel the inspiration to do so.
It’s also possible to make a picture more unique with the colors that you use. There are so many ways to color this cartoon fairy sketch that it would be easy to make it completely unique to you.
Don’t be shy about using some unusual art tools and mediums to add color as well!