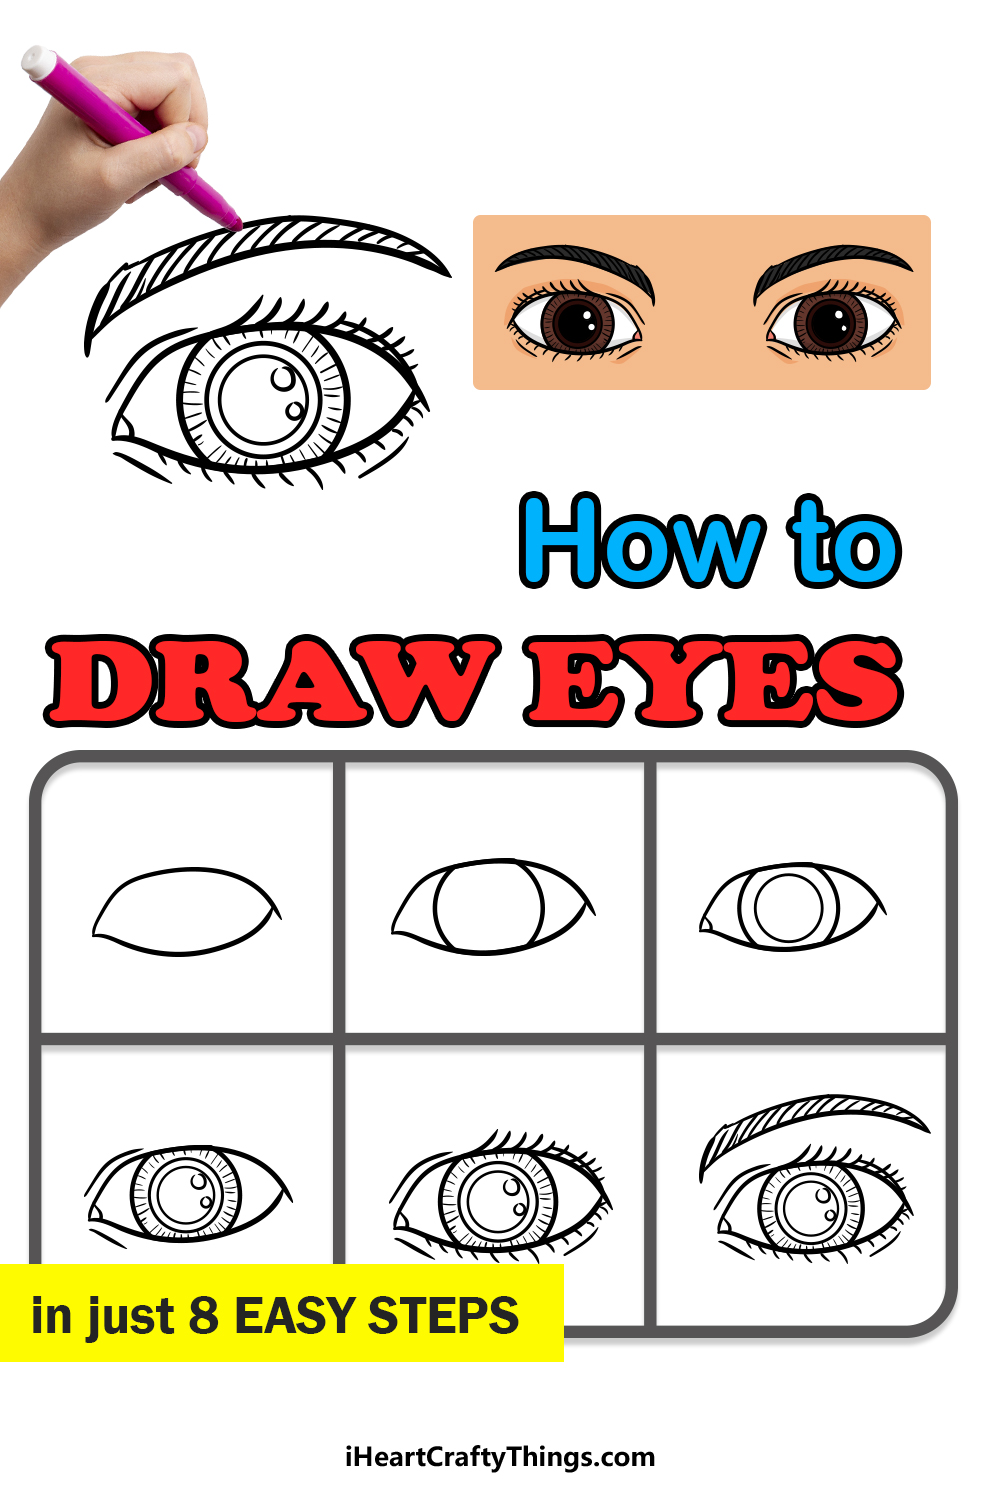
Learning how to draw an eye is famously tricky for many. This step-by-step guide for kids will show you that it can be easier than you ever imagined when you know what to do!
Eyes have a lot of detail on and around them such as pupils, irises, eyelids and eyebrows. These things all work together to show emotion and it’s easy to get the whole drawing wrong because of a few incorrect details.
I’ve broken down all of the major components of drawing an eye into some intuitive steps that will show you how to get the hang of this design. Once you really have the hang of it, you could even create your own custom versions with different emotions or areas of the face included.
You’ll want your eyes wide open for this fun guide as we discover the secrets of this drawing together!

Watch These Simple Steps On How To Draw An Eye
How to Draw an Eye – Let’s get Started!
Step 1
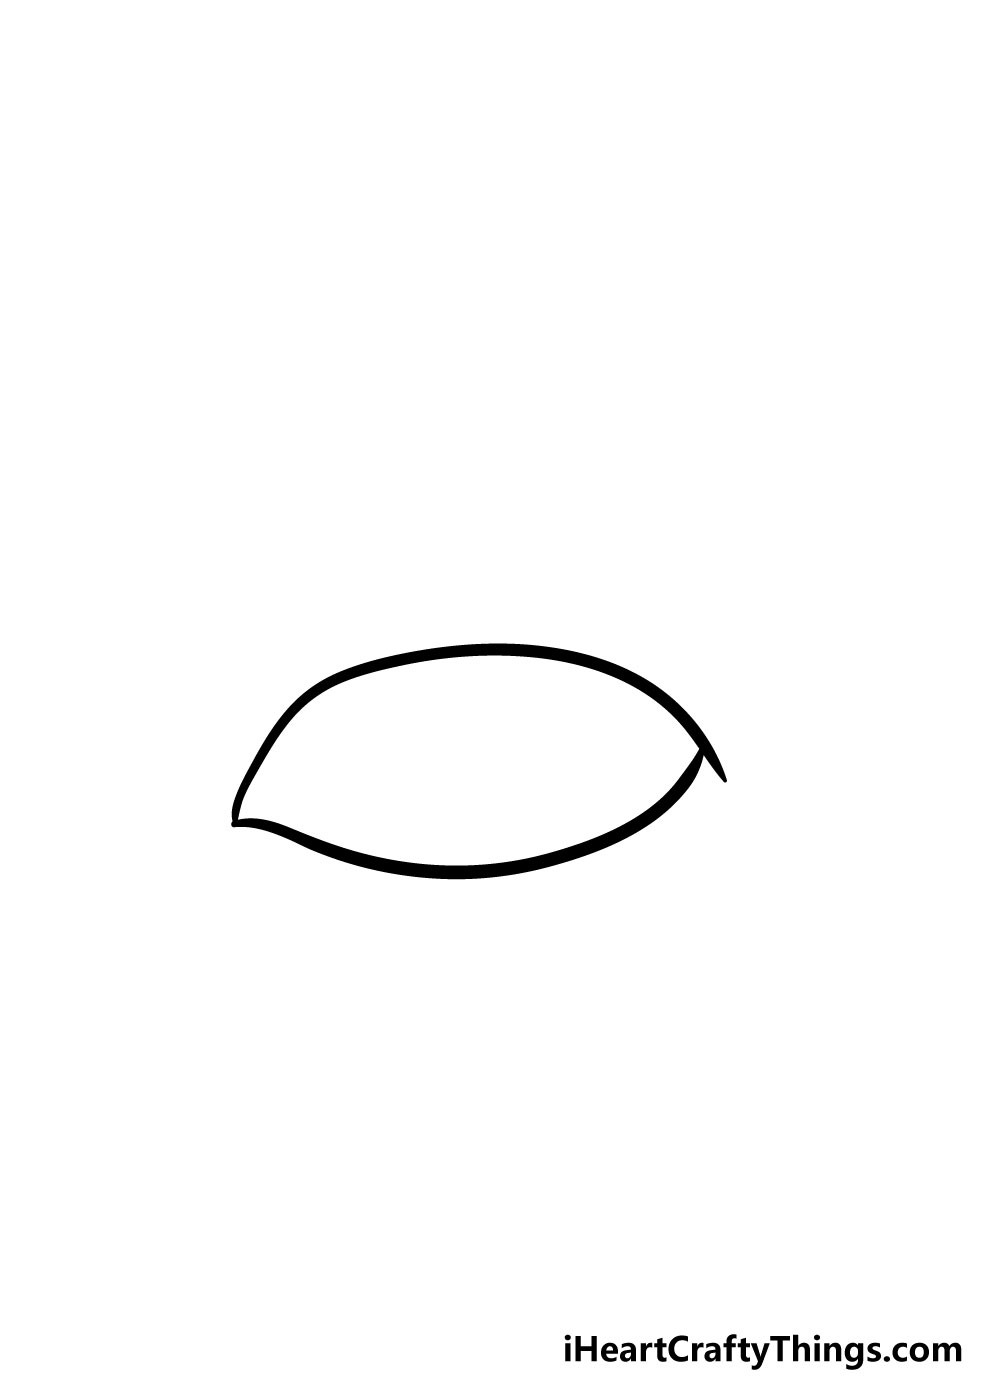
For this first step in creating an eye drawing, we’ll be starting simply by drawing two lines. Following the example in the image we provided, start by drawing a horizontal curved line.
Next, draw in another curved line underneath it, and connect them with two smaller lines to form a point at the left side.
This can take a bit of practice, so it might help to use a pencil to practice doing the outlines before doing a darker outline in pencil.
You could even use a thin piece of paper to sketch over the outline we provided here!
Step 2 – Draw in the iris
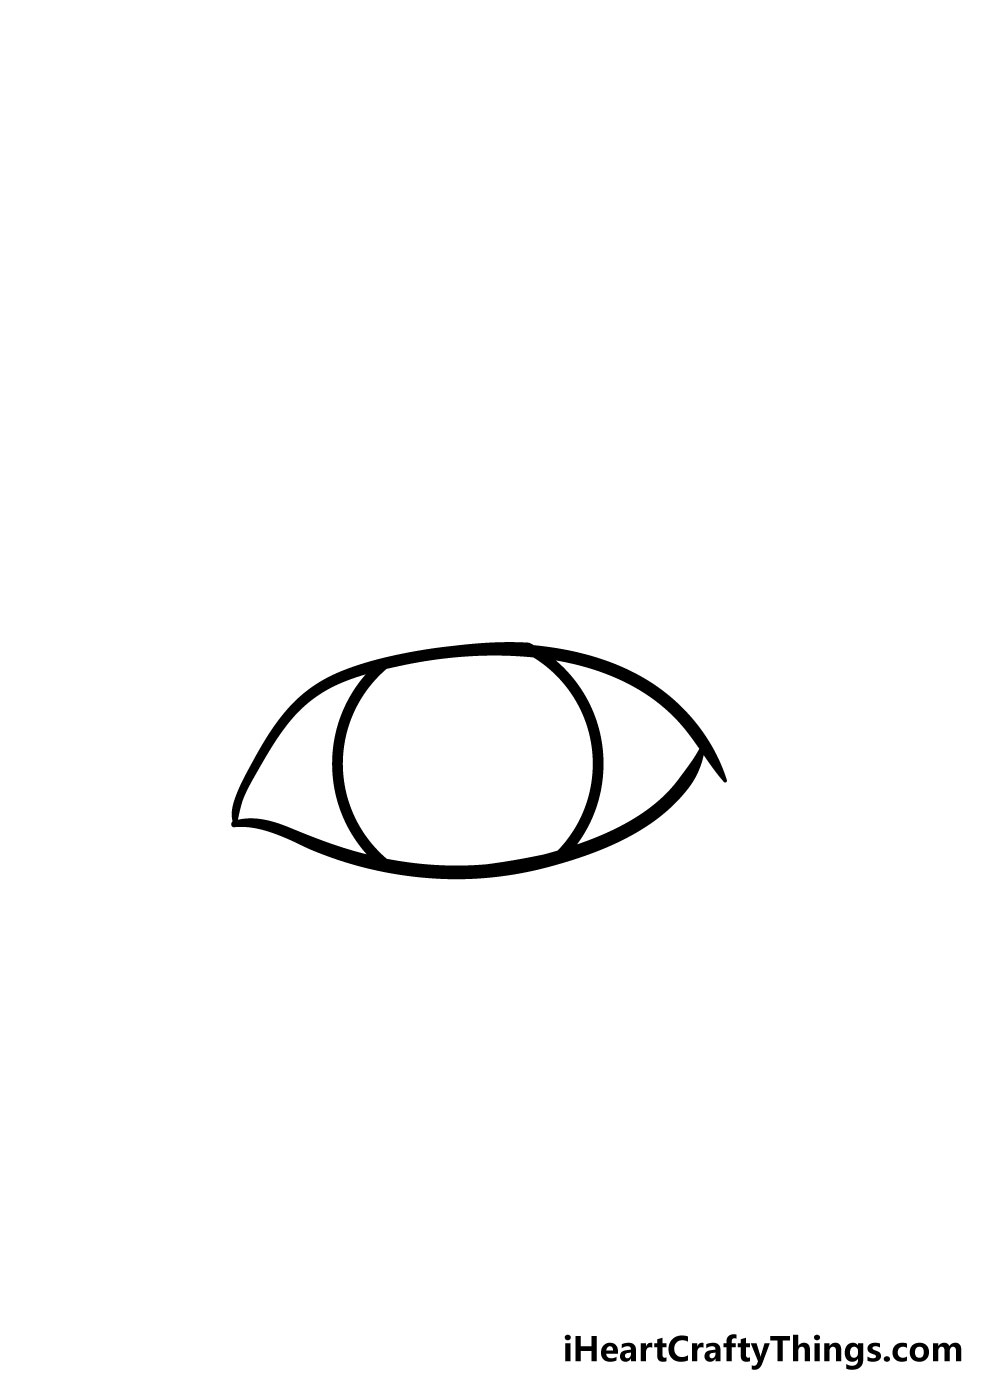
The next step when learning how to draw an eye is to add in the iris. This part is pretty easy, and all you have to do is draw in two curved vertical lines inside the outline we drew earlier.
These should be pretty sharply curved so that they make a circular shape. Referring to the image should help with the spacing.
Step 3 – Next, draw in the pupil

We have the outline and iris of our eye drawing done, so now we need to add in the pupil.
This will require drawing a circle, so if you struggle to do that you could use a drawing tool like a compass to draw into the center of the iris as shown in the picture.
Once you have that in, you can draw in a curved line at the far left corner for the tear duct of the eye.
Step 4 – Now draw in some pupil details
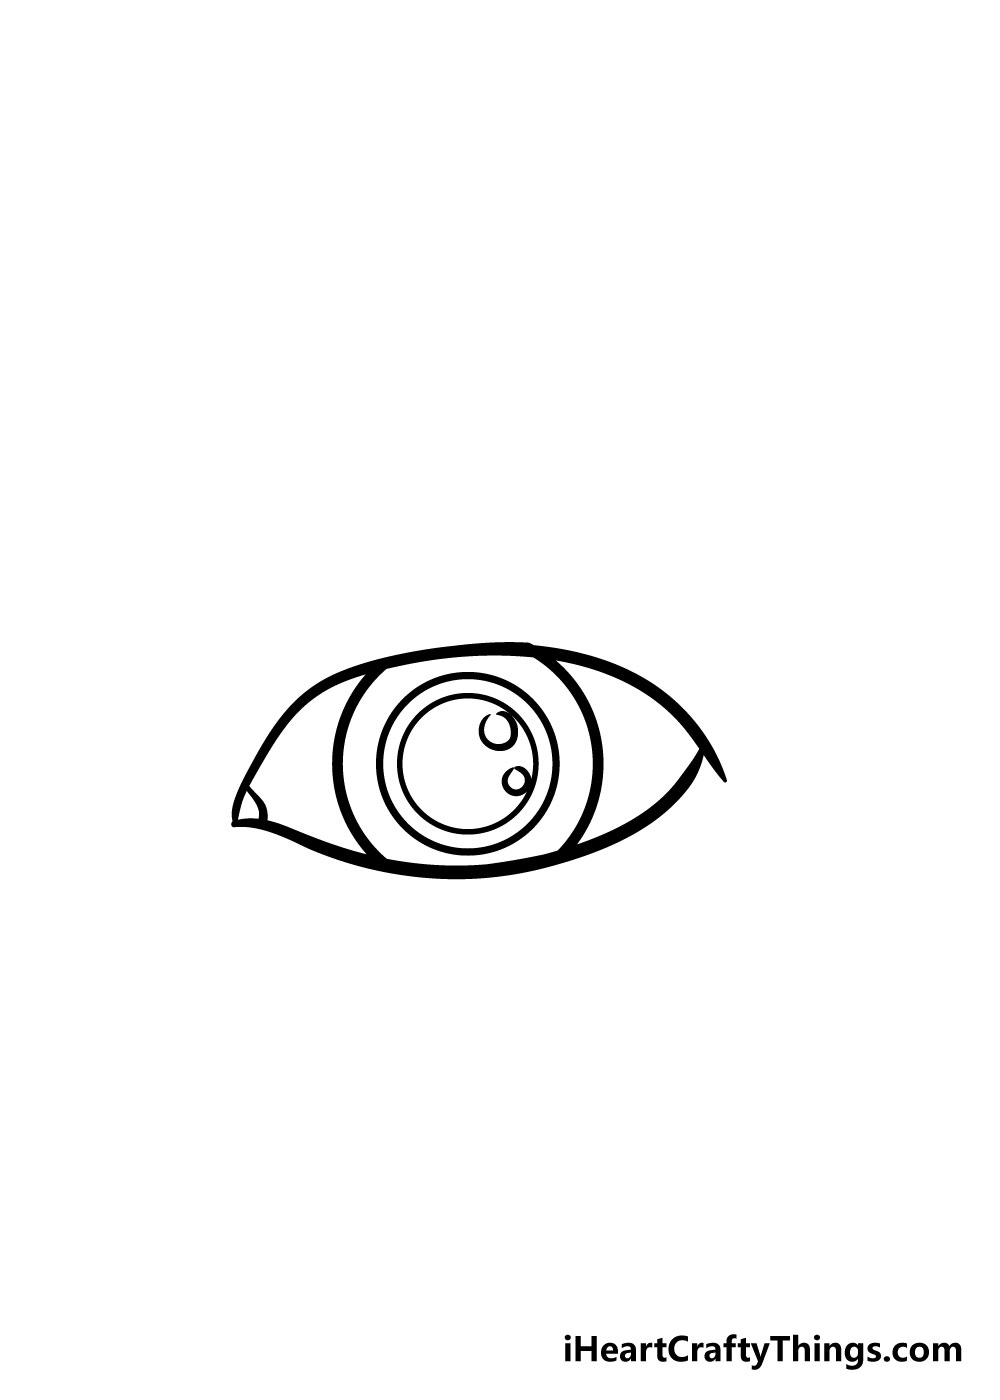
The pupil needs a little bit of detail added to it, so for the next step, we will simply add two small circles inside the pupil to make it look more reflective.
These don’t need to be perfect circles, so you can draw them freehand in a similar position to the ones in the reference image.
Step 5 – Next you will be adding more detail to the pupil
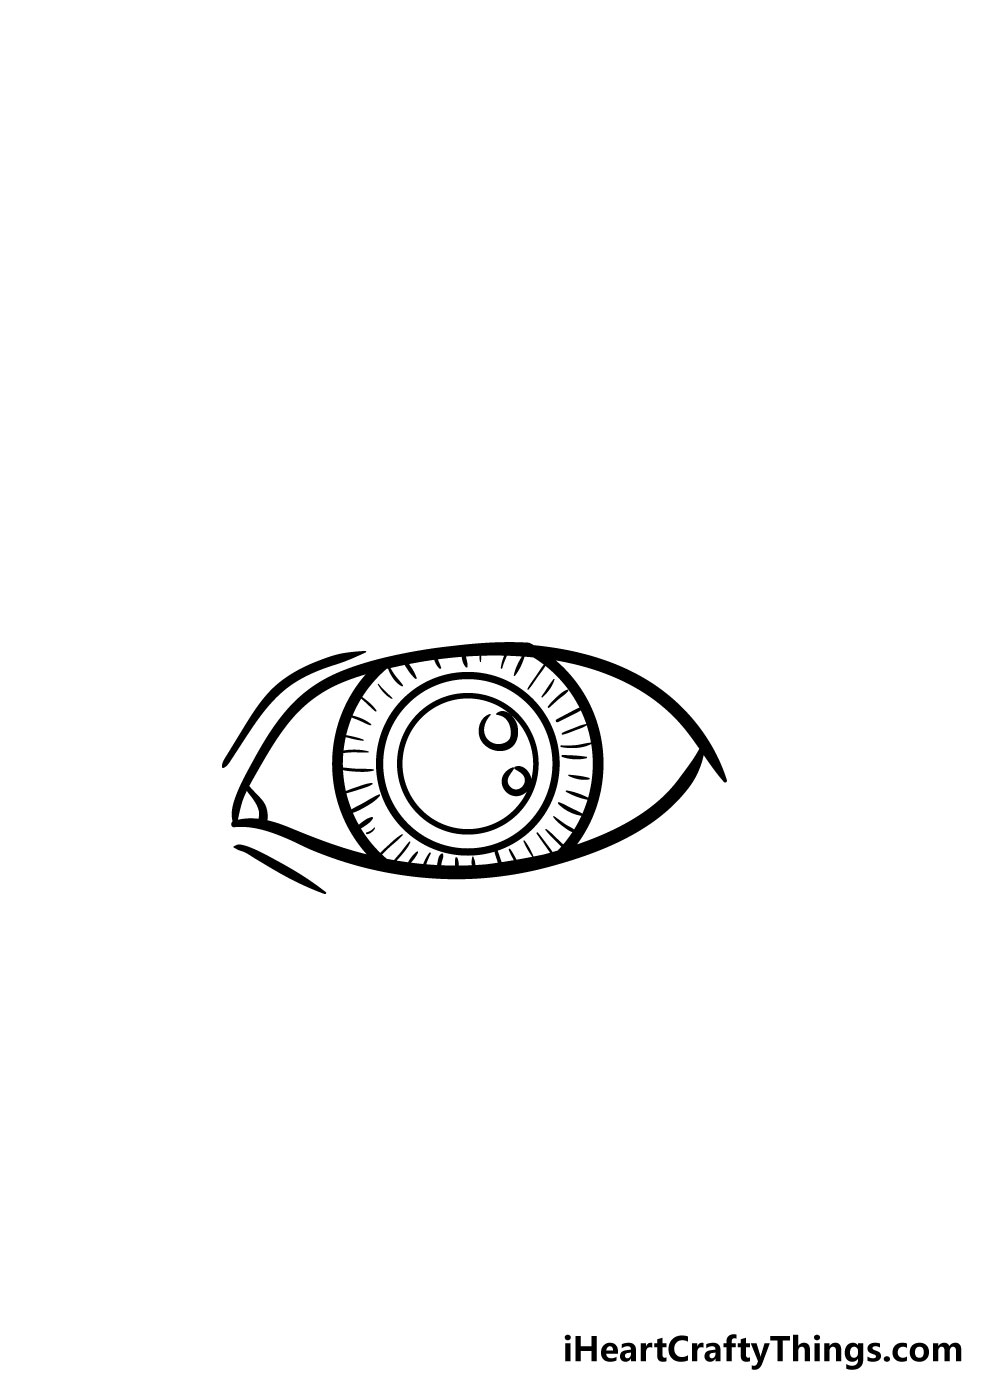
We’ll be finishing off the pupil of your eye drawing in this next step. For this step, simply draw in some short lines from the outline of the iris towards the inner pupil, but they shouldn’t quite touch the pupil outline.
You can keep these a little irregular as seen in the image to create a more realistic look. Lastly, draw in two lines above and below the left corner of the eye as you can see in this picture.
Step 6 – Add in some eyelashes and details

When learning how to draw an eye, it can be easy to forget about the eyelashes, so we will add them in for this next step!
Simply draw in some curved lines above and below the eye, with the eyelashes on top being a bit longer.
You can see in the image that some are longer than others, so you can replicate that look in your own drawing.
Step 7 – Now draw in the eyebrow
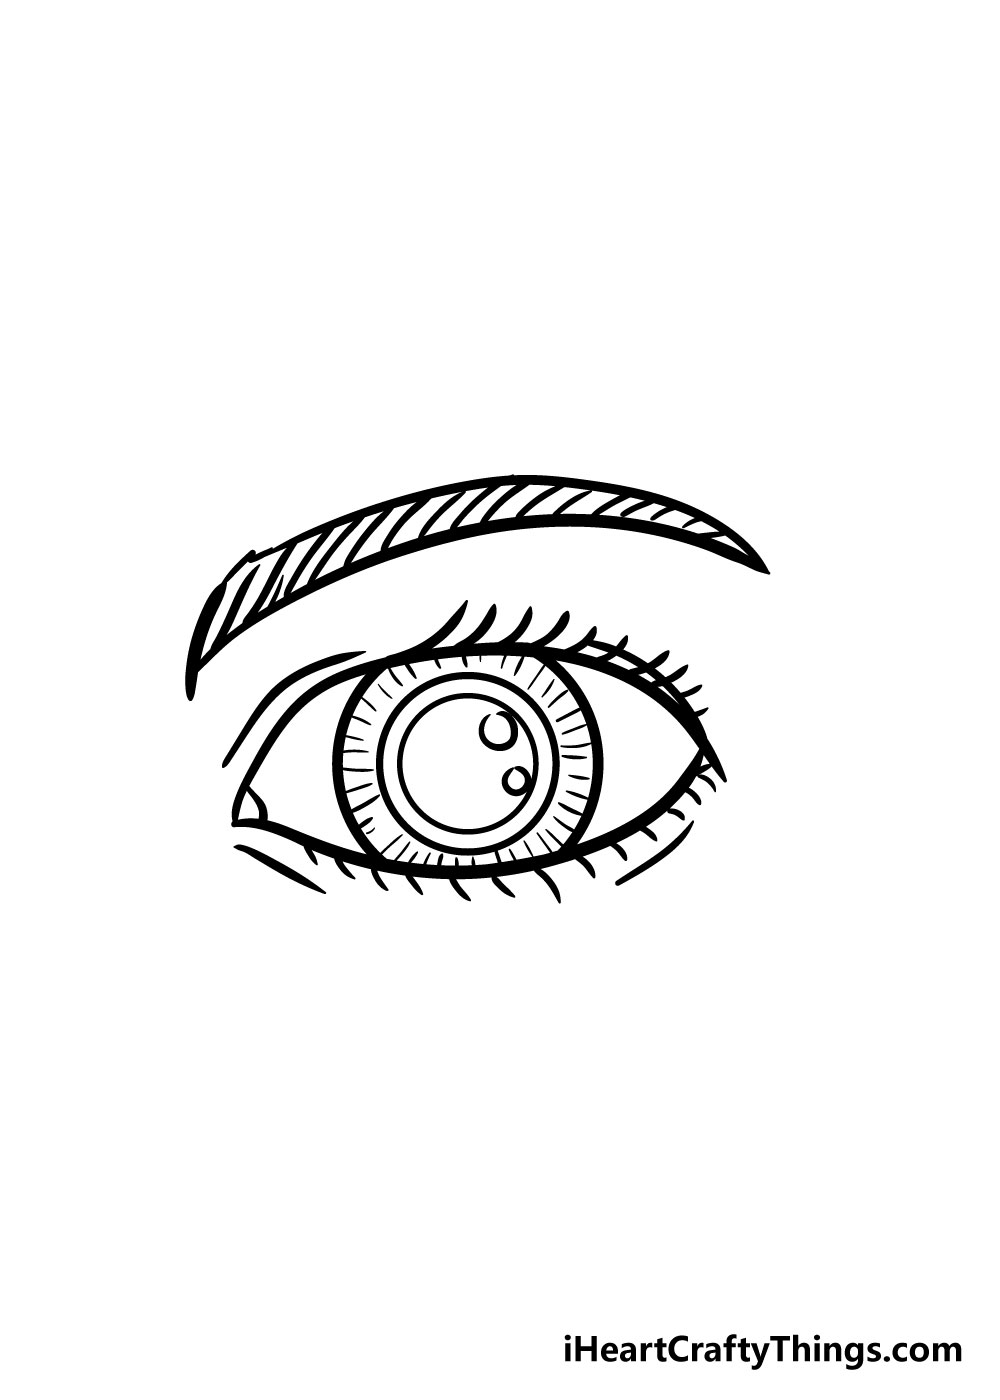
Your eye drawing is almost done and just needs one more detail: the eyebrow! To draw this in, you can draw in two curved lines that meet at a point above the eye.
Then, you can draw in a curved vertical line on the left-hand side to join them at the thicker end.
All that remains after drawing in these lines is to add in a series of vertical lines inside the eyebrow outline to give it the appearance of hair inside it.
With the eyebrow drawn in, your eye drawing is almost complete! Learning how to draw an eye is certainly easier when you break it down into manageable steps. To draw a left eye, all you would have to do is follow all of these steps but just reverse them.
Bonus: Use These Extra Tips To Make This Eye Drawing Easier
We tried to make this eye drawing as easy as we could in this guide, but the truth is that drawing eyes can be surprisingly difficult. The reason for this is that we see so many eyes in our lives, and they’re one of the key identifying factors of a person.
So, if they look a bit off or a bit wrong then it stands out a lot, as recognizing eyes is such a natural thing for us. If you got to this point of the guide and found it difficult, we have a few more tips you can try out.
Firstly, the best thing you can do is use a pencil first. This is always a good idea when getting to grips with a drawing, as it allows you to draw without the stress of making a mistake.
Using your pencil, try to slowly go through the guide again and simply erase any mistakes or any parts that didn’t come out the way you wanted.
You can also use additional references to aid you as you draw. If you have a willing friend or family member, then you can ask them to open their eyes wide so you can take a look.
Try to look at the eyes from different angles in order to get a better feel for what the structure of an eye actually looks like. You could also take some photos or look up diagrams online.
Getting a better feel for what the average eye looks like can make it so much easier, and you could also use your sources to add your own details and ideas to the drawing.
We hope these tips help you to get the drawing to a place you’re happy with as we move to the final step of the guide!
Step 8 – Finish it with some color
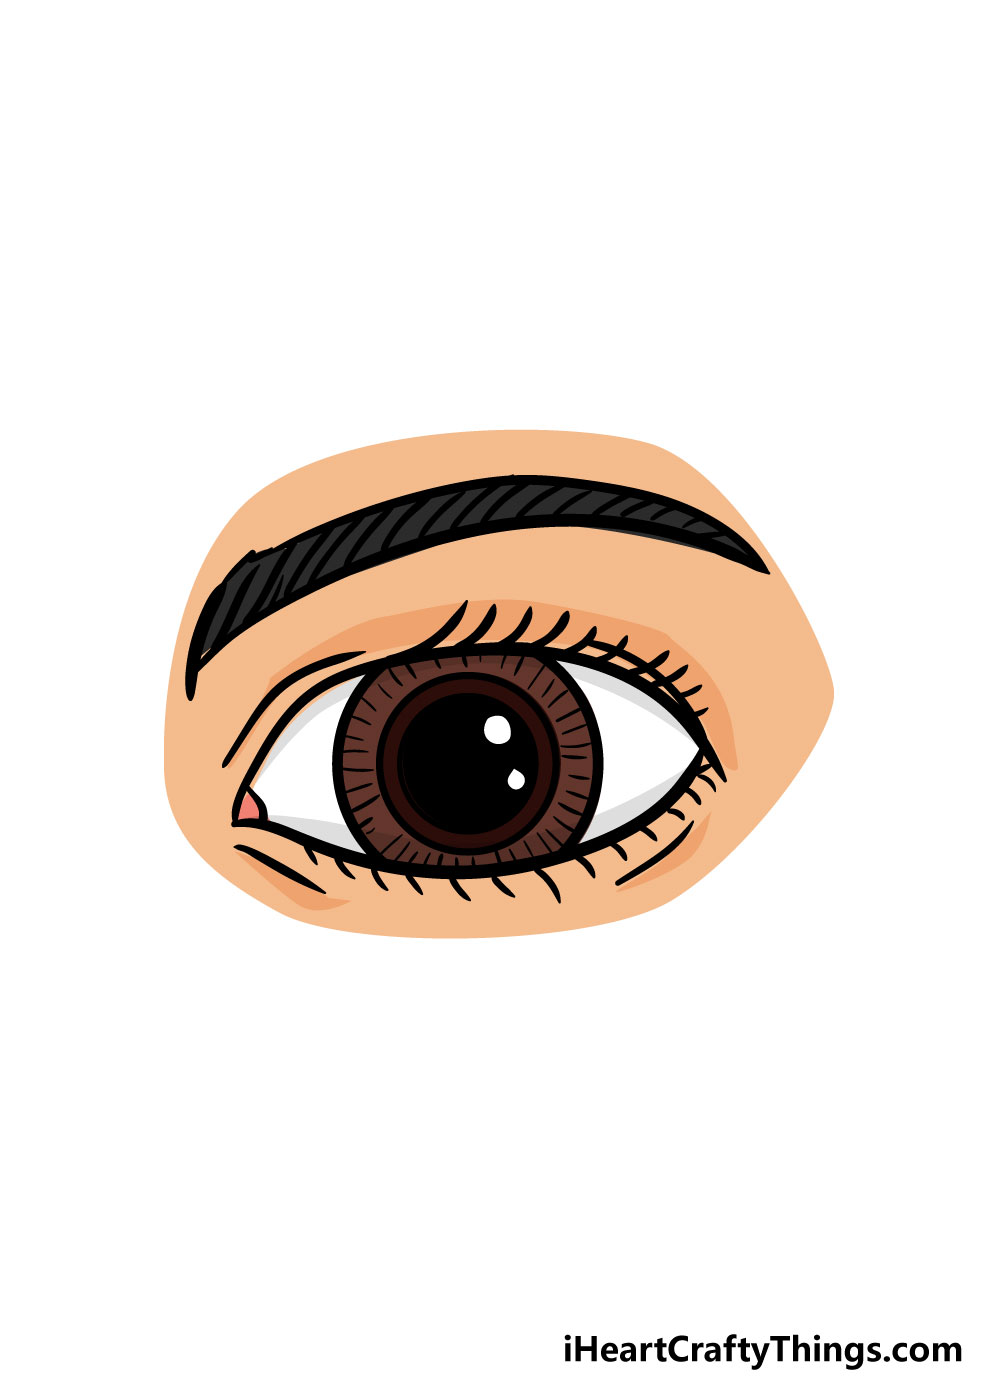
Once you’re happy with your eye drawing, all that remains is to color it in! For this first one, it could be fun to color in the eye and eyebrows to match your own in real life.
There are tons of color variations you could use for your amazing eye drawing, so this is your chance to show off your artistic skills!
What colors do you think that you will use for your eye drawing? You could try use some fun art mediums such as acrylic paint, watercolors or colored pens for some great color vibrancy!
There are no wrong answers to how you can finish off your drawing, so let your creativity shine!
5 Tips To Make Your Eye Drawing Even Better!
Take a look at these tips we have for making your eye sketch even better!
The drawing of an eye that we created in this guide has got a rich brown color to it. As you well know, eyes can come in many different colors.
You could use any of these colors for your own drawing! This could be blue, green or any other colors you like. For an extra fun touch, you could make the color of the eye match your own!
Our eyes are a big part of how we make facial expressions. You could make the eyes in this drawing even more expressive in a few ways.
A few ideas for how you could do this would include having them looking in different directions or maybe lowering the eyelids a bit. How else could you make them look more expressive?
Next, you could make your eye drawing even more interesting by adding some eyewear. This could be a pair of glasses or maybe some sunglasses.
You could even go for something a bit more unusual and put a monocle over one of the eyes! This would be a great way to add some personalization to the image.
Once you’re happy with how the eyes look, you could draw the rest of the face and head they are a part of. If you want to do this, you will need to make sure you leave enough space on your page!
Drawing a full face can be tricky, so you could use your own reflection or the face of someone you know to help you as you draw.
Finally, whether you added the rest of the face to your eye sketch or not, you could elevate it by adding a background to the image.
This background could be related to some of the additions you may have added. For instance, if you added some sunglasses then you could add a beach background.
That is just one possibility, but it’s up to you to decide what background you think would fit best!
Your Eye Drawing is Complete
We really hope that this guide on how to draw an eye has helped you to have fun while learning to draw some beautiful eyes!
Eyes can certainly be a challenge, but if you follow the easy steps we laid out here in this guide I know that you’ll master it in no time.
Once you can easily draw some beautiful eyes, you could try out some variations such as having them half-closed or looking in other directions.
Doing this along with trying out new colors and art mediums means that you’ll have plenty of stunning eye drawing variations, so don’t be afraid to let your creativity flow!
We have plenty of fun and helpful How To Draw guides coming out all the time, so keep checking in to our page to never miss out.
Once you’ve finished your amazing eye drawing and colored it in, we would love to see your incredible artwork!
We hope that you will share them on our Facebook and Pinterest pages so that we can all admire your wonderfully drawn and colored in eye drawings.