Dice can come in many different forms and variations, and they are used in many different games and sports.
The main appeal of dice is that they put everything in the hands of luck, and everyone has an equal chance to come out on top.
With all the variations that dice can come in, it can be fun to learn how to draw dice in order to design your own unique variations.
If you would like to know how to design your own set, then be sure to read on!
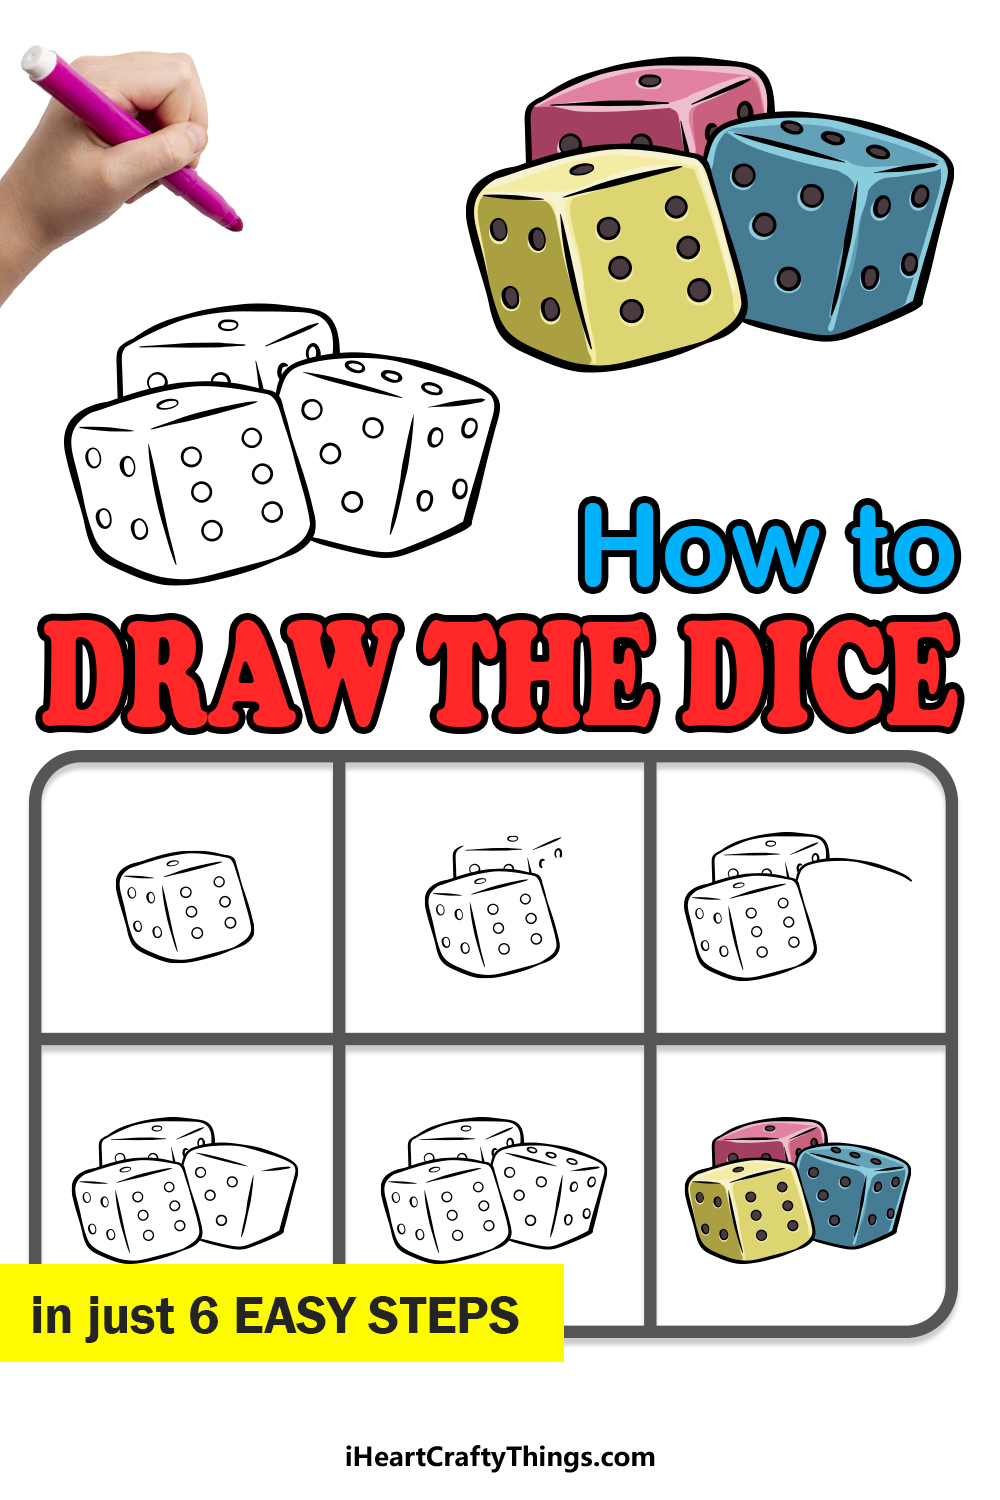
Our step-by-step guide on how to draw dice in 6 steps will make sure you don’t need any luck to learn this drawing.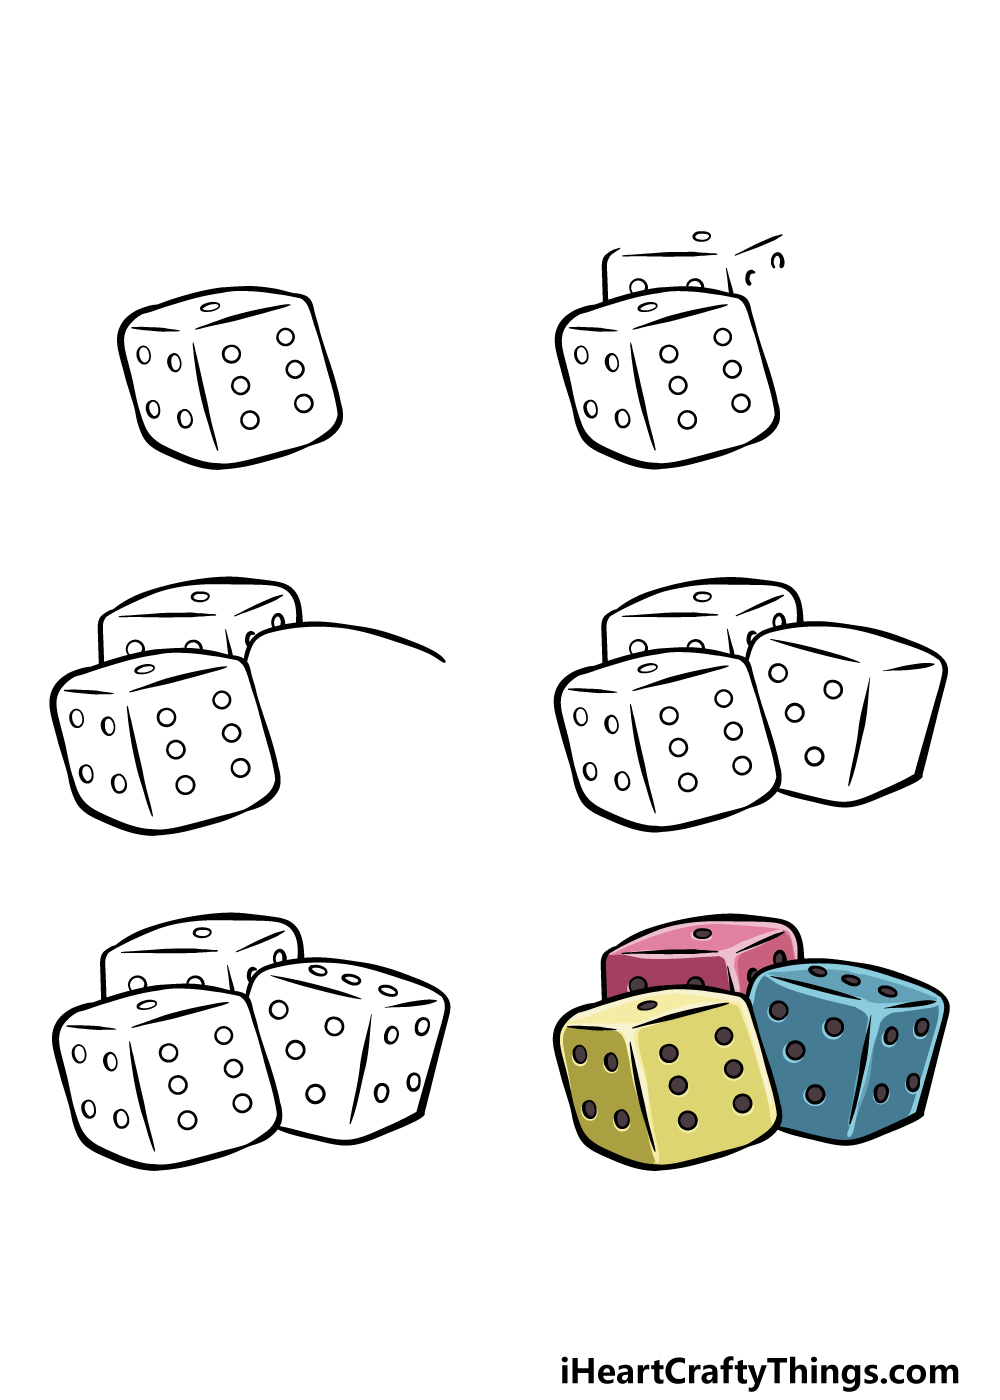
How to Draw Dice – Let’s Get Started!
Step 1
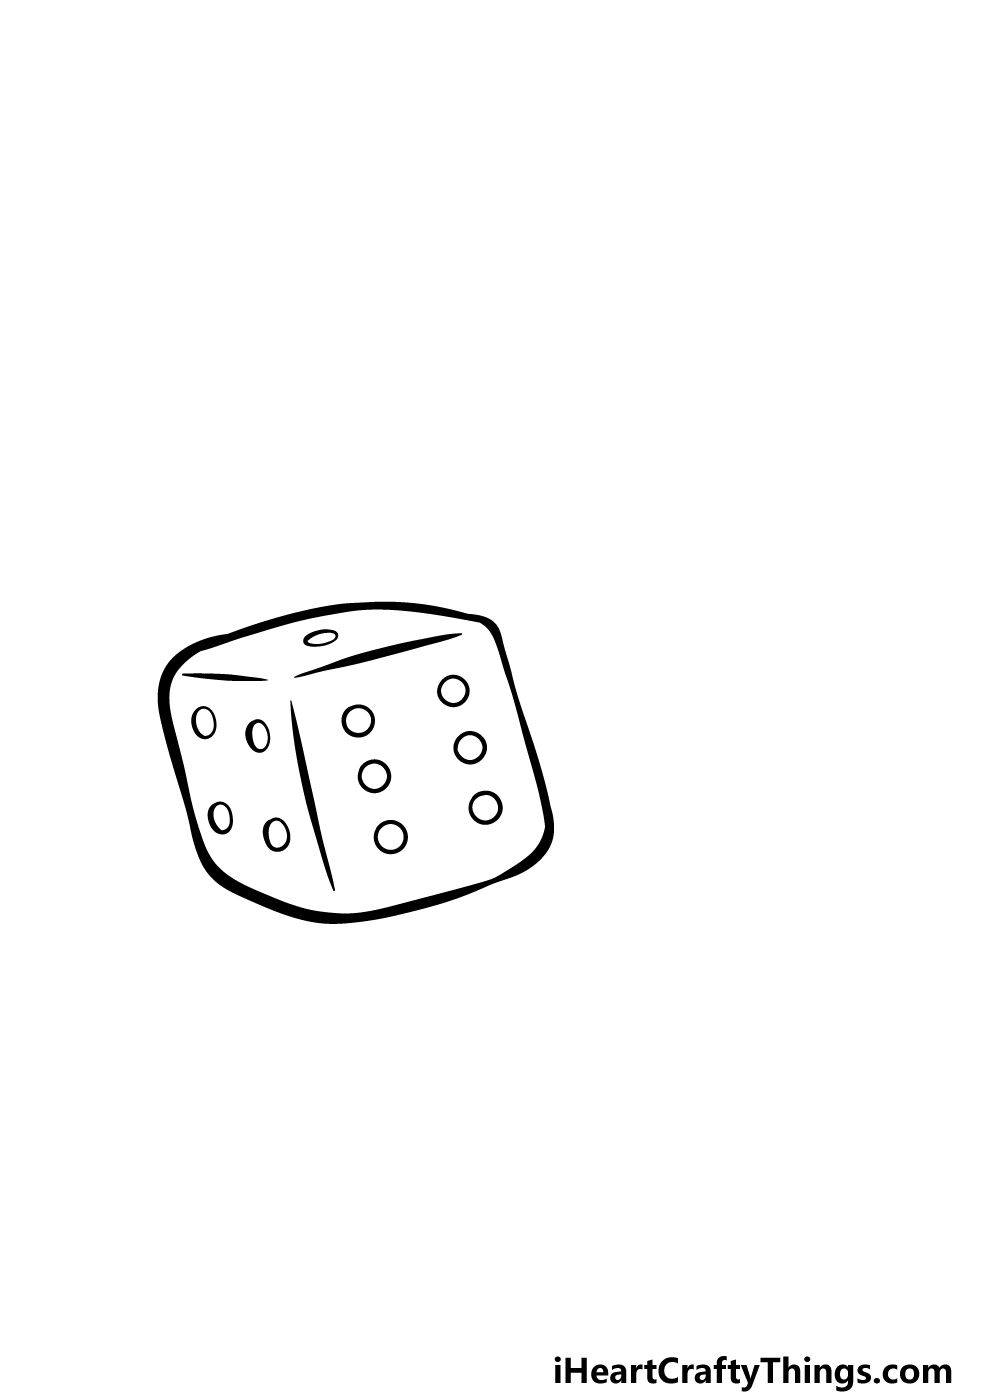
For this guide on how to draw dice, we will first be drawing some cubes.
Dice are usually a bit rounded on the edges to make it easier to throw them, so for that reason we won’t be using much in the way of perfectly straight lines for this drawing.
Using the reference image as your guide, you can draw a rough square shape with slightly rounded edges and corned.
Once you have this outline drawn, you can then add three lines forming a sort of T shape, but they won’t quite be touching. Instead, they will help to give the impression of the dice having corners.
Finally, draw six small circles onto the side of the dice facing you, then draw four dots on the side to the left of it and finish off with one on top.
Now you’re ready to start drawing the second dice in the next step!
Step 2 – Next, start drawing the second dice

We will be adding the second one to your dice drawing in this next step. This one will be behind the other two that we are featuring in this guide, so we will be going about it a bit differently this time.
Start off by drawing a vertical line up from the left-hand side of the first dice, and have that line curl to the right at the top.
Then, draw three more lines to form a similar T shape to the one from the first step, but most of it will be obscured by the other dice.
Finally, draw two half circles on the right side of the dice, two more partially obscured by the first dice and then finish off with one dot on top.
Step 3 – Draw the tops of the next two dice

This third step of our guide on how to draw dice should be pretty simple! We will pretty much just be drawing the top edges of the other to dice in the image.
For the first one, extend a curved horizontal line from the vertical line that you drew previously. Then, draw a similar one from the top right-hand corner of the very first dice that you drew.
Step 4 – Next, draw the outline of the third dice
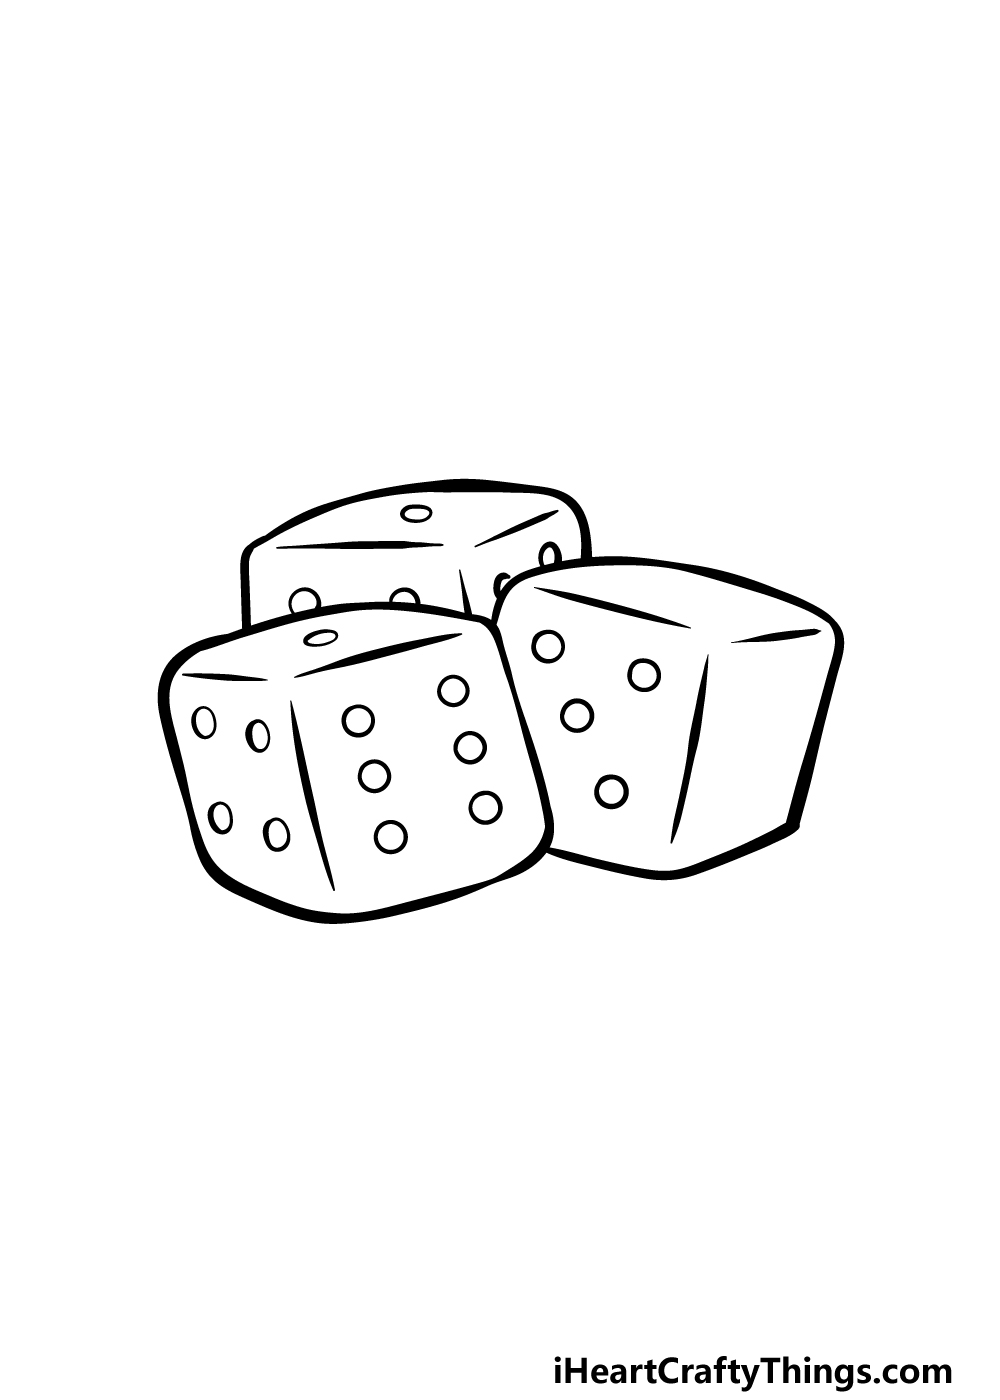
You will be able to finish the outline for the third dice in this step of your dice drawing. To do this, extend a line down from the horizontal one that you drew earlier.
It will curve at the base and move inward until it touches the first dice. Then draw three more lines making another of those T shapes, but once again make sure that the lines don’t quite meet.
You can then finish off by drawing some dots on the left edge of the dice. Technically, this side has five dots but only four will be visible with the last one obscured by the other dice.
Then it’s time for some final details in step 5!
Step 5 – Finish off your dice drawing

It’s almost time to add some colors to your dice drawing, but first we have a few final details to add.
These will mostly be confined to drawing some more dots on the dice, and you can start by drawing three on the top edge of it. Finally, you can finish off by drawing four more on the remaining edge.
Then your dice drawing is complete! You could also take this picture even further by adding some details and elements of your own.
One fun idea would be to draw a background to show what game these dice are being used for. You could also draw some different objects that may be sitting on a table with them.
This is your chance to have fun getting creative with it, so have a great time and see what happens!
Step 6 – Finish off your dice drawing with some color

This is the final step of your dice drawing, and this may be the most fun of all the steps! In this one, you get to bring this drawing to life with some amazing colors.
In our reference image, we went with a different color for each dice. We chose yellow, blue and pink for the colors, but these are just a suggestion.
This is a step where you could use any colors that you love to put your own spin on these dice. You could make them as bright or subdued as you wish, so from this point it’s completely up to you!
There’s also fun to be had in choosing which art mediums and tools you will use to achieve your color choices, so why not use all your favorites and experiment with some new ones?
Here’s how you can make your dice drawing even better…
Make these awesome dice look even better with some fun tips you can try for your dice sketch!
For this drawing of dice, we show three dice that are sitting on a surface. One way you could make the drawing more interesting would be by making it look as if they have just been thrown.
To do this, you could change the positioning of the dice and also add some lines around them to create a sense of motion. How else can you think to change the dice to make it look like they were just thrown?
Following on from our previous tip, you could also make the illusion of the dice being thrown by adding a hand that they have just come out of.
Drawing hands can be hard, so you could use your hand or the hand of a family member to help you.
Simply pretend you are throwing the dice, freeze your hand in that position and then try your best to replicate that in the image.
Next, you may wish to draw a background for this dice drawing. There are many places you could expect to see some dice, so there are many possibilities.
You could draw a casino setting to portray a high-stakes game for one idea. Or, they could even be at a magic show as someone performs a trick.
These are just two examples, but you can get really creative with the types of settings that you portray. Where are some other places you could expect to see some dice?
The dice sketch we created shows a trio of standard dice. These look cool, but dice can come in many variations.
You could make these dice look even more unique by changing a few details. For example, you could alter the material that they are made of.
Some dice are made of wood while others may be made of a transparent plastic. You could create these kinds of materials easily with some minor details and color changes.
What other materials could you recreate in this image?
Your Dice Drawing is Complete!
That will finish off this guide on how to draw dice, and we hope that it was very helpful for you in this drawing journey!
Breaking a drawing down into smaller, more manageable steps can make it so much more enjoyable as there is no frustration involved.
Then you can take it even further by adding some details and extra elements of your own to finish it off.
We went over a few ideas that you could try earlier in the guide, so be sure to have fun getting creative with these or some of your own ideas!
Don’t forget that we have many more drawing guides for you on our website. We upload more of these often, so please check in often to make sure you don’t miss out!
When you’re finished with your dice drawing, we hope that you will share it on our Facebook and Pinterest pages for us to enjoy!