When drawing human subjects, there are many challenges that present themselves. That’s why pretty much any drawing that involves the human body is dreaded by artists, and hair is certainly no exception!
It can get so frustrating drawing hair, leaving many to wonder just how they can learn how to draw boy’s hair.
It may seem impossible to get right, but like any drawing it can be made much easier when you know what to do and have some steps to follow.
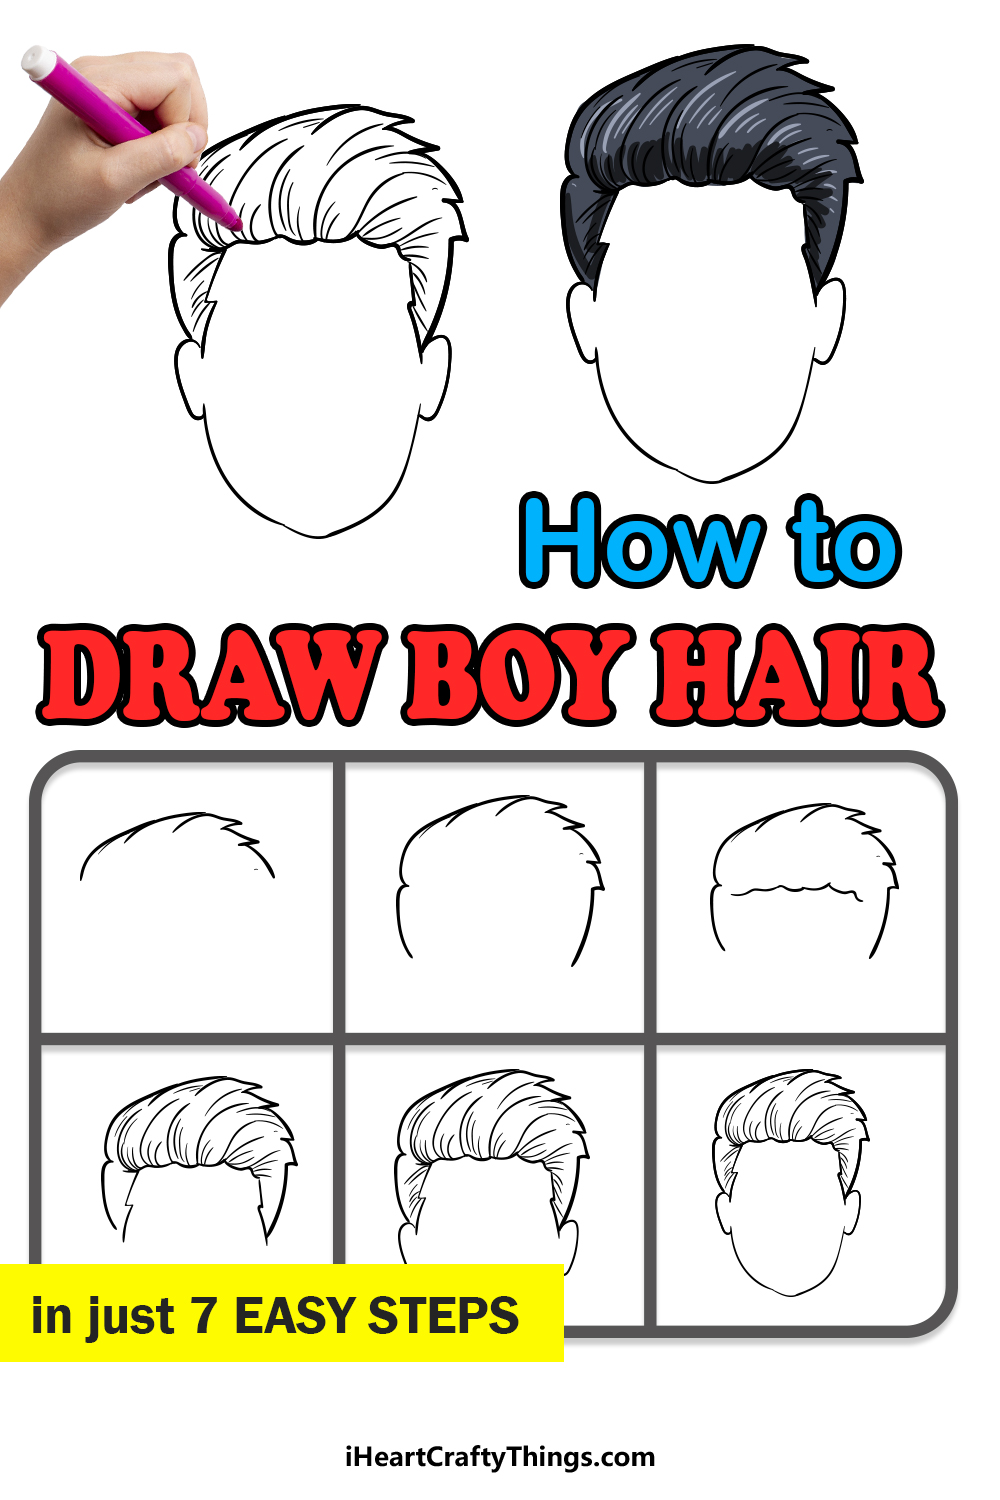
This step-by-step guide on how to draw boy’s hair will show you that it can be easier than you ever thought!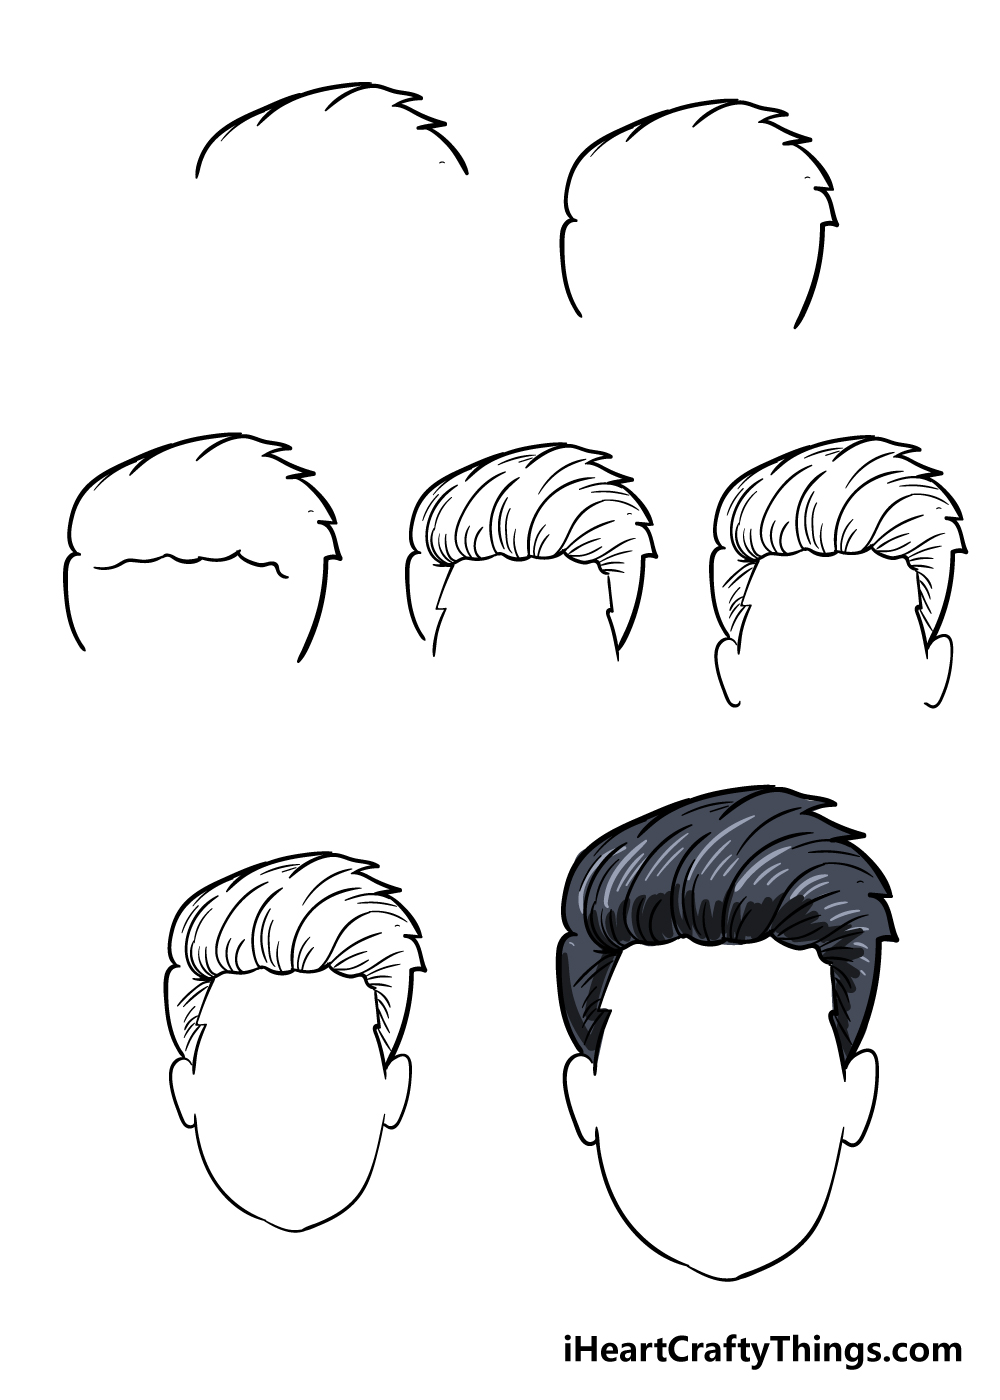
How to Draw Boy’s Hair – Let’s Get Started!
Step 1
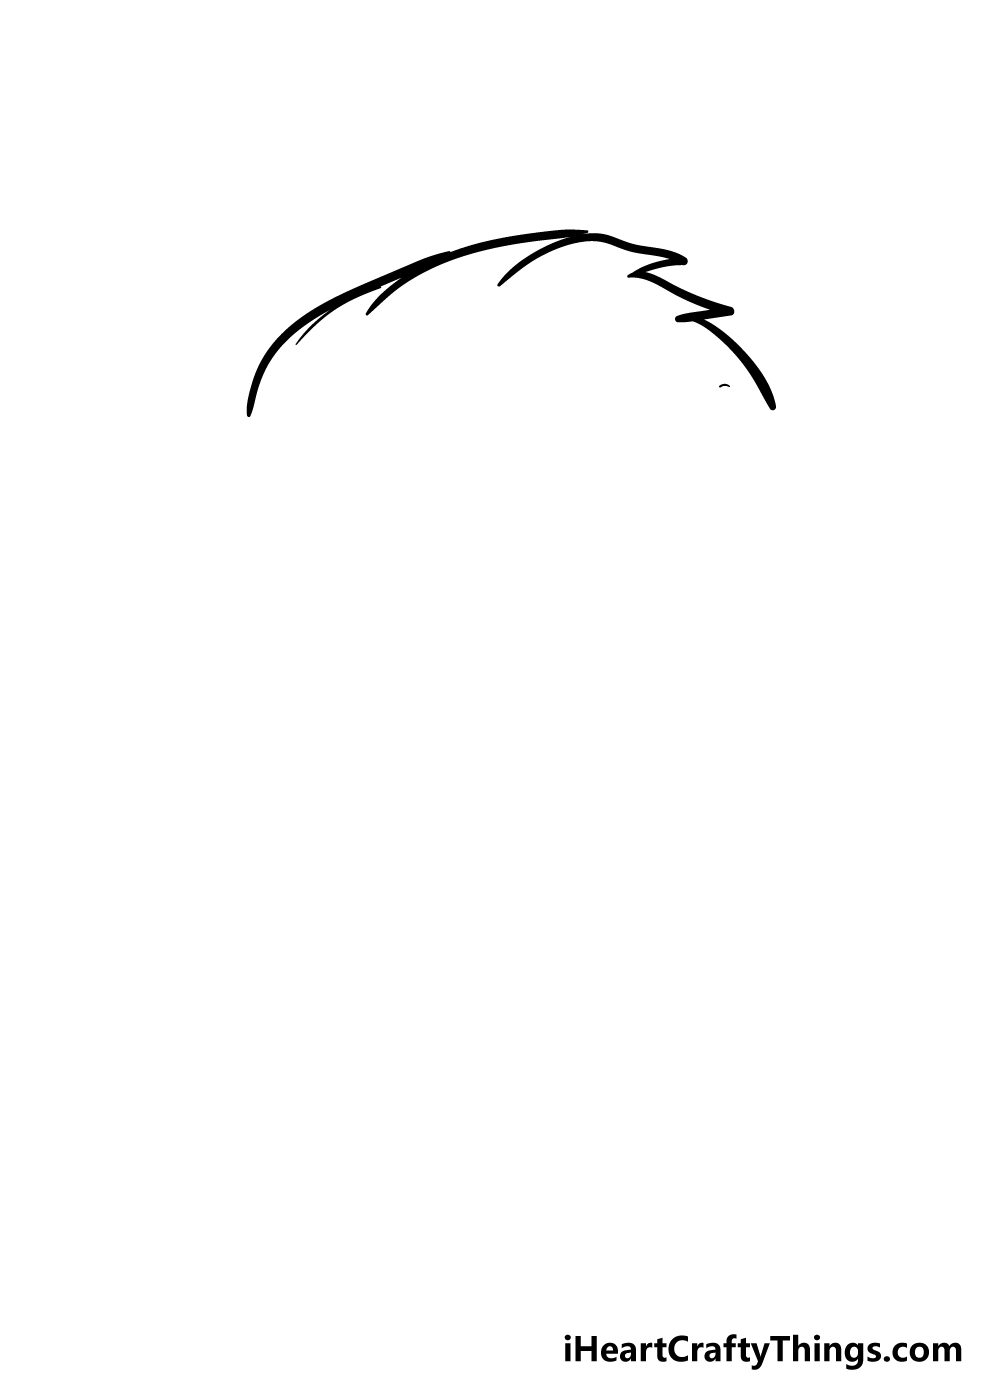
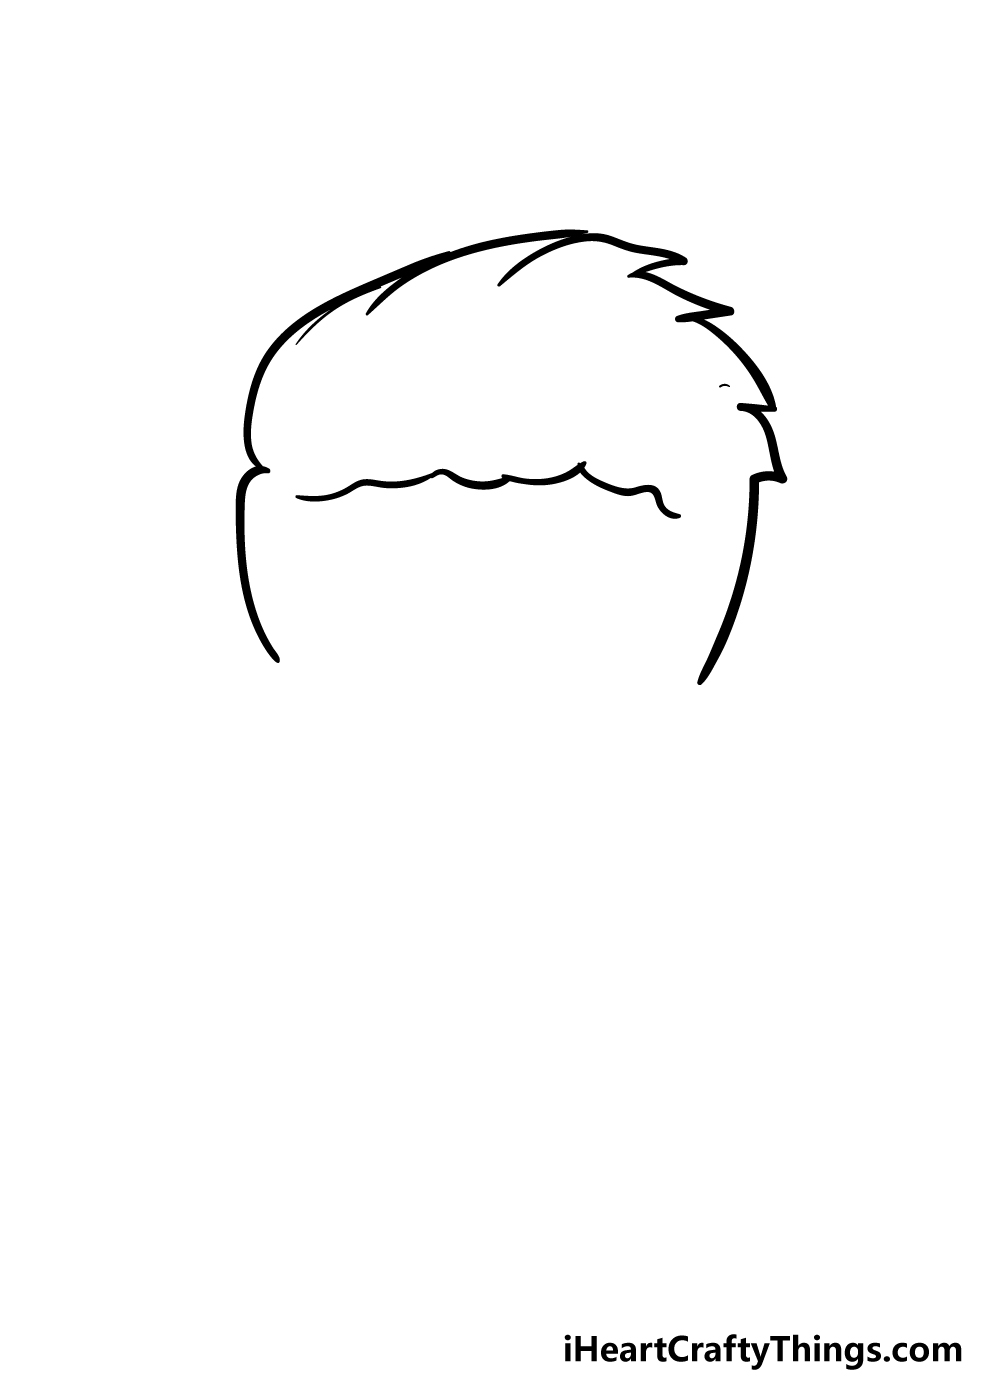
The first step of our guide on to draw boy’s hair will kick off with the top of the hairstyle. To do this, we shall start by drawing some jagged lines to form the curved top of the hairstyle.
To make this easier, you could use a pencil to draw a simple, curved line and then draw the jagged lines along it with your pen.
Once you have it looking like the reference image, then you’re ready for the next step of our guide!
Step 2 – Draw the sides of the hairstyle
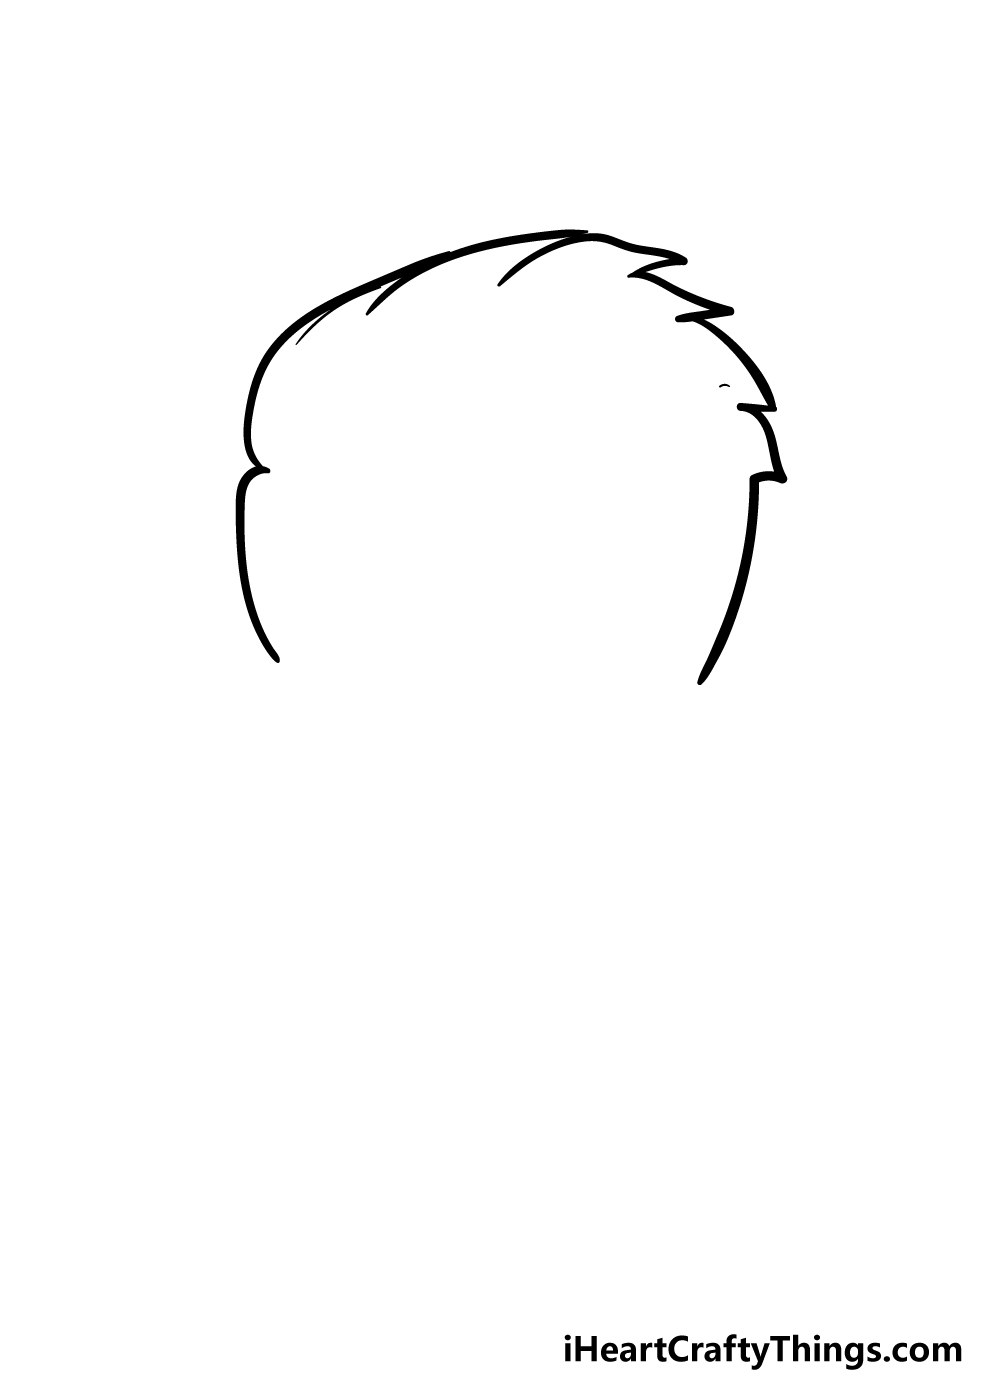
You will be adding to the top of the hairstyle that you drew for your boy’s hair drawing to create the sides in this step.
Each side of the hairstyle will be slightly curved as they come down from the top of the hair.
The two sides of the hair won’t be completely identical, as the side on the left has a rounded dip in it whereas the side on the right comes straight down from the top.
If that sounds a bit complicated, the reference picture will show you how it should look!
Step 3 – Start drawing the fringe of the hairstyle
In this step of our guide on how to draw boy’s hair, we will be drawing the fringe of the hairstyle. This fringe will go around the midway point of the hairstyle.
You can draw it with a series of small, curved lines to create the fringe, but make sure to leave a space between the end of the fringe and the sides of the hairstyle.
We will be filling that space in when we do the next step.
Step 4 – Start filling out the details of the hairstyle
When drawing convincing-looking hair, there are a few key attributes that contribute to getting the right look.
These include the shape of the hair, the way you use colors and how you draw lines inside the hairstyle.
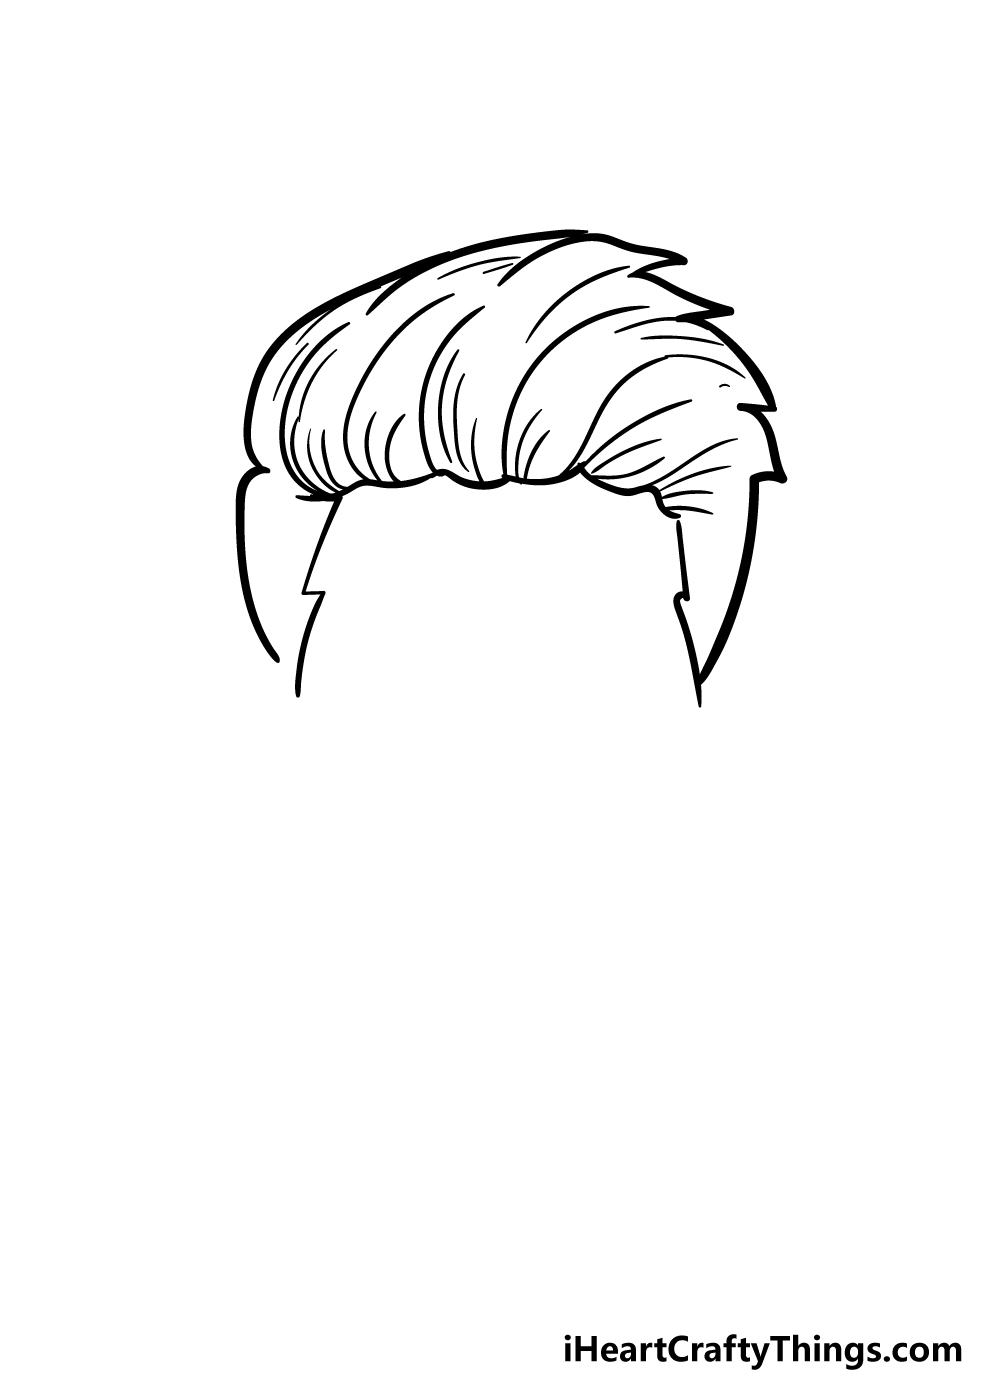
We will be concentrating on the last element in this part of your boy’s hair drawing. For this step, you will be drawing a series of slightly curved lines in the interior of the hairstyle.
This is a step where referring closely to the reference picture will be a big help! Some of the lines will come up from the line of the fringe, whereas others will come down from the top of the hairstyle.
The reference image will guide you in positioning these lines in a way that creates the flow of the hairstyle.
Finally, draw two jagged lines cooking down for the inner edges of the sides of the hair.
Step 5 – Now, draw some more details
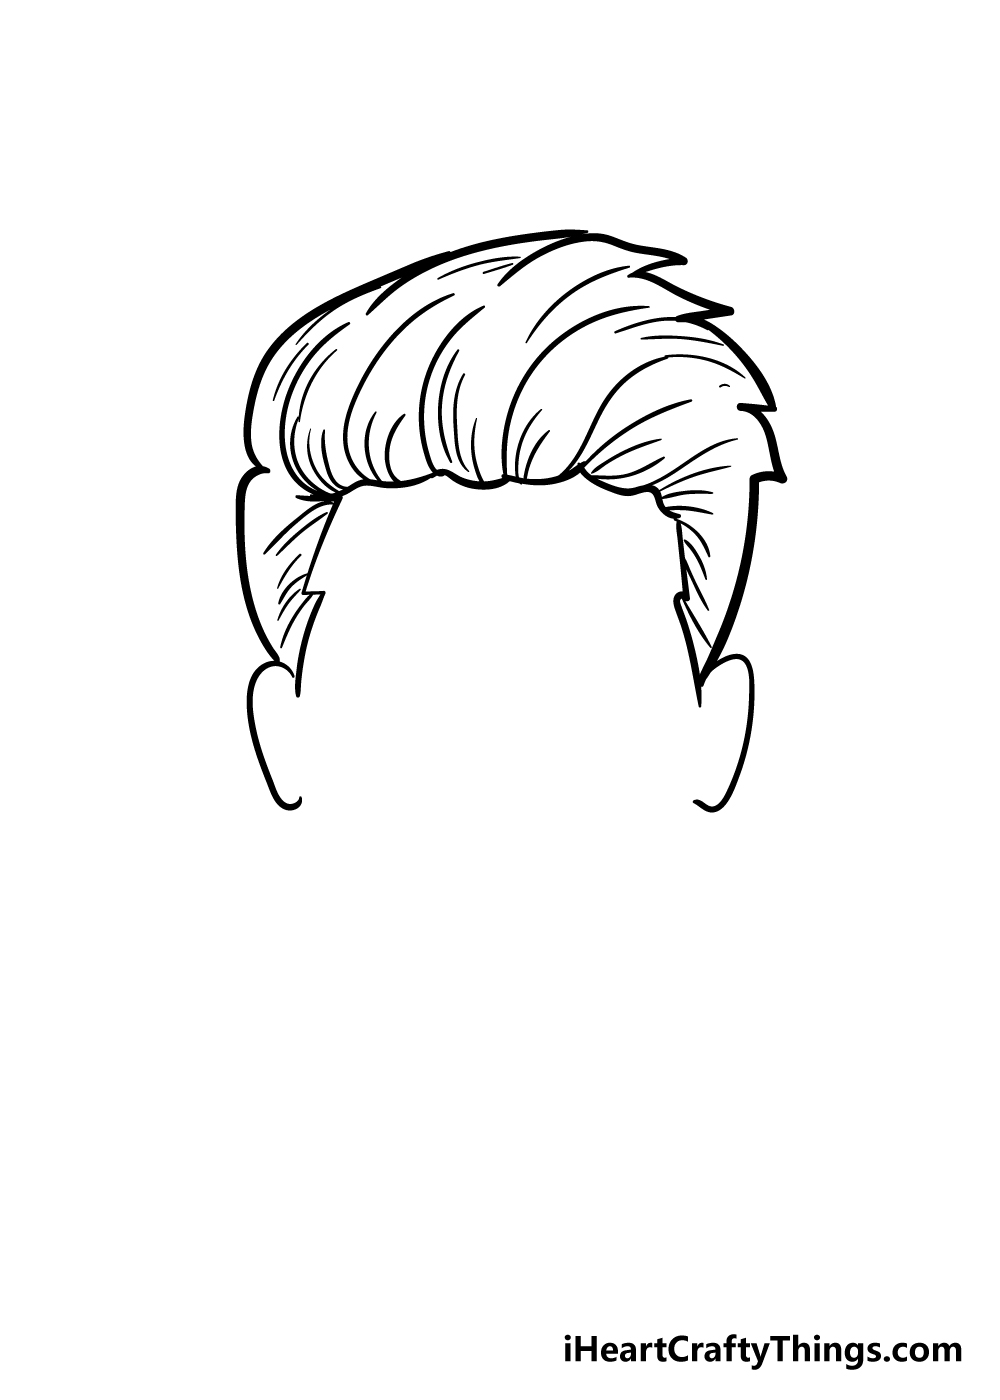
In this fifth step, we will be adding more to the sides of the hairstyle. First, draw some more straight lines along the side portions of the hairstyle.
Then, you can draw some rounded ear shapes underneath the sides. It’s as simple as that, and now it’s on to the next step!
Step 6 – Draw the chin of your hairstyle
Before we will be moving on to the final coloring step of this guide on how to draw boy’s hair, we have a few final touches to add.
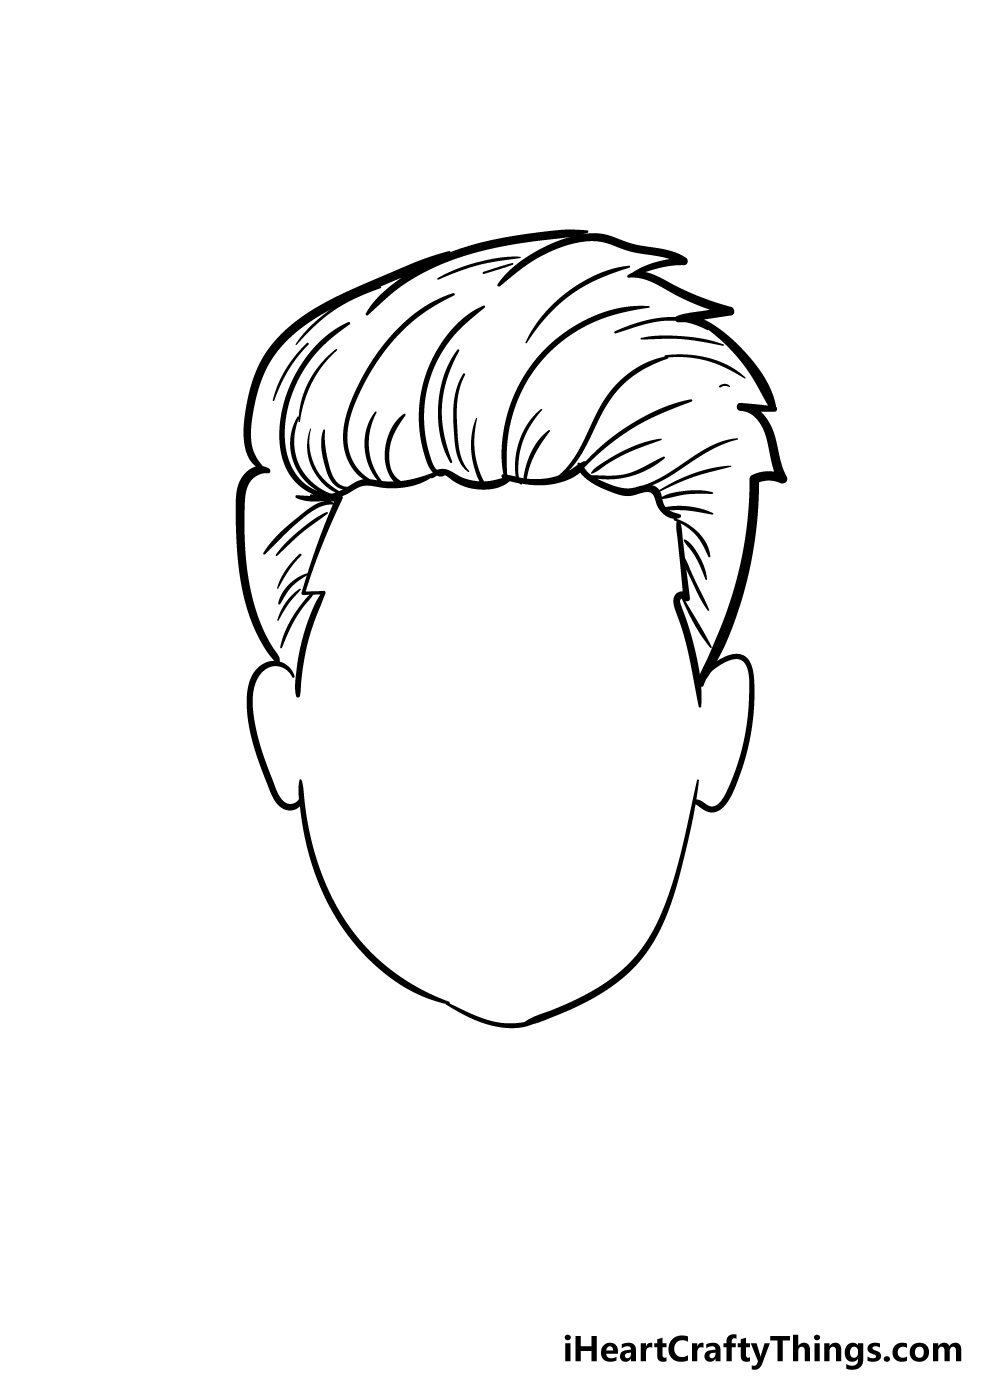
The main thing is to use a curved and rounded line for the jaw and chin of the face that is below the hairstyle.
Before you move on, be sure to add any extra details that you would like for your drawing!
You could draw a face to go with the hairstyle if you’re feeling extra creative, or even create a beautiful background for your drawing. We can’t wait to see what you do!
Step 7 – Finish off your boy’s hair drawing with some color
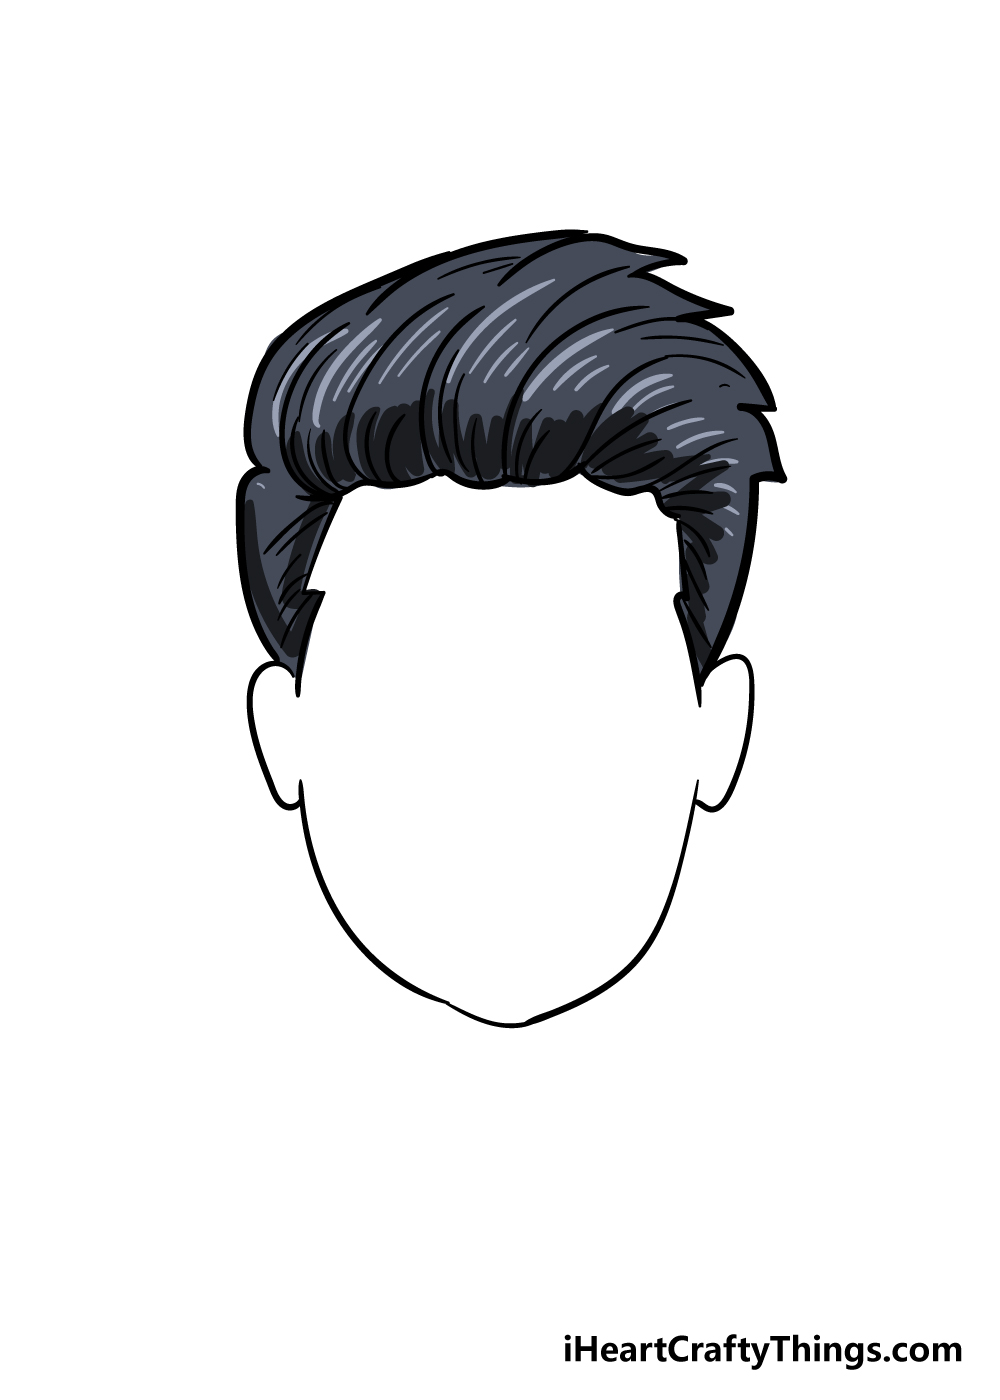
We mentioned earlier that color is one of the ways that you can create more realistic-looking hair, and that’s why we shall implement it in this part of your boy’s hair drawing!
We used blacks and greys for our example image, but you should feel free to use any colors that you wish!
While you can change up the colors to be anything that you want, the reference picture will guide you in how you can use the colors to create highlights.
You can see how we used different shades of black with grey lines mixed in to create this highlight effect.
No matter which colors you end up using, you can use this technique for your own drawing.
Try to incorporate different shades of your color scheme, and the reference picture will guide you in where to put the darker and lighter shades. What colors will you pick for your image?
Bonus: Use Real People As Inspiration For This Boy’s Hair Drawing
You have finished this guide on how to draw boy’s hair, and we have a few more tips after this that you can try out. Before that, we thought it would be fun to look at some ways you could incorporate real people to your drawing.
As you will see in the reference image, the face has been left blank, and this opens up all sorts of possibilities. You could use a simple cartoon face for the drawing, or you could use a real person.
It could be fun to start with someone you know, perhaps a friend or a family member. If they have similar hair to the drawing, then that works really well.
Otherwise, you can change the drawing to match their hairstyle. When turning a real person into a cartoon, you can look for identifying features.
Maybe that person wears a specific type of glasses or has a distinctively shaped mouth. It’s good to look for and portray these unique details, as you may find it difficult to make the character look like the real person otherwise.
You don’t necessarily have to make the character look like someone you know, however. Maybe you have a favorite actor or singer that you would like to turn into a cartoon.
Or, you could also use an existing cartoon character and then use them as inspiration for your drawing. If you can’t decide, then you could make a few different versions of the drawing.
It could be fun to have a whole series of drawings showing different faces and people. The question now is who would you choose if you were to turn someone into a cartoon version of themselves?
Here’s how you can make your boy’s hair drawing even better…
Create a stylish picture as we show you how to make your boy’s hair drawing even greater!
Now that you have mastered this boy’s hair sketch after finishing the guide, you could create all kinds of different hairstyles.
This could be done by following the steps of our guide and then changing a few details.
If you were to do this, you could look up a few different hairstyles online and use them to help you as you draw. Do you have a favorite hairstyle you could recreate?
Hairstyles will often have highlights and other fancy additions, and you could add these as well. This could be done whether you chose to keep the hairstyle as is or change it as we suggested.
Adding details such as these also allows for you to incorporate some great color effects and details to enhance the picture even further. What fancy details do you think you would like to add to your drawing of boy’s hair?
We kept the focus of this boy’s hair drawing on the hair itself while keeping the face blank. While that helped to make the drawing easier, you could also add some details to the facial region.
You would have lots of options for how you could do this! It could be modeled on your own face, or you could use the face of a friend, family member or even a celebrity.
The face could be drawn in any style you like, whether it’s realistic or more cartoony, and it all depends on your preference!
Once you have chosen whether you would like to incorporate these changes, you could finish it all off with a background. If you created a specific character, then you could make the background fit whatever they look like.
Also, if you chose a specific kind of style for the rest of the drawing then you could draw the background to match it.
Do you have any ideas for a background setting that would suit this boy’s hair sketch you have created?
Your Boy’s Hair Drawing is Complete!
That brings us to the end of this guide on how to draw boy’s hair! As we mentioned at the beginning, drawing something like hair can be tough even for seasoned artists.
That means you should be very proud that you completed this guide to end up with an amazing drawing! We hope that this guide showed you that it can be much easier if you follow the steps and take it slow.
Now that you have mastered this hairstyle, you could use this guide to create new hairstyles with this one as a base!
You can also really make this drawing your own by incorporating your favorite colors and art mediums into the mix.
Please be sure to check out our website where we have tons of awesome drawing guides for you to enjoy! We upload new ones all the time, so make sure to look often for new tutorials.
We would love to see your finished boy’s hair drawing, so we hope you will share it on our Facebook and Pinterest pages so we can see how incredible your picture is!