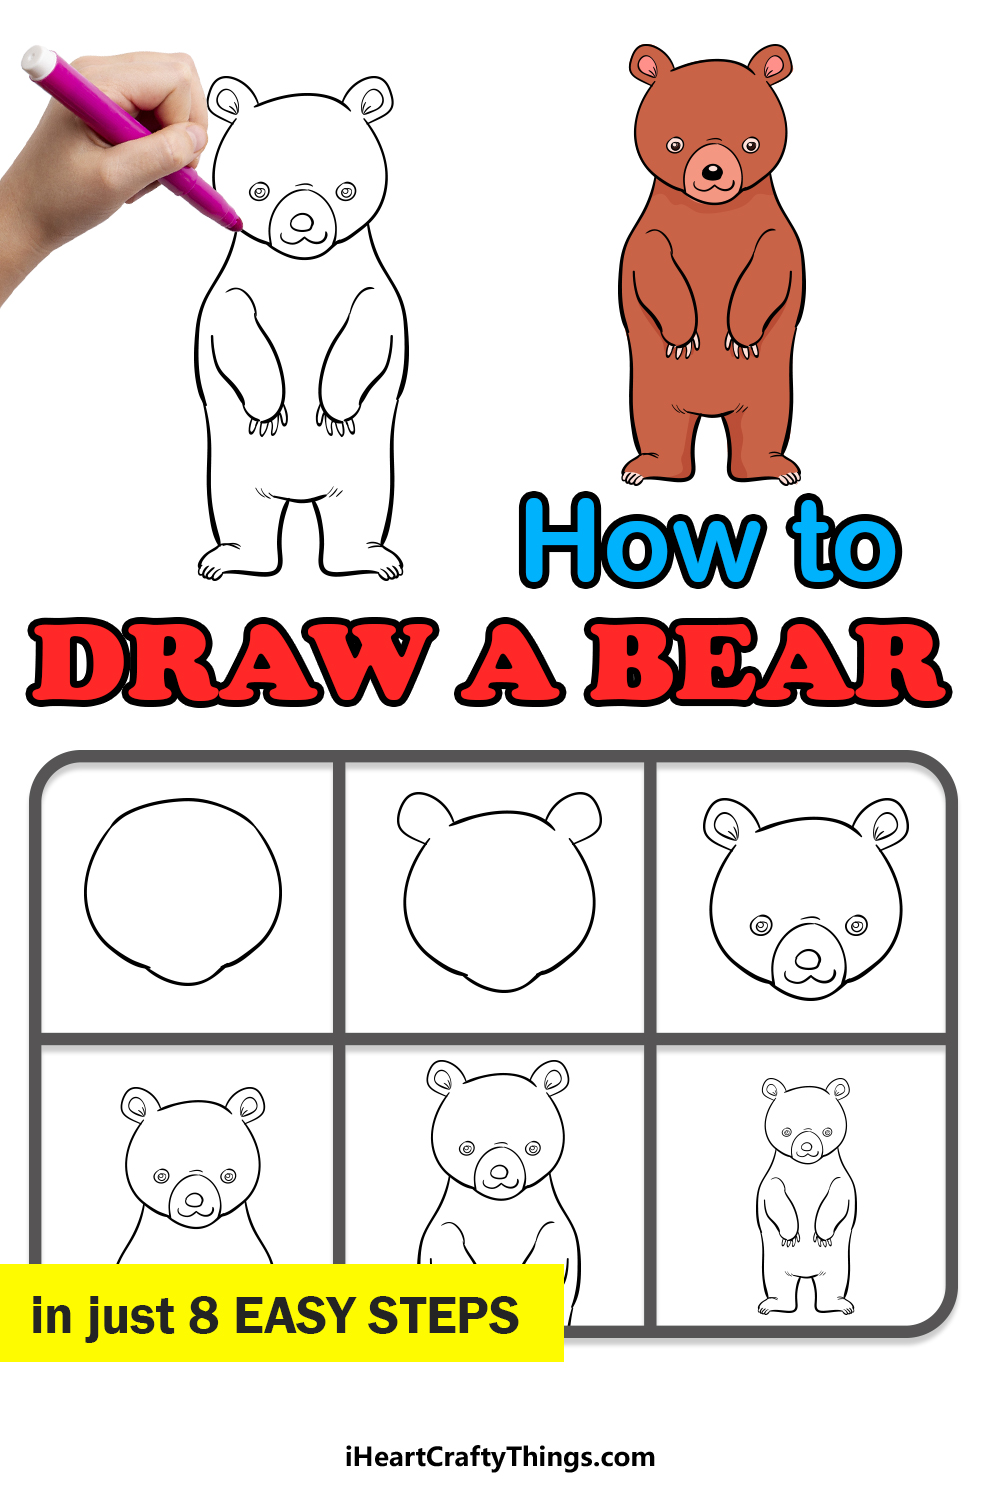
This guide on how to draw a bear is perfect for kids and artists of all ages! Follow along to create a cartoon bear that you can show off to everyone.
If you’ve ever struggled to draw a bear before, then chances are that you didn’t have the right steps to follow. That’s because it’s actually quite simple when you break it down.
Lots of people love bears, and this cartoon bear character will be great for any of those people! I’ve made the steps of drawing a bear easy to follow, so if you take it slowly then you will easily be able to replicate the design.
Once you have finished it, you can also add your own ideas and details such as a background and perhaps a tasty fish for the bear to feed on. The creativity you can use has no limits, and it all starts with learning the basics of making this cute character.
Watch How You Can Easily Make Your Own Bear Drawing!
How to Draw A Bear – Let’s get Started!
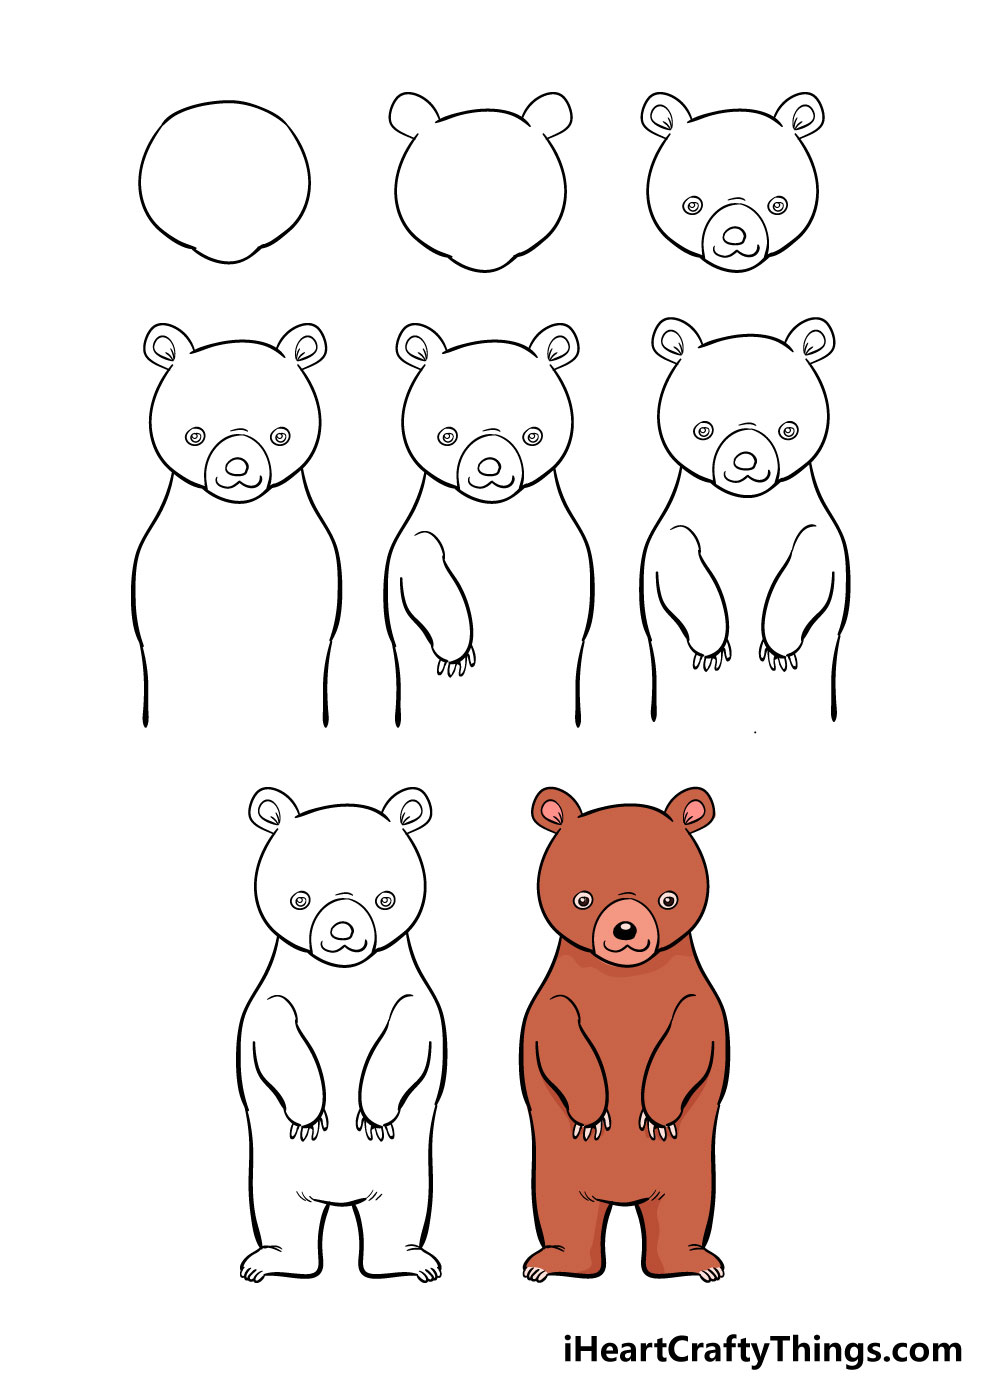
Step 1
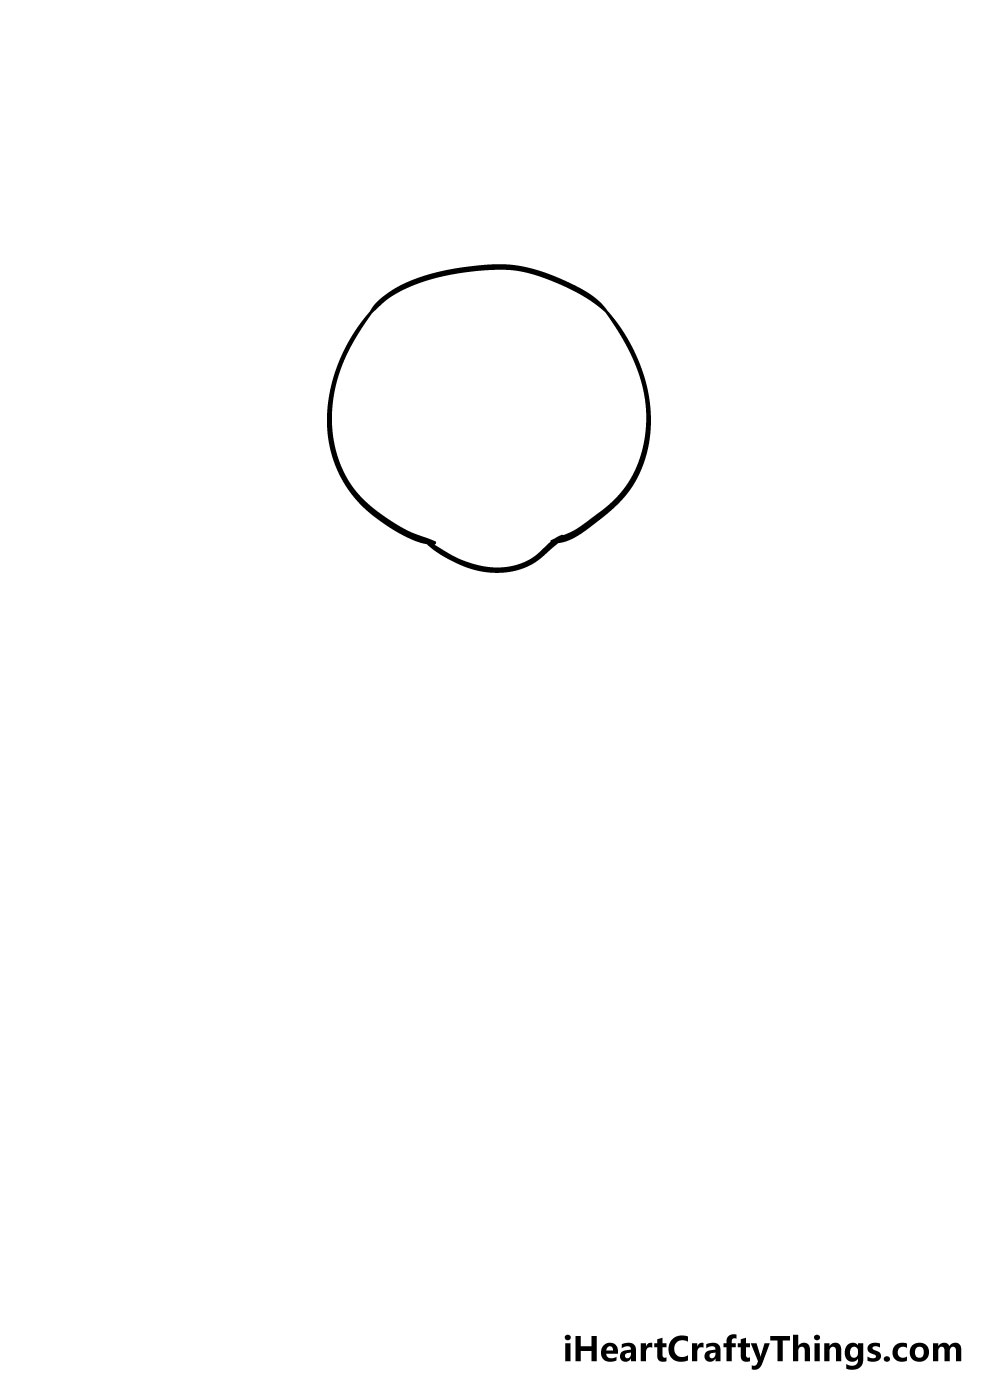
In the first step of our guide on how to draw a bear, we will start off by drawing in a guiding shape in pencil. This shape looks a bit like an oval with a bulge at the bottom.
We will be using a pencil for this step, as we will be adding some elements to this shape in the next step.
Step 2 – Next, draw in the ears
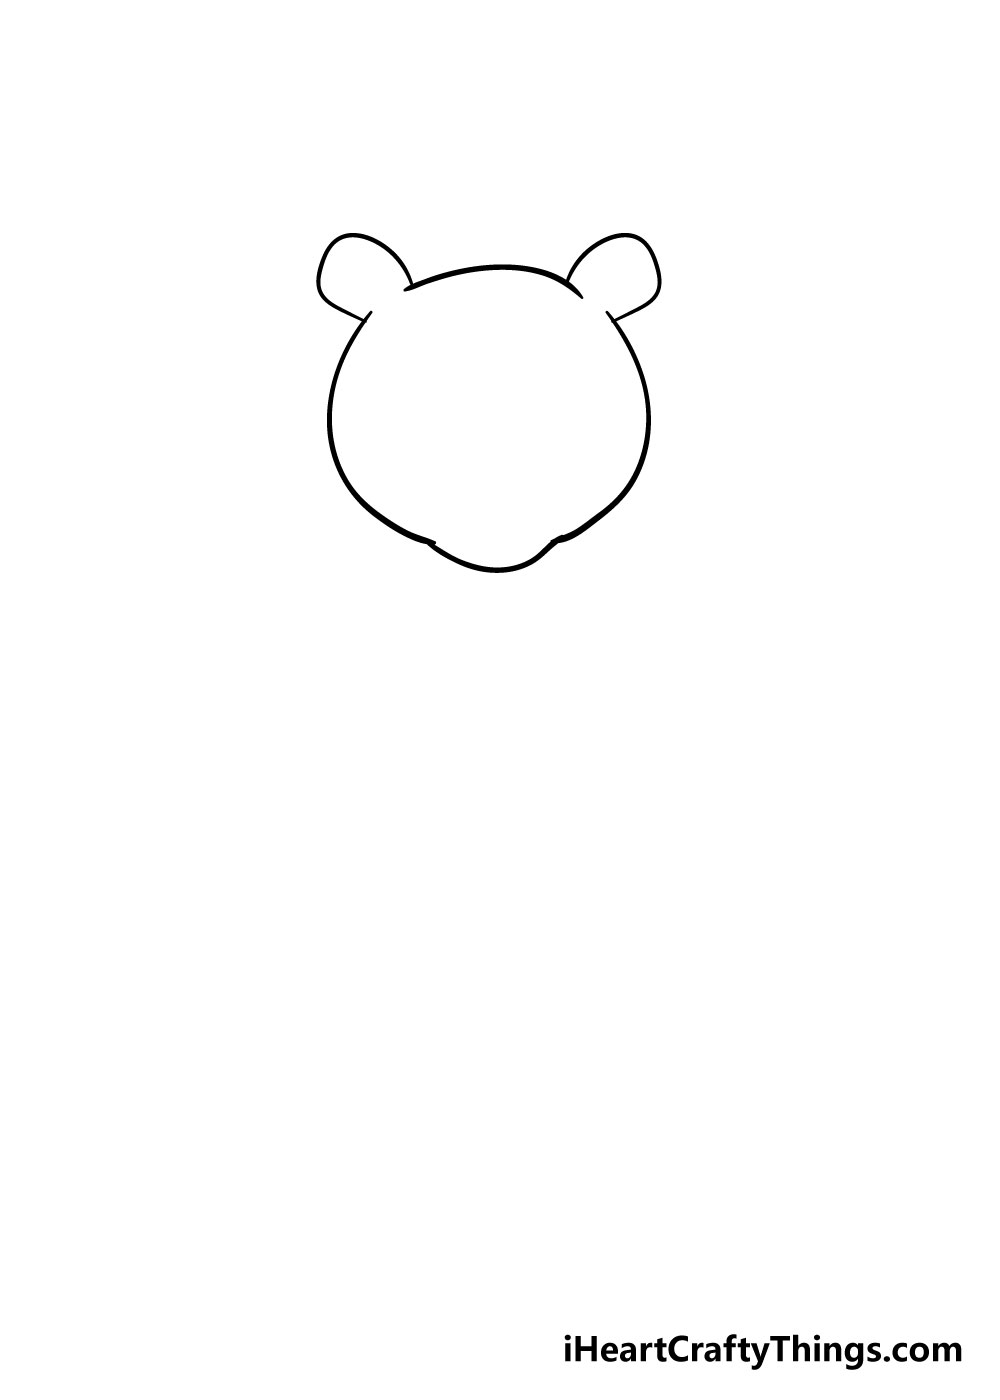
For this next step, you can add in some ears to the top of the head shape as you can see in the image.
Once you’re happy with how it looks, you can then go over the pencil in pen and erase your pencil guides so that you’re left with an image that looks like the one in the image.
Step 3 – Now, draw in the facial details
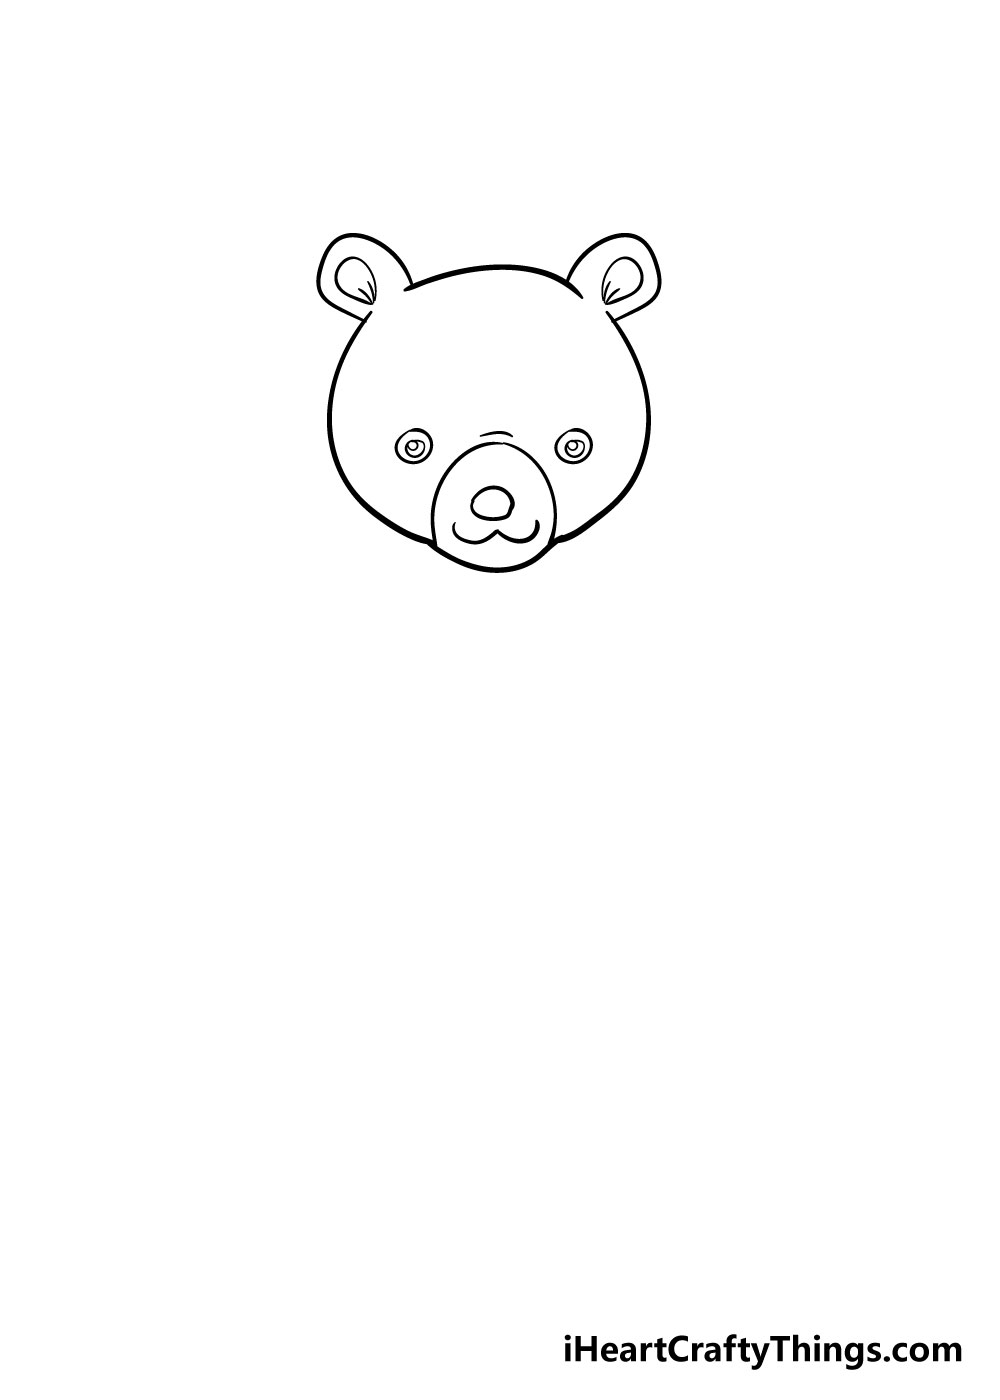
Now that the head of your bear drawing is complete, you can start to draw in some facial details.
For this step, we will be using circular shapes and curved lines to draw in the eyes, nose, mouth and ear details of your bear.
You could also change the facial details a bit if you want to give your bear some different facial expressions!
There are a lot of fun ways to change it up a bit, so don’t be afraid to change a few details.
Step 4 – Draw in the bear’s body
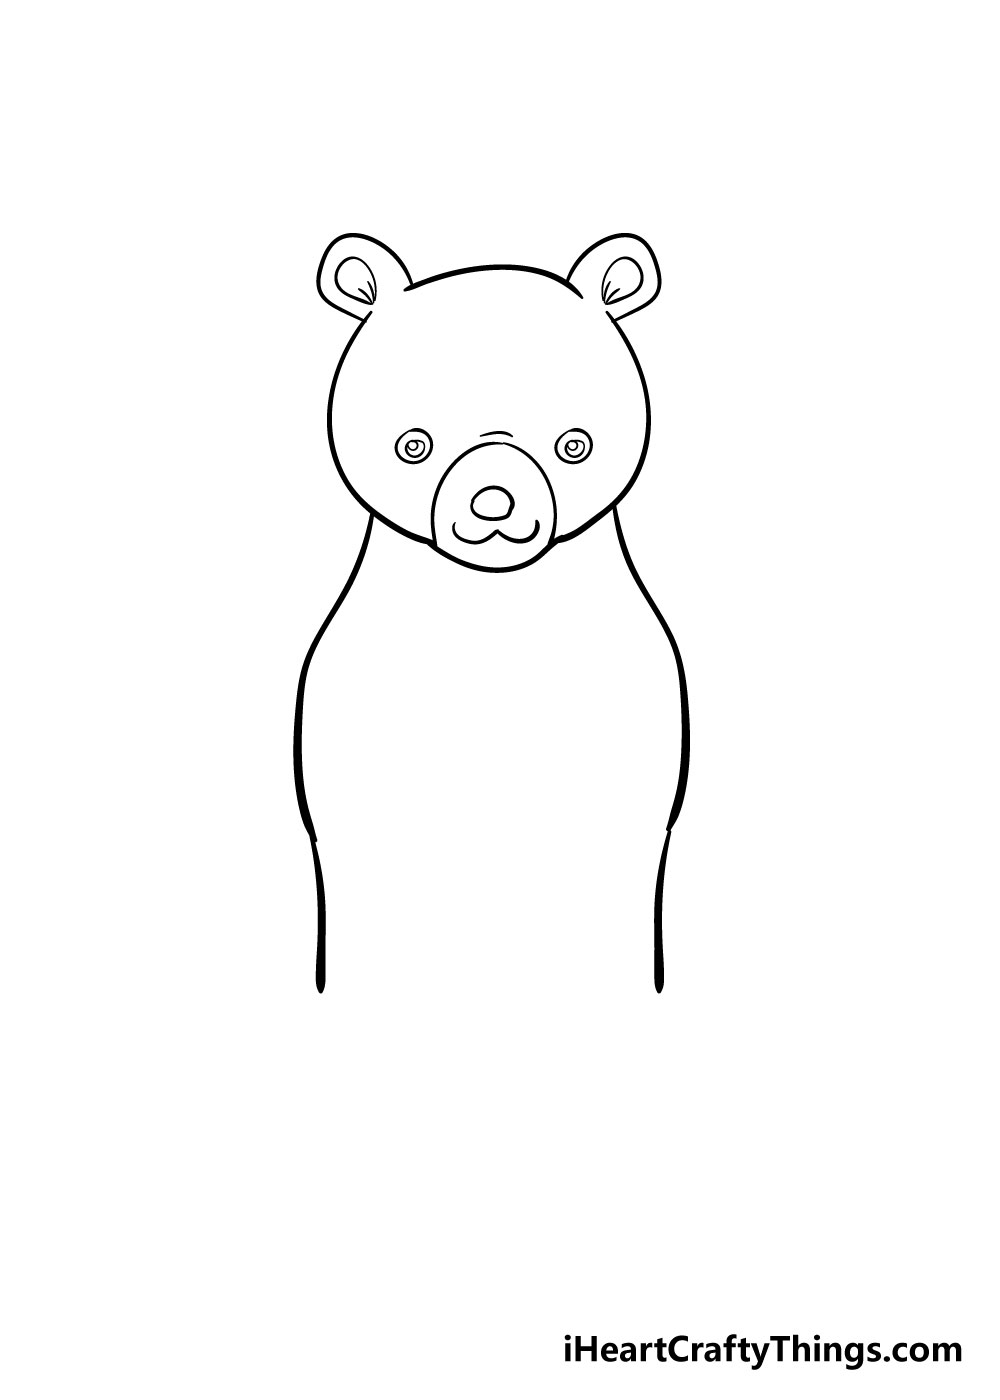
The head of your bear drawing is finished now, so we can begin on the bear’s body in this next step.
To begin with, you can simply draw in two curved lines as they appear in the image to make the sides of the body.
The reference picture will give you a guide on how to curve these lines. They should extend a bit further near the top, as these will form the shoulder of your bear once we add in some arms.
Step 5 – Now, we add in the first arm
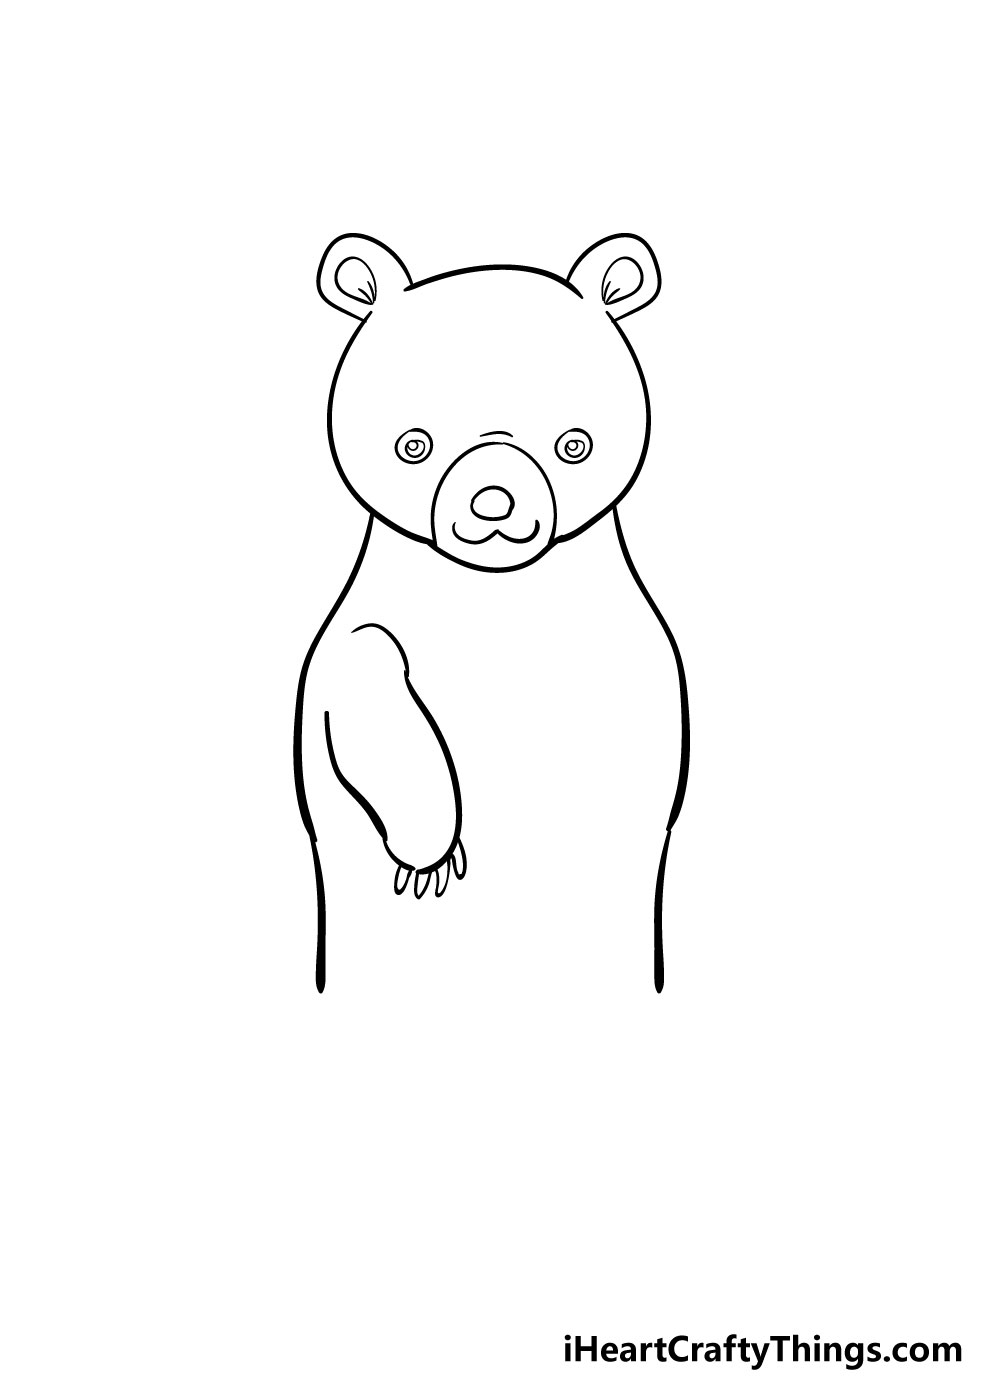
Now that we have the outline of the body done for your bear drawing, you can draw in the first arm.
To draw this in, you can add in a nice long line that curves in on itself as it appears in the picture.
Once you’ve drawn in the arm shape, don’t forget to add some sharp claws onto it!
Step 6 – Next, draw in the other arm
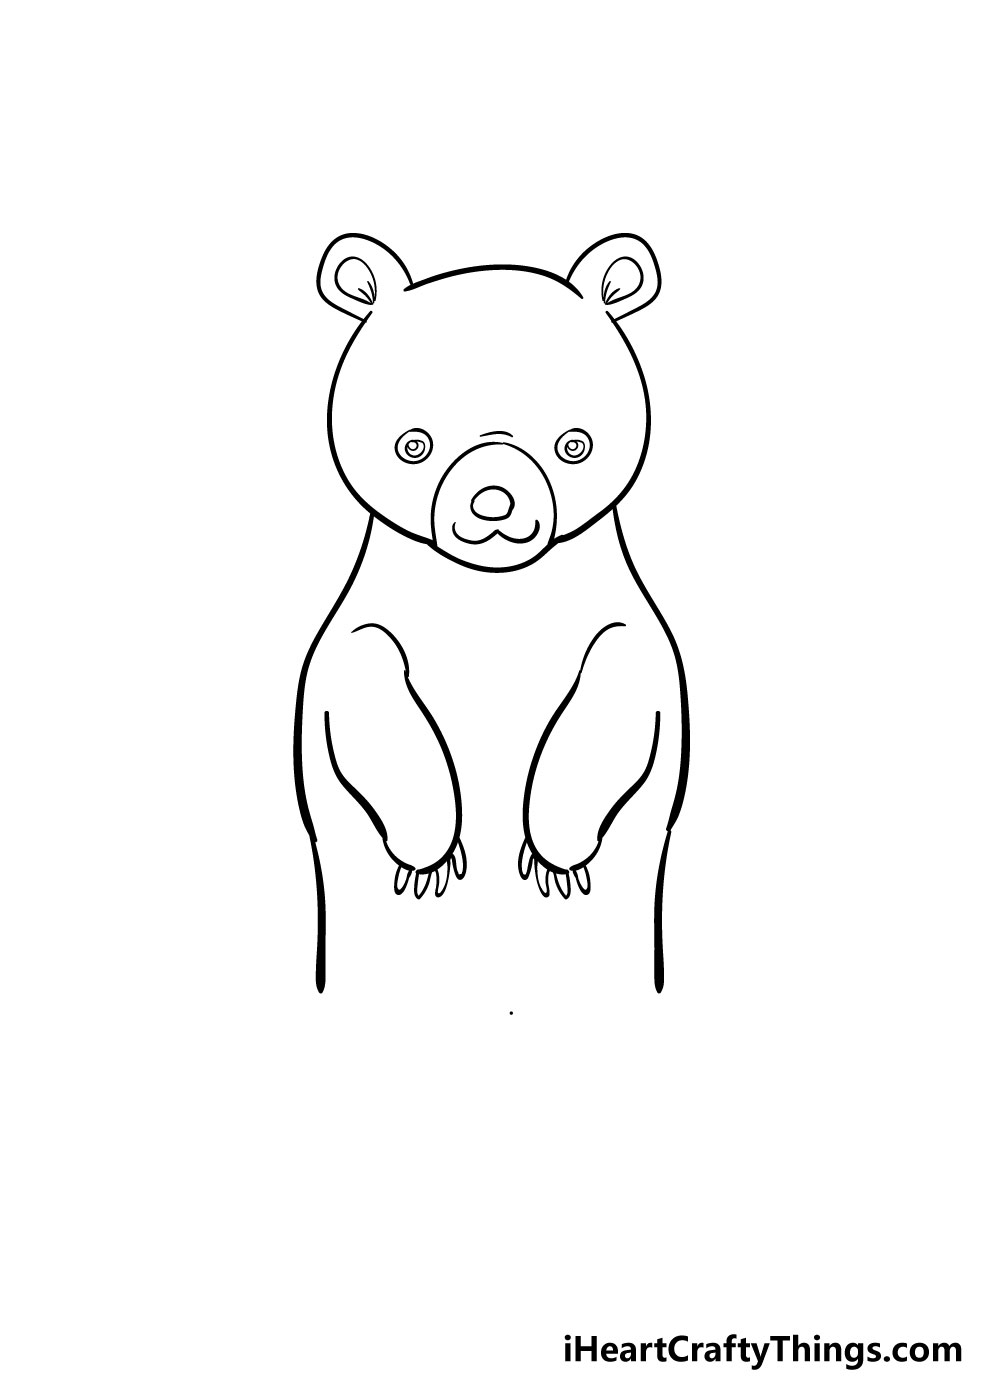
Once you’ve drawn in the other arm of your bear drawing, all you need to do is draw in the arm on the right-hand side as a mirror image of the arm you drew in step 5.
This is another step where you could change around the positions of the arms, for example you could have it so that your bear is waving if you want to!
Step 7 – Draw in the legs of your bear
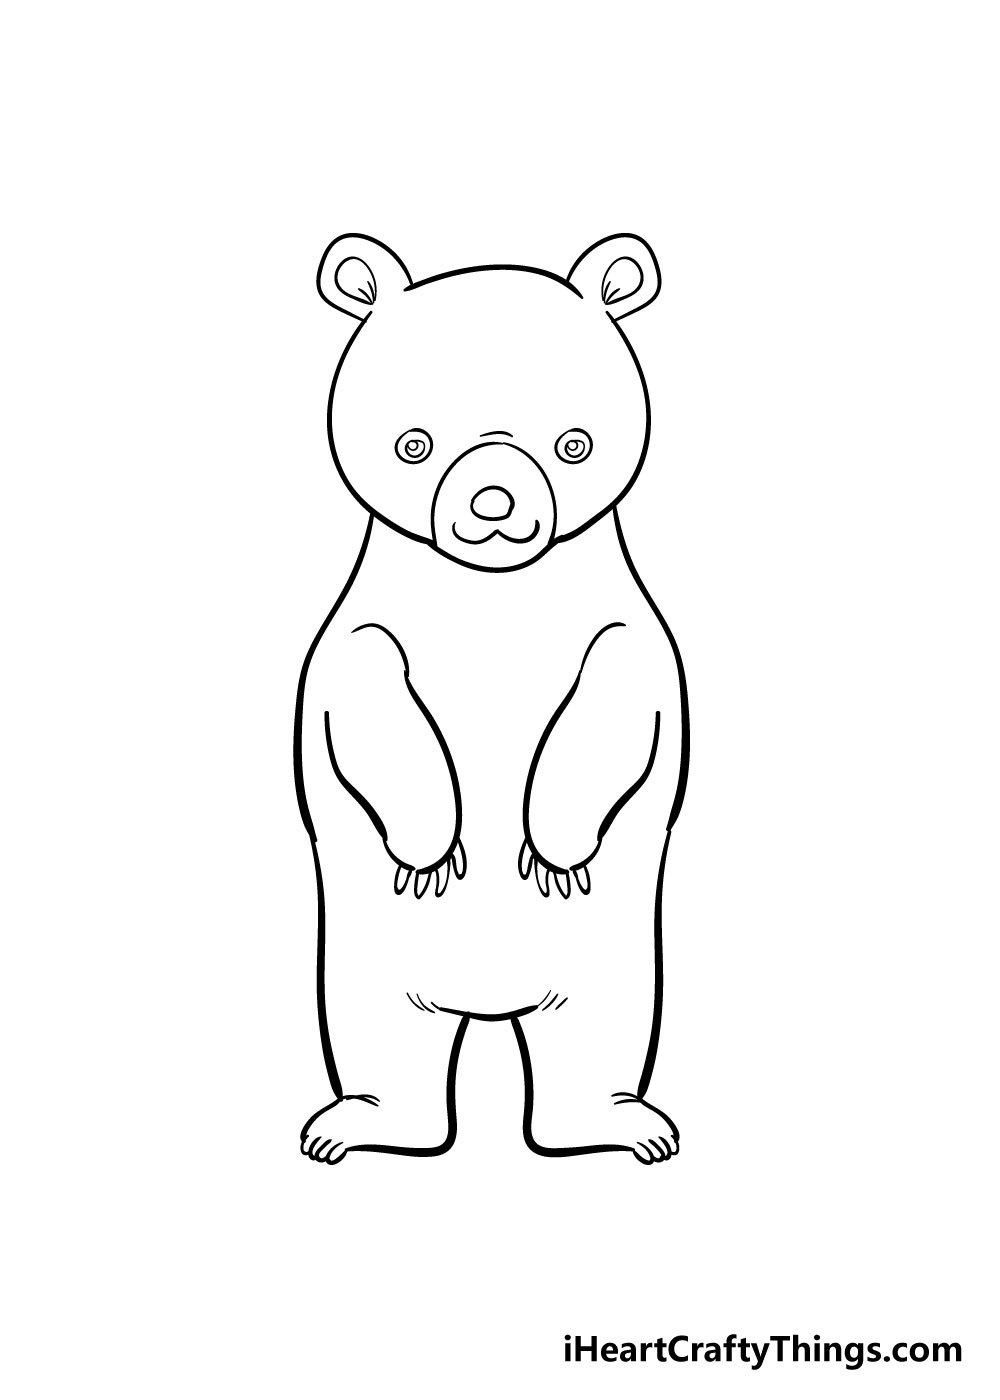
Your drawing is almost finished at this point, and the last thing that needs to be drawn in is some legs for your bear drawing.
To add in some legs, we will be using a combination of both curved and straighter lines.
I would recommend starting on the left side, drawing down from the body, curling into the foot and then finishing off that leg before drawing the other one in a mirror image.
With that done, you have learned how to draw a bear! Your drawing just needs one more thing, and we’ll cover it in the final step.
Step 8 – Now finish it off with some color
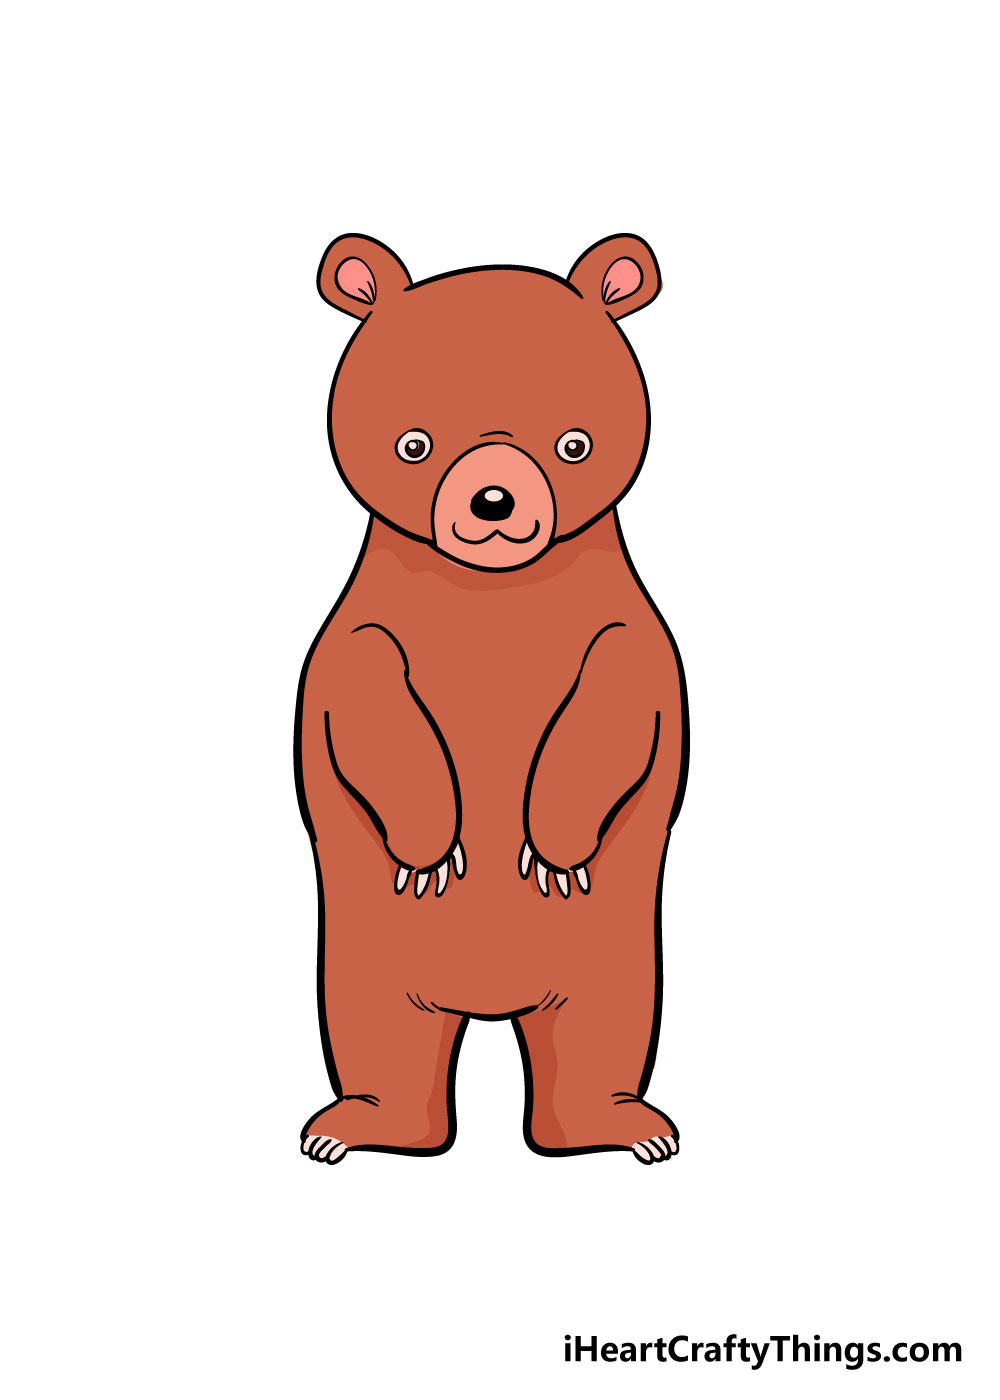
Now that you have finished drawing your bear, there’s one more really fun step to do! Your bear drawing needs some color now, and this is where you can really let your creativity run free.
We’ve shown you one way that you can color in your drawing, so you could use that as inspiration or use your own favorite colors!
There’s a lot of fun to be had with how you color in your drawing, as there are no wrong answers!
You can also try to experiment with different art mediums to get some amazing color looks! Using mediums like paints, watercolors, colored pens and pencils can be a great ay to add different color intensities to your picture.
We can’t wait to see how you finish off your bear drawing!
Here’s how you can make your bear drawing even better…
Make your adorable bear drawing even better with these fun ideas!
We went for a standard bear design with this bear sketch, but there are many different kinds you could turn it into. Bears come in many different shapes and sizes, and many times they are specifically suited to their environment.
One example would be how polar bears have thick white fur for their snowy home. You could easily change this bear to look like a polar bear if you wanted to!
What other bear species would you potentially change this one into?
We mentioned how bears can be found in many different kinds of environments. That means you could also make this bear drawing even better by adding some kind of background!
Going with the polar bear suggestion from before, you could add a snowy wonderland behind the bear. Or, it could be in a jungle or maybe on a lush mountain.
The place you use for the background doesn’t even really have to be realistic if you’d prefer a more cartoony setting!
Another way to improve this drawing of a bear even more would be by adding some friends for it. You could draw some more bears, and that would be easier now that you know how to do it.
If you’re feeling extra creative, then you could even design some different animal friends for the bear to hang out with. What kinds of animals can you think of that you could add to this picture?
Our final tip will be talking about how you could add some colors to this page. There are many different art mediums and techniques you can use, and we think you should try and use ones you’ve never tried before!
Maybe you want some softer colors, in which case you’ll want to go for some watercolors or colored pencils. Or, you could get some brighter, more vibrant tones with colored pens and markers.
It’s all up to you, and these are just a few of the mediums you could use to make the colors look exactly as you like!
Your Bear Drawing is Complete!
We really hope that this guide on how to draw a bear in 8 easy steps was helpful and fun for you to use!
When you set out to learn how to draw a bear, it was probably quite an intimidating task to take on.
With this guide, our aim was to try and make it fun and easy for you to learn.
Drawing something new is always easier when you can break it down into more manageable sections that you can take one at a time!
Now that you’ve learned how to draw a bear, you can have a lot of fun personalizing your drawing with the colors and mediums you choose for it.
You can further add more personality to your drawing by adding in a nice background for it! The sky is the limit, and we’re sure to see some incredibly creative designs come out from this guide.
We will be adding in more great step-by-step drawing guides to our site often, so be sure to check in frequently to make sure you never miss out on the fun!
Once you’ve finished drawing and coloring your bear drawings, we hope that you’ll share them on our Facebook and Pinterest pages for us to enjoy!
We always love to see your wonderful art creations, and e can’t wait to see your awesome bear drawings.
Here Is A Cartoon Bear Drawing To Inspire You!

In order to give you some ideas for your own cartoon bear sketch, we had our amazing artist Amanda draw this example for you. This bear is so adorable and looks very friendly as well!
The design of this bear is deceptively simple, and you could add even more details if you wanted to. For example, Amanda drew a pretty simple background setting with some rocks.
If you wanted to, you could build up a more detailed background scene with these details as your base. Of course, you may also want to go for a totally unique background as well!
This picture is meant to inspire you, so you can make your own version look just like this or you can make it as unique as you like. You get to decide on what it looks like, so what will you choose?