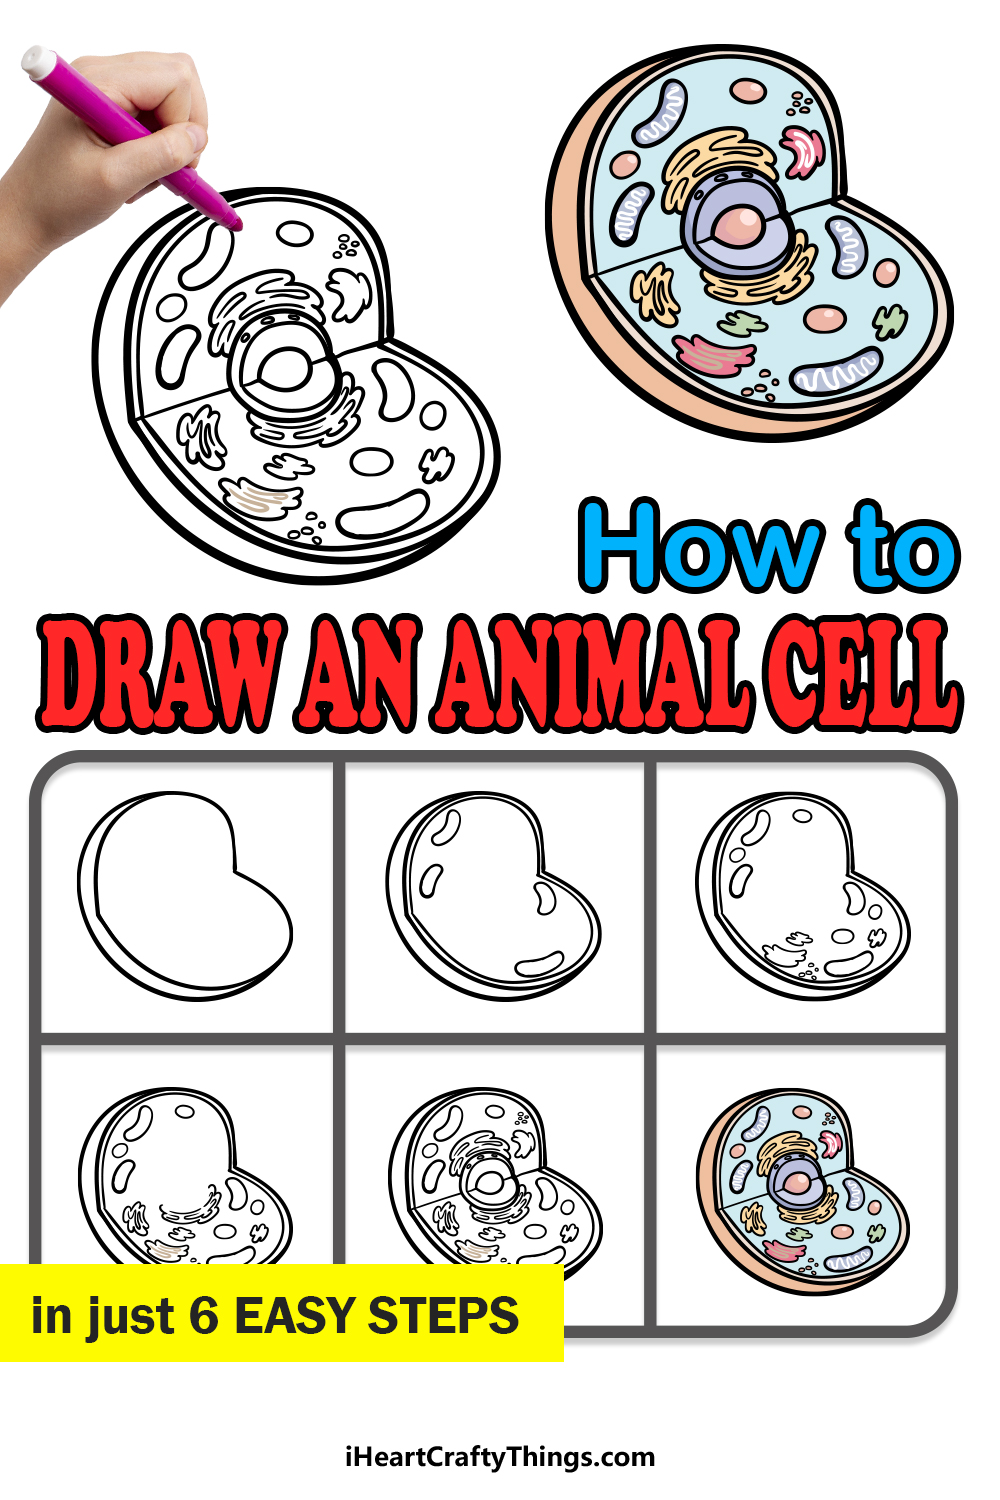
Cells make up all living beings, from the smallest bacteria to the largest animals to walk the planet. They’re often nicknamed the building blocks of life, and they can come in a few variations.
Plant and animal cells are the most prevalent variant, and as their names suggest they make up all organic plant and animal life. We will be focusing on the animal variant in this guide on how to draw an animal cell.
By the end of this helpful tutorial, you will be able to accurately draw a cross-section of this amazing structure.
We hope that you have a fun and easy time as you work on this step-by-step guide on how to draw an animal cell in just 6 easy steps!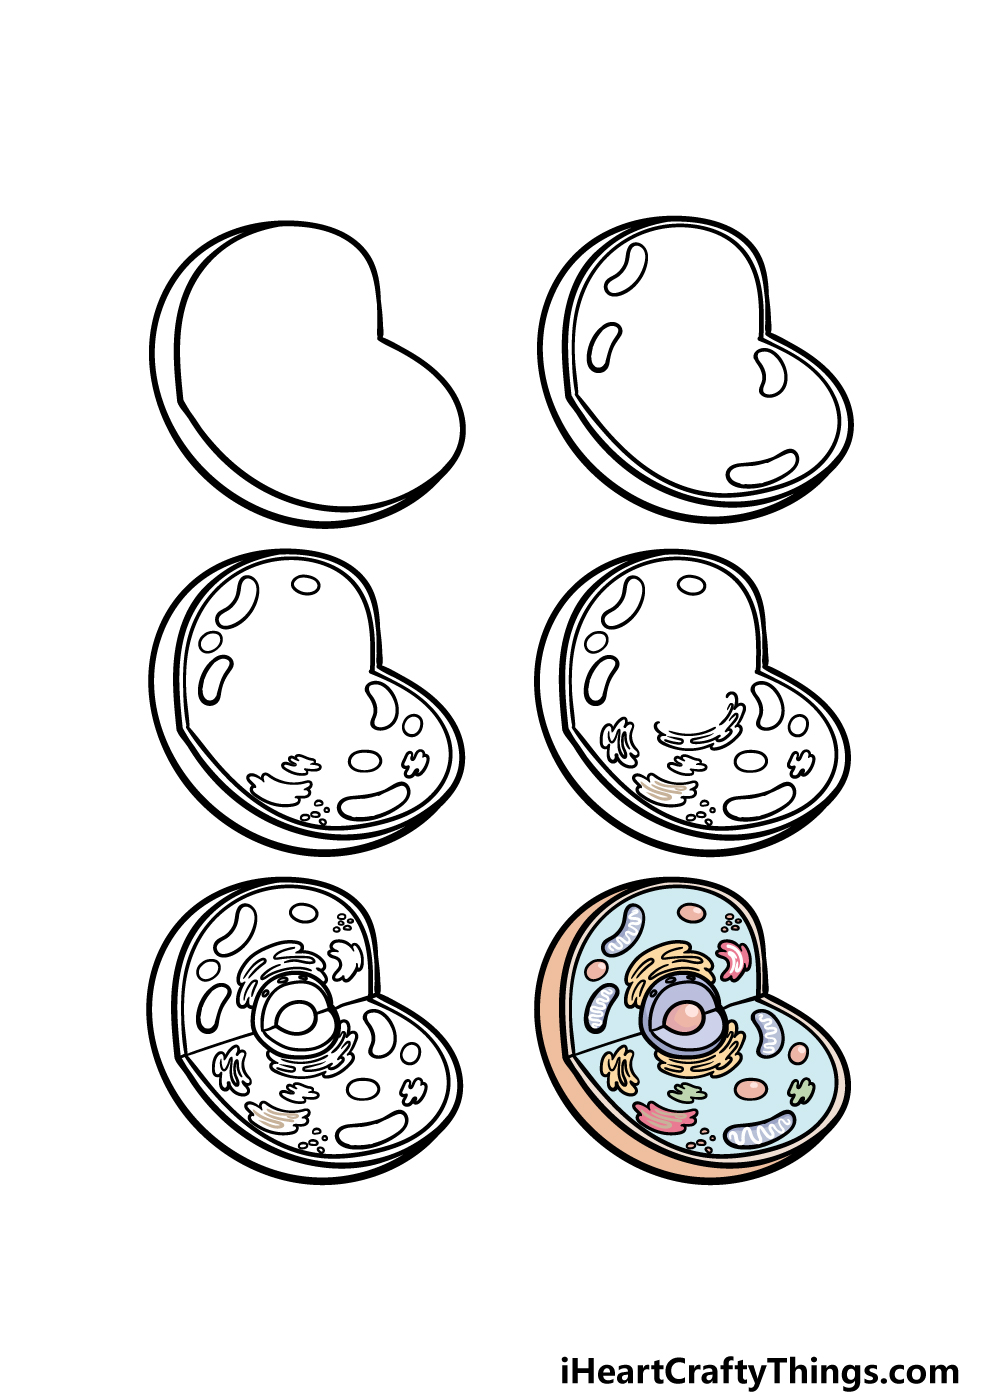
How to Draw An Animal Cell – Let’s Get Started!
Step 1
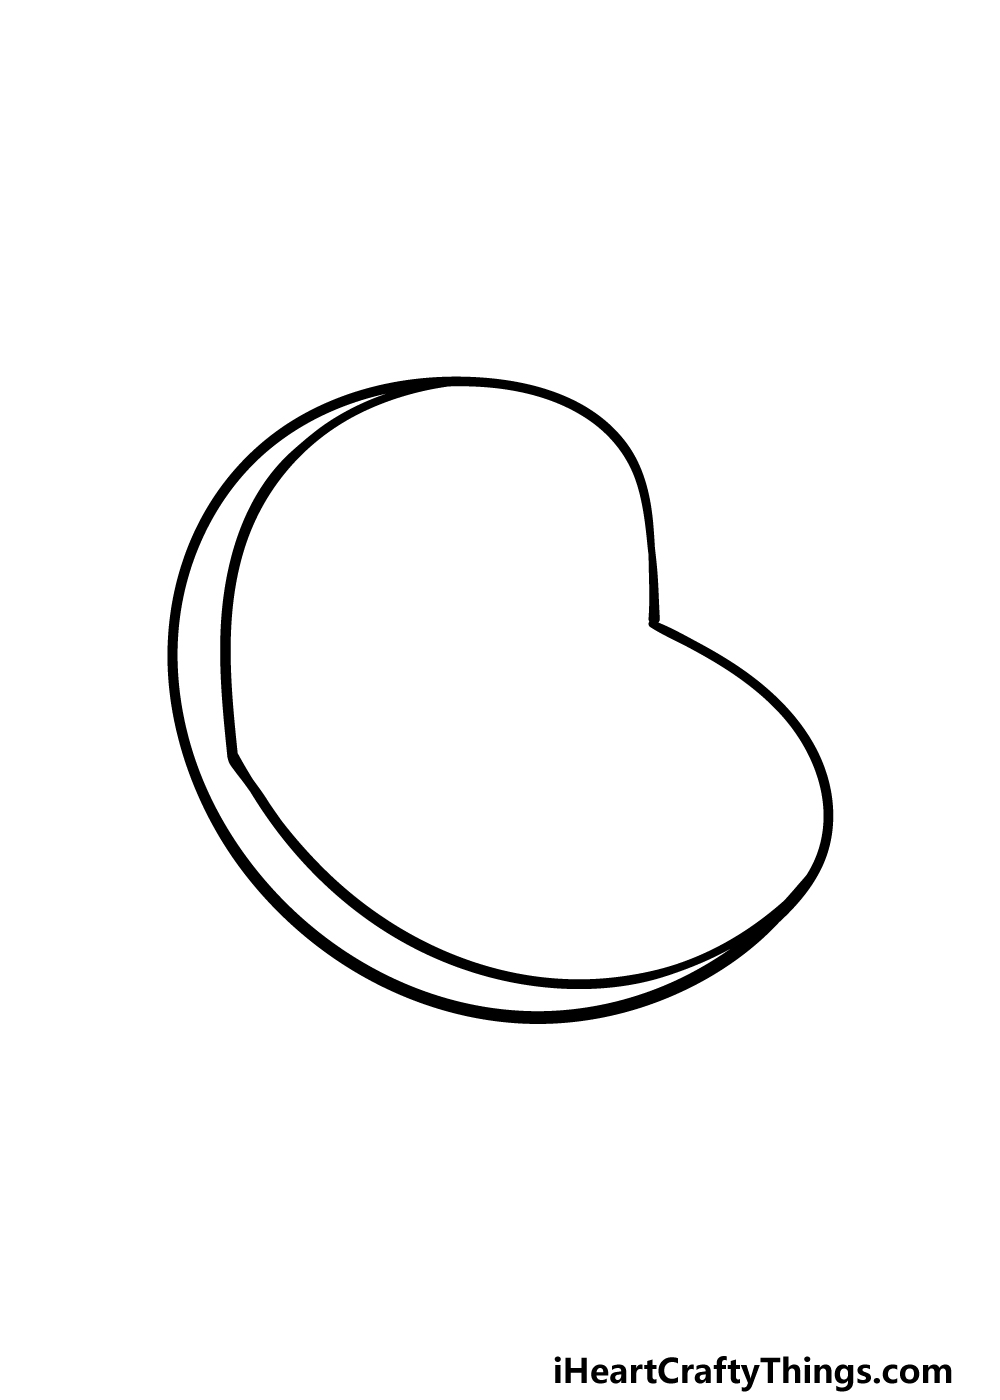
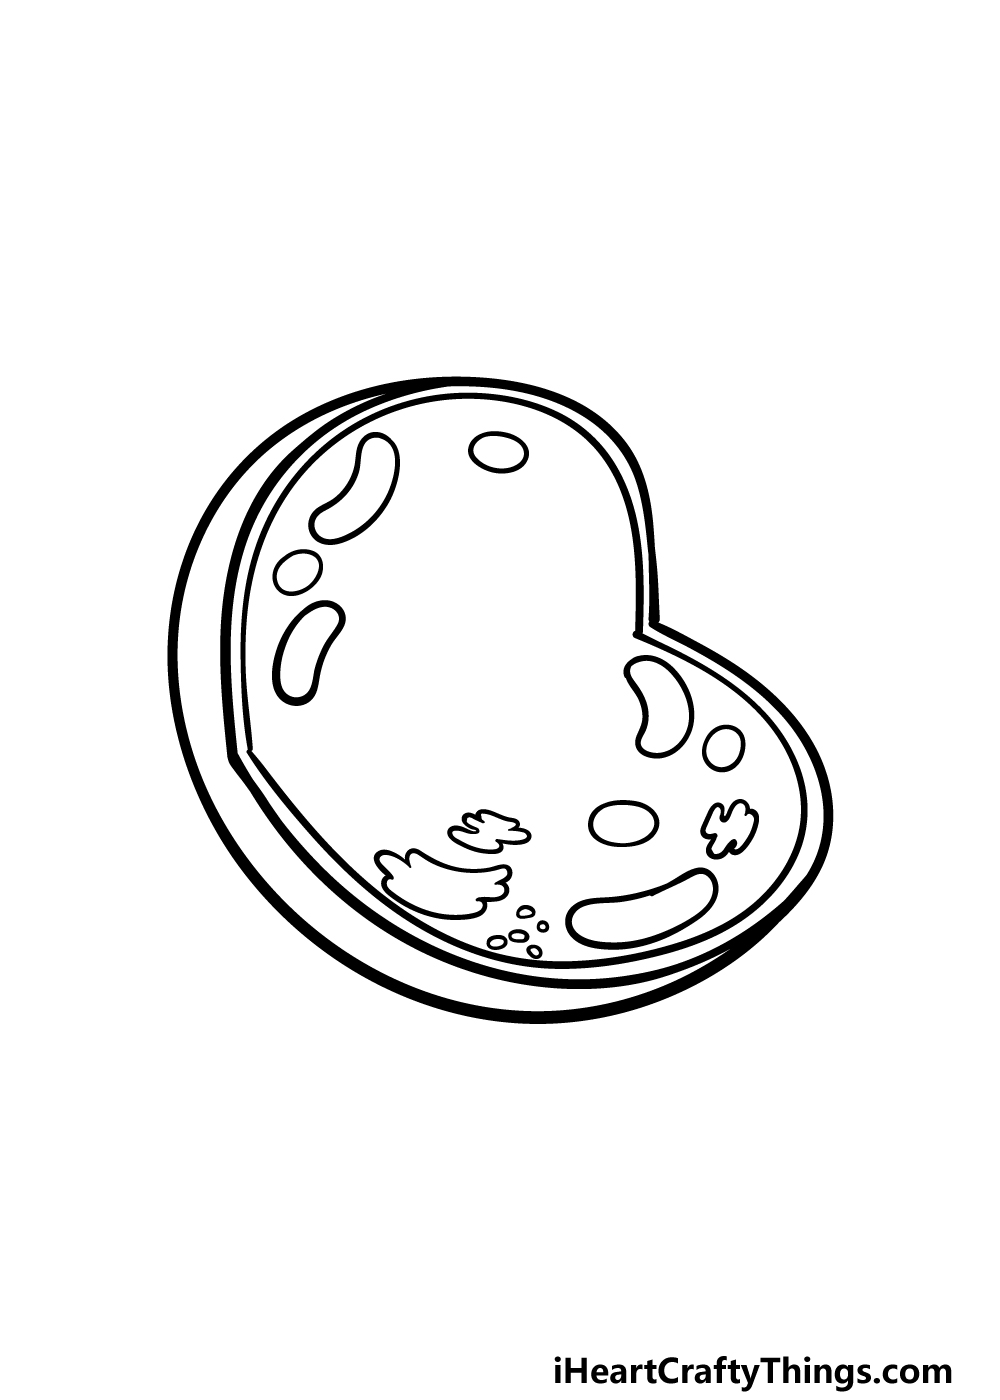
For this guide on how to draw an animal cell, we shall be drawing the outline first. As you draw this cell, try to think of it like a big round cake that had a big slice taken out of it.
You can then start this by drawing two curved lines, and one will be more vertical whilst the other will be at a more horizontal angle.
As seen in the reference image, these lines will form the open interior of the animal cell. Then, you can use another curved line on the exterior to connect both of these curved lines.
This will form the outside layer of the animal cell. Then, you will be ready to move on to step 2 of the guide!
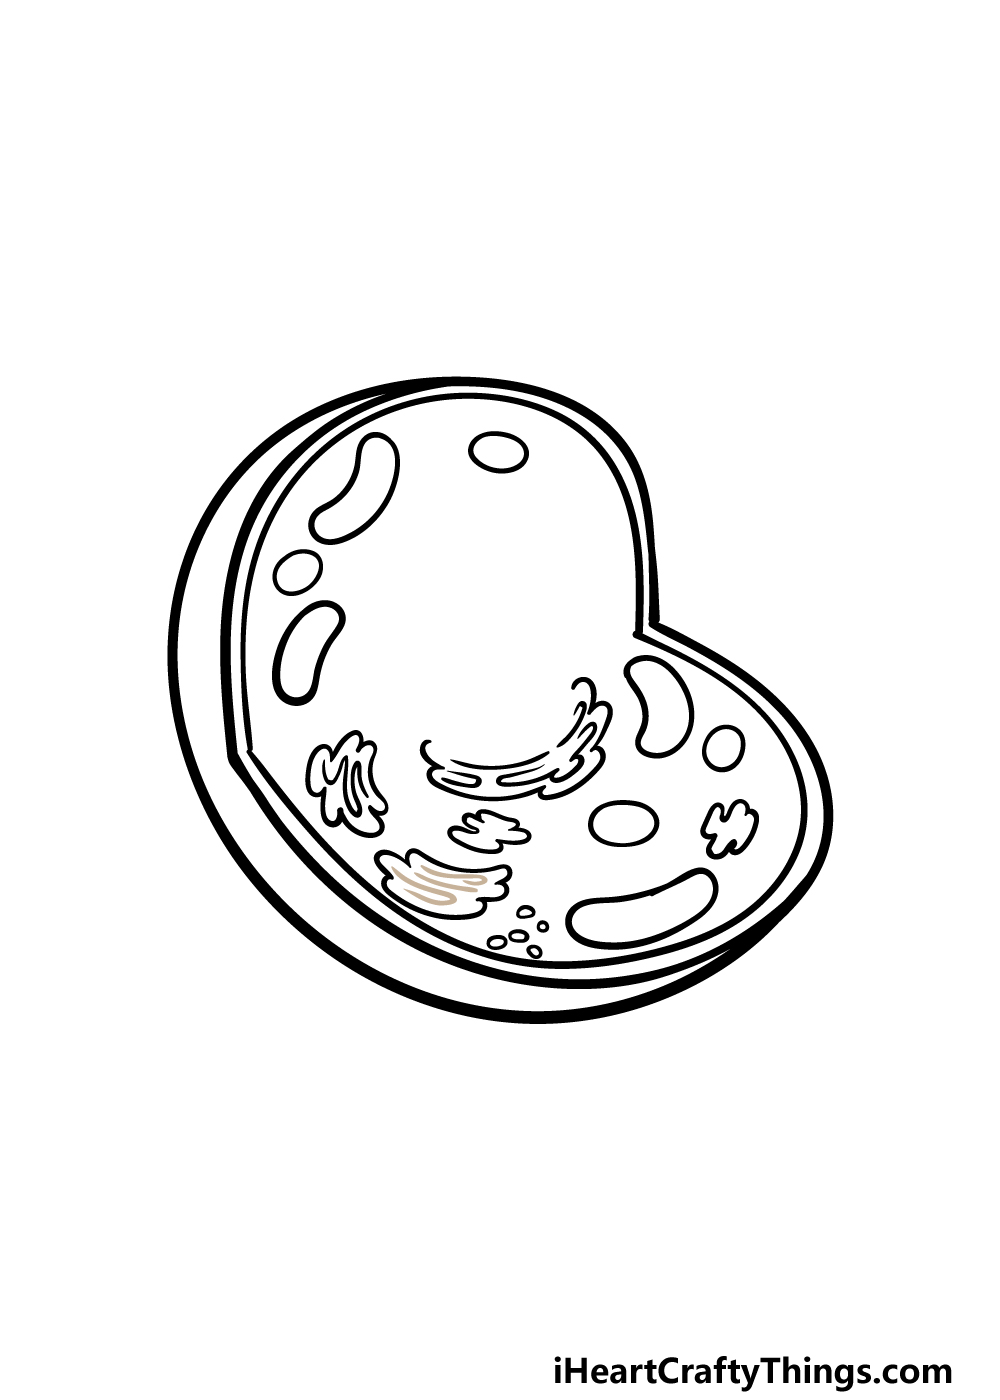
Step 2 – Now, draw more of the interior details for the animal cell
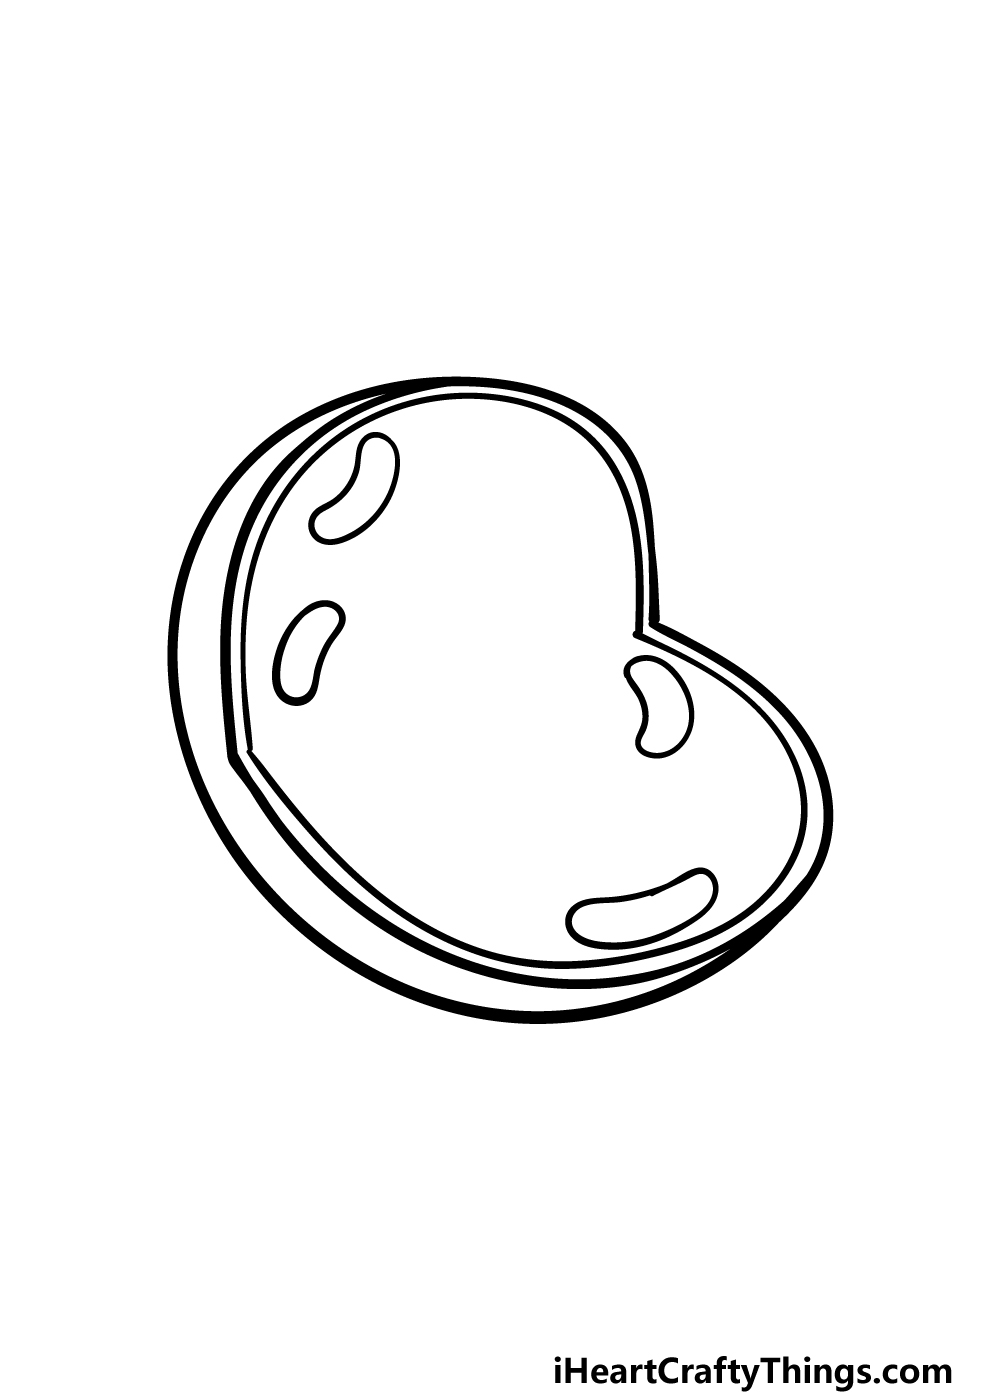
In this second step of your animal cell drawing, we shall add some more details to the interior of the animal cell.
First, we will be drawing the outer membrane that covers the exterior of the cell. To do this, simply draw a line running parallel to the opening of the cell that you drew in the previous step.
As seen in the reference picture, this will show the outer coating of the cell. Then, we will be drawing some details inside the opening.
Simply draw some thin, curved shapes sitting inside the cell. They will not be particularly detailed for now, but we will add some details to these in later steps.
Step 3 – Next, draw some more interior details in this step
For this third step of our guide on how to draw an animal cell, we shall be adding more details to the interior of the cell.
For the top half of the interior, we shall be drawing some small circles. Then, for the bottom of the interior you can draw some more small circles and rounded shapes along with some really irregular shapes.
As shown in the reference image, you should try your best to keep the center of the animal cell blank, as we will be adding something there later.
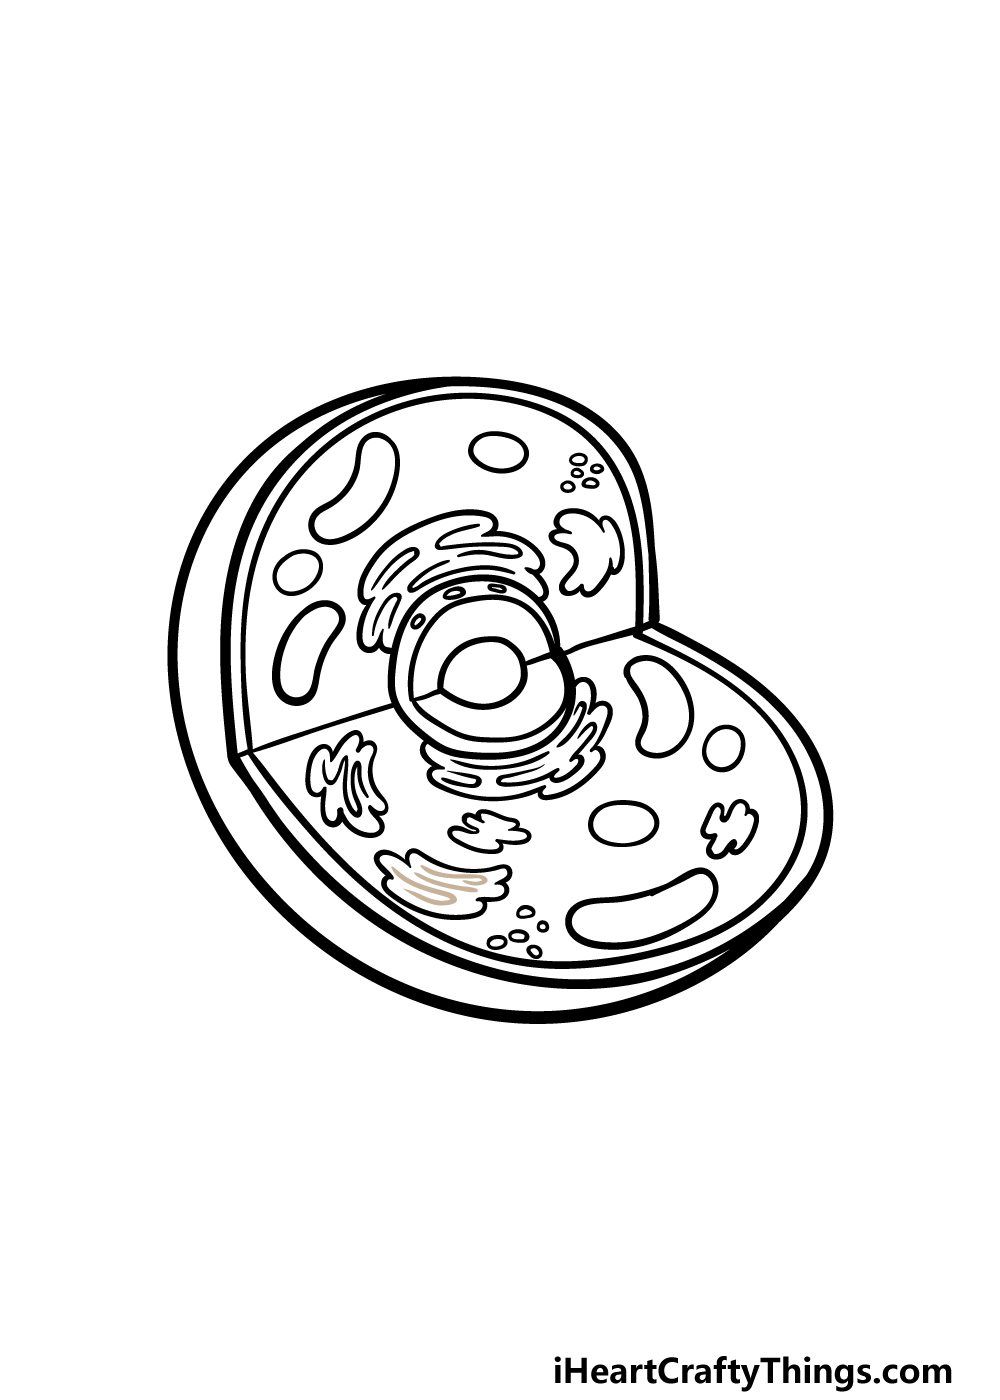
Step 4 – Now, start drawing more of the detailing
We shall start adding the final details and elements in this and the next step of our animal cell drawing.
For now, we will be adding some curvy line shapes connecting to one another near the center of the animal cell.
These will form what is called the ribosome, and they will surround the central nucleus of the animal cell that you will finish off in the next step.
Then, you can finish off this step by drawing some more of those twisty, irregular shapes that you drew in the previous step.
Finish these off by adding some curvy line details inside of the shapes, and then you will be ready for the final details in the next step.
Step 5 – Add the final details to your animal cell drawing
Now you are ready to finish off the final details and elements in this step of our guide on how to draw an animal cell.
First, we shall be drawing the nucleus at the center of the cell. The nucleus is round, and it will also have a section cut out of it to show the nucleolus at the center of it.
Once that is drawn, you can draw a straight line across the interior to show where the cross-section was taken out.
Finish off by drawing more ribosomes around the top of the nucleus, and then finish off with some smaller details throughout the cell.
Once these details are drawn, you can then finish off with your own touches! Maybe you could look up a diagram of an animal cell and label your own one! How will you finish it off?
Step 6 – Finish off your animal cell drawing with color
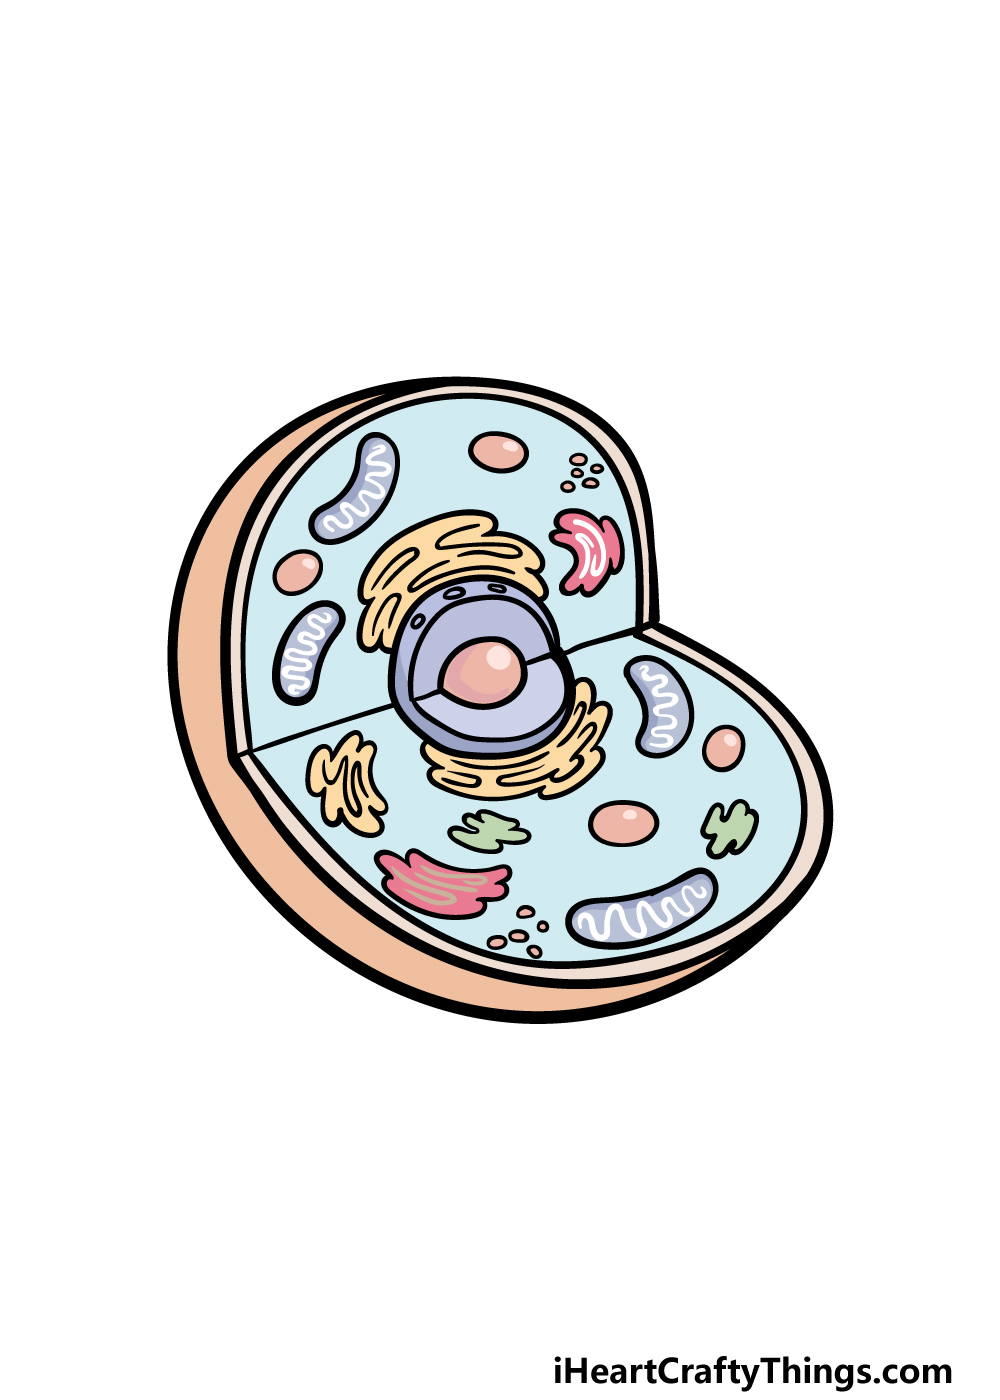
At this final step of your animal cell drawing, you are ready to finish it off with some color.
When coloring in an animal cell cross-section like this, bright colors will often be used to distinguish all of the aspects in the cell.
We went for that approach in our own image, and we used a wide variety of different colors for the various aspects of the animal cell.
You could use a similar color scheme or use some unique ones of your own!
You may want to use a medium that gives you a lot of precision like a colored pen or pencil when coloring, but anything you use will look great!
3 More tips to make your animal cell drawing easy!
Find out how to make your easy to draw animal cell even easier with these 3 tips!
The animal cell is a complex structure with many parts, and each of these parts performs a function.
One way that you could make your animal cell drawing easier would be by simplifying the details of some of these parts.
The details on all the different aspects of the animal cell do look great, but it can make the drawing a bit overwhelming. You could change, simplify or even remove some of these parts.
They wouldn’t make the drawing worse, and you could do this to practice before adding some more details later.
Another way you could make this animal cell drawing easy would be by showing a little less of the insides. For the drawing, we took quite a big slice out of the animal cell.
This does give us a better look at the details within, but it also means that there are more details to draw. If you made the slice of animal cell smaller, then there would be fewer details to draw!
You’d still want at least a small slice left in the image, but you could get away with making it quite a bit smaller. That should make your animal cell sketch so much easier to do if you’re having a hard time with it!
Finally, you can definitely make your animal cell drawing a bit easier if you refer to some extra sources. We tried to make the steps easy in our guide, but using some more images never hurts!
Luckily, you can easily find diagrams and pictures of animal cells to use. These can be found online, or you could find some in a biology textbook.
Using these extra images along with our pictures will make it a lot easier to get right. You could then take it even further and draw some labels for the various inner parts of the animal cell.
That would make this picture educational in addition to being fun to look at!
Your Animal Cell Drawing is Complete!
That will conclude this step-by-step guide on how to draw an animal cell!
Drawing diagrams such as this can sometimes be a bit tricky, so we hope that by breaking it down into smaller steps that we made it much easier for you to take on.
Once you have finished this guide, remember that you can also put your own spin on it by adding your own details, elements and ideas.
Changing up the colors and mediums that you use can also be a great way to put your own spin on it!
Then, when you’re ready for your next awesome drawing guide, you can check out our collection on our website. We upload new ones often, so keep checking in to never miss out!
We always love to see how your pictures turn out, so please share your animal cell drawing on our Facebook and Pinterest pages for us to see!