They say Christmas is the most wonderful time of the year, and it’s hard to argue with that sentiment!
It’s a time of family, color and celebration, and there are always many telltale signs that the festive season is in the air.
Inside the house there are stockings, Christmas trees and decorations, but on doors and walls outside you will often see a cheerful
Christmas wreath. Designing your own one can be lots of fun, but first one would need to learn how to draw a Christmas wreath.
If this sounds like something you would like to do, then this is the right tutorial for you!
Our step-by-step guide on how to draw a Christmas wreath will show you how to create this wonderful festive decoration.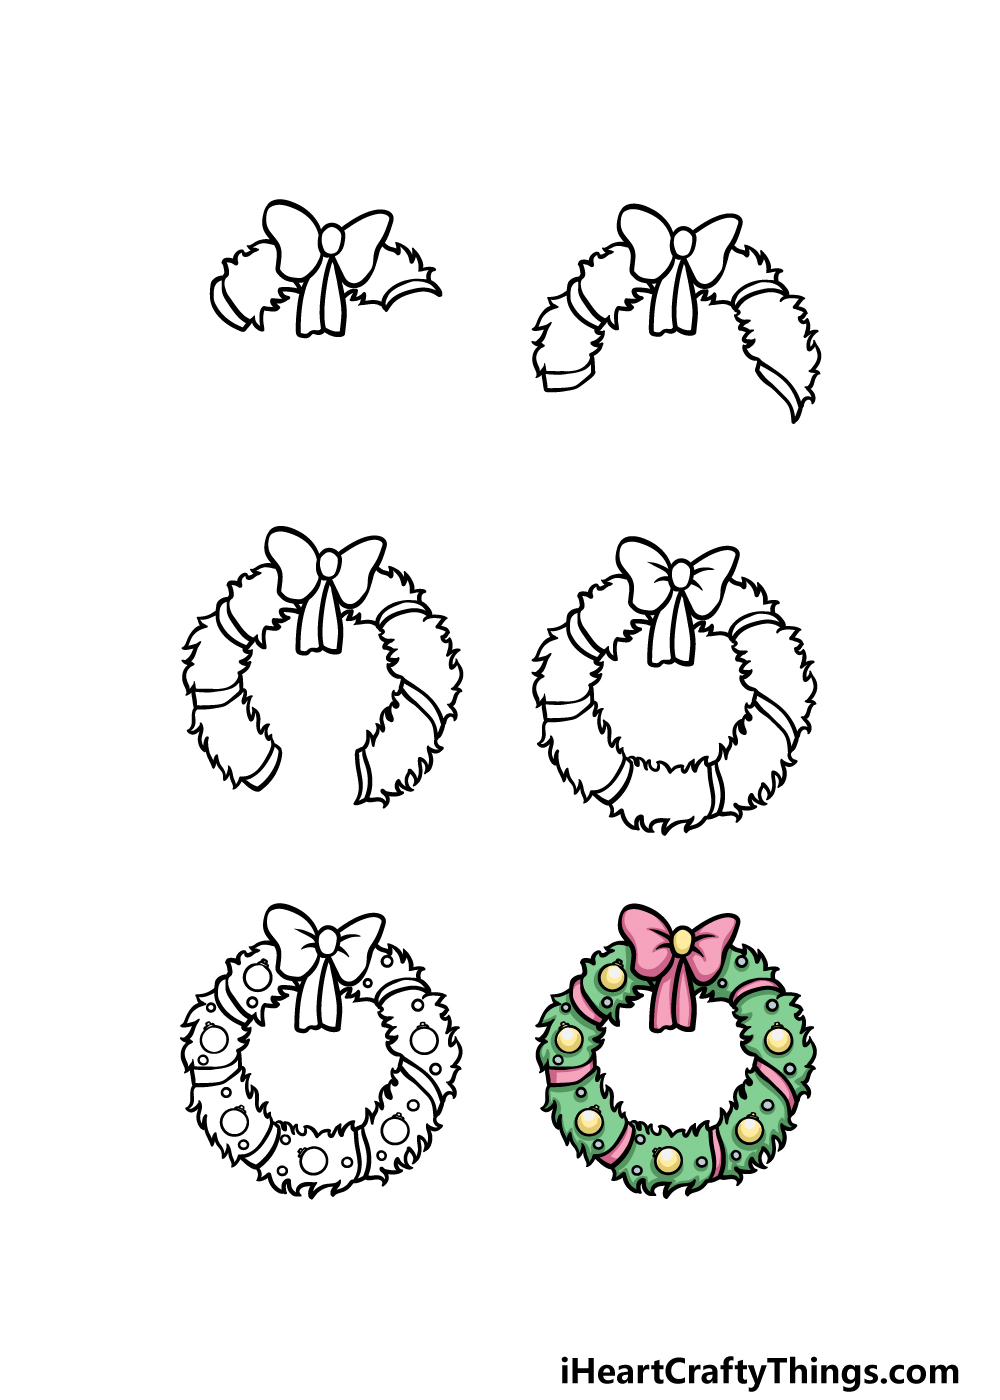
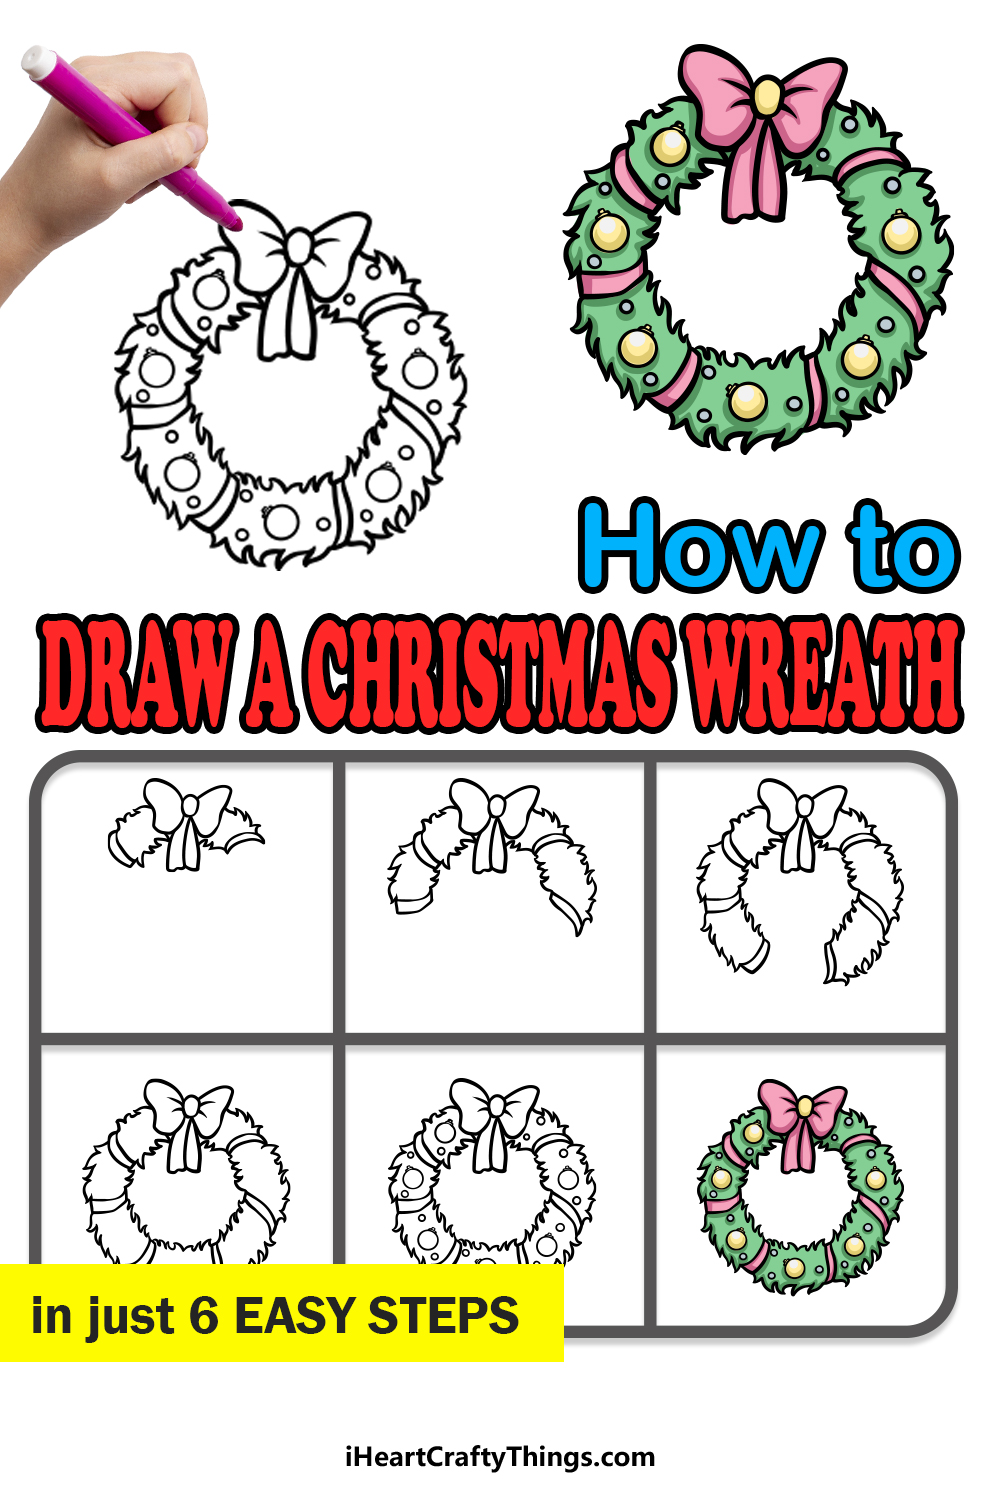
How to Draw A Christmas Wreath – Let’s Get Started!
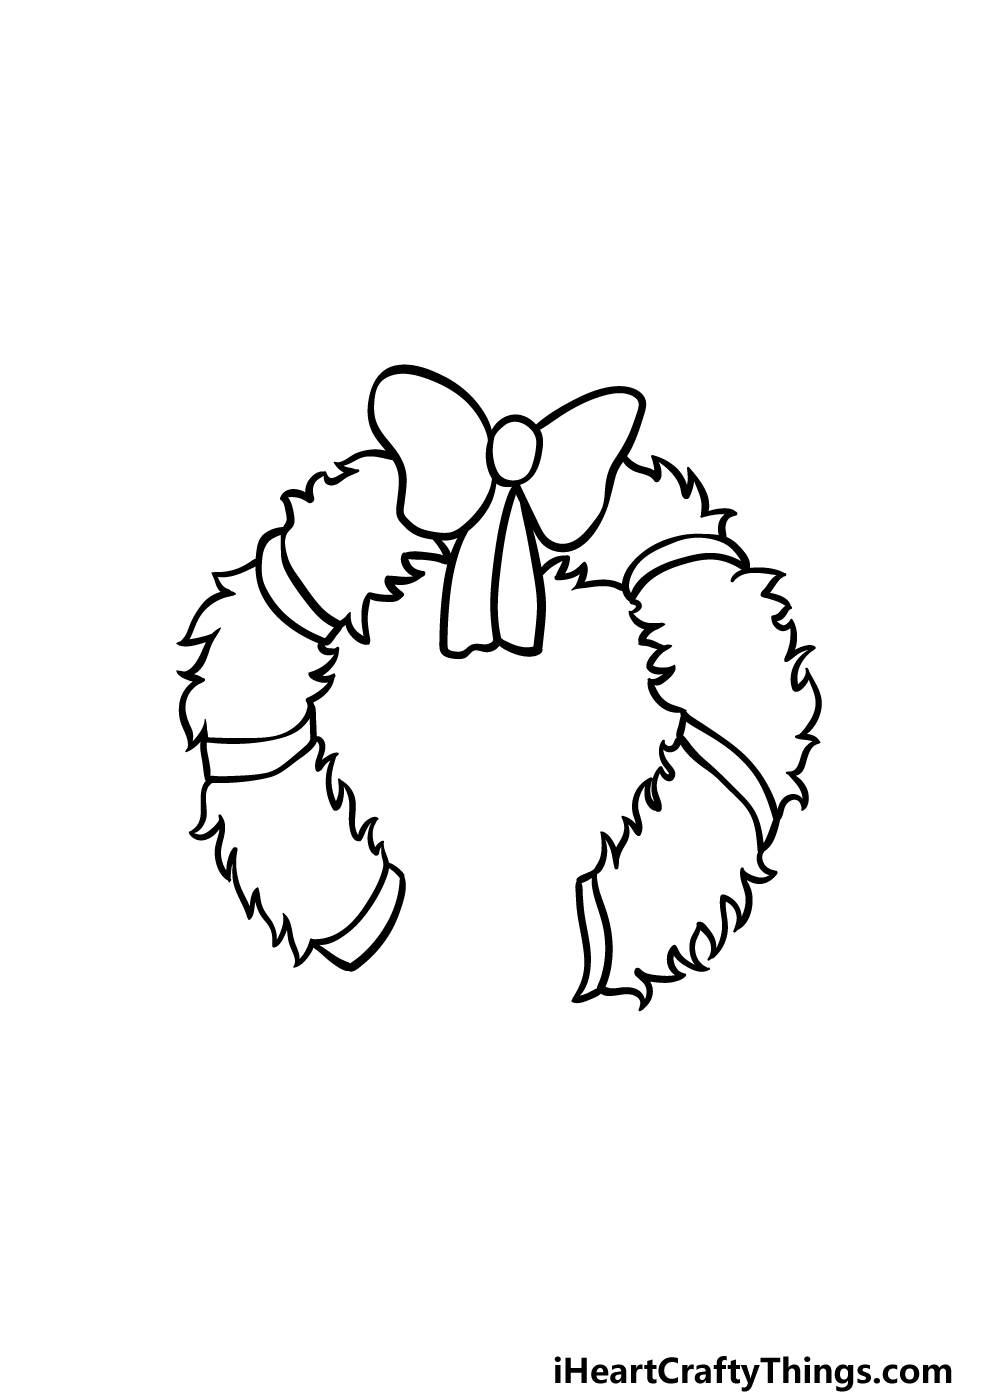
Step 1
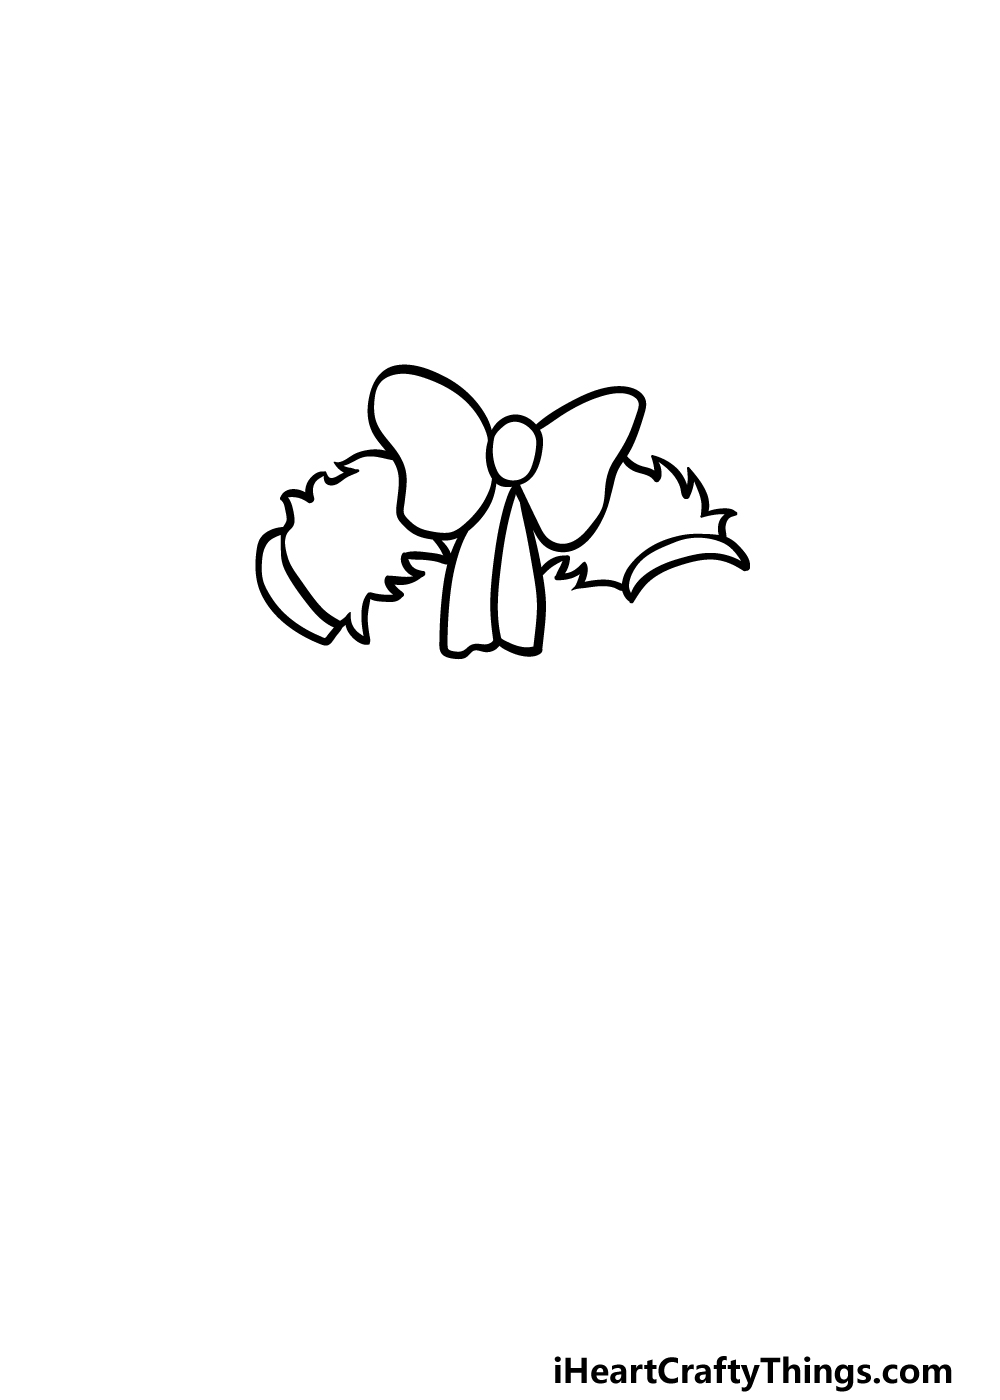
In this first step of our guide on how to draw a Christmas wreath, we will begin with the top of the wreath.
There will be a bow on top of the wreath, and you can begin it with a small oval shape at the center.
Use some curved lines for the sides of the bow. There will then be two strands dropping down from it, as shown in the reference image.
Once this bow is drawn, we will start drawing the wreath itself. Use some curved lines with sharp points to create the curved branches forming the circle.
These pointy lines will help to make it look like it is made of pin needles. Draw two smooth lines on each side of the branches to show some ribbon binding them, and then we can move on to step 2!
Step 2 – Now, draw some more of the wreath
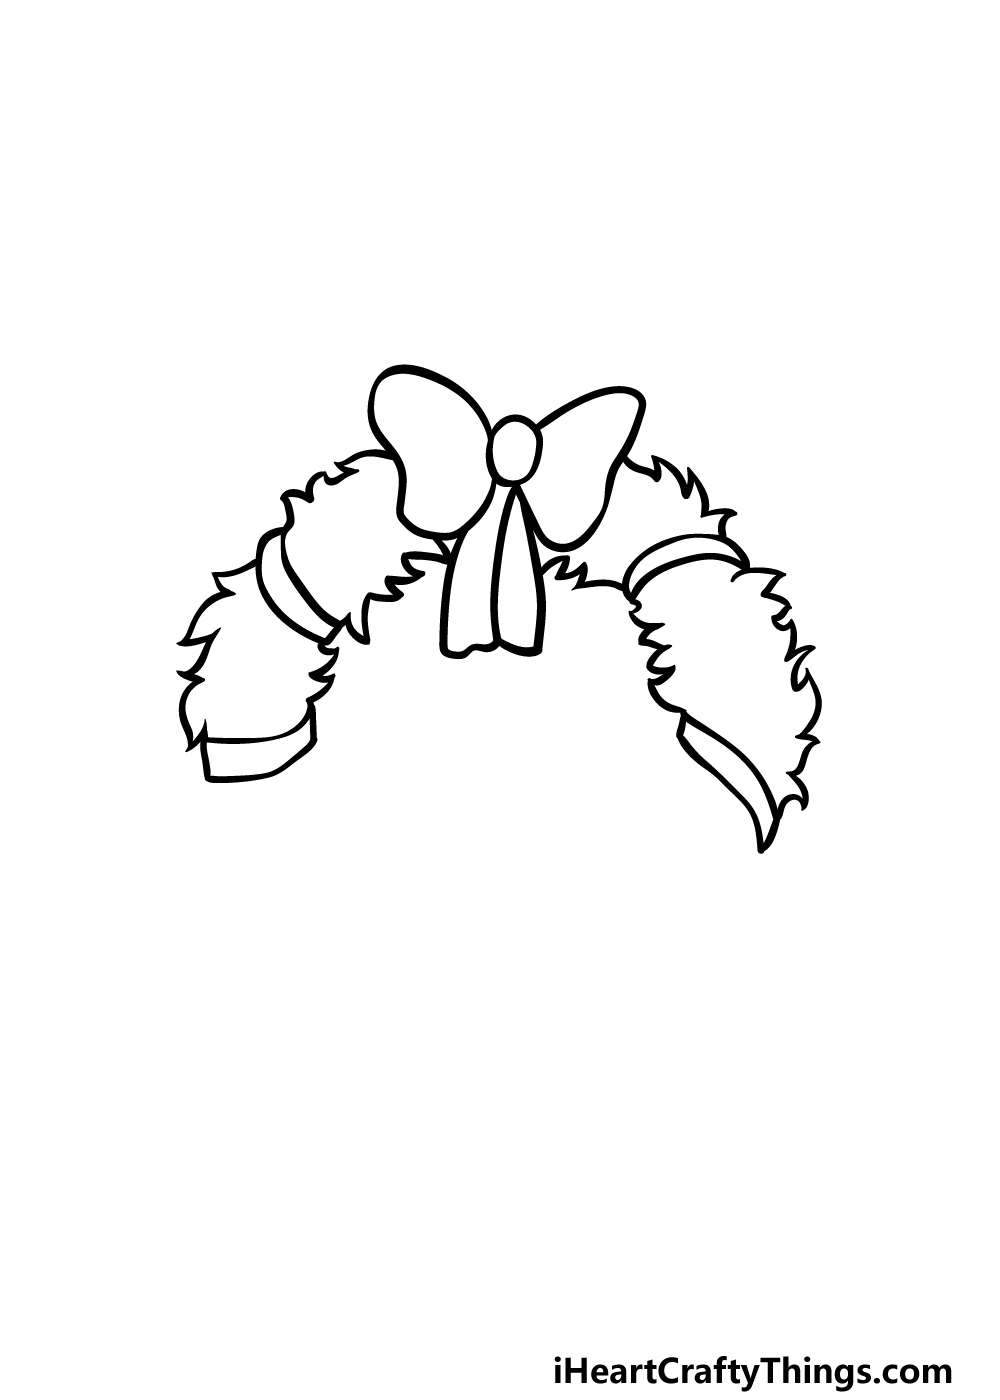
To continue this Christmas wreath drawing, the next thing we will be doing is drawing more of the branches that make up the wreath.
To do this, we will be using some more of those curved, pointy lines to make it look like pointy pine needles.
After drawing some more sections like these, we will be drawing some more ribbon sections tied around them as you did in the previous step.
That’s all there is to it for this step, so now let’s continue.
Step 3 – Draw some more sections for the wreath
You’re doing a great job in this guide on how to draw a Christmas wreath so far! In this third part, we will continue extending what you have been starting in the previous steps.
That means that you will be drawing some more curved, pointy lines for more branch sections of the Christmas wreath.
Again, there will be some more ribbons tying these sections together where they end.
There will still be a small section left blank at the bottom, but worry not as we will take care of that empty space in the next step of the guide!
Step 4 – Next, draw the final section of the Christmas wreath

This step of your Christmas wreath drawing will see you finishing off the outline. To do this, we will just have one more section of the wreath to draw.
This final section will fill in that empty space that you left in the previous step. The section will also be a branch piece, so again you can use some pointy lines to draw it with the pine texture.
Once this section is drawn, we will be moving on to the fifth step of the guide where you can finish it off by adding some amazing decorative elements!
Step 5 – Add the final details to your Christmas wreath drawing
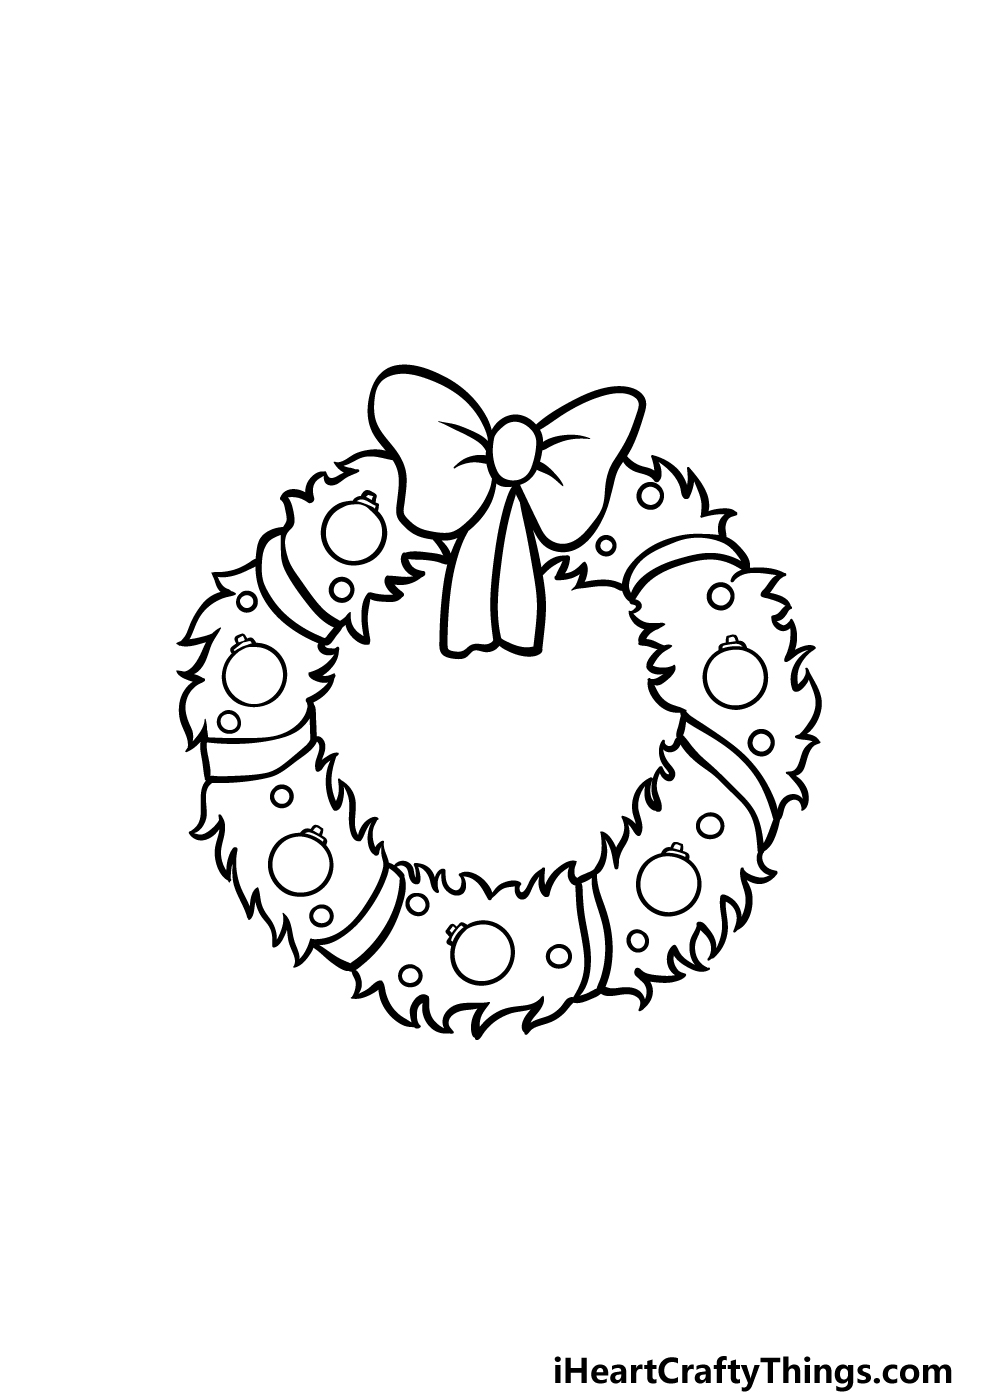
Before you start adding some color to your drawing, we have a few final details to add in this step of our guide on how to draw a Christmas wreath.
This should be a really fun step, as in this one you will be finishing off with some decorations!
In our example image, we drew several small circles throughout the Christmas wreath to start. Then, we drew some larger circles with small shapes at the top of each to have some pretty baubles on the wreath.
Once these details are drawn, you will be ready for the final step! Before you proceed, you could also change some details or add your own!
Part of the fun of this drawing is that you can take what you have learned and use it to create your own unique Christmas wreath.
What would your ideal Christmas wreath look like? You can show us with your incredible drawing!
Step 6 – Finish off your Christmas wreath drawing with color
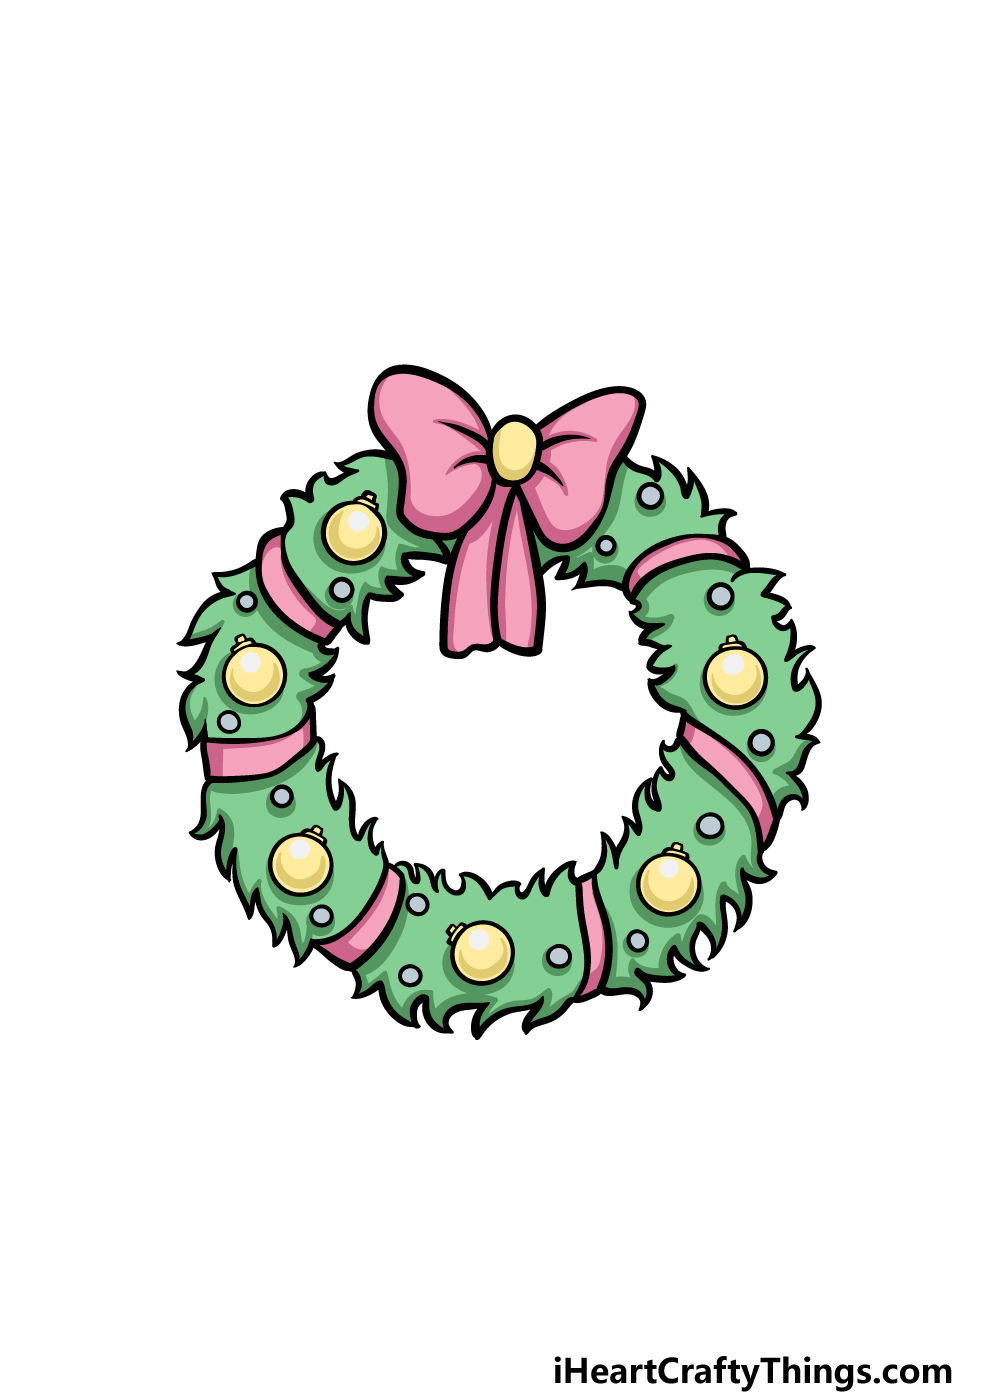
Now it’s time to finish off this Christmas wreath drawing with some color! In our reference image, we went for some wonderful festive colors.
We used some reds and pinks for the bow and the ribbon sections, and then we used some yellow for the baubles. Of course, we finished off the branch sections with shades of beautiful green for a fresh look.
These are the colors that we chose, but you should definitely use any other colors you would prefer!
This is your chance to make your perfect colorful Christmas wreath, so you should really let your creativity flow. What colors and art mediums will you choose for your image?
Do this to take your Christmas wreath drawing to the next level
Get into the festive spirit as we make this Christmas wreath sketch look even better!
This drawing of a Christmas wreath has a wonderful muted color scheme of green, yellow and pink. These colors look great, but you could also go with your own color choices!
Even if you stick to the color scheme, you could make them brighter or even more muted depending on your preference.
Or, you could go for some brand new colors instead. Any colors you choose will look amazing, so what will you pick for this Christmas wreath?
Right now, this Christmas wreath has a bow and some simple decorations on it. Some Christmas wreaths have many different decorations, so you could customize this one with some cool extras.
You’re limited only by your imagination, so you could create the ultimate Christmas wreath! It could contain classic Christmas elements such as candy canes or baubles for a few ideas.
Or, you may have some more unusual decorative ideas instead. How would you like to customize this Christmas wreath that you’ve created?
When bringing some color to your Christmas wreath drawing, you need not stick to just the traditional mediums.
It can be tempting to use pencils, pens and paint, but there are other fun mediums to try too.
For example, you can use certain arts and crafts to elevate the design. Beads, stickers and even pieces of real tinsel could all be used to add some stunning extras to this Christmas wreath.
Don’t be afraid to experiment with some unusual crafts!
Finally, once your Christmas wreath sketch is looking its best, you could then show where you would like to display it by drawing a background for the image.
There are so many fun places you could use as a background, and you could base it on real places around you. For instance, you could have it hanging in your own house.
That is one idea, but you could use any place you can imagine for the background!
Your Christmas Wreath Drawing is Complete!
We hope that you had a wonderfully festive fun time working on this guide on how to draw a Christmas wreath!
Designing decorations like this can be a lot of fun, but that fun can go quickly if it gets frustrating to draw.
That’s why we aimed to make sure you could focus entirely on the fun of creation with no frustration in this guide!
Now you can show off your creativity with your own details, ideas and additions.
There are no wrong ways to finish off this drawing, so feel free to add any extra details that you would like! We can’t wait to see how you complete this lovely image.
When you’re ready to take on a new drawing, you can visit our website for more awesome drawing guides. We upload new ones often, so keep checking in to never miss out.
Please also be sure to share your completed Christmas wreath drawing on our Facebook and Pinterest pages for us to admire!