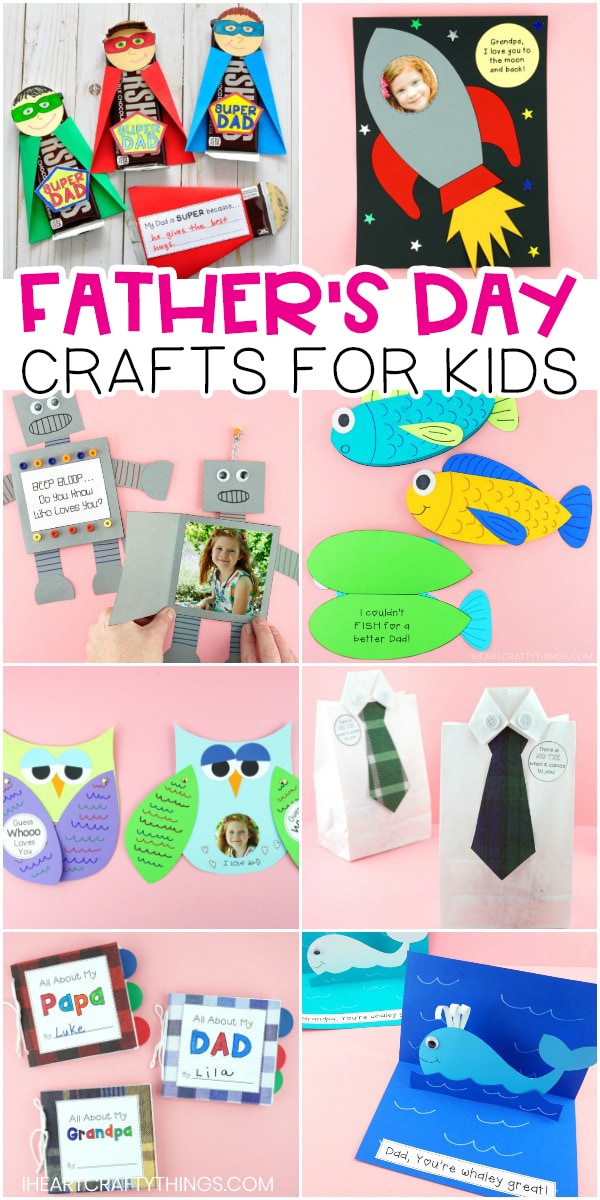
Father’s Day is a special time to honor the dads who have guided, inspired, and supported us throughout our lives. What better way to show your appreciation than by crafting something meaningful and memorable? Below, you’ll find my ideas of easy and fun Father’s Day craft projects to help you celebrate dad in a personal, heartfelt way.
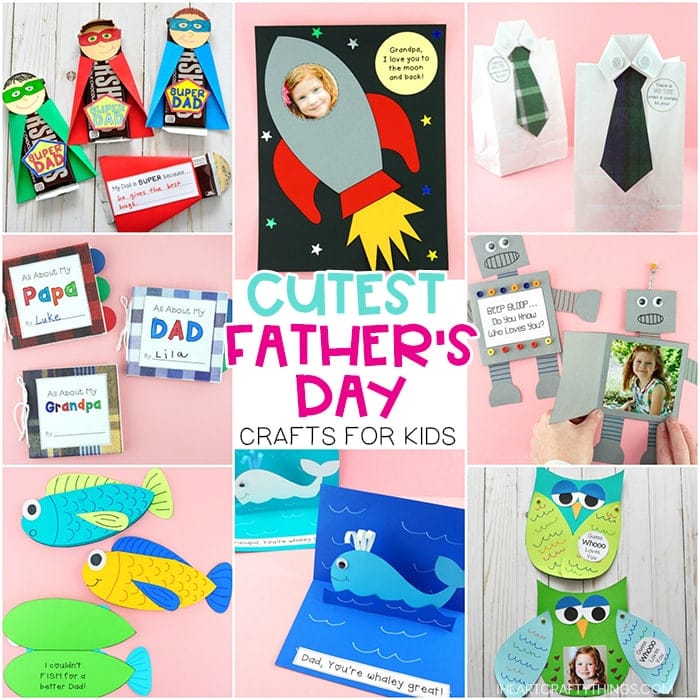
12 Father’s Day Crafts to Make Dad Feel Special
From charming cards to keepsake photo displays, these 12 DIY projects are sure to inspire you. Each craft includes simple instructions, helpful tips, and creative ideas, so you can find the perfect way to express your love and gratitude this Father’s Day.
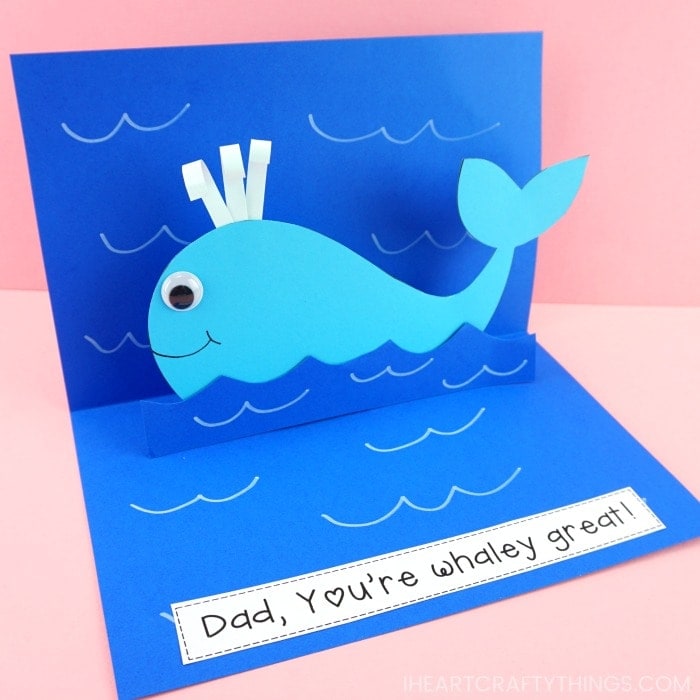
1. Craft a Whale-Themed Pop-Up Card
If dad’s sense of humor swims on the lighter side, this playful ocean-themed card will make him smile. Discover how to bring your idea to life with this Whale-Themed Father’s Day Pop-Up Card Tutorial.
2. Simple DIY Father’s Day Card Kids Can Make
Get the kids involved in making a heartfelt surprise for dad. Learn more in our Kid-Friendly DIY Father’s Day Card Instructions to ensure a creative, personal touch from the little ones.

3. Printable Fishing-Themed Father’s Day Card
For anglers and outdoorsy dads, try this ready-to-print design that’s quick and fun. Check out our Fishing-Inspired Printable Father’s Day Card Guide and cast a line straight to dad’s heart.
4. Customized Photo Blocks to Celebrate Dad
Turn favorite family snapshots into one-of-a-kind photo blocks that make a striking display. Follow the DIY Father’s Day Photo Block Tutorial and preserve dad’s cherished memories.

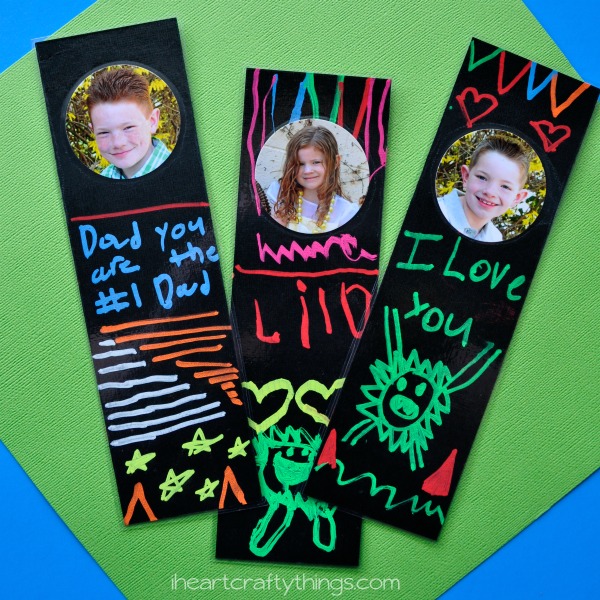
5. Personalize a Handmade Laminate Bookmark Dad Will Cherish
Help the kids create something dad will treasure for years. Dive into our Step-by-Step DIY Father’s Day Gift Idea and craft a truly unique present that’s straight from the heart.
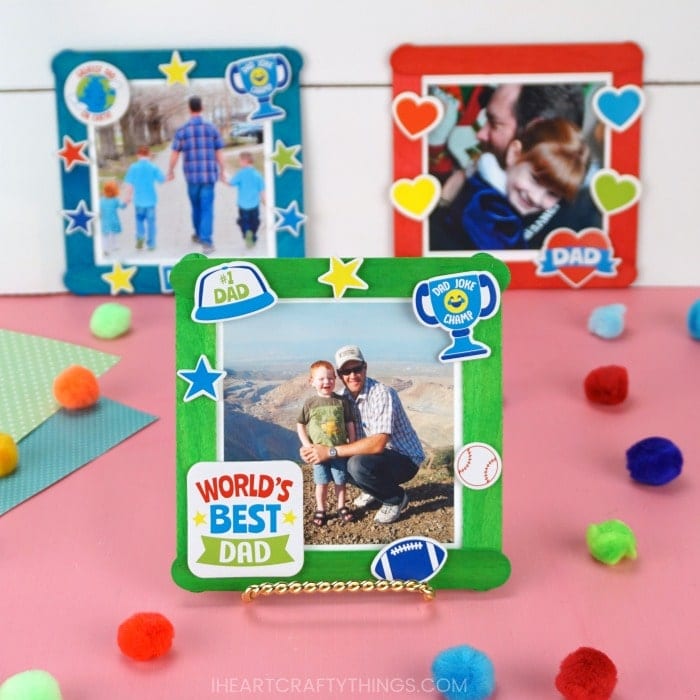
6. Create a Heartfelt Father’s Day Photo Frame
Capture a special moment and display it in a custom frame. Our Father’s Day Photo Frame Crafting Guide shows you how to design a meaningful keepsake dad will love.
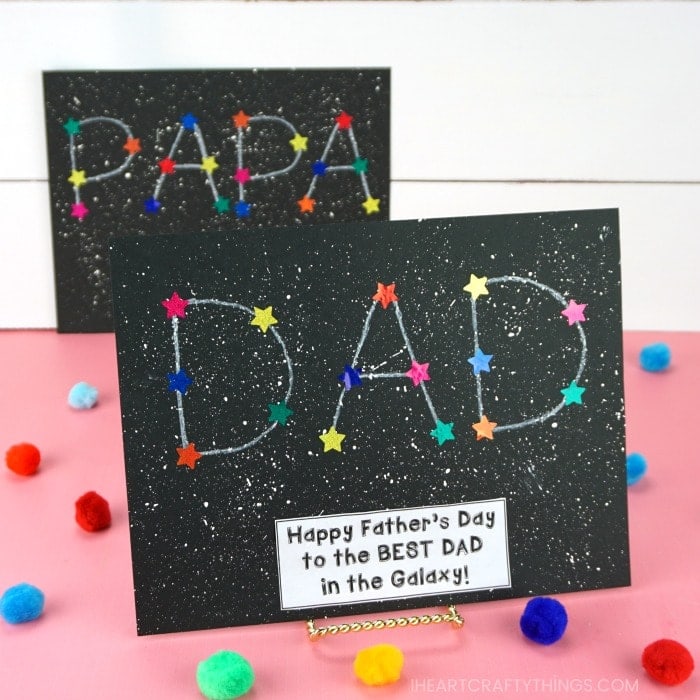
7. Craft a Personalized Constellation for Dad
Show dad he’s the brightest star in your galaxy. Get inspired by our Constellation-Themed Father’s Day Craft Instructions and watch his face light up.
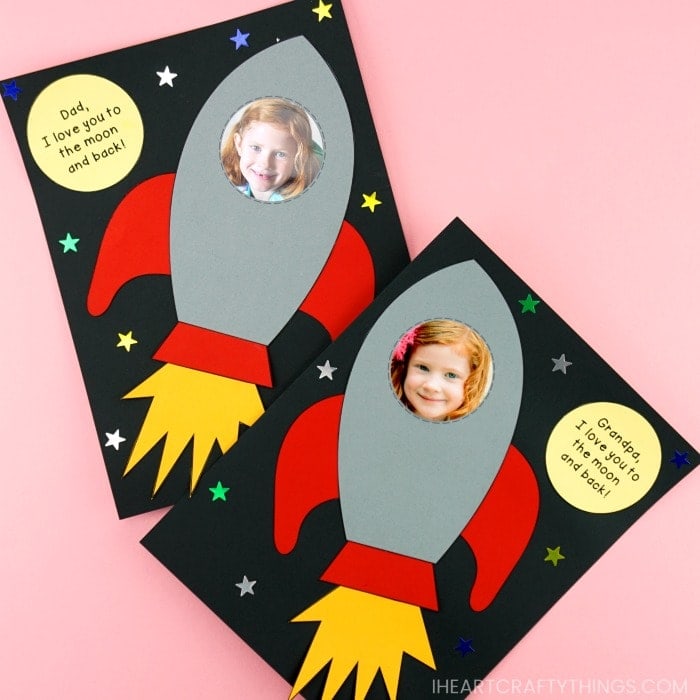
8. Blast Off with a Rocket Ship Craft
Encourage preschoolers to get crafty with this simple space-themed project. Launch into creativity with our Easy Rocket Ship Father’s Day Craft Directions.
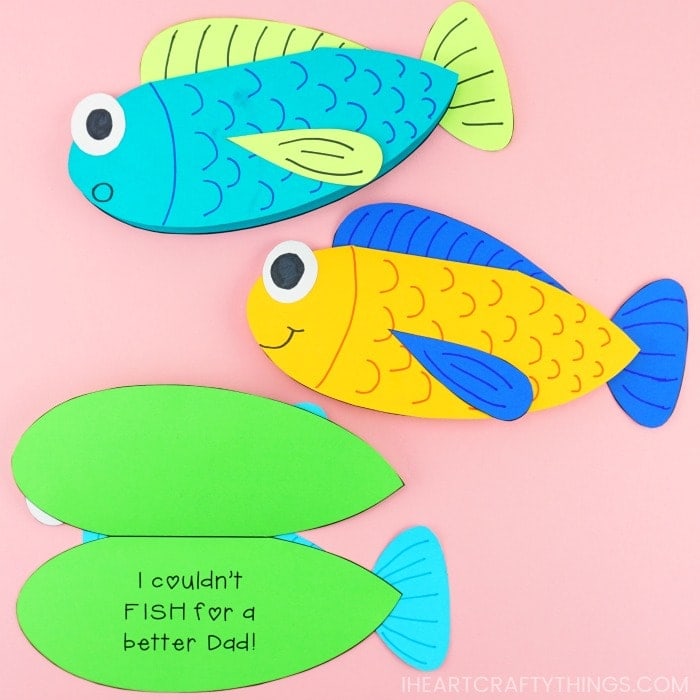
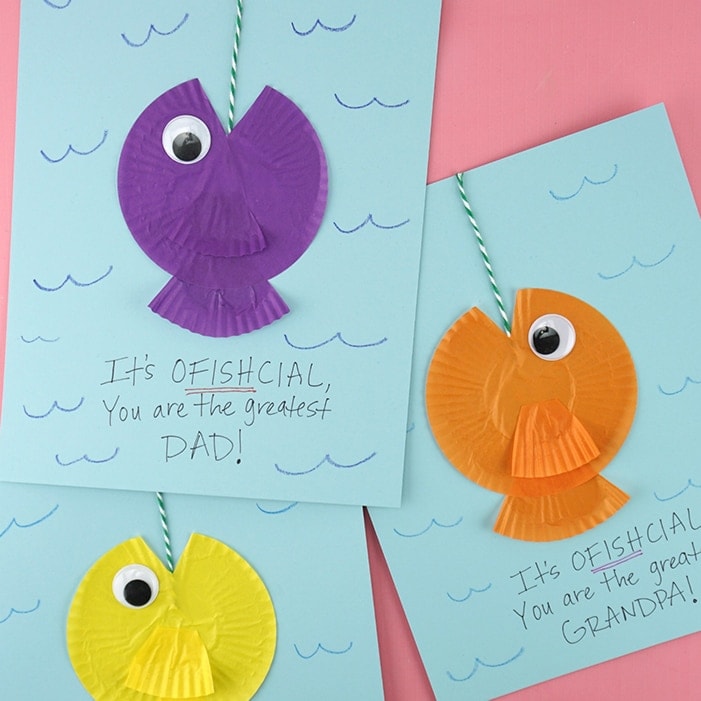
9. Make a Fun Fish-Themed Father’s Day Card
Hook dad’s attention with this quick, aquatic-inspired greeting. Reel in inspiration from our Simple Father’s Day Fish Card How-To.
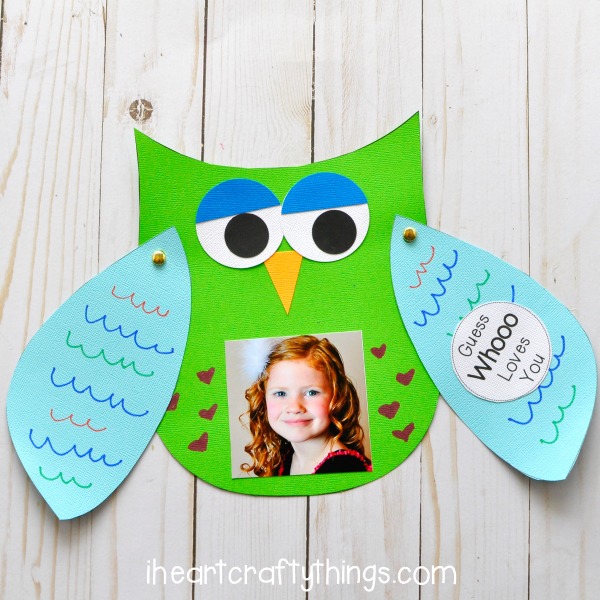
10. Owl-Themed ‘Guess Whooo Loves You’ Card
Let dad know whoooo appreciates him most. Create an adorable, bird-inspired greeting using our Owl-Inspired ‘Guess Whooo Loves You’ Father’s Day Craft Guide.
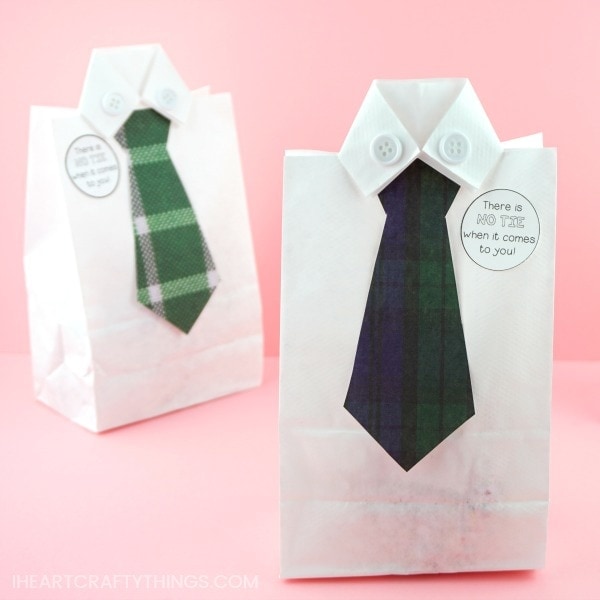
11. Design a Handcrafted Father’s Day Gift Bag
Why stop with the gift? Wrap it in style by making a custom bag. Try our DIY Father’s Day Gift Bag Tutorial for the perfect finishing touch.
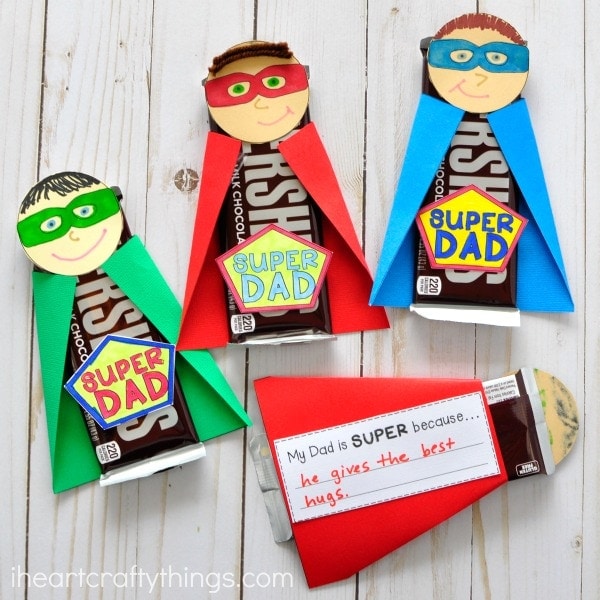
12. Celebrate a Super Dad with a Themed Gift
Show dad he’s your hero with a superhero-themed present. Explore this sweet Super Dad Father’s Day Gift Ideas for a truly heroic surprise.
Each of these Father’s Day crafts offers a heartfelt way to show dad how much he means to you. Whether you choose a whimsical card, a personalized frame, or a clever themed project, these creative ideas will help you craft a thoughtful token of appreciation that dad will treasure for years to come.