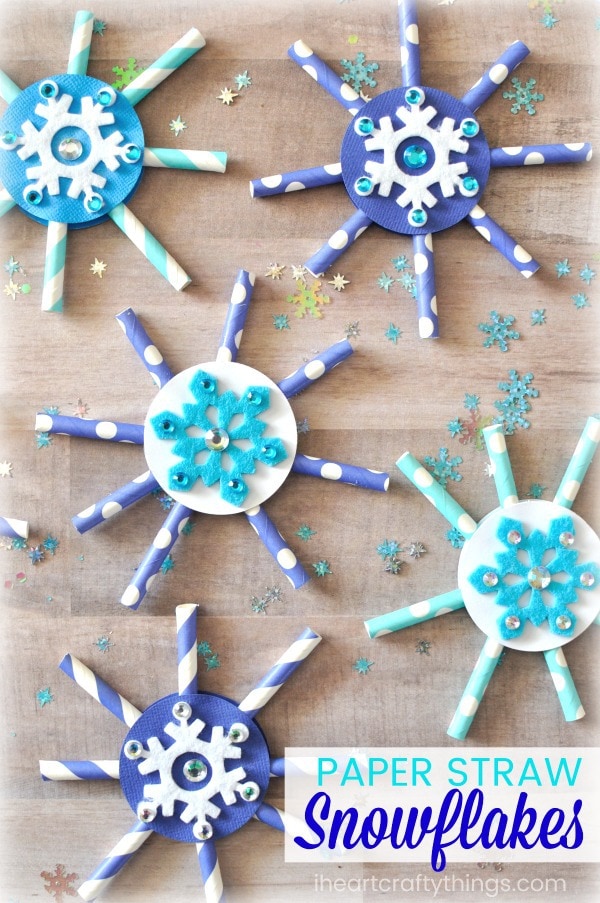
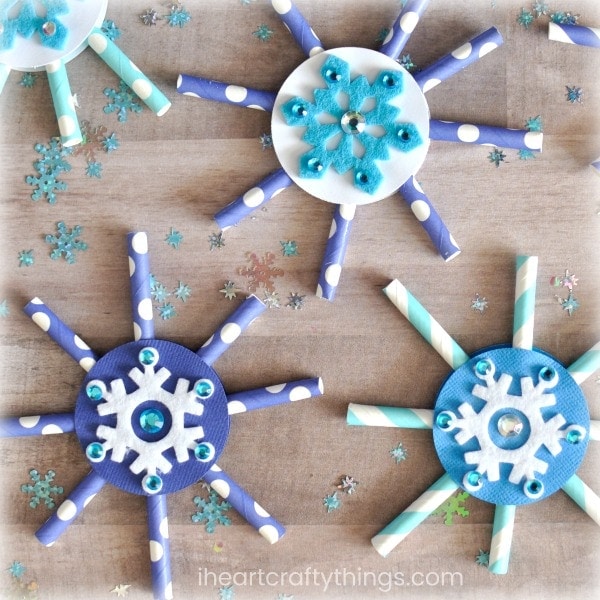
We love crafting with straws, especially paper straws. The different colors and patterns are simply irresistible. Another reason we love them so much is because they make such great scissor cutting practice for my preschooler! This week our Creative Preschoolers theme is scissor cutting practice so we made Paper Straw Snowflakes. If you have Frozen fanatics at your house, they are sure to love making these!
This post contains affiliate links to the products mentioned. I Heart Crafty Things is a participant in the Amazon Services LLC Associates Program, an affiliate advertising program designed to provide a means for sites to earn advertising fees by advertising and linking to amazon.com.
Supplies needed:
- aqua colored paper straws
- blue cardstock paper
- snowflake felt stickers
- scissors
- tacky glue
- 2-inch circle punch
Instructions:
1. Cut your straws in half
Start by cutting two paper straws in half and then each of those pieces in half again to end up with 8 pieces. It doesn’t have to be perfect, especially since this is designed for a preschool cutting activity, but just tell them to try their best. This is also great hand eye coordination practice for kids eyeballing the middle of each piece.
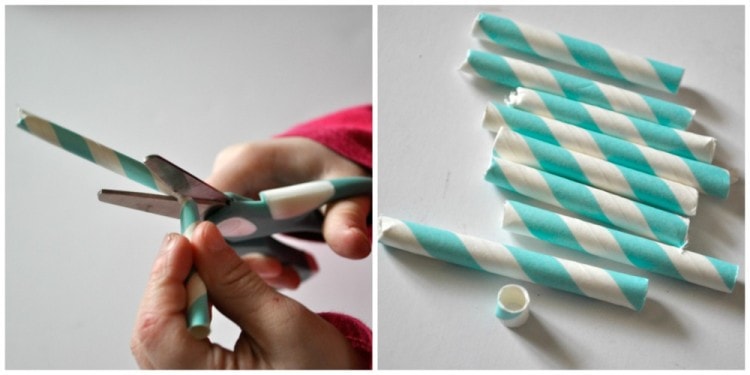
2. Cut tiny piece of straw
(Optional) After my daughter was finished cutting her straws I lined them all up together and took out the tallest straw and cut a tiny piece off of the end of it about the width of a straw. You’ll see how this little piece is helpful in the next couple steps.
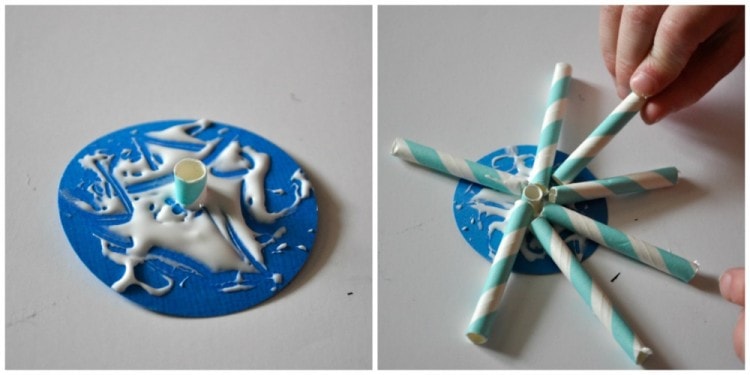
3. Cut out two circles
Use your 2-inch circle cutter to cut out two circles from your blue cardstock paper. Add tacky glue all over one of your circles. Place that little piece that you cut out in Step 2 right in the middle of the circle. This is going to help your preschooler correctly place all the straws around the circle.
4. Glue straw pieces to the circle
Place a straw piece on each side of the little circle, and then one on top of the little circle and one on bottom of the little circle making a “t” shape. Finish by adding the remaining straws in between each straw section.
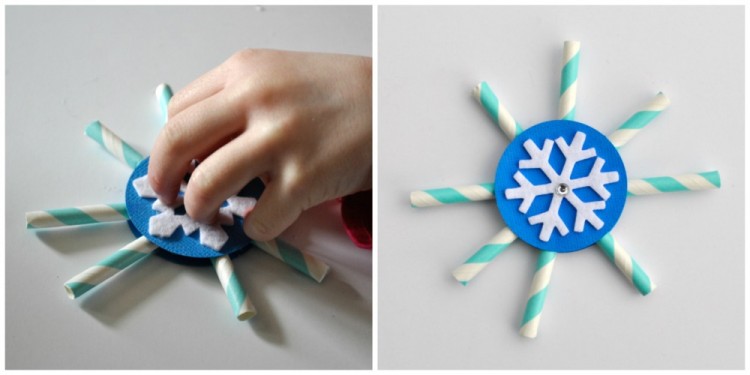
5. Glue snowflake sticker
Place your felt snowflake sticker on top of your other 2-inch circle. Add tacky glue all over the back of the circle and place it on top of your straw snowflake right in the middle. Let your snowflake dry completely.
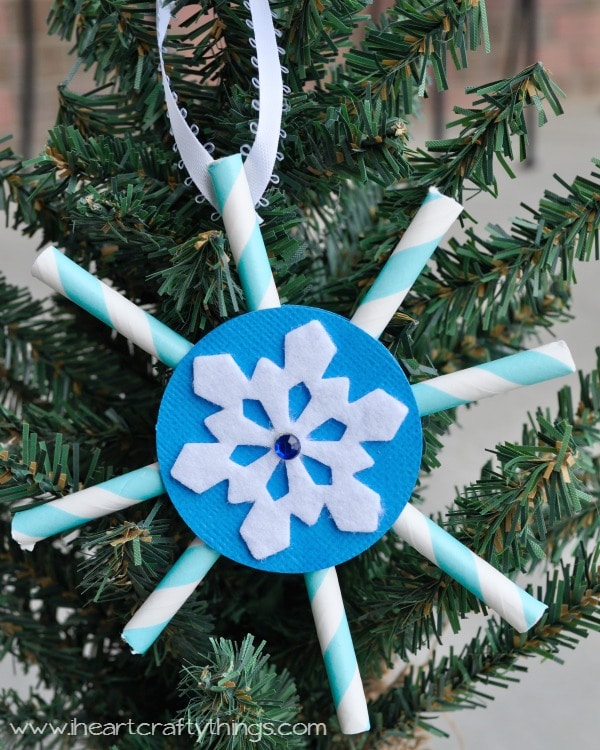
You can leave your paper straw snowflakes as is, or hot glue a ribbon to the back of them to turn them into an ornament. (Adult supervision with glue gun required.)
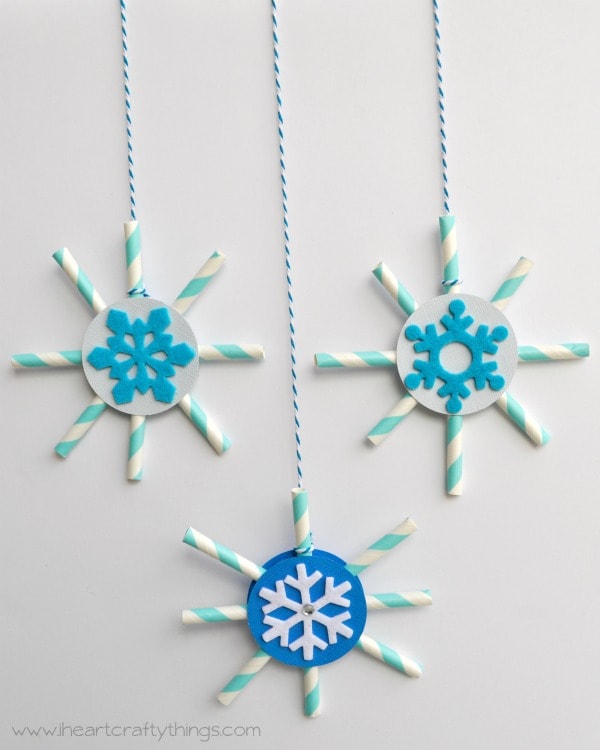
You can also tie string around your paper straw snowflakes and hang them from your wall or a window to make beautifully falling snowflakes.
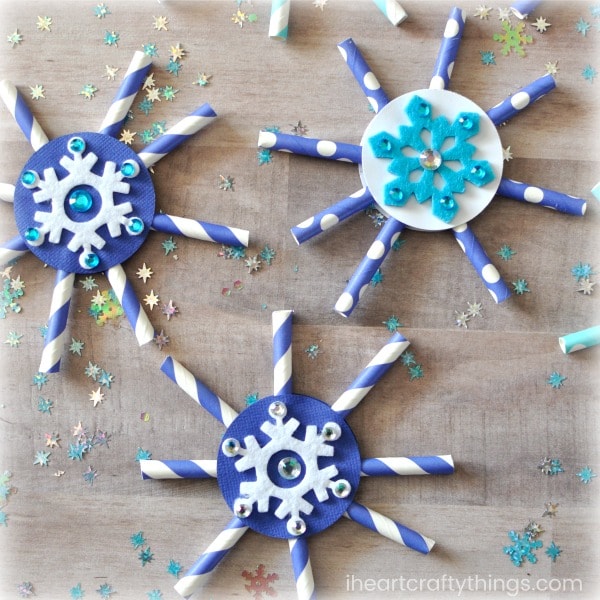
These paper straw snowflakes are so simple to make and were so addicting. We made 6 of them in no time at all. The added scissor cutting practice makes this such a perfect preschool craft!