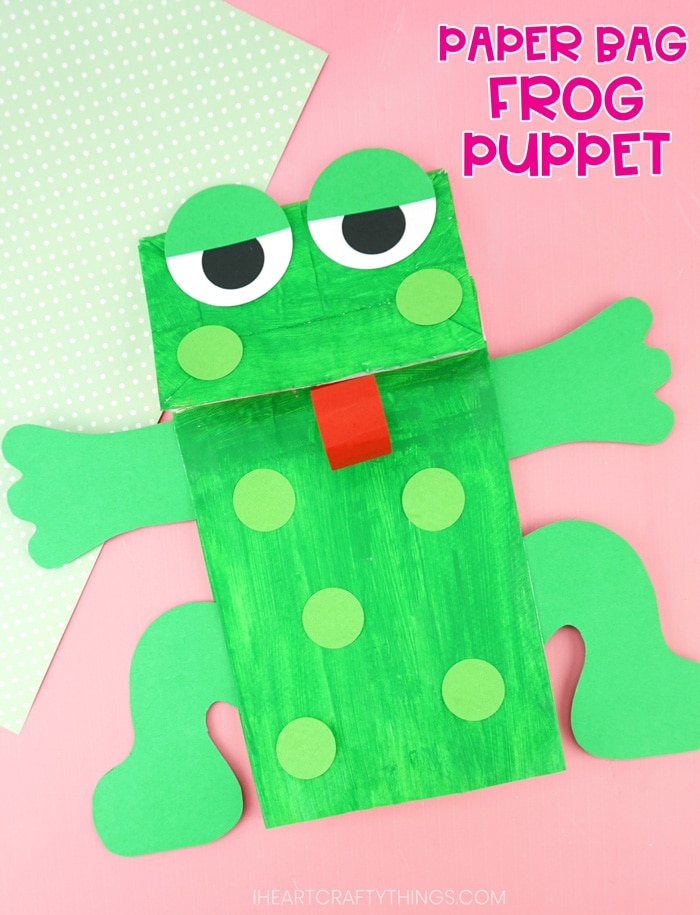
One of my daughter’s favorite books right now is Five Green and Speckled Frogs. She loves singing the song over and over and I thought it would be fun to make an adorable Paper Bag Frog Puppet with her so she can enjoy singing the song with her cute puppet.
We have included a pattern to make this frog craft even more simple for you and your little ones to make.
After preschoolers are finished making their paper bag frog puppets they are going to have so much fun playing with them and making them “ribbit, ribbit” all around the house or classroom.
Read our simple step-by-step instructions below for how to make this fun paper bag puppet. You will also want to make sure you watch our easy video tutorial inside this post before you get started.
Supplies needed:
- frog craft template <— Get the Pattern Here
- paper lunch bag
- green and pink paint
- paintbrush
- cardstock paper (green, white, black and red)
- scissors
- glue stick
- pencil
Tutorial:
1. Paint a paper bag
Start by painting the front of your paper bag with your green paint. After it has dried, paint the section underneath the flap of the bag with pink paint for the frog mouth. Set aside the paper bag to dry completely.
2. Print a pattern
Print out the paper bag frog pattern. The first page of the template can easily be printed out on green cardstock paper. The second page of the template has a mixture of pieces. You can color the pieces with crayons or marker, or cut them out and use them as a template to trace the pieces on colored cardstock paper. Cut out each of the pieces of the template.

An alternative to using the circle pieces of the template is to make them with circle punches. Use a 2-inch circle punch to cut out two white circles and one green circle. Cut the green circle in half to make eyelids. Then use a 1-inch circle punch to cut out 2 black circles for pupils and several light green circles to make your frog speckles.
3. Glue on arms & legs
Once the paint on your paper bag has dried, glue each of the arms and legs in the side flap of the paper bag. You’ll want to put glue on the front of the pieces when you slide them in so they attach to the front flap part of the bag.
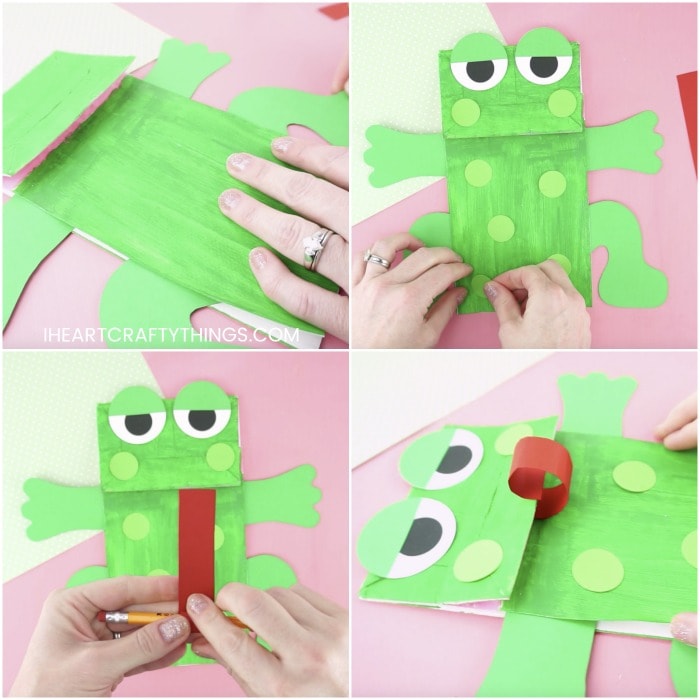
4. Make eyes
Glue the black pupil circles on the large white circles to make eyes. Then glue the large green half circles at the top of each of the eyes for eyelids. Add glue on the back of each of the eyes and attach them at the top of the paper bag, hanging off the top of the bag a little.
5. Add green circles
Glue your light green circles all over your paper bag.
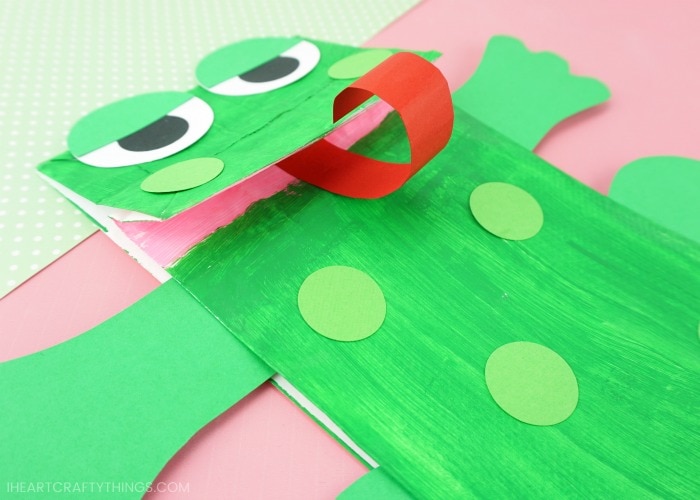
6. Glue a mouth
Curl your red strip of paper around a pencil or your finger tightly to curl it. Then glue it under the front flap of the puppet inside the frog mouth.
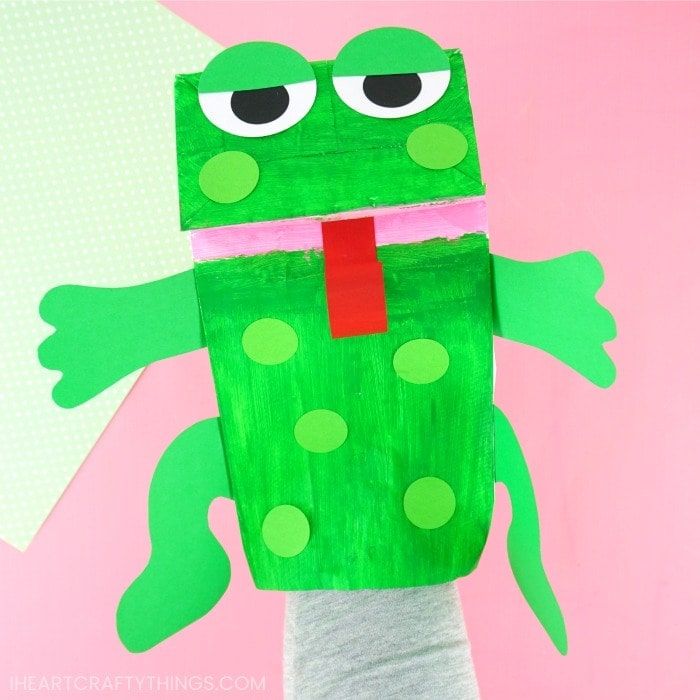
To play with your paper bag puppet, children place their hand inside the paper bag with their finger curled inside the top flap of the paper bag. Open and close your finger to watch as the frog mouth opens and closes.
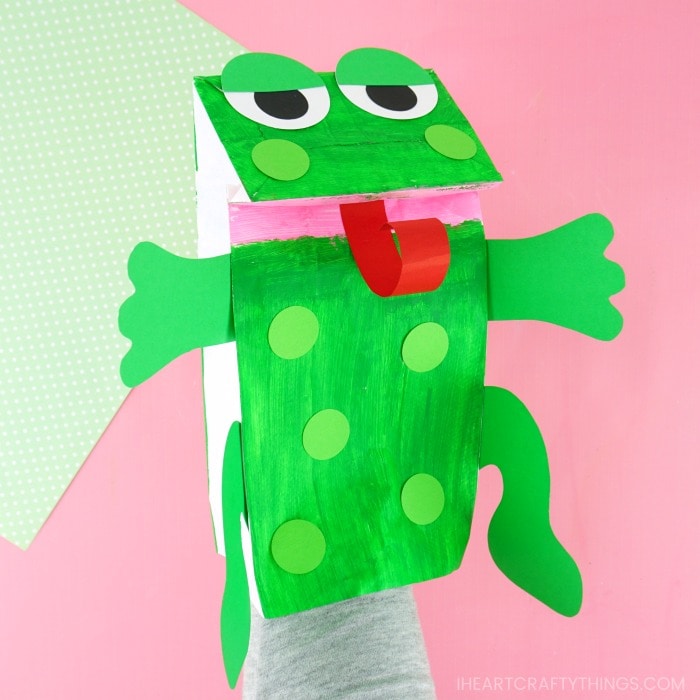
He’s a pretty cute little fella. My daughter likes to uncurl his tongue, pretend he catches a fly and then watch it curl back up quickly.