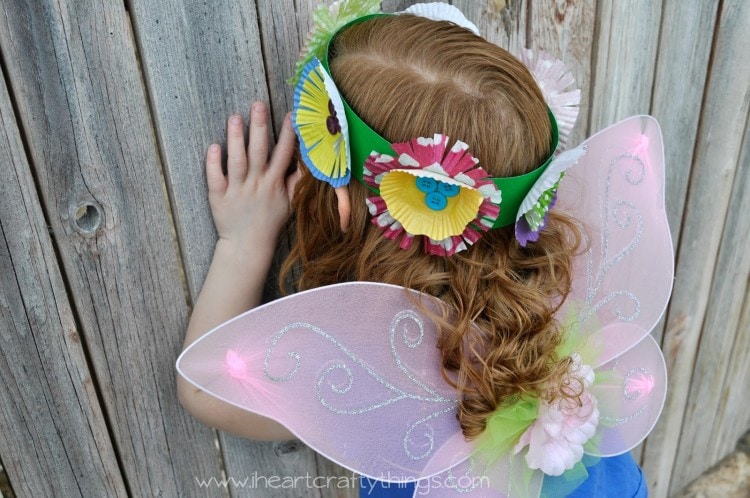
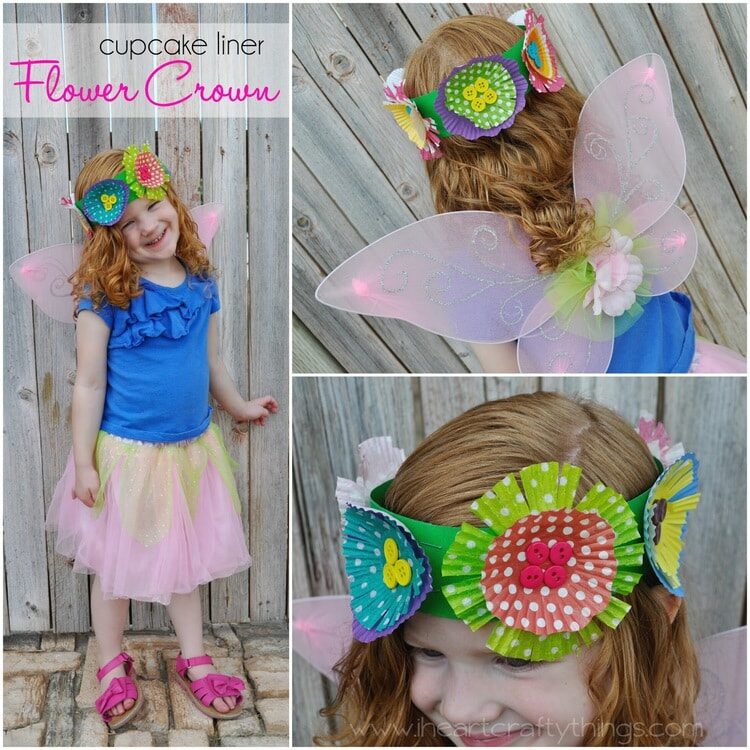
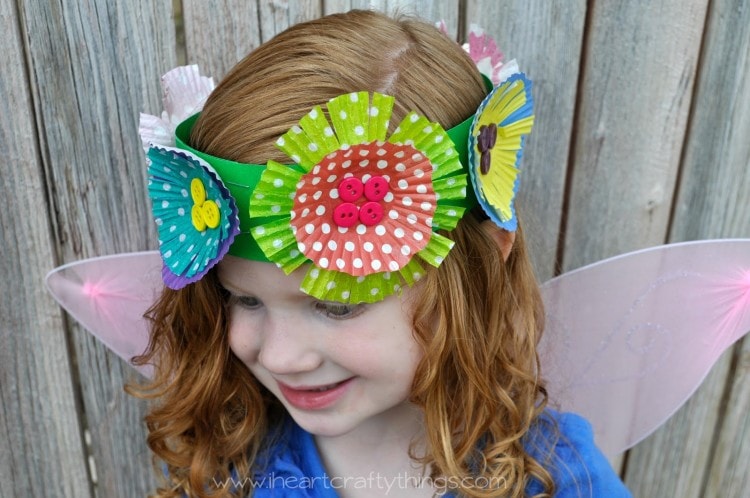
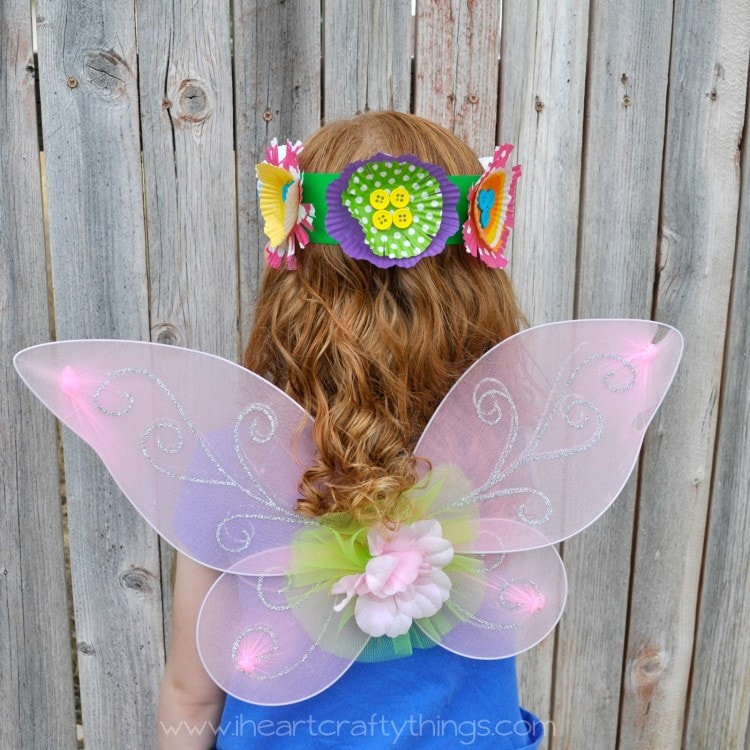
My daughter loves dressing up in her fairy costume and pretending to flutter around like a magical little fairy. As I was watching her play one day I thought about how a flower crown would be a perfect compliment to her costume. Since real flowers don’t last more than a day or two before withering on a traditional flower crown, and because we love making crafts, we came up with an alternative…A cupcake liner flower crown.
Materials you will need:
- green poster board (or white if you prefer)
- large and small cupcake liners with varying patterns
- buttons
- scissors
- glue stick
- school glue
- stapler
- pencil
How to make a Cupcake Liner Flower Crown:
1. Cut a strip from poster board
Cut a strip about 1 3/4″ from your poster board. I cut it horizontally across my poster board because the length fit my daughter’s head but you may have to use the vertical length dependent upon the size of your child’s head.
2. Measure strip around child’s head
Measure the strip around your child’s head and make it about 2″ larger than your child’s head. I put a pencil mark where it met around her head so I would know where to end my flowers.
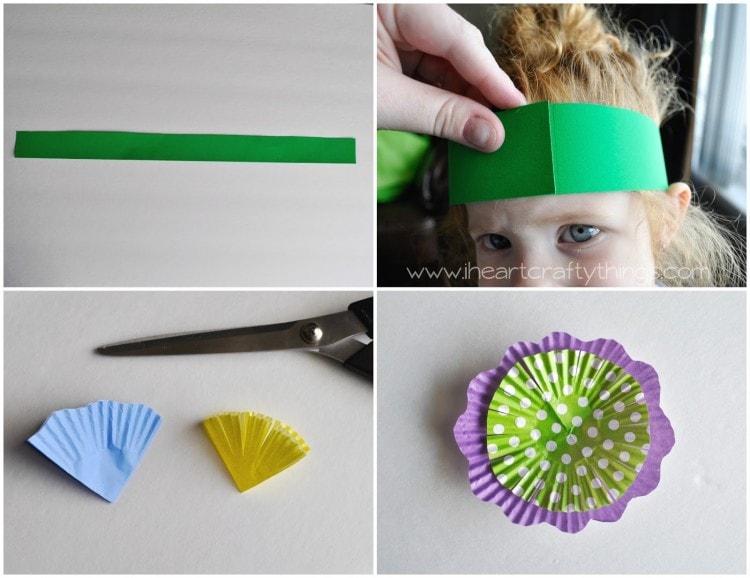
3. Make cupcake liner flowers
Now it’s time to make your cupcake liner flowers. I used one large liner and one small liner per flower. I used two different designs for my flowers too. Fold the liners into quarters and make either a wavy cut along the edge of the liner or make cuts along the edge of the the liner coming inward to the center of the liner to make petals. Unfold the liners to unveil your flower shapes. If some of the flowers seem to large, fold them back up and trim off some of the edge, or make another wavy cut.
4. Glue flowers down on poster board strip
Lay your flowers out along our poster board strip, making sure to not cover the 2″ extra length at the end. When you are finished making all of your flowers, use your glue stick to glue them all down to the poster board strip.
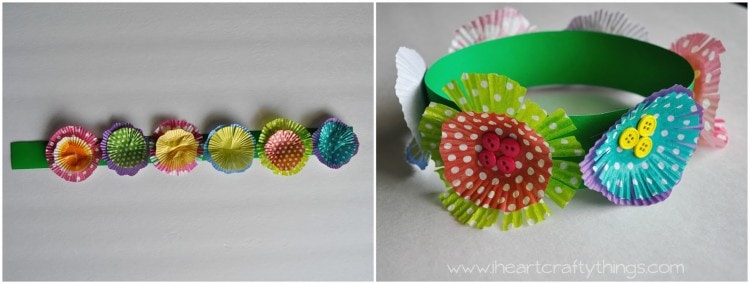
5. Staple strip ends together
Fold the poster board strip into a circle lining your pencil mark up to the opposite edge of the strip. Use your stapler to put a staple at the top and bottom of the pencil mark. Next, find the end of the 2″ extra hang over and put another two staples in the crown. The hang over piece adds extra strength to the crown so don’t skip out on that step.
6. Glue buttons inside the flowers
Finish your crown by gluing on different colored buttons to the insides of your flowers. When the buttons are done drying, have fun pretending you are a fairy or just have fun wearing your adorable new flower crown!
The best part is the flowers aren’t going to wither in a couple days. As long as you don’t jump all over your crown or crinkle it, and if you put it away in a safe place when you’re done playing with it, it should last for quire a long time. We’ve had ours for over a week now and it’s still like new.
I loved that I caught a picture of my little fairy peeking through the fence in search of her next great adventure!